Sign In
Upload
Manuals
Brands
barco Manuals
Projector
F70 Series
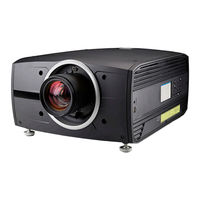
barco F70 Series Laser Phosphor Projector Manuals
Manuals and User Guides for barco F70 Series Laser Phosphor Projector. We have
7
barco F70 Series Laser Phosphor Projector manuals available for free PDF download: User Manual, Service Manual, Installation Manual
Barco F70 Series User Manual (258 pages)
Brand:
Barco
| Category:
Projector
| Size: 62 MB
Table of Contents
Table of Contents
5
Safety
11
General Considerations
12
Important Safety Instructions
13
Projector Hazard Distances
16
High Brightness Precautions
16
Hazard Distance for Fully Closed Projection System
19
HD in Function of the Lens Throw Ratio (TR)
20
Safety Symbols
21
Getting to Know the Projector
23
Main Components
24
Service and Maintenance
25
LED Status Light
25
Power on / Standby Button Backlight Indications
25
LCD Panel
26
LCD Panel General
26
LCD Touch Panel
26
LCD Status Screens
26
Dashboard
28
OSD Menu Mode
29
LCD Functionality in Ready Mode
29
Local Keypad
29
Shortcut Buttons
30
Basic Remote Control Unit
31
Platinum Remote Control Unit
32
Remote Control, Battery Installation
32
Remote Control, Protocol Setup
33
Functionality Overview
35
Pulse RCU, Function of the On/Off Button
35
Pulse RCU, Function of the "RGB Filter" Button
36
Enable / Disable Remote Control
36
Wired RC Connection
37
Projector Address
37
Controlling the Projector
37
Connector Panel
38
Color Wheels
39
Color Wheel Type
39
Optional Accessories
39
Lenses, Handling and Features
41
Approved Lenses
42
Lens Range
42
Replace a Lens
45
Lens Calibration
47
Installing the Lens Safety Cable
48
Preparing the FLDX Lens (0.38:1) UST
51
Mounting the FLDX Lens (0.38:1) UST Lens with a Lens Support
55
Mounting a Safety Cable to the FLDX Lens (0.38:1) UST Lens
58
Physical Installation
61
Installation Process
62
Installation Conditions
62
Initial Inspection
63
Positioning the Projector
64
Mounting the Projector, General Considerations
64
Projector Safe Attachment Points
66
Throw Distance
67
Scheimpflug (Boresight) Introduction
69
Scheimpflug Adjustment Procedure
70
Getting Started
73
Projector Source and Control Connections
74
Making Connections
74
Connector Specifications
74
Specifications DVI-I Inputs
74
Display Port 1.2
74
Specifications HDMI 2.0
75
Specifications SDI Inputs
75
Specifications Hdbase T Input
75
Control Interface Specifications
76
Lan/Ethernet
77
USB-A Port
77
Power up the Projector
77
Power down the Projector
78
Power Mode Transitions
78
General
78
Power on Projector
79
Going from READY to on
79
Going from on to READY
79
Going from READY to ECO Standby
79
Going from ECO to on
79
Wake on LAN (WOL)
79
Power Modes
80
Customize Projector Settings
80
User Interface
80
On Screen Display (OSD)
80
Source Menu
83
Connector Selection
84
Connector Settings
84
Using Dual Inputs
86
No Source Image
87
Image Menu
89
Contrast
91
Brightness
91
Saturation
92
Sharpness
92
Gamma Adjustment
93
Gamma Types
94
Predefined Gamma Types
94
DICOM Gamma
94
Digital Zoom Shift
95
Digital Zoom
96
Digital Shift
96
Advanced Image Adjustments
97
P7 Realcolor
97
Edit the Realcolor Presets
99
Output Resolution 4K
100
Smear Reduction
101
Brilliantcolor
101
Displaying HDR Content- Perceptual Quantizer (PQ)
104
HDR Status
105
Night Vision
105
Installation Menu
107
Position
108
Orientation
108
Projector Tilt Indication
109
Lens
110
Zoom / Focus
110
Shift
110
Shift to Center
111
Iris
112
Scaling Modes
113
Warping
115
About Warping
115
Warping - On/Off
116
Warping - Screen Size
117
Warp - 4 Corners Adjustment
118
Warping - Bow
120
Warping - Warp Files
123
Warping - Latency Control in a Multi Projector Setup
124
Blending
126
Introduction to Blend Functions
126
Set up the System
127
Blend Mask Setup Procedure
127
Basic Blend Setup Procedure
128
Black Level Setup Procedure
129
Color Level Adjustment Procedure
130
Black Level Files
131
Blend Files
132
Advanced Blend
133
CLO Feature
133
Introduction
133
Placement of the Light Sensor
133
Using the CLO Features
134
CLO Feature in the OSD, Prospector and API
134
Notifications Applicable for the CLO Feature
134
Example for Using the CLO Feature for Maintaining Brightness over Time
135
CLO Scale
135
Example: CLO Scale with One Projector
136
Example: CLO Scale with 3 Projectors
136
CLO Stable Signal
136
Ewma
137
Setpoint
137
CLO (Light Sensor) Calibration
137
IR / Night Vision Functionality
137
Illumination
138
Setup / IG Pixel Shift
139
IG Pixel Shift
139
IG Pixelshift Night Vision
140
Autostereo (3D) Setup
141
GUI - Profiles
143
Profiles Introduction
144
Saving the Current Projector Settings in a Profile
145
Assigning a Created Projector Profile to a Preset
146
Deleting a Projector Profile
148
System Settings Menu
151
Communication
152
Remote Control
152
Broadcast Address
152
Projector Address
153
IR Sensors
154
Host Name - Custom Projector Name Setup
155
DMX
156
Trigger
157
User Interface
158
Language
158
Themes
158
Units
159
Backlight / Stealth Mode
159
Date and Time
160
Date and Time Setup - Manually
160
Date and Time Setup - Automatically
161
Power Saving Settings
163
Lens Features
166
Maintenance
166
Lens Calibration
167
Reset
167
Controlling the Backlight of the LCD Display
169
Scheduler
171
About Scheduler
172
Open the Scheduler
172
Adding New Command
172
Edit or Delete
174
Clear the Scheduler
175
GUI - Status Menu
177
Status Menu Overview
178
181
181
Setup 3D Mode
182
Upgrade Projector Firmware
185
Upgrade Procedure
186
Calibration Routines
187
Advanced Settings - Tilt Sensor Calibration
188
User Maintenance - Cleaning the Projector
189
Projector Lenses
190
Projector Cabinet
190
Filters
190
Technical Specifications
191
FS70 4K6
195
Fs70 W6
196
Fs70 4K4
202
A Color Component Mapping
205
Introduction
206
How Infrared Is Displayed
206
Default Setup
206
Cloned Image with Full RGB Input
207
Cloned Inputs with Only Green Content for IR
208
B Image Settings and Adjustments for Optimal Latency
209
Introduction
210
Latency
210
DMD Display Device
210
Image Display
210
Image Positioning
212
C Color Calibration Guide
213
How to Calibrate
214
Laser Pulse Calibration
214
Maintain White Point Dimming
216
Native Color Calibration
220
D Advanced Blend
223
Advanced Blend, File Creation
224
Example Files
225
User Interface
227
E DMX Chart
231
DMX Chart, Basic
232
DMX Chart, Extended
233
F Overview Video Timings for Video Interfaces
235
Overview Video Timings
236
Overview Video Timings SDI Inputs
237
Overview Video Timings HDMI 2.0 Inputs
238
Overview Video Timings Displayport 1.2 Inputs
240
Overview Video Timings Hdbaset Input
241
Overview Video Timings DVI Inputs
243
G Regulatory Information
245
Product Compliance
246
Turkey Rohs Compliance
246
China Rohs Compliance
247
Taiwan Rohs Compliance
248
Advertisement
Barco F70 Series User Manual (218 pages)
Brand:
Barco
| Category:
Projector
| Size: 60 MB
Table of Contents
Table of Contents
5
Safety
11
General Considerations
12
Important Safety Instructions
13
Projector Hazard Distances
16
High Brightness Precautions
16
Hazard Distance for Fully Closed Projection System
19
HD in Function of the Lens Throw Ratio (TR)
20
Safety Symbols
21
Getting to Know the Projector
23
Main Components
24
Service and Maintenance
25
LED Status Light
25
Power on / Standby Button Backlight Indications
25
LCD Panel
26
LCD Panel General
26
LCD Touch Panel
26
LCD Status Screens
26
Dashboard
29
OSD Menu Mode
29
LCD Functionality in Ready Mode
29
Local Keypad
29
Shortcut Buttons
30
Basic Remote Control Unit
31
Platinum Remote Control Unit
32
Remote Control, Battery Installation
32
Remote Control, Protocol Setup
33
Functionality Overview
35
Pulse RCU, Function of the On/Off Button
35
Pulse RCU, Function of the "RGB Filter" Button
36
Enable / Disable Remote Control
36
Wired RC Connection
37
Projector Address
37
Controlling the Projector
37
Connector Panel
38
Color Wheels
39
Color Wheel Type
39
Optional Accessories
39
Lenses, Handling and Features
41
Approved Lenses
42
Lens Range
42
Replace a Lens
45
Lens Calibration
47
Installing the Lens Safety Cable
48
Preparing the FLDX Lens (0.38:1) UST
51
Mounting the FLDX Lens (0.38:1) UST Lens with a Lens Support
55
Mounting a Safety Cable to the FLDX Lens (0.38:1) UST Lens
58
Physical Installation
61
Installation Process
62
Installation Conditions
62
Initial Inspection
63
Positioning the Projector
64
Mounting the Projector, General Considerations
64
Projector Safe Attachment Points
66
Throw Distance
67
Scheimpflug (Boresight) Introduction
69
Scheimpflug Adjustment Procedure
70
Getting Started
73
Projector Source and Control Connections
74
Making Connections
74
Connector Specifications
74
Specifications DVI-I Inputs
74
Display Port 1.2
74
Specifications HDMI 2.0
75
Specifications SDI Inputs
75
Specifications Hdbase T Input
75
Control Interface Specifications
76
Lan/Ethernet
77
USB-A Port
77
Power up the Projector
77
Power down the Projector
78
Power Mode Transitions
78
General
78
Power on Projector
79
Going from READY to on
79
Going from on to READY
79
Going from READY to ECO Standby
79
Going from ECO to on
79
Wake on LAN (WOL)
79
Power Modes
80
Customize Projector Settings
80
User Interface
80
On Screen Display (OSD)
80
Source Menu
83
Connector Selection
84
Connector Settings
84
Using Dual Inputs
86
Image Menu
89
Contrast
91
Brightness
91
Saturation
92
Sharpness
92
Gamma Adjustment
93
Gamma Types
94
Predefined Gamma Types
94
DICOM Gamma
94
Digital Zoom Shift
95
Digital Zoom
96
Digital Shift
96
Advanced Image Adjustments
97
P7 Realcolor
97
Edit the Realcolor Presets
99
Output Resolution 4K
100
Smear Reduction
101
Brilliantcolor
101
Displaying HDR Content- Perceptual Quantizer (PQ)
104
HDR Status
105
Night Vision
105
Installation Menu
107
Lens
108
Zoom / Focus
108
Shift
108
Shift to Center
109
Iris
110
Orientation
111
Scaling Modes
112
Warping
114
About Warping
114
Warping - On/Off
115
Warping - Screen Size
116
Warp - 4 Corners Adjustment
117
Warping - Bow
119
Warping - Warp Files
122
Warping - Latency Control in a Multi Projector Setup
123
Blending
125
Introduction to Blend Functions
125
Set up the System
126
Blend Mask Setup Procedure
126
Basic Blend Setup Procedure
127
Black Level Setup Procedure
128
Color Level Adjustment Procedure
129
Black Level Files
130
Blend Files
131
Advanced Blend
132
CLO Feature
132
Introduction
132
Placement of the Light Sensor
132
Using the CLO Features
133
CLO Feature in the OSD, Prospector and API
133
Notifications Applicable for the CLO Feature
133
Example for Using He CLO Feature for Maintaining Brightness over Time
134
CLO Scale
134
Example: CLO Scale with One Projector
135
Example: CLO Scale with 3 Projectors
135
CLO Stable Signal
135
Ewma
136
Setpoint
136
CLO (Light Sensor) Calibration
136
IR / Night Vision Functionality
136
IG Pixel Shift
137
IG Pixelshift Night Vision
139
Autostereo (3D) Setup
140
GUI - Profiles
141
Profiles Introduction
142
Profiles Setup Parameters
142
Saving Settings to a New Profile
143
Deleting a Projector Profile
145
System Settings Menu
147
Communication
148
Remote Control
148
Broadcast Address
148
Projector Address
149
IR Sensors
150
Host Name - Custom Projector Name Setup
151
DMX
151
Trigger
153
Language
153
Themes
154
Units
154
Backlight
155
ECO Mode
155
Power Settings
156
Lens Features
156
24/7 Mode
157
Maintenance
157
Lens Calibration
158
Reset
159
Controlling the Backlight of the LCD Display
161
GUI - Status Menu
163
Status Menu Overview
164
167
167
Setup 3D Mode
168
Upgrade Projector Firmware
171
Upgrade Procedure
172
User Maintenance - Cleaning the Projector
173
Projector Lenses
174
Projector Cabinet
174
Filters
174
Technical Specifications
175
FS70 4K6
179
Fs70 W6
180
A Color Component Mapping
183
Introduction
184
How Infrared Is Displayed
184
Default Setup
184
Cloned Image with Full RGB Input
185
Cloned Inputs with Only Green Content for IR
186
B Image Settings and Adjustments for Optimal Latency
187
Introduction
188
Latency
188
DMD Display Device
188
Image Display
188
Image Positioning
190
C DMX Chart
191
DMX Chart, Basic
192
DMX Chart, Extended
193
D Overview Video Timings for Video Interfaces
195
Overview Video Timings
196
Overview Video Timings SDI Inputs
197
Overview Video Timings HDMI 2.0 Inputs
198
Overview Video Timings Displayport 1.2 Inputs
200
Overview Video Timings Hdbaset Input
201
Overview Video Timings DVI Inputs
203
E Regulatory Information
205
Product Compliance
206
Turkey Rohs Compliance
206
China Rohs Compliance
207
Taiwan Rohs Compliance
208
Contact Information
209
Barco F70 Series Service Manual (168 pages)
Brand:
Barco
| Category:
Projector
| Size: 46 MB
Table of Contents
Table of Contents
3
1 Introduction
9
Scope and Limitations
10
Copyright
10
Trademarks
10
Required Handtools
10
2 General Safety
11
General Safety Instructions
12
Notice on Safety
12
Users Definition
12
3 Important Safety Instructions
15
To Prevent the Risk of Electrical Shock
16
To Prevent Personal Injury
16
To Prevent Fire Hazard
17
To Prevent Projector Damage
17
On Servicing
18
To Prevent Battery Explosion (PCB)
18
Precautions During Lens Shift
19
Laser Safety
19
Warning Labels
19
4 DLP System General Description
21
Gp7Optical Principle
22
The DMD Device
24
The Grayscale Image
24
Adding Color
25
Single Chip DLP Projection System
25
5 GP7 System Functional Description
27
Electronic Platform
28
I/O's and Processing Tasks
28
Block Diagram GP7 Platform
29
Wiring Matrix
31
Firmware
32
System Safety Loop
33
Laser Driver Principle and Error Codes
34
6 GP7 Periodic Maintenance
37
Service Interval Matrix
38
Service Kits Available
38
7 OSD / Display Menu
41
Service Menu
42
Troubleshooting Tools
43
8 Thermal Management System
45
Ventilation and Cooling
46
Liquid Cooling System
47
Fans
48
Fan Overview
48
Fan Inlet/Outlet
49
FAN Phosphor Wheel
49
Fan Optics
49
Fan PSU
49
Fan PCB Scaler
49
Fan and Pump. Numbering and Location
50
Thermal Sensors
51
DMD Cooling
51
System Thermal Diagram
52
9 Lenses and Adjustment
55
Scheimpflug Adjustment
56
Locking the Lens Position
56
10 Optical Adjustments
59
Perfecting the Lighting Path
60
Lighting Mirror Adjustment
60
Lighting Mirror: Horizontal (X) Adjustment
60
Lighting Mirror: Vertical (Y) Adjustment
61
Focus: Relay Tube Lens Focus Adjustment
61
Color Uniformity, TI Loop Mirrors Adjustment
62
Color Uniformity, Left TI Loop Mirror
62
11 Colorwheels
63
Replacing the Colorwheel Assy
64
Colorwheel Index Adjustment
64
Index Adjustment Procedure
64
12 Phosphor Wheel
67
Replace the Phosphor Wheel Assembly
68
Entering Prospector Diagnostic Tool
68
Calibrating the Phosphor Wheel
68
13 Laser Pulsing Adjustment
71
Procedure
72
14 XPS Actuator
75
XPS Actuator Replacement
76
Calibrating the XPS Actuator
76
15 Power Supply Unit (PSU)
79
AC Input
80
Output Specification
80
Connectors
80
Mainboard Connector J4
81
Thermal Hub Connector J3
81
Laser Driver Connector J2
82
Power Supply Diagnostics
82
Power Good Output
82
AC Input Voltage Monitoring
82
Power Supply ID
82
Temperature Monitoring
82
Consumption Monitoring
82
Weight of PSU
82
16 Troubleshooting
83
Status LED Indications
84
Led's on Thermal Hub and Mainboard
84
Thermal Hub Board Led's
84
Main Board Led's
85
Available Diagnostic Tools
86
Prospector
86
Pd Diagnostic
87
Log Extractor
87
Osd
87
Lcd
87
Troubleshooting
87
Explanation of the Codes
88
Troubleshooting Checklist
89
Log Files
98
17 Assembly Hierarchy
103
Disassembly / Assembly Instructions
105
Safety Precautions
105
Removing the Projector Cover Panels
105
Remove Top Cover
105
Remove the Rear Cover
106
Remove the
107
Remove the Right and Left Side Cover
107
Removing Peripheral Pcbs
108
Removal of Display and Keypad Module
108
PCB GP6/GP7 IR Receiver and LED Board TOP
109
PCB Front USB & Trigger Board
109
PCB IR Front
109
Switch Air/Smoke Filter
110
PCB Temp Sensor Board #1 (Inlet)
110
PCB Temp Sensor Board #2 (Outlet)
112
18 Scheduled Operations
115
Scheduled Operations Matrix
116
20000 Hours LFM Service
116
Phosphor Wheel
117
Fan Phosphor Wheel
117
Colorwheel Cassette
118
Gp7 Fe Psu
118
Fan PSU
119
Fan PCB Scaler
120
Fan Optics
121
Laser Cluster
122
Remove the Liquid Cooling Pumps on Laser Cluster
123
Remove the Laser Cluster
125
Cleaning the Cooling Pump Surface
126
XPS Actuator Assy
128
40000 Hours Service
128
Liquid Cooling System, Generic Handling Instructions
128
Fan Outlet
129
Fan Inlet
129
Liquid Cooling Pumps
130
Liquid Cooling Pump for DMD
131
Cleaning the Cooling Pump Surface
132
19 Technical Operations
133
PCB Main
134
PCB Removal Preparations
134
PCB Main Assembly Removal
135
PCB Laser Driver Boards
136
DMD, DMD Board and CLGA & DMD Heatsink Elements
137
GP7 PCB DMD Board
138
Clga & DMD
138
Re-Assembly after PCB DMD or DMD/CLGA Repair
139
GP7 Heatsink DMD Front & Rear Assemblies
140
GP7 Heatsink DMD Front Assembly
141
Remove the Laser Interface
141
Install New Laser Interface
142
PCB Thermal Hub Board
143
PCB Thermal Hub, Complete Assy Removal
144
20 TI Loop
145
General
146
Overview Engine Assembly
146
Opening and Component Identification
146
Opening the Ti Loop
146
Overview Inside the TI Loop
147
Dichroic Filter B/Y
147
Barrel PW Lens Assy
148
Mirrors Blue
148
Blue Loop Lens 3
149
Blue Loop Lens 4
149
Diffusor Blue Loop
149
RGBY Converging Lenses
150
Rod Carrier
152
21 Illumination Engine
153
Iris Assembly
154
Relay Tube Assembly
154
PCB CLO (Constant Light Output)
155
Folding Mirror Assembl
156
Advertisement
barco F70 Series User Manual (136 pages)
DLP Projectors
Brand:
barco
| Category:
Projector
| Size: 16 MB
Table of Contents
Table of Contents
5
1 Safety
9
General Considerations
10
Important Safety Instructions
11
Projector Hazard Distances
14
High Brightness Precautions
14
Hazard Distance for Fully Closed Projection System
16
HD in Function of the Lens Throw Ratio (TR)
17
Safety Symbols
19
Rohs Compliance
21
Taiwan Rohs Compliance
23
Contact Information
24
Product Info
25
Statement
25
2 Getting to Know the Projector
27
Main Components
28
Service and Maintenance
29
LED Status Light
29
Power on / Standby Button Backlight Indications
29
LCD Panel
29
Local Keypad
30
Remote Control
31
Remote Control, Battery Installation
31
Remote Control, Protocol Setup
32
Functionality Overview
33
Remote Control, On/Off Button
34
Enable / Disable Remote Control
34
Wired RC Connection
34
Projector Address
35
Controlling the Projector
35
Connector Panel
35
Color Wheels
36
Optional Accessories
36
3 Lenses
39
Approved Lenses
40
Lens Range
40
Replace a Lens
43
Lens Shift
44
Adjust Zoom and Focus
45
Adjust Iris
45
4 Physical Installation
47
Installation Process
48
Installation Conditions
48
Initial Inspection
49
Positioning the Projector
49
Mounting the Projector, General Considerations
50
Projector Safe Attachment Points
52
Throw Distance
52
Scheimpflug (Boresight) Adjustment
55
Scheimpflug Adjustment Procedure
56
5 Getting Started
59
Projector Source and Control Connections
60
Making Connections
60
Connector Specifications
60
DVI-I
60
Display Port 1.2
61
Hdmi 2.0
61
Sdi
61
Control Interfaces
62
Lan/Ethernet
63
Power up the Projector
63
Power down the Projector
63
Power Mode Transitions
64
General
64
Power on Projector
64
Going from READY to on
65
Going from on to READY
65
Going from READY to ECO Standby
65
Going from ECO to on
65
Wake on LAN (WOL)
65
Power Modes
65
Customize Projector Settings
66
User Interface
66
On Screen Display (OSD)
66
6 Source Menu
69
Connector Selection
70
Connector Settings
70
Using Dual Inputs
72
7 Image Menu
75
Contrast
77
Brightness
77
Saturation
77
Sharpness
78
Gamma Adjustment
78
Advanced Image Adjustments
79
P7 Realcolor
79
Edit the Realcolor Presets
81
Output Resolution 4K
82
Smear Reduction
83
Brilliantcolor
84
HDR - Perceptual Quantizer (PQ)
85
HDR Status
86
8 Installation Menu
87
IR / Night Vision Functionality
88
Lens
90
Orientation
90
Warping
92
About Warping
92
Warping - On/Off
92
Warping - Screen Size
93
Warp - 4 Corners Adjustment
95
Warping - Bow
96
Warping - Warp Files
100
Warping - Latency Control in a Multi Projector Setup
101
Blending
103
Basic Blend
103
Set up the System
104
Adjustment Procedure
104
Black Level Adjustment
105
Black Level Files
106
Blend Files
107
Advanced Blend
108
Illumination
108
CLO - Constant Light Output
109
Display Setup
110
9 System Settings Menu
111
Communication
112
Apply a Menu Theme
112
Standby ECO
112
Service
113
Reset
113
Lens Features
115
Controlling the Backlight of the LCD Display
115
10 Status Menu
117
Status Menu Overview
118
121
121
Setup 3D Mode
122
12 User Maintenance
125
Update Projector Firmware
126
13 Cleaning the Projector
127
Projector Lenses
128
Projector Cabinet
128
Filters
128
Barco F70 Series User Manual (74 pages)
Brand:
Barco
| Category:
Projector
| Size: 12 MB
Table of Contents
Table of Contents
5
Safety
7
General Considerations
7
Important Safety Instructions
9
Projector Hazard Distances
11
High Brightness Precautions
11
Hazard Distance for Fully Closed Projection System
13
HD in Function of the Lens Throw Ratio (TR)
14
Safety Symbols
15
Rohs Compliance
17
Contact Adresses
20
Product Info
20
Statement
20
Getting to Know the Projector
21
Main Components
21
Service and Maintenance
22
LED Status Light
22
Power on / Standby Button Backlight Indications
23
LCD Panel
23
Local Keypad
23
Remote Control, Battery Installation
24
Remote Control, Protocol Setup
25
Functionality Overview
26
Projector Address
26
Controlling the Projector
27
Displaying and Programming Addresses into the RCU
27
Connector Panel
27
Color Wheels
28
Optional Accessories
28
Lenses
29
Approved Lenses
29
Lens Range
29
Replace a Lens
31
Lens Shift
33
Adjust Zoom and Focus
33
Adjust Iris
33
Physical Installation
35
Installation Process
35
Installation Conditions
35
Initial Inspection
36
Positioning the Projector
37
Mounting the Projector, General Considerations
37
Projector Safe Attachment Points
39
Throw Distance
40
Scheimpflug (Boresight) Adjustment
42
Scheimpflug Adjustment Procedure
43
Getting Started
45
Projector Source and Control Connections
45
Making Connections
45
Connector Specifications
45
DVI-I
45
Display Port 1.2
46
Hdmi 2.0
46
Sdi
47
Hdbase T
47
Control Interfaces
47
Lan/Ethernet
48
USB-A Port
48
Power up the Projector
48
Power down the Projector
48
Power Modes
49
Customize Projector Settings
49
User Interface
49
On Screen Display (OSD)
49
Source Menu
51
Connector Selection
51
Connector Settings
51
Using Dual DVI or Dual Display Port
51
Image Menu
53
IR / Night Vision Functionality
53
Output Resolution
54
Contrast
54
Brightness
54
Saturation
55
Advanced Image Adjustments
55
Installation Menu
57
Lens
57
Orientation
57
Warp
58
Warping - Bow
59
Basic Blend
60
Illumination
62
Settings Menu
63
Communication
63
Apply a Menu Theme
63
Service
63
Status Menu
65
Source Status
65
Product
65
Illumination
65
Communication
65
Reset Menu
67
Factory Reset
67
Selectable Reset
67
User Maintenance
69
Update Projector Firmware
69
Cleaning the Projector
71
Projector Lenses
71
Projector Cabinet
71
Filters
71
Barco F70 Series User Manual (14 pages)
3D functionality Pulse Platform
Brand:
Barco
| Category:
Projector
| Size: 0 MB
Table of Contents
Table of Contents
3
500 D Principles
5
Projection
5
The Difference between Active Stereo & Passive Stereo Output
6
2 Input Modes
9
Input Channel Setup
9
Synchronization
10
Input Specification
10
DVI-I
10
Display Port 1.2
10
3 Projector 3D Setup
13
Preparing 3D Setup
13
Block Diagram Connections
13
Setup 3D Mode
13
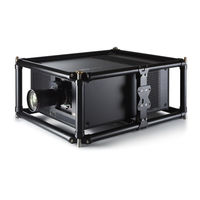
Barco F70 Series Installation Manual (22 pages)
Multifunctional Frame
Brand:
Barco
| Category:
Projector Accessories
| Size: 16 MB
Table of Contents
Disposal Information
3
F70 / F90-Series Multifunctional Frame
5
Installation Personnel
5
Necessary Tools
7
Parts Identification
7
Assembling the Frame
8
Advertisement
Related Products
Barco F70 - 4K6
Barco F70 - W6
Barco F70-W8
Barco F70-4K4
Barco F35
Barco F22 Series
Barco FLM R22+
Barco FL40-4K
Barco FS40 - 4K
Barco FS70-4K6
barco Categories
Projector
Monitor
Projector Accessories
Controller
Medical Equipment
More barco Manuals
Login
Sign In
OR
Sign in with Facebook
Sign in with Google
Upload manual
Upload from disk
Upload from URL