Barco F70 Series Installation Manual
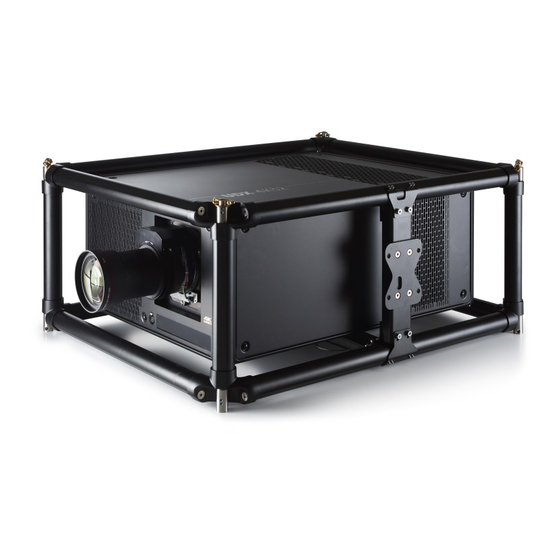
Multifunctional frame
Hide thumbs
Also See for F70 Series:
- User manual (218 pages) ,
- Service manual (168 pages) ,
- User manual (14 pages)
Advertisement
Quick Links
Advertisement

Related Manuals for Barco F70 Series


Summary of Contents for Barco F70 Series
- Page 1 F70 / F90 Multifunctional Frame Installation Manual R5906768/07 22/11/2017...
- Page 2 Barco NV President Kennedypark 35, 8500 Kortrijk, Belgium Phone: +32 56.36.82.11 Fax: +32 56.36.883.86 Support: www.barco.com/en/support Visit us at the web: www.barco.com Printed in Belgium...
-
Page 3: Disposal Information
The period of guarantee begins on the date of transfer of risks, in the case of special systems and software on the date of commissioning, at latest 30 days after the transfer of risks. In the event of justified notice of complaint, Barco can repair the fault or provide a replacement at its own discretion within an appropriate period. -
Page 5: F70 / F90-Series Multifunctional Frame
1. F70 / F90-SERIES MULTIFUNCTIONAL FRAME Purpose of the F70 / F90-series multifunctional frame The F70 / F90-series multifunctional frame is exclusively designed for the Barco F70 and F90 projectors and can thus not be used on any other equipment. - Page 6 1. F70 / F90-series multifunctional frame Keep the following in mind: • It is allowed to stack maximum three projectors. • It is allowed to suspend maximum two projectors. Transportation of the frame Never transport the multifunctional frame in portrait position with a projector mounted. Failure to do so can cause damage the multifunctional frame.
-
Page 7: Necessary Tools
1. F70 / F90-series multifunctional frame Parts to assemble rigging frame Pieces Hex screw with socket head M8 x 20 Plain washer M8 Locking pins Parts to mount F90 projector Hex screw with socket head M6 x 25 Spring washer M6 Plain washer M6 Hex screw with button head M8 x 20 Spring washer M8... -
Page 8: Assembling The Frame
1. F70 / F90-series multifunctional frame Side bracket Tilt adjustment knob Skew adjustment knob Before assembling the frame Packaging Be careful not to remove all of the cardboard when removing the rigging frame parts from the packaging. You will need the following parts when trying to place the projector into the rigging frame. - Page 9 3. Place the top frame onto the rest of the rigging frame. Make sure that the two side frame brackets are positioned on the same side and opposite of each other (image 1-6). If this is not possible due to mechanical error, contact Barco.
- Page 10 1. F70 / F90-series multifunctional frame 6. Install all 11 hex screws without tightening. Do this as illustrated (image 1-8). Use an 6 mm Allen wrench. Note: The four screws at the outer side of the rigging frame must be provided with a plain washer (reference 1 image 1-8). Caution: Use high strength threadlocker on ALL hex screws.
- Page 11 1. F70 / F90-series multifunctional frame Stacking pin orientation rod M3 + M3 nut Stacking hole 4. Mount the M6 set screws. Use a 3 mm Allen wrench. Caution: Use sufficient high strength threadlocker on the set screws. Image 1-12 Image 1-13 5.
- Page 12 1. F70 / F90-series multifunctional frame Necessary parts • Rigging frame cardboard packaging • Hex screws with socket head M6 x 25 (x4) • Spring washer M6 (x4) • Plain washer M6 (x4) • Hex screw with button head M8 x 20 •...
- Page 13 1. F70 / F90-series multifunctional frame 8,4 Nm 8,4 Nm Image 1-19 5. For the F90 Projector: a) Mount the four M6 hex screws (reference 1) + spring washer (reference 2) + plain washer (reference 3 ) on the bottom of the rigging frame to tie the two together.
- Page 14 1. F70 / F90-series multifunctional frame Image 1-23 3. Tighten the filter onto the side of the projector, using the screws provided with the filter. 4. Skew the projector back to its neutral position. Stacking multiple projectors using the multifunctional frame ARNING It is not allowed to stack more than three projectors.
- Page 15 1. F70 / F90-series multifunctional frame Image 1-25 Locking pin Note: Even if not all pins are necessary in your current setup, it is important to keep all locking pins to their respective rigging frame for future use. 3. Stack the multifunctional frames. Make sure the stacking pins of both frames are aligned. Image 1-26 Lower stacking pins Upper stacking pins...
- Page 16 1. F70 / F90-series multifunctional frame Suspending the projector from a truss ARNING It is the responsibility of the installer to suspend the rigging frames in a safe and secure fashion. Safety cables must be applied according to local regulations and standards. Safety cables must be dimen- sioned for the applicable load and no drop distance is allowed or must be limited as much as possible.
- Page 17 1. F70 / F90-series multifunctional frame AUTION When using single point suspension (both ceiling or portrait mode), it is not allowed to incline the frame for more than 20° towards the horizon. How to suspend from a truss, using the rigging clamps 1.
- Page 18 1. F70 / F90-series multifunctional frame Image 1-32 Example of mounting to truss Warning: Always secure the rigging points after adjustment. 5. Lock all four rigging clamps by turning the fixation handle clockwise. Image 1-33 Example of clamp fixation 6. Install the 2 safety cables, one on both sides of the rigging frame, and around the truss. Mount the 2 safety cables around the frame bar (push the hook through the loop and then around the truss so that there is not to much play (maximum 20 cm).
- Page 19 1. F70 / F90-series multifunctional frame Image 1-35 Image 1-36 Example of floor adapter installation in landscape Example of floor adapter installation in portrait 2. Place the projector (upside down) under the truss installation and lower the truss until the support bars of the truss are nearby the floor adapter mounted on the projector.
- Page 20 1. F70 / F90-series multifunctional frame Skewing the projector How to skew the projector? 1. Turn the skew knob at the back (reference 1, image 1-39) to skew the projector. Image 1-39 1.10 Tilting the projector How to tilt the projector? 1.
- Page 21 1. F70 / F90-series multifunctional frame Image 1-41 1.12 Dimensions Useful Dimensions Image 1-42 R5906768 F70 / F90 MULTIFUNCTIONAL FRAME 22/11/2017...
- Page 22 1. F70 / F90-series multifunctional frame All dimensions are in mm. The lens to lens distance when stacking is 392 mm. Weight The weight of the fully assembled frame without the projector is 20.6 kg (45.42 lbs). R5906768 F70 / F90 MULTIFUNCTIONAL FRAME 22/11/2017...
Need help?
Do you have a question about the F70 Series and is the answer not in the manual?
Questions and answers