Table of Contents
Advertisement
Quick Links
Advertisement
Table of Contents

Related Manuals for MUTOH SC-PRO


Summary of Contents for MUTOH SC-PRO
- Page 1 User’s Guide Sign Cutting Plotter...
- Page 2 User’s Guide SC-PRO Cutting Plotter AP-75280 – Rev. 1.1...
- Page 3 COPYRIGHT 2008 Mutoh Europe N.V. All rights reserved. Mutoh reserves the right to modify the information contained in this manual at any time without prior notice. This document may not be reproduced by any means, in whole or in part, without written permission of the copyright owner.
- Page 4 User’s Guide SC-PRO Cutting Plotter AP-75280 – Rev. 1.1...
- Page 5 As a stand-alone cutting plotter, the SC-Pro can cut and plot designs onto PVC or paper as required. In combination with an inkjet printer, the SC-Pro cutting plotter is ready for contour-cutting of pre-printed signs made with any printer capable of printing onto cutting plotter compatible media.
- Page 6 User’s Guide SC-PRO Cutting Plotter AP-75280 – Rev. 1.1...
-
Page 7: Table Of Contents
2 Product overview ............15 2.1 Dimensions ......................15 2.2 Installation environment requirements .............15 2.3 Part names and functions ..................17 2.3.1 Front of the SC-PRO ..................17 2.3.2 Rear of the SC-PRO ..................18 2.3.3 Operation panel ..................19 2.4 In-the-box contents ...................20 3 Basics ................ 21 3.1 Installing and replacing tools ................21... - Page 8 User’s Guide SC-PRO Cutting Plotter 4.1.8 TOOL key .....................42 4.2 Menu overview ....................43 4.2.1 Sheet off mode....................46 4.2.2 Sheet off margin ..................46 4.2.3 Auto Shuffle ....................46 4.2.4 Pre-Feed length ...................47 4.2.5 Max Sheet length ..................48 4.2.6 Page mode ....................49 4.2.7 Origin ......................50 4.2.8 Laser speed ....................50...
- Page 9 User’s Guide SC-PRO Cutting Plotter 5 Fine-tuning your cutter ..........63 5.1 Adjusting the knife depth ..................63 5.2 Setting the tool force ..................66 5.3 Offset principle ....................66 5.4 EPOS test cuts ....................67 5.4.1 EPOS alignment ...................67 5.4.1.1 Tools necessary: ..................67 5.4.1.2 Alignment procedure ................67...
- Page 10 User’s Guide SC-PRO Cutting Plotter AP-75280 – Rev. 1.1...
-
Page 11: Regularisation And Safety Information
User’s Guide SC-PRO Cutting Plotter CHAPTER 1 : SAFETY INSTRUCTIONS 1 REGULARISATION AND SAFETY INFORMATION Safety terms in this manual are categorized into following three types, depending on the degree of the risk (or the scale of accident) Safety Terms Details Must be followed carefully to avoid death or serious bodily injury. -
Page 12: Important Notes
User’s Guide SC-PRO Cutting Plotter CHAPTER 1 : SAFETY INSTRUCTIONS 1.2 IMPORTANT NOTES Technical problems and maintenance, which require the cutter to be opened, can only be done by qualified personnel who were trained to repair this type of machine. - Page 13 User’s Guide SC-PRO Cutting Plotter CHAPTER 1 : SAFETY INSTRUCTIONS Be careful not to get stuck between the following moving parts: Cutting head ► Grid rollers ► Be careful not to get stuck between the following moving parts: Cutting head ►...
- Page 14 User’s Guide SC-PRO Cutting Plotter CHAPTER 1 : SAFETY INSTRUCTIONS AP-75280 – Rev. 1.1...
-
Page 15: Product Overview
User’s Guide SC-PRO Cutting Plotter CHAPTER 2 : PRODUCT OVERVIEW 2 PRODUCT OVERVIEW 2.1 DIMENSIONS Please find below the sizes of the SC Pro cutter with all dimensions in millimeters. 2305 1062 1259 2.2 INSTALLATION ENVIRONMENT REQUIREMENTS The location where you set up your equipment is very important. Please see to it that it meets following... - Page 16 Avoid unnecessary vibrations and set up your cutter on a level surface. Be sure to have some free space on each side of the SC-Pro to ease the operating of it. a = at least 1 meter b = at least 1 meter...
-
Page 17: Part Names And Functions
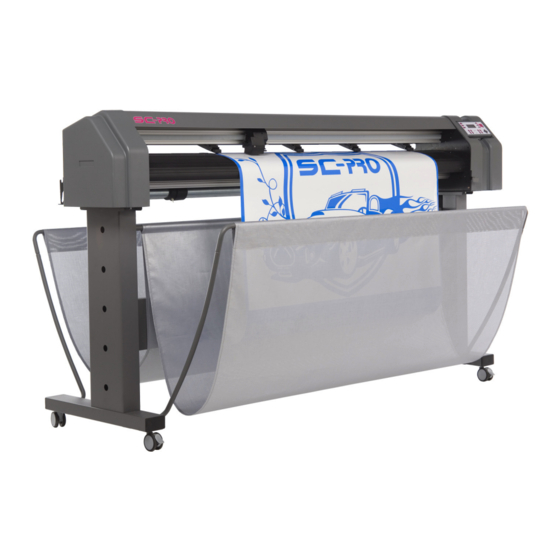
User’s Guide SC-PRO Cutting Plotter CHAPTER 2 : PRODUCT OVERVIEW 2.3 PART NAMES AND FUNCTIONS 2.3.1 Front of the SC-PRO 9 10 N° Part Function To avoid the head crashing against the side and to measure the width of Bumper the machine during initialization. -
Page 18: Rear Of The Sc-Pro
User’s Guide SC-PRO Cutting Plotter CHAPTER 2 : PRODUCT OVERVIEW 2.3.2 Rear of the SC-PRO N° Part Function To mark the position of the grid rollers. Grid roller marks The pressure rollers should always be positioned on top of a grid roller, if not, it will be impossible to start cutting. -
Page 19: Operation Panel
User’s Guide SC-PRO Cutting Plotter CHAPTER 2 : PRODUCT OVERVIEW 2.3.3 Operation panel BASIC KEYS MENU key To enter the main menu of the cutter ENTER key To open a menu item or to confirm a setting EXIT/CANCEL key To exit a menu item, to decline a setting or to cancel a cutting job. -
Page 20: In-The-Box Contents
Starter software kit (*) Quality test sheet of this machine When ordered as a bundle together with a Mutoh Printer, the in-the-box software may be replaced with one software which handles cutting, printing and contour cutting. AP-75280 – Rev. 1.1... -
Page 21: Basics
User’s Guide SC-PRO Cutting Plotter CHAPTER 3 : BASICS 3 BASICS 3.1 INSTALLING AND REPLACING TOOLS 3.1.1 Installing tools At the right-hand side of the cutter head, you will find a pivoting mounting bracket. Opening this bracket will enable you to install a full range of cutting and drawing tools. -
Page 22: Replace Cutter Blade
User’s Guide SC-PRO Cutting Plotter CHAPTER 3 : BASICS 3.1.2 Replace cutter blade To replace a blade, please proceed as follows: STANDARD KNIFE HOLDER KNIFE HOLDER WITH NONIUS Step 1 : Hold the body (2) into one hand and Step 1 : Take the body into one hand and remove... -
Page 23: Replace Auto Sheet-Off Knife
User’s Guide SC-PRO Cutting Plotter CHAPTER 3 : BASICS 3.1.3 Replace auto sheet-off knife When you frequently use the auto-sheet-off utility, it is a good practice to regularly clean the knife and to replace it when it starts to wear. -
Page 24: Replacing The Cutting Mat
For TYPE 2 Stick the vinyl as close as possible to the front of the machine. REAR FRONT Step 4 : Please contact an Authorized Mutoh technician to perform a Y-Z profile measurement and sheeting-off knife adjustment. AP-75280 – Rev. 1.1... -
Page 25: Handling And Storing Media
User’s Guide SC-PRO Cutting Plotter CHAPTER 3 : BASICS 3.2 HANDLING AND STORING MEDIA Before you will be able to cut a job, it is necessary to know which media to use. 3.2.1 Handling media When you handle media, please pay attention to the following: ... -
Page 26: Loading Media
User’s Guide SC-PRO Cutting Plotter CHAPTER 3 : BASICS 3.3 LOADING MEDIA 3.3.1 Loading roll media Please follow the procedure below to load roll media properly. Be aware that there is a loading cycle difference between loading cut vinyl and pre-printed vinyl meant for contour cutting. - Page 27 User’s Guide SC-PRO Cutting Plotter CHAPTER 3 : BASICS Step 3 : Guide the media under the pressure rollers to the front of the cutter. Step 4 : Position the pressure rollers as you have decided in step 2. Pressure rollers 2-3-4 have a tactile and audible click system which makes it easier to position them correctly.
- Page 28 D r a g K n i f e T o o l 6 0 c m / s 1 0 0 g Step 11 : The SC-Pro is ready to receive data from the host computer. AP-75280 – Rev. 1.1...
-
Page 29: Loading Pre-Printed Vinyl
User’s Guide SC-PRO Cutting Plotter CHAPTER 3 : BASICS 3.3.1.2 Loading pre-printed vinyl Configuration to start from: Raised pressure rollers. ► Rear media collection bag open and EMPTY. ► Front media collection bag open when the cutting job is smaller than 4m. - Page 30 User’s Guide SC-PRO Cutting Plotter CHAPTER 3 : BASICS Step 5 : Position the pressure rollers as you have decided in step 2. Pressure rollers 2-3-4 have a tactile and audible click system which makes it easier to position them correctly. The right pressure roller (1) can never be malpositioned.
- Page 31 D r a g K n i f e T o o l 6 0 c m / s 1 0 0 g Step 11 : The SC-Pro is ready to receive data from the host computer or Mutoh CutServer. AP-75280 – Rev. 1.1...
-
Page 32: Loading Sheet Media
User’s Guide SC-PRO Cutting Plotter CHAPTER 3 : BASICS 3.3.2 Loading sheet media Configuration to start from: Raised pressure rollers. ► Remove conveyor rolls. ► Rear media collection bag open and EMPTY. ► Front media collection bag open when the cutting job is smaller than 4m. - Page 33 User’s Guide SC-PRO Cutting Plotter CHAPTER 3 : BASICS Step 5 : Make sure that about half of the sheet hangs in front of the machine and half hangs at the back. This will make it easier to align the media correctly.
- Page 34 User’s Guide SC-PRO Cutting Plotter CHAPTER 3 : BASICS AP-75280 – Rev. 1.1...
-
Page 35: Walkthrough The Operation Panel
User’s Guide SC-PRO Cutting Plotter CHAPTER 4 : WALKTHROUGH THE OPERATION PANEL 4 WALKTHROUGH THE OPERATION PANEL The operation panel has been build up out of different keys as described in Chapter 2: “Product Overview - Operation Panel”. Direct access keys With these keys, it is possible to enter the frequently used menu items directly without the necessity to go via the main menu. -
Page 36: Sheet Off Key
User’s Guide SC-PRO Cutting Plotter CHAPTER 4 : WALKTHROUGH THE OPERATION PANEL 4.1.1 SHEET OFF key When a job has been finished and the media has to be sheeted off, this function can be used. Notes Please refer also to the “sheet off mode” and “sheet off margin” menu. -
Page 37: Origin Key
4.1.2 ORIGIN key Please follow the instructions below to change / control the origin. Notes Please make sure media is loaded. If not, the SC-Pro positioning calculation is based on previously installed media. Step 1 : Press the [ORIGIN] key. -
Page 38: Contour Cutting Key
User’s Guide SC-PRO Cutting Plotter CHAPTER 4 : WALKTHROUGH THE OPERATION PANEL 4.1.4 CONTOUR CUTTING key Please follow the instructions below to select an alignment method, to set parameters and to start contour cutting. OR MORE INFORMATION ON HOW TO CONTOUR CUT... -
Page 39: Speed Key
User’s Guide SC-PRO Cutting Plotter CHAPTER 4 : WALKTHROUGH THE OPERATION PANEL b. When you have selected “Barcode Single” or “Barcode Multi”, you have to decide if the job has to be performed only once (“Single Scan”) or multiple times (“Repeat Mode”). -
Page 40: Force Key
User’s Guide SC-PRO Cutting Plotter CHAPTER 4 : WALKTHROUGH THE OPERATION PANEL 4.1.6 FORCE key Please follow the instructions below to change / control the tool force. Tool force is the amount of downward pressure that the cutter applies on the knife / pen. -
Page 41: Offset Key
User’s Guide SC-PRO Cutting Plotter CHAPTER 4 : WALKTHROUGH THE OPERATION PANEL 4.1.7 OFFSET key Please follow the instructions below to change / control the offset. Step 1 : Press the [OFFSET] key. Step 2 : The current offset (in mm) will be displayed. Change the value with the - keys. -
Page 42: Tool Key
User’s Guide SC-PRO Cutting Plotter CHAPTER 4 : WALKTHROUGH THE OPERATION PANEL 4.1.8 TOOL key Please follow the instructions below to change the tool. Step 1 : Press the [TOOL] key. Step 2 : The current selected tool will be displayed. Switch between knife or pen with the - keys. -
Page 43: Menu Overview
User’s Guide SC-PRO Cutting Plotter CHAPTER 4 : WALKTHROUGH THE OPERATION PANEL 4.2 MENU OVERVIEW Before to be able to browse through the menu, ▼ be sure that the cutter is in normal conditions. ▼ ▼ Press the [ ] key to go back to the menu overview ▼... - Page 44 User’s Guide SC-PRO Cutting Plotter CHAPTER 4 : WALKTHROUGH THE OPERATION PANEL LEASE FIND BELOW A COMPLETE OVERVIEW OF THE EXISTING MENUS HE DEFAULT VALUES ARE MARKED IN BOLD Note that it is possible to view the full or basic menu. The items shown in the basic menu are marked in grey.
- Page 45 User’s Guide SC-PRO Cutting Plotter CHAPTER 4 : WALKTHROUGH THE OPERATION PANEL Emulation HPGL2 MHGL MHGL2 HPGL Program Step 0,010mm 0,025mm VS / ZF / AS ACCEPT IGNORE LCD contrast 0 – 16 – 32 Keyboard beep Application ► SP x.x.x...
-
Page 46: Sheet Off Mode
User’s Guide SC-PRO Cutting Plotter CHAPTER 4 : WALKTHROUGH THE OPERATION PANEL 4.2.1 Sheet off mode The auto-sheet-off mechanism of your cutter can be very easily used to cut the front edge of a new roll of vinyl straight as well as to cut off a sheet of vinyl from a roll, to be used as a separate sheet. -
Page 47: Pre-Feed Length
Your SC-Pro cutter has been equipped with MUTOH’s unique AUTO-SHEET-OFF feature, to automatically cut off media at the end of a cutting sequence. Following an automatic PAGE command or a manual PAGE command initiated via the control panel, the cutter will shuffle through the pre-set Pre-Feed length of media, to ensure that there is enough media left for a possible replot. -
Page 48: Max Sheet Length
To avoid unrolling a full roll of media when a roll is loaded while the media type is set to sheet, you can define a maximum allowed sheet length. In case sheet is selected in the menu, the SC-Pro will not measure more than the length in the Max. Sheet Length menu, preventing the roll media to be rolled off completely. -
Page 49: Page Mode
Sheeting-off automatically, without user intervention, is a feature which is unique to Mutoh cutting-plotters and which enhances the cutter’s versatility and overall performance enormously. A page-command looks like this: “PG;” or “PGN;” with “n” a number in millimetres. -
Page 50: Origin
4.2.7 Origin Change / control the default origin after a media load sequence. Notes Please make sure media is loaded. If this is not the case, the SC-Pro positioning calculation is based on previously installed media. REAR U LEFT U RIGHT... -
Page 51: Tool-Up Speed
User’s Guide SC-PRO Cutting Plotter CHAPTER 4 : WALKTHROUGH THE OPERATION PANEL 4.2.9 Tool-up speed Tool-up movements are mostly long movements (which reach their maximum speed) between the short tool- down movements. These movements could cause abrupt media transport (which could cause tracking problems). -
Page 52: Factory Default
User’s Guide SC-PRO Cutting Plotter CHAPTER 4 : WALKTHROUGH THE OPERATION PANEL 4.2.12 Factory default Restore the factory defaults as follows F a c t o r y d e f a u l t Y E S S a v e :... -
Page 53: Bezier
User’s Guide SC-PRO Cutting Plotter CHAPTER 4 : WALKTHROUGH THE OPERATION PANEL 4.2.14 Bezier This is the calculation accuracy factor for the incorporated Bézier curve generation. The value can be set between 1 and 10. B e z i e r 1 . -
Page 54: Program Step
User’s Guide SC-PRO Cutting Plotter CHAPTER 4 : WALKTHROUGH THE OPERATION PANEL 4.2.17 Program step Please note that some software packages use the “step per mm” terminology, in which case a program step of 0.025 mm corresponds with 40 steps per mm and a program step of 0.010 mm with 100 steps per mm. -
Page 55: Keyboard Beep
A keyboard beep will sound after pushing a key. 4.2.21 Versions Check which versions are installed on the SC-Pro cutter. V e r s i o n s S P x . x . x S a v e :... -
Page 56: Serial Communication
User’s Guide SC-PRO Cutting Plotter CHAPTER 4 : WALKTHROUGH THE OPERATION PANEL 4.2.23 Serial communication In order for your plotter to be able to communicate well with your host computer, the communication settings on both machines have to match exactly. Please refer to the manual of your software to determine which communication setting will be used by your software. -
Page 57: Network Communication
User’s Guide SC-PRO Cutting Plotter CHAPTER 4 : WALKTHROUGH THE OPERATION PANEL 4.2.24 Network communication In order for your plotter to be able to communicate well with your local network, some settings have to be made. Please contact your system administrator for all necessary information. -
Page 58: Special Key Combinations
User’s Guide SC-PRO Cutting Plotter CHAPTER 4 : WALKTHROUGH THE OPERATION PANEL 4.3 SPECIAL KEY COMBINATIONS Shortcut description Special Key combination EPOS Laser ON EPOS Laser OFF Bar code verification Updating the keyboard Reset the keyboard Activate Sheet off knife Factory defaults 4.3.1... -
Page 59: Epos Laser Off
User’s Guide SC-PRO Cutting Plotter CHAPTER 4 : WALKTHROUGH THE OPERATION PANEL 4.3.2 EPOS laser OFF Deactivate the EPOS laser as follows Step 1 : Power ON the cutter. Step 2 : Press the following keys simultaneously: Step 3 : The EPOS laser will go out. -
Page 60: Updating The Keyboard
User’s Guide SC-PRO Cutting Plotter CHAPTER 4 : WALKTHROUGH THE OPERATION PANEL 4.3.4 Updating the keyboard After installation of a new cutter firmware, it is highly recommended to update the keyboard firmware as described below: Step 1 : Power ON the cutter. -
Page 61: Activate Sheet Off Knife
User’s Guide SC-PRO Cutting Plotter CHAPTER 4 : WALKTHROUGH THE OPERATION PANEL 4.3.6 Activate Sheet off knife This function is made to check if the up down knife movement still works. Do NOT try to sheet off your media with this function, this to avoid damaging the media, head and knife. -
Page 62: Keys Accessible During A Cutting Job
User’s Guide SC-PRO Cutting Plotter CHAPTER 4 : WALKTHROUGH THE OPERATION PANEL 4.4 KEYS ACCESSIBLE DURING A CUTTING JOB During or while pausing a cutting job, a lot of keys are locked. Please find below an overview. 4.4.1 While cutting... -
Page 63: Fine-Tuning Your Cutter
User’s Guide SC-PRO Cutting Plotter CHAPTER 4 : WALKTHROUGH THE OPERATION PANEL 5 FINE-TUNING YOUR CUTTER In order to help you to obtain perfect quality our engineers have developed a step-by-step method for the beginning user. Once you have more experience with your cutter, you will be able to fine-tune your cutter in a trice. - Page 64 User’s Guide SC-PRO Cutting Plotter CHAPTER 4 : WALKTHROUGH THE OPERATION PANEL TO ADJUST THE KNIFE DEPTH, PROCEED AS FOLLOWS: STANDARD KNIFE HOLDER OPTIONAL KNIFE HOLDER WITH NONIUS Hold the body (2) in one hand and adjust the Loosen the base part of the cutting knife. To do this, depth by using the set screw (3).
- Page 65 For some applications it might be convenient to be able to very accurately change the depth of the cutting blade. For those applications, MUTOH can provide you with an optional knife holder, featuring a nonius (vernier) with which it is possible to adjust the depth of the knife in increments of 0.01 millimetre (0.0004”) The upper scale lines make it possible to change the knife depth over 0.05 mm (0.002”).
-
Page 66: Setting The Tool Force
Accurate measurement of the OFFSET to be used is very difficult and requires specialized equipment. You should therefore adjust the offset (2) by checking real cutting results on the media you will use. MUTOH helps you doing this by way of a semi-automatic offset adjustment routine, which has been integrated into your cutter. -
Page 67: Epos Test Cuts
Reference box and measure the position of the design(s). When you establish some miscalculations during contour cutting, it is recommended to perform the test cuts described below. After these test, everything should be all right. If not, please contact an Authorized Mutoh Technician. 5.4.1 EPOS alignment 325 mm 5.4.1.1... -
Page 68: Adjustments If Necessary
2. Press the [GO] button to start the test. Step 10 : The reference box will be automatically measured and the barcode verification will be executed. When the plot file is not listed in the Mutoh CutServer, the internal embedded Epos Final Check plot file will be used. -
Page 69: Epos Readout
Step 3 : Hold a white paper under the EPOS laser and check if the display message changes to WHITE. If not, the sensor is broken or badly positioned. Contact an Authorized Mutoh Technician to replace or calibrate the EPOS sensor. -
Page 70: Epos Calibration
EPOS calibration This test will fine-tune the position of the cutting knife compared to the EPOS laser firmware wisely. This test can be done manually and automatically. It is recommended however, to let the SC-Pro adjust the values automatically. Step 1 : Install and set a knife. - Page 71 User’s Guide SC-PRO Cutting Plotter CHAPTER 4 : WALKTHROUGH THE OPERATION PANEL Press the [ ] key. The following message will be displayed: P l e a s e w e e d o u t t h e s q u a r e ( s ) &...
- Page 72 User’s Guide SC-PRO Cutting Plotter CHAPTER 4 : WALKTHROUGH THE OPERATION PANEL AUTOMATIC CALIBRATION ► Following pattern will be cut: Press the [ ] key. The following message will be displayed: P l e a s e w e e d o u t t h e s q u a r e ( s ) &...
-
Page 73: Xy-Distance Accuracy
User’s Guide SC-PRO Cutting Plotter CHAPTER 4 : WALKTHROUGH THE OPERATION PANEL 5.5 XY-DISTANCE ACCURACY The XY - Distance Accuracy tests are developed to check the actual X-Y cutting distance with the sent vector data. Please follow the procedure below to make the test: Step 1 : Open Mutoh’s CutServer... - Page 74 User’s Guide SC-PRO Cutting Plotter CHAPTER 5 : FINETUNING YOUR CUTTER AP-75280 – Rev. 1.1...
-
Page 75: Contour Cutting
User’s Guide SC-PRO Cutting Plotter CHAPTER 6 : CONTOURCUTTING 6 CONTOUR CUTTING CONTOUR CUTTING is a very popular feature of the SC PRO cutter. This feature is made to cut pre-printed signs on vinyl for sticker production as shown on this picture ►... -
Page 76: Which Aligning Method Should I Use
(overnight printing for example), and then load the roll with images in the SC-Pro. If each sign on the roll has a barcode and if all plot files are in the Mutoh CutServer, just click on GO in the Mutoh CutServer (make sure that the Mutoh CutServer properties are set to SINGLE FRAME, and REPEAT MODE) and every sign on the roll will be cut, without the need for user intervention (make sure you’ve... -
Page 77: Square Details
Illustrator, Adobe Photoshop or Macromedia Freehand) or in origin software with design functionalities (EasySIGN Power Pack Pro Mutoh Edition or Scanvec Amiable PhotoPRINT DX Mutoh Edition) Do not forget to create the cutting line around your image. The default cutting line is a “magenta hairline”... -
Page 78: Automatic Alignment Without Barcode
User’s Guide SC-PRO Cutting Plotter CHAPTER 6 : CONTOURCUTTING 6.3.2 Automatic alignment without barcode The frame reference box printed or generated around the contour cut data should respect the following guidelines: N° Description Minimum Maximum Recommended White edge at the right side... -
Page 79: Automatic Alignment With Barcode - Single Frame
User’s Guide SC-PRO Cutting Plotter CHAPTER 6 : CONTOURCUTTING 6.3.3 Automatic alignment with barcode – single frame The frame reference box printed or generated around the contour cut data should respect the following guidelines: N° Description Minimum Maximum Recommended White edge at the right side... -
Page 80: Automatic Alignment With Barcode - Multi Frame
User’s Guide SC-PRO Cutting Plotter CHAPTER 6 : CONTOURCUTTING 6.3.4 Automatic alignment with barcode – multi frame The frame reference box printed or generated around the contour cut data should respect the following guidelines: N° Description Minimum Maximum Recommended White edge at the right side... -
Page 81: Cut Area Measurement
User’s Guide SC-PRO Cutting Plotter CHAPTER 6 : CONTOURCUTTING 6.4 CUT AREA MEASUREMENT As explained above, different alignment methods can be chosen. Each method has a different measurement method. Step 1 : Press the [CONTOUR CUTTING] key. Step 2 : Select the alignment method with the - keys. - Page 82 Notes > Single Scan: The command will be given to start scanning the bar code of the first / next reference box ONLY, from roll or sheet. After finishing this single job, the SC-Pro returns into the Ready status. > Repeat Mode: AUTOMATICALLY all succeeding frames will be scanned and contour cut as well, until the end of roll is reached.
-
Page 83: Maintenance
User’s Guide SC-PRO Cutting Plotter CHAPTER 7 : MAINTENANCE 7 MAINTENANCE In this chapter, you will learn: How to keep your cutter in good shape and prevent problems by regularly performing some easy, daily maintenance. How to pinpoint and check out problems that might occur. -
Page 84: Cleaning The Cutter Blade
User’s Guide SC-PRO Cutting Plotter CHAPTER 7 : MAINTENANCE 7.1.2 Cleaning the cutter blade Use following procedure to remove small vinyl particles in the base part of the cutting blade holder. STANDARD KNIFE HOLDER KNIFE HOLDER WITH NONIUS Step 1 :... -
Page 85: Troubleshooting
User’s Guide SC-PRO Cutting Plotter CHAPTER 8: TROUBLESHOOTING 8 TROUBLESHOOTING In this section you will find a summary of problems that might occur during day-to-day use of your cutter and some hints how to determine the cause of the problem. -
Page 86: Checking The Communication Settings
User’s Guide SC-PRO Cutting Plotter CHAPTER 8: TROUBLESHOOTING 8.1 CHECKING THE COMMUNICATION SETTINGS Communication problems are the most frequent errors, which occur. Therefore we have included a step- by-step procedure to check out your configuration’s communication settings and assure that your cutter is working fine. -
Page 87: For Network Connections
Step 6 : Open “HyperTerminal” (Accessories > Communications) Step 7 : Type a name for the new connection, for example: SC-Pro and press [OK]. Step 8 : Switch the “Connect using:“ choice to TCP/IP (Winsock). Step 9 : Type the IP-address of the cutter in the “Host address” field and 10001 as “Port number”. -
Page 88: Error Messages
During a cutting, measuring or other sequence, it might be possible that one of the below errors occur. Please find an alphabetical list below with all the possible errors which can be solved yourself, without any need of an intervention by an Authorized Mutoh Technician. - Page 89 User’s Guide SC-PRO Cutting Plotter CHAPTER 8: TROUBLESHOOTING EPOS problem: It might also be possible that the reference box 1. Select the correct file in the Mutoh ► Application Guide Print&Cut ► No EPOS reference cannot be found. CutServer and start the job manually...
- Page 90 User’s Guide SC-PRO Cutting Plotter CHAPTER 8: TROUBLESHOOTING Pressure roll ## One of the pressure rollers is not detected by 1. When you want to disable a pressure ► Basics ► Loading media ► the cutter. roller, be sure that it is in between two malpositioned clicks, not at the edge.
-
Page 91: Unrecoverable System Errors
The error id, number and description will appear on the keyboard display, and will be cleared when entering a key. It is recommended to contact an authorized Mutoh service technician. It is also possible that the error disappears after rebooting the cutter. - Page 92 User’s Guide SC-PRO Cutting Plotter CHAPTER 8: TROUBLESHOOTING Undefined Error No Error Found -------------------------------------------------------------------------- 1009 Y position error PWM switched off 1010 X position error PWM switched off 1012 12V detection failure PWM switched off 1013 48V detection failure PWM switched off...
- Page 93 User’s Guide SC-PRO Cutting Plotter CHAPTER 8: TROUBLESHOOTING 4055 RO caused an error 4056 PE caused an error 4060 PW caused an error 4062 WU caused an error 4064 CT caused an error 4072 PS caused an error 4075 VS caused an error...
- Page 94 User’s Guide SC-PRO Cutting Plotter CHAPTER 8: TROUBLESHOOTING 5060 HCLIP caused an error 5061 LASER caused an error 5066 KNIFE caused an error 5067 EPOSSEDGE caused an error 5068 EPOSPARS caused an error 5069 EPOSCALIB caused an error 5070 EPOSDIST caused an error...
-
Page 95: Consumables
User’s Guide SC-PRO Cutting Plotter CHAPTER 9 : CONSUMABLES 9 CONSUMABLES Please find below a list of all the available consumables for the Mutoh SC-Pro cutter. Part number Description ZMY-10050B Knife holder without depth indication. Contains the following extra items: One cutting knife blade ►... - Page 96 User’s Guide SC-PRO Cutting Plotter CHAPTER 9 : CONSUMABLES Part number Description PSGBBK Pressurized ballpoint pen. RJ8-CBS Long life tungsten carbide cutting blade for automatic sheet-off. ZME-23310 Set of 3 spare cutting mats. Set of 3 spare cutting mats designed for punching ZME-23132 applications.
- Page 97 User’s Guide SC-PRO Cutting Plotter CHAPTER 9 : CONSUMABLES Part number Description MY-10168 Set of two 3” core supports BM-9005-005015 Screw to tighten the 3” core supports ME-15088 One conveyor roll brake ZMY-10047 Set of two conveyor flanges AP-75280 – Rev. 1.1...
Need help?
Do you have a question about the SC-PRO and is the answer not in the manual?
Questions and answers