Table of Contents
Advertisement
Quick Links
Advertisement
Table of Contents

Related Manuals for Roland SH-4d


Summary of Contents for Roland SH-4d
- Page 1 SH-4d Owner's Manual...
-
Page 2: Table Of Contents
Table of contents Table of contents DRAWING ..................36 An Overview of the SH-4d ............5 PCM ....................37 Configuring a Tone ..............38 How the Sound Module is Structured ........5 Using the Modulation Matrix ..........40 Configuring the LFO .............. 43 Panel Descriptions .............. - Page 3 Limiter ..................... 128 Wavetable ..................185 Sustainer ..................128 Tone List ................186 Transient ..................129 SH-4d OSC model ............... 186 Gate ....................130 SH-3d OSC model ............... 192 Delay Type ................131 Sync OSC model ................194 Delay ....................131 SH-101d OSC model ..............
- Page 4 Table of contents MIDI Implementation Chart (SYSTEM) ......207 MIDI Implementation Chart ..........204 MIDI Implementation Chart (Tone) ........204 MIDI Implementation Chart (Rhythm) ......206...
-
Page 5: An Overview Of The Sh-4D
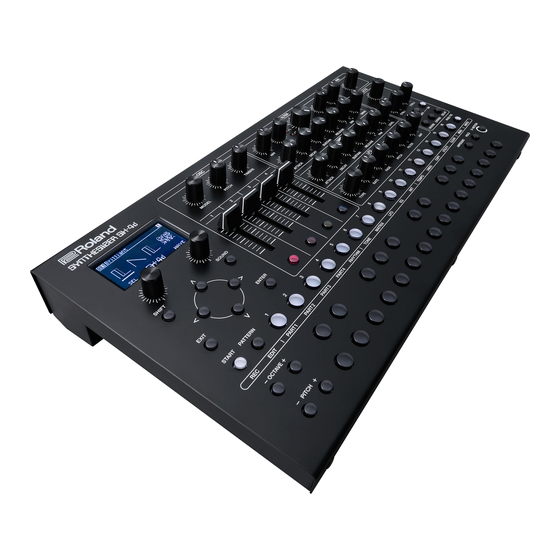
An Overview of the SH-4d An Overview of the SH-4d The SH-4d is a tabletop synthesizer that lets you switch between a variety of oscillator models to intuitively create a wide range of sounds. A variety of options for creating sounds The new interpretive oscillator model featured on this unit lets you create a wide array of sounds, from classic synthesizers to modern wavetable synthesizer sounds. - Page 6 A “part” is a place where you can load a tone and save it together with settings such as pan and EQ. The SH-4d contains five parts. You can select synthesizer tones for parts 1–4 and a rhythm kit tone for part R (the rhythm part).
-
Page 7: Panel Descriptions
Panel Descriptions Panel Descriptions Top Panel Control section Controller Explanation Displays the tone list (sound browser) and switches between sounds (tones). [SOUND] When you press this button on the pattern screen, the mixer screen appears. button Ø “Adjusting the Volume Balance and Effect Sends(P.21)”... -
Page 8: Osc Section
Panel Descriptions Controller Explanation Returns you to the previous screen. In some screens, this cancels the operation currently being executed. [EXIT] button * If you operate a knob or other control while holding down the [EXIT] button, you can check how the tone sounds with the edited value without actually changing the tone. -
Page 9: Effects Section
Effects section The SH-4d features one multi-effect unit (tone effect) per part, as well as four pattern effect units that are applied to the mix of all parts. Each pattern effect unit includes a multi-effect (MFX), delay, chorus and reverb. -
Page 10: Step Sequencer Section
Panel Descriptions Controller Explanation Quick press: Selects the pattern reverb. [REVERB] button Long-press: Shows the pattern reverb settings screen. Ø “PATTERN REVERB(P.173)” Quick press: Selects the pattern chorus. [CHORUS] Long-press: Shows the pattern chorus settings screen. button Ø “PATTERN CHORUS(P.168)” Quick press: Selects the pattern delay. -
Page 11: Keyboard Section
Panel Descriptions Controller Explanation [PAGE/TIE] Shows the WRITE MENU screen. Ø (WRITE) “Saving a Tone/Pattern (WRITE MENU)(P.73)” Keyboard section Controller Explanation OCTAVE [-] [+] Switches between octaves for the keyboard section. Press both buttons at the same time to reset the octave setting. buttons PITCH [-] [+] Applies pitch bend to the currently selected part while you hold down the buttons. -
Page 12: Rear Panel
* Do not use a USB cable that is designed only for charging. Charge-only cables cannot transmit data. * If you’re using a Mac, the SH-4d driver must be installed to connect to this unit. Access the website shown below to download the SH-4d Driver. -
Page 13: Turning The Power On
Turning the Power On Turning the Power On * Before turning the unit on/off, always be sure to turn the volume down. Even with the volume turned down, you might hear some sound when switching the unit on/off. However, this is normal and does not indicate a malfunction. When supplying power via the USB port Connect the included USB Type-C cable to a 5V USB AC adaptor or to the USB port on your computer. - Page 14 Turning the Power On If you handle the battery improperly, you risk explosion and fluid leakage. Make sure that you carefully observe all of the items related to batteries that are listed in the “USING THE UNIT SAFELY” and “IMPORTANT NOTES” (“USING THE UNIT SAFELY”) leaflets for proper use.
-
Page 15: Switching Between Tones
You can use the keyboard buttons or an external keyboard to preview the selected tones. ● On the sound browser screen, press the [EXIT] button to reload the tone that was selected when you entered the sound browser. Abbreviations when displaying categories SH-4d WAVETABLE Cross FM CHORD DRAWING... - Page 16 Switching Between Tones User Tone To save an edited tone, execute the write operation. For details on how to save a tone, refer to “Saving a Tone/Pattern (WRITE MENU)(P.73)”.
-
Page 17: Switching Between Parts
Switching Between Parts Switching Between Parts Hold down the [SHIFT] button and press the [1]–[5] buttons. The mark shown at the top-right corner of the screen indicates the current part. -
Page 18: Switching Between Patterns
Switching Between Patterns Switching Between Patterns When you switch to a different pattern, the previous unsaved tone/pattern is lost. If you want to keep the unsaved tone or pattern, save the tone/pattern before switching patterns. Using the [1]–[16] buttons to switch between patterns Press the [PATTERN] button. - Page 19 Switching Between Patterns Using the [2] knob to switch patterns On the PATTERN screen, turn the [2] knob to make the button ([1]–[16]) blink that corresponds to the pattern you want to select. Turn the [2] knob while holding down the [SHIFT] button to switch between banks. When playing back the pattern, press the [ENTER] button to confirm the pattern.
-
Page 20: Muting A Part
Muting a Part Muting a Part Press the [PATTERN] button. The PATTERN screen appears. Press the [SOUND] button. The MIXER screen appears. Use the [1]–[5] buttons and the keyboard buttons to mute the parts. Controller Explanation [1]–[5] buttons Mutes/unmutes parts 1–4 and part R (RHYTHM). Mutes/unmutes rhythm instruments 1–26 for part R (RHYTHM). -
Page 21: Adjusting The Volume Balance And Effect Sends
Adjusting the Volume Balance and Effect Sends Adjusting the Volume Balance and Effect Sends Press the [PATTERN] button. The PATTERN screen appears. Press the [SOUND] button. The MIXER screen appears, and the following operations are available. Controller Explanation [OSC 1]–[OSC 4] sliders Adjusts the volume of parts 1–4. -
Page 22: Initializing A Tone/Pattern (Initialize)
Initializing a Tone/Pattern (INITIALIZE) Initializing a Tone/Pattern (INITIALIZE) Initializing a tone part Set the part you want to initialize to the current part. Hold down the [SHIFT] button and press the [10] button to display the dialog box. Press the [ENTER] button. - Page 23 Initializing a Tone/Pattern (INITIALIZE) Initializing a Rhythm Kit/Instrument Set part R as the current part. To initialize an instrument, press a keyboard button to select the instrument you want to initialize as the current instrument. Hold down the [SHIFT] button and press the [10] button to display the dialog box. Use the [ç] [æ] buttons to select what you want to initialize, and press the [ENTER] button.
- Page 24 Initializing a Tone/Pattern (INITIALIZE) Initializing a Pattern Press the [PATTERN] button to display the PATTERN screen, and select the pattern to initialize. Hold down the [SHIFT] button and press the [10] button to display the dialog box. Press the [ENTER] button.
-
Page 25: Creating A Tone
Creating a Tone Creating a Tone How Parts 1–4 Are Structured... -
Page 26: Oscillator Model
Creating a Tone Oscillator Model Oscillator model Explanation SH-4d A virtual analog oscillator with four oscillators, featuring selectable waveforms that can be mixed. A virtual analog oscillator with three oscillators and a secondary LFO. SH-3D SYNC Two synchronizable virtual analog oscillators with a pitch envelope. - Page 27 Creating a Tone Parameter Controllers Value Explanation RAMP Ramp wave JUNO Modulated sawtooth wave TRI2 Triangle wave variation TRI3 Triangle wave variation SINE2 Sine wave variation SSAW SuperSAW NOISE White noise Osc 1–4 PITCH -24–+24 Specifies the pitch in semitone steps Coarse Tune (maximum ±2 octaves).
- Page 28 Creating a Tone SH-3D Turn the [1] knob or press the [1]–[4] buttons in the OSC section to select an oscillator or LFO 2, and use the [2] knob to select the oscillator or LFO 2 waveform. Use the [1]–[3] sliders to set the volume for each oscillator. Set the speed of the LFO 2 cycle with the [4] slider. Parameter Controllers Value...
- Page 29 Creating a Tone Parameter Controllers Value Explanation Osc 1–3 SHIFT+TIMBRE 0–63 This effect changes the duty ratio of the pulse width to alter the waveform. Pulse Width You can use this effect with other waveforms besides SQR (square wave). * A value of zero results in a 50:50% duty ratio.
-
Page 30: Sync
Creating a Tone Parameter Controllers Value Explanation LFO 2 Phase – Sets the LFO 2 start phase value when Key Trigger is “ON”. 1 cycle 1/4 cycle 1/2 cycle 3/4 cycle SYNC Use the [2] knob to set the waveform. Parameter Controllers Value... - Page 31 Creating a Tone SH-101 Parameter Controllers Value Explanation PITCH -24–+24 Specifies the pitch in semitone steps (maximum ±2 Coarse Tune octaves). Fine Tune SHIFT+PITCH -50–+50 Specifies the pitch in cents (maximum ±50 cents). TIMBRE (when “PWM Source” is 0–63 Changes the duty ratio of the pulse width to alter the set to “MANUAL”) waveform.
-
Page 32: Juno-106
Creating a Tone JUNO-106 Parameter Controllers Value Explanation PITCH -24– Specifies the pitch in semitone steps (maximum ±2 octaves). Coarse Tune SHIFT+PITCH -50– Specifies the pitch in cents (maximum ±50 cents). Fine Tune TIMBRE 0–63 Changes the duty ratio of the pulse width to alter the waveform. Pulse Width * A value of zero results in a 50:50% duty ratio. -
Page 33: Cross Fm
Creating a Tone Cross FM Parameter Controllers Value Explanation Carrier/Modulator [2] knob (on the top SINE, TRI, This sets the waveform. screen only) SQR, SAW Waveform Coarse Tune PITCH -24–+24 Specifies the pitch in semitone steps (maximum ±2 octaves). Fine Tune SHIFT+PITCH -50–+50 Specifies the pitch in cents (maximum ±50 cents). -
Page 34: Ring
Creating a Tone RING Parameter Controllers Value Explanation Osc 1–2 [2] knob (on the top SINE, TRI, This sets the waveform. screen only) SQR, SAW Waveform Coarse Tune PITCH -24–+24 Specifies the pitch in semitone steps (maximum ±2 octaves). Fine Tune SHIFT+PITCH -50–+50 Specifies the pitch in cents (maximum ±50 cents). -
Page 35: Chord
Creating a Tone Parameter Controllers Value Explanation [OSC 2] slider 0–1023 Sets the attack time for the envelope that’s applied at the wave Position Env Atk position. [OSC 3] slider 0–1023 Sets the decay time for the envelope that’s applied at the wave Position Env Dcy position. -
Page 36: Drawing
Creating a Tone DRAWING Use the [1] and [2] knobs to set the waveform shape. When you press the [ENTER] button, the cursor moves automatically, so you can draw the waveform by turning only the [2] knob. Parameter Controllers Value Explanation Wave Step 1–... -
Page 37: Pcm
Creating a Tone Parameter Controllers Value Explanation 1–53 Selects the PCM [2] knob, [ä] [å] OSC 1–4 waveforms that play. buttons (on the top Wave screen only) PITCH -24–+24 Specifies the pitch in Osc 1–4 semitone steps (maximum Coarse Tune ±2 octaves). -
Page 38: Configuring A Tone
Analog Feel Higher values produce more irregularity, which results in a more unstable sound (only when using SH-4d, SH-3D, SYNC, SH-101, JUNO-106, Cross FM, RING, CHORD or PCM models). Sets whether the tones play in polyphonic (POLY) or monophonic (MONO) mode. - Page 39 Creating a Tone Item Value Explanation -100– Sets how much the cutoff frequency changes according to how hard you play the keys. Cutoff Velo +100 Positive values make the cutoff frequency increase when you play the keys harder, and negative Sense values make the cutoff frequency decrease.
-
Page 40: Using The Modulation Matrix
Creating a Tone Using the Modulation Matrix What is the Modulation Matrix? The modulation matrix is a function that lets you freely “rewire” signals like the LFO and envelope generator, to create a variety of sounds that normally can’t be achieved when connecting these components with the system default settings. For the signal source, you can use internal signals like the LFO, as well as external MIDI signals like control change messages. - Page 41 Creating a Tone MATRIX ASSIGN function This function sets the source and destination according to how you operate the knobs. On the MATRIX screen, press the [ä] [å] buttons to select the source/destination to edit. Press the [ENTER] button. The MATRIX ASSIGN screen appears. Operate the controller (knob, slider or button) corresponding to the source/destination you want to set.
- Page 42 Creating a Tone AUTO ASSIGN function When you use the knobs to confirm both the source and destination, this function automatically assigns the source and destination to an available slot. On the MATRIX screen, hold down the [SHIFT] button and press the [7] button again. The AUTO ASSIGN screen appears.
-
Page 43: Configuring The Lfo
Creating a Tone Configuring the LFO Hold down the [SHIFT] button and press the [8] button. The LFO screen appears. Item Value Explanation OFF, Turn this ON to sync the LFO cycle with the tempo. Rate Sync OFF, Sets whether to synchronize the start of the LFO cycle with the timing you use to play the keys (“ON” to Key Trigger synchronize, “OFF”... -
Page 44: Configuring The Tone Eq
Creating a Tone Configuring the Tone EQ Hold down the [SHIFT] button and press the [9] button. The TONE EQ screen appears. Item Value Explanation Switch OFF, ON Turns the equalizer on/off. Low Gain -24.0–+24.0 [dB] Adjusts the boost/cut of the low frequency range. Mid Gain -24.0–+24.0 [dB] Adjusts the amount of boost/cut of the mid-frequency range. -
Page 45: Creating A Rhythm Kit
Creating a Rhythm Kit Creating a Rhythm Kit How Part R is Structured... -
Page 46: Creating A Rhythm Instrument
Creating a Rhythm Kit Creating a Rhythm Instrument Hold down the [SHIFT] button and press the [5] button to set part R as the current part. Press a keyboard button to select the rhythm instrument you want to set. The settings for the selected instrument are shown on the top screen, and you can configure the parameters of the instrument that you selected using the panel knobs. - Page 47 Creating a Rhythm Kit Use the [1] knob, [ä] [å] or [OSC 1] [OSC 2] buttons to select the layer for which you want to choose a waveform. Use the [2] knob (only if the top screen is shown) or the [MODEL] knob to select a waveform. Use the [2] knob, [PITCH] knob, [OSC 1] slider, and [OSC 4] button to set the parameters of the layer you selected in step 1.
- Page 48 Creating a Rhythm Kit Section Controller Value Explanation FLT ENV DECAY 0–255 Sets the decay time of the filter envelope. FLT ENV 0–1023 Sets the sustain level of the filter envelope. SUSTAIN FLT ENV 0–1023 Sets the release time of the filter envelope. RELEASE -63–...
-
Page 49: Configuring A Rhythm Kit/Instrument
Creating a Rhythm Kit Configuring a Rhythm Kit/Instrument Hold down the [SHIFT] button and press the [5] button to set part R as the current part. Press a keyboard button to select a rhythm instrument you want to edit. Hold down the [SHIFT] button and press the [6] button. The RHYTHM KIT EDIT screen appears. -
Page 50: Using The Arpeggiator
Using the Arpeggiator Using the Arpeggiator Press the [ARPEGGIO] button to make it light. Play more than one key on the keyboard at the same time. When you press the [HOLD] button to make it light up, the arpeggiator keeps playing even if you take your fingers off the keys. - Page 51 Using the Arpeggiator Configuring the Arpeggio Long-press the [ARPEGGIO] button, or hold down the [SHIFT] button and press the [ARPEGGIO] button. The ARPEGGIO settings menu appears. Parameter Value Explanation Sets the order in which notes are played by the arpeggio when you play a chord. The notes are played from the lowest key you played to the highest.
-
Page 52: Creating A Pattern (Step Sequencer)
Creating a Pattern (Step Sequencer) Creating a Pattern (Step Sequencer) What is the Step Sequencer? With the step sequencer, you can input notes for each step and then play them back in a loop. You can change the number of steps within a range of 1–64 for each part. Up to 128 patterns can be stored. -
Page 53: Setting The Tempo And Shuffle
Creating a Pattern (Step Sequencer) Setting the Tempo and Shuffle Hold down the [SHIFT] button and press the [11] button. The PATTERN TEMPO screen appears. Parameter Value Explanation 20.00– Sets the tempo of the pattern and arpeggio. 300.00 Tempo * Hold down the [SHIFT] button or the [2] knob while operating the controls to set the value in 0.01 increments. -
Page 54: Editing The Range Of Steps To View/Edit (Page)
Creating a Pattern (Step Sequencer) Editing the Range of Steps to View/Edit (PAGE) Press the [PAGE/TIE] button. Use the [1]–[16] buttons to advance the range of steps to show or edit, in 16-step increments. ● Turn the [1] knob while holding down the [PAGE/TIE] button to edit the number of steps (step length) of the current part. ●... -
Page 55: Inputting And Editing Notes
Creating a Pattern (Step Sequencer) Inputting and Editing Notes You can use the [1]–[16] buttons to input notes for each step. When editing with the step sequencer, make sure that the [PATTERN] button is not lit. When the [PATTERN] button is lit, you can press the [EXIT] button several times to return to the top screen. Tone Part Hold down one of the [1]–[16] buttons and press a keyboard button. - Page 56 Creating a Pattern (Step Sequencer) Rhythm part (TR-REC) Press a keyboard button to select the instrument you want to input. Press the [1]–[16] buttons corresponding to the notes you want to input for the selected instrument. ● You can input up to eight notes per step. When you input more than eight notes, the previous notes you inputted are deleted, with the oldest note deleted first.
-
Page 57: Inputting A Tie
Creating a Pattern (Step Sequencer) Inputting a Tie Hold down one of the [1]–[16] buttons corresponding to where you want the tie to start, and press the [PAGE/TIE] button. When you press the [PAGE/TIE] button more than once, a tie is input into the following steps. -
Page 58: Inputting A Pattern While The Steps Automatically Advance (Step Input)
Creating a Pattern (Step Sequencer) Inputting a Pattern While the Steps Automatically Advance (Step Input) Hold down the [1]–[16] buttons and press the [START] button to select the step where you want to start inputting. The unit enters step input mode, and “Recording” appears on the display. Input the notes using the keyboard buttons or an external keyboard. -
Page 59: Recording Your Performance In Real Time (Real-Time Input)
Creating a Pattern (Step Sequencer) Recording Your Performance in Real Time (Real-time Input) Hold down the [SHIFT] button and press the [START] button. The unit enters real-time input mode, and “Recording” appears on the display. Input the notes using the keyboard buttons or an external keyboard. Your playing is recorded in real time. -
Page 60: Inputting/Editing Velocity And Gate Length
Creating a Pattern (Step Sequencer) Inputting/Editing Velocity and Gate Length For tone parts Long-press the [1]–[16] buttons to bring up the STEP EDIT screen. While holding down the [1]–[16] buttons, press one of the [ä] [å] buttons. The STEP EDIT screen stays open. Without pressing the [ä] [å] buttons, take your finger off the [1]–[16] buttons to close the STEP EDIT screen. - Page 61 Creating a Pattern (Step Sequencer) For the rhythm part Long-press the [1]–[16] buttons to bring up the STEP EDIT screen. While holding down the [1]–[16] buttons, press one of the [ä] [å] buttons. The STEP EDIT screen stays open. Without pressing the [ä] [å] buttons, take your finger off the [1]–[16] buttons to close the STEP EDIT screen. Press the keyboard buttons to select the instrument whose velocity or gate length you wish to edit.
-
Page 62: Inputting/Editing The Probability And Sub Steps
Creating a Pattern (Step Sequencer) Inputting/Editing the Probability and Sub Steps For each step in a sequence, you can set the probability with which the step sounds, and the sounds that play continuously within that step (sub steps). Long-press the [1]–[16] buttons to bring up the STEP EDIT screen. While holding down the [1]–[16] buttons, press one of the [ä] [å] buttons. - Page 63 Creating a Pattern (Step Sequencer) Hold down one of the [1]–[16] buttons in step 1 and press the [æ] button to move to the NOTE 2 page.
-
Page 64: Recording The Knob Motions
Creating a Pattern (Step Sequencer) Recording the Knob Motions You can record and play back the motions of the knobs while the step sequencer plays back. Hold down the [SHIFT] button and press the [START] button. The unit enters real-time input mode, and “Recording” appears on the display. Move the knobs while the sequencer plays back. - Page 65 Creating a Pattern (Step Sequencer) You can also record the knob position into each step by following the steps in “Inputting and Editing Notes(P.55)”. Hold down the respective [1]–[16] buttons while turning the knob of the selected step where you want to save the motion, and set the value.
-
Page 66: Configuring The Patterns
Creating a Pattern (Step Sequencer) Configuring the Patterns Hold down the [SHIFT] button and press the [PATTERN] button. The PATTERN SETTINGS screen appears. Use the [1] knob or press the [ä] [å] buttons to select the item. Use the [2] knob to select a value. Press the [EXIT] button to exit the PATTERN SETTINGS screen. - Page 67 Creating a Pattern (Step Sequencer) Item Value Explanation Last Step Sw OFF, ON Switches the last step settings on/off. Last Step From 1 to (value set in STEP This specifies any step besides the first and last step to be played back as LENGTH) the last step.
-
Page 68: Pattern Utilities
Creating a Pattern (Step Sequencer) Pattern Utilities Hold down the [SHIFT] button and press the [14] button. The PATTERN UTILITY screen appears. Use the [1] or [2] knob or press the [ä] [å] buttons to select the item. To execute the operation, press the [ENTER] button. Item Explanation Duplicates the content of the step sequencer for the selected part, which doubles the number of... -
Page 69: Copying And Pasting The Content Of Patterns
Copying and Pasting the Content of Patterns Copying and Pasting the Content of Patterns You can copy and paste the data in a pattern to a different pattern, part or step. Copying the Data Hold down the [SHIFT] button and press the [13] button. The COPY screen appears. - Page 70 Copying and Pasting the Content of Patterns Pasting the Data Follow the steps in “ (P.52)” to select the copy destination pattern. Selecting and Playing a Pattern Hold down the [SHIFT] button and press the [1]–[5] buttons to select the copy destination part. Follow steps 1–2 in “...
-
Page 71: Using D-Motion
Using D-MOTION Using D-MOTION Press the [D-MOTION] button. The D-MOTION screen appears, and D-MOTION is turned on. Turn the [1] [2] knobs to select the parameter that changes when this unit is tilted to the left and right (X-axis) or forward/backward (Y-axis). Value Parameter Channel aftertouch... - Page 72 Using D-MOTION While the D-MOTION screen is still open, you can press the [EXIT] button to exit the D-MOTION screen while still leaving D- MOTION on.
-
Page 73: Saving A Tone/Pattern (Write Menu)
Saving a Tone/Pattern (WRITE MENU) Saving a Tone/Pattern (WRITE MENU) The edits that you make to a tone or pattern, or the sequencer data that you record are temporary. They will be lost if you turn off the power or select another tone or pattern. If you want to keep the data you’ve edited or recorded, you must save it to a tone or pattern. - Page 74 Saving a Tone/Pattern (WRITE MENU) Turn the [1] and [2] knobs to input the tone name, and press the [ENTER] button to confirm. Press [ENTER] again on the dialog box screen. This saves the tone. Saving the Pattern * When you edit the settings of a pattern, the icon appears on the PATTERN screen, and the EDITED icon appears on the WRITE MENU screen.
- Page 75 Saving a Tone/Pattern (WRITE MENU) Saving the Pattern and Tones Hold down the [SHIFT] button and press the [PAGE/TIE] button. The WRITE MENU screen appears. Turn the [1] knob to select “PATTERN & TONE” or “OVERWRITE”, and press the [ENTER] button. If the tone to save is a user tone and you select “OVERWRITE”, the tone name input is skipped and the tone is saved with the current tone number and name.
-
Page 76: Main Menu (Menu)
Main Menu (MENU) Main Menu (MENU) Hold down the [SHIFT] button and press the [16] button. The MENU screen appears. Turn the [1] and [2] knobs to select a menu item, and press the [ENTER] button. Item Explanation SYSTEM SETTINGS Configures the system settings. - Page 77 OFF, MIDI Sets which connector is used for input when you use an external MIDI keyboard instead of the IN, USB keyboard of the SH-4d. Normally you will leave this “OFF”. Remote Kbd Set the transmit channel of your external MIDI keyboard to the Ctrl Ch of this unit.
- Page 78 Main Menu (MENU) CONTROLLER Parameter Value Explanation KBD Sw 1–127 Sets the note velocity that’s generated when you press one of the keyboard buttons on this unit. Velo DIRECT, CATCH Specifies whether the parameter value corresponding to a controller is Knob immediately updated when you operate that controller (DIRECT) or only after Mode...
-
Page 79: Configuring The System Eq And System Comp Settings (System Eq/System Comp)
Main Menu (MENU) Configuring the System EQ and System Comp Settings (SYSTEM EQ/SYSTEM COMP) Parameter Value Explanation SYSTEM EQ OFF, ON Turns SYSTEM EQ on/off. Switch In Gain -24–+24 [dB] Adjusts the amount of boost/cut for the input to the EQ. Low Gain -24.0–+24.0 [dB] Adjusts the boost/cut of the low frequency range. -
Page 80: Creating Phrases And Modulation (Visual Arpeggio)
Main Menu (MENU) Creating Phrases and Modulation (VISUAL ARPEGGIO) This function lets you create phrases and modulation by various means. BOUNCE Press a keyboard button and then tilt this unit. You can also play using an external keyboard connected to this unit. Controller Explanation [1] knob... - Page 81 Main Menu (MENU) ORBIT Press the [ä] button and use the keyboard buttons to play a sustaining sound. You can more easily trigger the effect if you set the AMP [SUSTAIN] knob to a higher value to create a sustaining sound while the keyboard buttons are being played.
-
Page 82: Restoring The Factory Settings (Factory Reset)
Main Menu (MENU) Restoring the Factory Settings (Factory Reset) Here’s how to return the SH-4d to its factory-set state. On the MENU screen, select “FACTORY RESET”, and then press the [ENTER] button to display the dialog screen. Press the [æ] button and select “OK”, and then press the [ENTER] button to execute the factory reset. -
Page 83: Prioritizing The Battery (Battery Fixed Operation Mode)
Prioritizing the Battery (Battery Fixed Operation Mode) Prioritizing the Battery (Battery Fixed Operation Mode) In this mode, the unit does not switch to using bus power, even when a USB power supply is connected to the USB port. Although the unit does normally switch to bus power when batteries are installed and you connect a power supply to the USB port, you can make the unit run on batteries only when using battery fixed operation mode, regardless of the bus power supply. -
Page 84: Backing Up And Restoring Data
Copy the backup files to the computer. Once copying is finished, eject the USB drive from your computer. Windows Right-click on the “SH-4D” icon on your computer (located on the right corner of the taskbar or in Windows Explorer), and click “Eject”. macOS Drag the “SH-4D”... -
Page 85: Main Specifications
Leaflet “USING THE UNIT SAFELY” Accessories USB Type-C to USB Type-A cable Alkaline battery (AA, LR6) x 4 * This document explains the specifications of the product at the time that the document was issued. For the latest information, refer to the Roland website. -
Page 86: Mfx Parameters
MFX Parameters MFX Parameters MFX List (P.89) MFX Common Parameters (P.90) Thru (P.91) Equalizer (P.91) Mid-Side EQ (Mid-Side Equalizer) Spectrum(P.93) (P.93) Isolator (P.94) Low Boost (P.94) SuperFilter (P.91) Filter Type (P.95) MM Filter (Multi-mode Filter) Filter(P.96) Step (P.96) Enhancer (P.97) Exciter Wah(P.98) Auto... - Page 87 MFX Parameters (P.102) Step Phaser (P.103) M StagePhsr (Multi Stage Phaser) Phaser)(P.104) Inf Phaser (Infinite (P.105) Flanger Flanger)(P.106) (P.105) SBF-325 ( Flanger Type StepFlanger(P.107) (P.108) Chorus Hexa-Chorus(P.109) Chorus)(P.110) Trem Chorus (Tremolo (P.108) Chorus Type Space-D(P.111) Chorus)(P.112) CE-1 ( (P.112) SDD-320 (DIMENSION D) JUNO-106Chorus)(P.113) JUNO Chorus ( (P.114)
- Page 88 MFX Parameters (P.119) Overdrive (P.119) Distortion T-Scream(P.120) (P.120) Fuzz Fattener)(P.121) Fattener (Tone (P.121) (P.119) HMS Distort (HMS Distortion) Drive / Amp Saturator(P.122) (P.123) W Saturator (Worm Saturator) Simulator)(P.124) Gt Amp Sim (Guitar Amp (P.125) EP Amp Sim (RD EP Amp Simulator) (P.126) Speaker Sim (Speaker Simulater) (P.127)
-
Page 89: Mfx Common Parameters
MFX Parameters (P.148) OD -> Chorus (Overdrive -> Chorus) (P.148) OD -> Flanger (Overdrive -> Flanger) (P.149) OD -> Delay (Overdrive -> Delay) Chorus)(P.150) DS -> Chorus (Distortion -> (P.150) DS -> Flanger (Distortion -> Flanger) (P.151) DS -> Delay (Distortion -> Delay) (P.151) OD/DS ->... -
Page 90: Thru
MFX Parameters Thru... -
Page 91: Filter Type
MFX Parameters Filter Type Equalizer This is a four-band stereo equalizer (low, mid x 2, high). Parameter Value Explanation Low Freq 20, 25, 31, 40, 50, 63, 80, 100, 125, 160, 200, 250, 315, 400 [Hz] Frequency of the low range -15–+15 [dB] Amount of boost/cut for the low-frequency Low Gain... - Page 92 MFX Parameters Parameter Value Explanation 200, 250, 315, 400, 500, 630, 800, 1000, 1250, 1600, Frequency of the middle range 1 M Mid1 F 2000, 2500, 3150, 4000, 5000, 6300, 8000 [Hz] M Mid1G -12.00–+12.00 [dB] Gain of the middle range 1 0.5, 1.0, 2.0, 4.0, 8.0 Width of the middle range 1 M Mid1 Q...
-
Page 93: Spectrum
MFX Parameters Spectrum This is a stereo spectrum. Spectrum is a type of filter which modifies the timbre by boosting or cutting the level at specific frequencies. Parameter Value Explanation Band1 -15–+15 [dB] Gain of each frequency band Band2 Band3 Band4 Band5 Band6... -
Page 94: Low Boost
MFX Parameters Parameter Value Explanation OFF, ON Turns Low Booster on/off. Boost Sw This emphasizes the bottom to create a heavy bass sound. 0–127 Increasing this value gives you a heavier low end. Boost Lv Depending on the Isolator and filter settings this effect may be hard to distinguish. Level 0–127 Output Level... -
Page 95: Mm Filter (Multi-Mode Filter)
MFX Parameters Parameter Value Explanation Gain 0–+12 [dB] Amount of boost for the filter output Mod Sw OFF, ON On/off switch for cyclic change TRI, SQR, SIN, SAW1, SAW2 How the cutoff frequency will be modulated TRI: Triangle wave SQR: Square wave SIN: Sine wave SAW1: Sawtooth wave (upward) SAW2: Sawtooth wave (downward) -
Page 96: Step Filter
MFX Parameters Step Filter This is a filter whose cutoff frequency can be modulated in steps. You can specify the pattern by which the cutoff frequency will change. Parameter Value Explanation Step 1–16 0–127 Cutoff frequency at each step OFF, ON If this is ON, the rate synchronizes with the tempo of the rhythm. -
Page 97: Exciter
MFX Parameters Parameter Value Explanation Low Gain -15–+15 [dB] Amount of boost/cut for the low-frequency range High Gain -15–+15 [dB] Amount of boost/cut for the high-frequency range Level 0–127 Output Level Exciter This adds dynamics to the sound, by dynamically bringing up the high end using a split-band compressor. Parameter Value Explanation... -
Page 98: Auto Wah
MFX Parameters Auto Wah Cyclically controls a filter to create cyclic change in timbre. Parameter Value Explanation LPF, BPF Filter type Mode LPF: The wah effect will be applied over a wide frequency range. BPF: The wah effect will be applied over a narrow frequency range. Manual 0–127 Center frequency at which the wah effect is applied... - Page 99 MFX Parameters Parameter Value Explanation Rate Note Note(P.167) Depth 0–127 Effect depth OFF, ON LFO reset on/off In Sync Sw Determines whether the LFO for switching the vowels is reset by the input signal (ON) or not (OFF). InSyncThres 0–127 Volume level at which reset is applied 0–100 Point at which Vowel 1/2 switch...
-
Page 100: Phaser Type
MFX Parameters Phaser Type Phaser A phase-shifted sound is added to the original sound and modulated. Parameter Value Explanation 4-STAGE, 8-STAGE, 12- Number of stages in the phaser Mode STAGE Manual 0–127 Adjusts the basic frequency from which the sound will be modulated. OFF, ON If this is ON, the rate synchronizes with the tempo of the rhythm. -
Page 101: Small Phaser
MFX Parameters Small Phaser This simulates an analog phaser of the past. It is particularly suitable for electric piano. Parameter Value Explanation Rate 0–100 Frequency of modulation Color 1, 2 Modulation character Low Gain -15–+15 [dB] Amount of boost/cut for the low-frequency range High Gain -15–+15 [dB] Amount of boost/cut for the high-frequency range... -
Page 102: Script 100
MFX Parameters Script 100 This simulates an analog phaser of the past. Parameter Value Explanation OFF, ON If this is ON, the rate synchronizes with the tempo of the rhythm. Rate Sync Tempo (Pattern) Tempo (System)(P.76) 0.05–10.00 Frequency of modulation Rate [Hz] Rate Note... -
Page 103: M Stagephsr (Multi Stage Phaser)
MFX Parameters Parameter Value Explanation INVERSE, SYNCHRO Selects whether the left and right phase of the modulation will be the same or the opposite. INVERSE: The left and right phase will be opposite. Polarity When using a mono source, this spreads the sound. SYNCHRO: The left and right phase will be the same. -
Page 104: Inf Phaser (Infinite Phaser)
MFX Parameters Inf Phaser (Infinite Phaser) A phaser that continues raising/lowering the frequency at which the sound is modulated. Parameter Value Explanation Mode 1–4 Higher values will produce a deeper phaser effect. -100–+100 Speed at which to raise or lower the frequency at which the sound is modulated Speed (+: upward / -: downward) 0–127... -
Page 105: Flanger Type
MFX Parameters Flanger Type Flanger This is a stereo flanger (The LFO has the same phase for left and right.). It produces a metallic resonance that rises and falls like a jet airplane taking off or landing. A filter is provided so that you can adjust the timbre of the flanged sound. Parameter Value Explanation... -
Page 106: Flanger)
MFX Parameters SBF-325 (Flanger) This effect reproduces Roland’s SBF-325 analog flanger. It provides three types of flanging effect (which adds a metallic resonance to the original sound) and a chorus-type effect. Parameter Value Explanation Types of flanging effect A typical mono flanger... -
Page 107: Stepflanger
MFX Parameters StepFlanger This is a flanger in which the flanger pitch changes in steps. The speed at which the pitch changes can also be specified in terms of a note-value of a specified tempo. Parameter Value Explanation OFF, LPF, HPF Filter type OFF: No filter is used LPF: Cuts the frequency range above the Cutoff... -
Page 108: Chorus Type
MFX Parameters Chorus Type Chorus This is a stereo chorus. A filter is provided so that you can adjust the timbre of the chorus sound. Parameter Value Explanation OFF, LPF, HPF Filter type OFF: No filter is used LPF: Cuts the frequency range above the Cutoff Type Freq HPF: Cuts the frequency range below the Cutoff... -
Page 109: Hexa-Chorus
MFX Parameters Hexa-Chorus Uses a six-phase chorus (six layers of chorused sound) to give richness and spatial spread to the sound. Parameter Value Explanation Pre Delay 0.0–100 [ms] Adjusts the delay time from the direct sound until the chorus sound is heard. OFF, ON If this is ON, the rate synchronizes with the tempo of the rhythm. -
Page 110: Trem Chorus (Tremolo Chorus)
MFX Parameters Trem Chorus (Tremolo Chorus) This is a chorus effect with added Tremolo (cyclic modulation of volume). Parameter Value Explanation Pre Delay 0.0–100 [ms] Adjusts the delay time from the direct sound until the chorus sound is heard. OFF, ON If this is ON, the rate synchronizes with the tempo of the rhythm. -
Page 111: Space-D
MFX Parameters Space-D This is a multiple chorus that applies two-phase modulation in stereo. It gives no impression of modulation, but produces a transparent chorus effect. Parameter Value Explanation Pre Delay 0.0–100 [ms] Adjusts the delay time from the direct sound until the chorus sound is heard. OFF, ON If this is ON, the rate synchronizes with the tempo of the rhythm. -
Page 112: Chorus)
High Gain -15–+15 [dB] Amount of boost/cut for the high-frequency range Level 0–127 Output Level SDD-320 (DIMENSION D) This models Roland’s DIMENSION D (SDD-320). It provides a clear chorus sound. Parameter Value Explanation Mode 1, 2, 3, 4, 1+4, 2+4, 3+4 Switches the mode. -
Page 113: Juno Chorus (Juno-106Chorus)
MFX Parameters JUNO Chorus (JUNO-106Chorus) This models the chorus effects of the Roland JUNO-106. Parameter Value Explanation I, II, I+II, JX I, JX II Type of Chorus Mode I+II: The state in which two buttons are pressed simultaneously. Noise Lv 0–127... -
Page 114: Modulation Type
MFX Parameters Modulation Type Ring Mod (Ring modulator) This is an effect that applies amplitude modulation (AM) to the input signal, producing bell-like sounds. You can also change the modulation frequency in response to changes in the volume of the sound sent into the effect. Parameter Value Explanation... -
Page 115: Tremolo
MFX Parameters Tremolo Cyclically changes the volume. Parameter Value Explanation TRI, SQR, SIN, SAW1, SAW2, TRP Modulation Wave TRI: Triangle wave SQR: Square wave SIN: Sine wave SAW1/2: Sawtooth wave TRP: Trapezoidal wave Mod Wave OFF, ON If this is ON, the rate synchronizes with the tempo of the rhythm. Rate Sync Tempo (Pattern) Tempo... -
Page 116: Auto Pan
MFX Parameters Auto Pan Cyclically modulates the stereo location of the sound. Parameter Value Explanation TRI, SQR, SIN, SAW1, SAW2, TRP Modulation Wave TRI: Triangle wave SQR: Square wave SIN: Sine wave SAW1/2: Sawtooth wave Mod Wave TRP: Trapezoidal wave OFF, ON If this is ON, the rate synchronizes with the tempo of the rhythm. -
Page 117: Rotary
MFX Parameters Parameter Value Explanation 0.05–10.00 Rate at which the 16-step sequence will cycle Rate [Hz] Rate Note Note(P.167) Attack 0–127 Speed at which the level changes between steps OFF, ON Specifies whether an input note will cause the sequence to resume from the first step of the In Sync Sw sequence (ON) or not (OFF) InSyncThres 0–127... -
Page 118: Vk Rotary
MFX Parameters VK Rotary This type provides modified response for the rotary speaker, with the low end boosted further. This effect features the same specifications as the VK-7’s built-in rotary speaker. Parameter Value Explanation SLOW, FAST Rotational speed of the rotating speaker Speed SLOW: Slow FAST: Fast... -
Page 119: Drive / Amp
MFX Parameters Drive / Amp Overdrive This is an overdrive that provides heavy distortion. Parameter Value Explanation 0–127 Degree of distortion Drive Also changes the volume. Tone 0–127 Sound quality of the Overdrive effect Amp Switch OFF, ON Turns the Amp Simulator on/off. SMALL, BUILT-IN, 2-STACK, 3-STACK Type of guitar amp SMALL: Small amp... -
Page 120: T-Scream
MFX Parameters T-Scream This models a classic analog overdrive. It is distinctive in adding an appropriate amount of overtones without muddying the sound. Parameter Value Explanation 0–127 Degree of distortion Distortion Also changes the volume. Tone 0–127 Tonal character of the T-scream Level 0–127 Output Level... -
Page 121: Fattener (Tone Fattener)
MFX Parameters Fattener (Tone Fattener) This effect applies distinctive distortion, adding overtones to give more depth to the sound. Parameter Value Explanation Odd Level 0–400 [%] Raising the value adds odd-order overtones. Even Level 0–400 [%] Raising the value adds even-order overtones. Level 0–127 Output Level... -
Page 122: Saturator
MFX Parameters Saturator This effect combines overdrive and filter. Parameter Value Explanation THRU, LPF, HPF, LSV, HSV Type of filter that precedes the distortion processing THRU: No filter is applied LPF: A filter that passes the sound below the specified frequency Pre Type HPF: A filter that passes the sound above the specified frequency LSV: A filter that boosts/cuts the sound below the specified frequency... -
Page 123: W Saturator (Warm Saturator)
MFX Parameters W Saturator (Warm Saturator) This is a variety of saturator, and is distinctive for its warmer sound. Parameter Value Explanation 20–16000 [Hz] Input filter (low range) LowFreq Boosts/cuts the sound below the specified frequency. -24.0–+24.0 [dB] Input filter (low range) LowGain Amount of boost/cut THRU, -12dB, -24dB... -
Page 124: Gt Amp Sim (Guitar Amp Simulator)
Pre Amp OFF, ON Turns the amp switch on/off. JC-120 This models the sound of the Roland JC-120. CLEAN TWIN This models a Fender Twin Reverb. This models the sound input to left input on a Matchless D/C-30. MATCH DRIVE A simulation of the latest tube amp widely used in styles from blues rock and fusion. -
Page 125: Ep Amp Sim (Rd Ep Amp Simulator)
MFX Parameters Parameter Value Explanation METAL STACK large double stack 12 x 4 condenser 2-STACK large double stack 12 x 4 condenser 3-STACK large triple stack 12 x 4 condenser 1–3 Adjusts the location of the microphone that is recording the sound of the speaker. Mic Setting This can be adjusted in three steps, with the microphone becoming more distant in the order of 1, 2, and 3. -
Page 126: Speaker Sim (Speaker Simulator)
MFX Parameters Speaker Sim (Speaker Simulator) Simulates the speaker type and mic settings used to record the speaker sound. Parameter Value Explanation Cabinet Speaker Microphone SMALL 1 small open-back enclosure dynamic SMALL 2 small open-back enclosure dynamic MIDDLE open back enclosure 12 x 1 dynamic JC-120... -
Page 127: Comp / Limiter
MFX Parameters Comp / Limiter Compressor Flattens out high levels and boosts low levels, smoothing out fluctuations in volume. Parameter Value Explanation Attack 0–124 Sets the speed at which compression starts 0–124 Adjusts the time after the signal volume falls below the Threshold Level until compression is Release no longer applied. -
Page 128: Limiter
MFX Parameters Parameter Value Explanation 0–124 Adjusts the time after the signal volume falls below the S Thres Level until compression is no S Release longer applied. S Thres -60–0 [dB] Adjusts the volume at which compression begins 0–30 [dB] This is a function that smooths the onset of compression from the uncompressed state;... -
Page 129: Transient
MFX Parameters Parameter Value Explanation Post Gain -15–+15 [dB] Level of the output sound Low Gain -15–+15 [dB] Amount of boost/cut for the low-frequency range High Gain -15–+15 [dB] Amount of boost/cut for the high-frequency range Level 0–127 Output Level Transient This effect lets you control the way in which the sound attacks and decays. -
Page 130: Gate
MFX Parameters Gate Cuts the reverb’s delay according to the volume of the sound sent into the effect. Use this when you want to create an artificial-sounding decrease in the reverb’s decay. Parameter Value Explanation Threshold 0–127 Volume level at which the gate begins to close GATE, DUCK Type of gate GATE: The gate will close when the volume of the original sound decreases, cutting the original... -
Page 131: Delay Type
MFX Parameters Delay Type Delay This is a stereo delay. When Feedback Mode is NORMAL: When Feedback Mode is CROSS: Parameter Value Explanation OFF, ON If this is ON, the rate synchronizes with the tempo of the rhythm. Dly L Sync Tempo (Pattern) Tempo (System)(P.76) -
Page 132: Mod Delay (Modulation Delay)
MFX Parameters Parameter Value Explanation DRTime Note(P.167) Phase L NORMAL, INVERSE Phase of left and right delay sound NORMAL: Non-inverted NORMAL, INVERSE Phase R INVERT: Inverted NORMAL, CROSS Selects the way in which delay sound is fed back into the effect. (See Fbk Mode the figures above.) -98–+98 [%]... - Page 133 MFX Parameters When Feedback Mode is CROSS: Para Value Explanation OFF, ON If this is ON, the rate synchronizes with the tempo of the rhythm. Tempo (Pattern) Tempo (System)(P.76) Sync 1–1300 Adjusts the time until the left delay sound is heard. DLTi Note(P.167) OFF, ON...
-
Page 134: 2Tap Pandly (2 Tap Pan Delay)
MFX Parameters Para Value Explanation High -15–+15 [dB] Amount of boost/cut for the high-frequency range Gain Bala D100: 0W–D0: 100W Volume balance between the direct sound (D) and the delay sound (W) Leve 0–127 Output Level 2Tap PanDly (2 Tap Pan Delay) Parameter Value Explanation... -
Page 135: 3Tap Pandly (3 Tap Pan Delay)
MFX Parameters 3Tap PanDly (3 Tap Pan Delay) Produces three delay sounds; center, left and right. Parameter Value Explanation OFF, ON If this is ON, the rate synchronizes with the tempo of the rhythm. Dly L Sync Tempo (Pattern) Tempo (System)(P.76) DL. -
Page 136: 4Tap Pandly (4 Tap Pan Delay)
MFX Parameters 4Tap PanDly (4 Tap Pan Delay) This effect has four delays. Parameter Value Explanation OFF, ON If this is ON, the rate synchronizes with the tempo of the rhythm. Dly1 Sync Tempo (Pattern) Tempo (System)(P.76) D1.Time 1–2600 Adjusts the time from the original sound until delay 1 sounds is heard. -
Page 137: Multitapdly (Multi Tap Delay)
MFX Parameters Parameter Value Explanation Dly3 Lv 0–127 Dly4 Lv 0–127 Low Gain -15–+15 [dB] Amount of boost/cut for the low-frequency range High Gain -15–+15 [dB] Amount of boost/cut for the high-frequency range D100: 0W–D0: 100W Volume balance between the direct sound (D) and the delay sound Balance Level 0–127... -
Page 138: Reverse Dly (Reverse Delay)
MFX Parameters Parameter Value Explanation -98–+98 [%] Adjusts the proportion of the delay sound that is fed back into the Dly1 Fbk effect. Negative (-) settings will invert the phase. 200, 250, 315, 400, 500, 630, 800, 1000, 1250, Adjusts the frequency above which sound fed back to the effect is HF Damp 1600, 2000, 2500, 3150, 4000, 5000, 6300, filtered out. -
Page 139: Timectrldly (Time Control Delay)
MFX Parameters Parameter Value Explanation OFF, ON If this is ON, the rate synchronizes with the tempo of the rhythm. Dly1 Sync Tempo (Pattern) Tempo (System)(P.76) D1. Time 1–1300 Delay time from when sound is input into the tap delay until the delay sound is heard D1Time Nt Note(P.167) OFF, ON... -
Page 140: Tape Echo
Level 0–127 Output Level Tape Echo A virtual tape echo that produces a realistic tape delay sound. This simulates the tape echo section of a Roland RE-201 Space Echo. Parameter Value Explanation S, M, L, S+M, S+L, M+L, Combination of playback heads to use S+M+L Select from three different heads with different delay times. -
Page 141: M/S Delay (Mid-Side Delay)
MFX Parameters Parameter Value Explanation 0–5 Amount of tape-dependent distortion to be added This simulates the slight tonal changes that can be detected by signal-analysis Distortion equipment. Increasing this value will increase the distortion. 0–127 Speed of wow/flutter (complex variation in pitch caused by tape wear and rotational Wf Rate irregularity) Wf Depth... -
Page 142: Looper
MFX Parameters Looper DJFX Looper Loops a short portion of the input sound. You can vary the playback direction and playback speed of the input sound to add turntable-type effects. Parameter Value Explanation 230–23 (not Specifies the length of the loop. Length straight) -1.00–+1.00... -
Page 143: Bpm Looper
MFX Parameters BPM Looper Loops a short portion of the input sound. This can automatically turn the loop on/off in synchronization with the rhythm. Parameter Value Explanation 230–23 (not Specifies the length of the loop. Length straight) OFF, ON If this is ON, the rate synchronizes with the tempo of the rhythm. Rate Sync Tempo (Pattern) Tempo... -
Page 144: Lo-Fi
MFX Parameters Lo-fi LOFI Comp (Lo-Fi Compressor) Degrades the sound quality. Parameter Value Explanation 1–6 Selects the type of filter applied to the sound before it passes through the Lo-Fi effect. Pre Filter 1: Compressor off 2–6: Compressor on LoFi Type 1–9 Degrades the sound quality. -
Page 145: Phonograph
MFX Parameters Phonograph Recreates the sound of an analog record being played on a record player. This lets you simulate the unique noises produced when a record is played, as well as the variations that occur when the record spins. Parameter Value Explanation... -
Page 146: Pitch
MFX Parameters Pitch PitchShiftr (Pitch Shifter) A stereo pitch shifter. Parameter Value Explanation Coarse -24–+12 [sem] Adjusts the pitch of the pitch shifted sound in semitone steps. Fine -100–+100 Adjusts the pitch of the pitch shifted sound in 2-cent steps. OFF, ON If this is ON, the rate synchronizes with the tempo of the rhythm. -
Page 147: Pshifter (2 Voice Pitch Shifter)
MFX Parameters 2V PShifter (2 Voice Pitch Shifter) Shifts the pitch of the original sound. This 2-voice pitch shifter has two pitch shifters, and can add two pitch shifted sounds to the original sound. Parameter Value Explanation P1Coarse -24–+12 [sem] Adjusts the pitch of Pitch Shift 1 in semitone steps. -
Page 148: Combination
MFX Parameters Combination OD -> Chorus (Overdrive -> Chorus) Parameter Value Explanation 0–127 Degree of distortion OD Drive Also changes the volume. OD Pan L64–63R Stereo location of the overdrive sound 0.0–100 [ms] Adjusts the delay time from the direct sound until the chorus sound is heard. PreDly OFF, ON If this is ON, the rate synchronizes with the tempo of the rhythm. -
Page 149: Od -> Delay (Overdrive -> Delay)
MFX Parameters Parameter Value Explanation F.Rate Nt Note(P.167) Flg Depth 0–127 Depth of modulation -98–+98 [%] Adjusts the proportion of the flanger sound that is fed back into the effect. Flg Fbk Negative (-) settings will invert the phase. D100: 0W–D0: Adjusts the volume balance between the sound that is sent through the flanger (W) and the Flg Bal 100W... -
Page 150: Ds -> Chorus (Distortion -> Chorus)
MFX Parameters DS -> Chorus (Distortion -> Chorus) Parameter Value Explanation 0–127 Degree of distortion Dist Drive Also changes the volume. Dist Pan L64–63R Stereo location of the distortion sound 0.0–100 [ms] Adjusts the delay time from the direct sound until the chorus sound is heard. PreDly OFF, ON If this is ON, the rate synchronizes with the tempo of the rhythm. -
Page 151: Ds -> Delay (Distortion -> Delay)
MFX Parameters Parameter Value Explanation -98–+98 [%] Adjusts the proportion of the flanger sound that is fed back into the effect. Flg Fbk Negative (-) settings will invert the phase. D100: 0W–D0: Adjusts the volume balance between the sound that is sent through the flanger (W) and the Flg Bal 100W sound that is not sent through the flanger (D). -
Page 152: Od/Ds -> A. Wah (Overdrive/Distortion -> Auto Wah)
MFX Parameters Parameter Value Explanation SMALL, BUILT-IN, 2- Type of guitar amp STACK, 3-STACK SMALL: Small amp AmpType BUILT-IN: Single-unit type amp 2-STACK: Large double stack amp 3-STACK: Large triple stack amp TWah OFF, ON Wah on/off Switch LPF, BPF Filter type TWah Mode LPF: The wah effect will be applied over a wide frequency range. -
Page 153: Gt -> Chorus (Guitar Amp Simulator -> Chorus)
OFF, ON Turns the amp switch on/off. Type of guitar amp JC-120 This models the sound of the Roland JC-120. CLEAN TWIN This models a Fender Twin Reverb. This models the sound input to left input on a Matchless D/C-30. -
Page 154: Gt -> Flanger (Guitar Amp Simulator -> Flanger)
OFF, ON Turns the amp switch on/off. Type of guitar amp JC-120 This models the sound of the Roland JC-120. CLEAN TWIN This models a Fender Twin Reverb. This models the sound input to left input on a Matchless D/C-30. -
Page 155: Gt -> Phaser (Guitar Amp Simulator -> Phaser)
OFF, ON Turns the amp switch on/off. Type of guitar amp JC-120 This models the sound of the Roland JC-120. CLEAN TWIN This models a Fender Twin Reverb. This models the sound input to left input on a Matchless D/C-30. -
Page 156: Gt -> Delay (Guitar Amp Simulator -> Delay)
MFX Parameters Parameter Value Explanation METAL 5150 This models the lead channel of a Peavey EVH 5150. METAL LEAD This is distortion sound that is ideal for performances of heavy riffs. This models the sound of the BOSS OD-1. OD-1 This produces sweet, mild distortion. - Page 157 MFX Parameters Parameter Value Explanation JC-120 This models the sound of the Roland JC-120. CLEAN TWIN This models a Fender Twin Reverb. This models the sound input to left input on a Matchless D/C-30. MATCH DRIVE A simulation of the latest tube amp widely used in styles from blues and rock.
-
Page 158: Ep -> Tremolo (Ep Amp Simulator -> Tremolo)
MFX Parameters Parameter Value Explanation Negative (-) settings will invert the phase. 200, 250, 315, 400, 500, 630, 800, 1000, Frequency at which the high-frequency portion of the delay sound Dly HF 1250, 1600, 2000, 2500, 3150, 4000, 5000, will be cut (BYPASS: no cut) 6300, 8000, BYPASS [Hz] D100: 0W–D0: 100W Adjusts the volume balance between the sound that is sent through... -
Page 159: Ep -> Chorus (Ep Amp Simulator -> Chorus)
MFX Parameters EP -> Chorus (EP Amp Simulator -> Chorus) Parameter Value Explanation Type of amp Type OLDCASE A standard electric piano sound of the early 70s NEWCASE A standard electric piano sound of the late 70s and early 80s Bass -50–+50 Amount of low-frequency boost/cut... -
Page 160: Ep -> Phaser (Ep Amp Simulator -> Phaser)
MFX Parameters Parameter Value Explanation NEWCASE A standard electric piano sound of the late 70s and early 80s Bass -50–+50 Amount of low-frequency boost/cut Treble -50–+50 Amount of high-frequency boost/cut Flg Switch OFF, ON Flanger on/off Flg PreDly 0.0–100 [ms] Adjusts the delay time from the direct sound until the flanger sound is heard. -
Page 161: Ep -> Delay (Ep Amp Simulator -> Delay)
MFX Parameters EP -> Delay (EP Amp Simulator -> Delay) Parameter Value Explanation Type of amp Type OLDCASE A standard electric piano sound of the early 70s NEWCASE A standard electric piano sound of the late 70s and early 80s Bass -50–+50 Amount of low-frequency boost/cut... -
Page 162: Enhncr -> Cho (Enhancer -> Chorus)
MFX Parameters Enhncr -> Cho (Enhancer -> Chorus) Parameter Value Explanation Enh Sens 0–127 Sensitivity of the enhancer Enh Mix 0–127 Level of the overtones generated by the enhancer 0.0–100 [ms] Adjusts the delay time from the direct sound until the chorus sound is heard. PreDly OFF, ON If this is ON, the rate synchronizes with the tempo of the rhythm. -
Page 163: Enhncr -> Dly (Enhancer -> Delay)
MFX Parameters Parameter Value Explanation D100: 0W–D0: Adjusts the volume balance between the sound that is sent through the flanger (W) and the Flg Bal 100W sound that is not sent through the flanger (D). Level 0–127 Output Level Enhncr -> Dly (Enhancer -> Delay) Parameter Value Explanation... -
Page 164: Flanger -> Dly (Flanger -> Delay)
MFX Parameters Parameter Value Explanation Tempo (System)(P.76) C. Rate 0.05–10.00 [Hz] Frequency of modulation C.Rate Nt Note(P.167) Cho Depth 0–127 Depth of modulation D100: 0W–D0: 100W Volume balance between the direct sound (D) and the chorus Cho Bal sound (W) OFF, ON If this is ON, the rate synchronizes with the tempo of the rhythm. -
Page 165: Chorus -> Fl (Chorus -> Flanger)
MFX Parameters Parameter Value Explanation D100: 0W–D0: 100W Adjusts the volume balance between the sound that is sent Dly Bal through the delay (W) and the sound that is not sent through the delay (D). Level 0–127 Output Level Chorus -> Fl (Chorus -> Flanger) Parameter Value Explanation... - Page 166 MFX Parameters Parameter Value Explanation DS - PH - EN - SP DS: Distortion PH: Phaser DS - SP - PH - EN SP: Spectrum DS - SP - EN - PH EN: Enhancer DS - EN - PH - SP DS - EN - SP - PH PH - DS - SP - EN PH - DS - EN - SP...
-
Page 167: Note
MFX Parameters Note 1/64T Sixty-fourth-note triplet Sixty-fourth note 1/64 1/32T Thirty-second-note triplet 1/32 Thirty-second note 1/16T Sixteenth-note triplet 1/32. Dotted thirty-second note 1/16 Sixteenth note 1/8T Eighth-note triplet 1/16. Dotted sixteenth note Eighth note 1/4T Quarter-note triplet 1/8. Dotted eighth note Quarter note 1/2T Half-note triplet... -
Page 168: Pattern Chorus
It provides a chorus sound with a distinctively analog warmth. Parameter Value Explanation Intensity 0–127 Adjusts the chorus depth. SDD-320 (DIMENSION D) This models Roland’s DIMENSION D (SDD-320). It provides a clear chorus sound. Parameter Value Explanation Mode 1, 2, 3, 4, 1+4, 2+4, 3+4 Switches the mode. - Page 169 PATTERN CHORUS TimeCtrlDly (Time Control Delay) This is a delay in which the delay time can be varied smoothly. Parameter Value Explanation Dly Sync OFF, ON If this is ON, the delay synchronizes with the tempo. Dly Msec 1–1300 Adjusts the delay time from the direct sound until the delay sound is heard. Dly Note Note 0–15...
- Page 170 Dly1 Level 0–127 Adjusts the volume of Delay 1. Dly2 Level 0–127 Adjusts the volume of Delay 2. JUNO Chorus (JUNO-106 Chorus) This models the chorus effects of the Roland JUNO-106. Parameter Value Explanation I, II, I+II, JX I, JX II...
-
Page 171: Pattern Delay
PATTERN DELAY PATTERN DELAY Parameter Value Explanation Ø Type “Delay Parameters(P.171)” Switch OFF, ON Switches the delay on/off. Configure the parameters of the selected delay type. Delay parameters The available parameters differ depending on the type of delay you selected in Type. Ø... - Page 172 PATTERN DELAY Parameter Value Explanation This sets how the panning changes. Triangle wave Square wave Sine wave ModWave SAW1 Sawtooth wave SAW2 Trapezoidal wave Trm Sync OFF, ON If this is on, the tremolo synchronizes with the tempo. Trm Hz 0.05–10.00 [Hz] Adjusts the rate of the tremolo.
-
Page 173: Pattern Reverb
PATTERN REVERB PATTERN REVERB Parameter Value Explanation Ø Type “Reverb Parameters(P.173)” Switch OFF, ON Switches the reverb on/off. Configure the parameters of the selected reverb type. Reverb parameters The available parameters differ depending on the type of reverb you selected in Type. Ø... - Page 174 SRV-2000 Parameter Value Explanation R0.3, R1.0, R7.0, R15, R22, R26, R32, R37, H15, H22, Selects the type of reverb offered by the Roland SRV-2000 Selection H26, H32, H37, P-B, P-A digital reverb. 0–160 Adjusts the delay time from when the direct sound plays until PreDelay the reverb sound is heard.
- Page 175 PATTERN REVERB Parameter Value Explanation 0.2–9.0 Sets the bandwidth of the high frequency range. Hi Q Higher values make the bandwidth narrower. GM2 Reverb Parameter Value Explanation SMALL ROOM, This selects the reverb type. MEDIUM ROOM, LARGE ROOM, Char MEDIUM HALL, LARGE HALL, PLATE Time...
-
Page 176: Sound List
Sound List Sound List Waveform List PCM Tone Name Sine Cosine JP-8 Sine VS-Triangle 700 Triangle JP-8 Tri MG Tri Saw Ramp Wave Digital Saw Fat Square JX-8P Pulse SH-101SubOSC SubOSC Wave1 SubOSC Wave2 SubOSC Wave3 Cutters Nasty Wave Table Wally Wave Brusky Wave 5th Wave... -
Page 177: Rhythm Set
Sound List Name Glockenspiel Rhythm Set Name Sine Cosine JP-8 Sine VS-Triangle 700 Triangle JP-8 Tri MG Tri Saw Ramp Wave Digital Saw Fat Square JX-8P Pulse SH-101SubOSC SubOSC Wave1 SubOSC Wave2 SubOSC Wave3 Cutters Nasty Wave Table Wally Wave Brusky Wave 5th Wave Sync Wave... - Page 178 Sound List Name Condor 808 K Super 808 K Ana Whack K Sat Kick DAPunchyKick DuffLoFiKick EDM Kick 1 EDM Kick 2 EDM Kick 3 BigroomKick1 BigroomKick2 Dubstep Kick HardlifeKick RoughLayer K Smallpunch K Superthump K Synth Kick 1 Synth Kick 2 Synth Kick 3 Synth Kick 4 FM Kick 1...
- Page 179 Sound List Name 606 Snare 1 606 Snare 2 Alt Snare Poster Snare Dry Snare Lofipop Snr MG888 Snare1 Transist Snr Driven 606SD Hi Snare FM Snare 1 FM Snare 2 FM Snare 3 Cubangrit SD Ring Snare Snr Scratch Sick Snare Trap Snare Dubstep Snr...
- Page 180 Sound List Name 808 Rimshot 909 Rimshot 707 Rimshot 8-Bit Slap Lo-Fi Rim Wild Stick 808 Cl HiHat 808 Cl&Op HH 909 Cl HH 1 909 Cl HH 2 707 Cl HiHat 606 ClHH 1 606 ClHH 2 606 ClHH 3 606 ClHH 4 606 ClHH 5 606 ClHH 6...
- Page 181 Sound List Name 606 OpHH 6 Dirt Op HH Analog Op HH Noise Op HH Sat Op HH Grunt Op HH Lo-Bit Op HH Rideout Cym Reg.OHH mf Reg.OHH f Reg.OHH ff Rock OpHH p Rock OpHH f Jazz OpHH p Jazz OpHH mf Jazz OpHH f Op HiHat...
- Page 182 Sound List Name 909 RideCym3 707 Ride Cym Rock RdCym1p Rock RdCym1f Rock RdCym2p Rock RdCym2f Jazz RdCym p Jazz RdCymmf Jazz RdCym f Ride Ride Bell Rock China China Cym Rock Splash 808 Clap 909 Clap 707 Clap Clap Stop Clap Noisegranule EDM Clap...
- Page 183 Sound List Name FM Op HiHat FM Clap FM Hi Tom FM Mid Tom AnalogPerc 4 AnalogPerc 5 AnalogPerc 6 AnalogPerc 7 Bounce FX Blipper Perc Ping FM Wobble MG888 Rim Ana MtlPerc1 Ana MtlPerc2 AnalogPerc 8 AnalogPerc 9 AnalogPerc10 Chiptune FX1 Chiptune FX2 Chiptune FX3...
- Page 184 Sound List Name Conga Lo Op Conga Slp Op Conga Efx Conga Thumb Conga 2H Op Conga 2H Mt Conga 2H Slp Conga 2L Op Conga 2L Mt Timbale 1 Timbale 2 Timbale 3 Timbale 4 Timbles LoOp Timbles LoMt TimbalesHand Timbales Rim TmbSideStick...
-
Page 185: Wavetable
Sound List Wavetable Name 4waves morph Sine Garden SineToDist 1 SineToDist 2 Sine Blend Sqr To Saw Saw Sync Morph Mode EffEmm One FM Bells EffEmm Two FM Parade FM Sweep FM Oct Mod Circuit Inharmonic Can Tank Spect2 UniSqr Spctl Saw Spectral Hubble Harmonic... -
Page 186: Tone List
Sound List Tone List SH-4d OSC model Name Category Brilliant 38:Synth PolyKey Synth Bass 1 21:Synth Bass Synth Lead 1 34:Synth Lead Willkommen! 36:Synth Pad/Str November 2019 36:Synth Pad/Str CollapsedCircuit 39:Synth FX Echoes from Eons 38:Synth PolyKey SK Seqsy Pluck... - Page 187 Sound List Name Category Synth Lead 2 34:Synth Lead Synth Bass 2 21:Synth Bass Synth Bass 3 21:Synth Bass Synth Pad/Str 7 36:Synth Pad/Str Synth Pad/Str 8 36:Synth Pad/Str Synth Pad/Str 9 36:Synth Pad/Str Pulsating 1 42:Pulsating Synth Pad/Str 10 36:Synth Pad/Str Synth Pad/Str 11 36:Synth Pad/Str...
- Page 188 Sound List Name Category Saw Oct Stack Bs 21:Synth Bass 7th Stack Lead 34:Synth Lead Phaser Pad 36:Synth Pad/Str Flanger Pad 36:Synth Pad/Str S-Saw Stack Key 38:Synth PolyKey Solid Lead 34:Synth Lead Buzz Lead 34:Synth Lead Saw Stack Stab 36:Synth Pad/Str Silent Lead 34:Synth Lead Bit Force...
- Page 189 Sound List Name Category Synth Pad/Str 29 36:Synth Pad/Str Synth Pad/Str 30 36:Synth Pad/Str Synth Pad/Str 31 36:Synth Pad/Str Synth Pad/Str 32 36:Synth Pad/Str Synth PolyKey 5 38:Synth PolyKey Synth PolyKey 6 38:Synth PolyKey Synth PolyKey 7 38:Synth PolyKey Synth PolyKey 8 38:Synth PolyKey Pulsating 3 42:Pulsating...
- Page 190 Sound List Name Category Synth PolyKey 21 38:Synth PolyKey Synth PolyKey 22 38:Synth PolyKey Synth PolyKey 23 38:Synth PolyKey Synth Pad/Str 39 36:Synth Pad/Str Synth Pad/Str 40 36:Synth Pad/Str Synth Pad/Str 41 36:Synth Pad/Str Pulsating 6 42:Pulsating Pulsating 7 42:Pulsating Pulsating 8 42:Pulsating Synth Bass 23...
- Page 191 Sound List Name Category Synth Pad/Str 56 36:Synth Pad/Str Synth Pad/Str 57 36:Synth Pad/Str Synth FX 9 39:Synth FX Synth PolyKey 33 38:Synth PolyKey Synth Lead 22 34:Synth Lead Synth Brass 15 35:Synth Brass Synth Brass 16 35:Synth Brass Synth Brass 17 35:Synth Brass Synth PolyKey 34 38:Synth PolyKey...
-
Page 192: Sh-3D Osc Model
Sound List Name Category Synth Bass 44 21:Synth Bass Synth Bass 45 21:Synth Bass Synth Bass 46 21:Synth Bass Synth Bass 47 21:Synth Bass Synth Bass 48 21:Synth Bass Synth Bass 49 21:Synth Bass Synth Bass 50 21:Synth Bass Synth Bass 51 21:Synth Bass Synth Bass 52 21:Synth Bass... - Page 193 Sound List Name Category Synth Lead 45 34:Synth Lead Synth Bass 56 21:Synth Bass Synth Brass 19 35:Synth Brass Synth Lead 46 34:Synth Lead Synth Lead 47 34:Synth Lead Synth Lead 48 34:Synth Lead Synth Lead 49 34:Synth Lead Synth Brass 20 35:Synth Brass Synth Lead 50 34:Synth Lead...
-
Page 194: Sync Osc Model
Sound List Name Category Future Org Bass 21:Synth Bass Disco Lead 34:Synth Lead LoFiWarm E.Piano 38:Synth PolyKey Sweep Pad 36:Synth Pad/Str Seq Pad 42:Pulsating Seq Noise Delay 39:Synth FX Pop Lead 1 34:Synth Lead Pop Lead 2 34:Synth Lead Alien Dialogue 39:Synth FX Wind Wave 2 39:Synth FX... -
Page 195: Sh-101D Osc Model
Sound List Name Category Sync Zap FX 39:Synth FX Rock Solo Lead 34:Synth Lead Sync Saw 34:Synth Lead Kick The Square 21:Synth Bass Space Clav 38:Synth PolyKey OD Sync 34:Synth Lead SH-101d OSC model Name Category SHlime Bass 21:Synth Bass SHoly Pad 36:Synth Pad/Str SH Bass Gate... -
Page 196: Juno-106 Osc Model
Sound List JUNO-106 OSC model Name Category NothinButTheRain 36:Synth Pad/Str Green Grid 38:Synth PolyKey Ju-Funk Bass 21:Synth Bass PulseControl Pad 36:Synth Pad/Str Cordion 36:Synth Pad/Str JUNO Viola 36:Synth Pad/Str 106 Swell 36:Synth Pad/Str Glow Pad 36:Synth Pad/Str Ice & Fire 38:Synth PolyKey Brilliant JUNO 38:Synth PolyKey... - Page 197 Sound List Name Category Bell B 14:Bell Lead 34:Synth Lead Lead C 34:Synth Lead Lead P 34:Synth Lead Delay Glass Plk 40:Synth Seq/Pop Glassy Brass 35:Synth Brass Old Tape Bell 14:Bell Plastic Pluck 40:Synth Seq/Pop Grass Land 36:Synth Pad/Str Satellites 14:Bell Echo Pluck 34:Synth Lead...
-
Page 198: Ring Osc Model
Sound List Name Category Porta Mono Lead 40:Synth Seq/Pop 313 Ring 14:Bell Glissen 14:Bell Ring OSC model Name Category Synth Bass 64 21:Synth Bass Ring Mod Sweep 42:Pulsating Mo Drum 39:Synth FX Ring Wash BPF 36:Synth Pad/Str Broke Box 14:Bell Tek Blip 40:Synth Seq/Pop Ring LFO Sweep... -
Page 199: Wavetable Osc Model
Sound List Wavetable OSC model Name Category Synth Lead 62 34:Synth Lead Bell Pad ALiVE 14:Bell Industrial Rev4d 42:Pulsating LearningMachines 42:Pulsating FeedbackOsc Izit 42:Pulsating IndexTransitions 34:Synth Lead Resurgence 4D 36:Synth Pad/Str FM Parade 42:Pulsating Lozza Wub 21:Synth Bass Metal Droid Bass 21:Synth Bass Morph Mode 38:Synth PolyKey... -
Page 200: Chord Osc Model
Sound List Name Category S&H Bass 42:Pulsating Rhythm Warp 42:Pulsating Voxylor 42:Pulsating Radio Tune 34:Synth Lead Wow Lead 34:Synth Lead Fold Bell 14:Bell Sync Bass B 21:Synth Bass Warp Pad 36:Synth Pad/Str Hexa Bass 21:Synth Bass Space Alien 42:Pulsating Scat Pluck 40:Synth Seq/Pop Digital Harpsico 38:Synth PolyKey... -
Page 201: Drawing Osc Model
Sound List Name Category Chord Sine 36:Synth Pad/Str Wavy Brass 35:Synth Brass Chord Ripples 42:Pulsating Chordy Dance 38:Synth PolyKey Drawing OSC model Name Category Scribble Bass 21:Synth Bass Box Bot Lead 34:Synth Lead Vision EP 38:Synth PolyKey Drawing Guitar 38:Synth PolyKey Foreign Pluck 40:Synth Seq/Pop Load "*", 8,1... -
Page 202: Rhythm Set List
Sound List Rhythm Set List Name Synthesized Kit IDM Kit Chill-Hop Kit Thumper Kit Techno Kit Drum & Step Old Machine Kit Big Breaks Kit Machine Kit Toy Kit DG Kit 908 Kit Euro Modular Kit Friendship Kit Plastic Kit Mod Kit Dark GB Kit Power X0X... -
Page 203: Pattern List
Sound List Pattern List Name Do Synths Dream? Paati Pi Flutable Romper Lofi Beats Space Trip Beats Electro Machine Fern Gully Dist Lead Beats Pluck Syn Beats Mystery Spiral Into the void Night Drop Tamarind Future Lovers Saw&Noise Pluck Perfect Rise Misc Machines Drum 'n' Bells Phat Seq Beats... -
Page 204: Midi Implementation Chart
MIDI Implementation Chart MIDI Implementation Chart MIDI Implementation Chart (Tone) Function Transmitted Recognized Remarks Basic Channel 1-16 1-16 MODE MODE3 MODE3 Note Number 0-127 0-127 Velocity Note On Note Off Channel Key Pressure o (*1) o (*2) Pitch Bend Control Change o (*1) o (*2) Modulation Wheel... - Page 205 MIDI Implementation Chart : Poly Mode On : Active Sensing : System Reset (*1) Can be transmitted from D-MOTION only (*2) Channel Key Pressure and all Control Change messages except for CC#0 and CC#32 are recognized depending on settings of MATRIX (*3) See Sound List...
-
Page 206: Midi Implementation Chart (Rhythm)
MIDI Implementation Chart MIDI Implementation Chart (Rhythm) Function Transmitted Recognized Remarks Basic Channel 1-16 1-16 MODE MODE3 MODE3 Note Number 0-127 0-127 Velocity Note On Note Off Channel Key Pressure Pitch Bend Control Change Program Change 0, 64 (*3) 0, 64 (*3) 86 (*3) 86 (*3) 0-127 (*3) -
Page 207: Midi Implementation Chart (System)
MIDI Implementation Chart MIDI Implementation Chart (SYSTEM) Function Transmitted Recognized Remarks Basic Channel 1-16, OFF 1-16, OFF MODE MODE3 MODE3 Note Number 0-127 0-127 transfer to selected part Velocity Note On transfer to selected part Note Off transfer to selected part After Touch transfer to selected part ControlChange... - Page 208 MIDI Implementation Chart SH-4d Owner’s Manual ©2023 Roland Corporation...
Need help?
Do you have a question about the SH-4d and is the answer not in the manual?
Questions and answers
How can I control tones via MIDI from another keyboard, and/or receive program change messages? Thanks
To control tones via MIDI and receive program change messages on the Roland SH-4d:
1. Set "Rx PC" (Receive Program Change) to ON to allow the unit to receive program change messages via MIDI.
2. Connect a MIDI controller or keyboard to the SH-4d.
3. Ensure the keyboard is connected to the internal sound generator by setting "Sw" to ON.
This setup allows the SH-4d to receive program changes and respond to MIDI input for tone control.
This answer is automatically generated
How is the SH-4d rotary speaker sim switched in real time between slow and fast or on/off (for the VK-7)
To switch the SH-4d rotary speaker sim between Slow and Fast, adjust the "Speed" parameter to SLOW or FAST. To turn the rotary speaker rotation on or off, use the "Brake" parameter: set it to ON to gradually stop rotation, or OFF to gradually resume it.
This answer is automatically generated