Sign In
Upload
Manuals
Brands
Konica Minolta Manuals
Printer
BIZHUB C250P
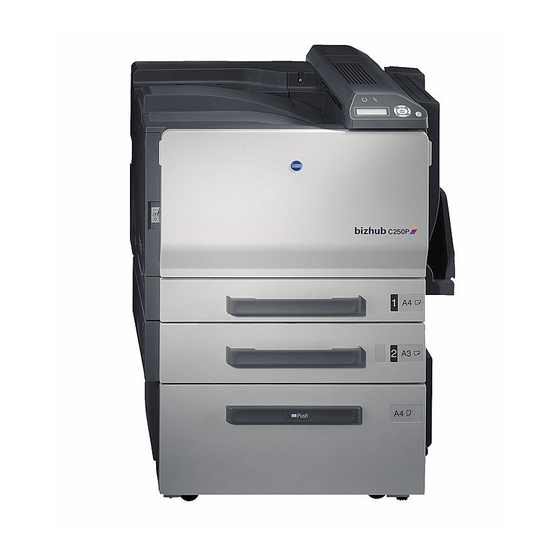
Konica Minolta BIZHUB C250P Manuals
Manuals and User Guides for Konica Minolta BIZHUB C250P. We have
5
Konica Minolta BIZHUB C250P manuals available for free PDF download: User Manual, Service Manual, System Administrator Manual
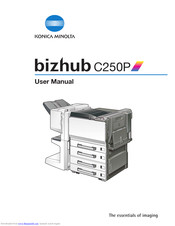
Konica Minolta BIZHUB C250P User Manual (538 pages)
Brand:
Konica Minolta
| Category:
All in One Printer
| Size: 13.9 MB
Table of Contents
Table of Contents
3
1 Introduction
15
Energy Star
18
What Is an Energy Star® Product
18
Trademarks and Registered Trademarks
19
License Information
19
Openssl Statement
20
Software Licence Agreement
23
Explanation of Manual Conventions
25
Safety Advices
25
Sequence of Action
25
Tips
26
Special Text Markings
26
2 Installation and Operation Precautions
27
Safety Information
29
Warning and Precaution Symbols
29
Meaning of Symbols
30
Disassemble and Modification
30
Power Cord
31
Power Source
32
Power Plug
33
Grounding
33
Installation
34
Ventilation
35
Actions in Response to Troubles
35
Consumables
36
When Moving the Machine
37
Before Successive Holidays
37
Regulation Notices
38
CE Marking (Declaration of Conformity) for Users of the European Union (EU)
38
USER INSTRUCTIONS FCC PART 15 - RADIO FREQUENCY DEVICES (for U.S.A. Users)
38
INTERFERENCE-CAUSING EQUIPMENT STANDARD (ICES-003 ISSUE 4) (for Canada Users)
39
For Users in Countries Not Subject to Class B Regulations
39
Laser Safety
40
CDRH Regulations
41
For European Users
42
For Denmark Users
42
For Finland, Sweden Users
42
For Norway Users
43
Laser Safety Label
44
Ozone Release
45
Acoustic Noise (for European Users Only)
45
For EU Member States Only
45
Caution Notations and Labels
46
Space Requirements
47
Operation Precautions
48
Power Source
48
Operating Environment
48
Storage of Printed Pages
48
Part Names and Their Functions
49
Options
49
Outside of Machine
52
Inside of Machine
58
Finisher FS-603/Punch Kit PK-501
60
Finisher FS-501/Job Separator JS-601
62
Saddle Stitcher SD-503/Mailbin Kit MT-501
64
Finisher FS-514/Output Tray OT-601/Punch Kit PK-510
65
Output Tray Ot
66
Punch Kit Pk
66
Control Panel
68
Basic Operations
69
Turning on the Machine
69
Turning off the Machine
70
Automatically Canceling the Settings (Automatic Panel Reset)
71
Automatically Conserving Energy (Low Power Mode)
71
Automatically Conserving Energy (Sleep Mode)
72
Power Supply
72
Connecting to a Computer
73
Compatible Interfaces
73
Connection Diagram
74
3 Setting up the Printer Driver
75
About the Provided Printer Drivers
77
Printer Drivers and Supported Operating Systems
77
System Requirements
78
Setting up the System
79
Installing the Printer Driver
80
When Used with Windows
80
Installing the Printer Driver Using the Add Printer Wizard
82
For Windows Xp/Server 2003
82
For Windows 98Se/Me/2000/Nt 4.0
84
Installing the Printer Driver Using Plug and Play
86
For Windows 98SE
86
For Windows Me/2000
87
For Windows Xp/Server 2003
89
Uninstalling the Printer Driver
91
When Used with Macintosh
93
Installing the Printer Driver
94
Selecting a Printer
95
Uninstalling the Printer Driver
98
For Mac os X
98
For Mac os 9.2
99
Printing Operations
100
For Windows
100
Printing Operation
100
Test Printing
101
For Macintosh
102
Printing Operation
102
Setting up Network Printing
103
Overview of Network Functions
103
Network Functions
103
Features of the Network Functions
104
Network Connection Methods that Can be Selected in each Windows Operating System
106
Specifying the TCP/IP Settings
109
Accessing Pagescope Web Connection
112
SMB Printing
113
Operations on this Machine
113
Printer Driver Settings (for Windows 98Se/Me)
115
Printer Driver Settings (for Windows 2000/Xp/Server 2003)
115
LPR Printing
116
Operations on this Machine
116
Printer Driver Settings (for Windows 2000/Xp/Server 2003)
116
Printer Driver Settings (for Windows NT 4.0)
117
Port 9100 Printing (Windows 98Se/Me/2000/Xp/Server 2003)
118
Operations on this Machine
118
Printer Driver Settings (Windows 2000/Xp/Server 2003)
119
Installing the Peer to Peer Printing Tool to Connect Using Port 9100 (Windows 98Se/Me)
120
Printer Driver Settings When the Peer to Peer Printing Tool Is Installed to Connect Using Port 9100 (Windows 98Se/Me)
121
IPP Printing (Windows 2000/Xp/Server 2003)
122
Operations on this Machine
122
Installing the Printer Driver
124
Printing with Netware
126
For Remote Printer Mode with Netware 4.X Bindery Emulation
126
For Print Server Mode with Netware 4.X Bindery Emulation
129
For Netware 4.X Remote Printer Mode (NDS)
132
For Netware 4.X/5.X/6 Print Server Mode (NDS)
134
For Netware 5.X/6 Novell Distributed Print Services (NDPS)
136
Specifying Client (Windows) Settings When Using the Netware Server
137
Printing with Macintosh
138
Operations on this Machine
138
Specifying the Appletalk Settings
138
Specifying the Bonjour Settings
140
Specifying Macintosh Settings
142
For Mac os X
142
For Mac os 9.2
143
4 Specifying Printer Driver Settings
145
Specifying the Printer Driver Basic Settings
147
For Windows
147
To Display the Printer Driver Setup Dialog Box
148
For Macintosh
149
Setting up the PCL Driver
150
Selecting the Printer
150
Settings
151
Common Settings
151
Specifying Printer Driver Settings
153
Setup Tab
153
Per Page Setting Tab
153
Overlay Tab
153
Watermark Tab
153
Specifying the Setup Tab Settings
155
Printing to Suit the Paper Size
155
Specifying a Custom Size
157
Selecting the Paper Source
159
Assigning a Paper Type to a Paper Tray
160
Specifying Double-Sided/Booklet Printing
162
Printing Multiple Pages on One Page (N in 1)
163
Setting the File Margin
164
Stapling
165
Hole Punching
165
Fold & Staple
166
Selecting the Output Method
167
Specifying Account Track Settings
170
Specifying the Per Page Setting Tab Settings
172
Printing Documents with a Front Cover/Back Cover
172
Printing Multiple Pages
173
Per Page Setting
174
Chapter ........................................................................................ 4-29 Per Page Setting
174
Specifying the Overlay Tab Settings
175
Printing Different Original Documents Together (Overlay)
175
Editing Forms
177
Specifying the Watermark Tab Settings
179
Printing a Watermark
179
Editing a Watermark
180
Printing the Document Number
181
Copy Protect
182
Specifying the Quality Tab Settings
184
Specifying Settings
185
Specifying the Font Tab Settings
186
Replacing Fonts
186
Specifying the Option Tab Settings
187
Selecting Options
188
Saving the Driver Settings
190
To Save the Driver Settings
190
Viewing the Settings
192
Deleting the Settings
192
Setting up the Postscript Driver (Windows)
193
Selecting the Printer
193
Settings
195
Common Settings
195
Layout Tab
197
Quality Tab
198
Advanced Tab
199
Device Settings Tab
199
Specifying the Setup Tab Settings
201
Printing to Suit the Paper Size
201
Saving a Custom Sizes
203
Selecting the Output Method
204
Specifying Account Track Settings
208
Specifying the Layout Tab Settings
210
Printing Multiple Pages on One Page (N in 1)
211
Double-Sided Printing
212
Setting the File Margin
212
Stapling
213
Center Binding
214
Hole Punching
215
Specifying the Per Page Setting Tab Settings
216
Printing Documents with a Front Cover/Back Cover
216
Specifying the Watermark Tab Settings
217
Printing a Watermark
217
Editing a Watermark
218
Specifying the Quality Tab Settings
220
Specifying Settings
221
Font Settings
222
Specifying the Option Tab Settings
223
Specifying Settings
224
Saving the Driver Settings
226
To Save the Driver Settings
226
Viewing the Settings
228
Changing the Settings
228
Setting up the PPD Driver (Windows)
229
Settings
229
Specifying the Paper Tab Settings
233
Specifying Settings
233
Specifying the Device Options Tab Settings
234
Specifying Settings
234
Specifying the Options
236
To Select an Option
236
Setting up the PPD Driver (Mac os 9.2)
238
Settings
238
Page Setup Dialog Box
238
Print Dialog Box
240
Page Setup
243
Basic Settings
243
Custom Page Sizes
245
Postscript Options
246
Printing
247
Basic Settings (General)
247
Printing Multiple Pages on One Page (Layout)
249
Printer-Specific Options (Finishing Options 1 to 4)
250
Setting Options
253
Specifying Settings
253
Setting up the PPD Driver (Mac os X)
255
Settings
255
Page Setup Dialog Box
255
Print Dialog Box
257
Page Setup
261
Basic Settings
261
Custom Paper Size
263
Printing
264
Basic Settings (Copies
264
Printing Multiple Pages on One Page (Layout)
266
Paper Feed
267
Security
268
Finishing
271
Quality
273
Setup
275
Setting Options
276
Specifying Settings
276
Saving the Driver Settings
278
To Save the Driver Settings
278
Viewing the Settings
279
Changing the Settings
279
Advertisement
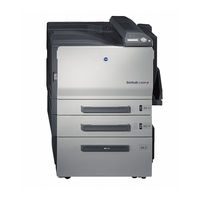
Konica Minolta BIZHUB C250P Service Manual (422 pages)
Brand:
Konica Minolta
| Category:
Printer
| Size: 38.16 MB
Table of Contents
Field Service Total
2
Service Manual
1
Table of Contents
2
Safety and Important Warning Items
4
Important Notice
4
Description Items for Danger, Warning and Caution
4
Safety Warnings
5
Connection to Power Supply
7
Handling of Consumables
13
Internal Laser Radiation
16
Laser Caution Label
19
Laser Safety Label
19
Precautions for Handling the Laser Equipment
20
Warning Indications on the Machine
21
Measures to Take in Case of an Accident
23
Composition of the Service Manual
24
Notation of the Service Manual
25
Revision History
27
General/Maintenance
28
General
42
1 System Configuration
42
Paper Feed Cabinet
46
Finisher
47
2 Product Specifications
44
3 Center Cross Section
48
4 Paper Path
49
5 Image Creation Process
50
Maintenance
52
6 Periodical Check
52
Maintenance Items
52
Parts to be Replaced by Users (CRU)
52
Service Schedule
52
Periodical Parts Replacement 1 (Per 120,000-Print)
53
Periodical Parts Replacement 2 (Per 200,000-Print)
53
Periodical Parts Replacement 3 (Per 300,000-Print)
54
Maintenance Parts
55
Replacement Parts
55
Cleaning Parts
56
Concept of Parts Life
57
Maintenance Procedure (Periodical Check Parts)
59
Replacing the Tray 1 Feed Roller
59
Replacing the Tray 1 Separation Roller Assy
59
Replacing the Bypass Tray Feed Roller
60
Replacing the Bypass Tray Separation Roller Assy
62
Replacing the Tray 2 Separation Roller
63
Replacing the Tray 2 Feed Roller
64
Replacing the Tray 2 Pick-Up Roller
67
Cleaning of the Registration Roller
69
Replacing the Waste Toner Box
70
Cleaning of the Area Around the Waste Toner Collecting Port
71
Replacing the Deodorant Filter
71
Replacing the Ozone Filter
71
Replacing the Dust Filter/Cooling Fan
72
Replacing the Dust Filter/Vertical Conveyance
72
Replacing the Unit
73
Replacing the 2Nd Image Transfer Roller Unit
73
Replacing the Image Transfer Belt Unit
73
Cleaning of the Image Transfer Entrance Guide
75
Cleaning of the IDC/Registration Sensor 1, 2
76
Replacing the Toner Cartridge (C, M, Y, K)
76
Cleaning of the Comb Electrode
77
Replacing the Imaging Unit (C, M, Y, K)
78
Replacing the Fusing Unit
81
7 Service Tool
83
CE Tool List
83
Print Materials
84
Imaging Unit Single Parts (IU)
84
Maintenance Kit
84
Toner Cartridge Single Parts (T/C)
84
Waste Toner Box
84
8 Service Jig
85
Construction of the Service Jig
85
Setting up the Service Jig
86
Prepare the Unit Necessary for the Service Jig
86
Connecting the Service Jig
87
Connecting the Jig Software to the Printer
88
9 Electrical/Image Adjustment
91
Calling the Service Mode to Screen
91
List of Functions
91
X-Rite Calibration (Gradation Adjust)
92
10 Firmware Upgrade
97
Outline
97
Preparations for Firmware Rewriting by the Compact Flash
98
Application to be Used
98
Installing the Cygwin
98
Service Environment
98
Writing into the Compact Flash
102
Firmware Rewriting
105
Updating Method
105
Action When Data Transfer Fails
106
Updating the Firmware with the Internet ISW
107
Out Line
107
Preparations for Firmware Rewriting
107
Service Environment
107
Firmware Rewriting
110
11 Other
111
Disassembly/Adjustment Prohibited Items
111
Disassembly/Assembly/Cleaning List (Other Parts)
112
Disassembly/Assembly Parts List
112
Cleaning Parts List
113
Disassembly/Assembly Procedure
114
Left Cover/Rear Left Cover
114
Exit Tray/Upper Rear Cover/Lower Rear Cover
115
Multi Bypass Tray Left Cover/Multi Bypass Tray Right Cover/Multi Bypass Tray Upper Cover
116
Front Door
117
Rear Right Cover
117
Control Panel
118
Tray 1
119
Tray 2
120
Tray 2 Rear Right Cover/Tray 2 Rear Left Cover
120
Tray 2 Right Rear Cover
121
Front Cover
122
Mechanical Control Board (PWB-M)
124
DC Power Supply (PU1)
126
Slide Interface Board (PWB-SIF)
128
MFP Control Board (PWB-MFP)
129
DIMM0 (Work0), DIMM1 (Work1)
131
Hard Disk Drive (HDD)
132
High Voltage Unit (HV1)
133
Tray 1 Paper Size Board (PWB-I)
134
Tray 2 Control Board (PWB-Z-PC)
135
Tray 2 Paper Size Board (PWB-I-PC)
137
PH Interface Board (PWB-D)
139
Multi Bypass Unit
141
PH Unit
142
Transport Drive Assy
146
Hopper Drive Assy
148
Right Door Assy
149
PWB Box
152
Color Developing Motor (M3)
156
Color PC Drum Motor (M2)
156
Toner Supply Motor C/K (M7)
156
Main Motor (M1)
157
Toner Supply Motor Y/M (M6)
157
Fusing Drive Motor (M4)
158
Tray 2 Lift-Up Motor (M3-PC)
160
Tray 2 Paper Feed Motor (M1-PC)
160
Tray 2 Vertical Transport Motor (M2-PC)
162
IDC/Registration Sensor/1, IDC/Registration Sensor/2 (SE1/SE2)
163
Cleaning Procedure
165
PH Window
165
Image Transfer Belt Unit
166
Tray 1 Feed Roller
166
Tray 1 Separation Roller
166
Bypass Tray Feed Roller
167
Bypass Tray Separation Roller
167
Tray 2 Feed Roller/Tray 2 Pick-Up Roller
168
Tray 2 Separation Roller
170
Tray 2 Transport Roller
171
Adjustment/Setting
172
12 How to Use the Adjustment Section
172
13 Control Panel
173
Identification and Functions of Keys on Control Panel
173
Utility Mode Function Tree
174
Settings in Control Panel
184
Cancelling the Settings
184
Changing the Settings on the Setting Menu
184
Procedure
184
Settings in Job Operation (Account Track)
185
Settings in Paper Tray
186
Banner Printing
186
14 User Setting
187
User Setting Function Setting Procedure
187
Cancelling the Settings
187
Changing the Settings on the Setting Menu
187
Procedure
187
Settings in User Setting
188
Print Reports
188
System Setting
188
Power Save
189
Tray Setting
190
Output Setting
191
Printer Setting
191
Settings in Admin. Setting
197
Canceling the Settings
197
Changing the Settings on Admin. Setting
197
Procedure
197
Network
198
I/F Setting
211
Time Adjustment
212
Call Center
213
List Output Mode List
213
Security Setting
213
User Box Oper
213
Openapi
217
Data Capture
218
15 Adjustment Item List
219
16 Tech. Rep. Mode
221
Calling the Tech. Rep. Mode to Screen
221
Changing the Setting Value in Service Mode Functions
221
Exiting
221
Procedure
221
Tech. Rep. Mode Function Tree
222
Settings in Tech. Rep. Mode
226
Counter Reset
226
Option Board
226
Running Mode
226
List Output
227
Serial Number
227
Image Controller
228
LCT Paper Size
228
Unit Change
228
Foolscap Size
229
Initialization
229
No Sleep
229
HDD Formatting
230
Version Upgrade
230
Data Capture
232
Data Backup
235
Software SW
235
Settings in CS Remote Care
236
Outlines
236
Setting up the CS Remote Care
236
Software SW Setting for CS Remote Care
239
Calling the Center from the Administrator
244
Calling the Maintenance
244
Checking the Transmission Log
244
Setup Confirmation
244
Detail on Settings
245
List of the CS Remote Care Error Code
250
Troubleshooting for CS Remote Care
252
17 Jig Soft
253
Connection When Using the Jig Software
253
Connecting the Crossing Cable
253
How to Display the Jig Software
254
Jig Software Function Tree (Service Mode)
255
Date/Time Input Mode
258
Date & Time Setting Mode Screen
258
Machine
259
Fusing Temperature
259
Fusing Transport Speed
260
Printer Area
261
Printer Resist Loop
263
Color Registration Adjustment
264
Fusing Loop Size
265
Lead Edge Erase Adjustment
265
Manual Bypass Tray Adjustment
265
Firmware Version
265
Imaging Process Adjustment
266
D Max Density
266
X-Rite Calibration (Gradation Adjust)
266
Background Voltage Margin
267
Transfer Output Fine Adjustment
267
Stabilizer
268
TCR Toner Supply
269
Thick Paper Density Adjustment
269
Dev. Bias Choice
270
Monochrome Density Adjustment
270
CS Remote Care
271
Outlines
271
Setting up the CS Remote Care
271
Software SW Setting for CS Remote Care
274
Calling the Center from the Administrator
279
Calling the Maintenance
279
Checking the Transmission Log
279
Setup Confirmation
279
Detail on Settings
280
List of the CS Remote Care Error Code
285
Troubleshooting for CS Remote Care
288
System 1
289
Marketing Area
289
No Sleep
289
Serial Number
289
Foolscap Size Setting
290
Initialization
290
Install Date
290
System 2
291
Hdd
291
Image Controller Setting
291
Option Board Status
291
LCT Paper Size Setting
292
Software Switch Setting
292
Unit Change
292
Data Capture
293
Counter
296
Jam
296
Life
296
Procedure
296
Maintenance
297
Service Call Counter
297
Service Total Counter
297
Warning
297
Counter of each Mode
298
Paper Jam History
298
Service Call History (Data)
298
List Output
299
Adjustment List
299
Machine Management List
299
State Confirmation
299
Sensor Check
299
Level History1
306
Table Number
306
Level History2
307
Memory/Hdd Adj
307
Temp. & Humidity
307
Color Regist
309
Memory/Hdd State
309
Adjustment Data List
310
IU Lot no
310
Test Mode
311
Gradation Pattern
311
Procedure for Test Pattern Output
311
Halftone Pattern
312
Lattice Pattern
312
Color Sample
313
Solid Pattern
313
Color Solid Pattern
314
Running Mode
314
Finisher
314
Internet ISW
315
Internet ISW Set
315
HTTP Setting
316
FTP Setting
317
Forwarding Access Setting
318
18 Enhanced Security
319
Enhanced Security Function Setting Procedure
319
Enhanced Security Function Tree
319
Exiting
319
Procedure
319
Administrator Password
320
CE Authentication
320
CE Password
320
IU Life Stop Setting
320
Settings in the Enhanced Security
320
19 Billing Setting
321
Billing Setting Function Setting Procedure
321
Exiting
321
Procedure
321
Billing Setting Function Tree
321
Settings in the Billing Setting
322
Counter Setting
322
Coverage Rate Clear
323
20 Procedure for Resetting
324
Trouble Resetting
324
Contents to be Cleared by Reset Function
324
21 Mechanical Adjustment
325
Mechanical Adjustment of the Bypass Tray Section
325
Adjustment of the Bypass Paper Size Unit
325
PH Unit Mechanical Adjustment
327
Skew Adjustment
327
Troubleshooting
330
22 Jam Display
330
Misfeed Display
330
Misfeed Display Resetting Procedure
331
Sensor Layout
331
Solution
333
Initial Check Items
333
Misfeed at Tray 1 Feed Section
334
Misfeed at 2Nd Image Transfer Section
335
Misfeed at Tray 2 Feed, Tray 2 Vertical Transport Section
336
Misfeed at Manual Bypass Feed Section
337
Misfeed at LCT Feed and LCT Vertical Transport Section (PC-403)
338
Misfeed at Tray 3 Feed and Tray 3 Vertical Transport Section (PC-103/PC203)
339
Misfeed at Tray 4 Feed and Tray 4 Vertical Transport Section (PC203)
340
Misfeed at Duplex Transport Section (AD-503)
341
Misfeed at Duplex Unit Pre-Registration Section (AD-503)
342
Misfeed at Fusing/Exit Section
343
23 Malfunction Code
344
Alert Code
344
Alert List
344
Solution
345
IDC Sensor (Back) Failure
346
P-5: IDC Sensor (Front) Failure
346
P-21: Color Shift Test Pattern Failure
347
P-22: Color Shift Adjust Failure
347
P-6: Cyan Imaging Unit Failure
347
P-7: Magenta Imaging Unit Failure
347
P-8: Yellow Imaging Unit Failure
347
P-9: Black Imaging Unit Failure
347
P-26: 1St Image Transfer ATVC (Black) Failure
348
P-27: 2Nd Image Transfer ATVC Failure
348
P-29: 1St Image Transfer ATVC (Color) Failure
348
P-30: Color PC Drum Sensor Malfunction
348
P-31: Black PC Drum Sensor Malfunction
348
Call Service (Trouble Code)
349
Call Service List
349
How to Reset
366
Solution
366
C0204: Tray 2 Elevator Failure
366
C0211: Manual Tray Rise Descent Error
366
C0301: Suction Fan Motor's Failure to Turn
367
C2151: 2Nd Image Transfer Roller Separation
367
C2152: Transfer Belt Separation
367
C2253: Color PC Drum Motor's Failure to Turn
367
C2254: Color PC Drum Motor's Turning at Abnormal Timing
368
C2255: Color Developing Motor's Failure to Turn
368
C2256: Color Developing Motor's Turning at Abnormal Timing
368
C2451: Transfer Cleaner Unit New Article Release
368
C2551: Abnormally Low Toner Density Detected Cyan TCR Sensor
369
C2552: Abnormally High Toner Density Detected Cyan TCR Sensor
369
C2553: Abnormally Low Toner Density Detected Magenta TCR Sensor
369
C2554: Abnormally High Toner Density Detected Magenta TCR Sensor
369
C2555: Abnormally Low Toner Density Detected Yellow TCR Sensor
369
C2556: Abnormally High Toner Density Detected Yellow TCR Sensor
369
C2557: Abnormally Low Toner Density Detected Black TCR Sensor
370
C2558: Abnormally High Toner Density Detected Black TCR Sensor
370
C2559: Cyan TCR Sensor Adjustment Failure
370
C255A: Magenta TCR Sensor Adjustment Failure
370
C255B: Yellow TCR Sensor Adjustment Failure
370
C255C: Black TCR Sensor Adjustment Failure
371
C2651: Cyan Imaging Unit EEPROM Access Error
371
C2652: Magenta Imaging Unit EEPROM Access Error
371
C2653: Yellow Imaging Unit EEPROM Access Error
371
C2654: Black Imaging Unit EEPROM Access Error
371
C2A01: Cyan Toner Cartridge EEPROM Access Error
371
C2A02: Yellow Toner Cartridge EEPROM Access Error
371
C2A03: Magenta Toner Cartridge EEPROM Access Error
371
C2A04: Black Toner Cartridge EEPROM Access Error
371
C3301: Fusing Cooling Fan Motor /1'S Failure to Turn
372
C3302: Fusing Cooling Fan Motor /2'S Failure to Turn
372
C3451: Heat. Heater Trouble
372
C3452: Press. Heater Trouble
372
C3751: Abnormal High Temp. (Heater)
372
C3752: Abnormal High Temp. (Press)
372
C3851: Abnormal Low Temp. (Heater)
372
C3852: Abnormal Low Temp. (Press)
372
C3461: Fusing Unit New Article Release
373
C3A01: Paper Stuck to Fuser Heater Roller
373
C3A02: Paper Stuck to Fuser Pressure Roller
373
C4151: Polygon Motor/C Failure to Turn
373
C4152: Polygon Motor/M Failure to Turn
373
C4153: Polygon Motor/Y Failure to Turn
373
C4154: Polygon Motor/K Failure to Turn
373
C4551: Laser Malfunction (Cyan)
374
C4552: Laser Malfunction (Magenta)
374
C4553: Laser Malfunction (Yellow)
374
C4554: Laser Malfunction (Black)
374
C4705: Image Output Time out
374
C4761: Compression Hardware Timeout
375
C4765: Extraction Hardware Timeout
375
C5351: Power Supply Cooling Fan Motor/1'S Failure to Turn
376
C5358: Power Supply Cooling Fan Motor/2'S Failure to Turn
377
CD002: JOB RAM Save Error
378
CD011: Hard Disk Specifications Error
379
CD3##: NVRAM Data Error
379
CE001: Abnormal Message Queue
380
CE002: Message and Method Parameter Failure
380
CE003: Task Error
380
CE004: Event Error
380
CE005: Memory Access Error
380
CE006: Header Access Error
380
CE007: DIMM Initialize Error
380
CEEE1: MSC Undefined Malfunction Occurring
380
CEEE3: Engine Section Undefined Malfunction
380
24 Power Supply Trouble
381
Control Panel Indicators Do Not Light
381
Machine Is Not Energized at All (PU1 Operation Check)
381
Fusing Heaters Do Not Operate
382
Power Is Not Supplied to Option
382
Finisher
382
Optional Paper Feed Cabinet
382
Power Is Not Supplied to Automatic Duplex Unit
382
25 Image Quality Problem
383
How to Read Element Date
383
Level History 1
384
Level History 2
385
How to Identify Problematic Part
386
Initial Check Items
386
Solution
387
Printer Monocolor: White Lines in Sub Scan Direction, White Bands in Sub Scan Direction, Colored Lines Colored Bands in Sub Scan Direction
387
Printer Monocolor: White Lines in Main Scan Direction, White Bands in Main Scan Direction, Colored Lines in Main Scan Direction, Colored Bands in Main Scan Direction
388
Printer Monocolor: Uneven Density in Sub Scan Direction
389
Printer Monocolor: Uneven Density in Main Scan Direction
390
Printer Monocolor: Low Image Density
391
Printer Monocolor: Gradation Reproduction Failure
393
Printer Monocolor: Foggy Background
394
Printer Monocolor: Void Areas, White Spots
396
Printer Monocolor: Colored Spots
397
Printer Monocolor: Blurred Image
398
Printer Monocolor: Blank Print, Black Print
399
Printer Monocolor: Uneven Image
400
Printer 4-Color: White Lines in Sub Scan Direction, White Bands in Sub Scan Direction, Colored Lines in Sub Scan Direction, and Colored Bands in Sub Scan Direction
401
Printer 4-Color: White Lines in Main Scan Direction, White Bands in Main Scan Direction, Colored Lines in Main Scan Direction, and Colored Bands in Main Scan Direction
402
Printer 4-Color: Uneven Density in Sub Scan Direction
403
Printer 4-Color: Uneven Density in Main Scan Direction
404
Printer 4-Color: Low Image Density
405
Printer 4-Color: Poor Color Reproduction
406
Printer 4-Color: Incorrect Color Image Registration
407
Printer 4-Color: Void Areas, White Spots
408
Printer 4-Color: Colored Spots
409
Printer 4-Color: Poor Fusing Performance, Offset
410
Printer 4-Color: Brush Effect, Blurred Image
411
Printer 4-Color: Back Marking
412
Printer 4-Color: Uneven Image
413
26 Controller Trouble
414
Unable to Print over the Network
414
The "RIP" Is Displayed on the Machine Control Panel
414
The "RIP" Is Not Displayed on the Machine Control Panel
414
27 Parts Layout Drawing
416
Main Unit
416
Engine Section
416
Tray 1
420
Tray 2/Multiple Bypass Tray
421
Appendix
416
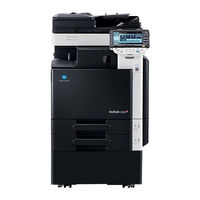
Konica Minolta BIZHUB C250P User Manual (498 pages)
Konica Minolta Printer Users Guide
Brand:
Konica Minolta
| Category:
Printer
| Size: 21.35 MB
Table of Contents
Energy Star
2
What Is an Energy Star ® Product
2
Trademarks and Registered Trademarks
3
Software License Agreement
6
Table of Contents
8
Explanation of Manual Conventions
18
1 Installation and Operation Precautions
20
Safety Information
21
Warning and Precaution Symbols
21
Meaning of Symbols
21
Regulation Notices
28
CE Marking (Declaration of Conformity) for Users of the European Union (EU)
28
USER INSTRUCTIONS FCC PART 15 - RADIO FREQUENCY DEVICES (for U.S.A. Users)
28
INTERFERENCE-CAUSING EQUIPMENT STANDARD (ICES-003 ISSUE 4) (for Canada Users)
28
For Users in Countries Not Subject to Class B Regulations
29
Laser Safety
29
Internal Laser Radiation
29
CDRH Regulations
30
For European Users
31
For Denmark Users
31
For Finland, Sweden Users
31
For Norway Users
32
Laser Safety Label
33
Ozone Release
33
Acoustic Noise (for European Users Only)
34
For EU Member States Only
34
Caution Notations and Labels
35
Space Requirements
36
Operation Precautions
37
Power Source
37
Operating Environment
37
Storage of Printed Pages
37
Part Names and Their Functions
38
Options
38
Outside of Machine
41
Inside of Machine
47
Finisher FS-603/Punch Kit PK-501
49
Finisher FS-501/Job Separator JS-601
51
Saddle Stitcher SD-503/Mailbin Kit MT-501
53
Finisher FS-514/Output Tray OT-601/Punch Kit PK-510
54
Control Panel
57
Basic Operations
58
Turning on the Machine
58
Turning off the Machine
59
Automatically Canceling the Settings (Automatic Panel Reset)
60
Automatically Conserving Energy (Low Power Mode)
60
Automatically Conserving Energy (Sleep Mode)
61
Power Supply
61
Connecting to a Computer
62
Compatible Interfaces
62
2 Setting up the Printer Driver
64
About the Provided Printer Drivers
65
Printer Drivers and Supported Operating Systems
65
System Requirements
66
Setting up the System
67
Installing the Printer Driver
68
When Used with Windows
68
Automatic Installation Using the Installer
70
To Install the Printer Driver
71
Installing the Printer Driver Using the Add Printer Wizard
73
For Windows Xp/Server 2003
73
For Windows 98Se/Me/2000/Nt 4.0
76
Installing the Printer Driver Using Plug and Play
79
For Windows 98SE
79
For Windows Me/2000
80
For Windows Xp/Server 2003
81
Uninstalling the Printer Driver
83
When Used with Macintosh
84
Installing the Printer Driver
85
Selecting a Printer
87
Uninstalling the Printer Driver
92
For Mac os X
92
For Mac os 9.2
93
Printing Operations
94
For Windows
94
Printing Operation
94
Test Printing
94
For Macintosh
95
Printing Operation
95
Setting up Network Printing
96
Overview of Network Functions
96
Network Functions
96
Features of the Network Functions
97
Network Connection Methods that Can be Selected in each Windows Operating System
98
Specifying the TCP/IP Settings
100
Accessing Pagescope Web Connection
103
SMB Printing
104
Operations on this Machine
104
Printer Driver Settings (for Windows 98Se/Me)
106
Printer Driver Settings (for Windows 2000/Xp/Server 2003)
106
LPR Printing
107
Operations on this Machine
107
Printer Driver Settings (for Windows 2000/Xp/Server 2003)
107
Printer Driver Settings (for Windows NT 4.0)
108
Port 9100 Printing (Windows 98Se/Me/2000/Xp/Server 2003)
109
Operations on this Machine
109
Printer Driver Settings (Windows 2000/Xp/Server 2003)
109
Installing the Peer to Peer Printing Tool to Connect Using Port 9100 (Windows 98Se/Me)
111
Printer Driver Settings When the Peer to Peer Printing Tool Is Installed to Connect Using Port 9100 (Windows 98Se/Me)
112
IPP Printing (Windows 2000/Xp/Server 2003)
113
Operations on this Machine
113
Installing the Printer Driver
114
Printing with Netware
116
For Remote Printer Mode with Netware 4.X Bindery Emulation
116
For Print Server Mode with Netware 4.X Bindery Emulation
118
For Netware 4.X Remote Printer Mode (NDS)
120
For Netware 4.X/5.X/6 Print Server Mode (NDS)
122
For Netware 5.X/6 Novell Distributed Print Services (NDPS)
124
Specifying Client (Windows) Settings When Using the Netware Server
125
Printing with Macintosh
127
Operations on this Machine
127
Specifying the Appletalk Settings
127
Specifying the Bonjour Settings
129
Specifying Macintosh Settings
130
For Mac os X
132
3 Specifying Printer Driver Settings
134
Specifying the Printer Driver Basic Settings
135
For Windows
135
To Display the Printer Driver Setup Dialog Box
135
For Macintosh
137
Setting up the PCL Driver
138
Selecting the Printer
138
Settings
139
Common Settings
139
Specifying the Setup Tab Settings
143
Printing to Suit the Paper Size
143
Specifying a Custom Size
145
Selecting the Paper Source
146
Assigning a Paper Type to a Paper Tray
146
Specifying Double-Sided/Booklet Printing
147
Printing Multiple Pages on One Page (N in 1)
148
Setting the File Margin
149
Stapling
150
Hole Punching
150
Fold & Staple
151
Selecting the Output Method
152
Specifying Account Track Settings
154
Specifying the Per Page Setting Tab Settings
155
Printing Documents with a Front Cover/Back Cover
155
Printing Multiple Pages
156
Per Page Setting
156
Chapter ......................................................................................... 3-23 Per Page Setting
156
Specifying the Overlay Tab Settings
158
Printing Different Original Documents Together (Overlay)
158
Editing Forms
160
Specifying the Watermark Tab Settings
162
Printing a Watermark
162
Editing a Watermark
163
Printing the Document Number
164
Copy Protect
165
Specifying the Quality Tab Settings
167
Specifying Settings
168
Specifying the Font Tab Settings
169
Replacing Fonts
169
Specifying the Option Tab Settings
170
Selecting Options
170
Saving the Driver Settings
172
To Save the Driver Settings
172
Viewing the Settings
173
Deleting the Settings
173
Setting up the Postscript Driver (Windows)
174
Selecting the Printer
174
Settings
175
Common Settings
175
Layout Tab
177
Per Page Setting Tab
177
Watermark Tab
177
Quality Tab
177
Advanced Tab
178
Device Settings Tab
178
Specifying the Setup Tab Settings
180
Printing to Suit the Paper Size
180
Saving a Custom Sizes
182
Selecting the Output Method
183
Specifying Account Track Settings
185
Specifying the Layout Tab Settings
186
Printing Multiple Pages on One Page (N in 1)
187
Double-Sided Printing
187
Setting the File Margin
188
Stapling
188
Center Binding
189
Hole Punching
189
Specifying the Per Page Setting Tab Settings
190
Printing Documents with a Front Cover/Back Cover
190
Specifying the Watermark Tab Settings
191
Printing a Watermark
191
Editing a Watermark
192
Specifying the Quality Tab Settings
193
Specifying Settings
193
Font Settings
194
Specifying the Option Tab Settings
195
Specifying Settings
196
Saving the Driver Settings
198
To Save the Driver Settings
198
Viewing the Settings
199
Changing the Settings
200
Setting up the PPD Driver (Windows)
201
Settings
201
Specifying the Paper Tab Settings
204
Specifying Settings
204
Specifying the Device Options Tab Settings
205
Specifying Settings
205
Specifying the Options
207
To Select an Option
207
Setting up the PPD Driver (Mac os 9.2)
209
Settings
209
Page Setup Dialog Box
209
Print Dialog Box
211
Page Setup
214
Basic Settings
214
Custom Page Sizes
215
Postscript Options
216
Printing
217
Basic Settings (General)
217
Printing Multiple Pages on One Page (Layout)
218
Printer-Specific Options (Finishing Options 1 to 4)
219
Setting Options
221
Specifying Settings
222
Setting up the PPD Driver (Mac os X)
223
Settings
223
Page Setup Dialog Box
223
Print Dialog Box
225
Page Setup
228
Basic Settings
228
Custom Paper Size
230
Printing
231
Basic Settings (Copies
231
Printing Multiple Pages on One Page (Layout)
232
Paper Feed
233
Security
233
Finishing
236
Quality
237
Setup
239
Setting Options
240
Specifying Settings
240
Saving the Driver Settings
241
To Save the Driver Settings
241
Viewing the Settings
241
Changing the Settings
242
Advertisement
Konica Minolta BIZHUB C250P User Manual (438 pages)
Brand:
Konica Minolta
| Category:
All in One Printer
| Size: 11.47 MB
Table of Contents
Energy Star
5
What Is an Energy Star® Product
5
Trademarks and Registered Trademarks
6
Software License Agreement
9
Table of Contents
11
Explanation of Manual Conventions
21
Safety Advices
21
Sequence of Action
21
Tips
22
Special Text Markings
22
1 Installation and Operation Precautions
23
Safety Information
25
Warning and Precaution Symbols
25
Meaning of Symbols
26
Disassemble and Modification
26
Power Cord
27
Power Source
28
Power Plug
29
Grounding
29
Installation
30
Ventilation
31
Actions in Response to Troubles
31
Consumables
32
When Moving the Machine
33
Before Successive Holidays
33
Regulation Notices
34
CE Marking (Declaration of Conformity) for Users of the European Union (EU)
34
USER INSTRUCTIONS FCC PART 15 - RADIO FREQUENCY DEVICES (for U.S.A. Users)
34
INTERFERENCE-CAUSING EQUIPMENT STANDARD (ICES-003 ISSUE 4) (for Canada Users)
34
For Users in Countries Not Subject to Class B Regulations
35
Laser Safety
36
Internal Laser Radiation
36
CDRH Regulation
37
For European Users
38
For Denmark Users
38
For Finland, Sweden Users
38
For Norway Users
39
Laser Safety Label
40
Ozone Release
41
Acoustic Noise (for European Users Only)
41
Caution Notations and Labels
42
Space Requirements
43
Operation Precautions
44
Power Source
44
Operating Environment
44
Storage of Printed Pages
44
Part Names and Their Functions
45
Options
45
Outside of Machine
47
Inside of Machine
53
Finisher FS-603/Punch Kit
55
Finisher FS-501/Job Separator
57
Control Panel
60
Basic Operations
61
Turning on the Machine
61
Turning off the Machine
62
Automatically Canceling the Settings (Automatic Panel Reset)
63
Automatically Conserving Energy (Low Power Mode)
63
Automatically Conserving Energy (Sleep Mode)
64
Power Supply
64
Connecting to a Computer
65
Compatible Interfaces
65
2 Setting up the Printer Driver
67
CD-ROM Configuration
69
CD-Roms
69
About the Provided Printer Drivers
70
Printer Drivers and Supported Operating Systems
70
System Requirements
71
Setting up the System
72
Installing the Printer Driver
73
When Used with Windows
73
Installing the Printer Driver Using the Add Printer Wizard
75
For Windows Xp/Server 2003
76
For Windows 98Se/Me/2000/Nt 4.0
78
Installing the Printer Driver Using Plug and Play
80
For Windows 98SE
80
For Windows Me/2000
81
For Windows Xp/Server 2003
83
Uninstalling the Printer Driver
85
When Used with Macintosh
87
Installing the Printer Driver
87
For Mac os X
87
Selecting a Printer
89
For Mac os X
89
For Mac os 9.2
89
Uninstalling the Printer Driver
91
For Mac os X
91
For Mac os 9.2
92
Printing Operations
93
For Windows
93
Printing Operation
93
Test Printing
94
For Macintosh
94
Printing Operation
94
Setting up Network Printing
95
Overview of Network Functions
95
Network Functions
95
Features of the Network Functions
96
Network Connection Methods that Can be Selected in each Windows Operating System
98
Specifying the TCP/IP Settings
100
Accessing Pagescope Web Connection
102
SMB Printing
103
Operations on this Machine
103
Printer Driver Settings (for Windows 98Se/Me)
105
Printer Driver Settings (for Windows 2000/Xp/Server 2003)
105
LPR Printing
106
Operations on this Machine
106
Printer Driver Settings (for Windows 2000/Xp/Server 2003)
106
Printer Driver Settings (for Windows NT 4.0)
107
Port 9100 Printing (Windows 98Se/Me/2000/Xp/Server 2003)
108
Operations on this Machine
108
Printer Driver Settings (Windows 2000/Xp/Server 2003)
108
Installing the Peer to Peer Printing Tool (Windows 98Se/Me)
110
To Install the Peer to Peer Printing Tool
110
Printer Driver Settings (Windows 98Se/Me)
111
IPP Printing (Windows 2000/Xp/Server 2003)
112
Operations on this Machine
112
Installing the Printer Driver
114
Printing with Netware
116
For Remote Printer Mode with Netware 4.X Bindery Emulation
116
For Print Server Mode with Netware 4.X Bindery Emulation
119
For Netware 4.X Remote Printer Mode (NDS)
121
For Netware 4.X/5.X/6 Print Server Mode (NDS)
123
For Netware 5.X/6 Novell Distributed Print Services (NDPS)
125
Specifying Client (Windows) Settings When Using the Netware Server
126
Printing with Macintosh
127
Operations on this Machine
127
Specifying Macintosh Settings
129
For Mac os X
129
For Mac os 9.2
130
3 Specifying Printer Driver Settings
131
Setting the Printing Functions
133
For Windows
133
To Display the Printer Driver Setup Dialog Box
133
For Macintosh
134
Setting up the PCL Driver
135
Selecting the Printer
135
Settings
136
Common Settings
136
Setup Tab
138
Per Page Setting Tab
138
Overlay Tab
138
Watermark Tab
138
Specifying the Setup Tab Settings
140
Printing to Suit the Paper Size
140
Specifying a Custom Size
141
Selecting the Paper Source
142
Assigning a Paper Type to a Paper Tray
142
Specifying Double-Sided/Booklet Printing
144
Printing Multiple Pages on One Page (N in 1)
145
Setting the File Margin
146
Stapling
147
Hole Punching
147
Selecting the Output Method
148
Specifying Account Track Settings
151
Specifying the Per Page Setting Tab Settings
153
Printing Documents with a Front Cover/Back Cover
153
Printing Multiple Pages
153
Per Page Setting
154
Specifying the Overlay Tab Settings
155
Printing Different Original Documents Together (Overlay)
155
Editing Forms
157
Specifying the Watermark Tab Settings
159
Printing a Watermark
159
Editing a Watermark
160
Printing the Document Number
161
Specifying the Quality Tab Settings
162
Specifying Settings
163
Specifying the Font Tab Settings
164
Replacing Fonts
164
Specifying the Option Tab Settings
165
Selecting Options
166
Saving the Driver Settings
167
To Save the Driver Settings
167
Viewing the Settings
169
Deleting the Settings
169
Setting up the Postscript Driver (Windows)
170
Selecting the Printer
170
Settings
172
Common Settings
172
Layout Tab
174
Quality Tab
175
Advanced Tab
176
Device Settings Tab
176
Specifying the Setup Tab Settings
178
Printing to Suit the Paper Size
178
Saving a Custom Sizes
179
Selecting the Output Method
180
Specifying Account Track Settings
183
Specifying the Layout Tab Settings
185
Printing Multiple Pages on One Page (N in 1)
186
Double-Sided Printing
187
Setting the File Margin
187
Stapling
188
Hole Punching
189
Specifying the Per Page Setting Tab Settings
190
Printing Documents with a Front Cover/Back Cover
190
Specifying the Watermark Tab Settings
191
Printing a Watermark
191
Editing a Watermark
192
Specifying the Quality Tab Settings
194
Specifying Settings
195
Font Settings
195
Specifying the Option Tab Settings
196
Specifying Settings
197
Saving the Driver Settings
198
To Save the Driver Settings
198
Viewing the Settings
200
Changing the Settings
200
Setting up the PPD Driver (Windows)
201
Settings
201
Graphics Tab
202
Device Options Tab
202
Specifying the Paper Tab Settings
205
Specifying Settings
205
Specifying the Device Options Tab Settings
206
Specifying Settings
206
Specifying the Options
208
To Select an Option
208
Setting up the PPD Driver (Mac os 9.2)
210
Settings
210
Page Setup Dialog Box
210
Print Dialog Box
212
Page Setup
215
Basic Settings
215
Custom Page Sizes
217
Postscript Options
218
Printing
219
Basic Settings (General)
219
Printing Multiple Pages on One Page (Layout)
221
Printer-Specific Options (Finishing Options 1 to 4)
222
Setting Options
224
Specifying Settings
224
Setting up the PPD Driver (Mac os X)
226
Settings
226
Page Setup Dialog Box
226
Print Dialog Box
227
Page Setup
230
Basic Settings
230
Custom Paper Size
231
Printing
232
Basic Settings (Copies
232
Printing Multiple Pages on One Page (Layout)
234
Paper Feed
235
Security
236
Finishing
238
Quality
240
Setup
242
Setting Options
243
Specifying Settings
243
Saving the Driver Settings
245
To Save the Driver Settings
245
Viewing the Settings
246
Changing the Settings
246
Konica Minolta BIZHUB C250P System Administrator Manual (52 pages)
universal printer driver
Brand:
Konica Minolta
| Category:
All in One Printer
| Size: 6.82 MB
Table of Contents
Table of Contents
3
1 Introduction
5
2 Software Description
8
System Requirements
8
UPD Components
9
Supported Models
10
Third-Party Product Compatibility
12
3 Install and Uninstall of the UPD
16
Install and Uninstall
16
Use Point & Print
23
Individual Child Driver Updates
25
Adding New KONICA MINOLTA Mfps to Your Installation
26
4 Using the Universal Print Driver
30
Dynamic Mode and Traditional Mode
30
Using Dynamic Mode
30
Using Traditional Mode
43
UPD Versions
47
5 Frequently Asked Questions
50
Is the Cluster Server Environment Supported
50
Is the Citrix Environment Supported
50
How to Find the Supported or Non Supported Products by UPD
50
Can I Use Mytab Function
50
User Profile Size of Windows System Expanded after Installing UPD
51
Can Non PC Administrator also Operate UPD Without any Restrictions
51
Is the Windows 7 Device Stage Supported
51
Advertisement
Related Products
Konica Minolta bizhub C200
Konica Minolta BIZHUB C250
Konica Minolta BIZHUB C252
Konica Minolta AccurioPress C2070
Konica Minolta AccurioPress C2070P
Konica Minolta AccurioPress C2060
Konica Minolta AccurioPrint C2060L
Konica Minolta bizhub C31P
Konica Minolta AccurioPress C3080
Konica Minolta AccurioPrint C3070L
Konica Minolta Categories
All in One Printer
Printer
Digital Camera
Measuring Instruments
Copier
More Konica Minolta Manuals
Login
Sign In
OR
Sign in with Facebook
Sign in with Google
Upload manual
Upload from disk
Upload from URL