Sign In
Upload
Manuals
Brands
Clarity Manuals
Medical Equipment
RetCam3
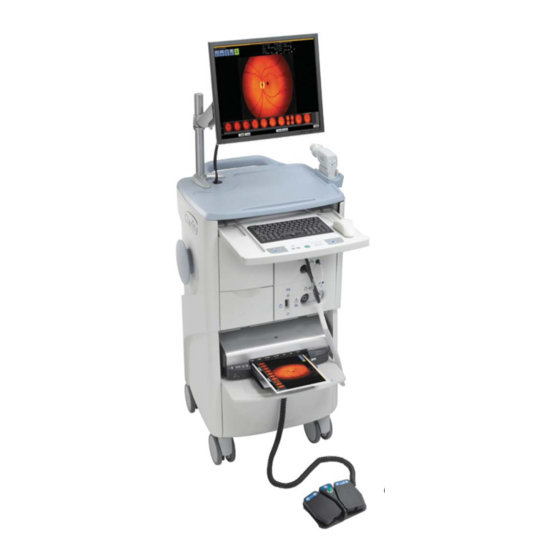
Clarity RetCam3 Manuals
Manuals and User Guides for Clarity RetCam3. We have
1
Clarity RetCam3 manual available for free PDF download: User Manual
Clarity RetCam3 User Manual (177 pages)
Ophthalmic Imaging Systems
Brand:
Clarity
| Category:
Medical Equipment
| Size: 5.3 MB
Table of Contents
Table of Contents
4
List of Tables
10
List of Figures
12
1 Introduction
16
Indications for Use
16
Contraindications
17
Warnings and Cautions
17
Retcam 3 System Hardware
19
Figure 1 Retcam 3 Ophthalmic Imaging System Front View
20
Figure 2 Retcam 3 Ophthalmic Imaging System Rear View
21
Main Hardware Components
22
The Computer Electro-Optical Box (CEO)
22
Figure 3 Computer Electro-Optical (CEO) Box
23
Figure 4 Inside Connector Notch
24
Figure 5 CEO Box Notch
24
Figure 6 Handpiece and Lenspiece
24
Storage
25
Transport
25
Figure 7 Retcam 3 with All Items Stowed
25
To Relocate the System Within a Building
25
Electrical Safety Information
26
Table 1 Retcam 3 Electromagnetic Emissions
27
Table 2 Retcam 3 Electromagnetic Immunity
28
System Hardware (Retcam Shuttle)
30
Figure 8 Retcam Shuttle Imaging System
30
Figure 9 Handpiece and Lens Piece
31
Hardware Components
31
Figure 10 Electro-Optical (EO) Box
32
The Electro-Optical Box (EO Box)
32
Figure 11 Inside Connector Notch
33
Figure 12 EO Box Notch
33
Figure 13 Shuttle with All Items Stowed
34
Storage
34
To Relocate the System Within a Building
34
Transport
34
Figure 14 Transporting the Shuttle
35
To Transport the System to Another Location
35
Class I Type BF Electrical Equipment
36
Electrical Safety Information
36
Rated for Continuous Operation
36
Table 3 Retcam Shuttle Electromagnetic Emissions
37
Table 4 Retcam Shuttle Electromagnetic Immunity
38
Important User Safety Notices for All Retcam Systems
40
Labels and Symbols
41
Product Labels
44
2 Retcam System Software Configuration
46
Configuring the Retcam System for Use with Optional Retcam Review Software
46
Figure 15 Utilities Menu
47
Figure 16 User Preferences Window
47
Creating Domains
48
Figure 17 Domain Selection Menu
48
Creating Domains Without Retcam Review Software
49
Figure 18 Select Domain Dialog Box
49
Figure 19 Create Domain Dialog Box
49
Figure 20 Assign Users Dialog Box
50
Creating User Login Accounts
51
Figure 21 Manage Users Menu
51
Figure 22 Create User Dialog Box
51
Assigning Patients to Domains
52
Figure 23 Assign Domains Dialog Box
52
Figure 24 User Preferences Dialog Box
53
Figure 25 Patient Assignment Dialog Box
53
Figure 26 Domain Assignment Dialog Box
54
Functions Managed by Retcam Review Software
48
3 Synchronization with Retcam Review Software (RCRS)
56
Determining if Retcam Is Configured for RCRS
56
Figure 27 Server Connection Status
56
Synchronization with RCRS
57
Figure 28 Domain Selection List
57
Reconciling Data Mismatches
59
Figure 29 Reconciliation Form
59
Figure 30 Reconciliation Form: Partially Reconciled
60
Figure 31 Reconciliation Form: Reconciled
60
Removing Videos and Images from the Retcam System
61
Figure 32 Confirmation Window
61
Figure 33 Image Selection Box
61
4 Preparing the System for Use
64
Preparing the Retcam 3 System for Use
65
Turning the System on
65
Figure 34 Control Panel
65
Figure 35 Footswitch Controls
65
Installing Lens Pieces
66
Handpiece Connection
66
Figure 36 Installing a Lens Piece on the Handpiece
66
Printer Setup
67
System Software
67
Figure 37 Handpiece Connections
67
Figure 38 User Login Screen
67
Fluorescein Angiography
68
Illumination Lamp
68
Figure 39 Change Password Dialog Box
68
Figure 40 Select Domain Screen
68
Preparing the Retcam Shuttle System for Use
69
Figure 41 Main Power Switch
69
Power Cord and Power Connector
69
Turning the System on
69
Figure 42 Footswitch Controls
70
Figure 43 Computer Power and USB (Video) Cables
70
Figure 44 EO Box
71
Figure 45 Installing a Lens Piece on the Handpiece
72
Installing Lens Pieces
72
Figure 46 User Login Screen
73
Figure 47 Change Password Dialog Box
73
Figure 48 Select Domain Screen
73
System Software
73
5 Using the Retcam System
74
Managing Patient Records
74
Figure 49 Patients and Exams Screen
75
Table 5 Patients and Exams Screen Command Buttons
75
Add a New Patient Record
76
Command Button Colors
76
Figure 50 Add New Patient Screen
76
Editing a Patient Record
77
Figure 51 Patient Information
77
Figure 52 Birth Information
77
Figure 53 Edit Patient Record Screen
78
Finding Existing Patient Records
78
Figure 54 Select Images Toolbar
79
Figure 55 Patient Search: Advanced
79
Figure 56 Patient Directory
80
Figure 57 Patients and Exams Screen Command Buttons
80
Search Results
80
Figure 58 Taskbar Showing Sync Enabled
81
Figure 59 Taskbar Showing Sync Disabled
81
Figure 60 Domain Configuration Window
81
Working with Domains
81
Table 6 Selected Image Filters
79
Figure 61 Create Domain Dialog Box
82
Performing Exams
82
Figure 62 New Exam Configuration Screen
83
Figure 63 Edit Imaging Configuration
84
Figure 64 Manual Configuration
85
Figure 65 New Exam Screen
85
Figure 66 Confirm Exit Dialog Box
86
Figure 67 Configure Playback
86
Figure 68 Configure Color Mode
86
Figure 69 Configure FA Mode (Retcam 3)
86
Capturing Images
87
Figure 70 Image Capture Controls
87
Image Capture Controls
87
Figure 71 Timer Menu Options
88
Figure 72 Progress Bar
88
Figure 73 Range Levels
89
Range
89
Footswitch
90
Keyboard Controls
90
Retcam 3 Control Panel
90
Video Playback
90
Saving a Video
91
Using Helpful Features
91
Figure 74 Video Playback Controls
91
Locating Still Images from Video
92
Changing Image Capture Options During an Exam
92
Figure 75 Video Scrollbar Control
92
Changing Image Type
93
Changing Lens
93
Changing Right Eye (OD) / Left Eye (OS)
93
Adding Exam Notes
93
Figure 76 Select Options for Image Capture
93
Adding Exam Notes During an Exam
94
Figure 77 Exam Notes During Exam Screen
94
Figure 78 Creator Menu
94
Figure 79 Edit Clinician Dialog Box
94
Adding Exam Notes after an Exam
95
Figure 80 New Clinician Dialog Box
95
Figure 81 Exam Notes Window
96
Figure 82 Creator Menu
96
Figure 83 Edit Clinician Dialog Box
96
Figure 84 New Clinician Dialog Box
97
Figure 85 Save Confirming Changes
97
Turning off the Retcam 3 System
97
Figure 86 Shutdown Icon Options
98
Figure 87 Footswitch Pocket
98
Using Hard Shutdown
99
Figure 88 Shutdown Icon
99
Figure 89 Shutdown Options
99
Turning off the Retcam Shuttle System
99
6 Review and Compare Images
100
Exam Review Screen
100
Figure 90 Exam Review Screen
100
Figure 91 Exam Selector
101
Figure 92 Exam Review Video Clip
101
Configure Options
102
Figure 93 Exam Review with Playback Controls
102
Figure 94 Video Playback Controls
102
Figure 95 Configure: Playback
102
Edit Image
103
Figure 96 Configure: Annotations
103
Flag Image
103
Full Screen
103
Hide Thumbnails
103
Normal Screen
103
Print Image
103
Show Thumbnails
103
Compare
104
Compare Mode
104
Figure 97 Compare Images - One Patient
104
Configure
105
Figure 98 Compare Images - Two Patients
105
Print Image
105
Edit Image
106
End Compare
106
Exit Review
106
Exam Notes
104
Exit Review
104
Image Adjustment
106
Figure 99 Image Adjustment Window
106
Annotating an Image
107
Figure 100 Color Adjustments Pane
107
Figure 101 Annotations Pane
107
Image Display Color Adjustments
107
Figure 102 Insert Ellipse Button
108
Figure 103 Insert Line Button
108
Adding Text Notes to an Image
109
Additional Options
109
Figure 104 Text Overlays Pane
109
Figure 105 General Options Pane
109
Reset Button
110
Save as
110
7 Import and Export Images
112
Backing up Images
112
Backup Recommendation: Network or Removable USB Storage Device
112
Compatible Removable Media
113
Exporting Images
113
Select Images for Export
113
Figure 106 Select Patients and Exams for Export
114
Figure 107 Select Images Toolbar
114
Figure 108 Search Results
115
Table 7 Selected Image Filters
115
Figure 109 Export Dialog Box
116
Select Export Options
116
Figure 110 File Format Options
117
Figure 111 Select Image and Data Format
117
Format Options
117
Select the File Format
117
Table 8 Format Options for Exam Images
117
Complete Export
118
Export Data Formats
118
Export Image Formats
118
Figure 112 Export Progress Dialog Box
118
Table 10 Export Data Formats for Patient Records
118
Table 9 Export Image Formats for Exam Images
118
Importing Images
119
Figure 113 Start Screen
120
Figure 114 Importing from Removable Drives
120
Figure 115 Please Connect Your Removable Drive Message
120
Figure 116 Import Review Dialog Box
121
Figure 117 Import Review Show Details Dialog Box
121
Delete Source Files and Subfolders after Import Check Box
122
Figure 118 Importing in Progress
122
Include Subfolders Check Box
122
Confirm Images and Media Importation
123
Figure 119 Import Report
123
8 Printing Images
124
Printing Images and Reports
124
Recommended Supplies
125
Locations Within the United States
125
Locations Outside the United States
125
Figure 120 Print Dialog Box
125
9 User Preferences
126
About Retcam Software
126
Figure 121 Accessing User Preferences
126
User Preferences
127
Figure 122 about Clarity Software
127
Device Identification
128
Figure 123 User Preferences Screen
128
Table 11 Configuration Options
128
Domain Configuration
129
Figure 124 User Preferences: Device
129
Figure 125 User Preferences: Domain Configuration
129
Image Audit
129
Configuring Live Imaging
130
Figure 126 User Preferences: Image Audit
130
Figure 127 User Preferences: Image Adjustment
130
Imaging Adjustment
130
Configuring New Exam Defaults
131
Figure 128 User Preferences: Live Imaging
131
Figure 129 User Preferences: New Exam
131
Configuring Notification Options
132
Configuring Printers
132
Figure 130 User Preferences: Notification
132
Figure 131 User Preferences: Printers
132
Configuring Windows® Preferences
133
Enabling Synchronization
133
Figure 132 User Preferences: Synchronization
133
Figure 133 User Preferences: Windows Configuration
134
10 Fluorescein Angiography (Retcam 3 System)
136
Theory of Operation
136
Using Fluorescein Angiography (FA) Mode
136
Figure 134 New Exam Configuration Screen
137
Figure 135 Barrier Filter Installation
138
Figure 136 FA Front Panel
139
Figure 137 Configure Button: FA Mode
140
Figure 138 FA Timer Controls
141
Using Video Controls in FA Mode
141
11 Screening for Retinopathy of Prematurity (ROP)
142
Retcam Physician Information
142
Indications for Use
142
Contraindications
143
Warnings
143
Preparation
144
Using the Retcam
144
Screening for Retinopathy of Prematurity
145
Figure 139 Chiang Method: Three Images
145
Figure 140 Clarity Method: Five Images
146
Performance Data
147
Table 12 Cross-Classification of Graders
147
Image Quality
148
Table 13 Statistics and 2X2 Cross-Tabulation Components by Grader
148
Reference
149
Training
149
Photo Documentation
149
Adverse Events
150
Table 14 Clinical Risks and Recommended Mitigation Steps
150
12 Maintenance and Support
152
Recommended General Maintenance Schedule
152
Cleaning Procedures
153
Cleaning the Lens Piece
153
Alternate Cleaning and Disinfection
154
Cleaning the Rest of the System
154
Disposal of Materials
154
Figure 141 Inverted Lens Piece Showing Permissible Immersion Depth
154
Cable and Connections Inspection
155
Retcam 3 Maintenance
155
Figure 142 Power Entry Module
155
Retcam 3 Fuse Replacement
155
Figure 143 Opening the Fuse Holder Cover
156
Figure 144 Removing the Fuse Holder
156
Figure 145 Fuses Removed
157
Figure 146 Fuse Holder Re-Inserted
157
Retcam 3 Illumination Lamp Replacement
157
Figure 147 Opening the Front Cover
158
Figure 148 Removing the Camera and Focus Cables
158
Figure 149 Front Panel Showing Lamp Assembly Drawer
159
Figure 150 Removing the Illumination Lamp
159
Figure 151 Handling the Illumination Lamp
160
Retcam Shuttle Maintenance
161
Figure 152 Power Entry Module
161
Figure 153 Opening the Fuse Holder Cover
161
Retcam Shuttle Fuse Replacement
161
Figure 154 Removing the Fuse Holder
162
Figure 155 Blown Fuse Removed
162
Retcam Shuttle Illumination Lamp Replacement
162
Figure 156 Front Panel Showing Lamp Assembly Drawer
163
Figure 157 Open Lamp Assembly Drawer
163
Figure 158 Eject the Bulb
164
Figure 159 Catch the Bulb
165
Figure 160 Insert New Bulb
165
General Support Issues
166
Figure 161 Replace Lamp Assembly and Fiber Optic Cable
166
Key Validation
166
Figure 162 Authorization Key Dialog Box
167
Technical Support
168
E-Mail
168
Mailing Address
168
Service Information
168
Technical Support Contact Information
168
Telephone
168
13 Technical Specifications
170
Retcam 3 Technical Specifications
170
Retcam 3 Hardware Requirements
170
Computer (CEO Module)
170
Electrical
170
Physical
170
Retcam 3 Environmental Conditions
171
Retcam 3 Software Requirements
171
Table 15 Retcam 3 Environmental Conditions
171
Retcam Shuttle Technical Specifications
172
Electrical
172
Notebook Computer
172
Physical
172
Retcam Shuttle Hardware Requirements
172
Retcam Shuttle Software Requirements
172
Retcam Shuttle Environmental Conditions
173
Table 16 Retcam Shuttle Environmental Conditions
173
14 License Agreements
174
Clarity Software Restricted Rights
174
Retcam Software End User License Agreement
174
Advertisement
Advertisement
Related Products
Clarity RetCam Shuttle
Clarity RC100
Clarity RC200
Clarity Platinum
Clarity RetCam 3
Clarity Categories
Telephone
Cordless Telephone
Speakers
Cell Phone
Handsets
More Clarity Manuals
Login
Sign In
OR
Sign in with Facebook
Sign in with Google
Upload manual
Upload from disk
Upload from URL