Table of Contents
Advertisement
Quick Links
Advertisement
Table of Contents

Related Manuals for Safran WR-Z16


Summary of Contents for Safran WR-Z16
- Page 1 ELECTRONICS & DEFENSE WR-Z16 MODEL User Manual Revision: v5.0 Date: 25-July-2023...
- Page 3 Safran for its use, nor for any infringements of patents or other rights of third parties that may result from its use. Safran reserves the right to make changes without further notice to any products herein. Safran makes no warranty,...
- Page 4 Blank page. WR-Z16 User Manual...
-
Page 5: Table Of Contents
CONTENTS CHAPTER 1 Introduction 1.1 About this Document 1.2 About WR-Z16 1.3 About WRZ-OS 1.4 About White Rabbit / High-Accuracy Technology CHAPTER 2 Product Description 2.1 Front panel 2.2 Rear panel 2.3 Monitoring LEDs 2.3.1 System Status 2.3.2 Timing Output 2.3.3 Timing Input... - Page 6 4.3 The Web GUI 4.3.1 Network configuration from web 4.4 CLI Configuration 4.4.1 Network configuration from CLI 4.5 CLI Monitoring 4.5.1 Listing parameters 4.5.1.1 Readback a specific parameter 4.5.2 Applying changes online 4.5.3 Other functionalities • TABLE OF CONTENTS WR-Z16 User Manual...
- Page 7 5.3.2.1 Active servo 5.3.2.2 Port Instance 5.4 IEEE 1588-2008 (PTPv2) 5.4.1 License 5.4.1.1 PTP license management 5.4.2 Configuration 5.4.2.1 Configuration of PTP Profiles 5.4.3 Info/Overview 5.5 External Reference (GM) 5.5.1 Configuration 5.5.2 Info/Overview 5.6 NTP • TABLE OF CONTENTS WR-Z16 User Manual...
- Page 8 6.5.1 Example to only allow a specific IP for management CHAPTER 7 Monitoring & Logging 7.1 Syslog 7.1.1 Session logs 7.1.2 Permanent logs 7.1.3 Remote logs 7.1.4 Logging tools 7.1.5 Configuration 7.2 SNMP • TABLE OF CONTENTS WR-Z16 User Manual...
- Page 9 8.1.4.4 Remove local license from device 8.1.5 License Server 8.2 Firmware Update 8.2.1 Hardware version and firmware 8.2.2 Using Web interface 8.2.3 Using SSH/SCP 8.3 Recovery Mode 8.3.1 Manual recovery mode 8.3.1.1 Using reset button • TABLE OF CONTENTS WR-Z16 User Manual...
- Page 10 9.7 TACACS+ and RADIUS server configuration 9.7.1 TACACS+ server installation and configuration 9.7.2 RADIUS server installation and configuration 9.8 List of supported SFPs 9.9 List of Tables 9.10 List of Images 9.11 Document Revision History INDEX • TABLE OF CONTENTS VIII WR-Z16 User Manual...
-
Page 11: Introduction
CHAPTER 1 Introduction The following topics are included in this Chapter: 1.1 About this Document 1.2 About WR-Z16 1.3 About WRZ-OS 1.4 About White Rabbit / High-Accuracy Technology CHAPTER • WR-Z16 User Manual... -
Page 12: About This Document
1.1 About this Document About this Document This document is the main user guide of the WR-Z16 Model . It describes the essential information about the WR-Z16 hardware, its features, and configuration options. It is designed to allow users who have their first contact with the device to easily connect it to a management network and distribute precise timing (PTP or White Rabbit (WR), for example) through optical interfaces. -
Page 13: About Wrz-Os
IP CORE. This license might be available per port or within a pack. About WRZ-OS The WR-Z16 is part of a full ecosystem of products which maintain sub-nano- second accuracy synchronization from an external time reference to the end nodes of the timing network, where different timing interfaces are provided to inter-operate with third-party equipment. -
Page 14: About White Rabbit / High-Accuracy Technology
PPS expansion license. About White Rabbit / High-Accuracy Technology One of the key-features of the WR-Z16 family is that it fully supports the White Rabbit (WR) protocol, an extension of the IEEE 1588 (PTP), to achieve ultra- accurate sub-nanosecond synchronization in Ethernet-based networks. Since the publication of the new IEEE 1588-2019 standard, White Rabbit is also known as “PTP High Accuracy”... - Page 15 1.4 About White Rabbit / High-Accuracy Technology Integration: WR is based on existing protocols and standards (such as PTP and Ethernet) so it is very easy to integrate into your existing network infra- structure. CHAPTER • WR-Z16 User Manual Rev. v5.0...
- Page 16 1.4 About White Rabbit / High-Accuracy Technology BLANK PAGE. CHAPTER • WR-Z16 User Manual Rev. v5.0...
-
Page 17: Product Description
CHAPTER 2 Product Description The Chapter presents an overview of the WR-Z16 Model , its capabilities, main technical features and specifications. The following topics are included in this Chapter: 2.1 Front panel 2.2 Rear panel 2.3 Monitoring LEDs 2.4 Product Specifications 2.5 Safety Notes... -
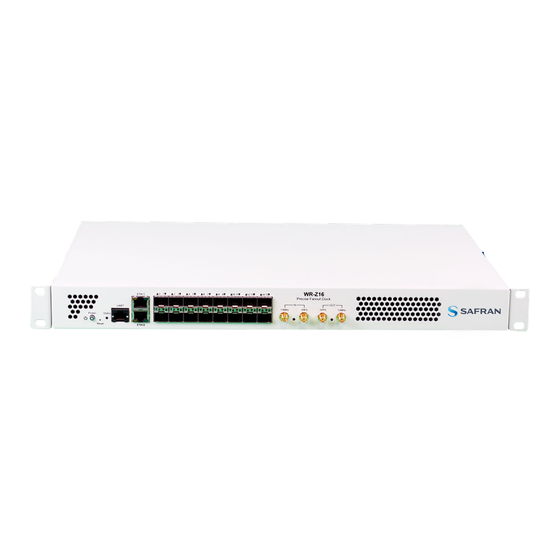
Page 18: Front Panel
"Timing Output" on page 11 Timing Input OK: Green; Warning: Yellow; Crit- ical: Red Ω ● "External Reference (GM)" 10 MHz input connector ● on page 85 termination ● 1Veff (+/- 30%) digital or sine wave CHAPTER • WR-Z16 User Manual Rev. v5.0... -
Page 19: Rear Panel
● page 57 Digital output ●High level output: 3.0V +/- (with 50 Ω termination) 0.2V Rear panel Figure 2-2: Rear panel of the WR-Z16 Table 2-2: RearPanel Legend Name Information Ref. ●Ground connector of the device Ground Power Supply CHAPTER •... -
Page 20: Monitoring Leds
- Default airflow: blowing out Monitoring LEDs The status of the WR-Z16 device can be quickly verified using the 3 visible LEDs in the front-panel. The tables below detail the behavior of each LED depending on the status of the WR-Z16. -
Page 21: Timing Output
Device timing state is in a transitional WARNING. The device is not locked to a reference. ●●● Steady Red Device timing state CRITICAL and PPS mode is ‘Only Locked’ ●●● Idle The time manager module has not been loaded yet CHAPTER • WR-Z16 User Manual Rev. v5.0... -
Page 22: Timing Input
The LEDs of these SFP ports are slightly different to standard usage as it does not differentiate TX/RX but utilizes the arrows to indicate the upper- /lower port and their corresponding states: CHAPTER • WR-Z16 User Manual Rev. v5.0... -
Page 23: Product Specifications
▼ Passive slave Led C is orange when port is in passive/monitoring mode Product Specifications System On-Chip SoC: Xilinx Zynq 7000 series CPU: Dual ARM® A9 MP@ 1 GHz CHAPTER • WR-Z16 User Manual Rev. v5.0... - Page 24 10MHz OUT (LVTTL) PPS OUT (LVTTL) PPS IN (TTL/LVTTL) 10MHz IN (TTL/CMOS/ECL/clipped sine) Back-panel Power Supply 2x Redundant & Hot-swappable 100-240VAC, 50-60 Hz / 50W (max. 80W) 2 x Swappable fan modules Airflow: blowing out CHAPTER • WR-Z16 User Manual Rev. v5.0...
-
Page 25: Safety Notes
SAFETY: Before You Begin Installation DANGER! Do not block the air vents which are located on the front panel of the device, the internal temperature might increase and damage the equipment. CHAPTER • WR-Z16 User Manual Rev. v5.0... - Page 26 Temperature: -10°C ~ +50°C; Humidity; 0% ~ 90% RH Note: The use of dust covers is recommended for the unused SFP/SFP+ slots. CHAPTER • WR-Z16 User Manual Rev. v5.0...
-
Page 27: Rack Installation
To properly mount the device to a rack cabinet: 1. Place the device on the floor or on a sturdy table near the rack. 2. Use a tape measure to verify the interior dimensions of the rack. CHAPTER • WR-Z16 User Manual Rev. v5.0... -
Page 28: Regulatory Compliance
L bracket and into the threaded holes in the mounting post (or the clip-nuts or cage-nuts). Regulatory Compliance 2.7.1 EN55032:2015 AC:2016 EN55035:2017 EN61000-3-2:2014 EN61000-3-3:2013 FCC: 47 CFR Part 15B (10–1–15 Edition) ICES-003 Issue 6 2.7.2 Safety IEC 62368-1:2014 AC:2015 A11:2017 2.7.3 RoHS 2011/65/UE 2015/863/UE CHAPTER • WR-Z16 User Manual Rev. v5.0... -
Page 29: Device Connectivity
CHAPTER 3 Device Connectivity This chapter includes instruction to aid in device connectivity. The following topics are included in this Chapter: 3.1 Default Configuration 3.2 Connecting to the Device CHAPTER • WR-Z16 User Manual... -
Page 30: Default Configuration
RJ-45 Cat5/6/7 Ethernet cable. RJ45-RS232(m) and RS232(f)-USB cable. 3.2.2 Logging from the UART In order to connect to the WR-Z16 device, it is required to connect the RJ45- RS232(m) and RS232(f)-USB cable to the RJ45 management port at the front panel. CHAPTER •... -
Page 31: Logging From Ssh
This can render the device accessible only by UART. There are three main ways to connect to the WR-Z16 device from SSH: 1. To use the default static IP on eth1: Connect the RJ-45 Ethernet cable to the eth1 interface. -
Page 32: Connecting On Linux (Ubuntu 18.04 Lts)
PC) and the expected output is as follows $ sudo picocom -b 115200 /dev/ttyUSB0 Calling 'sudo /usr/bin/picocom -b 115200 /dev/ttyUSB0 -b 115200' Exiting Ctrl+A, then Ctrl+X picocom v2.2 port is : /dev/ttyUSB0 lowcontrol : none CHAPTER • WR-Z16 User Manual Rev. v5.0... -
Page 33: Logging In From Ssh
3.2.4.2 Logging in from SSH Ubuntu distributions (and many others) have already installed all ssh- related tools necessary to connect to the device. The user does not need to perform any CHAPTER • WR-Z16 User Manual Rev. v5.0... -
Page 34: Connecting On Windows
3.2.5.1 Logging in from UART The connection to the UART in the WR-Z16 Model can be made by using Putty, the SSH and Telnet client for Windows, as it supports serial connections too. When having connected the RJ45-RS232-USB cable to the Windows PC, a new serial port identified by COM<number>... -
Page 35: Logging In From Ssh
Once the device is set with an IP address, it can be accessed by typing http://<device_ip> in the browser address bar. By default, https is disabled but if it has been enabled, the address bar should be replaced by https://<device_ip>. CHAPTER • WR-Z16 User Manual Rev. v5.0... - Page 36 3.2 Connecting to the Device Once connected the WR-Z16, the user must login by clicking on Login Page, and provide the corresponding password for the root user (see "Default Con- figuration" on page 20). Figure 3-3: Login page of the web interface.
-
Page 37: Gui & Cgi Tools
The following topics are included in this Chapter: 4.1 Parameters API Introduction 4.2 The REST-API 4.3 The Web GUI 4.4 CLI Configuration 4.5 CLI Monitoring 4.6 Other CLI tools CHAPTER • WR-Z16 User Manual... -
Page 38: Parameters Api Introduction
Write: can directly apply (online) the value. Load: can save the value (it will be applied at next restart). Disabled: Currently disabled, writing will not apply anything and the value read value might be invalid. CHAPTER • WR-Z16 User Manual Rev. v5.0... - Page 39 → 201x, wr1 → 211x, ..., wr15 → 361x & eth0 1.xxx0.x /net/<iface>/xxx Directory related to the <iface> name → 680x, eth1 → 690x. where OIDs follow the given pattern: wr0 0.xxx0.7 DHCP <Bool> Enable/Disable the DHCP IPv4 discovery. CHAPTER • WR-Z16 User Manual Rev. v5.0...
- Page 40 <Integer> Transmitted bytes on <iface>. (u32) 0.xxx0.12 Rx Bytes <Integer> Received bytes on <iface>. (u32 0.xxx0.13 Tx Errors <Integer> Transmission errors on <iface>. (u32) 0.xxx0.14 Rx Errors <Integer> Reception errors on <iface>. (u32 CHAPTER • WR-Z16 User Manual Rev. v5.0...
-
Page 41: The Rest-Api
Postman or via its own applic- ation. Also, the REST-API is testable directly from the documentation page. 4.2.2.1 HTTP Methods The user can interact with the device using four HTTP methods: CHAPTER • WR-Z16 User Manual Rev. v5.0... -
Page 42: Get Formats
Note: For monitoring purposes, use value_string or value_number format because of their light computation impact. Other formats require more computation time and will affect the system per- formance if they are requested frequently. CHAPTER • WR-Z16 User Manual Rev. v5.0... -
Page 43: Accessing The Rest-Api Through The Documentation Page
Obtain an authentication token by clicking the “Authorize :lock: “ button on the top of the page and inserting the credentials: Open the Authorize dialog for obtaining a token: Enter the credentials in the Authorize form. CHAPTER • WR-Z16 User Manual Rev. v5.0... - Page 44 Choose a parameter and a method. If using the “GET” method, choose also a “format”. For example: Open the `GET /v1/preset` method and click in “Try it out”. Choose a format string (for example: complete) and click in “Execute”. CHAPTER • WR-Z16 User Manual Rev. v5.0...
- Page 45 4.2 The REST-API Check the response of the request. An example line for curl is provided for testing purposes: curl -X 'GET' \ 'http://10.22.26.106:8201/v1/preset?format=complete' \ -H 'accept: application/json' \ 'Authorization: Bearer eyJh- bGciOiJIUzI1NiIsInR5cCI6Ik- pXVCJ9.eyJzdWIiOiJyb290IiwiZXhwIjoxNjc1MzY3Mjk1fQ.RGDFVCnbG- ltHa9PfiAqLZXpaw5R_wPtOWe8R6DYZhQ' CHAPTER • WR-Z16 User Manual Rev. v5.0...
-
Page 46: Accessing The Rest-Api Through Postman
4.2.4.3 Familiarizing Yourself with Postman The following is a brief overview of the Postman UI. More comprehensive assist- ance found under https://learning.postman.com/docs/getting-started/introduction/ The View Selector is used to switch between different functionality. CHAPTER • WR-Z16 User Manual Rev. v5.0... - Page 47 Body: Click the Body toggle switch to open the Body editor. The body editor has different controls depending on the body type: form- data, urlencoded, raw, binary, and GraphQL. To edit key values, click the Params button. CHAPTER • WR-Z16 User Manual Rev. v5.0...
-
Page 48: Importing The White Rabbit Collection
Capture documentation for requests in a description field. 4.2.4.4 Importing the White Rabbit Collection Safran’s Postman™ collection for White Rabbit Time Servers provides examples of how to pull and send data through the API. To import this collection: Click on /openapi.json to download the collection: CHAPTER •... -
Page 49: Configuring The 'Baseurl
“White Rabbit Solutions”, and in the “Variables” tab, edit the Current Value of the baseUrl variable and set it to http://<ip>:8201/, where <ip> valid address that reach device (e.g. http://10.22.26.106:8201/ ) CHAPTER • WR-Z16 User Manual Rev. v5.0... -
Page 50: Obtaining The Access Token
An authenticated user (i.e. an user with an authentication token) can make any type of request. For doing this: Open the desired request in the sidebar (for example, /v1/preset/Read Pre- set). Navigate to the “Authorization” tab. Introduce the access token. Click on the “Send” button. CHAPTER • WR-Z16 User Manual Rev. v5.0... -
Page 51: The Web Gui
(or your updated credentials). A dashboard tab will then be shown with the main information of the device, product image, status panel, basic timing information, system and version information, and network con- figuration. CHAPTER • WR-Z16 User Manual Rev. v5.0... - Page 52 White Rabbit, PTP, External Reference (GM), Holdover, NTP, and Misc. The Administration Menu allows users to configure Network, SNMP, and Security settings. The Management Menu links to pages for Info, Logging, Maintenance, Firmware Update, System Alerts, Licenses, and Import/Export config. CHAPTER • WR-Z16 User Manual Rev. v5.0...
-
Page 53: Network Configuration From Web
IP for eth0 network interface follows. After logging in to the unit, select the Administration drop- down in the Main Navigation bar, and then select the Network page: CHAPTER • WR-Z16 User Manual Rev. v5.0... - Page 54 Maintenance and select the device Reboot button. Your changes can be confirmed from the dashboard (which lists all inter- face IP addresses in the Network Status Panel) or you can also return to the Administration > Network page. CHAPTER • WR-Z16 User Manual Rev. v5.0...
-
Page 55: Cli Configuration
Security: Configuration related to the security of the device ("Security & Authentication" on page 97). Management: Logging & Monitoring ("Monitoring & Logging" on page 109) configuration and aspects related to the maintenance of the device ("Device Maintenance" on page 137). CHAPTER • WR-Z16 User Manual Rev. v5.0... - Page 56 Changes applied at reboot: It is important to highlight that the changes performed through the wrz_config tool will only be applied at next reboot. Indeed, each init.d services will load their cor- responding values from /root/.config file during startup. CHAPTER • WR-Z16 User Manual Rev. v5.0...
-
Page 57: Network Configuration From Cli
Then, the Network section must be selected from the main menu: Then the corresponding network interface (eth0) to be modified must be selected:. Figure 4-8: wrz_config interface. Network interfaces to change If the static IPv4 settings must be loaded, disable DHCP CHAPTER • WR-Z16 User Manual Rev. v5.0... - Page 58 To load this configuration at next reboot default filename (.config) must used. Figure 4-10: wrz_config interface. File in which to save the new applied configuration Select Exit or press <Esc> to return to the command line. CHAPTER • WR-Z16 User Manual Rev. v5.0...
-
Page 59: Cli Monitoring
The figure below illustrates the usage of gpa_ctrl to monitor all parameters cor- responding to the power supplies by executing the command: gpa_ctrl hald pws/ Figure 4-11: Example of gpa_ctrl usage to list power supplies parameters. The list of related parameters displays in 5 columns: CHAPTER • WR-Z16 User Manual Rev. v5.0... -
Page 60: Readback A Specific Parameter
For example, to disable the alert for the right power supply the user must execute: gpa_ctrl hald pws/pwsr/disable_alert Yes If the command returns without any errors, this mean that the changes have been properly applied. This can be checked by reading back the output of CHAPTER • WR-Z16 User Manual Rev. v5.0... -
Page 61: Other Functionalities
To improve legibility, the parameters can be displayed in a tree view by adding the –t flag: The user can get more information about the parameters by using the verbose flag -v: Or specifically list of the corresponding enum values using the -i e Option CHAPTER • WR-Z16 User Manual Rev. v5.0... -
Page 62: Other Cli Tools
How to report an error" on page 158). More information about each tool can be found in their respective section or simply by adding the -h flag to output the help message embedded in the execut- able. CHAPTER • WR-Z16 User Manual Rev. v5.0... -
Page 63: Timing
(1.5us < 24h after learning 3 days) even if all timing references are down. The following topics are included in this Chapter: 5.1 Multi-sources & Resiliency 5.2 General Timing Management 5.3 White Rabbit 5.4 IEEE 1588-2008 (PTPv2) 5.5 External Reference (GM) 5.6 NTP 5.7 Holdover 5.8 Miscellaneous CHAPTER • WR-Z16 User Manual... -
Page 64: Multi-Sources & Resiliency
5.1 Multi-sources & Resiliency Multi-sources & Resiliency To ensure continued operation over possible failures, the WR-Z16 incorporates an innovative system that handles multiple timing sources. It also synthesizes these timing sources into a simplified state (a.k.a Virtual Clock State) to ease the monitoring of the device and distributes a common timing information to the down layers. - Page 65 Multi-timing sources handle by FOCA policy with its two strategies: only fall- down (blue) & re-evaluation (purple) An example of the behavior is given by the scenario illustrated in the next image where the following events are shown: CHAPTER • WR-Z16 User Manual Rev. v5.0...
- Page 66 ("Grand Master (GM VCS Code)" on page 161). For a deeper understanding of the behavior of the FOCA algorithm it is recom- mend reading the section "Others" on page 168 in the appendix where more scen- arios are detailed. CHAPTER • WR-Z16 User Manual Rev. v5.0...
-
Page 67: Virtual Clock Overview
NTP, NMEA, etc. The following figure displays the overview panel of the virtual clock information when the device is using an external reference from front-panel (GM) as the act- ive source. CHAPTER • WR-Z16 User Manual Rev. v5.0... - Page 68 Code and provides a precise but simple way to identify the current timing status of the device. The complete table with all VCS codes is detailed in the Appendix, under "VCS Code" on page 161. CHAPTER • WR-Z16 User Manual Rev. v5.0...
-
Page 69: General Timing Management
PPS only needed at startup It is recommended to use this preset when the device is configured to be the Grand-Master in the timing network and is disciplined using an Atomic Clock as external reference. CHAPTER • WR-Z16 User Manual Rev. v5.0... -
Page 70: External Gnss Receiver (Gm)
PPS). This causes a jump in the time reference. To avoid this situation, the user should configure the GNSS to not out- put any PPS before locking to GNSS signals. CHAPTER • WR-Z16 User Manual Rev. v5.0... -
Page 71: Wr Slave @ Wr0 À Wr1 (Bc)
(PTP or WR) used for all network interfaces with some default settings. A specific configuration of PTP (e.g., Profile, packet rates, etc.) can then be performed under the PTPv2 configuration tab if a valid license has been detected. CHAPTER • WR-Z16 User Manual Rev. v5.0... -
Page 72: Wr Slave @ Wr0>Wr1 / Ptp Fan-Out
5.2.1.8 Custom The Custom Preset has been designed to allow unique selections for timing source and fanout settings in order to meet any kind of user needs. If the user CHAPTER • WR-Z16 User Manual Rev. v5.0... - Page 73 Set the Protocol field to determine the communication method used for that interface. The Protocol field options are DISABLED, WR, PTP, and NTP. If an interface is left as DISABLED, no timing information will be output by CHAPTER • WR-Z16 User Manual Rev. v5.0...
- Page 74 Then each port can be configured independently with: Protocol: WR, PTP, NTP, Disabled Role: Master, Slave, Auto , Survey Source Rank: [0-255], Order the timing source given the source rank pri- orities where: CHAPTER • WR-Z16 User Manual Rev. v5.0...
-
Page 75: Reference Topology
The following figure summarizes how devices can be configured with different presets to operate on a generic timing network. To improve the com- prehensibility of the reader, this reference topology has been separated in sev- eral theoretical layers: CHAPTER • WR-Z16 User Manual Rev. v5.0... - Page 76 White Rabbit network to other 3rd party devices in the cab- inet via PTP, via 10MHz/PPS (legacy devices), etc. CHAPTER • WR-Z16 User Manual Rev. v5.0...
-
Page 77: Timing Source Info
Name of the corresponding timing source. wr0, front- panel, eth1, etc.) 3.13x0.2 Type Type of timing source, each type can have slightly different state machines to properly handle its tim- ing source. HO/FR CHAPTER • WR-Z16 User Manual Rev. v5.0... - Page 78 Force BMCA decision using 1st priority (Lower values Default: 128 take precedence). 3.13x1.3 Priority2 <Integer> Manually force BMCA to select a clockID when clock Default: 128 quality is the same (Lower values take precedence). CHAPTER • WR-Z16 User Manual Rev. v5.0...
-
Page 79: White Rabbit
When the device is running as a WR Boundary Clock, this means that one of the fiber network interfaces is an active slave. The data related to how the servo dis- ciplines the internal oscillator can thus be visualized under the active servo panel. CHAPTER • WR-Z16 User Manual Rev. v5.0... -
Page 80: Port Instance
5.3.2.2 Port Instance A WR port instance is then associated to each network interface. The table dis- played in the following image provides a quick overview of the state of each inter- face. CHAPTER • WR-Z16 User Manual Rev. v5.0... - Page 81 Number of received PTP packet on this port. If the interface is currently running WR (“Port State” not “Disabled”), the user can expand (+) a specific interface to display an Advanced Overview (See the figure below): CHAPTER • WR-Z16 User Manual Rev. v5.0...
- Page 82 1.xx10.5 Rx Sync ID <Integer> (u16) Receive Sync Sequence ID. 1.xx10.5 Peer VID <Integer> (u16) VLAN ID of the connected peer. 1.xx31.xx net/<wrX>/1/clk/Q/ Clock Quality of the cor- responding WR port instance (wrX). CHAPTER • WR-Z16 User Manual Rev. v5.0...
- Page 83 To obtain more details about time properties & clock quality of a given WR port instance, the user should use gpa_ctrl tool with the - a (expert) flag or with the –A (expert & disabled) flag. CHAPTER • WR-Z16 User Manual Rev. v5.0...
-
Page 84: Ieee 1588-2008 (Ptpv2)
Table 5-2: IEEE 1588 configuration with/without license With License Without License Mode Auto, Master, Slave, Disabled Master, Slave or Disabled BMCA Enabled or Disabled Disabled Transfer mode Multicast, Unicast, or Hybrid Multicast CHAPTER • WR-Z16 User Manual Rev. v5.0... -
Page 85: Ptp License Management
The CLI tool allows to modify and save all the parameters lis- ted in "IEEE 1588 configuration with/without license" on the previous page even without license. However, they will Applied/Loaded until the PTP license is validated. CHAPTER • WR-Z16 User Manual Rev. v5.0... -
Page 86: Configuration
}. 19.xx13.14 Domain <Integer> Domain number associated to the PTP trans- [0-255] actions. Several domains can work sim- Default: 0 ultaneously. PTP profiles can restrict the value of domain number (i.e., 8275.1) CHAPTER • WR-Z16 User Manual Rev. v5.0... -
Page 87: Configuration Of Ptp Profiles
A valid license is needed to perform the configuration of PTP profiles. If your pre- sets allow a valid MASTER or SLAVE port state, then you will be able to configure your PTP profiles for each port by navigating to Configuration > IEEE 1588- 2008 (PTP). CHAPTER • WR-Z16 User Manual Rev. v5.0... - Page 88 The tables below summarize the limitation of the configuration for the different PTP profiles supported by the WR-Z16 device. Worth mentioning that some of the settings have no default value but must fit with a specific range.
- Page 89 Transport Multicast Only Multicast allowed. Mode 19.xx13.20 Announce Only 1 packet/s allowed Rate 19.xx13.21 Sync Rate Only 1 packet/s allowed 19.xx13.23 Peer Delay Only 1 packet/s allowed req Rate 19.xx13.24 PTP Times- cale CHAPTER • WR-Z16 User Manual Rev. v5.0...
- Page 90 UDP/IPv4. 19.xx13.10 Delay Mech- anism 19.xx13.14 Domain 19.xx13.11 Transport Multicast Multicast Hybrid Multicast Unicast and Mode Hybrid modes are allowed. 19.xx13.20 Announce 1/128 Rate 19.xx13.21 Sync Rate 1/128 CHAPTER • WR-Z16 User Manual Rev. v5.0...
-
Page 91: Info/Overview
"PTP information for a port interface" on the next page more details on the provided parameters). The PTP Overview page is located at Overview > Timing > IEEE-1588-2008 (PTPV2). Figure 5-16: PTP Overview Menu CHAPTER • WR-Z16 User Manual Rev. v5.0... - Page 92 Then if a specific interface is not disabled (Port State ≠ None), by clicling on the (+) a user will expand the interface to its Advanced View to get more information about the PTP exchange. The bi-directional exchanges of PTP is resumed in "IEEE CHAPTER • WR-Z16 User Manual Rev. v5.0...
- Page 93 Slave instances when a PTP exchange is com- pleted) 19.xx12.65 Rx PeerDelayResp <Integer> Number of received peer delay Packets response messages (Incre- menting for Slave instances when a PTP exchange is com- pleted) CHAPTER • WR-Z16 User Manual Rev. v5.0...
- Page 94 Slave instances when a PTP exchange is com- pleted) 19.xx12.69 Tx PeerDelayRespFUp <Integer> Number of transmitted peer Packets delay response follow up mes- sages (Incrementing for Slave instances when a PTP exchange is completed) CHAPTER • WR-Z16 User Manual Rev. v5.0...
-
Page 95: External Reference (Gm)
GM • STARTUP_ source. ONLY The user can also configure the following parameters independently from the chosen preset: Name Value Type Description 3.7110.x gm/cfg/xxx Configuration of the GM timing source (By Preset). CHAPTER • WR-Z16 User Manual Rev. v5.0... -
Page 96: Info/Overview
The GM timing source provides its own overview panel under Overview > Timing General > External Reference (GM), where the user can easily audit the con- dition of its external reference (see figure below). CHAPTER • WR-Z16 User Manual Rev. v5.0... -
Page 97: Ntp
GM or BC, to check the coherence of the timing ref- erence. 5.6.1 Configuration The WRZ-OS supports NTP over management interfaces (ethX) and fiber optics ports (wrX). NTP configuration is described in the following sections. CHAPTER • WR-Z16 User Manual Rev. v5.0... -
Page 98: Ntp Provider
NTP time is distributed over UDP and thus it requires the interface to have an IP and subnet configured on the subnet where NTP is going to be served. The NTP Stratum can be configured using the table in the previous section. CHAPTER • WR-Z16 User Manual Rev. v5.0... -
Page 99: Ntp Timing Source Configuration
NTP server status. Warns if the NTP server Status • OK cannot be reached. • NTP sync error • NTP stopped replying 3.70x5.0 Offset <Integer> Time offset between the device and the NTP reference server (in seconds). CHAPTER • WR-Z16 User Manual Rev. v5.0... -
Page 100: Stratum Levels
NTP time. Holdover The WR-Z16 can be ordered with an optional holdover oscillator (OCXO) in order to ensure an accuracy of 1.5µs even after 24 hours. If this holdover oscillator is detected, it will be automatically enabled as a timing source. - Page 101 (GPS L1 signals). A better clock can be used as reference (e.g., Atomic Clock, ePRTC, multi bands/constellations GNSS receiver) but using a clock reference with worth performance might not fulfil the provided specifications. CHAPTER • WR-Z16 User Manual Rev. v5.0...
-
Page 102: Configuration
8265.1 as third one. This means that if WR fails, the device will enter in HO until expiration and finally switch to PTP that might provide bet- ter accuracy than an expired HO. CHAPTER • WR-Z16 User Manual Rev. v5.0... -
Page 103: Info/Overview
5. ACTIVATED case to avoid triggered it. 6. EXPIRED 3.7220.0 Time Learning <Integer> Time the holdover has been in LEARNING state (in seconds) 3.7220.1 Time Holdover <Integer> Seconds elapsed since holdover activ- ation CHAPTER • WR-Z16 User Manual Rev. v5.0... -
Page 104: Miscellaneous
- PPS is only output if the active ref- erence is locked. - PPS follows the same behavior as in the legacy release (wr-zynq-os-v2.x). 3.8020.x misc/info/xxx Miscellaneous Timing inform- ation. 3.8020.1 Uptime <Integer> Time Manager uptime in seconds. (u64) CHAPTER • WR-Z16 User Manual Rev. v5.0... -
Page 105: Update Leap Seconds File
Grand-Master on the network, can also manually update this file through the Con- figuration > Misc panel: Figure 5-19: Manual Leap seconds update. Note: Updating the leap seconds file can be performed hot by apply- ing the configuration, so there is no need to reboot. CHAPTER • WR-Z16 User Manual Rev. v5.0... - Page 106 5.8 Miscellaneous BLANK PAGE. CHAPTER • WR-Z16 User Manual Rev. v5.0...
-
Page 107: Security & Authentication
CHAPTER 6 Security & Authentication The WR-Z16 incorporates several mechanisms in order to provide enhanced security to the system. TACACS+ and RADIUS are integrated to enable remote authentication for network access control through a centralized server. Additionally, the secure version of the network protocols used in the system are implemented, i.e. -
Page 108: Upload Ssh Keys
Hypertext Transfer Protocol over TLS (HTTPS) is the encapsulation of HTTP over a Transport Layer Security (TLS) secured channel, which is the primary protocol used to send data between a web browser and a website. CHAPTER • WR-Z16 User Manual Rev. v5.0... - Page 109 6.2 HTTPS The WR-Z16 includes the possibility of activating HTTPS. This can be done from the web interface by following the next steps: The options about HTTPS can be accessed under Administration > Security > HTTP/HTTPS Configuration as shown in the figure below: Figure 6-1: Security-HTTP/HTTPS menu of Web Interface.
-
Page 110: Tacacs
This section explains how to install and configure a TACACS+ on up to two serv- ers on a Linux environment where the client is a WR-Z16 device. The instructions to install and configure a TACACS+ server on an Ubuntu machine are explained in the Appendix "... -
Page 111: Tacacs+ Client Configuration
Once the server is configured, it is necessary to configure the client. In this sec- tion, the client will be configured on the WR-Z16 device. For that purpose, gpa_ ctrl is used to configure IP and secret. These parameters can be found in the... - Page 112 6.3 TACACS+ Figure 6-3: SSH connection with the WR-Z16 board Figure 6-4: tac_plus output with debug information Caution: When TACACS and RADIUS work and have been con- figured on the same client device, be careful with the order of the configuration lines in /etc/pam.d/sshd.
-
Page 113: Radius
This section will define the processes necessary to install and configure the RADIUS client on up to two servers on the WR-Z16 device. The steps to install and configure a RADIUS server on an Ubuntu machine are explained in Appendix"... -
Page 114: Radius Client Configuration
Now that everything has been configured correctly, it is possible to access the WR-Z16 board with these new passwords which have been set in the users file. In addition, the command freeradius-X can be used in order to verbose the RADIUS access. - Page 115 6.4 RADIUS Figure 6-6: SSH connection with the WR-Z16 board Figure 6-7: Freeradius failed attempt with debug information CHAPTER • WR-Z16 User Manual Rev. v5.0...
-
Page 116: Firewall
This is a typical use case where only a single IP (or a subnetwork) should be allowed to access to the management port of the device. ##First append the current rule to existing rule (overwise flush) iptables INPUT eth0 192.168.7.1 ACCEPT iptables INPUT eth0 DROP CHAPTER • WR-Z16 User Manual Rev. v5.0... - Page 117 (UART) to the device as it is easy to make an error and fully block the network access to this device. To revert the changes, the user should perform a factory reset or delete the /us- r/local/etc/iptables.rules files. CHAPTER • WR-Z16 User Manual Rev. v5.0...
- Page 118 6.5 Firewall BLANK PAGE. CHAPTER • WR-Z16 User Manual Rev. v5.0...
-
Page 119: Monitoring & Logging
CHAPTER 7 Monitoring & Logging The WR-Z16 device includes enhanced monitoring and logging tools to ease its deployment and manageability during operation. The following topics are included in this Chapter: 7.1 Syslog 7.2 SNMP 7.3 LLDP 7.4 Healthing CHAPTER •... -
Page 120: Syslog
It contains the kernel/user event logging. Systemlog In the same way as a normal Linux device, the kernel and the userspace pro- cesses send information to a central logger. Its contents can be found at CHAPTER • WR-Z16 User Manual Rev. v5.0... -
Page 121: Permanent Logs
The wrz_logdump tool is responsible for generating the logdump. The logdump is a set of compressed files that can be easily shareable, which provides all the information about the current state and log of the device. CHAPTER • WR-Z16 User Manual Rev. v5.0... -
Page 122: Configuration
The systemlog file under /var/log/systemlog Information about uboot and versions Note: The Safran support service will require the wrz_ logdump information in order to debug any issues. Please, download and attach this information when opening a support ticket. All the logging information under /var/log/ is rotated for security reasons. This prevents to use all the available memory in the device in case the log files sud- denly increase and is performed automatically when the file size exceeds 5 MB. - Page 123 6 hours in case of power cuts. 13.2000.6 Log N rotate <Integer> (i.e., Number of logdumps rotations stored in the device. Logging can also be configured via the Web GUI. Navigate to Management > Logging (see image below). CHAPTER • WR-Z16 User Manual Rev. v5.0...
-
Page 124: Snmp
/wr/etc/snmp/SEVEN-PRODUCT-MIB.txt: It contains the MIB file with all the SNMP OIDs in the device. /etc/snmp/snmpd.conf: It contains the global SNMP configuration. This file can be modified to customize the configuration. CHAPTER • WR-Z16 User Manual Rev. v5.0... - Page 125 Name of the corresponding loc- ation) ation. 13.3000.2 Contact <String> (i.e.,user- Contact information. @dom.com) 2. v1/v2: Parameters for SNMP v1 and v2. Name Value Type Description 13.3002.1 Community <String> (i.e., public) Name of the name community. CHAPTER • WR-Z16 User Manual Rev. v5.0...
- Page 126 Source mask value: By default, the localhost source is added. If no other source mask is added the device will only accept local quer- ies. Caution: The default community name is public. For security reas- ons, it is recommended to change this parameter. CHAPTER • WR-Z16 User Manual Rev. v5.0...
-
Page 127: General Configuration
To configure SNMP via the Web GUI, log in to the device and navigate to Admin- istration > SNMP. In order to configure SNMP from the CLI, the wrz_config tool must be accessed. Once it has been launched, the SNMP configuration is under Management > SNMP. CHAPTER • WR-Z16 User Manual Rev. v5.0... - Page 128 In order to create custom SNMP groups, the configuration file /us- r/share/snmp/snmpd.conf can be modified to define or modify them. Caution: SNMP configuration files customization: Safran is not responsible for any damage caused by the user while manually modi- fying the SNMP configuration files.
-
Page 129: Specific Snmp V1/V2 Configuration
Note: SNMP v3 user parameters: Only access_ view and access_ mode parameters can be directly changed. Encryption protocols are changed through change_password. CHAPTER • WR-Z16 User Manual Rev. v5.0... - Page 130 After saving the changes, the SNMP daemon must be restarted to apply them. Alternatively, net-snmp-create-v3-user tool can be used after stopping the SNMP daemon or the groups definition can be modified to create users. For that purpose, information from mapping section /us- CHAPTER • WR-Z16 User Manual Rev. v5.0...
-
Page 131: Snmp Traps
It translates the SNMP trap, classify the information with pre- defined clauses and acts accordingly to the rules defined for each SNMP trap type. Monitoring center: Monitoring software, e.g. Nagios, Icinga, etc, that handles the traps using snmptt. CHAPTER • WR-Z16 User Manual Rev. v5.0... -
Page 132: Trap Objects
Trap generated when the system completely starts, and all services are initialized. wrzShutdown: Trap generated when all services are closed before a system shut down or reboot. modOpen: Trap generated when a module or service is launched. CHAPTER • WR-Z16 User Manual Rev. v5.0... -
Page 133: Trap Configuration
Name of the com- name munity. 13.3900.2-5 NMS IP 1-4 Authentication <IP address> (i.e., 192.168.1.5 or encryption pro- 192.168.1.0/24) tocolDestination NMS IP address. 13.3900.6 Start/shutdown Enable/disable star- <Enum> tup and shutdown • Enabled traps. • Disabled CHAPTER • WR-Z16 User Manual Rev. v5.0... -
Page 134: Basic Trap Receptor Nms Configuration
SNMP traps. For that purpose, it is important grant execution per- missions to snmp_trap_test_handle.sh #!/bin/sh read host read ip vars="" while read oid val; do if [ "x$vars" = "x" ]; then vars="$oid = $val" else vars="$vars, $oid = $val" CHAPTER • WR-Z16 User Manual Rev. v5.0... -
Page 135: Lldp
-f -m all LLDP The WR-Z16 devices support the Link Layer Discovery Protocol (LLDP), which functions at the link layer (Layer 2 of OSI model) to discover neighboring devices and their capabilities. 7.3.1 Standard (IEEE 802.1AB-2005) TLVs... -
Page 136: Configuration
Other interfaces are leaved disabled. This means that if no neighbors are running a compatible LLDP agent, the LLDP daemons of this device will be empty. The information gathered by each port running LLDP is then structured into three categories: CHAPTER • WR-Z16 User Manual Rev. v5.0... - Page 137 20.xx11.10 Firmware Version <String> (i.e., v3.2.1-RC5) Firmware version of the cor- responding WRZ- OS (only) peer. 20.xx11.11 Hardware Version <String> (i.e., WR_ZEN-v3.1) Hardware version of the cor- responding WRZ- OS (only) peer. CHAPTER • WR-Z16 User Manual Rev. v5.0...
- Page 138 Serial Number <String> (i.e., AX17460000223) SFP serial number. 20.xx22.4 Transmission <Decimal> (i.e., 1490.000000) SFP transmission Wavelength wavelength. 20.xx22.5 DOM Availability <Boolean> (i.e., Yes) SFP DOM present flag. 20.xx22.6 Temperature <Decimal> (i.e., 0.000000) SFP temperature. CHAPTER • WR-Z16 User Manual Rev. v5.0...
-
Page 139: Healthing
The associated parameters can be accessed through the Web GUI or the com- mand line. The Web GUI has three Healthing pages, located under Overview > Healthing. The Healthing System Overview page provides all necessary information on tem- perature, computer usage, etc.: CHAPTER • WR-Z16 User Manual Rev. v5.0... - Page 140 7.4 Healthing Figure 7-5: Healthing System Overview The Healthing Power Overview page contains all necessary information related to the status and functionality of the power supplies: Figure 7-6: Healthing Power Overview CHAPTER • WR-Z16 User Manual Rev. v5.0...
- Page 141 2.1001.32 CPU load 5 <Decimal> (i.e., 0.054199) Average CPU load during the last 5 minutes. 2.1001.33 CPU load 15 <Decimal> (i.e., 0.054199) Average CPU load during the last 15 minutes. CHAPTER • WR-Z16 User Manual Rev. v5.0...
- Page 142 The devices incorporate redundant power supplies and fans. In order to ensure their proper behavior, their information can be checked too in the web GUI under Healthing or through the command line: CHAPTER • WR-Z16 User Manual Rev. v5.0...
-
Page 143: Configuration
<Enum> 0. OK 1. Unplugged 2. Stopped I2C Status of the Error back ventilator of fanX module. 7.4.2 Configuration There are a few parameters that can be configured. In the CLI, these parameters are configured via the Healthing module: CHAPTER • WR-Z16 User Manual Rev. v5.0... - Page 144 In the Web GUI, the healthing settings for fans and power supply modules are found under Management > System Alerts: Figure 7-9: Healthing Web GUI settings The healthing, fans and power supply configuration parameters can be found in the following table: CHAPTER • WR-Z16 User Manual Rev. v5.0...
- Page 145 - Yes alerts. 0.9210.5 Fan 0 disable <Enum> Disable fan 0 alert - No alerts. - Yes 0.9220.5 Fan 1 disable <Enum> Disable fan 1 alert - No alerts. - Yes CHAPTER • WR-Z16 User Manual Rev. v5.0...
- Page 146 7.4 Healthing BLANK PAGE. CHAPTER • WR-Z16 User Manual Rev. v5.0...
-
Page 147: Device Maintenance
CHAPTER 8 Device Maintenance The following topics are included in this Chapter: 8.1 Licenses 8.2 Firmware Update 8.3 Recovery Mode 8.4 Factory Config Mode 8.5 Failsafe Mode CHAPTER • WR-Z16 User Manual... -
Page 148: Licenses
Buy a new license. Install a new license. Check if license has been activated. Perform maintenance on a license. 8.1.1 List of related Licenses The available feature licenses related to WR-Z16 are: Feature Group Description Name ptp_pro- Unlock the configuration of different options to enable other profiles file_cfg than the default such as the telecom profile ITU-T G.8265.1 and power... - Page 149 Figure 8-1: Checking available licenses. Each possible license available for the WR-Z16 devices is represented by a single box where its status is summarized by the color of the box: Red: License is not available (See Figure 8:1 - Checking available licenses.).
-
Page 150: Order Licenses
Local Licenses Management In order to perform local licenses management by directly uploading licenses files to the device the user first needs to login to the license portal by clicking on the following link: https://flex1667.flexnetoperations.com/flexnet/operationsportal/logon.do CHAPTER • WR-Z16 User Manual Rev. v5.0... -
Page 151: Map A Feature To A Device
At this point the license(s) is(are) associated but still not generated yet. By clicking on the Action > Download Capability Response a license file (.bin) will be automatically generated and downloaded. After refreshing the screen, the corresponding Status should be updated to License generated. CHAPTER • WR-Z16 User Manual Rev. v5.0... -
Page 152: Create A New Device
Load local license file in the device In order to load the generated license file, the user first needs to access to the Management > Licenses within the web interface of the device. CHAPTER • WR-Z16 User Manual Rev. v5.0... -
Page 153: Remove Local License From Device
Select the quantity of the corresponding license to remove and Click Save. Review that the Status of the licenses to remove is Waiting for con- firmation. Then click on Action > Download Capability Response. CHAPTER • WR-Z16 User Manual Rev. v5.0... -
Page 154: License Server
(e.g., an offline/backup device will not consume any licenses until it is connected to the network). In order to get more information about this alternative, contact Safran for assist- ance on the solution that best fits the topology and help through its setup. -
Page 155: Firmware Update
8.2.1 Hardware version and firmware The HW version is displayed on the dashboard page in the Versions overview panel. The device shown below is a WR-Z16 that mounts a Z16v4.0 as main board. Figure 8-4: HW version displayed in dashboard. -
Page 156: Using Web Interface
If an incompatibility (figure below) has been detected, the user should NOT continue with the flashing procedure except if the support team has con- firmed that this is the way to fix a specific problem. CHAPTER • WR-Z16 User Manual Rev. v5.0... -
Page 157: Using Ssh/Scp
SD card and will enter itself into a recovery mode. This recovery mode consists of a minimal Linux stored into internal memory of the equipment that allows to: CHAPTER • WR-Z16 User Manual Rev. v5.0... - Page 158 4. Restore: Remove any customization and restore the device to its default values (WARNING: Any specific network settings will be removed). CHAPTER • WR-Z16 User Manual Rev. v5.0...
-
Page 159: Manual Recovery Mode
Factory Config Mode In case a miss configuration of the device invalids its correct login, one can manu- ally reset the configuration to default factory value by using one of the following methods. CHAPTER • WR-Z16 User Manual Rev. v5.0... -
Page 160: Reset Via Front Panel Controls
U-Boot 2015.04-wr7s-v2.10-z16 (Apr 26 2022 - 10:51:49) Z16v4 WR_Z16-v4.1-S01_183 Environment found in flash CTRL button is pressed! ....Setting reset factory boot mode To complete the factory reset, hold the Reset button for 20s. CHAPTER • WR-Z16 User Manual Rev. v5.0... -
Page 161: Failsafe Mode
Factory reset vs. Failsafe mode: If the device initialization is blocked due to a custom script, it might be easier to directly perform a factory reset even if this means that the device will lose all its con- figuration. CHAPTER • WR-Z16 User Manual Rev. v5.0... - Page 162 8.5 Failsafe Mode BLANK PAGE. CHAPTER • WR-Z16 User Manual Rev. v5.0...
-
Page 163: Appendix
9.3 Technical Support 9.4 VCS Code 9.5 Persistent Custom Files 9.6 Low Jitter Setup 9.7 TACACS+ and RADIUS server configuration 9.8 List of supported SFPs 9.9 List of Tables 9.10 List of Images 9.11 Document Revision History • APPENDIX WR-Z16 User Manual... -
Page 164: Acronyms
Pulse Per Second Power Supply Round Trip Time Small Form-factor Pluggable Transceiver for fiber link Secure Shell SNMP Simple Network Management Protocol SyncE Synchronous Ethernet International Atomic Time (Temps Atomique International) Time of Day Coordinated Universal Time White Rabbit WR-Z16 User Manual... -
Page 165: Troubleshooting
White Rabbit Zynq based (Z16, ZEN, LEN+) Operative System Troubleshooting This section intends to help the user understand how to identify an issue in your WR-Z16 device, as well as giving some guidance to figure out the cause of the problem. 9.2.1... -
Page 166: Health General Status
The WR-Z16 web interface You can access the WR-Z16 graphical interface by setting the device an IP and copying its address into the browser's URL bar. General ports, mode and other configuration can be consulted or changed in the web. -
Page 167: Virtual State Clock Code Error
APPENDIX $ snmpwalk -v2c -c public <WR-Z16 IP> 9.2.3 Virtual State Clock Code Error Virtual State Clock (VSC) Code Errors are codes that refer to different virtual clock states for debugging purposes. The format for these codes is the following one: VSC-XXXXX These codes provide information on the synchronization status in the device. -
Page 168: How To Report An Error
These are the steps that should be followed in case a problem happens. 2. If the device is alive and accessible, please go to the WR-Z16’s web inter- face -> Management -> Download device’s log dump. -
Page 169: Rsyslog Template To Improve Remote Login
Severity="info") local0.* @<rsyslog server1 IP> local0.* @<rsyslog server2 IP> 9.2.7 Warranty The WR-Z16 device is fully factory tested and warranted against manufacturing defects for a period of one year. Failure of the WRZ device due to installation WR-Z16 User Manual... -
Page 170: Technical Support
To request technical support for your WR- Z16 unit, please go to the "Timing Support" page of the Safran website, where you can not only submit a support request, but also find additional technical documentation. Phone support is available during regular office hours under the telephone num- bers listed below. -
Page 171: Vcs Code
Additional regional contact information can be found on the Contact page of the Safran Trusted 4D website. VCS Code The Virtual Clock Status Code has been created to easily identify the timing status of a device and easily troubleshoot in case it has failed. The VCS code are also used by the FOCA algorithm to detect a failure within a timing source and switch to the next available one. - Page 172 GM can not guarantee the UTC-TAI convertion even if the currently leap seconds used is still valid. If gm/cfg/leapsec_file_ ignore option is active, this status will never occur and will be noted as VSC-10000. WR-Z16 User Manual...
-
Page 173: Boundary Clock (Bc Vcs Code)
WR and the upstream device provide all the inform- ation properly VSC- Locked BC: PTP @ The BC clock is 20001 ifname locked using PTP and the upstream device provide all the inform- ation properly WR-Z16 User Manual... - Page 174 No WR/PTP con- Internal The BC clock 20303 nected reference Oscillator has link with upstream device but does not prop- erly receive any PTP announce mes- sage (or any other mes- sages). This include the servo_state- e=NOT_ UPDATED WR-Z16 User Manual...
- Page 175 VSC- CRITICAL Upstream device Passive The GM is not 22320 in Free-Running WR/PTP @ available in this ifname network. This passive timing source can become active only if no bet- ter time source is available. WR-Z16 User Manual...
- Page 176 VSC- CHANGEOVER Upstream GM in BC: Hol- GM announce 21201 Free-Running dover itself to be now in FR, if we have an active HO we should exit through this state and fail to the HO timing source WR-Z16 User Manual...
- Page 177 BC is using its ifname Holdover. Accuracy will decrease over time and when the HO expir- ation time has passed, the upper BC will be announced as FR (the tim- ing will then be placed into a critical state). WR-Z16 User Manual...
-
Page 178: Others
VSC- Timing For ports, "Ready" 09000 source is means that the link is ready up and some announce messages sent by a master has been received. For GM, "Ready" means that 10M/PPS has been detected prop- erly WR-Z16 User Manual... - Page 179 Iddle VSC- Holdover Passive The Holdover timing 92400 Ready source has been learn- ing in background from the active timing source. It is now ready to being triggered. VSC- Holdover Passive Transitional state 92401 Ready WR-Z16 User Manual...
-
Page 180: Persistent Custom Files
This allow to store per- sistent files by placing them into the second ext4 partition on the SD drive moun- ted as /media/data which will be then mounted at next boot into the operating system directories: WR-Z16 User Manual... -
Page 181: Low Jitter Setup
The user must comply with the warmup time of the external reference that is using. (For the OCXO that was used for the WR-Z16 performance data, a 24 hour warmup period was kept). -
Page 182: Tacacs+ And Radius Server Configuration
We have not measured the noise of the external reference, but only the noise that is linearly added by the WR-Z16 as the 10 MHz time signal is consumed and regenerated. For more information on your unit's documented jitter per- formance, see the product data sheet. -
Page 183: Radius Server Installation And Configuration
(which serves to accept or reject clients depending on their IP address). Note: If your WR-Z16 unit has been used as the client, the password must be configured for the root user. Registration of new users is not allowed in this device so root is the only existing user. - Page 184 Cleartext-Password := "password" Note: If your WR-Z16 unit has been used as the client, the password must be configured for the root user. Registration of new users is not allowed in this device so root is the only existing user.
-
Page 185: List Of Supported Sfps
<-31 120km 1490nm-TX/1550nm-RX 120km List of Tables Table 1-1: Options and Licenses available in WR-Z16 Table 2-1: Front Panel Legend Table 2-2: RearPanel Legend Table 2-3: Status LED behavior Table 2-4: Timing Output LED behavior Table 2-5: Timing Input LED behavior... -
Page 186: List Of Images
List of Images Figure 1-1: Intra-datacenter WR network topology Figure 2-1: WR-Z16 front panel Figure 2-2: Rear panel of the WR-Z16 Figure 3-1: Device manager. New serial port detected. Figure 3-2: Putty configuration for serial port connection. Figure 3-3: Login page of the web interface. -
Page 187: Document Revision History
APPENDIX Figure 6-2: TACACS setup for verifying the installation. Figure 6-3: SSH connection with the WR-Z16 board Figure 6-4: tac_plus output with debug information Figure 6-5: Set-up RADIUS for verifying the installation Figure 6-6: SSH connection with the WR-Z16 board Figure 6-7: Freeradius failed attempt with debug information Figure 7-1: Logging configuration parameters through CLI. - Page 188 LEDs section, and added explanation of new warning message 2022 due to firmware/hardware upgrade incompatibility. Switch to Orolia branding. V4.0 Updated firmware update information 2023 V5.0 Documented new REST-API and updated Web GUI functionality. 17-July Updated PTP profile information. Switch to Safran branding. 2023 WR-Z16 User Manual...
-
Page 189: Index
Custom Preset Custom Profile Healthing Holdover 3, 42, 53-54, 66, 71, 90, Default HTTP Dimension HTTPS IEEE 1588-2008 Environmental Installation External Reference Leap second 73, Factory Config Factory Config Mode License Failsafe Licenses Failsafe Mod LLDP • INDEX WR-Z16 User Manual... - Page 190 Timing Input Product Specifications Timing Management Timing Output PTPv2 Timing Sources Troubleshooting RADIUS Rear panel UART Recovery Mode Update Regulatory Compliance Upgrade Remote logs Resiliency RoHS Virtual Clock Safety Web GUI instructions White Rabbit 2, symbols Symbols WRZ-OS WR-Z16 User Manual...
Need help?
Do you have a question about the WR-Z16 and is the answer not in the manual?
Questions and answers