Table of Contents
Advertisement
Advertisement
Table of Contents

Related Manuals for L-Acoustics K1 REFERENCE WST SYSTEM


Summary of Contents for L-Acoustics K1 REFERENCE WST SYSTEM
- Page 1 ® ® ® ® REFERENCE WS REFERENCE WST T T T REFERENCE WS REFERENCE WS SYSTEM SYSTEM SYSTEM SYSTEM R R R R IGGING PROCEDURES IGGING PROCEDURES IGGING PROCEDURES IGGING PROCEDURES VERSION 2 VERSION 2 VERSION 2 VERSION 2..0 0 0 0 w w w .
- Page 2 w w w . l - a c o u s t i c s . c o m...
-
Page 3: Safety Warnings
2. Heed all safety warnings 3. Follow all instructions ® 4. The user should never incorporate equipment or accessories not approved by L-ACOUSTICS Personnel qualification Installation and set-up should only be carried out by qualified personnel that are familiar with the rigging techniques and safety recommendations outlined in this manual. - Page 4 11. Local regulations Some countries require higher Ultimate Strength Safety Factors and specific rigging approvals. It is the user’s ® responsibility to ensure that any overhead suspension of L-ACOUSTICS systems has been made in accordance with all applicable local regulations.
-
Page 5: Ec Declaration Of Conformity
EC declaration of conformity ® L-ACOUSTICS 13 rue Levacher Cintrat Parc de la Fontaine de Jouvence 91462 Marcoussis Cedex France States that the following products: Flying structure, K1-BUMP Plate, K1-DELTA Rigging accessory, KARA-DOWNK1 Cart, K1-CHARIOT Flight-case, K1BUMP-FLIGHT Are in conformity with the provisions of:... -
Page 6: Table Of Contents
CONTENTS SAFETY WARNINGS Symbol description ............................1 Important safety instructions..........................1 EC declaration of conformity ..........................3 CONTENTS INTRODUCTION ® Welcome to L-ACOUSTICS ..........................5 Symbol description ............................5 Unpacking .................................5 Web links ................................5 K1 SYSTEM K1 RIGGING COMPONENTS K1-BUMP flying structure, K1-DELTA plate.......................9 KARA-DOWNK1 rigging accessory........................10 K1BUMP-FLIGHT case............................11... -
Page 7: Introduction
Unpacking ® Carefully open the shipping carton and check the product for any noticeable damage. Each L-ACOUSTICS product is tested and inspected before leaving the factory and should arrive in perfect condition. If found to be damaged, notify the shipping company or the distributor immediately. Only the consignee may initiate a claim with the carrier for damage incurred during shipping. -
Page 8: K1 System
SOUNDVISION Acoustical and mechanical modeling software ® Each system configuration should first be modeled using L-ACOUSTICS SOUNDVISION Software [3.4] to verify the mechanical conformity of the system. Please refer to the SOUNDVISION Help menu to obtain a detailed description on software use. - Page 9 K1-DELTA LA-RAK Four K1-SB enclosures K1-BUMP K1-LASERMOUNT Eight K1 enclosures KARA-DOWNK1 ® Six KARA enclosures SB28 Figure 1: K1 system components (part 1) w w w . l - a c o u s t i c s . c o m K1_RM_EN_2-0 7 7 7 7...
- Page 10 ® ® ® ® reference wst reference wst reference wst reference wst system system system system RIGGING PROCEDURES RIGGING PROCEDURES RIGGING PROCEDURES RIGGING PROCEDURES VERSION 2.0 LA NETWORK MANAGER SOUNDVISION K1BUMP-FLIGHT K1-COV K1-SBCOV K1-CHARIOTCOV K1-PLA K1-CHARIOT Figure 2: K1 system components (part 2) w w w .
-
Page 11: K1 Rigging Components
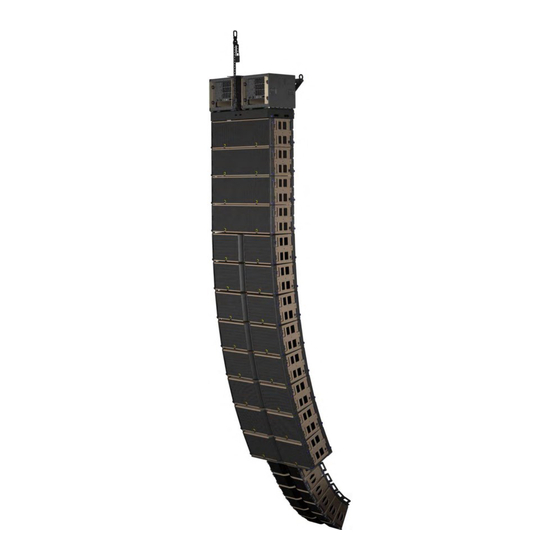
K1 RIGGING COMPONENTS K1-BUMP flying structure, K1-DELTA plate ® The L-ACOUSTICS K1-BUMP flying structure and K1-DELTA plate have been exclusively designed to fly the K1 and/or K1-SB enclosures as a variable-curvature, vertical line source array. The K1-DELTA plate is for azimuth angle setting [9.5]. -
Page 12: Kara-Downk1 Rigging Accessory
RIGGING PROCEDURES VERSION 2.0 KARA-DOWNK1 rigging accessory ® ® The L-ACOUSTICS KARA-DOWNK1 rigging accessory has been exclusively designed to attach KARA enclosures as a downfill array for K1. The KARA-DOWNK1 package is composed of the following elements: • One main frame. -
Page 13: K1Bump-Flight Case
K1BUMP-FLIGHT case ® The L-ACOUSTICS K1BUMP-FLIGHT case has been exclusively designed to transport the K1-BUMP flying structure. The K1BUMP-FLIGHT is composed of the following elements (see also Figure 5): • One wheeled bottom tray. • Two compartments. • One removable tray. -
Page 14: Installation
® ® ® ® reference wst reference wst reference wst reference wst system system system system RIGGING PROCEDURES RIGGING PROCEDURES RIGGING PROCEDURES RIGGING PROCEDURES VERSION 2.0 6 6 6 6 INSTALLATION INSTALLATION INSTALLATION INSTALLATION K1-BUMP preparation and LA-RAK rigging 6.1.1 K1-BUMP preparation All along the procedure: •... - Page 15 Check if the four shackles are well secured to the central bar. If necessary, attach the adjustable sling to the front external shackle [9.3]. If necessary, attach the K1-DELTA to the rear external shackle [9.5]. Figure 7: Attaching the adjustable sling and the K1-DELTA w w w .
-
Page 16: La-Rak Rigging
® ® ® ® reference wst reference wst reference wst reference wst system system system system RIGGING PROCEDURES RIGGING PROCEDURES RIGGING PROCEDURES RIGGING PROCEDURES VERSION 2.0 6.1.2 LA-RAK rigging It is possible to rig up to four LA-RAK touring racks to the K1-BUMP flying structure as it is described below. Before applying this procedure, the K1-BUMP must have been prepared as described in [6.1.1]. - Page 17 Secure the LA-RAK to the K1-BUMP : a. Turn a spring-loaded safety and slide in the coupling bar along the rails until the safety has returned to locking position (a click is heard). b. Repeat for the second coupling bar. REAR identification plate Figure 9: Rigging a first LA-RAK to the K1-BUMP If necessary, install a second LA-RAK onto the second 2-rail template by repeating steps 1 to 3.
- Page 18 ® ® ® ® reference wst reference wst reference wst reference wst system system system system RIGGING PROCEDURES RIGGING PROCEDURES RIGGING PROCEDURES RIGGING PROCEDURES VERSION 2.0 If necessary, install a third and a fourth LA-RAK onto the first ones and secure each one by repeating steps 1 to The LA-RAK touring racks must be arranged so as to properly balance the centre of gravity of the K1-BUMP.
- Page 19 Once all LA-RAK are installed (between 1 and 4), slide the rack stabilizer along one or two LA-RAK rails until it locks (one rail for 1 or 3 LA-RAK, two rails for 2 or 4 LA-RAK). Figure 12: Installing the rack stabilizer (chains not represented for visibility purposes) Screw in the safety screw and place the front motor chain into the groove of the rack stabilizer Figure 13: Securing the rack stabilizer and the front motor chain w w w .
- Page 20 ® ® ® ® reference wst reference wst reference wst reference wst system system system system RIGGING PROCEDURES RIGGING PROCEDURES RIGGING PROCEDURES RIGGING PROCEDURES VERSION 2.0 When the final number of LA-RAK is 1 or 3, place the front motor chain and a rubber molding on the external side of the rack stabilizer (see Figure 14).
-
Page 21: Flying A Vertical Array By Using The Tower Method
The TOWER method consists in building the array by successively adding 4-enclosure blocks. Each block, called ® TOWER, ships onto an L-ACOUSTICS K1-CHARIOT cart. The fully integrated rigging system on K1 and K1-SB allows assembling the enclosures and K1-BUMP with no need for any external fastening accessory. - Page 22 ® ® ® ® reference wst reference wst reference wst reference wst system system system system RIGGING PROCEDURES RIGGING PROCEDURES RIGGING PROCEDURES RIGGING PROCEDURES VERSION 2.0 Select the 0° angle for both angle arms on top of TOWER#1: remove the R-BLP from the shipping location, hold it facing to the 0°...
- Page 23 REAR identification plate Figure 16: Attaching K1-BUMP to TOWER#1 (motor hooks not represented) Verify that each enclosure of TOWER#1 is attached to the enclosure above and (if necessary) pre-select the angles as described below (see also Figure 17): Ensure that both rear and angle arms are attached to the enclosure above. ALWAYS check that all BLP are attached between enclosures in the TOWER.
- Page 24 ® ® ® ® reference wst reference wst reference wst reference wst system system system system RIGGING PROCEDURES RIGGING PROCEDURES RIGGING PROCEDURES RIGGING PROCEDURES VERSION 2.0 NO yellow sticker on rear arm Yellow sticker on latch Figure 17: Verifying attachment and pre-selecting the angles w w w .
- Page 25 On both sides of each enclosure (except for the bottom one) select the “fix” setting by pressing the angle locking pushbutton. Angle locking pushbutton Figure 18: Selecting the “fix’’ setting w w w . l - a c o u s t i c s . c o m K1_RM_EN_2-0...
- Page 26 ® ® ® ® reference wst reference wst reference wst reference wst system system system system RIGGING PROCEDURES RIGGING PROCEDURES RIGGING PROCEDURES RIGGING PROCEDURES VERSION 2.0 Raise the TOWER#1 until the K1-CHARIOT wheels reach 0.3 m/1 ft eight. Note: As the array is raised all angle latches should subsequently take their locking position and a “shlack” noise should be heard.
- Page 27 11. Raise the TOWER#1 until the bottom enclosure reaches a height of more than 2 m/6.5 ft. 12. Place the TOWER#2 beneath the TOWER#1. 13. Verify attachment and pre-select the angles for the TOWER#2 by repeating step 7. Also pre-select the angle for the top enclosure.
- Page 28 ® ® ® ® reference wst reference wst reference wst reference wst system system system system RIGGING PROCEDURES RIGGING PROCEDURES RIGGING PROCEDURES RIGGING PROCEDURES VERSION 2.0 15. Select the “fix” setting on the bottom enclosure of TOWER#1 and all enclosures of TOWER#2 except on the bottom one (see step 8).
- Page 29 17. Attach the rear rigging points between TOWER#1 and TOWER#2 as follows: a. Arrange the K1-CHARIOT front wheels towards interior as it is shown in Figure 22. This operation will avoid instability when the wheels are in contact with the ground. WARNING b.
-
Page 30: Array Removal
® ® ® ® reference wst reference wst reference wst reference wst system system system system RIGGING PROCEDURES RIGGING PROCEDURES RIGGING PROCEDURES RIGGING PROCEDURES VERSION 2.0 18. Raise the array until the K1-CHARIOT wheels reach 0.3 m/1 ft eight. 19. Remove the K1-CHARIOT from TOWER#2 by repeating step 10. 20. - Page 31 Detach the rear rigging points between TOWER#1 and TOWER#2 as described below: a. Arrange both K1-CHARIOT front wheels towards interior as it is shown in Figure 24. This operation will avoid instability when the wheels are in contact with the ground. WARNING b.
- Page 32 ® ® ® ® reference wst reference wst reference wst reference wst system system system system RIGGING PROCEDURES RIGGING PROCEDURES RIGGING PROCEDURES RIGGING PROCEDURES VERSION 2.0 With 3 people (one manipulating the hoist controller and two on both sides of TOWER#2 grabbing handles to prevent it from swinging frontward), raise the array until TOWER#2 is hinging from its front rigging points.
- Page 33 Lower the array until the K1-CHARIOT four wheels are laid on the ground. Stop lowering the array at the exact moment when all four bottom enclosure front angles have collapsed. WARNING Detach the front rigging points between enclosures #4 and #5 as described below: On both sides of enclosure#4, remove the front top R-BLP.
- Page 34 ® ® ® ® reference wst reference wst reference wst reference wst system system system system RIGGING PROCEDURES RIGGING PROCEDURES RIGGING PROCEDURES RIGGING PROCEDURES VERSION 2.0 14. Lower TOWER#1 until the K1-CHARIOT four wheels are laid on the ground. Stop lowering the array at the exact moment when all four bottom enclosure front angles have collapsed.
- Page 35 17. On both sides of the top enclosure remove the front top R-BLP (the angle arm should automatically slide in) and put it in its storage location (the angle arm is locked in shipping position). Figure 28: Preparing TOWER#1 for shipping w w w .
- Page 36 ® ® ® ® reference wst reference wst reference wst reference wst system system system system RIGGING PROCEDURES RIGGING PROCEDURES RIGGING PROCEDURES RIGGING PROCEDURES VERSION 2.0 18. Remove the TOWER#1 from the rigging location. 19. Insert the four R-BLP in their shipping locations on the K1-BUMP main frame. Note: These locations are located inside or outside the frame.
-
Page 37: Flying A Vertical Array By Using The Caterpillar Method
Any system must be modeled before installation so as to ensure acoustical and mechanical conformity. This can be ® done using L-ACOUSTICS SOUNDVISION Software [3.4] which will assist the user to: • Determine the number of required K1 and/or K1-SB enclosures. - Page 38 ® ® ® ® reference wst reference wst reference wst reference wst system system system system RIGGING PROCEDURES RIGGING PROCEDURES RIGGING PROCEDURES RIGGING PROCEDURES VERSION 2.0 On both sides of each enclosure ensure that the ‘‘variable’’ setting is selected by pulling on the angle unlocking latch.
- Page 39 On both sides of each enclosure, pre-select the angle: hold a R-BLP facing to the desired angle hole, slide out the angle arm until the R-BLP enters and locks (see Figure 33). Note: Select the 0° angle for the enclosure#1 (to align with the K1-BUMP site angle).
- Page 40 ® ® ® ® reference wst reference wst reference wst reference wst system system system system RIGGING PROCEDURES RIGGING PROCEDURES RIGGING PROCEDURES RIGGING PROCEDURES VERSION 2.0 Remove both S-BLP (straight ball-locking pin) from each K1-PLA by pulling on the lanyards. Figure 35: Removing S-BLP from K1-PLA 10.
- Page 41 12. Raise the array until enclosure#2 is flown (the K1-PLA should separate from enclosure#2). Have on person holding the last enclosure to prevent array rough movements. WARNING 13. With 2 people (one on each side) lift the front of enclosure#2 and attach both angle arm oblong holes to the enclosure#1 front rigging points (use two R-BLP).
- Page 42 ® ® ® ® reference wst reference wst reference wst reference wst system system system system RIGGING PROCEDURES RIGGING PROCEDURES RIGGING PROCEDURES RIGGING PROCEDURES VERSION 2.0 14. On both sides of enclosure#1, select the ‘‘fix’’ setting by pressing the angle locking pushbutton. Angle locking pushbutton Enclosure #1...
-
Page 43: Array Removal
6.3.3 Array removal All along the disassembling procedure: • Strictly follow the sequence of the successive steps. • Ensure that each BLP is fully inserted by pulling on it. • Have 3 people working (one operating the hoist controller and one on each side of the WARNING array) while raising or lowering the array so as to prevent it from swinging. - Page 44 ® ® ® ® reference wst reference wst reference wst reference wst system system system system RIGGING PROCEDURES RIGGING PROCEDURES RIGGING PROCEDURES RIGGING PROCEDURES VERSION 2.0 On both sides of the first four enclosures, select the ‘‘variable’’ setting by pulling on the angle unlocking latch until a click is heard.
- Page 45 Land the first four bottom enclosures as described below: With 2 people (one on each side) lift the front of the bottom enclosure. Pull both front bottom R-BLP of the enclosure (or bumper) above and put them back in their storage locations.
- Page 46 ® ® ® ® reference wst reference wst reference wst reference wst system system system system RIGGING PROCEDURES RIGGING PROCEDURES RIGGING PROCEDURES RIGGING PROCEDURES VERSION 2.0 On both sides of the four landed enclosures, remove the angle R-BLP, slide in the angle arm, and put the R-BLP into its storage location: the angle arm is locked in shipping position.
- Page 47 Repeat steps 4 to 7 until all enclosures composing the array are on the ground. Remove all rear R-BLP between K1-BUMP and all enclosures (and put them in their shipping locations) and pull back the rear arms (they should lock back into the enclosures and a yellow sticker should be visible on each one). Figure 43: Detaching rear rigging points between all enclosures (including K1-BUMP) 10.
-
Page 48: Rigging A Kara Downfill Array To The K1 Array
Modeling and safety Any system must be modeled before installation so as to ensure acoustical and mechanical conformity. This can be ® done using L-ACOUSTICS SOUNDVISION Software [3.4] which will assist the user to: • Determine the number of required KARA enclosures. - Page 49 Check the inter-enclosure connections in ARRAY#1 (repeat for each side): a. For both front connecting points, verify that the front arm is open and locked to 2 KARA by 2 R-BLP inserted in yellow link holes. b. For both rear connecting points, verify that the angle arm cursor is aligned with the 0° angle value and locked to 2 KARA by 2 R-BLP, the upper one inserted into a yellow link hole and the bottom one inserted into angle hole 0°/2°/4°.
- Page 50 ® ® ® ® reference wst reference wst reference wst reference wst system system system system RIGGING PROCEDURES RIGGING PROCEDURES RIGGING PROCEDURES RIGGING PROCEDURES VERSION 2.0 Attach a KARA-DOWNK1 on top of Short stud Long stud ARRAY#1 as follows: Remove the 4 R-BLP from the KARA-DOWNK1.
- Page 51 With 2 people working simultaneously on each side of the array, connect the front rigging points between KARA-DOWNK1 and K1 as follows: a. Remove the front bottom R-BLP from the bottom K1. b. Rotate the KARA-DOWNK1 upwards so as to align the front rigging point with the K1.
- Page 52 ® ® ® ® reference wst reference wst reference wst reference wst system system system system RIGGING PROCEDURES RIGGING PROCEDURES RIGGING PROCEDURES RIGGING PROCEDURES VERSION 2.0 Raise the array to a height for which the angle arms of ARRAY#1 are comfortably reachable. 10.
- Page 53 15. Connect both front rigging points between ARRAY#1 and ARRAY#2 as follows: a. Slide both KARA#4 front arms up and align them with the KARA#3 bottom front rigging points. b. On KARA#3, remove both front bottom R-BLP from the storage holes and secure by re-inserting them into the bottom yellow link holes.
-
Page 54: Array Removal
® ® ® ® reference wst reference wst reference wst reference wst system system system system RIGGING PROCEDURES RIGGING PROCEDURES RIGGING PROCEDURES RIGGING PROCEDURES VERSION 2.0 6.4.3 Array removal All along the procedure: STRICTLY follow the sequence of the successive steps. SYSTEMATICALLY ensure that each BLP is fully inserted. - Page 55 Place an empty KARA flight-case at the rigging location, remove the lid, and place the tray beneath ARRAY#2. Pay attention to the tray position: both inner slopes must be inclined upwards from front to rear (see Figure 55). WARNING Inner slopes Empty tray Tray supporting a 3-KARA array Figure 55: Recommended flight-case for KARA...
- Page 56 ® ® ® ® reference wst reference wst reference wst reference wst system system system system RIGGING PROCEDURES RIGGING PROCEDURES RIGGING PROCEDURES RIGGING PROCEDURES VERSION 2.0 Lower the array until ARRAY#2 is totally placed in the tray and the front rigging points between ARRAY#2 and ARRAY#1 are in contact.
- Page 57 12. With 2 people working simultaneously on each side of ARRAY#1, disconnect the rear rigging points between KARA#1 and KARA#2 & 3 as follows: a. Grab the back handle of KARA#2 and remove the rear bottom link R-BLP from KARA#1. b.
- Page 58 ® ® ® ® reference wst reference wst reference wst reference wst system system system system RIGGING PROCEDURES RIGGING PROCEDURES RIGGING PROCEDURES RIGGING PROCEDURES VERSION 2.0 14. Disconnect the rear rigging points between the KARA-DOWNK1 and the K1 as follows: a.
- Page 59 17. Set ARRAY#1 for transport as follows: On each side of KARA#1, remove the front top link R-BLP, slide the front arm up, rotate down, and secure by re-inserting the R-BLP into the top storage hole. On each side of KARA#1, remove the rear top angle R-BLP, slide the angle arm so as to align the cursor with the storage position, and secure by re-inserting the R-BLP into the top storage hole.
-
Page 60: Care And Maintenance
The replacement kits (KR) available for the customer are listed in Table 2. ® Service and repair work for any other part must be carried out by an L-ACOUSTICS authorized representative. Otherwise, the customer may be exposed to dangerous situations and the warranty will no longer apply. -
Page 61: Specifications
The M6 notation refers to the European standard (see applicable external documentation). ® Installation safety limits are specified in SOUNDVISION Software which is designed to help with L-ACOUSTICS product implementation. w w w . l - a c o u s t i c s . c o m... - Page 62 Maximum of 6 KARA enclosures per KARA-DOWNK1. Material Polyester powder-coated steel. ® Installation safety limits are specified in SOUNDVISION Software which is designed to help with L-ACOUSTICS product implementation. Reference K1-CHARIOT Dimensions (L x H x D) 1441.5 x 279.7 x 601.5 mm / 56.7 x 11 x 23.7 inch...
-
Page 63: Appendix
A support plate has been integrated inside the K1-BUMP main frame for remote inclinometer sensor mounting (see ® ® Figure 63). Two sensor models are supported: TEQSAS LAP-TEQ (part of the L-ACOUSTICS TECH TOOLCASE, ® refer to the TECH TOOLCASE Product spec sheet [3.4]) and SSE ProSight. -
Page 64: Rigging And Safety Requirements
® ® ® ® reference wst reference wst reference wst reference wst system system system system RIGGING PROCEDURES RIGGING PROCEDURES RIGGING PROCEDURES RIGGING PROCEDURES VERSION 2.0 Rigging and safety requirements Two-point unbridled hang must be performed off the central bar using both K1-BUMP external shackles with a spacing of 1.2 m/4 ft. -
Page 65: Standard Or Climbing Hoist Setup
Standard or climbing hoist setup The adjustable sling provided with the K1-BUMP must be used in case of climbing-hoist setup in order to prevent the chain bag to lie in front of the enclosures located on top of the array. Ceiling structure Electric chain hoists Chain bags... - Page 66 ® ® ® ® reference wst reference wst reference wst reference wst system system system system RIGGING PROCEDURES RIGGING PROCEDURES RIGGING PROCEDURES RIGGING PROCEDURES VERSION 2.0 Sling length setting procedure Free the inserted link from the setting shackle by pulling it up. Slide the chain through the setting shackle so as to select the desired length.
-
Page 67: Site Angle Setting
Site angle setting The array site angle depends on the relative heights between the K1-BUMP’s front and rear hang points (motor chain lengths) and central bar configuration (front or rear overhang). Rear overhang Rear overhang Front overhang F > R F = R F <... - Page 68 w w w . l - a c o u s t i c s . c o m...
- Page 69 w w w . l - a c o u s t i c s . c o m...
- Page 70 w w w . l - a c o u s t i c s . c o m...
- Page 71 w w w . l - a c o u s t i c s . c o m...
- Page 72 Document reference: K1_RM_EN_2-0 Distribution date: December 20 , 2010 ® © 2010 L-ACOUSTICS . All rights reserved. No part of this publication may be reproduced or transmitted in any form or by any means without the express written consent of the publisher.
Need help?
Do you have a question about the K1 REFERENCE WST SYSTEM and is the answer not in the manual?
Questions and answers