Table of Contents
Advertisement
Advertisement
Table of Contents

Related Manuals for L-Acoustics dV-DOSC


Summary of Contents for L-Acoustics dV-DOSC
- Page 1 Version 3.0 June 2005 dV-DOSC dV-SUB OPERATOR MANUAL...
- Page 3 This manual is intended for sound engineers who are responsible for the installation and operation of the dV-DOSC sound reinforcement system. It is also intended to provide interested sound designers, consultants and installers with information regarding the fundamental principles of Wavefront ®...
-
Page 4: Table Of Contents
First V-DOSC, Now dV-DOSC........................12 Summary of dV-DOSC Applications......................15 dV-DOSC TRAINING AND QUALIFICATIONS ....................16 QUALIFIED V-DOSC TECHNICIAN (QVT) ...................16 CERTIFIED V-DOSC ENGINEER (CVE) ....................16 1. THE dV-DOSC SYSTEM STANDARD ....................17 1.1 dV-DOSC System Components........................21 LOUDSPEAKER ENCLOSURES .........................21 RIGGING ACCESSORIES..........................21 SUBWOOFER ENCLOSURES ........................23 SUBWOOFER RIGGING ACCESSORIES ....................24... - Page 5 3.3 MULTIPLE ARRAY CONCEPTS ........................83 3.4 SUBWOOFERS ............................84 General Guidelines for the Use of Subwoofers ...................84 3.4.1 Flown dV-DOSC, Ground Stacked SB Subwoofers (3-way system operation) .........85 3.4.2 Physically Coupled dV-SUB/dV-DOSC (3-way system operation).............86 3.4.3 Hybrid Flown/Ground Stacked Subwoofers (4-way system operation)..........88 3.4.4 Time Alignment: Flown/Ground Stacked Subwoofers ...............89...
- Page 6 Figure 31: L- L-ACOUSTICS RK124a amplifier rack channel assignments and cabling ........45 Figure 32: L-ACOUSTICS RK122a amplifier rack channel assignments and cabling for 2-way stereo presets ...46 Figure 33: L-ACOUSTICS RK122a amplifier rack channel assignments and cabling for 3-way stereo presets ...46 Figure 34: L-ACOUSTICS RK124a amplifier rack channel assignments and cabling for 2-way stereo presets ...47...
- Page 7 Figure 46 (b): Cutview showing constant enclosure site angle impact spacing for an 8 enclosure variable curvature dV-DOSC array (inter-enclosure angles = 1, 1, 2, 3, 3.75, 5.5, 7.5 degrees) ......66 Figure 46 (c): Plan view representation of non-constant (a) versus constant spacing (b) ........66 Figure 47: dV-DOSC single point hang simulation ....................67...
- Page 8 Table 11: PADO2a COMB Wiring Chart......................41 Table 12: PADO2a Internal Amp Rack Wiring Chart...................41 Table 13a: dV-DOSC DSP output channel assignment and COMB connector summary (5+1 format presets) 44 Table 13b: dV-DOSC DSP output channel assignment and COMB connector summary (4+2 format presets) 45 Table 14: 2-way and 3-way stereo preset DSP output channel assignment and COMB connector summary ..46...
-
Page 9: Introduction
If all of the individual pebbles could be glued together, this would provide the same effect as the larger stone... This illustrates the thinking behind dV-DOSC and V-DOSC: if we can build a single sound source from a number of individual speakers that can be separated for transport and handling, then we have achieved our goal, i.e., to provide a totally coherent, predictable wavefield. -
Page 10: Wavefront Sculpture Technology Background
Figure 1: Wavefield interference for a conventional sound reinforcement system compared to a sculptured dV-DOSC wavefield Wavefront Sculpture Technology Background As early as 1988, a preliminary system named "Incremental" had proven the feasibility of Wavefront Sculpture Technology. From this experimental concept, further theoretical research was conducted by Professor Marcel Urban and Dr. -
Page 11: Figure 2: Wavefront Sculpture Technology Criteria 1 And 2
DOSC stands for ”Diffuseur d’Onde Sonore Cylindrique” – in English this means Cylindrical Sound Wave Generator. Essentially, the DOSC waveguide permits fulfillment of the and 3 WST conditions at higher frequencies. dV-DOSC dV-SUB Manual V3.0 June 2005... -
Page 12: First V-Dosc, Now Dv-Dosc
DOSC waveguides (one per enclosure) as close together as possible, allowing dV-DOSC to be used up to a maximum of 7.5 degrees between each enclosure while still satisfying the greater than 80% fill WST criterion. By comparison, V-DOSC enclosures can be arrayed up to a maximum of 5 degrees between enclosures. - Page 13 The configuration of transducers in a dV-DOSC enclosure is symmetrical with respect to the plane of propagation of the wave, i.e., the plane bisecting the horizontal coverage angle. High frequency transducers are located in the middle and low frequency transducers are located on both sides of the high section.
-
Page 14: Figure 3: Cylindrical Versus Spherical Wave Propagation
Aside: Conventional modeling techniques cannot accurately simulate WST-based systems such as ARCS, KUDO, dV- DOSC or V-DOSC. For WST-based products, L-ACOUSTICS has worked with the developers of EASE and CATT to integrate proprietary SOUNDVISION modeling techniques into these industry-standard room acoustics modeling programs. -
Page 15: Summary Of Dv-Dosc Applications
Wavefront Sculpture allows the sound designer to cover virtually any room geometry. The compact size of dV-DOSC also opens up the possibility for adding a center cluster for LCR reproduction and depending on room geometry, dV-DOSC can be used exclusively for all LCR channels or as a center cluster in conjunction with ARCS, KUDO or V-DOSC FOH L/R systems. -
Page 16: Dv-Dosc Training And Qualifications
Try to accept that THIS SYSTEM BEHAVES DIFFERENTLY! dV-DOSC cannot be left in the hands of someone who has no experience with the system - even if that person has great skills and experience with respect to other systems. A dV-DOSC operator needs... -
Page 17: The Dv-Dosc System Standard
OEM factory presets; channel assignments for signal distribution; L-ACOUSTICS LA power amplifiers; and power amplifier rack panels. NOTE: dV-DOSC systems that do not comply with the system standard are considered non-approved by L- ACOUSTICS. For the case of non-standard systems, L-ACOUSTICS does not accept responsibility for misuse or misoperation and in some cases warranty coverage may be considered void. -
Page 18: Figure 5: Dv-Dosc 3-Way System Configuration
Figure 5: dV-DOSC 3-way system configuration... -
Page 19: Figure 6A,B: Dv-Dosc 4-Way System Configuration Comb And Cabling Options
Figure 6a: dV-DOSC 4-way system configuration (option 1 COMB connector / cabling) dV-DOSC dV-SUB Manual V3.0 June 2005... - Page 20 Figure 6b: dV-DOSC 4-way system configuration (option 2 COMB connector / cabling) dV-DOSC dV-SUB Manual V3.0 June 2005...
-
Page 21: Dv-Dosc System Components
RIGGING ACCESSORIES dV-BUMP Bumper for rigging dV-DOSC and/or dV-SUB. When combined with V-DOSC BUMP2 (see V-DOSC manual for details), can be used for stacking dV-DOSC on top of V-DOSC (for upfill) or for stacking dV-DOSC standalone dV-BUMP2 Alternative bumper for rigging dV-DOSC and/or dV-SUB. dV-DOSC can also be stacked on top of dV-... -
Page 22: Figure 8: Dv-Dosc Rigging Accessories
Front and rear angle bar used to rig dV-SUB to dV-SUB (i.e., SS=sub to sub) dV-ANGLESD Front angle bar used to rig dV-DOSC to dV-SUB (i.e., SD=sub to dV) or dV-SUB to dV-BUMP dV-ANGLESDP Rear angle bar used to rig dV-DOSC to dV-SUB (i.e., SDP=sub to dV, positive tilt). -
Page 23: Subwoofer Enclosures
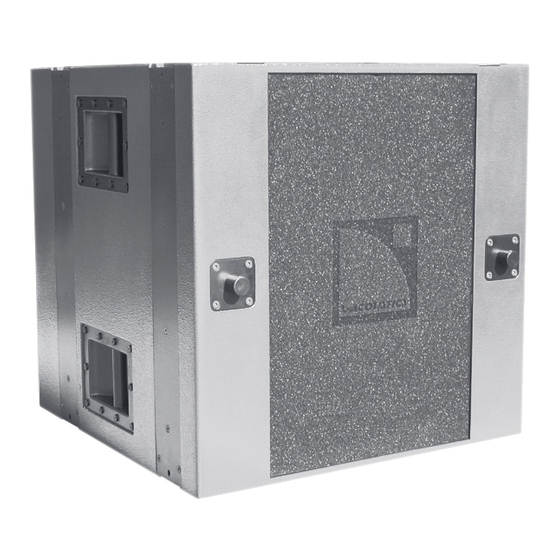
Front-loaded, bass-reflex, dual 18’’ subwoofer for high SPL, extended bandwidth. Optional removable front dolly (not shown) recommended for touring applications. SUBCOV Protective cover for SB218 enclosures (comes in pairs) dVSUB COV dV-SUB SB118 SB118 COV SUB COV SB218 Figure 9: dV-DOSC Subwoofer Options dV-DOSC dV-SUB Manual V3.0 June 2005... -
Page 24: Subwoofer Rigging Accessories
8 ohms, 2300 watts per channel into 4 ohms. L-ACOUSTICS LA24a L-ACOUSTICS LA48a Figure 11: L-ACOUSTICS LA24a, LA48a power amplifiers Note: For full details see the LA24a, LA48a user manuals (available for download on: www.l-acoustics.com) dV-DOSC dV-SUB Manual V3.0 June 2005... -
Page 25: Amplifier Racks
Routes desired input lines from the male 19 pin CA-COM connector to the appropriate amplifier inputs allowing RK122a or RK124a amplifier racks to be configured in 2-way (dV-DOSC, ARCS), 3- way (V-DOSC, KUDO) or subwoofer (SB218) operating modes (COMB connectors: D2WAY, D3WAY and DSUB, respectively). -
Page 26: Figure 12: Amplifier Rack Options And Accessories
PADOSEC RK12U PADO2a COMB CONNECTOR RK122a PADO4a RK124a Figure 12: Amplifier Rack Options and Accessories dV-DOSC dV-SUB Manual V3.0 June 2005... -
Page 27: Signal Distribution And Cabling
Multipair cable adapter with 1x female 19 pin CA-COM connector at one end, 6x female XLR connectors at the other (used as a LINK cable breakout for patching and testing purposes). Note: Parts nomenclature is as follows: DOM = DOSC Modulation DOMP = DOSC Modulation Prolongateur (french for extender) dV-DOSC dV-SUB Manual V3.0 June 2005... -
Page 28: Figure 13: Signal Distribution And Cabling
MD24 MULTI DISTRO CO24 CONTROL OUTPUT CO6 CONTROL OUTPUT MC28100 MULTI DOM2 AMP LINK DOM30 CROSS LINK DOMF LINK BREAKOUT DOMM LINK BREAKOUT PCMCIA CARD DOMP LINK EXTEND Figure 13: Signal distribution and cabling dV-DOSC dV-SUB Manual V3.0 June 2005... -
Page 29: Loudspeaker Cabling
2-way fill loudspeaker cable, 4 conductor, 4 mm conductor cross-section, 7 m (20 ft) length, equipped with 2x NL4 Speakon connectors (for connecting dV-DOSC or other 2-way fill enclosures to PADO2a or to PADO4a using DO2W and CC4FP) SP25 F-CABLE... -
Page 30: Figure 14: Loudspeaker Cabling Options
DO25 DOSUB CABLE DO10P EXTENSION SP25 CC4FP SP.7 DO3WFILL DOFILL DO2W DO3W Figure 14: Loudspeaker cabling options dV-DOSC dV-SUB Manual V3.0 June 2005... -
Page 31: Dv-Dosc Specifications
DO7 or DO25 cables and the DOFILL adapter (8 pin male CA-COM barrel to dual speakon breakout). The bandwidth of dV-DOSC is 100 Hz to 18 kHz although the system can be used down to 80 Hz. For extended bandwidth applications, the addition of dV-SUB, SB118 or SB218 subwoofers is recommended in order to extend the low frequency response. -
Page 32: Dv-Dosc Rigging System
For a tightly wrapped array of 12 dV-DOSC, 90 degrees vertical coverage is obtained. For this case, when the rear-most point on the extension bar is used for a single point hang, the 90 degree coverage runs from parallel to the floor to perpendicular to the floor. -
Page 33: Figure 18: Dv-Bump And Dv-Bump2 Rigging Bumpers
- maximum 12 dV-DOSC enclosures Figure 19: dV-DOWN Up to 6 dV-DOSC can be flown underneath V-DOSC for downfill applications using the dV-DOWN rigging adapter. Three dV-DOSC are equivalent to the weight of one V-DOSC, therefore maximum cabinet combinations include: 15 V-DOSC plus 3 dV-DOSC or 14 V-DOSC plus 6 dV-DOSC. -
Page 34: Dv-Sub Enclosure Description
SB218 subwoofer cabling and sub cable DOSUB (8 pin CACOM to 4 x Speakon) with, or without, sub extension DO10P can be used for connecting dV-SUB to the amplifier racks. dV-DOSC dV-SUB Manual V3.0 June 2005... -
Page 35: Dv-Sub Rigging System
Note: dV-ANGLESS and dV-ANGLESDP have two different holes for connection to the dV-SUB depending on whether dV-DOSC is to be stacked on top of dV-SUB or flown underneath. The closest hole is for stacked applications while the further hole is for flown applications - the need for different attachment points is due to the requirement for physical clearance for the dV-SUB stacking runners when dV-DOSC is flown underneath. -
Page 36: Figure 23: Illustration Of Dv-Sub Rigging Configurations
#5 on the central spreader bar will produce a dead hang (nominal zero degree site angle). When flying combined dV-DOSC/dV-SUB arrays in a single column, dV-SUB is always flown on top. Under no circumstances should dV-SUB be flown beneath dV-DOSC. Maximum rated combinations... -
Page 37: Powering Dv-Dosc
(80 Hz, 100 Hz, 120 or 200 Hz). Limiter settings are adjusted in the OEM factory presets to account for this. As seen in Table 3, the LA24a is suitable for powering up to 2 dV-DOSC while the LA48a is recommended for powering 3 enclosures in parallel. Tables 4 and 5 give a cross reference of L- ACOUSTICS LA24a and LA48a power amplifier ratings and MLS switch settings for powering dV- DOSC. -
Page 38: Powering Subwoofers
Table 4: L-ACOUSTICS LA24a MLS Settings for use with dV-DOSC MLS SWITCH SETTING LOAD CONFIGURATION -5 dB -4 dB -2 dB 0 dB 8 ohms Stereo (2 channel) 1100 4 ohms Stereo (2 channel) 1300 1500 1180 1465 1635 2.7 ohms Stereo (2 channel) -
Page 39: Dv-Dosc Amp Panels
3-way stereo format presets: Line 1 is reserved for dV-SUB, SB118 or SB218 subwoofers (SUB(A) COMB connector); lines 2 and 3 for dV-DOSC low, dV-DOSC high (2W(A) COMB connector); Line 4 for dV-SUB, SB118 or SB218 subwoofers (SUB(B) COMB connector); lines 2 and 3 for dV-DOSC low and dV-DOSC high (2W(B) COMB connector). -
Page 40: Figure 26: Pado4A Amp Rack Wiring
Table 9: PADO4a COMB Wiring Chart Table 10: PADO4a Internal Amp Rack Wiring Chart Figure 26: PADO4a amp rack wiring dV-DOSC dV-SUB Manual V3.0 June 2005... -
Page 41: Figure 27: Pado2A Amp Rack Wiring
Table 11: PADO2a COMB Wiring Chart Table 12: PADO2a Internal Amp Rack Wiring Chart Figure 27: PADO2a amp rack wiring dV-DOSC dV-SUB Manual V3.0 June 2005... -
Page 42: Dv-Dosc Amplifier Racks
A channels and B channels independently. When fully-loaded (4 x LA48a plus PADO4a) the RK124a rack can power up to 12 x dV-DOSC, 8 x SB218 or dV-SUB subwoofers or 16 x SB118 subwoofers. In terms of construction, the amplifier rack is made of a lightweight aluminum space frame with heavy duty bracing, internal shock mounting, standard rack rails and provision for rear support of amplifiers. -
Page 43: Figure 29: L-Acoustics Amplifier Rack Options
Master Rack Slave Rack Figure 29: L-ACOUSTICS Amplifier Rack Options: (a) 4x LA48a plus PADO4a; (b) 4x LA48a plus 2x PADO2a; (c) Master Rack with DSP, CO6 Control Output, 2x LA48a, PADO2a; (d) Slave Rack with 2x LA48a, PADO2a dV-DOSC dV-SUB Manual V3.0... -
Page 44: Comb Connectors
PADO4a amplifier rack panels to the appropriate amplifier inputs. Amplifier racks can be conveniently reconfigured without rewiring internally - simply by changing the COMB connector. COMB connectors for use with dV-DOSC (4-way+2 or 5-way+1 format presets) are: DSUB = SUB... -
Page 45: Figure 30: L-Acoustics Rk122A Amplifier Rack Channel Assignments And Cabling
2-way HI * 2-WAY ENCLOSURES: ARCS, 112XT, 115XT, 115XT HiQ Operating modes, amplifier rack channel assignments and cabling plus loudspeaker enclosure combinations for the L-ACOUSTICS RK122a amplifier rack (PADO2a plus 2 x LA48a) are as follows: dV-DOSC HI dV-SUB 2W HI... -
Page 46: Figure 32: L-Acoustics Rk122A Amplifier Rack Channel Assignments And Cabling For 2-Way Stereo Presets
To power 2-way fill enclosures or 3-way stereo dV-DOSC, ARCS or XT systems using PADO2a and PADO4a amplifier panels, additional COMB connectors can be employed: 2W(A), 2W(B), 3W(A), 3W(B), SUB(A), SUB(B) or 2W STEREO. DSP output channel assignments for 2-way stereo and 3-way... -
Page 47: Figure 34: L-Acoustics Rk124A Amplifier Rack Channel Assignments And Cabling For 2-Way Stereo Presets
Operating modes, amplifier rack channel assignments and cabling plus loudspeaker enclosure combinations for the L-ACOUSTICS RK124a amplifier rack (PADO4a plus 4 x LA48a) are as follows: HI (A) HI (A) HI (A) HI (B) LO (A) LO (A) LO (A) -
Page 48: Co24 Control Output Panel
Each of the four arrays can have associated 2-way fill enclosures and SB218 subwoofers. Therefore, each L-L, L, R and R-R array requires 6 drive channels: 2 for dV-DOSC, 1 for dV-SUB, 1 for SB218s or SB118s and 2 for active 2-way fill enclosures. Since there are 4 arrays, this requires 24 drive channels total. -
Page 49: Md24 Multi Distro Panel
The CO6 Control Output panel allows for maximum flexibility while providing a scaleable architecture that can be used for small, medium and even large system applications since it is compatible with the dV-DOSC and V-DOSC signal distribution strategy and cabling/connector standards. Figure 38: CO6 Control Output Panel dV-DOSC dV-SUB Manual V3.0... -
Page 50: Approved Digital Signal Processors
… The bottom line is that making sure that dV-DOSC is used properly is in everyone’s best interest and it is up to the Qualified V-DOSC Technician and Certified V-DOSC Engineer to maintain quality control standards. -
Page 51: Dv-Dosc Presets
For dV-DOSC 2W 100 presets, a 100 Hz, 24 dB/octave slope HPF is applied to the low section and the limiter threshold is set at +7 dBu. For dV-DOSC 2W 80 presets, an 80 Hz 24 dB/octave slope HPF is applied to the low section and the limiter threshold is set at +5 dBu. - Page 52 Note: For all 5+1 format 4-way presets, output 6 can be used for auxiliary sub drive via input B. Note: The crossover frequency between the flown dV-SUB and dV-DOSC low section is 120 Hz to optimize the power bandwidth for both sections for all 4-way presets.
-
Page 53: Figure 40: Time Alignment Guidelines For 3-Way Sb118 And Sb218 Presets
3W SB118 (120 Hz crossover between SB118 and dV-DOSC low section) dV 3WX SB118 (80 Hz crossover between SB118 and dV-DOSC low section) dV 3W SB218 (120 Hz crossover between SB218 and dV-DOSC low section) dV 3WX SB218 (80 Hz crossover between SB218 and dV-DOSC low section) Figure 40: Time alignment guidelines for 3-way SB118 and SB218 presets dV-DOSC dV-SUB Manual V3.0... -
Page 54: Figure 41: Time Alignment Guidelines For 4-Way Presets
+ dV-SUB + SB118 INFRA (60 Hz crossover between SB118 and dV-SUB) dV-DOSC + dV-SUB + SB118 X (SB118=25-80 Hz/negative polarity, dV-SUB=30-120 Hz) dV-DOSC + dV-SUB + SB218 INFRA (60 Hz crossover between SB218 and dV-SUB) dV-DOSC + dV-SUB + SB218 X (SB218=25-80 Hz/negative polarity, dV-SUB=30-120 Hz) Figure 41: Time alignment guidelines for 4-way presets dV-DOSC dV-SUB Manual V3.0... -
Page 55: General Guidelines Regarding System Protection
+7 dBu (100 Hz HPF) or +5 dBu (80 Hz HPF) for the low section and +1 dBu for the high section. For additional protection, L-ACOUSTICS LA24a and LA48a output power can be matched to dV-DOSC power handling capabilities using MLS switches (refer to tables 3, 4 and 5 for recommended settings). -
Page 56: Table 16 : Xta Dp224 Presets
2W 100 HI 2-way stereo dV-DOSC LO (A) dV-DOSC HI (A) dV-DOSC LO (B) dV-DOSC HI (B) dV-DOSC 3W 80 dV-SUB LO 3-way (A) + 1 (B) dV-SUB (A) dV-DOSC LO (A) dV-DOSC HI (A) dV-SUB (B) dV-DOSC 3W 80 dV-SUB HI... -
Page 57: Table 17: Xta Dp226 Presets
3-way stereo FULL (A) dV-DOSC LO (A) dV-DOSC HI (A) FULL (B) dV-DOSC LO (B) dV-DOSC HI (B) dV-DOSC 3W 80 dV-SUB LO 3-way stereo dV-SUB (A) dV-DOSC LO (A) dV-DOSC HI (A) dV-SUB (B) dV-DOSC LO (B) dV-DOSC HI (B) -
Page 58: Table 18: Bss Fds 366 Presets
FULLRANGE (A) SB218 (B) FULLRANGE (B) SB218 MONO (A+B) MONO (A+B) 2(A)+2(B)+2(C) SB218 (A) FULLRANGE (A) SB218 (B) FULLRANGE (B) SB218 MONO (A+B) MONO (A+B) 218 LCR 80 Table 18: BSS FDS 366 Presets dV-DOSC dV-SUB Manual V3.0 June 2005... -
Page 59: Table 19: Lake Contour Preset Modules
OUT 1 (Source) OUT 2 (Source) OUT 3 (Source) OUT 4 (Source) OUT 5 (Source) OUT 6 (Source) 2-WAY MODULES dV-DOSC 2W 80 LO dV-DOSC LO (A) dV-DOSC HI (A) FULL (A) dV-DOSC LO (B) dV-DOSC HI (B) FULL (B) -
Page 60: Dv-Dosc Array Specifications
2.1 COVERAGE IN THE HORIZONTAL PLANE dV-DOSC has a coverage angle of 120° in the horizontal plane from 1-10 kHz with -6 dB points at +/- 60° off axis. Horizontal coverage is independent of both the number of arrayed enclosures and the vertical configuration of the array. -
Page 61: Wavefront Sculpture In The Vertical Plane
Since dV-DOSC is, in essence, more efficient at projecting HF energy than LF, the net result is that for large distances, the tonal balance is progressively tilted by a HF enhancement. For longer throw... -
Page 62: Constant Curvature Dv-Dosc Array
A° is the constant angle between each adjacent enclosure. Therefore, a curved array of 9 dV-DOSC enclosures can provide a maximum vertical coverage of 8 x 7.5° = 60° while still satisfying WST criteria. -
Page 63: Coverage Predictions Using Array2004
(Cutview 2). Typically the second cutview is taken at 60° offstage (corresponding to the -6 dB coverage angle of dV-DOSC) in order to confirm coverage throughout all parts of the audience. The ear height relative to floor level should be entered in the “listening level”... -
Page 64: Figure 43: Defining Cutview Dimensions
(such as the Leica Disto Basic or Hilti PD22) on site to perform dimensional measurements. Alternatively, L-ACOUSTICS has had good results with the Bushnell Yardage Pro 600 for field measurements. Apart from being useful for defining room geometry, this tool can also be used for determining delay time settings during system tuning, for locating laser beams during array trim and angle adjustment (and on the golf course on days off!). -
Page 65: Figure 45: Array 2004 Geometric Data For Dv-Dosc
DOES NOT CORRESPOND TO THE TILT ANGLE OF THE dV-DOSC BUMPER. Note: The site angle for dV-DOSC enclosure #1 is equal to the dV-BUMP site angle provided that a 3.75° angle bar is used at the rear to connect enclosure #1 to the bumper (to compensate for the trapezoidal angle of the enclosure). -
Page 66: Optimization Procedure
The cutview display shows the intersection of individual dV-DOSC enclosure site angles with the audience (square blocks = site angle impacts) and represents the SPL dispersion over the audience. In accordance with WST Condition #4, the best results are achieved when enclosure site angle impacts have equal spacing between them. -
Page 67: Dv-Dosc Single Point Hang Utility
Bumper Elevation as necessary to ensure that audience coverage is correct. Note: The smaller and flatter the dV-DOSC array, the larger the error in the Single Point Hang estimate (i.e., there is more error in the centre of gravity calculation for smaller, flatter arrays). -
Page 68: Dv-Dosc Downfill / Upfill Simulation
V-ARRAY1 or V-ARRAY2 sheets using the available cells. Note: For dV-DOSC downfill simulation, autofocus adjust angle = 0 degrees corresponds to the first dV- DOSC enclosure as tightly wrapped to the bottom V-DOSC (i.e., a relative site angle of 3.75 degrees). -
Page 69: Figure 50: Dv-Dosc Downfill Simulation (Circuiting Issues)
Figure 50: dV-DOSC downfill simulation (circuiting issues) For dV-DOSC upfill simulation, an autofocus adjust angle of zero degrees corresponds to the first dV- DOSC enclosure as parallel to the site angle of the top V-DOSC. Note: To obtain the 0 degree relative angle, the 3.75 degree hole on dV-ANGLEP1 must be used during installation. -
Page 70: Output Data
3) Calculation of the FRONT LOAD is within 20% error. When the front motor load goes to zero, Minimum Site Angle is displayed. 4) Rear and Front Pin Stress refer to the stress on the dV-PINs used to attach the top dV-DOSC enclosure to dV-BUMP or dV-BUMP2 and is accurate within 20% error. -
Page 71: H-Isocont Sheet
Two audience areas can be defined and the coverage of up to four arrays displayed (4 x V-DOSC, 4 x dV-DOSC). Calculation assumptions include: 3 dB SPL reduction with doubling of distance (i.e., arrays have been designed for constant impact spacing using their respective Cutview sheets);... -
Page 72: Optimization Procedure
L, R arrays illustrates which portions of the audience will experience stereo imaging. Note: It is not possible to simulate the transition between dV-DOSC to V-DOSC isocontours in ARRAY 2004 when dV-DOSC is used for downfill or upfill in conjunction with V-DOSC. In order to simulate this transition, SOUNDVISION is recommended. -
Page 73: Figure 54: Array 2004 Spreadsheet Calculation Example
CUTVIEW SHEET HORIZONTAL ISOCONTOUR SHEET Figure 54: ARRAY 2004 spreadsheet calculation example dV-DOSC dV-SUB Manual V3.0 June 2005... -
Page 74: Dv-Dosc Coverage Modeling Using Soundvision
DOSC array is perpendicular to a 35 x 100 metre target plane at a 30 metre throw distance (imagine the dV-DOSC array firing at a large wall). Coverage is stable and well-defined above 1 kHz while becoming progressively more omnidirectional at lower frequencies. Figure 56 shows impact mode coverage and band-averaged SPL mappings for the array of 12 dV-DOSC enclosures pictured in Fig. -
Page 75: Figure 55: Plan View Spl Mappings At Octave Band Frequencies For 12 Dv-Dosc
250 Hz 4 kHz 500 Hz 6.3 kHz 1 kHz 8 kHz 2 kHz 10 kHz Figure 55: Plan view SPL mappings at octave band frequencies for 12 dV-DOSC (30 metre throw distance, enclosures perpendicular to target plane) -
Page 76: Figure 56: Impact Coverage And Spl Mappings For 12 Dv-Dosc
Impact Coverage Unweighted SPL Map A Weighted SPL Map 1-10 kHz SPL Map Figure 56: Impact coverage and SPL mappings (unweighted, A-weighted, 1-10 kHz bandwidth) for 12 dV-DOSC (30 metre throw distance, enclosures perpendicular to target plane) -
Page 77: Sound Design
Note: For hybrid stacked/flown systems, the trim height of the flown system should be selected so that the bottom dV-DOSC cabinet has a zero degree site angle and is at the same height as the listening level for the first row of the balcony audience. This helps avoid reflections from the balcony face while providing more even off-axis coverage for the first row of the balcony. -
Page 78: Stacking Guidelines
The stacking system is rated for a maximum of 12 dV-DOSC enclosures For stacked systems, the well-defined vertical coverage of dV-DOSC allows little margin for error. Whether the audience is standing or seated is an important consideration and the system should be stacked on a riser of suitable height (or on top of subwoofers) so that the system is higher than the listening level of the first row of the audience. -
Page 79: Rigging Guidelines
Multiple Arrays). For improved offstage coverage in arenas, it is best to have the system flown so that the bumper elevation is at the same height as the highest audience elevation and the top dV-DOSC enclosure has a zero degree site angle. Conversely, for the hybrid flown/stacked configuration (theatre... -
Page 80: Achieving Optimum Coverage
Figure 58c: Main Stage FOH L/R system = 12+12 dV-DOSC, 4+4 SB218 (75 m throw distance); Tent System FOH L/R = 7+7 dV-DOSC, 3+3 dV-SUB (Toronto Jazz Festival 2002, sound design: M. Vincent) dV-DOSC dV-SUB Manual V3.0... -
Page 81: Tradeoffs Between Intelligibility And Stereo Imaging
10 20 30 40 50 60 70 80 90 100 110 120 130 140 150 -10 0 10 20 30 40 50 60 70 80 90 100 110 120 130 140 150 Optimizing coverage and intelligibility Optimizing stereo imaging Figure 59: Tradeoffs between intelligibility versus stereo imaging dV-DOSC dV-SUB Manual V3.0 June 2005... -
Page 82: Left/Centre/Right (Lcr) Configurations
L/R arrays for music) Figure 61: LCR Configuration: 3 x 9 dV-DOSC, 4+4 SB218, 3+3 dV-SUB FOH system; 2+2 ARCS, 2+2 SB218 sidefill monitor system (Nine Inch Nails 2005 US tour, sound designers: F. Bernard; M. Prowda) dV-DOSC dV-SUB Manual V3.0... -
Page 83: Multiple Array Concepts
6-7 meters (approximately 20 ft) from the first array. Figure 62: Generic rigging plot for a dV-DOSC system consisting of main L/R FOH and LL/RR offstage fill arrays Given this separation, interference only occurs in the low frequency range and there are no audible... -
Page 84: Subwoofers
3.4 SUBWOOFERS dV-DOSC is capable of radiating frequencies down to 80 Hz with good vertical directivity control (the low frequency pattern control limit depends on the size of the array). To extend low frequency response to 40 Hz, dV-SUB enclosures are added to create a 3-way system. SB118 or SB218 subwoofers can also be added to further extend frequency response down to 27 Hz and increase the overall unweighted SPL. -
Page 85: Flown Dv-Dosc, Ground Stacked Sb Subwoofers (3-Way System Operation)
Figure 63: Flown dV-DOSC and ground stacked SB218 3-way system configurations As illustrated in Figure 64, for flown dV-DOSC and ground stacked subwoofers, time alignment of subwoofers is required due to the geometric path difference between the two systems. The distance... -
Page 86: Physically Coupled Dv-Sub/Dv-Dosc (3-Way System Operation)
In some cases (e.g., theatrical sound reinforcement), it can be desirable to use the 80 Hz crossover point to benefit from the horizontal pattern control of the dV-DOSC low section, i.e., the dV-SUB is more omnidirectional than dV-DOSC at lower frequencies and if used up to 120 Hz or 200 Hz, reduced gain before feedback may result. -
Page 87: Figure 66: Hybrid Stacked/Flown Dv-Dosc/Dv-Sub Arrays And Centre Cluster
Note: For hybrid stacked/flown systems (as seen in Fig. 65e), the trim height of the system should be selected so that the bottom cabinet of the stacked dV-DOSC system has a zero degree site angle and is at the same height as the listening level for the first row of the balcony audience. This helps avoid reflections from the balcony face while providing more even off-axis coverage for the first row of the balcony. -
Page 88: Hybrid Flown/Ground Stacked Subwoofers (4-Way System Operation)
(d) Flown dV-SUB, ground stacked LCR SB218 arrays Figure 67: Hybrid flown/stacked subwoofer configurations As seen in Figure 67, dV-SUB enclosures can be flown offstage beside L/R dV-DOSC arrays or as part of the array to provide low frequency extension and ground stacked subwoofers added to provide additional low end impact. -
Page 89: Time Alignment: Flown/Ground Stacked Subwoofers
Note: For all 4-way mode presets, output 6 can be used for auxiliary sub drive via input B. Note: The crossover frequency between the flown dV-SUB and dV-DOSC low section is 120 Hz to optimize the power bandwidth for both sections for all 4-way presets. -
Page 90: Large Format Flown/Ground Stacked Subwoofer Configurations
X) can be used for this configuration. In Fig. 69b, the dV-SUB array is flown behind the dV-DOSC array. Pre-delay is applied to the dV- DOSC array in order to time align the two flown systems and the 3-way stereo preset dV 3W 80 dV- SUB is recommended in conjunction with aux sub drive for the ground stacked subwoofers (X mode, i.e., 80 Hz low pass filter, negative polarity for SB118 or SB218 subwoofers). -
Page 91: Subwoofer Arraying Techniques
(80 Hz preset, less than 2.1 metre separation between columns recommended) allows coupling between the dV-SUB arrays while helping to provide low end impact for both main FOH L/R and offstage LL/RR dV-DOSC arrays (plus for nostalgics, there is the added benefit that it resembles a conventional PA system!). -
Page 92: Figure 70: L/R Ground Stacked Subwoofer Arraying Techniques
(c) L-Wrap L/R ground stacked subwoofer arrays (d) Curved L/R ground stacked subwoofer arrays (e) L/R horizontal line arrays Figure 70: L/R Ground stacked subwoofer arraying techniques Figure 71: Flown L/R subwoofers integrated with dV-DOSC offstage fill arrays dV-DOSC dV-SUB Manual V3.0 June 2005... -
Page 93: Central Line Array With Electronic Delay Processing
(into half space) - this is useful for venues where there is an audience tribune. Since subwoofers are physically separate from the flown dV-DOSC arrays they are normally driven via aux send (although the system can also be operated in 4-way mode). -
Page 94: Left/Centre/Right Configurations
(i) time align L with respect to C with the measurement microphone on-axis to L at a distance where the SPL from C and L arrays is identical; (ii) time align dV-DOSC/dV-SUB FOH L with respect to L with the measurement microphone located between FOH L dV-SUBs and ground stacked L subwoofers at a distance where the SPL from the low section of the flown system equals the SPL from the ground stacked subwoofers;... -
Page 95: Figure 74: Lcr Subwoofer Arraying Techniques
(d) Ground stacked L/R, flown C (e) Centre line with electronic delay processing (f) Ground stacked L/R plus distributed ground stacked (FOH L/R dV-SUB arrays act as L/R) subwoofers Figure 74: LCR Subwoofer arraying techniques dV-DOSC dV-SUB Manual V3.0 June 2005... -
Page 96: Installation Procedures
4.1 STACKED SYSTEMS Stacking dV-DOSC Standalone For stability reasons, the maximum number of dV-DOSC enclosures that can be stacked is 12. When the V-DOSC bumper is used in conjunction with dV-BUMP as a stacking platforn for 12 dV-DOSC, each screwjack can present a load of 95 kg (210 lbs). The strength of the supporting floor should be carefully examined to determine if such a load can be supported - sheets of plywood or steel plates can be placed under individual screwjack feet to help distribute the load. - Page 97 Alternatively, from the highest section of audience area, if you can see the upper wall of the top dV-DOSC enclosure, you are 3.75 degrees out of the coverage pattern. More precise aiming can be accomplished by placing a laser pointer or similar device on the upper wall of the top enclosure (and compensating for the 3.75...
- Page 98 (iii) dV-BUMP mounted inside V-DOSC BUMP (iv) Insert locator pin (v) Use dV-PIN81 to secure locator pin (vi) Overview of dV-BUMP secured to V-DOSC BUMP (vii) Attach rear screwjacks to V-DOSC BUMP (viii) Select 3.75 deg for rear points dV-DOSC dV-SUB Manual V3.0 June 2005...
-
Page 99: Figure 75: Stacking Dv-Dosc Using Dv-Bump Plus The V-Dosc Bumper
(xv) Pin front points first, rear points last using dV-PIN25 (xvi) Use dV-ANGLE at 3.75 (rear) and 7.5 (front) as a site for adjusting the focus of the stacked system Figure 75: Stacking dV-DOSC using dV-BUMP plus the V-DOSC bumper dV-DOSC dV-SUB Manual V3.0 June 2005... -
Page 100: Stacking On Top Of V-Dosc
Note: For upfill applications, the trapezoidal angle of the bottom dV-DOSC enclosure must be taken into account. The 3.75 degree angle provides the same site angle for the bottom dV-DOSC as the top V-DOSC (0 deg relative site angle). Subtract 3.75 from all other dV-ANGLE values to obtain the correct site angle for the bottom dV-DOSC relative to the top V-DOSC, i.e., the 7.5 degree hole provides 3.75 degrees relative... - Page 101 (i) dV-BUMP and V-DOSC BUMPER (ii) Raise and level the V-DOSC BUMPER (iii) Place dV-BUMP inside V-DOSC BUMPER (iv) Attach locator pin into position using dV-PIN81 dV-DOSC dV-SUB Manual V3.0 June 2005...
-
Page 102: Figure 76: Stacking Dv-Dosc On Top Of V-Dosc For Upfill/Longthrow
(v) Attach rear dV-ANGLE and mount the first enclosure (vi) Continue to build the stack (vii) Note bridling arrangement in front (viii) Entire system is now ready to fly Figure 76: Stacking dV-DOSC on top of V-DOSC for upfill/longthrow dV-DOSC dV-SUB Manual V3.0 June 2005... -
Page 103: Stacking On Top Of Sb218 Subwoofers
Start by building a stack of SB218 subwoofers. From ground level, stacking at least four SB218 enclosures high puts dV-DOSC at a good height so that the bottom cabinet will be angled down into the audience. Before stacking secure the SB218 stack and dV-BUMP (or dV- BUMP2) using a ratchet strap running around the entire stack. - Page 104 (i) Note circular discs on dV-BUMP (ii) These mate with stacking runner recesses on SB218 (iv) Double stud to ring fitting attached to SB218 flytrack (alternative: run a ratchet (iii) dV-BUMP placed into position around the entire stack) dV-DOSC dV-SUB Manual V3.0 June 2005...
- Page 105 (v) Ratchet strap secures dV-BUMP to the SB218 (vi) Rear dV-ANGLE pre-attached at desired angle (viii) Pre-attach next set of dV-ANGLE (vii) Bottom dV-DOSC mounted, attached using dV-PIN25 dV-DOSC dV-SUB Manual V3.0 June 2005...
-
Page 106: Figure 77: Stacking Dv-Dosc On Top Of Sb218 Subwoofers
(x) then secured using dV-PIN25 (front first then rear) (ix) Second dV-DOSC placed into position (xii) for more downwards tilt (xi) Use dV-ANGLE N instead of dV-ANGLE P1… Figure 77: Stacking dV-DOSC on top of SB218 subwoofers dV-DOSC dV-SUB Manual V3.0 June 2005... -
Page 107: Stacking Dv-Sub Subwoofers
Either of these options is recommended, especially if dV-SUB will serve as a stacking platform for dV-DOSC (see the following section). If dV-ANGLESS (sub-to-sub) angles are used, it is best to place the first enclosure in the desired stacking location and pre-attach four dV-ANGLESS using dV-PIN25 quick release pins to the second enclosure before stacking. -
Page 108: Figure 78: Stacking Dv-Sub Subwoofers
Repeat the same procedure to stack 3 dV-SUBs high The stack - secured using 8 dV-ANGLESS and 16 dVPIN25 Figure 78: Stacking dV-SUB subwoofers dV-DOSC dV-SUB Manual V3.0 June 2005... -
Page 109: Stacking Dv-Dosc On Top Of Dv-Subs
Secure the front two attachment points using 2 x dV-PIN25 then raise the dV-DOSC at the rear and select the desired tilt angle on dV-ANGLESDP (0, 1.75 or or 3.75 degrees), again securing the two rear points using 2 x dV-PIN25. - Page 110 (ii) Note: The ''fat'' part of dV-ANGLESD and dV-ANGLESDP is oriented towards the center of dV-SUB on both sides (iv) Lift dV-DOSC into position and secure with dV-PIN25 (iii) Place dV-DOSC in position (inverted) and secure the front 2 points dV-DOSC dV-SUB Manual V3.0 June 2005...
-
Page 111: Figure 80: Stacking Dv-Dosc On Top Of Dv-Sub Subwoofers (Without Dv-Bump Or Dv-Bump2)
(v) Pre-select the angle / pre-attach dV-ANGLE P1 or P2 for the second dV-DOSC enclosures and continue to build the stack (vi) The finished stack of dV-SUB and dV-DOSC Figure 80: Stacking dV-DOSC on top of dV-SUB subwoofers (without dV-BUMP or dV-BUMP2) dV-DOSC dV-SUB Manual V3.0 June 2005... -
Page 112: Procedure 2: Stacking With Dv-Bump Or Dv-Bump2
3 dV-SUB enclosures high puts dV-DOSC at a good height so that the bottom cabinet will be angled down into the audience. Typically downwards tilt is necessary to reduce audience shadowing effects and to improve HF penetration into the audience. -
Page 113: Figure 81: Stacking Dv-Dosc On Top Of Dv-Sub Subwoofers With Dv-Bump (Or Dv-Bump2)
2 metres onwards. (ii) dV-DOSC installed - note how dV-ANGLEN provides downwards tilt Stacking dV-DOSC on top of dV-SUB subwoofers with dV-BUMP (or dV-BUMP2) Figure 81: dV-DOSC dV-SUB Manual V3.0 June 2005... -
Page 114: Flown Systems
Line up all dV-DOSC enclosures in their flight cases (3 per case). Mate the bottom rigging tabs from the first group of 3 cabinets with the top locator slots of the next group of cabinets. Repeat until all dV-DOSC flight cases are physically lined up. - Page 115 Referring to the angle values that were pre-calculated using ARRAY2004 or SOUNDVISION, pre- attach pairs of dV-ANGLE bars at the rear of all dV-DOSC enclosures of the array (while they are still face down in their flight cases). Remember to keep the ball/tab end up as a reference. Be careful to select the correct angle for each enclosure (generally, it is better if one person performs this operation to avoid mistakes).
- Page 116 (ii) Pin the fronts of all dV-DOSC using dV-PIN25 (i) dV-DOSC lined up in FLIGHT-dV cases (iii) Use 3.75 degree for rear when attaching dV-BUMP dV-DOSC dV-SUB Manual V3.0 June 2005...
- Page 117 (iv) Pre-attach all rear dV-ANGLE (ball/tab end up) (v) Pre-select the desired angle (vii) Connect dV-DOSC enclosures in groups of three (vi) dV-BUMP attached, dV-ANGLE pre-attached dV-DOSC dV-SUB Manual V3.0 June 2005...
- Page 118 (viii) Lower detail between adjacent blocks of 3 dV-DOSC (ix) As cabinets lift off … (x) Pin adjacent blocks of 3 together as the gaps close dV-DOSC dV-SUB Manual V3.0 June 2005...
-
Page 119: Figure 82: Rigging Dv-Dosc Standalone With Dv-Bump (Or Dv-Bump2)
(xiii) Single point hang from rear point on extension bar gives (xiv) 90 degrees vertical coverage running from parallel to 90 degrees coverage with 12 dV-DOSC vertical with respect to floor level Figure 82: Rigging dV-DOSC standalone with dV-BUMP (or dV-BUMP2) dV-DOSC dV-SUB Manual V3.0 June 2005... -
Page 120: Trim And Angle Adjustments
Note: For dV-DOSC, do not use the top and bottom of the cabinet as a visual reference (as for V-DOSC). The radiated wavefront is parallel to the front of the cabinet and is not defined by the trapezoidal enclosure walls. -
Page 121: Rigging Dv-Dosc Under V-Dosc With Dv-Down
Verifying coverage down front is more difficult since the trapezoidal angle of dV-DOSC cannot be used as a reference. If you can see the bottom of the bottom dV-DOSC you are definitely outside the coverage pattern (more so than for V-DOSC). Attaching an extra dV-ANGLE at the rear of the bottom cabinet at 3.75 degrees and using this as a site reference with the front rigging post can help... - Page 122 Once flown, there will be a gap between dV-DOSC and the bottom V-DOSC enclosure. To remove this gap, the two dV-DOWN screwjacks are tightened to firmly secure dV-DOWN and the first dV- DOSC enclosure to the V-DOSC enclosure, i.e., as the screwjacks are tightened, the underhung dV- DOSC array will swing upwards.
- Page 123 (v) Attach dV-DOWN using U-PIN and locking safety (vi) Preconnect all dV-ANGLE at the rear of dV-DOSC (viii) Connect ANGLE straps on bottom V-DOSC (vii) Pin all dV-DOSC at the rear using dV-PIN25 dV-DOSC dV-SUB Manual V3.0 June 2005...
-
Page 124: Figure 84: Rigging Dv-Dosc Below V-Dosc For Downfill
(ix) Raise the ARRAY - note the gap (xi) dV-DOSC flown under V-DOSC (x) Tighten screwjacks to remove this gap Figure 84: Rigging dV-DOSC below V-DOSC for downfill dV-DOSC dV-SUB Manual V3.0 June 2005... -
Page 125: Rigging Dv-Sub Standalone
Rigging dV-SUB Standalone When rigging dV-SUB standalone, up to 6 enclosures deep can be flown from dV-BUMP or dV- BUMP2 (single or two point hang). Please refer to the photo sequence below in addition to the following description of dV-SUB rigging procedures. To fly the system, the first dV-SUB enclosure is located at the rigging location and flipped onto it's stacking runners in the normal orientation. -
Page 126: Figure 85: Rigging Dv-Sub Standalone
Lower 1 dV-SUB into position and attach using 4 dV-PIN25 Figure 85: Rigging dV-SUB Standalone... -
Page 127: Rigging Dv-Dosc Under Dv-Sub (3+1 Configuration)
Connect the rears of the 3 dV-DOSC enclosures (while they are still face down in their flight cases) by pulling the cabinets together at the rear and inserting dV-PIN25. This operation is facilitated by the fact that all fronts are pinned together and can pivot, plus all rear angles were pre-attached in the previous step. -
Page 128: Table 20: Example Pick Point Reference Chart
Slowly begin to raise the array. As the array lifts off, there will be a gap between the dV-SUB and dV- DOSC. One person on either side can lift/rotate the block of 3 dV-DOSC into position and then secure the front attachment points to dV-ANGLESD using 2 x dV-PIN25. -
Page 129: Figure 86: Rigging Dv-Dosc Under Dv-Sub (Small Configuration)
(vi) Houston - we have liftoff… (v) Attach rear points only (dV-SUB to dV-DOSC) (vii) Lift dV-DOSC into position, secure front points using 2 x dV-PIN25 (viii) The flown array Figure 86: Rigging dV-DOSC under dV-SUB (small configuration) -
Page 130: Rigging Dv-Dosc Under Dv-Sub (Larger Configurations)
Pre-connect the front and rear points for the first dV-DOSC to the dV-SUB, using 4 x dV-PIN25. Do not connect the rear of dV-DOSC #2 to #1 (this will be done as the system is flown). Do connect the rear of dV-DOSC #2 to #3. -
Page 131: Procedure 2 (Larger Configurations)
DO plus DOFILL) and SP.7 jumpers between enclosures for parallel operation. Long cable runs should be dressed and tied off to dV-BUMP for strain relief. Be careful not to connect more than 3 dV-DOSC enclosures in parallel. Conduct a final inspection to make sure all cabling is correct, proper inter- enclosure angles have been selected and that all dV-PINs are in place and securely seated. - Page 132 (i) dV-SUB with dV-BUMP attached using 4 x dV-ANGLESD and 8 dV-PIN25 (ii) Second dV-SUB with 4 x dV-ANGLESS pre-attached (iV) dV-ANGLESD (front) and dV-ANGLESDP (rear) pre-attached (iii) 2 x dV-SUB physically connected...
-
Page 133: Figure 87: Rigging Dv-Dosc Under Dv-Sub (Larger Configuration - Procedure 1)
(Do not attach the dV-DOSC #2 to dV-DOSC #1) (viii) The flown system (2 dV-SUB + 6 dV-DOSC) (vii) dV-DOSC #2 to #1 then blocks of 3 are attached as the array is raised Figure 87: Rigging dV-DOSC under dV-SUB (larger configuration – procedure 1) dV-DOSC dV-SUB Manual V3.0... - Page 134 (i) dV-DOSC are pre-attached in blocks of 3 (ii) Flip dV-DOSC onto dV-SUB dolleys to position under the dV-SUB array (iv) dV-DOSC front point attachment using dV-ANGLESD. (iii) Standalone dV-SUB techniques (see above) are used to fly the dV-SUB array The array is raised and rear points attached using dV-ANGLESDP dV-DOSC dV-SUB Manual V3.0...
-
Page 135: Figure 88: Rigging Dv-Dosc Under Dv-Sub (Larger Configuration - Procedure 2)
(v) The procedure is repeated for subsequent blocks of 3 dV-DOSC Figure 88: Rigging dV-DOSC under dV-SUB (larger configuration – procedure 2) dV-DOSC dV-SUB Manual V3.0 June 2005... -
Page 136: Table 22: Maximum Rated Dv-Sub / Dv-Dosc Combinations - With Extension Bar
When flying dV-DOSC and/or dV-SUB, determine the overall weight of the system to be flown • and determine chain motor ratings accordingly. When dV-DOSC is flown on top of, or below V-DOSC account for the additional weight and adjust your chain motor ratings accordingly. -
Page 137: Maintenance And Installation Tools
4 mm hex key HF Diaphragm Mount 4 mm hex key DOSC Waveguide Mount Bolt 10 mm socket 5.3 SPARE PARTS Speakers dV-DOSC HF driver (complete) HP BC22 dV-DOSC HF diaphragm HS BC22 dV-DOSC 8'' loudspeaker HP PH81 dV-DOSC 8'' recone kit... -
Page 138: Recommended Installation Tools
20 m (50 ft) tape measure (for setting array trim height) PORTABLE COMPUTER SOUNDVISION, Excel (for ARRAY 2004), WinMLS, SMAART or MLSSA measurement software, sound card, measurement mic/preamp, DSP control/programming software (Lake Contour, XTA Audiocore, BSS Soundbench2, BSS Soundweb) Figure 89: Recommended Installation Tools dV-DOSC dV-SUB Manual V3.0 June 2005... -
Page 139: Specifications
6. SPECIFICATIONS 6.1 dV-DOSC SPECIFICATIONS L-ACOUSTICS specifications are based on measurement procedures which produce unbiased results and allow for realistic performance prediction and simulation. Some of these specifications will appear conservative when compared with other manufacturer's specifications. Measurements are conducted under free field conditions and scaled to a 1 m reference distance unless otherwise specified. -
Page 140: Figure 90: Dv-Dosc Enclosure - Line Drawing
477.0 1051.6 508.8 1121.7 540.6 1191.8 572.4 1261.9 604.2 1332.0 636.0 1402.1 667.8 1472.2 699.6 1542.3 731.4 1612.4 763.2 1682.6 Table 25: dV-DOSC weight per number of cabinets Figure 90: dV-DOSC Enclosure – Line Drawing dV-DOSC dV-SUB Manual V3.0 June 2005... -
Page 141: Figure 91: Dv-Bump - Line Drawing
Net Weight: 22.5 kg without extension bar (49.6 lbs) 32.0 kg with extension bar (70.5 lbs) Figure 91: dV-BUMP – Line Drawing dV-DOSC dV-SUB Manual V3.0 June 2005... -
Page 142: Dv-Sub Specifications
1x 4 pin Neutrik Speakon (1+/1-) Connector 24 mm Baltic birch plywood (sealed, screwed and rabbeted angles, Material internally braced) Maroon-gray™ Finish Grill Black epoxy-coated perforated steel, acoustically transparent foam Integral flying hardware and handles Rigging dV-DOSC dV-SUB Manual V3.0 June 2005... -
Page 143: Figure 92: Dv-Sub Line Drawing
Figure 92: dV-SUB Line Drawing dV-DOSC dV-SUB Manual V3.0 June 2005... -
Page 144: Appendix 1: How Does Dv-Dosc Behave With Respect To Wst Criteria
8" operating bandwidth. Figure 93: Front view of dV-DOSC array and vertically stacked DOSC waveguides We have to fulfil the first WST criterion at higher frequencies since it is not possible to satisfy the components within λ/2. -
Page 145: Appendix 2: How Does The Dosc Waveguide Work
5 mm of curvature at 16 kHz and experiments have shown that the DOSC waveguide provides less than 4 mm of curvature at this frequency. DOSC waveguide technology is patented on an international basis. (n°0331566 in Europe, n°5163167 in North America) dV-DOSC dV-SUB Manual V3.0 June 2005... -
Page 147: Rigging Certification
Manual V3.0 June 2005... - Page 148 Manual V3.0 June 2005...
- Page 149 Manual V3.0 June 2005...
- Page 150 Manual V3.0 June 2005...
Need help?
Do you have a question about the dV-DOSC and is the answer not in the manual?
Questions and answers