Universal Robots E Series Service Manual
Robot arm
Hide thumbs
Also See for E Series:
- Original instructions manual (291 pages) ,
- Original instructions manual (199 pages) ,
- User manual (248 pages)

Related Manuals for Universal Robots E Series


Summary of Contents for Universal Robots E Series
- Page 1 Service Manual e-Series Original instructions (EN) Version: 1.1.8 Robot: UR3e, UR5e, UR10e and UR16e Control Box: e-Series Control box, OEM AC and OEM DC...
- Page 2 The information contained herein is the property of Universal Robots A/S and shall not be reproduced in whole or in part without prior written approval of Universal Robots A/S. The information herein is subject to change without notice and should not be construed as a commitment by Universal Robots A/S.
-
Page 3: Table Of Contents
Contents 1. General Information ..........................7 1.1 Purpose ............................7 1.2 Company Details ........................8 1.3 Disclaimer ..........................8 1.4 Safety message types ......................9 2. Handling ESD-Sensitive Parts......................10 3. Recommended Inspection activities ....................15 3.1 Robot Arm ..........................15 3.1.1 Inspection Plan ....................... - Page 4 4.2 Control Box ..........................54 4.2.1 Dismantling the Control Box ..................54 4.2.2 Dismantling the OEM AC and DC Control Box .............. 60 4.2.3 Assembling the Control Box incl. OEM AC and OEM DC ..........68 4.2.4 Replacing of Teach Pendant ..................72 5.
- Page 5 Lid set for UR10e/UR16e – 103410 ..................152 Protective cap for tool connector - 131095 ................153 Tool mount with Force/Torque sensor for UR3e – 124083 ..........154 Tool mount with Force/Torque sensor for UR5e –124085 ..........155 Tool mount with Force/Torque sensor for UR10e/UR16e – 124080 ......... 156 Wrist joint 3 for UR3e –...
- Page 6 Control Board Assembly – 124511 ..................185 Battery for Control Board PCB - 170009 ................186 Terminal set for Control Board – 104007................187 Teach Pendant and Control Box mounting bolts – 105202 ..........188 Fuse for Control Board – 170008 ..................189 SD card for Control Board –...
-
Page 7: General Information
1. General Information 1.1 Purpose The purpose of the Service Manual is to help Universal Robots (UR) users and integrators to safely perform service-related operations and troubleshooting. Universal Robots industrial robots are designed using high quality components to ensure a long lifetime. -
Page 8: Company Details
Universal Robots continues to improve reliability and performance of its products, and therefore reserves the right to upgrade the product without prior warning. Universal Robots takes every care that the contents of this manual are precise and correct, but takes no responsibility for any errors or missing information. -
Page 9: Safety Message Types
1.4 Safety message types Safety messages in this document contain information that helps you avoid injuries or equipment damage. This document contains the following safety message types. DANGER This safety message indicates a hazardous situation that, if not avoided, will result in death or serious injury. -
Page 10: Handling Esd-Sensitive Parts
2. Handling ESD-Sensitive Parts CAUTION Static Sensitivity Device ALWAYS WEAR YOUR WRIST STRAP To prevent damage to ESD-sensitive parts i.e. Printed Circuit Board, follow the instructions below in addition to all the usual precautions, such as turning off the power before removing the circuit boards See section 6.5 Complete rebooting sequence. - Page 11 NOTICE Keep the ESD-sensitive part in its original shipping container. (a special "ESD bag") until the part is ready to be installed. NOTICE Put the ESD wristband on your wrist. Connect the wristband to the system ground point It discharges any static electricity in your body to ground. NOTICE Replacing an ESD-sensitive part in a safe way is important to avoid damage to the part.
- Page 12 NOTICE Hold the ESD-sensitive part by its edges. Do not touch its pins or hold directly on any exposed prints. NOTICE First place the OLD part in the spare ESD bag, then take out the NEW part of the ESD bag.
- Page 13 NOTICE Machine covers and metal tables/surfaces are electrical grounds. They increase the risk of damage because they make a discharge path from your body through the ESD- sensitive part. (Large metal objects can be discharge paths without being grounded.). All rights reserved Service Manual e-Series (EN) 1.1.8...
- Page 14 NOTICE If passing an ESD-sensitive part to another person, ensure both are wearing ESD wristband and the ESD wristband is attached to the system grounding point. NOTICE Be extra careful in working with ESD-sensitive parts when cold-weather and heating is used, because low humidity increases static electricity.
-
Page 15: Recommended Inspection Activities
3.1 Robot Arm 3.1.1 Inspection Plan Set forth below is a check list of inspections that Universal Robots recommends be performed according to the marked time interval. If upon inspection, the referenced parts are not in an acceptable state, please rectify immediately. -
Page 16: Visual Inspection
3.1.2 Visual Inspection NOTICE Never use compressed air to clean the Robot Arm as it can damage components. 1. Move the Robot Arm to ZERO position, if possible. 2. Turn off and disconnect the power cable from Control Box. 3. Inspect the cable between Control Box and Robot Arm for any damage. 4. -
Page 17: Control Box And Teach Pendant
3.2 Control Box and Teach Pendant 3.2.1 Inspection Plan Set forth below is a check list of inspections that Universal Robots recommends be performed according to the marked time interval. If upon inspection, the referenced parts are not in an acceptable state, please rectify immediately Use the following sections as guide: 3.2.2 Functional and safety inspection... -
Page 18: Functional And Safety Inspection
3.2.2 Functional and safety inspection NOTICE Robot safety functions is highlight recommended be tested monthly to ensure correct function. Emergency Stop button on the Teach Pendant: 1. Press the Emergency Stop button on the Teach Pendant. 2. Observe the robot stops and shuts off power to the joints. 3. - Page 19 Freedrive Mode: 1. Unmount attachment or set TCP/Payload/CoG according to tool specifications. 2. On the Teach Pendant, press the Freedrive button to set the robot to Freedrive mode. 3. Move the robot to a horizontally elongated position and release. 4. Verify the robot can maintain its position when not being held with the Freedrive button still pressed.
- Page 20 Backdrive Mode: If the robot is close to colliding with something, you can use the Backdrive function to move the Robot Arm to a safe position before initializing. 1. Press ON to enable power. Status changes to Robot Active 2. Press and hold Freedrive. Status changes to Backdrive All rights reserved Service Manual e-Series (EN) 1.1.8...
- Page 21 3. Move robot as in Freedrive mode. Joint brakes are released where needed once the Freedrive button is activated. NOTICE In Backdrive Mode the robot is “heavy” to move around. MANDATORY ACTION You must test Backdrive mode on all joints. Safety settings: Verify the robot safety settings comply with the robot installation risk assessment.
-
Page 22: Visual Inspection
It may become necessary to clean the Teach Pendant screen. A standard mild industrial cleaning agent without a thinning agent or any aggressive additives is recommended. Do not use an abrasive material to wipe down the screen. Universal Robots does not promote a specific cleaning agent. -
Page 23: Service And Replacement Of Parts
4. Service and Replacement of Parts 4.0.1 Pre-Use Assessment Verify all safety inputs and outputs are correctly connected. Test all connected safety inputs and outputs, including devices common to multiple machines or robots, are functioning. The following tests must be conducted before using the robot for the first time or after any modifications are made: •... -
Page 24: Recommended Tools
4.0.2 Recommended Tools Robot Arm Control Box Service tools – part no.: 109011 Service tools – part no.: 109011 Spirit level Cabinet key SD card reader Dual Robot Calibration tooling (double-bit key) part no.: 185500 All rights reserved Service Manual e-Series (EN) 1.1.8... -
Page 25: Robot Arm
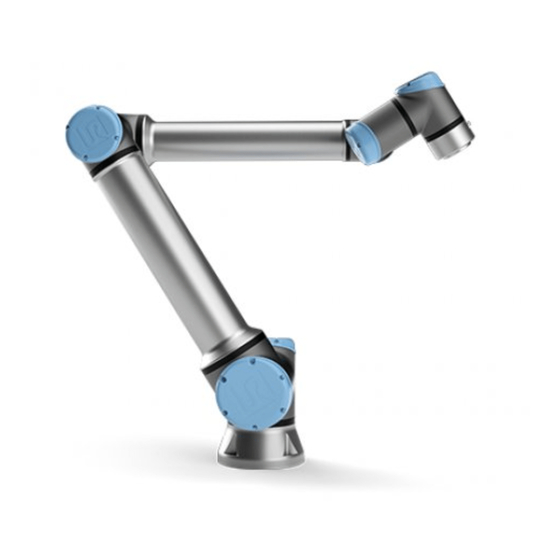
4.1 Robot Arm Joint names Wrist 2 joint Wrist 1 joint Wrist 3 joint Lower arm Elbow joint Tool Force/Torque sensor Upper arm Base joint Base Shoulder joint Joint size UR3e Joint size UR5e Joint size UR10e and UR16e Size 2 Size 2 Size 0 Size 1... -
Page 26: Movement Without Drive Power
In the unlikely event of an emergency, when the robot power is either impossible or unwanted, you can use forced back-driving or contact your Universal Robots distributor if this is not possible. To perform forced back-driving you must push, or pull, the Robot Arm hard to move the joint. Each joint brake has a friction clutch that enables movement during high forced torque. -
Page 27: General Guidance To Separate Joint From Counterpart
4.1.2 General Guidance to Separate Joint from Counterpart WARNING Before replacing ANY components inside the Control Box, it is important to completely shut it down first. Follow the first 3 steps in.6.5 Complete rebooting sequence. NOTICE Exercise caution when handling ESD sensitive parts. See Section 2.Handling ESD- Sensitive Parts Disassemble: 1. - Page 28 6. Now reattach one of the screws, on one of the standoffs and mount the alligator clip on your ESD wristband, as shown below. NOTICE Some connectors have a lock that must be engaged before it is pulled out of the printed circuit board.
-
Page 29: Joint Connection Types
4.1.3 Joint Connection Types There are two different ways the joints are assembled. Screw Connection Bracket Connection Head Size Torque Head Size Torque +0,10Nm +0.00Nm Torx T10 1.3Nm Hex key 4 5.0Nm -0.10Nm -1.00Nm +0.30Nm Torx T20 3.0Nm -0.30Nm 4.1.4 Torque values Connection Head size Torque... -
Page 30: Power And Communication Connector Types On The Joint
4.1.5 Power and Communication Connector Types on the Joint There are two different power plug types and one plug type for communication. Power Plug Types This plug can be removed by GENTLY pulling in the plug. This plug has a lock. Use a flat-nose plier or fingers to unlock and GENTLY pull in the plug. -
Page 31: Connector Location On Joints
4.1.6 Connector Location on joints Size 0 Communication Power Size 1 Communication Power All rights reserved Service Manual e-Series (EN) 1.1.8... - Page 32 Size 2 Communication Power – (Black) Power + (Red) Size 3 Communication Power – (Black) Power + (Red) All rights reserved Service Manual e-Series (EN) 1.1.8...
- Page 33 Size 4 Communication Power + (Red) Power – (Black) Power + (Red) All rights reserved Service Manual e-Series (EN) 1.1.8...
-
Page 34: Screw Connection
4.1.7 Screw Connection The following two sections describe how to disassemble and assemble a joint with a screw- connection. Screw connection location UR3e UR5e UR10e and UR16e 4.1.7.1 Disassembling Screw Connection 1. Remove the screws in the blue lid, then remove the blue lid as shown in Section 4.1.2 General Guidance to Separate Joint from Counterpart 2. - Page 35 3. You can use a small flathead screwdriver to push-off the flat-ring. Then slide the flat-ring over the joint. 4. Remove Teflon-ring. All rights reserved Service Manual e-Series (EN) 1.1.8...
- Page 36 MANDATORY ACTION The joint can fall off if not supported when removing the screws. 5. First remove the countersunk screws(a) then the remaining(b) screws. 6. The joint is now loose and can be removed. Remember to pull the wires out. All rights reserved Service Manual e-Series (EN) 1.1.8...
- Page 37 4.1.7.2 Assemble Screw Connection Joint The assembly is done in reverse of the disassembly. However, a few things must be noted before assembly is begun. NOTICE • Remove old Loctite residue in the screw holes with a roll tap or forming tap (Size 2 M4 the rest M3) for threads before assembling the joint to get the correct torque on the new screws.
- Page 38 2. Insert and tighten the hex countersunk screws according to the image below. Do not exceed recommended torque. Example: 1, 2, 3 3. Insert and tighten the hex countersunk screws according to the image below. Do not exceed recommended torque. Example: 1A, 1B, 2A, 2B etc.
-
Page 39: Bracket Connection
4.1.8 Bracket Connection The following two sections describe how to disassemble and assemble a joint with a bracket- connection. Bracket connection location UR5e UR10e and UR16e 4.1.8.1 Disassembly Bracket Connection 1. Remove the screws in the blue lid, then remove the blue lid as shown in Section 4.1.2 General Guidance to Separate Joint from Counterpart. - Page 40 3. Remove the black flat-ring. You can use a small flathead screwdriver. 4. Remove the screws and the bracket on one side. MANDATORY ACTION The joint can fall off if not supported when removing the bracket. All rights reserved Service Manual e-Series (EN) 1.1.8...
- Page 41 5. Support the joint as you remove the second side of the bracket. 6. The joint is now loose and can be removed. Remember to pull the wires out as well. All rights reserved Service Manual e-Series (EN) 1.1.8...
- Page 42 4.1.8.2 Assembling Bracket-Connection The assembly is done in reverse of the disassembly. However, a few things must be noted before assembly is begun. NOTICE • Always replace the black flexible flat ring with a new one to maintain the IP classification.
- Page 43 • When tightening the brackets, it must be done in steps. Do not exceed recommended torque: Step 1: Tighten one side so there is a gap of 1.0mm to 1.5mm. +0.0 Step 2: Tighten the other side completely with 5.0 +1.0 +0.0 Step 3: Tighten the first side with 5.0...
-
Page 44: Tool Flange
4.1.9 Tool Flange The tool flange is a Screw Connection and is disassembled like a joint with this connection. See section 4.1.7 Screw Connection Power and communication plug is in the same plug. Connector for power and Communication All rights reserved Service Manual e-Series (EN) 1.1.8... -
Page 45: Joint Verification
4.1.10 Joint Verification When a joint is replaced it needs to be verified by the controller to be assigned the correct ID. The steps below appear automatically when the Robot Arm is powered on for the first time. 1. Go to Initialize screen and press ON 2. - Page 46 3. Press Test Joints to start joint verification. 4. Move all joints with the arrows respective to each joint. a. If joints move as expected, press Valid and a popup appears. Follow the popup instructions. b. If joints did not move as expected (i.e., wrong joint moves or incorrect direction), press Failed and a popup appears.
-
Page 47: Zeroing Of Joints
4.1.11 Zeroing of joints When a joint has been replaced and verified it may be necessary to zero the joint so that it is aligned with the rest of the robot arm. There are two ways this can be done. •... - Page 48 Press and hold the UR logo for approximately 5 seconds. The screen will change. 3. Press the gray box and type the password lightbot and press OK All rights reserved Service Manual e-Series (EN) 1.1.8...
- Page 49 4. Select Joint Zeroing in the menu to the left. All rights reserved Service Manual e-Series (EN) 1.1.8...
- Page 50 5. Use the arrows in the Joint Position window on the right side of the screen to move each joint to align as shown in the images below. The Speed Slider can be used to reduce the speed of movement. Base Shoulder, Elbow, Wrist 1 Base zero position is aligned so the Base...
- Page 51 6. In the Joint Zeroing window select the joint you want to zero. When selected the box will change from gray to blue. Press Zero Joints 7. Confirm you want to zero the joint. The robot will power down after confirmation. All rights reserved Service Manual e-Series (EN) 1.1.8...
- Page 52 8. A popup shows to confirm that the joint(s) has now been zeroed. Press OK to close the popup and return it to normal. All rights reserved Service Manual e-Series (EN) 1.1.8...
-
Page 53: Dual Robot Calibration
• 2 robots (same size and same generation) • Dual Robot Calibration Tooling Complete (Part no: 185500) You can download the Calibration Manual from the Universal Robots Support site www.universal- robots.com/support/ 4.1.13 Program Correction by Key Waypoints Program Correction by Key Waypoints helps adjusting programs waypoints when a program is moved from an uncalibrated robot to another. -
Page 54: Control Box
4.2 Control Box 4.2.1 Dismantling the Control Box WARNING Before replacing ANY components inside the Control Box, you MUST do a complete shutdown. Follow the first 3 steps in section 6.5 Complete rebooting sequence. NOTICE Exercise caution when handling ESD sensitive parts. See section 2. - Page 55 Remove the Teach Pendant, see Section 4.2.4 Replacing of Teach Pendant Lay the Control Box on the backside and remove the four nuts. Take out the Control Box bracket and place it on the edge of the Control Box as shown below.
- Page 56 Control Board Ground - Robot Ground – Fan and Energy Eater Ground – Power supply 48V – Power supply 48V - Robot 48V – Fan and Energy Eater Communication – Power Supply Fan and Energy Eater Communication – Fan and Energy Eater Communication –...
- Page 57 Remove the four screws on the bottom of the power supply, then remove the power supply. NOTICE When assembling, the screws must not be tightened with a torque greater +0.1 than 1.0 −0.1 All rights reserved Service Manual e-Series (EN) 1.1.8...
- Page 58 Remove the twenty-two screws and remove the Control Board upward. All rights reserved Service Manual e-Series (EN) 1.1.8...
- Page 59 Removing the Energy Eater and fan assembly. Remove the four screws. Ground – Control Board Communication – Control Board 48V – Control Board NOTICE When assembling, remember to place the round spacers behind the Energy Eater board. All rights reserved Service Manual e-Series (EN) 1.1.8...
-
Page 60: Dismantling The Oem Ac And Dc Control Box
4.2.2 Dismantling the OEM AC and DC Control Box The OEM AC and DC version are special Control Box units made for OEM installation in AC and DC environments. WARNING Before replacing ANY components inside the Control Box, you MUST do a complete shutdown. - Page 61 OEM DC Control Box special precautions WARNING • In case of a battery failure, (for example, due to a short circuit) the current can cause fire or explosion. To avoid injury while performing service: Wear safety glasses. o Wear fireproof protective gloves. •...
- Page 62 Dismantling the OEM AC and DC Control Box 1) Follow step 1 and 2 as described in 4.2.1 Dismantling the Control Box 2) Remove main power connection by pushing in on the two clips and pull backwards. 3) Remove robot cable by unscrew the top part clock-vise then pull the plug out. All rights reserved Service Manual e-Series (EN) 1.1.8...
- Page 63 CAUTION When pulling the robot arm cable connector, be careful not to scrape your hand/fingers on the frame edge. 4) Remove the OEM Control Box from its installation and place it on a table or similar. 5) Remove the 4 screws(T20) shown below, remember the washers as well. All rights reserved Service Manual e-Series (EN) 1.1.8...
- Page 64 6) Remove the top lid. 7) Now the power plug on the inside needs to be disconnected from the frame, how to do this correctly is shown in Step 8. All rights reserved Service Manual e-Series (EN) 1.1.8...
- Page 65 8) For removing the power plug, you will need a small 2mm flathead screwdriver. Pull in the power plug AND tip the two front locks upwards at the same time 9) Remove all connections to the Control Board. All rights reserved Service Manual e-Series (EN) 1.1.8...
- Page 66 10) Lay the Control Box on the “back” 11) Remove the 6 screws(T20) shown below. All rights reserved Service Manual e-Series (EN) 1.1.8...
- Page 67 12) Pull out the front part where the power supply and Control Board is attached. 13) There are now two possibilities: - Remove Power Supply and/or Control Board see step 7 and 8 in section 4.2.1 Dismantling the Control Box NOTE: Remember to cable tie the energy eater cable to the power cable when assembly the unit.
-
Page 68: Assembling The Control Box Incl. Oem Ac And Oem Dc
4.2.3 Assembling the Control Box incl. OEM AC and OEM DC NOTICE Assembling is done in revers from the steps shown in section 4.2.1 and 4.2.2. 4.2.3.1 Torque values and notes for Control Box Below are the torque values used in the Control Box. DESCRIPTION Tool size Torque... - Page 69 DESCRIPTION Tool size Torque Screw for fan and energy eater assembly Torx T20 0.6Nm Screw for mounting power supply Torx T20 1.0Nm Internal power terminal screws 1.2Nm External power terminal screws 1.2Nm Control Board mounting screws Torx T10 0.6Nm Bolt for Control Box handle Hex key 5 4.0Nm All rights reserved...
- Page 70 4.2.3.2 Torque values and notes for OEM AC and DC Control Box Below are the torque values used in the OEM AC and DC Control Box. NOTICE The washer, when present, need to have the spikes facing downwards. DESCRIPTION Tool size Torque Bolt and nut for fan and energy eater T20/7mm...
- Page 71 DESCRIPTION Tool size Torque AC external power terminal screws 1.2Nm DC external power terminal bolts 1.6Nm AC internal power terminal screws 1.2Nm DC internal power terminal screws 1.6Nm Control Board mounting screws 0.6Nm Torx Bolt and nut for fan and energy eater 10mm 2.25Nm Power supply mounting screw...
-
Page 72: Replacing Of Teach Pendant
4.2.4 Replacing of Teach Pendant 1. Power off the Control Box 2. Press in the clips (as seen in the image below with red arrows), on both sides of the Teach Pendant plug and pull down. 3. Fully open/loosen the plastic grommet at the bottom of the Control Box and remove the plug and cable. -
Page 73: Software
• Read these instructions and the instructions on our support website (www.universal-robots.com/support) completely prior to updating your software. Universal Robots assumes no responsibility for failed updates caused by improper operation. • Control Box power MUST NOT be turned off during the software update process. -
Page 74: Update Procedure
5.1.1 Update Procedure 1. On your robot, go to About and check your current software version. 2. Download to your computer the software versions needed to be installed, you can download from Universal Robot’s website (www.universal-robots.com/support). o If your SW is below 5.5 (E.g.: 5.3), you will need to incrementally update until you reach 5.5 (E.g.: 5.3 to 5.4, then 5.4 to 5.5), after updating to software 5.5 you can download the most up to date software and go straight from 5.5 to this last update (E.g.: 5.5 to 5.8). - Page 75 5. On teach pendant screen, press the right top corner icon to access the settings menu. 6. Press Settings to access the settings menu. All rights reserved Service Manual e-Series (EN) 1.1.8...
- Page 76 7. On the left side menu, select System. 8. Press Update, then Search to locate software update on USB stick. All rights reserved Service Manual e-Series (EN) 1.1.8...
- Page 77 9. Select the desired software update and press Update. 10. Press Install Software to update the software. 11. The robot will power off and power on again. Once the update is complete, the Control Box automatically reboots. Do not power off or unplug the robot from the outlet during startup. All rights reserved Service Manual e-Series (EN) 1.1.8...
-
Page 78: Update Timeline
12. Wait until the reboot is complete. Firmware for the control Box and Tech Pendant is updated. 13. When complete, go to the Initialize screen and press ON, if available joint firmware is going to update. 14. Remove the USB stick. 15. -
Page 79: Downgrading Vs. Restoring System Backup
5.1.3 Downgrading vs. Restoring system backup Do not downgrade the robot software to an earlier version than the version the robot was manufactured. Do not revert your robot software using older update packages if you have software version equal or above 5.8 installed. If for any reason, you need to downgrade below PolyScope version 5.8, you can do so by restoring your old system backup (system backup was implemented from Polyscope version 5.5 ahead). -
Page 80: Using Support File
5.2 Using Support File For easy backup, Universal Robots provides a feature available from software version equal or above 5.8 called Support File, an automatically copy of the robot data from Control Box to the USB stick. 1. Go to Log tab, insert a USB stick and click on Support File. -
Page 81: Using Magic Files
5.3 Using Magic Files For easy backup, Universal Robots provides Magic Files to automatically copy data from Control Box to USB stick. Magic files backup works with all software versions. NOTICE • Always perform program and installation files backup before updating the software. -
Page 82: Backup Of Data
When using Windows operation system, to read a Linux partition a software file system driver is required; in this example we are using “Linux File Systems for Windows” by Paragon but other Windows Linux reader can be used as well (these are however not tested by Universal Robots). NOTICE “Linux File Systems for Windows”... -
Page 83: Copy The Data From Sd Card
5.4.4 Copy the data from SD card Navigate to the SD card partition called datafs and copy the below listed files/folders. NOTICE Do not alter any files. You must only take backup copies as needed. • programs/ [all of the following files: .urp, .txt, .script, .installation, .variable, .old] •... -
Page 84: Troubleshooting
6. Troubleshooting 6.1 Adding external equipment for troubleshooting purpose For troubleshooting it can be useful to add a mouse, keyboard or monitor. Most USB mouse and keyboards are supported. Plug in the mouse or keyboard in one of the available USB ports. It may be required to restart the Control Box for it to work. -
Page 85: Support Log Reader(Slr)
6.2 Support Log Reader(SLR) Open log files with the Universal Robots Support Log Reader(SLR). Go to www.universal-robots.com/support to download the Support Log Reader 1. Filter; Select what filter to activate = Info filter = Warning filter = Error filter 2. Tool bar;... -
Page 86: Error Codes
6.3 Error codes In the error codes, multiple terms are used for the same components and codes until C271 are shared between robot generations. • On the Safety Control Board: Processor A = A uP = SafetySys1 • On the Safety Control Board: Processor B = B uP = SafetySys2 •... - Page 87 C4A5 Communication with secondary Teach a) Check RS485-12V connection between Motherboard and Teach Pendant uP lost Pendant. b) Do a Complete rebooting sequence. c) Replace Teach Pendant C4A6 Communication with primary EUROMAP67 uP a) Check Euromap67 connection between Motherboard and Teach lost Pendant.
- Page 88 C4A65 Lost package from Primary Teach Pendant 1 package lost If this happens often: a) Verify that the communication cables are connected properly. b) Do a Complete rebooting sequence C4A66 Lost package from Secondary Teach Pendant 1 package lost If this happens often: a) Verify that the communication cables are connected properly.
- Page 89 C4A76 Lost package from tool Serial communication problem with one or If this happens often: more joints a) Verify that the communication cables are connected properly. b) Do a Complete rebooting sequence C4A77 Lost package from uPA to joints 1 package lost If this happens often: a) Verify that the communication cables are connected properly.
- Page 90 C4A87 Packet counter disagreement in packet from If this happens often: joint 1 a) Verify that the communication cables are connected properly. b) Do a Complete rebooting sequence C4A88 Packet counter disagreement in packet from If this happens often: joint 2 a) Verify that the communication cables are connected properly.
- Page 91 C12A Unknown message error C14A Debug message C14A1 {float} C14A2 {signed} C14A3 {unsigned} C17A Communication error between Safety Control a) Check Ethernet connection between circuit Board and Motherboard boards. b) Do a Complete rebooting sequence. c) Update the software C26A Motor Encoder index drift detected Joint mechanical problem a) Do a Complete rebooting sequence.
- Page 92 C39A1 Max current deviation failure a) Do a Complete rebooting sequence. b) If this happens more than two times in a row, replace joint C39A2 Max joint-encoder speed exceeded a) Do a Complete rebooting sequence. b) If this happens more than two times in a row, replace joint C39A3 Max motor-encoder speed exceeded a) Do a Complete rebooting sequence.
- Page 93 C44A4 Wrist 2 C44A5 Wrist 3 C44A6 Tool C44A80 CRC Check failure on primary bus. Most likely an interference on the communication bus. C45A AD-Converter error C46A Loose gearbox or bad encoder mounting Mechanical problem in gear related to encoder a) Do a Complete rebooting sequence mounting b) If this happens more than two times in a row, replace joint...
- Page 94 C50A27 12V, 3V3 or ADC error (12V too high) C50A28 12V, 3V3 or ADC error (12V too low) C50A29 Analog I/O error (-12V too high) C50A30 Analog I/O error (-12V too low) C50A31 The other safetySYS do not initialize C50A40 Wrong voltage from PSU1 C50A41 Wrong voltage from PSU2...
- Page 95 C51A1 Primary screen processor CRC check failure on safety processor 1 in Teach Pendant C51A2 Secondary screen processor CRC check failure on safety processor 2 in Teach Pendant C51A3 Primary E67 C51A4 Secondary E67 C53A IO overcurrent detected Control Board error Remove all external connections to I/O-interface of Safety Control Board.
- Page 96 Ensure power grid is not delivering more than 48V energy eater b) Measure robot energy input c) Contact your local Universal Robots service provider for assistance. C61A Idle power consumption to high The system is drawing more power than...
- Page 97 C62A11 Joint temperature: Shut down (85 C) C62A13 Shutdown: Static load too high C63A Motor test failed in step {unsigned}. C65A PSU voltage to high The power supply output voltage is above a) Ensure supply is not delivering more than 48V 48.7V b) Contact support C68A...
- Page 98 C71A51 Current sensor test failed Sensor reported wrong current when probed a) Check joint for damaged or loose connections. b) Replace the joint C71A52 Current sensor test failed Sensors reported different currents when a) Check joint for damaged or loose connections. probed b) Replace the joint C71A101...
- Page 99 C75A16 Temperature is out of range C75A32 Signal lost =Misaligned readhead or damaged a) Do a Complete rebooting sequence. ring b) Check grounding and shielding for EMC problems. c) If this happens more than two times in a row, replace joint C75A64 Signal low =Too far from magnetic ring a) Do a Complete rebooting sequence.
- Page 100 C115A Unknown robot type The robot type specified in the configuration is unknown C116A Realtime part warning Possible CPU-overload due to structure of user Restructure user program program C117A Restart SCB failed The Control Board couldn’t be rebooted from Do a Complete rebooting sequence the controller.
- Page 101 C157A0 (base). Check payload, center of gravity and Make sure no objects are in the path of the robot and resume the acceleration settings. Log screen may contain program. additional information. C157A1 (shoulder). Check payload, center of gravity Make sure no objects are in the path of the robot and resume the and acceleration settings.
- Page 102 C158A5 (wrist 3). The user specified payload is 0kg, Specifying an incorrect payload mass and/or Make sure the specified payload mass and center of gravity are please make sure this is correct. center of gravity may cause poor robot correctly specified. performance and/or protective stops.
- Page 103 C161A Protective stop: Large movement of the robot a) Verify that the robot position in the 3D graphics matches the real detected while it was powered off. The joints robot, to ensure that the encoders function before releasing the were moved while it was powered off, or the brakes.
- Page 104 C171A14 Overlapping Blends in a MoveL, a waypoint Decrease the blend radius or choose waypoints that are further apart. was skipped C172A Illegal control mode C184A Joint self test not received by controller C185A1 START_NORMAL_OPERATION is not allowed on selftest firmware C185A2 GOTO_BACKDRIVE_COMMAND is not allowed on selftest firmware...
- Page 105 C191A5 TCP orientation limit violated C191A6 Power limit violated C191A7 Joint torque window violated C191A8 Joint torque window too large C191A9 Reduced mode output violation C191A10 Safeguard stop output violation C191A11 Emergency stop output violation C191A12 Momentum limit violation C191A13 Robot moving output violation C191A14 Robot is not braking in stop mode...
- Page 106 C191A28 Robot Emergency Stop exceeded maximum Too high payload a) Check that max payload of the robot has not been exceeded. stop time b) Check TCP configuration, payload and mounting settings C191A29 System Emergency Stop exceeded maximum Too high payload a) Check that max payload of the robot has not been exceeded.
- Page 107 C192A10 TCP position disagreement a) Check TCP configuration, payload and mounting settings. b) Check that safety settings respected C192A11 TCP orientation disagreement a) Check TCP configuration, payload and mounting settings. b) Check that safety settings respected C192A12 Power disagreement Power calculation: uP-A and uP-B disagreement C192A13 Joint torque window disagreement...
- Page 108 C192A33 A timing issue occurred during startup. Please Checksum disagreement between safety restart to proceed processors uA and uB C192A34 User safety config checksum disagreement between uA and GUI C192A35 Robot config checksum disagreement between uA and GUI C192A36 Online RAM test failed C192A37 Not all safety related functionalities are running...
- Page 109 C193A9 Euromap 1 a) See previous error. b) Do a Complete rebooting sequence C193A10 Euromap 2 a) See previous error. b) Do a Complete rebooting sequence C194A One of the nodes is not booted or not present C194A0 Base Joint C194A1 Shoulder Joint C194A2...
- Page 110 C195A2 for TCP speed safety limit C195A3 for momentum safety limit C196A MoveP speed too high Too high speed in relation to blend radius Reduce speed or increase blend radius in user program C197A Blend overlap warning C200A Safety Control Board hardware error C200A1 Hardware ID is wrong Safety Control Board: uP-A has detected an...
- Page 111 C200A11 5V power good is low Safety Control Board: uP-A has detected an a) Do a Complete rebooting sequence. error b) If this happens more than two times in a row, replace Safety Control Board C200A12 3V3 voltage too low Safety Control Board: uP-A has detected an a) Do a Complete rebooting sequence.
- Page 112 Do a Complete rebooting sequence at initialization or invalid safety parameters b) Update software have been received c) Contact your local Universal Robots service provider for assistance. C201A1 SCB uA is not responding No data or invalid data was received from the...
- Page 113 C204A2 Inconsistency between target position and Controller is detecting that position in current a) Either an incorrect payload is mounted, or an external force is speed cycle has changed much more than it should pushing the robot. based on expected joint speed. b) Check TCP configuration, payload and mounting settings.
- Page 114 C209A A protective stop was triggered (for test A protective stop was triggered. Notice: The purposes only) functionality is exclusively used for testing purposes. C210A Socket is read-only when the robot is in local Set the robot in remote control in PolyScope to enable receiving (Teach pendant) control scripts in the controller C211A...
- Page 115 C259A0 Critical error A critical error occurred in the filesystem a) Do a Complete rebooting sequence b) Reimage SD card c) Contact your local Universal Robots service provider for assistance. C260A Brake Release C260A0 Critical error A critical error occurred during Brake Release...
- Page 116 A critical error occurred in the Motor Encoder. a) Do a Complete rebooting sequence b) Update software c) Contact your local Universal Robots service provider for assistance. C263A21 Validation of the detected Index Mark failed The absolute Motor Encoder position cannot...
- Page 117 C267A Bootloader error a) Do a Complete rebooting sequence b) Update software c) Contact your local Universal Robots service provider for assistance. C267A0 Critical error A critical error occurred during Firmware a) Do a Complete rebooting sequence upgrade. b) Update software c) Contact your local Universal Robots service provider for assistance.
- Page 118 A critical disagreement occurred within the a) Do a Complete rebooting sequence safety system b) Update software c) Contact your local Universal Robots service provider for assistance. C273A12 Disagreement on Teach Pendant State A critical disagreement occurred within the a) Do a Complete rebooting sequence...
- Page 119 A critical disagreement occurred within the a) Do a Complete rebooting sequence safety system b) Update software c) Contact your local Universal Robots service provider for assistance. C273A26 Maximum stopping time disagreement A critical disagreement occurred within the a) Do a Complete rebooting sequence...
- Page 120 A critical disagreement occurred within the a) Do a Complete rebooting sequence safety system b) Update software c) Contact your local Universal Robots service provider for assistance. C273A40 Disagreement on motor parameter (Kb) A critical disagreement occurred within the a) Do a Complete rebooting sequence...
- Page 121 C276A0 Critical error A critical error occurred in the UART driver a) Do a Complete rebooting sequence b) Update software c) Contact your local Universal Robots service provider for assistance. C278A Servo in Joint A processor C278A0 Critical error A critical error occurred in the servo module...
- Page 122 C281A14 IMMI entered the Fault State a) Do a Complete rebooting sequence b) Update software c) Contact your local Universal Robots service provider for assistance. C281A15 IMMI entered the Violation State a) Do a Complete rebooting sequence b) Update software c) Contact your local Universal Robots service provider for assistance.
- Page 123 Do a Complete rebooting sequence c) Update software c) Contact your local Universal Robots service provider for assistance. C283A18 Lost too many Joint safety packages in a row. a) Check that the joints are proper connected...
- Page 124 The input signals are not switching a) Ensure both inputs are correctly connected. safety systems simultaneously or are incorrectly connected. b) Contact your local Universal Robots service provider for assistance. C283A41 TCP Velocity violates limits of maximum a) Ensure the mounted payload, TCP and CoG matches your stopping time configuration.
- Page 125 Ensure the mounted payload, TCP and CoG matches your configuration. b) Slow down movements c) Check safety setting d) Contact your local Universal Robots service provider for assistance. C283A48 Tool position limit exceeded a) Ensure the mounted payload, TCP and CoG matches your configuration.
- Page 126 Error caused by the {unsigned} Joint A critical safety error a) Do a Complete rebooting sequence b) Update software c) Contact your local Universal Robots service provider for assistance. C283A72 The motor configuration sent by the Control The motor configuration sent is unusable with...
- Page 127 The input signals are not switching a) Ensure both inputs are properly connected within the safety system simultaneously, or are incorrectly connected b) Contact your local Universal Robots service provider for assistance C283A86 Automatic Safeguard Reset Input The input signals are not switching...
- Page 128 Three-Position Enabling device is Configuration configured b) Conduct a complete rebooting sequence c) Update software d) Contact your local Universal Robots service provider for assistance C284A Brake Release C284A0 Critical error A critical error occurred during Brake Release...
- Page 129 Critical error A critical error occurred during RAM test a) Do a Complete rebooting sequence b) Update software c) Contact your local Universal Robots service provider for assistance. C294A Analog to Digital converter a) Do a Complete rebooting sequence b) Update software c) Contact your local Universal Robots service provider for assistance.
- Page 130 Check wrist position. meter. b) Verify mounting c) Do a Complete rebooting sequence d) Update software e) Contact your local Universal Robots service provider for assistance C299A Tool communication C299A0 Communication error detected A problem with the Tool communication was a) Do a Complete rebooting sequence detected.
- Page 131 A critical error occurred in physical, logical, a) Do a Complete rebooting sequence and temporal monitoring (PLATM) b) Update software c) Contact your local Universal Robots service provider for assistance. C304A3 Close to the gearbox shear limit. Encoders The Joint acceleration or deceleration is too a) Reduce acceleration in the user program.
- Page 132 Verify Control Box and Robot Arm are correctly paired c) Check for loose connections d) Do a complete rebooting sequence e) Contact your local Universal Robots service provider for assistance C305A6 Power supply voltage too high: {float} V Power supply is higher than 56V a) Make sure the cable between Control Box and Robot Arm is correctly connected and it has no damage.
- Page 133 Conduct a complete rebooting sequence messages in a row from Safety Control Board- have been lost from the Safety Control Board b) Update software Processor B c) Contact your local Universal Robots service provider for assistance C312A Data validation C312A0 Critical error...
- Page 134 Verify there are no short circuits on the 24V IO connectors c) Contact your local Universal Robots service provider for assistance C330A4 Injection-Molding-Machine-Interface 48V The voltages measured on the 48V rails are...
- Page 135 Do a Complete rebooting sequence Robot software b) Check for loose connections c) Update software d) Contact your local Universal Robots service provider for assistance C450A4 Force-Torque sensor is expected, but it cannot Force-Torque sensor is expected, but no...
- Page 136 Remove any pressure off the button c) Press the button with more pressure, if light pressing may not work d) Update software e) Contact your local Universal Robots service provider for assistance C740A25 The right Three-Position Enabling button is...
-
Page 137: Led Indicators And Fuse On Safety Control Board
6.4 LED indicators and Fuse on Safety Control Board 6.4.1 LED Indicators on Safety Control Board The below LEDs are “power” LEDs. They are either on or off. +24V +12V +12V AUX +5V PC +3.3V Safety A +3.3V Safety B +3.3V FPGA +3.3V PC -4V for Analog... - Page 138 Below are “communication” LEDs. They flash in different patterns, depending on the status. Safety A Safety B FPGA LED for Safety A and Safety B ∙∙∙∙∙∙∙∙∙∙ Green fast flash = Bootloader ∙ ∙ ∙ ∙ Green slow flash = Normal communication Red permanent = Error (Red flash can happen during bootup/power on, this is normal.) LED for FPGA...
-
Page 139: Fuse
6.4.2 Fuse Fuse is a 10A fast-acting mini blade fuse. WARNING Never use a different fuse than specified. Only use high grade components. Fuse specifications: • Interrupting Rating: 1000A @ 32 VDC • Voltage Rating: 32 VDC • Component Level Temperature Range: -40˚C to +125˚C •... -
Page 140: Complete Rebooting Sequence
6.5 Complete rebooting sequence. To completely reboot the robot system, follow the following steps: Push the power button on the To completely reboot, do Teach Pendant and follow the the following… onscreen instructions Send power off command to Step 1 controller or inputs via I/O’s Power down the Control Box Disconnect the main power to... -
Page 141: Protective Stop
6.6 Protective stop Read also article 18939 on the support site Protective Stop www.universal-robots.com/support Check TCP configuration, payload and mounting Adjust TCP configuration, payload, mounting settings and settings it must correspond with actual tool and check that safety settings robot position. respected. - Page 142 Ignoring protective stops is considered abuse of the robot which voids the warranty. These faults can be hidden from view under the following two circumstances: 1) Personnel simply resetting a fault without review of why the fault has happened. WARNING: Ignoring protective stops masks fault detection! Pay careful attention to protective stops.
-
Page 143: Electrical Drawings
7. Electrical drawings Valid for: Control Box UR3e * Control Box UR5e, UR10e, UR16e Control Box OEM AC All rights reserved Service Manual e-Series (EN) 1.1.8... - Page 144 Valid for: Control Box OEM AC All rights reserved Service Manual e-Series (EN) 1.1.8...
-
Page 145: Spare Parts
8. Spare Parts NOTICE Ensure you have the correct part numbers when ordering spare parts. All rights reserved Service Manual e-Series (EN) 1.1.8... -
Page 146: Robot Arm
8.1 Robot Arm Click on the page no. in the right column to see part in detail or go to the page. DESCRIPTION PART NUMBER(S) PAGE NO. Sealing ring set 103703/103705/103700 147-149 Lid set 103413/103405/103410 150-152 Protective cap for tool connector 131095 Tool mount with Force/Torque sensor 124083/124085/124080... -
Page 147: Sealing Ring Set Ur3E - 103703
Sealing ring set UR3e – 103703 Return to overview Sealing ring set UR3e – 103703 QTY. DESCRIPTION PART NUMBER(S) PAGE NO. Form-ring for Size 2 joints Form-ring for Size 1 joints Form-ring for size 0 joints O-ring for size 2 lids O-ring for size 1 lids O-ring for size 0 lids Flat ring for lower arm... -
Page 148: Sealing Ring Set Ur5E - 103705
Sealing ring set UR5e – 103705 Return to overview Sealing ring set UR5e – 103705 QTY. DESCRIPTION PART NUMBER(S) PAGE NO. Form-ring for Size 1 joints O-ring for size 3 lids O-ring for size 1 lids Flat ring for size 3 joints Flat ring for lower arm Flat ring for size 1 joints Wear ring for size 3 joints... -
Page 149: Sealing Ring Set Ur10E/Ur16E -103700
Sealing ring set UR10e/UR16e –103700 Return to overview Sealing ring set UR10e/UR16e –103700 QTY. DESCRIPTION PART NUMBER(S) PAGE NO. Form-ring for Size 2 joints O-ring for size 4 lids O-ring for size 3 lids O-ring for size 2 lids Flat ring for size 4 joints Flat ring for size 3 joints Flat ring for size 2 joints Wear ring for size 4 joints... -
Page 150: Lid Set For Ur3E - 103413
Lid set for UR3e – 103413 Return to overview Lid set for UR3e – 103413 QTY. DESCRIPTION PART NUMBER(S) PAGE NO. O-ring for size 2 Lid for size 2 Screws for size 2 lid O-ring for size 1 Lid for size 1 Screws for size 1 O-ring for size 0 Lid for size 0... -
Page 151: Lid Set For Ur5E - 103405
Lid set for UR5e – 103405 Return to overview Lid set for UR5e – 103405 QTY. DESCRIPTION PART NUMBER(S) PAGE NO. O-ring for size 3 Lid for size 3 Screws for size 3 lid O-ring for size 1 Lid for size 1 Screws for size 1 All rights reserved Service Manual e-Series (EN) 1.1.8... - Page 152 Lid set for UR10e/UR16e – 103410 Return to overview Lid set for UR10e/UR16e – 103410 QTY. DESCRIPTION PART NUMBER(S) PAGE NO. O-ring for size 4 Lid for size 4 Screws for size 4 lid O-ring for size 3 Lid for size 3 Screws for size 3 O-ring for size 2 Lid for size 2...
- Page 153 Protective cap for tool connector - 131095 Return to overview Protective cap for tool connector - 131095 QTY. DESCRIPTION PART NUMBER(S) PAGE NO. Protective cap for tool connector 131095 All rights reserved Service Manual e-Series (EN) 1.1.8...
- Page 154 Tool mount with Force/Torque sensor for UR3e – 124083 Return to overview Tool mount with Force/Torque sensor for UR3e – 124083 QTY. DESCRIPTION PART NUMBER(S) PAGE NO. Wear ring 103703 Flat ring 103703 Form ring 103703 Screw Screw counter sunk Tool connector lid 131095 Tool mount with Force/Torque sensor...
- Page 155 Tool mount with Force/Torque sensor for UR5e –124085 Return to overview Tool mount with Force/Torque sensor for UR5e –124085 QTY. DESCRIPTION PART NUMBER(S) PAGE NO. Wear ring Flat ring Form ring Screw Screw counter sunk Tool connector lid 131095 Tool mount with Force/Torque sensor 124085 All rights reserved Service Manual e-Series (EN) 1.1.8...
- Page 156 Tool mount with Force/Torque sensor for UR10e/UR16e – 124080 Return to overview Tool mount with Force/Torque sensor for UR10e/UR16e – 124080 QTY. DESCRIPTION PART NUMBER(S) PAGE NO. Wear ring Flat ring Form ring Screw Screw counter sunk Tool connector lid 131095 Tool mount with Force/Torque sensor 124080...
- Page 157 Wrist joint 3 for UR3e – 124002 Return to overview Wrist joint 3 for UR3e – 124002 QTY. DESCRIPTION PART NUMBER(S) PAGE NO. Flat ring for size 0 103703 Form ring for size 0 103703 Wear ring for size 0 103703 Wrist 3, size 0 O-ring for lid size 0...
- Page 158 Wrist joint 3 for UR5e – 102414 Return to overview Wrist joint 3 for UR5e – 102414 QTY. DESCRIPTION PART NUMBER(S) PAGE NO. Flat ring for size 1 103705 Form ring for size 1 103705 Wear ring for size 1 103705 Wrist 3, size 1 O-ring for lid size 1...
- Page 159 Wrist joint 3 for UR10e/UR16e – 102412 Return to overview Wrist joint 3 for UR10e/UR16e – 102412 QTY. DESCRIPTION PART NUMBER(S) PAGE NO. Flat ring for size 2 103700 Form ring for size 2 103700 Wear ring for size 2 103700 Wrist 3, size 2 O-ring for lid size 2...
- Page 160 Wrist joint 2 for UR3e – 124110 Return to overview Wrist joint 2 for UR3e – 124110 QTY. DESCRIPTION PART NUMBER(S) PAGE NO. Flat ring for size 0 103703 Form ring for size 0 103703 Wear ring for size 0 103703 Wrist 2, size 0 O-ring for lid size 0...
- Page 161 Wrist joint 2 for UR5e –124111 Return to overview Wrist joint 2 for UR5e –124111 QTY. DESCRIPTION PART NUMBER(S) PAGE NO. Flat ring for size 1 103705 Form ring for size 1 103705 Wear ring for size 1 103705 Wrist 2, size 1 O-ring for lid size 1 103405 Lid size 1...
- Page 162 Wrist joint 2 for UR10e/UR16e –124112 Return to overview Wrist joint 2 for UR10e/UR16e –124112 QTY. DESCRIPTION PART NUMBER(S) PAGE NO. Flat ring for size 2 103700 Form ring for size 2 103700 Wear ring for size 2 103700 Wrist 2, size 2 O-ring for lid size 2 103410 Lid size 2...
- Page 163 Wrist joint 1 for UR3e – 124001 Return to overview Wrist joint 1 for UR3e – 124001 QTY. DESCRIPTION PART NUMBER(S) PAGE NO. Flat ring for size 0 103703 Form ring for size 0 103703 Wear ring for size 0 103703 Wrist 1, size 0 O-ring for lid size 0...
- Page 164 Wrist joint 1 for UR5e –102413 Return to overview Wrist joint 1 for UR5e –102413 QTY. DESCRIPTION PART NUMBER(S) PAGE NO. Flat ring for size 1 103705 Form ring for size 1 103705 Wear ring for size 1 103705 Wrist 1, size 1 O-ring for lid size 1 103405 Lid size 1...
- Page 165 Wrist joint 1 for UR10e/UR16e –102411 Return to overview Wrist joint 1 for UR10e/UR16e –102411 QTY. DESCRIPTION PART NUMBER(S) PAGE NO. Flat ring for size 2 103700 Form ring for size 2 103700 Wear ring for size 2 103700 Wrist 1, size 2 O-ring for lid size 2 103410 Lid size 2...
- Page 166 Lower arm assembly – N/A Return to overview Lower arm assembly – N/A QTY. DESCRIPTION PART NUMBER(S) PAGE NO. Lower arm assembly UR3e Lower arm assembly UR5e Lower arm assembly UR10e Lower arm assembly UR16e Contact your preferred distributor for part number and availability. All rights reserved Service Manual e-Series (EN) 1.1.8...
- Page 167 Elbow joint for UR3e– 124011 Return to overview Elbow joint for UR3e– 124011 QTY. DESCRIPTION PART NUMBER(S) PAGE NO. Flat ring for size 1 103703 Form ring for size 1 103703 Wear ring for size 1 103703 Elbow, size 1 O-ring for lid size 1 103413 Lid size 1...
- Page 168 Elbow joint for UR5e –124031 Return to overview Elbow joint for UR5e –124031 QTY. DESCRIPTION PART NUMBER(S) PAGE NO. Flat ring for size 3 103705 Bracket connection incl. bolts and seals size 3 Wear ring size 3 103705 Elbow, size 3 O-ring for lid size 3 103405 Lid size 3...
- Page 169 Elbow joint for UR10e/UR16e –124031 Return to overview Elbow joint for UR10e/UR16e –124031 QTY. DESCRIPTION PART NUMBER(S) PAGE NO. Flat ring for size 3 103700 Bracket connection incl. bolts and seals size 1 Wear ring size 3 103700 Elbow, size 3 O-ring for lid size 3 103410 Lid size 3...
- Page 170 Upper arm – N/A Return to overview Upper arm assembly – N/A QTY. DESCRIPTION PART NUMBER(S) PAGE NO. Upper arm assembly UR3e Upper arm assembly UR5e Upper arm assembly UR10e Upper arm assembly UR16e Contact your preferred distributor for part number and availability. All rights reserved Service Manual e-Series (EN) 1.1.8...
- Page 171 Shoulder joint for UR3e – 124021 Return to overview Shoulder joint for UR3e – 124021 QTY. DESCRIPTION PART NUMBER(S) PAGE NO. Flat ring for size 2 103703 Form ring for size 2 103703 Wear ring for size 2 103703 Shoulder, size 2 O-ring for lid size 2 103413 Lid size 2...
- Page 172 Shoulder joint for UR5e –124031 Return to overview Shoulder joint for UR5e –124031 QTY. DESCRIPTION PART NUMBER(S) PAGE NO. Flat ring for size 3 103705 Bracket connection incl. bolts and seals size 3 Wear ring size 3 103705 Shoulder, size 3 O-ring for lid size 3 103405 Lid size 3...
- Page 173 Shoulder joint for UR10e/UR16e –124041 Return to overview Shoulder joint for UR10e/UR16e –124041 QTY. DESCRIPTION PART NUMBER(S) PAGE NO. Flat ring for size 4 103700 Bracket connection incl. bolts and seals size 4 Wear ring size 4 103700 Shoulder, size 4 O-ring for lid size 4 103410 Lid size 4...
- Page 174 Base joint for UR3e – 124021 Return to overview Base joint for UR3e – 124021 QTY. DESCRIPTION PART NUMBER(S) PAGE NO. Flat ring for size 2 103703 Form ring for size 2 103703 Wear ring for size 2 103703 Base joint, size 2 O-ring for lid size 2 103413 Lid size 2...
- Page 175 Base joint for UR5e – 124031 Return to overview Base joint for UR5e – 124031 QTY. DESCRIPTION PART NUMBER(S) PAGE NO. Flat ring for size 3 103705 Bracket connection incl. bolts and seals size 3 Wear ring size 3 103705 Base joint, size 3 O-ring for lid size 3 103405...
- Page 176 Base joint for UR10e/UR16e –124041 Return to overview Base joint for UR10e/UR16e –124041 QTY. DESCRIPTION PART NUMBER(S) PAGE NO. Flat ring for size 4 103700 Bracket connection incl. bolts and seals size 4 Wear ring size 4 103700 Base joint, size 4 O-ring for lid size 4 103410 Lid size 4...
- Page 177 Base with Robot Arm cable for UR3e – 122083 Return to overview Base with Robot Arm cable for UR3e – 122083 QTY. DESCRIPTION PART NUMBER(S) PAGE NO. Flat ring for size 2 103703 Form ring for size 2 103703 Wear ring for size 2 103703 Screws Screws counter sunk...
- Page 178 Base with Robot Arm cable for UR5e –122085 Return to overview Base with Robot Arm cable for UR5e –122085 QTY. DESCRIPTION PART NUMBER(S) PAGE NO. Flat ring for size 3 103705 Wear ring for size 3 103705 Bracket connection incl. bolts and seals size 3 Base incl.
- Page 179 Base with Robot Arm cable for UR10e/UR16e –122080 Return to overview Base with Robot Arm cable for UR10e/UR16e –122080 QTY. DESCRIPTION PART NUMBER(S) PAGE NO. Flat ring for size 4 103700 Wear ring for size 4 103700 Bracket connection incl. bolts and seals size 4 Base incl.
- Page 180 8.2 Control Box Click on the page no. in the right column to see part in detail or go to the page. DESCRIPTION PART NUMBER(S) PAGE NO. Fan & Energy Eater 122750 Power Supply 177525/177526/177005 Wire bundle Power Supply Unit 164071/164072 Control Board 124511...
- Page 181 Fan & Energy Eater assembly – 122750 Return to overview Fan & Energy Eater assembly – 122750 QTY. DESCRIPTION PART NUMBER(S) PAGE NO. Housing for filter incl. filter sheet 104008 Plate Fan Spacer Disc Energy Eater PCB Wire bundle All rights reserved Service Manual e-Series (EN) 1.1.8...
- Page 182 Power Supply for UR3e – 177525 Return to overview Power Supply for UR3e – 177525 QTY. DESCRIPTION PART NUMBER(S) PAGE NO. Power Supply for UR3e 177525 Power Supply for UR5e/UR10e/UR16e/OEM AC – 177526 Return to overview Power Supply for UR5e/UR10e/UR16e/OEM AC – 177526 QTY.
- Page 183 Power Supply for OEM DC – 177005 Return to overview Power Supply for OEM DC – 177005 QTY. DESCRIPTION PART NUMBER(S) PAGE NO. Power Supply for OEM DC 177005 All rights reserved Service Manual e-Series (EN) 1.1.8...
- Page 184 Wire bundle from Power Supply to Control Board UR3e – 164071 Return to overview Wire bundle from Power Supply to Control Board UR3e – 164071 QTY. DESCRIPTION PART NUMBER(S) PAGE NO. Wire bundle from Power Supply to Control Board 164071 UR3e Wire bundle from Power Supply to Control Board UR5e/UR10e/UR16e/OEM AC –...
- Page 185 Control Board Assembly – 124511 Return to overview Control Board Assembly – 124511 QTY. DESCRIPTION PART NUMBER(S) PAGE NO. Control Board PCB Battery for Control Board PCB 170009 Control Board Bracket Control Board Terminal set 104007 Fuse Mini Blade 10A 170008 All rights reserved Service Manual e-Series (EN) 1.1.8...
- Page 186 Battery for Control Board PCB - 170009 Return to overview Battery for Control Board PCB - 170009 QTY. DESCRIPTION PART NUMBER(S) PAGE NO. Battery for Control Board PCB 170009 All rights reserved Service Manual e-Series (EN) 1.1.8...
- Page 187 Terminal set for Control Board – 104007 Return to overview Terminal set for Control Board – 104007 QTY. DESCRIPTION PART NUMBER(S) PAGE NO. Terminals for Control Board 104007 Jumpers for Safety Terminal Jumpers for external 24V power All rights reserved Service Manual e-Series (EN) 1.1.8...
- Page 188 Teach Pendant and Control Box mounting bolts – 105202 Return to overview Teach Pendant and Control Box mounting bolts – 105202 QTY. DESCRIPTION PART NUMBER(S) PAGE NO. Teach Pendant and Control Box mounting bolts 105202 All rights reserved Service Manual e-Series (EN) 1.1.8...
- Page 189 Fuse for Control Board – 170008 Return to overview Fuse for Control Board – 170008 QTY. DESCRIPTION PART NUMBER(S) PAGE NO. Fuse Mini Blade 10A 170008 All rights reserved Service Manual e-Series (EN) 1.1.8...
- Page 190 SD card for Control Board – 170010/170013 Return to overview SD Card for Control Board incl. Software and License - 170010 QTY. DESCRIPTION PART NUMBER(S) PAGE NO. SD Card for Control Board excl. software 170010 SD Card for Control Board excl. software - 170013 QTY.
- Page 191 Cover plate with seal – 103240 Return to overview Cover plate with seal for Control Box - 103240 QTY. DESCRIPTION PART NUMBER(S) PAGE NO. Cover plate with seal for Control Box 103240 Screw and tooth washer for cover plate All rights reserved Service Manual e-Series (EN) 1.1.8...
- Page 192 Light pipes for control box - 170007 Return to overview Light pipes for control box - 170007 QTY. DESCRIPTION PART NUMBER(S) PAGE NO. Light Pipes for Control Box 170007 All rights reserved Service Manual e-Series (EN) 1.1.8...
- Page 193 Fan housing and filter for Control Box – 104008/170020 Return to overview Housing and filter for Control Box incl. filter sheets - 104008 QTY. DESCRIPTION PART NUMBER(S) PAGE NO. Housing for Control Box 104008 Filter material sheets 170020 Filter material sheets - 170020 QTY.
- Page 194 Teach Pendant - 124091 Return to overview Teach Pendant - 124091 QTY. DESCRIPTION PART NUMBER(S) PAGE NO. Teach Pendant 124091 All rights reserved Service Manual e-Series (EN) 1.1.8...
- Page 195 Control Box – 124500/124510 Return to overview Control Box for UR3e excl. Teach Pendant - 124500 QTY. DESCRIPTION PART NUMBER(S) PAGE NO. Control Box for UR3e excl. Teach Pendant 124500 Control Box for UR5e/UR10e/UR16e excl. Teach Pendant - 124510 QTY. DESCRIPTION PART NUMBER(S) PAGE NO.
- Page 196 8.3 Tools Click on the page no. in the right column to see part in detail or go to the page. DESCRIPTION PART NUMBER(S) PAGE NO. Service Tools - UR3e/UR5e/UR10e/UR16e 109011 Dual Robot Calibration Tooling Complete 185500 Mounting plate Robot Arm UR5e 131501 (Item profile) Mounting plate Robot Arm UR5e...
- Page 197 Service tool set – 109011 Return to overview Service Tool set - 109011 QTY. DESCRIPTION PART NUMBER(S) PAGE NO. Service tool set 109011 Screwdriver Flat 2.5 Multi-bit tool incl. bits 109117 Screwdriver hex key 4mm. – 5.0Nm for e-Series 109113 Socket bit 10mm.
- Page 198 Dual Robot Calibration Tooling - 185500 Return to overview Dual Robot Calibration Tooling - 185500 QTY. DESCRIPTION PART NUMBER(S) PAGE NO. Tooling Dual Robot Calibration Horse complete with mounting screws Tooling Dual Robot Calibration Tool Connector complete with mounting screws Tooling Calibration GO tool Tooling Calibration NOGO tool All rights reserved...
- Page 199 Mounting plate Robot Arm UR5e(Item profile) - 131501 Return to overview Mounting plate Robot Arm UR5e(Item profile) - 131501 QTY. DESCRIPTION PART NUMBER(S) PAGE NO. Mounting plate Robot Arm UR5e(Item profile) 131501 All rights reserved Service Manual e-Series (EN) 1.1.8...
- Page 200 Mounting plate Robot Arm UR5e(BOSCH profile) - 131502 Return to overview Mounting plate Robot Arm UR5e(BOSCH profile) - 131502 QTY. DESCRIPTION PART NUMBER(S) PAGE NO. Mounting plate Robot Arm UR5e(BOSCH profile) 131502 All rights reserved Service Manual e-Series (EN) 1.1.8...
- Page 201 Mounting plate Robot Arm UR3e(Item & BOSCH profile) - 135103 Return to overview Mounting plate Robot Arm UR3e(Item & BOSCH profile) - 135103 QTY. DESCRIPTION PART NUMBER(S) PAGE NO. Mounting plate Robot Arm UR3e 131503 (Item & BOSCH profile) All rights reserved Service Manual e-Series (EN) 1.1.8...
- Page 202 Mounting plate Robot Arm UR5e/UR10e/UR16e(Item & BOSCH profile) - 131510 Return to overview Mounting plate Robot Arm UR5e/UR10e/UR16e(Item & BOSCH profile) - 131510 QTY. DESCRIPTION PART NUMBER(S) PAGE NO. Mounting plate Robot Arm UR5e/UR10e/UR16e 131510 (Item & BOSCH profile) All rights reserved Service Manual e-Series (EN) 1.1.8...
- Page 203 Cable for tool external - 173101 Return to overview Cable for tool external - 173101 QTY. DESCRIPTION PART NUMBER(S) PAGE NO. Cable for tool external 173101 NOTE: Cable is with 90 bend connector – not shown on above image All rights reserved Service Manual e-Series (EN) 1.1.8...
- Page 204 If Universal Robots finds the robot/part unsafe to service, UR reserves the right to get the robot/part(s) cleaned or decline the case and send the part(s) back at customers expense.
- Page 205 Change log Date Revision Action Changes June 2018 1.0.0 Started Service Manual e-Series English August 2018 1.0.1 Corrected Service tool part number September 2018 1.0.2 Added Descriptions to error codes Added Inspection plan to section 3 October 2018 1.0.2 Added Detailed spare parts list March 2019 1.0.3...
Need help?
Do you have a question about the E Series and is the answer not in the manual?
Questions and answers