Table of Contents
Advertisement
Quick Links
Advertisement
Table of Contents

Related Manuals for Pyronix 256


Summary of Contents for Pyronix 256
- Page 1 RINS871-3 Customer Support line: 0870 122 3360 (national rate)
- Page 3 The philosophy behind the association is that you will receive tangible benefits, which are applicable to both the work and home environment. Dedicated Website You will have access to a dedicated PI Club section of the Pyronix website which is packed full of features that will keep you updated on Pyronix and industry news. Product Training Product training days are run monthly at Pyronix Head Office, and on-site training can also be provided to meet your individual needs.
-
Page 4: Table Of Contents
NGINEERS 3.2 E ....................13 XITING NGINEER CHAPTER 4: SYSTEM OVERVIEW................. 14 4.1 PCX 26/SMS I ...................14 NPUT NFORMATION 4.2 PCX 256 I ....................14 NPUT NFORMATION 4.3 S ........................15 YSTEM VERVIEW 4.3.1 Inputs ..........................15 4.3.2 Programmable Outputs (PGM) ..................15 4.3.3 Keypads (PCX-LCD/UK) ....................16 4.3.4 Tag Readers (PCX-PROX/INT &... - Page 5 CHAPTER 10: NOTES ON THE PCX SYSTEM ............... 36 10.1 P ................... 36 ARTITION EVEL YSTEM 10.1.1 PCX 26/SMS Level Arming.................... 36 10.1.2 PCX 256 Partition / Level Arming .................. 36 10.2 A ..................36 RMING ISARMING YSTEM 10.2.1 Flexi Arm........................36 10.2.2 Intelligent Arming ......................
- Page 6 13.10 S ......................66 IME AND 13.11 E ........................67 ODES 13.11.1 Timed ...........................67 13.11.2 Final Door........................67 13.11.3 Timed/Final ........................67 13.11.4 PTS (Push To Set) .......................67 13.12 C )................68 HANGE ODES URESS UARD 13.12.1 Code Types and Numbers...................68 13.12.2 User Types........................68 13.12.3 User Arm Options......................68 13.12.4 Flexi Arm ........................69 13.13 V...
- Page 7 ROBLEM OLVING 16.11 T ....................115 ECHNICAL PECIFICATION CHAPTER 17: WIRING DIAGRAMS ................116 17.1 PCX 26/SMS PCX 256 P ........... 116 RINTED IRCUIT OARD AYOUT 17.1.1 Relay Terminals:......................116 17.2 IMPORTANT NOTES ON CONNECTIONS ............... 117 17.2.1 Terminals ........................117 17.2.2 470 ohm resistor ......................
- Page 8 17.12.2 Connecting a PCX-ROX16R/PSU................131 17.12.3 Terminals of the PCX-ROX16R .................132 17.12.4 Addressing the PCX-ROX16R ...................132 17.13 I ......................133 NPUT ONFIGURATION 17.13.1 Single End of Line (SEOL) Wiring................133 17.13.2 Double End of Line (DEOL) Wiring ................134 17.13.3 Connecting Series Door Contacts to One Input ............135 17.13.4 Grade 3 Configuration Using An Anti Mask Detector To A Single Input ....136 17.13.5 Configuration of Shunt Inputs..................137 17.14 A...
-
Page 9: Chapter 1: Engineer Menu Structure
P C X S M S A N D P C X 2 5 6 S Y S T E M M A N U A L C H A P T E R 1 : E N G I N E E R M E N U S T R U C T U R E MENU Sub-Menu Page:... - Page 10 P C X S M S A N D P C X 2 5 6 S Y S T E M M A N U A L MENU Sub-Menu Page: CHANGE CODES? 5 Digit Pins?* Page: 69 Change Duress Codes? Page: 69 Change Master Manager Code? Page: 70...
- Page 11 P C X S M S A N D P C X 2 5 6 S Y S T E M M A N U A L MENU Sub-Menu Page: ATE Inputs Page: 84 Eng Restore Int Page: 85 ENGINEER RESTORE OPTIONS? Eng Restore HU Page: 85 Eng Restore Tamp...
-
Page 12: Chapter 2: Quick Find Guide
P C X S M S A N D P C X 2 5 6 S Y S T E M M A N U A L C H A P T E R 2 : Q U I C K F I N D G U I D E 2 . -
Page 13: Chapter 3: The Engineers Menu
P C X S M S A N D P C X 2 5 6 S Y S T E M M A N U A L C H A P T E R 3 : T H E E N G I N E E R S M E N U In order to program system configurations from the keypad, you must be in the Engineer Menu. -
Page 14: Chapter 4: System Overview
C H A P T E R 4 : S Y S T E M O V E R V I E W This manual supports the following panels: PCX 26/SMS and the PCX 256. 4 . 1 P C X 2 6 / S M S I n p u t I n f o r m a t i o n... -
Page 15: System Overview
PCX 256 PCX 26/SMS 26 inputs using 2 x PCX RIXs & 1 PCX Keypad Maximum Inputs Capacity PCX 256 256 inputs using 29 x PCX RIXs & 8 PCX Keypads PCX 26/SMS / Input Configurations DEOL, SEOL PCX 256... -
Page 16: Keypads (Pcx-Lcd/Uk)
Unconfirmed Any, Can All Arm, Exit Starts All, Exit Starts Any, Final Arm Any, Strobe Set Fail, Keyswitch Disarm, Entry, Exit, Entry/Exit, Lights, Follow Input, PCX 256 Shunt Fault, Reset 1 (Viper Reset), Reset 2 (Viper Arm/Disarm), PIR Latch 1,... -
Page 17: Other
Tamper input, First tamper input, Tamp Input Restore Telephone Line Monitoring Digital Communicator Analogue Line and Digi Modem Card. 4.3.9 Other UDL Programming software. Equipment needed: Software Support Direct Dial: PCX RS232 lead Remotely: Modem PCX 26/SMS Memory Event Log PCX 256 3000 RINS871-3 Page: 17... -
Page 18: Defaults
Partition # (Text String) Partition # (Text String) Full Partition Text Full (Text String) Sign On Message PCX 26.V5.e (Text String) PCX 256.V5.e (Text String) Site Name _ (Text String) _ (Text String) Display When Arm CHANGE TIMERS PCX 26/SMS... - Page 19 3 minutes Fire Bell Time 99 minutes 99 minutes Input NAT days Input NAT hours Zero EXIT MODES PCX 26/SMS PCX 256 All Partition Exit Modes Timed Timed CHANGE CODES PCX 26/SMS PCX 256 5 Digit Pins Change Duress Codes...
- Page 20 Keypad PGMs All Not Used All Not Used Reader PGMs All Not Used All Not Used INTELLIGENT ARM PCX 26/SMS PCX 256 Intelligent SITE OPTIONS PCX 26/SMS PCX 256 Arm With Fault Arm With Tamper+ Arm With ATS Flt Arm Part TFault...
- Page 21 Global Fault 1 Global Fault 2 Digi Channel 10 Test ATS Test ATS Digi Channels 11-16 Not Used Not Used 3 Way Calling DIAL OUT MENU PCX 26/SMS PCX 256 Select Operation Are You Sure? Connect to PC RINS871-3 Page: 21...
-
Page 22: Chapter 5: Technical Specification
C H A P T E R 5 : T E C H N I C A L S P E C I F I C A T I O N This chapter outlines the essential specifications for the PCX range. Pyronix Ltd. reserves the right to change these specifications at any time, without notice, in the interests of product improvement. -
Page 23: Warranty
2 years. In the interest of continuing improvement of quality, customer care and design, Pyronix reserves the right to amend specifications without giving prior notice. 5 . 3 P C X S y s t e m S p e c i f i c a t i o n s... -
Page 24: Devices Technical Specification
P C X S M S A N D P C X 2 5 6 S Y S T E M M A N U A L 5 . 4 D e v i c e s T e c h n i c a l S p e c i f i c a t i o n LCD KEYPAD (PCX-LCD/UK) REMOTE INPUT EXPANDER (PCX-RIX8) Supply Voltage... -
Page 25: Chapter 6: Safety
P C X S M S A N D P C X 2 5 6 S Y S T E M M A N U A L C H A P T E R 6 : S A F E T Y SAFETY A technically competent person must carry out the mains installation in accordance with the national and local electrical installation regulations... -
Page 26: Chapter 7: Installation
P C X S M S A N D P C X 2 5 6 S Y S T E M M A N U A L C H A P T E R 7 : I N S T A L L A T I O N This chapter describes the recommended procedure for installing PCX systems 7 . -
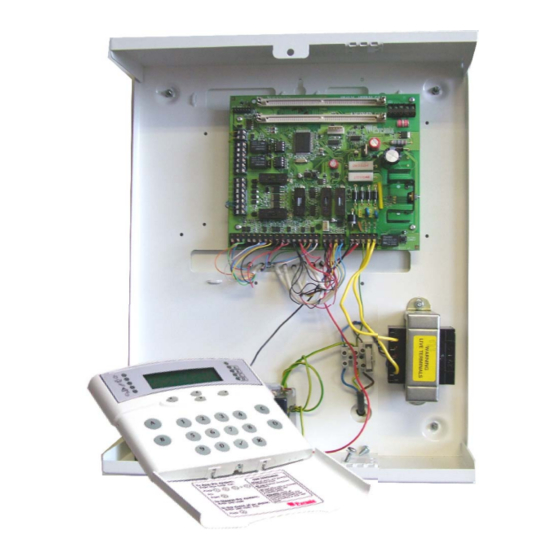
Page 27: The Pcx Panel Layout
P C X S M S A N D P C X 2 5 6 S Y S T E M M A N U A L 7 . 4 T h e P C X P a n e l L a y o u t Tamper Switch Wall Fixing DIGI MODEM CARD SLOT... -
Page 28: Tamper Switch
P C X S M S A N D P C X 2 5 6 S Y S T E M M A N U A L 7 . 7 T a m p e r S w i t c h The Tamper switch that is already fitted onto the metal case connects via a plug-on connector to the tamper pins on the PCX control panel as shown below: Tamper Switch... -
Page 29: Cabling Information
P C X S M S A N D P C X 2 5 6 S Y S T E M M A N U A L 7 . 1 3 C a b l i n g I n f o r m a t i o n 7.13.1 Planning the Cable Routes Care should be taken to avoid running alarm cables in the same trunking as, or otherwise close to, cables carrying signals that may cause interference –... -
Page 30: Chapter 8: Keypad And Reader Indications
Also note that the PCX LCD keypad also has an inbuilt prox reader. 8 . 1 T h e P C X L C D K e y p a d ( P C X - L C D / U K ) PCX 256.v5.e Time 14:48 c ,/+. - Page 31 P C X S M S A N D P C X 2 5 6 S Y S T E M M A N U A L NUMERICAL BUTTONS Used to enter user codes, programming the system and text programming. DIRECTION BUTTONS Used to select options and scroll display.
-
Page 32: The Internal Reader (Pcx-Prox/Int)
P C X S M S A N D P C X 2 5 6 S Y S T E M M A N U A L 8 . 2 T h e I n t e r n a l R e a d e r ( P C X - P R O X / I N T ) Alert Alarm Tamper... -
Page 33: The External Reader (Pcx-Prox/Ext)
P C X S M S A N D P C X 2 5 6 S Y S T E M M A N U A L 8 . 3 T h e E x t e r n a l R e a d e r ( P C X - P R O X / E X T ) GREEN LED This indicated that the reader is ready to accept a tag. -
Page 34: Chapter 9: The Pcx Devices
P C X S M S A N D P C X 2 5 6 S Y S T E M M A N U A L C H A P T E R 9 : T H E P C X D E V I C E S This section summarises the components available to complete the PCX systems. - Page 35 P C X S M S A N D P C X 2 5 6 S Y S T E M M A N U A L PCX-ACCESS: Access control module Assign the PCX-ACCESS as a reader (and then as access control) in the function ‘Assign Keypads/Readers’.
-
Page 36: Chapter 10: Notes On The Pcx System
1 0 . 1 P a r t i t i o n / L e v e l A r m S y s t e m The PCX 26/SMS can have up to 4 arm modes, and the PCX 256 can have up to 14 partitions or arm modes. -
Page 37: The Msx Card And The Digi Modem Card
The PCX system complies with all requirements of BSIA Form 175 for exchange of information between CIE and ATE. An industry standard plug on ATE or communicator can be fitted to a PCX 26/SMS or 256. Up to 10 channels are available and are fully programmable under ‘Change Outputs’ on page 79. -
Page 38: Sequential Confirmation Signalling
P C X S M S A N D P C X 2 5 6 S Y S T E M M A N U A L Re-Arm When the bell time expires the system will silence. Re-arm will NOT take place until expiration of the “confirmation”... -
Page 39: Terminology
P C X S M S A N D P C X 2 5 6 S Y S T E M M A N U A L NOTE: Whilst an ‘intruder’ alarm signal will be generated in the event of entry time expiring after a FINAL EXIT input is activated, such inputs are NOT allowed to count towards a confirmed alarm. -
Page 40: Chapter 11: The Master Manager Menu
Enable detector operation to be tested BELL TEST? Enable system siren and strobe to be tested Initiate a test call to the Pyronix Host Computer (PHC) TEST PHC COMMUNICATIONS? if SMS messaging in use Allows the PCX system to connect to a PC and allows... -
Page 41: Chapter 12: Powering Up & Keypad Operations
P C X S M S A N D P C X 2 5 6 S Y S T E M M A N U A L C H A P T E R 1 2 : P O W E R I N G U P & K E Y P A D O P E R A T I O N S Before using the system, all items connected to the RS-485 communications bus must be allocated a unique address. -
Page 42: Text Programming
P C X S M S A N D P C X 2 5 6 S Y S T E M M A N U A L 1 2 . 4 T e x t P r o g r a m m i n g Text may be programmed for input names, for the ‘sign-on’... -
Page 43: Forced Arm O N Inputs
P C X S M S A N D P C X 2 5 6 S Y S T E M M A N U A L 1 2 . 6 F o r c e d A r m O n I n p u t s The ‘Forced Arm On Inputs’... -
Page 44: Chapter 13: The Engineer Functions
P C X S M S A N D P C X 2 5 6 S Y S T E M M A N U A L C H A P T E R 1 3 : T H E E N G I N E E R F U N C T I O N S Please note that any programming done in the Engineers Menu will not be seen by the system until you have exited and the system has saved its data (please see Page: 13). -
Page 45: Inhibit Fire /Hu
P C X S M S A N D P C X 2 5 6 S Y S T E M M A N U A L “Please Wait” will be displayed, and then the following: Press the key. “Clear Codes will be displayed”. If you would like to clear all the codes then press the key now. -
Page 46: Revision
‘SOFTWARE REVISION?’ Press the The following will be displayed (on a PCX 256) Press the You will be returned to the Engineer Menu. 1 3 . 4 C h o o s e M o d e This option allows you to select the following options: 13.4.1 The End of Line Range... - Page 47 P C X S M S A N D P C X 2 5 6 S Y S T E M M A N U A L V i s u a l K e y p a d P r o g r a m m i n g P r o c e d u r e C H O O S E M O D E Choose Mode Using the...
-
Page 48: Install Rix
P C X S M S A N D P C X 2 5 6 S Y S T E M M A N U A L 1 3 . 5 I n s t a l l R I X Any Remote Input Expanders installed on the PCX system must be enabled by the ‘Install RIX’... -
Page 49: Change Inputs
P C X S M S A N D P C X 2 5 6 S Y S T E M M A N U A L 1 3 . 6 C h a n g e I n p u t s By default, all inputs are pre-set as ‘unused’... -
Page 50: Entry Shock Input Type (21)
P C X S M S A N D P C X 2 5 6 S Y S T E M M A N U A L Number & Type Operation Communicator: ‘Intruder’ signal When disarmed: Audible Response: Programmable Communicator: ‘Day Alarm’ signal Sub Part Input is allocated by system software and cannot be reprogrammed to a different Control*... -
Page 51: Creating A Common Partition
P C X S M S A N D P C X 2 5 6 S Y S T E M M A N U A L 13.6.3 Creating a Common Partition Please ignore this section if you are using a PCX 26/SMS. In certain situations, a ‘common’... - Page 52 (To select level arming instead of partitions please refer to Site Options “Use Level Arming”, see page: 84). Example shows the PCX 256 system display. Please note the primary partitions are A, B, C and D. Press the key.
- Page 53 P C X S M S A N D P C X 2 5 6 S Y S T E M M A N U A L Chime Enter : for Any Enter : for Single Enter : for Follow Press the Omittable Enter...
- Page 54 P C X S M S A N D P C X 2 5 6 S Y S T E M M A N U A L Paired Input (Not available on PCX 26/SMS) Enter : for No Enter : for Yes Press the Confirm Group Enter the Confirm Group if used.
-
Page 55: Shunt Inputs
A maximum of 13 shunt inputs can be programmed on the PCX 26/SMS and a maximum of 128 on the PCX 256 (i.e. half the number of inputs on the system). The inputs in the shunt group/list will only activate after 10 seconds of the nominated shunt input. For example, if input 1 is programmed as ‘Shunt Input’, and inputs 2 and 3 are programmed as “24hr”, then once... - Page 56 (To select level arming instead of partitions please refer to Site Options “Use Level Arming”, see page: 84). Example shows the PCX 256 system display. Please note the primary partitions are A, B, C and D. Press the key.
- Page 57 P C X S M S A N D P C X 2 5 6 S Y S T E M M A N U A L Chime Enter : for Any Enter : for Single Enter : for Follow Press the Omittable Enter...
- Page 58 P C X S M S A N D P C X 2 5 6 S Y S T E M M A N U A L Paired Input (Not available on PCX 26/SMS) Enter : for No Enter : for Yes Press the Confirm Group Enter the Confirm Group if used.
-
Page 59: 3 . 7 A S S I G N K E Y P A D S / R E A D E R S
On the PCX 26/SMS system you will only select one level arm under ‘Default Level’, this selects what the “default arm mode” will be set to (A,B,C or D). Arm point arms, disarms and point in is only on the PCX 256 RINS871-3... - Page 60 P C X S M S A N D P C X 2 5 6 S Y S T E M M A N U A L V i s u a l K e y p a d P r o g r a m m i n g P r o c e d u r e A S S I G N K E Y P A D S / R E A D E R S Assign Keypads/Readers Using the...
- Page 61 P C X S M S A N D P C X 2 5 6 S Y S T E M M A N U A L Arm Point Disarms Select the Disarm Points you would like for ‘disarming’ the system. Press the NOTE: The partition options will change depending on the system you are using.
-
Page 62: Access Control
P C X S M S A N D P C X 2 5 6 S Y S T E M M A N U A L 13.7.5 Access Control The following programming shows how to set up the Access Control facility if you are using it. For connection details please see page: 138. - Page 63 P C X S M S A N D P C X 2 5 6 S Y S T E M M A N U A L Enter the input number to monitor the chosen door. Please note that this must be selected for the door monitoring to function.
-
Page 64: System Displays
P C X S M S A N D P C X 2 5 6 S Y S T E M M A N U A L 1 3 . 8 S y s t e m D i s p l a y s Please see page 42, “Text Programming”... - Page 65 P C X S M S A N D P C X 2 5 6 S Y S T E M M A N U A L 1 3 . 9 C h a n g e T i m e r s All the timers can be changed in this function, the table below shows the different timers available and the default values: Timer...
-
Page 66: Change Timers
P C X S M S A N D P C X 2 5 6 S Y S T E M M A N U A L V i s u a l K e y p a d P r o g r a m m i n g P r o c e d u r e C H A N G E T I M E R S Change Timers Using the... -
Page 67: Exit Modes
P C X S M S A N D P C X 2 5 6 S Y S T E M M A N U A L Adjust the day using the numeric keys Press the Hours Adjust the hours using the numeric keys Press the Minutes Adjust the minutes using the numeric keys... -
Page 68: Guard
The Manager Mode. See page: 40. The Master User and Engineer Codes cannot be deleted. 13.12.1 Code Types and Numbers. PCX System User/Manager Codes Duress/Guard Codes PCX 26/SMS PCX 256 13.12.2 User Types User Type Functions Operation User Arm and Disarm System Programmed by Manager only. -
Page 69: Flexi Arm
P C X S M S A N D P C X 2 5 6 S Y S T E M M A N U A L 13.12.4 Flexi Arm If enabled, the user will be able to select which partitions they can arm/disarm, from those the code is valid for. - Page 70 P C X S M S A N D P C X 2 5 6 S Y S T E M M A N U A L User Partitions Select the partitions the code will be valid for. Please note that the partitions will change depending on the PCX system.
- Page 71 P C X S M S A N D P C X 2 5 6 S Y S T E M M A N U A L User Arm Options Enter : for Disarm/Arm Enter : for Disarm Only Enter : for Arm Only Enter : for None...
-
Page 72: Volume Control
P C X S M S A N D P C X 2 5 6 S Y S T E M M A N U A L 1 3 . 1 3 V o l u m e C o n t r o l The Volume Control function applies to the loudspeaker output only. -
Page 73: Silent 1 St Alarm
P C X S M S A N D P C X 2 5 6 S Y S T E M M A N U A L E/E Keypads Only Enter : for No Enter : for Yes Press the Alert Kps Only Enter : for No... - Page 74 P C X S M S A N D P C X 2 5 6 S Y S T E M M A N U A L as you do not wish anything else to activate when the system is disarmed, enter ‘1’ for Internal Sounders again.
-
Page 75: Change Outputs
P C X S M S A N D P C X 2 5 6 S Y S T E M M A N U A L Partition Stops Enter : for Keypads Enter : for Internal Sounders Enter : for Bells Only Enter : for Digi Enter... - Page 76 0025 Keyswitch unset via a keyswitch input (either pulsed or latched keyswitch) Set with Omit (Not on 0026 Activates when inputs are omitted on an arming mode PCX 256) 0031 Entry* Live during any exit time 0032 Exit* Live during any entry time...
- Page 77 P C X S M S A N D P C X 2 5 6 S Y S T E M M A N U A L Type Active Restore 0059 Engineer Access When entering Engineer Mode When leaving Engineer Mode 0060 Initialise Digi At power up...
-
Page 78: Stu / Ate Pin Outputs (Defaults)
Any communicating device with the industry standard footprint may be plugged onto the control panel STU / ATE (Alarm Transmission Equipment) pins. The default types for the footprint are as follows: COM LOOM Default Type (PCX 26/SMS) Default Type (PCX 256) 1 (Blue) Fire (0001) Fire (0001) - Page 79 P C X S M S A N D P C X 2 5 6 S Y S T E M M A N U A L V i s u a l K e y p a d P r o g r a m m i n g P r o c e d u r e C H A N G E O U T P U T S Change Outputs Using the...
- Page 80 P C X S M S A N D P C X 2 5 6 S Y S T E M M A N U A L Select the output type for the PGMs and press the key. Repeat for each PGM (and RIX address once you have pressed the key) ROX PGMS...
-
Page 81: The 'Follow Input
P C X S M S A N D P C X 2 5 6 S Y S T E M M A N U A L 13.15.5 The ‘Follow Input’ PGM If the expander card is installed the PGM output ‘Follow Input’ is made available. This output provides the following functionality: Follow (whilst input active), TIMED or LATCHED output Follow individual INPUT, PARTITION, SUB PARTITION or SHUNT LIST... -
Page 82: Intelligent Arm
P C X S M S A N D P C X 2 5 6 S Y S T E M M A N U A L Follow When? Enter : for When Arm Enter : for When Disarm Enter : for Always Press the key. -
Page 83: Options
P C X S M S A N D P C X 2 5 6 S Y S T E M M A N U A L V i s u a l K e y p a d P r o g r a m m i n g P r o c e d u r e I N T E L L I G E N T A R M Intelligent Arm Using the... -
Page 84: Ate Inputs Page
P C X S M S A N D P C X 2 5 6 S Y S T E M M A N U A L If ‘YES’: The system becomes a ‘level arm’ (Having one partition set only at any one Use Level Arm* time, e.g. -
Page 85: Engineer Reset Options
P C X S M S A N D P C X 2 5 6 S Y S T E M M A N U A L 1 3 . 1 8 E n g i n e e r R e s e t O p t i o n s The Engineer Reset Options are used so that once an alarm has occurred;... -
Page 86: Review Logs
Information on all fault codes that appear in the log can be seen on page: 143. 13.19.1 Log Entries The PCX 26/SMS holds up to: 300 log entries The PCX 256 holds up to: 3000 log entries 13.19.2 Code Identification The codes that are entered into the PCX system are identified as follows:... -
Page 87: Sounds To Play
P C X S M S A N D P C X 2 5 6 S Y S T E M M A N U A L V i s u a l K e y p a d P r o g r a m m i n g P r o c e d u r e R E V I E W L O G S Review Logs Using the... -
Page 88: Test Control
STU/ATE pins. 13.20.7 Test PHC Communications Before SMS signalling can be used, it must be initialised by communication with the Pyronix Host Computer (PHC). Once the test has completed, SMS texting can be performed. - Page 89 P C X S M S A N D P C X 2 5 6 S Y S T E M M A N U A L V i s u a l K e y p a d P r o g r a m m i n g P r o c e d u r e E N G I N E E R T E S T S Engineer Tests Using the...
- Page 90 P C X S M S A N D P C X 2 5 6 S Y S T E M M A N U A L Enter the number of the inputs you wish to soak test and press .
- Page 91 P C X S M S A N D P C X 2 5 6 S Y S T E M M A N U A L Once the Battery test has completed, press the key, ‘Do Battery Load Test’ will be displayed, press key.
-
Page 92: Diagnostics
P C X S M S A N D P C X 2 5 6 S Y S T E M M A N U A L 1 3 . 2 1 D i a g n o s t i c s The system diagnostics are available for all parts of the system, including any remote power supplies if fitted. - Page 93 P C X S M S A N D P C X 2 5 6 S Y S T E M M A N U A L Enter the address of the ROX you wish to view. Repeat for each ROX. Press the key.
-
Page 94: Set U P Downloading
There are two way that the panel communicates with the PC, one is remotely; via the telephone line (thus you will require the digi modem card (PCX-DIGI+ARM) and the other is directly; by using an RS232 lead (PCX-RS232L) which connects into the PCX 256 expander card and your PC. 13.22.1 Download By Select either RS232 (direct connection) or Modem (remote dial in connection). - Page 95 P C X S M S A N D P C X 2 5 6 S Y S T E M M A N U A L V i s u a l K e y p a d P r o g r a m m i n g P r o c e d u r e S E T U P D O W N L O A D I N G Set Up Downloading Using the...
- Page 96 P C X S M S A N D P C X 2 5 6 S Y S T E M M A N U A L Enter the Arm telephone number. Press the key. This is not available on PCX 26/SMS. Program PCs Select the PC that will be used for programming.
-
Page 97: Programme Digi / Sms
The channels can be individually programmed in the “Program Digi Channels” section. Each channel uses a programmable output number. The default values are described on the next page. Channel Default Type (PCX 26/SMS) Default Type (PCX 256) Fire (PGM 0001) Fire (PGM 0001) HU Device Any (PGM 0009) - Page 98 P C X S M S A N D P C X 2 5 6 S Y S T E M M A N U A L To program in an ARC number, press the Disable Digi/SMS Enter : for No (Enables the Digi Modem) Enter : for Yes Press the...
- Page 99 P C X S M S A N D P C X 2 5 6 S Y S T E M M A N U A L Stop on Success Enter : for No Enter : for Yes Press the ARC Account Use the numeric keys to program the account number of the central station (this will be given to you by your...
- Page 100 P C X S M S A N D P C X 2 5 6 S Y S T E M M A N U A L Test Calls Enter : for No Enter : for Timed (If Timed is chosen you will need to enter the hours and minutes once you have pressed the key) Press the...
-
Page 101: Programming Contact Id
P C X S M S A N D P C X 2 5 6 S Y S T E M M A N U A L 13.23.2 Programming Contact ID The Contact ID signalling protocol can also be used. However the programming differs from Fast Format, here you have to select the content types you would like to be sent to the Alarm Receiving Centre. - Page 102 P C X S M S A N D P C X 2 5 6 S Y S T E M M A N U A L V i s u a l K e y p a d P r o g r a m m i n g P r o c e d u r e P R O G R A M M E D I G I / S M S C o n t a c t I D Programme Digi / SMS...
- Page 103 P C X S M S A N D P C X 2 5 6 S Y S T E M M A N U A L Enter the 1 telephone number. Press the key. Enter the 2 telephone number. Press the key.
- Page 104 P C X S M S A N D P C X 2 5 6 S Y S T E M M A N U A L Using the numeric keys select the content types you would like to use for Contact ID for the different types. Press the key.
-
Page 105: Programming Sms Texts
P C X S M S A N D P C X 2 5 6 S Y S T E M M A N U A L 13.23.3 Programming SMS Texts The PCX system also has the facility of sending an SMS to a mobile phone when an alarm has occurred. This facility can be programmed using the content type the protocol Contact ID uses. -
Page 106: Pabx Telephone Systems
P C X S M S A N D P C X 2 5 6 S Y S T E M M A N U A L 1 3 . 2 4 P A B X T e l e p h o n e S y s t e m s Please note for PABX telephone systems (where a “9”... - Page 107 P C X S M S A N D P C X 2 5 6 S Y S T E M M A N U A L Network Enter : for Vodafone Enter : for one2one Enter : for Orange Enter : for Cellnet (O Enter...
- Page 108 P C X S M S A N D P C X 2 5 6 S Y S T E M M A N U A L Test Calls Enter : for No Enter : for Timed (If Timed is chosen you will need to enter the hours and minutes once you have pressed the key) Press the...
-
Page 109: Dial Out Menu
P C X S M S A N D P C X 2 5 6 S Y S T E M M A N U A L 1 3 . 2 5 D i a l O u t M e n u The Dial Out Menu can be used to dial to a remote PC (rather than the PC dialling the control panel). -
Page 110: Chapter 14: The Digi Modem Card
C H A P T E R 1 4 : T H E D I G I M O D E M C A R D The Digi-Modem card is design to slot into a SIMM socket (Communication card) on either the PCX 26/SMS or the PCX 256. PCX-COM9600 ©... -
Page 111: Pstn Wiring
P C X S M S A N D P C X 2 5 6 S Y S T E M M A N U A L 1 4 . 2 P S T N W i r i n g Connections are made to the terminals on the end station PCB: Telephone line output for connection to analogue PSTN telephone line Telephone line output for connection to analogue PSTN telephone line... -
Page 112: Chapter 15: System Expansion And Enhancement
C H A P T E R 1 5 : S Y S T E M E X P A N S I O N A N D E N H A N C E M E N T PLEASE NOTE THE SYSTEM EXPANSION CARD IS ONLY USED FOR PCX 256 SYSTEMS This chapter highlights the means of providing additional and expanded facilities. -
Page 113: Chapter 16: The Radio Expander
The radio expander contains the 868 inovonics receiver and programming PCB. To connect the expander to the PCX system please see page 114. A total of 10 radio expanders can be connected to the PCX 256 system, and a total of 2 to the PCX 26/SMS system. -
Page 114: Expander
P C X S M S A N D P C X 2 5 6 S Y S T E M M A N U A L 1 6 . 4 A d d r e s s i n g t h e R a d i o E x p a n d e r Once a radio expander is installed on the system in must be enabled at both the radio expander and the PCX system. -
Page 115: Assigning Repeaters To The Radio Expander
P C X S M S A N D P C X 2 5 6 S Y S T E M M A N U A L Activate the detector and the signal strength will be displayed (0- 99). If it is below 14, use a REPEATER to boost the signal. 1 6 . -
Page 116: Chapter 17: Wiring Diagrams
P C X S M S A N D P C X 2 5 6 S Y S T E M M A N U A L C H A P T E R 1 7 : W I R I N G D I A G R A M S 1 7 . -
Page 117: Important Notes On Connections
P C X S M S A N D P C X 2 5 6 S Y S T E M M A N U A L 1 7 . 2 I M P O R T A N T N O T E S O N C O N N E C T I O N S 17.2.1 Terminals Some devices may carry different idents, therefore please note the following: Meanings... -
Page 118: Power Supply Wiring
P C X S M S A N D P C X 2 5 6 S Y S T E M M A N U A L 1 7 . 3 P o w e r S u p p l y W i r i n g COMMUNICATION CARD CO MMS PG MS EXPANSION CARD SLOT... -
Page 119: Stu/Ate And Rs232 Connections
The RS232 connector is used to connect an RS232 lead via a PC/Laptop. This enables the engineer to upload/download information from the panel using the PCX UDL Software. Please contact Pyronix or your local distributor regarding the PCX software. 17.5.2 Connecting the Communication Loom... -
Page 120: Stu/Ate Output Pins
P C X S M S A N D P C X 2 5 6 S Y S T E M M A N U A L 17.5.3 STU/ATE Output Pins COM LOOM Default Type (PCX 26/SMS) Default Type (PCX 256) 1 (Blue) Fire (0001) Fire (0001) -
Page 121: Keypads Wiring (Pcx-Lcd/Uk)
1 7 . 6 K e y p a d s W i r i n g ( P C X - L C D / U K ) A maximum of 4 keypads can be installed onto the PCX 26/SMS system and a maximum of 16 can be installed on to the PCX 256 system. 17.6.1 Connecting the PCX-LCD/UK... -
Page 122: Tag Reader Wiring (Pcx-Prox/Int)
1 7 . 7 T a g R e a d e r W i r i n g ( P C X - P R O X / I N T ) A maximum of 3 internal tag readers can be installed onto the PCX 26/SMS system and a maximum of 15 can be installed onto the PCX 256 system. 17.7.1 Connecting the PCX-PROX/INT... -
Page 123: External Tag Reader (Pcx-Prox/Ext)
1 7 . 8 E x t e r n a l T a g R e a d e r ( P C X - P R O X / E X T ) A maximum of 3 external tag readers can be installed onto the PCX 26/SMS system and a maximum of 7 can be installed onto the PCX 256 system. 17.8.1 Connecting the PCX-PROX/EXT... -
Page 124: Addressing A Pcx-Prox/Ext
P C X S M S A N D P C X 2 5 6 S Y S T E M M A N U A L 17.8.3 Addressing a PCX-PROX/EXT The brown, green and orange wires are used to address the external proximity reader. Depending on which wires are shorted to ground (black wire) or left floating, the proximity reader can be addressed as shown in the table below: Address... -
Page 125: Remote Input Expander (Pcx-Rix8)
P C X S M S A N D P C X 2 5 6 S Y S T E M M A N U A L 1 7 . 9 R e m o t e I n p u t E x p a n d e r ( P C X - R I X 8 ) The PCX RIX8 enables the expansion of inputs. -
Page 126: Addressing The Pcx-Rix8
RIXs are addressed using the DIP switches on the PCB. A maximum of 2 RIXs can be connected to the PCX 26/SMS system and a maximum of 29 RIXs can be connected to the PCX 256 system. The DIP switches... -
Page 127: Input
P C X S M S A N D P C X 2 5 6 S Y S T E M M A N U A L 1 7 . 1 0 R e m o t e I n p u t E x p a n d e r ( P C X - R I X 8 + / P S U ) Every PCX-RIX8+ will come with its own power supply. -
Page 128: Addressing A Pcx-Rix8+/Psu
RIXs are addressed using the DIP switches on the PCB. A maximum of 29 RIXs can be connected to a PCX 256 system. The DIP switches operate as follows: Switches should be On or Off as shown in the following table:... -
Page 129: Connecting The Radio Expander
Radio expanders are addressed using the programming buttons on the PCB (see page: 114). A maximum of 2 radio expanders can be connected to the PCX 26/SMS system, and a maximum of 10 radio expanders can be connected to a PCX 256 system. COMMUNICATION CARD... -
Page 130: Remote Output Expander (Pcx-Rox16R & Pcx-Rox16R/Psu)
P C X S M S A N D P C X 2 5 6 S Y S T E M M A N U A L 1 7 . 1 2 R e m o t e O u t p u t E x p a n d e r ( P C X - R O X 1 6 R & P C X - R O X 1 6 R / P S U ) The Remote Output Expander has 16 relay programmable outputs on the board. -
Page 131: Connecting A Pcx-Rox16R/Psu
P C X S M S A N D P C X 2 5 6 S Y S T E M M A N U A L 17.12.2 Connecting a PCX-ROX16R/PSU The PCX-ROX16R/PSU comes with a power supply of 1.5A. Please note that when connecting the ROX PSU, the terminal “K+”... -
Page 132: Terminals Of The Pcx-Rox16R
ROXs are addressed using the DIP switches on the PCB. A maximum of 8 ROXs can be connected to a PCX 256 system and 1 ROX to the PCX 26/SMS. The DIP switches operate as follows: Switches should be On or Off as shown in the following table. -
Page 133: Input 1
P C X S M S A N D P C X 2 5 6 S Y S T E M M A N U A L 1 7 . 1 3 I n p u t C o n f i g u r a t i o n 17.13.1 Single End of Line (SEOL) Wiring NOTE: This wiring configuration does not comply with Grade 3 COMMUNICATION CARD... -
Page 134: Double End Of Line (Deol) Wiring
P C X S M S A N D P C X 2 5 6 S Y S T E M M A N U A L 17.13.2 Double End of Line (DEOL) Wiring COMMUNICATION CARD COMMS PGMS A-1 B-1 EXPANSION CARD SLOT TAMPER RS232... -
Page 135: Connecting Series Door Contacts To One Input
P C X S M S A N D P C X 2 5 6 S Y S T E M M A N U A L 17.13.3 Connecting Series Door Contacts to One Input The below diagrams shows how you can connect a series of door contacts to one input, while still maintaining the tamper circuit of each. -
Page 136: Grade 3 Configuration Using An Anti Mask Detector To A Single Input
+AUX- Alarm Type Readings SUPPLY ALARM FAULT TAMPER Mask 16k2 /MASK 11k5 Fault Alarm Tamper <3k, >23k Input 1 Anti Mask Detector Please note the PCX 256 Grade 3 System uses the resistor value 6k8 for Mask. Page: 136 RINS871-3... -
Page 137: Configuration Of Shunt Inputs
P C X S M S A N D P C X 2 5 6 S Y S T E M M A N U A L 17.13.5 Configuration of Shunt Inputs COMMUNICATION CARD COMMS PGMS A-1 B-1 EXPANSION CARD SLOT TAMPER RS232 PGMS... -
Page 138: C (Pcx-Access)
The PCX system provides access control facilities integrated into the alarm system, incorporating the following features: Number of Doors 1 per door station, max (dependant upon other control devices fitted): PCX-256: 15 Reader Head Fully sealed to IP66 for exterior use. Suitable for any type, including car park barriers. Voltage or volt-free outputs Lock Release available, for 12V or 24V DC, or AC mechanisms. - Page 139 P C X S M S A N D P C X 2 5 6 S Y S T E M M A N U A L The Access Control Reader looks like the following: NOTE 1: Before powering up, the Door Station must be addressed using the coding switches –...
-
Page 140: Connecting The Pcx-Access System
P C X S M S A N D P C X 2 5 6 S Y S T E M M A N U A L 17.14.1 Connecting the PCX-ACCESS System COMMUNICATION CARD EXPANSION CARD SLOT RS232 PGMS RESET BELL ENGINEER KEYPAD... -
Page 141: Programmable Outputs Wiring
P C X S M S A N D P C X 2 5 6 S Y S T E M M A N U A L 1 7 . 1 5 P r o g r a m m a b l e O u t p u t s W i r i n g 17.15.1 Belle Connection NOTE: PGM 5 is programmed as “Bell Any”, and PGM 4 is programmed as “Strobe Any”. -
Page 142: Twin Alert Internal Sounder Connection
P C X S M S A N D P C X 2 5 6 S Y S T E M M A N U A L 17.15.3 Twin Alert Internal Sounder Connection NOTE: PGM 5 is programmed as “Bell Any”. COMMUNICATION CARD CO MMS PGMS EXPANSION CARD SLOT... -
Page 143: Appendix A: Faults
“TRY NEXT”. an equipment fault. PHC TEST Unable to communicate with Ensure Digi is enabled, and at least one SMS call is Pyronix Host Computer. correctly programmed. FAIL Note: This would also Check that ordinary phone on same line connects to... - Page 144 P C X S M S A N D P C X 2 5 6 S Y S T E M M A N U A L ATSF 1 Signalling equipment has The control panel will automatically signal a test on ATE Path/Both 100 failed to signal on one of its output 10 –...
-
Page 145: Appendix B: Input Types
P C X S M S A N D P C X 2 5 6 S Y S T E M M A N U A L POWER SUPPLY PROBLEMS Fault Description Solution Battery Fuse (F4) failed, Note: This indication should be expected BATTERY OR Battery not present, during recharge after a mains failure. - Page 146 P C X S M S A N D P C X 2 5 6 S Y S T E M M A N U A L A P P E N D I X B : T H E I N D E X A P P E N D I X C : Connecting a Grade 3 Detector Connecting an Internal Speaker...
- Page 147 Partition Texting Temperatures PCX 256 Inputs Table Terminology PCX Layout Test Bell 11, 88, 90 PCX SMS and 256 PCB Test Calls 17, 21, 100, 104, 108 PCX SMS Inputs Table Test PGMs (Outputs) 11, 88, 91 PCX-LCD/UK 16, 24, 30, 34, 86, 121...
-
Page 148: Input Types
P C X S M S A N D P C X 2 5 6 S Y S T E M M A N U A L A P P E N D I X D : I N P U T T Y P E S I n p u t T y p e s Number &... -
Page 149: Input Attributes
P C X S M S A N D P C X 2 5 6 S Y S T E M M A N U A L Number & Type Operation Active when armed or disarmed Audible Response: Graduated internal Fault Triggers ‘Global Fault 1 and 2’... -
Page 150: Appendix C: Output Types
0025 Keyswitch unset via a keyswitch input (either pulsed or latched keyswitch) Set with Omit (Not on 0026 Activates when inputs are omitted on an arming mode PCX 256) 0031 Entry* Live during any exit time 0032 Exit* Live during any entry time... - Page 151 P C X S M S A N D P C X 2 5 6 S Y S T E M M A N U A L Type Active Restore procedure completed Follow Input* When input triggers Dependant upon programming 0035 See page: 81.
- Page 152 P C X S M S A N D P C X 2 5 6 S Y S T E M M A N U A L Type Active Restore 0218 Unconfirmed A As 0018 for Partition A / Arm Level A events only 0219 Can Arm A As 0019 for Partition A / Arm Level A events only...
-
Page 153: Appendix D: User / Engineer Operations
The display will switch between the activation that has just occurred and ‘Restore Required’. Press the key. The following display will be displayed: PCX 256.V5.e Time 02:31 c ,/+. -
Page 154: Chime Function
Chime function while the system is disarmed. If enabled, a tone will sound every time the relevant inputs are opened. When enabled the display will show a ‘c’ on the right hand side of the keypad as shown below. PCX 256.v5.e Time 11.09 c ,/+. -
Page 155: Hold Up Alarm
The PCX LCD keypad can be used to produce a Hold Up alarm if enabled by the engineer. If this is enabled, you can produce a Hold Up Alarm as follows: 1. Press the keys at the same time: PCX 256.v5.e Time 11.09 c ,/+. -
Page 156: Appendix E: Master Manager Menu
P C X S M S A N D P C X 2 5 6 S Y S T E M M A N U A L A P P E N D I X G : M A S T E R M A N A G E R M E N U S e t D a t e &... -
Page 157: Deleting A User Code
P C X S M S A N D P C X 2 5 6 S Y S T E M M A N U A L 7. User Partitions: Select the partitions that this user code or card/tag will be assigned for. 8. -
Page 158: Review Logs
P C X S M S A N D P C X 2 5 6 S Y S T E M M A N U A L R e v i e w L o g s The Panel Log The panel log includes all armed events, disarmed events, alarm events and system faults. -
Page 159: Phonebook
P C X S M S A N D P C X 2 5 6 S Y S T E M M A N U A L P h o n e b o o k This function allows you to change the SMS telephone numbers that are programmed for the text messaging service. -
Page 160: Test Phc Communications
If the engineer has set up SMS text messaging then this function needs to be used. The system will automatically carry out a test call to the PHC (Pyronix Host Computer) every two weeks. The call is made via a premium rate number and the bill payer should be informed of the charges. Customers who have “BT Answer 1571”... -
Page 161: Allow Engineer Menu
A l l o w E n g i n e e r M e n u If this function is enabled, the engineer will require authorisation from the user to access the Engineers menu. 1. Use the keys to scroll to ‘ALLOW ENGR MENU’. Press the key. -
Page 162: Appendix F: Contact Details
Pyronix Ltd. reserves the right to adjust specifications of this system, at any time and without notice, in the interests of product improvement. Pyronix Ltd. is an independent British company specialising in the design and manufacture of high-quality security control equipment. -
Page 163: Appendix G: Index
A P P E N D I X I : I N D E X Connecting an Internal Speaker........142 Connecting Inputs (DEOL) ........134 16 Way Relay Output Module 24, 34, 86, 130, 131, 132 Connecting Inputs (SEOL)........133 Connecting multiple contacts ........135 16 Way Relay Output Module with PSU ... - Page 164 PCX-LCD/UK......16, 24, 30, 34, 86, 121 Test PGMs (Outputs)........11, 88, 91 PCX-PROX/EXT . 16, 24, 33, 34, 78, 86, 121, 123, 124 Test Pyronix Host Computer ....11, 88, 91, 160 PCX-PROX/INT ....16, 24, 32, 33, 34, 86, 122 Testing Keypads ............41 PGM Specs...........15, 88, 127, 141...
- Page 166 Page: 166 RINS871-3...
- Page 168 QUICK FIND GUIDE COMMUNICATION Function Description Pages Programming of telephone numbers, Digi channels and SMS Page: 97 PROGRAM DIGI/SMS? details. ENGINEER RESTORE Anti code and Engineer resets after alarms Page: 85 OPTIONS? Makes the system available for upload/download via a SET UP DOWNLOADING? Page: 94 modem or RS232 lead.
Need help?
Do you have a question about the 256 and is the answer not in the manual?
Questions and answers