Table of Contents
Advertisement
EN50131-1:2006+A1:2009
EN50131-3:2009
EN50131-6:2008
EN50131-5-3:2005+A1:2008
PD6662:2010
Security Grade 2
Environmental Class II
Software Version >9.13
User Manual
Wireless Alarm System
RINS1548-4
PIEZO WARNING
The wireless system contains a
loud siren, please be aware of
this after an activation
SMS CHARGES:
If you're using the SMS text messaging facility of the panel, you
will be charged at 50p every two weeks for an SMS Server
Update call. This charge is raised via use of a premium rate
telephone number. Please see page 23 for details.
Advertisement
Table of Contents

Subscribe to Our Youtube Channel
Related Manuals for Pyronix Enforcer 32-W


Summary of Contents for Pyronix Enforcer 32-W
- Page 1 EN50131-1:2006+A1:2009 EN50131-3:2009 EN50131-6:2008 EN50131-5-3:2005+A1:2008 PD6662:2010 Security Grade 2 Environmental Class II Software Version >9.13 User Manual Wireless Alarm System RINS1548-4 PIEZO WARNING The wireless system contains a loud siren, please be aware of this after an activation SMS CHARGES: If you’re using the SMS text messaging facility of the panel, you will be charged at 50p every two weeks for an SMS Server Update call.
-
Page 2: Table Of Contents
C o n t e n t s P a g e Contents Page ........................2 1. Introduction ........................4 2. The Setting Devices ......................5 2.1 The Wireless Panel Keypad and Additional Keypads (EUR-068) ........... 5 2.2 The Internal Tag Reader (EUR-107) ................5 2.3 The External Tag Reader (EUR-108) ................ - Page 3 13.4 Omit Inputs ......................17 13.5 Change Codes (Adding codes, tags and keyfobs) ............18 13.5.1 Button Actions: ....................18 13.5.2 Flexi Set ......................18 13.6 Review Logs ......................20 13.7 Phonebook ......................20 13.8 Walk Test ....................... 21 13.9 Siren Test ....................... 21 13.10 Start CHC SMS Update ....................
-
Page 4: Introduction
User Manual 1 . I n t r o d u c t i o n Two Way Wireless Security Protects Your Family and Property Without Compromise. This wireless alarm system has been designed with your security in mind; with quick and easy installation and minimal maintenance, this system protects your home or property with a multitude of unique features. -
Page 5: The Setting Devices
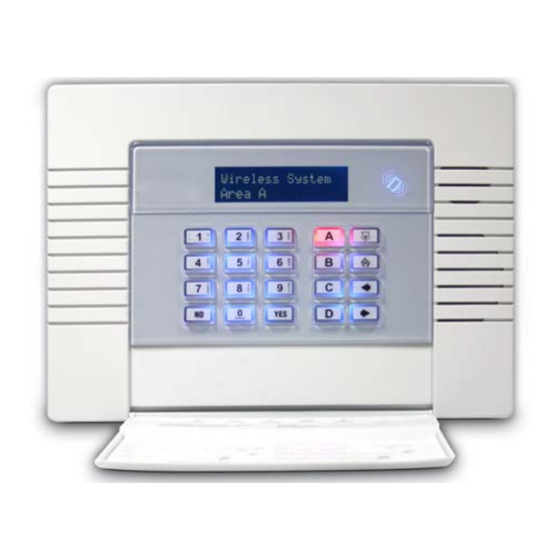
User Manual 2 . T h e S e t t i n g D e v i c e s 2.1 The Wireless Panel Keypad and Additional Keypads (EUR-068) Additional wired keypads may also be connected to the wireless control panel, please ask your Engineer for more information. -
Page 6: The Kf4-We (Wireless Keyfob)
User Manual 3 . T h e K F 4 - W E ( W i r e l e s s K e y f o b ) The wireless keyfob has 4 buttons that may be programmed for specific purposes (please see ‘CHANGE CODES’... -
Page 7: Using Predictive Text
User Manual 4 . U s i n g P r e d i c t i v e T e x t The wireless alarm system incorporates predictive text, so the system will predict the word that is being spelt. For example, if you type ‘John’, press 5 once and the name ‘Julia’... -
Page 8: Setting The System
User Manual 5 . S e t t i n g T h e S y s t e m 5.1 Using a PIN Code or Tag Enter a valid PIN code or present a valid tag to the symbol as shown. Enter the area you wish to set, and press I. -
Page 9: Unsetting The System
User Manual 6 . U n s e t t i n g T h e S y s t e m 6.1 Using a PIN Code or Tag Enter the building, the 'entry time' will start. Enter a valid PIN code or present a valid tag to the symbol as shown. -
Page 10: Unsetting After An Alarm
User Manual 7 . U n s e t t i n g a f t e r a n a l a r m 7.1 Using a PIN Code or Tag Enter a valid PIN code or present a valid tag to the symbol as shown. -
Page 11: Using An Tag Reader
User Manual 8 . U s i n g a n T a g R e a d e r 8.1 Setting and Unsetting If you have a tag reader installed, then it will be possible to set and unset the wireless alarm system using a tag (the same tags can also be used to set/unset via the keypad prox). -
Page 12: Anti Code / Engineer Restore Facility
User Manual 9 . A n t i C o d e / E n g i n e e r R e s t o r e F a c i l i t y 9.1 Anti-Code Your Engineer may have set up the system so that either an ‘Anti-Code’ or 'Engineer Restore' is required in order to fully reset the wireless alarm system (your code will still silence the alarm, but it will not reset the system). -
Page 13: Intelligent Setting
User Manual 1 0 . I n t e l l i g e n t S e t t i n g If intelligent set is enabled by your engineer, the system automatically recognises whether to full set (Area A), or part set. (Area B). ‘Flexi Set’ (Page 18) should be disabled for this feature to work properly. -
Page 14: Fault Indications / Unable To Set
User Manual 1 1 . F a u l t I n d i c a t i o n s / U n a b l e T o S e t 11.1 Fault Indications Any faults that occur on the system will be easily recognised by the flashing ALERT LED. -
Page 15: Advanced Functions
User Manual 1 2 . A d v a n c e d F u n c t i o n s 12.1 Chime Feature The chime can be used for any input on the system. This can be set up by your engineer. -
Page 16: Master Manager Menu
User Manual 1 3 . M a s t e r M a n a g e r M e n u The Master Manager Menu has the following functions: Function Description Set Date and Time Programs the date and time. Omit Inputs Omits any 24 inputs only (except Personal Attack inputs). -
Page 17: Set Date And Time
User Manual 13.3 Set Date and Time Press b or A to scroll to ‘SET DATE & TIME’. Press I. Enter the Year. Press I . Enter the Month. Press Enter the Day. Press Enter the Hours. Press Enter the Minutes. Press 13.4 Omit Inputs Press b or A to scroll to ‘OMIT... -
Page 18: Change Codes (Adding Codes, Tags And Keyfobs)
User Manual 13.5 Change Codes (Adding codes, tags and keyfobs) The ‘CHANGE CODES’ function allows adding, editing and deleting of user codes, tags and keyfobs. The master manager code can also be changed. The control panel can have up to 80 user codes or tags. Up to 32 keyfobs can be learnt. 13.5.1 Button Actions: Each wireless keyfob has 4 buttons that can be programmed for any of the functions below: No Action = Disables the button... - Page 19 User Manual Press [ or ] to choose between 'User' or 'Manager'. Press I NOTE: This screen will not be displayed if you have programmed a wireless keyfob. Select the areas that the user will be assigned to: A, B, C or D. Press I.
-
Page 20: Review Logs
User Manual 13.6 Review Logs The ‘Review Logs’ function monitors all operational information of the wireless alarm system, such as setting/unsetting information and alarm activations etc. Press b or A to scroll to ‘REVIEW LOGS’. Press I. Press I. The most recent event will be displayed, press b or D to scroll backwards and forwards through the log. -
Page 21: Walk Test
User Manual 13.8 Walk Test The ‘Walk Test’ function allows the testing of all programmed inputs on the wireless alarm system. Press b or A to scroll to ‘WALK TEST’. Press I . Select which level set to walk test. Press I to walk test all inputs or press the A to walk test an input individually. -
Page 22: Dial Out Menu
User Manual 13.11 Dial Out Menu The control panel may be dialled into, and programming information kept on a PC using the InSite UDL software. This function allows the control panel to dial a Pre-programmed PC telephone number (programmed by your engineer) to directly dial to a PC. This is usually used when your engineer requests it. -
Page 23: Block Udl
Electronic messages and SMS messages are carried by the WNO by means of networks and transmission facilities over which Pyronix Limited (Pyronix) has no control. Pyronix shall therefore not be responsible for the WNO’s service level or the WNO’s network failures. -
Page 24: Engineer Contacts And Tables
User Manual 1 5 . E n g i n e e r C o n t a c t s a n d T a b l e s 15.1 Engineer Information Alarm Company Date of Installation Site Reference Engineer Name Engineer Contact Number Installed to Grade... -
Page 25: Input Contact Table
User Manual 15.3 Input Contact Table Input No Input Name Input Areas Description Page: 25... -
Page 26: Code Table
User Manual Input No Input Name Input Areas Description 15.4 Code Table Code No Code Type (Code/Tag/Fob) Code Areas Code Name Page: 26... - Page 27 User Manual Code No Code Type (Code/Tag/Fob) Code Areas Code Name Page: 27...
- Page 28 For electrical products sold within the European Community: At the end of the electrical product’s useful life, it should not be disposed of with household waste. Please recycle where facilities exist. Check with your Local Authority or retailer for recycling advice in your country. When disposing of the product the batteries must be removed and disposed of separately in accordance with the local regulations...
Need help?
Do you have a question about the Enforcer 32-W and is the answer not in the manual?
Questions and answers