Table of Contents
Advertisement
Quick Links
Advertisement
Table of Contents

Related Manuals for Strand Lighting NEO


Summary of Contents for Strand Lighting NEO
- Page 1 Software Version 3.0...
-
Page 2: Strand Lighting Offices
Lighting no asume responsabilidad por errores o omisiones que puedan aparecer. Cualquier comentario, sugerencia o corrección con respecto a este manual, favor de dirijirlo a la oficina de Philips Strand Lighting más cercana. Der Inhalt dieses Handbuches ist nur für Informationszwecke gedacht, Aenderungen sind vorbehalten. Philips Strand Lighting uebernimmt keine Verantwortung für Fehler oder Irrtuemer, die in diesem Handbuch auftreten. -
Page 3: Important Information
It is recommended that a qualified electrician perform this installation. Philips Strand Lighting Limited Two-Year Warranty Philips Strand Lighting offers a two-year limited warranty of its products against defects in materials or workmanship from the date of delivery. A copy of Philips Strand Lighting two-year limited warranty containing specific terms and conditions can be obtained from the Philips Strand Lighting web site at www.strandlighting.com... -
Page 4: Table Of Contents
User’s Manual TABLE OF CONTENTS Strand Lighting Offices ........................... 0 IMPORTANT INFORMATION Warnings and Notices............................1 Philips Strand Lighting Limited Two-Year Warranty..................1 TABLE OF CONTENTS Introduction Preface .................................. 12 About This Guide ..............................12 NEO Software License NEO Software License Agreement ........................13 Customer Support How to Reach Us .............................. - Page 5 Control Tabs..............................56 Side Bar Cue List ............................58 Clock ................................59 Split View..............................59 Library FX Control............................59 NEO Console Configuration Status........................60 Command Line.............................. 60 Master Fade Time............................61 Shortcuts ................................61 On-Screen Shortcuts............................62 Options ................................63 Right click options ............................
- Page 6 Modify a Scheduled Task..........................77 Remove a Scheduled Task..........................77 Temporarily Turn Off a Scheduled Task(s) ....................77 User Permissions ..............................78 NEO Software License Registration........................79 Live Display................................80 Groups Display ..............................81 Group Number............................... 81 Group Name ..............................81 Channels ................................
- Page 7 NEO Lighting Control Console Snapshot When Adding Groups........................86 Select Active Button............................86 Select All / Unselect All..........................86 Select Inactive ............................... 86 Sorting ................................86 Filters................................87 Print Channel Groups ............................ 87 Cue List Display / Editor............................87 Cue Lists................................87 Behavior ................................
- Page 8 User’s Manual Testing a Show ............................109 Cue Go................................. 109 Cue Stop ..............................109 Cue Back ..............................109 Cue Reset..............................109 FX List (Effects Editor) ............................109 Effect Filters ..............................110 Creating New Effects ..........................110 New Effects Builder Opening Page......................111 DMX Recorder ............................
- Page 9 NEO Lighting Control Console Command Buttons and Pulldowns ......................144 Standard Dimmer Patching ......................... 147 Command Line Patch ..........................147 Intelligent Fixtures ............................147 Other Information............................148 RDM ................................... 148 Automatic Patching ............................. 150 Edit Menu..............................150 Cue Playbacks ..............................154 FX or Effects Playbacks .............................
- Page 10 Advanced Level Programming Options ......................182 Appearance ................................. 183 Create a taskbar button for every window....................184 NEO Console & Software Software Registration ............................185 Upgrade this NEO system ..........................185 Visualization ............................... 186 Media .................................. 187 Special Shortcuts ..............................188 TABLE OF CONTENTS...
- Page 11 NEO Lighting Control Console Special Shortcuts: More ..........................189 Shortcuts Window ............................189 Submaster Window ............................. 189 Playback Window ............................190 DMX View..............................190 Live Video Preview............................. 190 Touchscreen Keyboard..........................190 Timecode Monitor............................190 Power Monitor............................. 191 Console Debug Window ..........................191 Desk Light Control............................
- Page 12 User’s Manual Cue Shortcuts............................... 216 Cue Channel Groups............................ 216 Tracking (Intelligent Cue Execution) ......................... 216 Hybrid Mode ............................... 216 Full Tracking Mode............................. 216 Tracking Options ............................216 Recording Modes..............................217 Effects ................................. 217 Effect Types..............................217 Effect Playbacks ............................217 Exclusive Groups............................
- Page 13 NEO Lighting Control Console CueServer ..............................242 Hardware Submasters..........................243 Hardware Shortcuts ............................244 Window Layout Options ............................ 244...
-
Page 14: Introduction Preface
WARNING! It is important to read ALL included safety and installation instructions to avoid damage to the product and potential injury to yourself or others. NEO NOTES & TIPS: Important notes and tips will are shown in like this with the NEO logo on the left. The notes often contain important information about the current topic. -
Page 15: Neo Software License
License The Licensee is granted a non-exclusive, non-transferable, non-sublicensable license to install and use the NEO Software for the Licensee's own internal business purposes, provided that the Licensee pays the charges for the Console and/or output authorization. The Licensee is permitted to make one copy of the Software for backup purposes only. - Page 16 8.4.1 the mediator will not be acting as an expert or as an arbitrator; 8.4.2 the mediator will determine the procedure and timetable for the mediation; and 8.4.3 the parties will share equally the cost of the mediation. NEO Software License...
- Page 17 License, all of which will remain in full force and effect to the extent permitted by law, subject to any modifications made necessary by the deletion of the invalid or unenforceable provision. Note: If you have questions about the NEO Software License, please send an email to entertainment.service@philips.com or call us at 1.214.647.7880 prior to using.
-
Page 18: Customer Support
The console's graphical user interface (GUI) is provided by Dream Solution. For detailed instructions on using the NEO operating software, refer to the NEO operating software Help Menu within the software itself. For the latest software documentation updates, please visit: www.strandlighting.com... -
Page 19: Overview Components
The DMX output functionality included with your console is pre-authorized at the level initially purchased. However, the DMX output authorization can be easily upgraded at any time. To purchase a DMX output upgrade for your NEO Lighting Control Console, please contact your Authorized Strand Lighting Dealer. -
Page 20: Control
• Tracking / Cue Only / Hybrid Tracking style operation • Astronomical time clock and time events • Macros Playback: • 10 Submasters on NEO base console (Unlimited Pages) • 4 moving light encoders with LCD status screens • Support for 3 HD touchscreen monitors • 5 playback faders •... -
Page 21: Connectivity Features
NEO Lighting Control Console • FX List / Details • Palette List / Details • Cue Playbacks • FX Playbacks • Macro Editor • System Properties • Shortcuts Window • Submaster Window • Playbacks Window • DMX View • Live Video Preview •... -
Page 22: Software Overview Neo Software
For more information about external hardware controls, refer to "Hardware Interfaces" on page 242. For more instructions on using the NEO software, please refer to the user manual within the program itself (by either selecting it from the Options menu or Control Panel. 4. External Control The console can accept several forms of external control, depending on your console's particular configuration. -
Page 23: Installation And Setup Unpack
(i.e. absent of any construction dust or debris) and dry. Before setting up, ensure that the installation site meets these requirements. Refer to product specification sheet on the Philips Strand Lighting web site for console dimensions and power requirements. -
Page 24: Dmx512 Output
DMX512 universe of 512 DMX channels. Connect DMX512 devices as shown in Figure 1. 4. MIDI/SMPTE The NEO has the capability to both send and receive MIDI and SMPTE time code. 5. Console Power Up Procedure Once the console has been installed and all components connected, the console and processor can be powered up. -
Page 25: Using The Manual
Using this manual to its full potential is aided by knowing the format in which the information is provided. There will be Command Line instructions. These are commands that you enter by typing on the NEO console keys. Figure 2: NEO console keys All Command Line entries in this document will be displayed in brackets. -
Page 26: Desk Layout
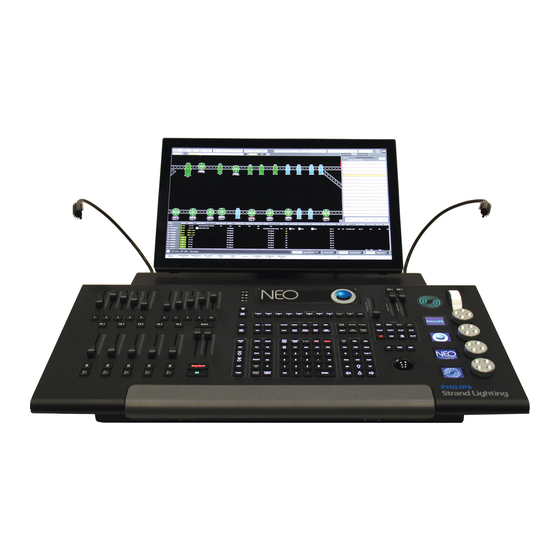
K. A/B Playback Controls (with Go and Stop/Back buttons) F. Grand Masters (2) L. Track Ball Figure 3: NEO Control Console Overview 2. Programming Button Layout The programming section of the desk provides direct access to intensity channels, channel attributes, playback control, console setup and display options. -
Page 27: Display Keys
NEO Lighting Control Console Display Keys [Live] - Live is the main viewport and will show all active output for fixtures and cues. [Blind] - Activates Blind Mode. While in Blind, the channel grid has a Grey background. Blind allows for non-Live viewing and editing. -
Page 28: Action Keys
User’s Manual Action Keys [Update] - Stores changes to selected item. This could be a Cue, Group or other item. Ex: [UPDATE] [CUE] [1] [ENTER]. [Record] - Stores lighting state as a selected item. This could be a Cue, Group or other item. Ex: [RECORD] [CUE] [1] [ENTER]. -
Page 29: Advanced Keys
NEO Lighting Control Console [Last] / [Next] - Advances to next or reverses to previous channel. Also acts as a tab key for navigating dialog boxes. [Thru] - Used when entering a range of numbers. [Bksp] - Backspace [0 - 9, .] - 10-Key Numerical Entry. -
Page 30: Shortcut Keys
Focus, Iris, Zoom and Shutters. [Select] - Will open NEO's Select box. The Select box will access show programmed items like groups. This also will show items labeled in patch from columns like position, purpose and color. -
Page 31: Automated Luminaire Encoders
3) PB Master and Disabled - left fader is master, right fader is disabled. 4) Cue List Split Crossfader - left fader controls levels going up, right fader controls levels going down. NEO NOTES & TIPS: PB faders can be configured in System Properties>System Settings. SUBMASTER Controls and Button Layout... -
Page 32: Playback Faders
The Green LED will flash when cues are running. 6. Grand Masters and Master Fade Time Fader The NEO console features two programmable Grand Masters and a Master Fade Time Slider. -
Page 33: Software Configuration
The Command Pulldowns are single action buttons that also have a down arrow on the right hand side that reveal advanced actions within the same action family. NEO NOTES & TIPS: When discussing the advanced options, if the item/action shown with an icon, it has a NEO console key for that feature. -
Page 34: Command Pulldown - Selection
Select Next - selects the next numerical fixture. NEO NOTES & TIPS: For advanced functionality, if a group of fixtures is selected, NEXT / LAST will allow the user to cycle through that group of fixtures only. For example, if 11 thru 15 are selected. Pressing NEXT will select 11. -
Page 35: Select Active Options
NEO Lighting Control Console Select Active Options Select all fixtures - selects all patched fixtures. Select inactive (off) fixtures - selects all non-active fixtures. (with a level of Select changed fixtures - selects all fixtures that have had a value changed (in red). - Page 36 User’s Manual In Figure 4, we see all of the fixtures fanned out across the stage and Figure 5 on page 34 shows the same fixtures are crossed over each other in a two by two formation. Figure 4: Fan Figure 5: Fan (Crossed) Software Configuration...
- Page 37 Other Attributes NEO will also allow you to apply a fan to any of the generic attributes the system knows about. Select the attribute from the drop down combo box and then use the spread control to fan the values.
-
Page 38: On Options
The value that each fixture is set to when hi-light is active can be defined in the fixture library. For most attributes this is the same as the home value. Highlight is a toggle option in NEO so that once you have identified the fixtures pressing the button again will return you to the previous stage look. -
Page 39: Command Pulldown - Release
Edge - sets selected fixtures to the default beam value. Utility - sets selected fixtures to the default utility value. NEO NOTES & TIPS: All fixture default values are set in the Fixture Library Editor per fixture type. Command Pulldown - Release Park - assign the current fixture value to a locked level. -
Page 40: Undo Options
The 2nd press of RELEASE will restore all remaining fixtures to their default state or their state as determined by another control item like a cue. Release + Attribute Families NEO NOTES & TIPS: Pressing [RELEASE] and any attribute family button will release that attribute families attributes on the selected fixtures. Software Configuration... -
Page 41: Command Pulldown - Record
NEO Lighting Control Console Release current control - releases control of current fixtures. Release current control for selected fixtures - releases control for selected fixtures only. Release all control - releases all control. This is equivalent to the second stage of the Release key. Example: [RELEASE][RELEASE]. - Page 42 User’s Manual Add selected channels to group (Dimmer only) - brings up the Record/Update Group dialogue box to add selected fixtures' intensity to the designated group. Add selected channels to group (Snapshot current state) - bring up the Record/Update Group dialogue box to add selected fixtures to the designated group.
- Page 43 Enter appropriate info in the presented dialogue box. NEO NOTES & TIPS: The effect will be recorded/edited but must be triggered manually though the FX List display. Add selected channels to simple chase step - adds "selected" fixtures to a newly created or existing chase effect assigning each fixture to its own step in numerical order.
- Page 44 1 to 1 basis. Enter appropriate info in the presented dialogue box. NEO NOTES & TIPS: The effect will be recorded/edited but must be triggered manually though the FX List display.
- Page 45 NEO NOTES & TIPS: This operation only allows you to create new entries and cannot be used to add to an existing palette. Step 4. Enter the shortcut number you would like to assign and click the "OK" button to confirm the requested action.
-
Page 46: Command Pulldown - Items
User’s Manual Command Pulldown - Items FX Library - opens the FX library. This allows you to apply a pre-built effect to the selected fixtures. Once the library effect is running, the controls for the running effect is available on the encoders or is available in the Side Bar > Library FX Controls. - Page 47 NEO Lighting Control Console Channel Groups - opens the list of show built groups and preset focus groups. Press on any group displayed to select that group of fixtures. Edit - opens the Group Display window for editing groups. Release - releases selected channels from Build/HTP/LTP behavior.
-
Page 48: Command Pulldown - View
Faders and ML View. There is no issue using any views to control your lighting rig as you may want to use conventional lights in the grid display and intelligent fixtures in the intelligent view. NEO will switch between the views without effecting the operation of the lights. - Page 49 NEO Lighting Control Console Compact View - Use the compact view to maximize the number of channels visible on screen at once. This view will show the least amount of information per fixture and is limited to the basic channel number and dimmer level. It will also show graphically a moving light position and color.
- Page 50 NEO NOTES & TIPS: The Magic Sheet view also supports a number of multi touch gestures to help when working with large sets of fixtures. You can use the two finger pinch to zoom and two fingers on the screen to pan around the layout.
- Page 51 NEO Lighting Control Console Just above the layout panel (black area of the window) is tool bar that is used to edit the layout and insert fixtures onto the view. New - Click on the "New" tool button to start a blank layout. This will clear all of the fixtures from the Magic Sheet view (fixtures will remain patched in the system) provide a blank page to work with.
- Page 52 User’s Manual Moving fixtures around in the layout - By default the Magic Sheet view is in control mode meaning it is expecting the user wants to control and modify the fixtures output. When you click on a fixture it will highlight it exactly as it does in the grid display.
- Page 53 NEO Lighting Control Console Edit Patch Mode - In addition to the six view modes you can also switch the channel view into patch mode. Patch mode can be used to edit the fixture patching directly in the channel display window. If no channels are patched in the system then the patch mode will display automatically.
- Page 54 User’s Manual Open a new view of selected channels - opens a separate window of a fixture display filtering to only display selected fixtures. Choose from the following list of options… • Expanded • Compact • Classic • Faders • Intelligent Lights Open a split view of channels - opens a fixture window at the bottom of the main monitors view.
- Page 55 NEO Lighting Control Console Open a blind view of channels - opens a separate window of a fixture display in the Blind view. Choose from the following list of options… • Expanded • Compact • Classic • Intelligent Lights Open Side Bar - the side bar is the right side section of the main monitor's screen. This displays…...
- Page 56 User’s Manual Show Palette Information - when on, will show Palette and Preset Focus Group labels in the fixture windows. The fixture block shows pan and tilt info referencing a preset focus group labeled "DCS" from the Classic view. This shows the preset focus group label in the ML view where you see both raw data and the referenced groups label.
- Page 57 NEO Lighting Control Console Show Clock - will turn on / off the clock / showfile name / date display. Show Timecode - will turn on / off the timecode clock. Copy - allows Store, Recall, Swap and Copy functionality for fixture data.
-
Page 58: Control Tabs
User’s Manual Thumb Wheel For systems that do not have a scroll wheel on the mouse or cursor (such as tablet or pen based systems) you can use the on screen wheel provided. Click on this control and hold down the mouse button down. As you move your mouse or cursor up and down the intensity of the channels will change in the same way as the scroll wheel. - Page 59 DMX box. Color speed and a Color Picker is available. "Use Advanced Color Heuristics". When checked, NEO will attempt to map the spectrum selected color across all color controls. When unchecked, the spectrum selected color will apply only to the 3 main colors. In this case, CMY.
-
Page 60: Side Bar Cue List
User’s Manual Edge Tab This is for all attributes that effect the "outside" of the beam of light. Focus, Zoom, Iris, Shutters and such. The VL1100 has Focus, Zoom, Diffusion and Framing Shutters. All appear here with Minimum / Maximum buttons, slider bar, percentage edit box and DMX edit box. -
Page 61: Clock
NEO Lighting Control Console NEO NOTES & TIPS: The full cue list detail window can be displayed by selecting Cue Lists or F4 or the NEO display button [CUE LISTS]. Clock The clock is a display option under View. This will also display the showfile name and date. -
Page 62: Neo Console Configuration Status
Command Line The Command Line is the main point of entry for all NEO key press entry. Command Line entry has been around for decades and remains the main focus for programmers as the fastest way to achieve the desired results onstage. When a NEO key is pressed, it will populate on the Command Line. -
Page 63: Master Fade Time
• Execute level groups • And many more… As with submasters, shortcuts can be accessed through an on-screen display or by the NEO console hardware. On- screen shortcuts also have the added feature of being designed for use with a touch screen display. -
Page 64: On-Screen Shortcuts
User’s Manual On-Screen Shortcuts The shortcut window is a grid of 100 buttons each tagged with a number, description, and color. If a shortcut is not assigned the button will appear greyed out and cannot be selected. When a shortcut is assigned a default description is created and appears below the shortcut number. -
Page 65: Options
Auto Select page based on fixtures selected - With this option turned on the shortcut page will change if a palette page is setup for the fixture. This works on the name of the shortcut page. If a single fixture type is selected then NEO will search through the page labels to try and locate one that matches the fixture name. -
Page 66: Submasters And Submaster
Once entered click on the "OK" button to assign the new command. The command entered will become the description for the shortcut. NEO NOTES & TIPS: Clicking on the shortcut will cause the command to be immediately executed in the command line window. -
Page 67: On-Screen Submasters
To return to the previous state click the flash button again. NEO NOTES & TIPS: If hardware submasters are being used, you will also see the slide position and edit box value change to reflect the hardware. -
Page 68: Submaster Wheel
User’s Manual Submaster Wheel On the right hand side of this window is a large wheel that can be used to move all of the submasters on this page at once. Click on the wheel and while holding the mouse button down move the mouse up or down to raise or lower the levels. -
Page 69: Playback Page
Create a New Blank Show - Creates a new blank show file on the hard drive and loads this as the current show. NEO NOTES & TIPS: There is a setting in System Properties > System Settings > Intermediate Options: Start new shows with nothing patched. This setting determines if creating a blank show starts with nothing patched or with a default patch. -
Page 70: Open A Saved Show
Save (Show) as… Saving a NEO show will make a new show file that contains all the same data as the current show. There should be no change to the data you are actively working on in the system. -
Page 71: External Triggers
NEO Lighting Control Console Once opened NEO will read all of the information about the show and allow you to select what elements you want to import. You can select to import Channel Groups, Cue Lists, Effects, Palettes, Macros and Patch information. -
Page 72: Midi Learn
User’s Manual MIDI Learn To make it easier to setup MIDI triggers NEO can learn events as you go. Click on the "START LEARNING" button begin listening for MIDI events. As soon as a MIDI event occurs in the software the "Found MIDI event" options will be shown. -
Page 73: Note Velocity
This is useful when changing the submaster page in NEO or if you make an on-screen change to a submaster. The physical sliders will move with the change you make. If the device you are using does not support motorized faders then it is recommended to turn this option off. -
Page 74: Timecode (Mtc) / Clock
Receive MIDI Clock - Enable this check box to begin processing of MIDI clock data. The incoming clock messages will be used to set the timing of the tap tempo within NEO. If the timing of the incoming clock changes the tap tempo will automatically be updated. -
Page 75: Creating An Event
For NEO to listen to the selected audio source you must enable it by clicking on the "Enable Audio Line In Control" Above the event grid is a graphic display of the incoming audio frequencies. This is known as the audio spectrum that shows the response to frequencies from 0 to the maximum frequency set. -
Page 76: Mysql Interface
User’s Manual • Winamp timecode - Winamp is a popular free media player that is capable of playing video and audio files. NEO can read timecode directly from this software when running on the same PC. • Adrienne Timecode - The Adrienne devices are a collection of internal and USB devices that support a number of timecode formats. -
Page 77: Scheduled Tasks
Scheduled tasks allow you to setup recurring lighting events using the real time clock of Windows. Each task can be scheduled to run daily, weekly, monthly, one-time only, every hour, or every X seconds. Each task executes a NEO shortcut. - Page 78 User’s Manual 2) In the space provided on the second page enter a meaningful name to describe the task. (e.g. Hourly fountain show 1). Then select how often you want this task to run and click "Next" to continue. 3) The next page is specific to the frequency that you want the task to be performed. a.
-
Page 79: Modify A Scheduled Task
NEO Lighting Control Console d. One Time Only e. Every Hour or Every X seconds. No additional information is required for this option. 4) Once you have selected the schedule options for the task click "Next" to continue to the final page. -
Page 80: User Permissions
By default no users will exists in the system. An empty user list is the equivalent of turning off the security feature. NEO NOTES & TIPS: The software will not allow you to disable the "Edit Users" option if the selected user is the last one with this privilege. -
Page 81: Neo Software License Registration
9. NEO Software License Registration NEO uses a software license to ensure that the product has been legally purchased. Without a valid registration code, the software will still operate normally and no functionality will be restricted, however the software will not produce any DMX output. -
Page 82: Live Display
About NEO - Shows the about screen for copyright message. Restart - restarts the NEO console. Shutdown - will shut down the NEO console. Once complete, DMX is held and the power switch needs to be toggled off to complete the shutdown process. -
Page 83: Groups Display
NEO Lighting Control Console 11. Groups Display Channel groups (Scenes & Submasters) are a convenient way to manipulate a number of channels and fixtures with one control. Channel groups can operate on any number of fixture attributes and do not need to operate on the dimmer. -
Page 84: Overview
100 possible values but the underlying DMX associated with the dimmer has 255 possible values. When the percentage is changed is converted to a DMX value for storage in NEO. Software Configuration... -
Page 85: Timing
NEO Lighting Control Console Timing To set an individual fade time for any attribute use the timing tab to enter a time value in seconds. If the value shows "Not set" then no independent fade time exists. Any fade time set here will override the channel fade time and the group fade time when the group value is set or the group applied. -
Page 86: Value
NEO NOTES & TIPS: In any of the tabs you can enter data into multiple cells by highlighting the cells you want to change and then typing the new value. As you type the value will only populate the first cell. Pressing the enter key after you have finished typing will copy the value to all of the highlighted cells. -
Page 87: Submaster
(page 0) simply enter the number between 1 and 100. For the second page (page 1) enter submasters 101 through to 200. NEO NOTES & TIPS: The value of the group will not change until the next time the submaster changes. To learn how to use a submaster once it has been set up, see "Submaster Options" on page 155. -
Page 88: Snap Attributes
4) If you want to add a short description to the cue being created, enter this into the field provided. 5) Select "OK" to complete this operation. NEO NOTES & TIPS: The "cue selection" dialog will default to the last selected cue list and the next available (integer) cue number. -
Page 89: Filters
14. Cue Lists NEO provides the ability to create multiple cue lists to help manage and run complex shows. A "cue list" is a way to collect a number of cues and assign a name or short description. -
Page 90: Behavior
User’s Manual To create a new cue list click on the "Options" drop down menu and select "Create a new Cue List" from the resulting options. A dialog will appear titled "Create New Cue List". Enter the name of the cue list you want to create and click "OK" to continue. To change the name, right click on the cue list name and select "Edit Cue List Name". -
Page 91: Cue List Options Menu
NEO Lighting Control Console Cue List Options Menu As well as creating and deleting cue lists the options menu has several other functions to make working with cue lists easier. Edit Cue List Name This allows the user to change the name and behavior type to the cue list. -
Page 92: Open Tracking Sheet
User’s Manual Open Tracking Sheet The tracking sheet is a convenient way to view how channels are changing between cues. The view consists of a channels vs. cue grid. The channels used in the entire cue list are listed in each row while the cues travel across the columns of the grid as above. -
Page 93: Open Visual Timecode Editor
NEO will automatically calculate the first and last cue for this section of the show based on the media track. The first cue that contains this media is shown on the right hand panel as with the last cue with this media. -
Page 94: Report
User’s Manual Report Channels Used In Cues - shows a list of cues and the channels stored in them. Palettes / Groups Used In Cues - shows a list of Palette and then Groups with the cues that reference them. Use Primary Playback Check this option if you want that master playback on the external playback wing to be used to control the master cue list playback. -
Page 95: Keyboard Playback Options
NEO Lighting Control Console Keyboard Playback Options Use the submenu under this option to turn on various keyboard options for running cues. Use "Space bar" for cue go - With this option on pressing the space bar on your keyboard will execute a cue go. -
Page 96: Reset Grid Layout To Default
User’s Manual NEO NOTES & TIPS: Point cues cannot be exported to a CSD file. Use the option in the cue menu to renumber as whole cues before proceeding with export. Reset Grid Layout to Default If you have resized or moved columns in the cue list grid you can restore the default positions and size by selecting this option. -
Page 97: Cue Options
NEO Lighting Control Console Cue Options To assist with many tedious tasks the "Cue Options" drop down menu provides several convenient options related to creating and managing cues. Copy Selected Cue (Added to the End of the Cue List) Selecting this will create a new cue at the end of the cue list. The cue number will be the next available integer value. - Page 98 User’s Manual Insert a New Cue Above (Copy This Cue) This option will create a new cue above the current cue. The cue number will be half way between the previous cue and the current cue. All of the properties (channels, trigger, etc) will be copied from the current cue to the new cue. Insert a New Cue Below (Copy This Cue) This option will create a new cue below the current cue.
- Page 99 NEO Lighting Control Console When a cue is reverted to a previous state the current state is also added to the history table so that no state is ever lost. Use the preview button to apply on stage what the cue looked like at the specified date and time. Click on the apply button to set the state of the current cue to what it was at the selected date and time.
-
Page 100: Visualizer Preview Options
Once you have created the cue list you must then go back and assign timecode values manually. To aid with this operation NEO provides the ability to timestamp cues with the last read timecode. Once you have created the cue list you can then play back the timecode track and stamp each cue in real time. Because using the right click menu is not a quick enough operation when playing back media in real time a shortcut (control - t) is also provided. -
Page 101: Cue Controls
2.5 to 3. NEO NOTES & TIPS: Changing the cue number can also be used to park a cue for use later. To do this, simply change the cue number to a high value and ensure that none of the other cues have the "next cue" set to this value. -
Page 102: Tricks For Editing Multiple Cells At Once
User’s Manual From version 2.9 onward the "Cue List Detail" window will default open and docked to the bottom of the cue list window. You can undock it at any time by clicking and dragging the bar (below the x) running down the left of the panel. -
Page 103: Dmx
"Not set" then no independent delay exists. Any delay set here will override the channel delay when the cue timing. Profile The profiles tab is reserved for a future version of NEO. This feature is not currently supported in this version. CH Grid The channel grid view will show the channels in a similar view to the channel display window. -
Page 104: Palettes
A palette is used in cases where we want to apply an abstract value to an attribute. Color is an example of this type of reference as NEO is capable of working out how to set the color on a fixture regardless of its type or place in the rig. -
Page 105: Matrix
NEO Lighting Control Console To add a palette reference to an attribute select it from the panel on the left and while holding the mouse button down drag and drop it onto the attribute. Alternatively you can enter palettes by clicking in the required attribute field and start typing the name of the palette you want. - Page 106 NEO NOTES & TIPS: In any of the tabs you can enter data into multiple cells by highlighting the cells you want to change and then typing the new value. As you type the value will only populate the first cell. Pressing the enter key after you have finished typing will copy the value to all of the highlighted cells.
- Page 107 NEO Lighting Control Console The "Effects (FX)" field is a non-editable field that will show how many effects the cue contains. To edit or add effects to the cue, click the ( ) button to the right of the field or double click on the field.
- Page 108 User’s Manual Simple Chases The "Direction" field specifies how the chase steps will play. Select from forward, backwards, bounce, or random from the drop down. The "Run times" field allows you to specify how many times through the chase will run before stopping. "Step time"...
- Page 109 If you are running the software is fade up/down mode then this value will determine the time taken for channels and attributes that are decreasing in value. NEO NOTES & TIPS: An override fade time for individual channels can be set in the "Cue List Channels" window. See page 250.
-
Page 110: Playback Options
Playback Options When a cue is executes NEO will display the cue notes in a non-editing window. The playback options at the top of the window can be used to set other features during cue execution. -
Page 111: Testing A Show
As soon as this button is pressed, the cue will start and a cue progress will be displayed in the status field of the cue NEO NOTES & TIPS: If the cue is triggered by some external event, such as a timecode, then the "cue go" will override this and execute the cue immediately. -
Page 112: Effect Filters
Media - To playback media files, flash animations, or control a DV desk. DMX Recorder - The DMX recorder will use the DMX input system of NEO to record a continuous stream of data that can be played back at any time. -
Page 113: New Effects Builder Opening Page
NEO Lighting Control Console New Effects Builder Opening Page Chose the type of effect you want, if you need help selecting, chose the "Run Effects Wizard". This first page will ask you to define what type of effect you want. Select the type of effect you want to create and click "Next"... - Page 114 User’s Manual Timeline Effect Provides the ability to build your effect by viewing its behavior over a timeline. The effect has a fixed length and each fixture can be given a specific behavior over that time. New Effect Builder, Timeline To complete the creation of an effect enter the name to identify the effect and set the length (in seconds) that you want the effect to run for.
- Page 115 NEO Lighting Control Console When the effect is created with more than one fixture the wizard can place all fixtures into one path or create a separate entry for each. Use the "All fixtures will use the same path" option to set how the fixtures in the effect are organized.
-
Page 116: Dmx Recorder
The record DMX stream can then be played back to any DMX universe on an LTP bases. Only DMX channels that have changed will be applied meaning that you can mix a recorded DMX stream with other NEO functionality. DMX Recorder... -
Page 117: Effect Library
NEO Lighting Control Console To begin recording click on the "Record" button in the top right corner of the window. The button will change to red and the length display will begin increasing in time. Click on the button again to stop the recording. - Page 118 User’s Manual Pause Pausing an effect will stop its execution immediately but keep the position pointer at the current location. If you start the effect again (press "play" button), the effect will continue from this location. Rewind Pressing the rewind button will stop the effect and resets its position back to the start. If the effect is restarted, it will start from the beginning.
-
Page 119: Create An Independent Fx Playback
NEO Lighting Control Console Make a Copy of This Effect (Offset Fixtures) This copies the selected effect when it's easier to start from an existing effect and gives you the opportunity to offset the fixtures. Find and Replace Media Paths Use this option to conveniently update the location of media on your HDD in one step. -
Page 120: Add The Selected Fx To Multiple Cues
User’s Manual An alternative way to create an effect playback and assign a shortcut all at the same time is to simply drag and drop it from the effects editor to the shortcut window. Drag and Drop FX to Shortcuts Add the Selected FX To Multiple Cues This will add the selected effect to multiple cue as selected in this dialogue box. -
Page 121: Simple Chase
NEO Lighting Control Console Simple Chase A simple chase is a series of steps each containing a specific lighting state. Each step can contain any number of channels each in a different state. A chase can either run automatically or wait for a trigger before stepping onto the next state. - Page 122 User’s Manual Copy step - Select this option to copy the currently selected step to the end of the chase. Reverse step order - Select this option to reverse the order that the steps run. Adding Channels to a Step Along the bottom of the chase editor panel is an edit box and the "add channels"...
- Page 123 NEO Lighting Control Console Right Click Menu Right clicking anywhere in the channel grid will bring up the context menu for this window. This is the same menu as the dropdown off the "Remove Channels" button. Copy selected channels to another step - Use the sub menu to select a chase step to copy the current selection to.
-
Page 124: Timeline Effects
Timeline effects are viewed in NEO as a Fixture vs. Time graph. Along the top of the effect view, you will see a time scale from 0 to the length of the effect. On the left of the effect view is a list of the fixtures included in the timeline. - Page 125 For example, often we may want the color of a fixture to be set before the light becomes visible. In the NEO effects engine, this will be done automatically for us if the next segment has this attribute set.
- Page 126 Drag mouse to end position Example: Creating an Effect Sequence NEO NOTES & TIPS: By default, the newly created segment will have its start and end states set with the dimmer at full (100%) and all other properties set to zero.
- Page 127 Clicking on the "OK" button will commit the new path to the selected segment. NEO NOTES & TIPS: If you set the elasticity of the path to 1 then a straight line will be created between points (not a curve) and the software will create a single segment for each line.
- Page 128 User’s Manual You can create a similar path for determining the color during the segment by click on the color path area of the right of the segment state editor. Color Path Editor Options Clicking on the right mouse button while over a segment of the effect will bring up a number of advanced options to assist with creating effects.
-
Page 129: Channels / Fixtures
To place a copied segment or segments onto a fixture, select the "Paste" option while the mouse is over the fixture you would like to paste to. NEO NOTES & TIPS: When pasting, if a segment conflicts with segments that already exist for this fixture you are pasting to, nothing will happen. - Page 130 User’s Manual If you right click on the channel list cell you can add or remove channels from the selection shortcuts. The popup menu will provide options to add, replace or remove channels. Each submenu will display the selection shortcuts already setup in the system.
-
Page 131: Matrix Effect
If you add the effect into a cue then NEO will setup the fixture based on the data in the cue and then apply the effect over top. - Page 132 User’s Manual Effects Editor, Matrix/LED Effect Once you have created the effect you must define the background that the effect will operate on. The background can be a jpeg, bitmap, or video (AVI) file. To set the background either enter the filename into the "Image or Video File" edit box or click on the button to the right to bring up the open file dialog box.
- Page 133 When the effect is played from the editor the red box will track the path over the specified time. As the effect runs NEO will map the contents of the red box onto the defined matrix. The color of each fixture will be mapped to the color on the image or video clip.
-
Page 134: Media Effect
User’s Manual 17. Media Effect The media playback provides an easy way to trigger audio and video clips from with NEO. You can use this feature to playback sound effects or video clips within a cue lists. Once you have created the effect you can modify the file that will play, where the file starts playing (in seconds) and how long it will play for. -
Page 135: Palettes & Groups
18. Palettes & Groups One of the most powerful features in NEO is the use of palettes and groups as building blocks for your show. These are useful not only in on-the-fly control but also for building flexible cue lists. This section will cover both uses for palettes and groups and explain how these are related. -
Page 136: Creating Color Palettes
For example if a palette containing color information is applied to a CMY fixture then NEO will work out what levels to set the CMY flags to reproduce this color. If the fixture only has a color wheel then NEO will find the color that is the closest match to the color in the palette. -
Page 137: Channel Groups (Specific Palette)
"OFF" and will not be changed when the group is applied. On the Fly Control (Busking a Show) When using NEO in live control environment palettes become a key component of your show. You can use palettes to pull up looks on stage quickly and as required. - Page 138 Note that as soon as the group has been recorded the verbose display will show the group name in the list of attributes. This indicates that NEO has automatically set the fixture to the new position preset so that if we record a cue the correct reference will be recorded (more on this later).
-
Page 139: Using The Color Palettes
A menu will drop down with each of the colors listed. Select the color "Red" from the list and the color wheel on the Mac 250 will change to "Red 301". Because the Mac 250 does not have color mixing capability NEO has found the closest match from the color wheel. -
Page 140: Cue List Based Shows
When recording a cue in NEO will the channel state and all attributes associated will be store so that it can be recalled for playback. -
Page 141: Recording Palettes Into Cues
NEO Lighting Control Console Recording Palettes into Cues NEO is able to automatically use the palettes (generic palettes) or channel groups (specific palettes) you have created when a cue is recorded. Before recording the cue apply the pallets you want to use as described in "Using the color palettes" and "Using the position presets". -
Page 142: Manually Changing A Palette In A Cue
User’s Manual Manually Changing a Palette in a Cue The channel detail window can also be used to manually change palette references. If in the example above we wanted to remove the palette references for "P/T Speed" and change channel 3 and 4 to blue rather than magenta. Do this by clicking on the "Palettes"... -
Page 143: Updating A Cue With A Palette
If a attribute that is referencing a palette is changed and you update a cue you must decide if you want to record the new value into the cue as a hard value or if you want NEO to change the palette that is referenced. -
Page 144: P/T (Pan & Tilt) Adjust
Fixture List - At the bottom right is the fixture list, containing all the different fixtures that can be patched into channels. When NEO is started for the first time or when a new show is created, all channels will be patched 1 to 1 with the available dimmers. -
Page 145: Aux Dimmers
RE202, L194) into this field. If the color description is not known then the color will be set to "None". You can also select the color from the standard NEO color chooser by clicking on the button to the right of the field or by double clicking on the field. -
Page 146: Circuit Name, Circuit Number & Dimmer Phase
Options Listed are the different options available to the user in patch. The main issue to understand about patching in NEO is that the patch data is not saved until you say Save Patch. This gives the user the flexibility to make changes and restore the patch prior to committing to it for the showfile. - Page 147 NEO Lighting Control Console Clear Patch Selecting "Clear patch" from the menu will remove all of the patch information form the system. Each channel will no longer be patched to dimmers. To clear only a range of channels select the desired channels by clicking in the left of the system channels grid to highlight the desired channels.
- Page 148 Create Palette Automatically When Patching Fixtures When an automated luminaire is patched, this gives you the option of having the NEO software automatically create palettes based upon the patched fixtures wheel assignments. This will create palettes for colors and gobos.
-
Page 149: Standard Dimmer Patching
To patch an automated luminaire, start typing the fixture name in the left field. Once you have typed 3 digits, the NEO software will attempt to find it. I've typed in VARI*LITE VL3000 as an example. From here, ARROW Up/ Down or click with the mouse pointer to select. -
Page 150: Other Information
NEO NOTES & TIPS: When intelligent fixtures are selected, the dimmers will be highlighted in a grey background to show the number of dimmers that the fixture uses. - Page 151 To start the discovery process select the DMX universe form the menu in the in the top left corner and click on "Find All". The discovery process may take some time to return and if possible NEO will notify you of its progress. This is not always possible and it may appear as though nothing it happening.
-
Page 152: Automatic Patching
Automatic Patching The NEO RDM window provides a quick and easy way to patch all of the RDM devices that have been found. Before starting this process click on the "clear channel assignment" and the "clear DMX addresses" button. - Page 153 NEO Lighting Control Console The fixture editor is a separate program provided with NEO. You can use the graphical interface to add, remove or modify fixtures. See the "NEO Fixture Editor Manual" for a detailed description of how to work with this application.
- Page 154 User’s Manual To adjust a profile or to make a new one choose "Edit Profiles" from the drop down menu attached to the "Edit" button. You can also access the profile editor from the main command window from the "Extras" menu. Profile Editor, Damped Profile Selected Profile Editor, Custom Profile On the left side of the window is the list of profiles in the system.
- Page 155 Before creating matrix or LED effects you must define how the fixtures and lights are laid out in the real world. The "Edit Matrices" window provides a simple interface to provide a rough layout of the fixtures. You can also access this window from the "Extras" menu on the NEO Command Line interface window. Edit Matrix Window A lighting matrix is a simple two dimensional grid where each cell can be assigned a channel or fixture from the system.
-
Page 156: Cue Playbacks
MUTE Output The mute button will temporarily STOP all DMX output from NEO at a hardware level. If you want to use another DMX controller temporally you can mute NEO so that the output streams do not fight for control. -
Page 157: Fx Or Effects Playbacks
NEO Lighting Control Console Add a playback to the system by pressing the "Add" button at the bottom of the page. The new playback will be placed at the end of the list. To remove the last playback click on the "Remove" button provided. A confirmation dialog will ask that you are sure you want to remove the playback. -
Page 158: Options
User’s Manual Open the "Effects Playback" window by clicking on the "Fx Playbacks" button at the bottom of the Command Line interface or pressing the F9 key on your keyboard. Effects Playbacks This window will remain empty until you begin adding playbacks by clicking on the "Add Playback" button. Playbacks can be removed by clicking on the small X in the top right of the frame. - Page 159 NEO Lighting Control Console Effects Playback Sizes The "Options" menu will allow you to set 3 different sizes for the playbacks. Effect Playbacks - Compact Mode Effect Playbacks - Normal Mode Effect Playbacks - Large Mode Setting up a New Effect Playback Left click inside the playback to bring up the "Effect Playback Properties"...
-
Page 160: Timeline Effects Options
User’s Manual Depending on the type of effect you have selected different options will become visible. Click on the "Edit Effect" button to open the effects editor and automatically show the effect assigned to this playback. Exclusive Group When a playback is created it is automatically placed into the "Independent" group (exclusive group 0). Effects contained in the independent group will run independently and can all be run at the same time. -
Page 161: Chase Options
NEO Lighting Control Console Chase Options Submaster - Assigning a submaster to the playback will override the dimmer of the fixtures contained in the effect. As the effect runs the position of the submaster will determine output of the fixtures. A submaster assigned to a chase will also cause the effect to automatically start when the value is above 0 and pause with it returns to 0. -
Page 162: Profile Effect Options
User’s Manual Profile Effect Options Submaster - Assigning a submaster to the playback will override the dimmer of the fixtures contained in the effect. As the effect runs the position of the submaster will determine output of the fixtures. Playback - Assigning a playback will disable the submaster edit as only one can be assigned to the FX playback at a time. -
Page 163: Matrix Effect Options
NEO Lighting Control Console Matrix Effect Options Submaster - Assigning a submaster to the playback will override the intensity the all of the fixtures contained in the matrix. Playback - Assigning a playback will disable the submaster edit as only one can be assigned to the FX playback at a time. -
Page 164: Playback Controls
NEO NOTES & TIPS: This is particularly useful if you have a sequence of commands that you use frequently. Creating a macro enables you to activate the sequence in one operation rather than entering each command manually. -
Page 165: Additional Commands
You can loop a series of commands using the "Loop" and "End Loop" keywords. Loop {number of times} - This command will mark the beginning of the loop and also define how many times NEO will perform the loop block. -
Page 166: Dmx View
User’s Manual branch channel(3) > 30 label1 3@10 #label1 3@50. The above macro will set channel 3 to 50% if its current value is greater than 30 otherwise it will be set to 10% branch my_variabe <= 5 label1 Jump to label1 if the system variable is less than or equal to 5. branch playback(0) >... -
Page 167: System Properties
Show Defaults - setting in this tab provide default options for cue lists, channel groups and recording. Appearance - the appearance tab allows you to change colors and fonts used throughout the software. Registration - Options for registering your NEO software. Without a valid registration, NEO will not produce any DMX output. -
Page 168: System Input/Output (Dmx)
This number will also define the number of cells in the channel display window. Some may find it easier to view this window will only the number of channels they need for a show. Enter the number of channels you want the software to use and restart NEO for the change to take effect. Max DMX Universes By default the software will be setup for 10 DMX universes. -
Page 169: Merge With Universe
Merge with Universe Use this spin edit option to set what NEO universe the software will merge input with. Merging will only occur on the universe if the "Merge DMX input with output" combo box is set to something other than "None". -
Page 170: Information
Turn on "Enable receiving UDP based commands" to allow NEO to listen for commands via UDP messages. Note: The Telnet interface must be enabled to use any of the remote (e.g. LFRemote for iPad) applications with NEO. 1 6 8... -
Page 171: System Input/Output - Advanced
The Advanced tab will allow you to configure advanced and complex DMX routes that don't necessarily conform to the standard DMX universe length. NEO NOTES & TIPS: Not all protocols allow for sending a partial DMX universe string. Philips ShowNet does which gives the system the ability to output to discreet DMX routes over Ethernet. -
Page 172: System Properties, System Settings Tab
User’s Manual System Properties, System Settings Tab Basic Settings These are the settings most likely used during traditional programming on your NEO console. System Settings stay with the console and are not saved with the showfile. On Level Use this to specify the value fixtures will be set to when clicking on the "ON" or "SOLO" buttons in the channel window. -
Page 173: Cue List Split Crossfader
Determines backup file settings. Backup location By default NEO will store the backups in a sub folder of the "NEO Shows" directory. Use this field to change this location. This can be useful for automatically storing the backup on a remote system. -
Page 174: Intermediate Options
For example if you have a external 24 channel DMX lighting board connected to DMX input then it is recommended that you set number of submasters per page to 24. This means that when you change to the second page in NEO channel 1 on you physical lighting desk will correspond to submaster 25. -
Page 175: Disable Double Click Function
Start New Show with Nothing Patched When you create a new blank show NEO will patch all of the available desk channels 1:1 with the dimmer (dmx) channels. Tick this option stop this happening and start all new shows with no channels patched. -
Page 176: Apply Color Selection To All Color Mixers
User’s Manual Apply Color Selection to All Color Mixers If the fixture used has more than 1 color mixer then selecting a color using a color picker will be applied to all of the color mixers in the light. If this option is off then the selected color will only apply to the first mixer in the fixture. This option can also be changed in the generic color picker that is shown with color mixing fixtures. -
Page 177: Sunrise / Sunset
Sunrise / Sunset When using the built in scheduling feature of NEO you can create schedule items that will operate on sunrise and/or sunset. The software will automatically calculate the time of the day for these events based on your location. -
Page 178: Advanced System Settings
User’s Manual 29. Advanced System Settings Click on the advanced options button to open an additional screen of system settings. Advanced System Settings External Joystick Sensitivity Controls the sensitivity to an external joystick. External Joystick Threshold Controls the range of the dead zone before the joystick responds to movement. 1 7 6 Software Configuration... -
Page 179: Log Incoming Telnet Data
Don't Show Startup Failure Warning If NEO does not start correctly it will prompt if you want to open a default show the next time you start. To disable this prompt turn this option on. -
Page 180: Make Show File Smaller
The result of this operation is often a significantly smaller file. When you click on this option you will see a new window appear (external to NEO) that will perform this operation. The show file you are working on will be closed while the database pack is running. -
Page 181: Full Tracking Mode / Hybrid Tracking Mode Switch (Important)
Full Tracking Mode - In full tracking mode only changes are recorded into each cue however any channel that is currently on will stay at that level. When a cue is recorded or updated NEO will work out what has changed and record only that information. -
Page 182: Set Auto Mark
NEO console. The options are… None - meaning that the NEO console will not auto mark when running cues. Mark as early as possible - will mark for the next use as soon as the lights go to 0 intensity. -
Page 183: Channel Group Defaults
"Down" time. NEO NOTES & TIPS: With Fade mode in Up/Down (not In/Out) the next option is as the option does not apply. NEO NOTES & TIPS: Cue List time options change when this is turned off. -
Page 184: Advanced Level Programming Options
User’s Manual Independent - Channels in an "Independent" group will override all other requests to modify the channel value. As soon as the group level is above 0, channels within this group will be controlled by the group values. Inhibit - With an inhibit group the value masters all channels that are in the group. The output value of the channel will be scaled by the value of the inhibit group it belongs to. -
Page 185: Appearance
System Properties, Appearance Tab Show pan and tilt position within fixture image - By default NEO will draw a small x inside the image at the top of the channel cell to represent the position of the pan and tilt values. Turn this option off to disable this feature. -
Page 186: Create A Taskbar Button For Every Window
User’s Manual Make active color proportional to dimmer level - Use this option to make the active channel colors intensity proportional to the current output level. When the channel is at full the background will be the defined active channel color. -
Page 187: Neo Console & Software
1. Software Registration NEO uses a software license to ensure that the product has been legally purchased. Without a valid registration code, the software will still operate normally and no functionality will be restricted, however the software will not produce any DMX output. -
Page 188: Visualization
Enable Auto Focus Exchange - Auto focus is the term used for transfer of fixture state between the visualizer and NEO. If enabled changes made to the fixture in the visualizer will be transferred back to NEO. For example setting the position of the fixture in the 3D environment can be automatically translated into pan and tilt information in NEO. -
Page 189: Media
This setting determines the device that will be used. Video Scaling - NEO supports a number of advanced scaling routines to improve the output quality when the video size does not match the output size. These options can require a lot of CPU to work at full frame rate so it is always recommended that your video be pre rendered to the size you need. -
Page 190: Special Shortcuts
Pressing the shortcut while in the Command Line interface will bring up the appropriate word to use in the command line. System Properties, Special Shortcuts Execute shortcut on shutdown - a Shortcut configured here will run on shutdown. 1 8 8 NEO Console & Software... -
Page 191: Special Shortcuts: More
NEO Lighting Control Console Special Shortcuts: More This gives you access to advanced displays and advanced features like the timecode monitor, power monitor, fixture library editor, matrix editor and more. Shortcuts Window This calls up the Shortcuts Page. See “Shortcuts” on page 61 for more information. -
Page 192: Playback Window
Allows the user to view the live video output of a connected video camera. Note: Video camera by others. Touchscreen Keyboard Opens up a touchscreen keyboard. Timecode Monitor Opens up the timecode monitor or clock. 1 9 0 NEO Console & Software... -
Page 193: Power Monitor
Console Debug Window This is a great troubleshooting tool to help identify communication to the hardware. The top portion identifies the NEO console tiles that it is communicating with. It identifies the Board Type, ID, Firmware Version, Message Count and Status. -
Page 194: Control Panel
This opens the NEO Control Panel. See “Control Panel” on page 192 for more information. Edit Fixture Library This opens the NEO Fixture Library Editor. There is a separate manual for the Fixture Library Editor. Please go to www.strandlighting.com www.neocontrol.net to download. -
Page 195: Edit Matrices
NEO Lighting Control Console Edit Matrices Opens the Matrix Editor. See “Edit Matrices” on page 153 for more information. Edit Profiles Opens the Profile Editor. See “Edit Profiles” on page 151 for more information. Control Panel... -
Page 196: Edit Color Filters
This allows the user to remove a color from the library. 7. Layout Setting Save Layout and Settings This allows the user to save their NEO window layout. The layout is saved as a separate file. 1 9 4 NEO Console & Software... -
Page 197: Load Layout And Settings
NEO Lighting Control Console Load Layout and Settings This allows the user to load their NEO window layout. The layout is loaded from a separate file. 8. Control Panel The PaletteOS software runs on a PC processor under a Windows® operating system (OS). An OS system means that only the software necessary to run the console is installed and no unauthorized software can be installed by the user. -
Page 198: Applications
Quick Start Guide - launches the Quick Start Guide document. Manual - launches the manual document. Applications The NEO Control Panel: Applications gives you access to basic auxiliary applications. File Manager - launches the Windows file manager. Web Browser - launches the default web browser. -
Page 199: System
NEO Lighting Control Console System The NEO Control Panel: System gives you access to Windows PC system configuration items to help you configure your NEO to your system. Configure Network - launches the Windows Network Connections application. Here is where NEO's network can be configured for your lighting network. - Page 200 Select Internet Protocol Version 4 (TCP/IPv4) then press the Properties button. A typical setup will require NEO to have a static IP address. Select Use the following IP address: and assign according to the needs of your network. The image below shows a standard static IP for a Strand network installation.
- Page 201 Change Console Name - allows the ability to change the computer name and domain. NEO NOTES & TIPS: Consult your network administrator prior to changing this setting. Set System Time - allows the ability to change the computer's date and time setting.
- Page 202 Set Screen Resolution - allows the ability to change the appearance of your displays. Screen Saver Preferences - allows the ability to change NEO's screen saver setting. This is off by default and it is recommended to keep that setting.
- Page 203 • Click on Setup and follow the on screen instructions to "Touch this screen to identify it as a touchscreen." NEO NOTES & TIPS: You may need to touch the screen multiple times. It will change screens when it has enough data.
- Page 204 Note: On screen keyboard will only operate with a touchscreen (sold separately). Regional Settings - allows the ability to change the Region and Language settings. Volume Control - allows the ability to change the volume control. 2 0 2 NEO Console & Software...
- Page 205 Windows Task Manager is a advanced level utility that helps with discovering, diagnosing and troubleshooting Windows and Windows program issues. Note: Consult with Philips Entertainment Technical Support when troubleshooting any console related issue. Printer Setup - allows the ability to setup a printer for your NEO console. Control Panel...
- Page 206 Note: Consult Philips Entertainment Tech Support before changing any Firewall Settings. Command Prompt - this opens a Windows Command Prompt as is password protected. A Command Prompt gives DOS level access to the NEO Windows PC. Note: Consult with Philips Entertainment Technical Support before using the Command Prompt.
- Page 207 NEO Lighting Control Console Disk Cleanup - this opens Windows Disk Cleanup utility. Note: Consult with Philips Entertainment Tech Support before using the Disk Cleanup utility. Windows Access Point Configure - allows access to the Windows Access Point Configure utility.
-
Page 208: Maintenance
Update NEO Software - the first step to updating your NEO console is to copy the software file to the C: drive. Then Force NEO Shutdown. Once done, you can press the Update NEO Software button and follow the prompts to update your console's software. - Page 209 Note: This should only be accessed by authorization of Philips Entertainment Technical Support. Restart - will restart your NEO console. Shutdown - will shut down the NEO software and Windows software. DMX will be held until the power supplies rocker switch is turned off.
-
Page 210: General Concepts
The DMX 512 protocol is a stream of data that is sent via a cable system connected between the console (NEO) and a data receiver, which could be anything ranging from a basic light to intelligent lights, smoke machines, etc. -
Page 211: Rdm
By adjusting the DMX value up and down, the intensity of the light increases and decreases. By default the NEO console will control this via percentage values. So 0% will be off and 100% will be fully on. -
Page 212: Dmx Value
DMX Universe A DMX universe consists of 512 DMX dimmers. In the case of the NEO system, the console was purchased with a set number of universes. This can be from 1 to 100 universes. Should the NEO console need more universes after the initial purchase, more DMX universes can be authorized at any time. -
Page 213: Conventional Fixtures
• 16-bit - has 65535 (256 x 256) settings, 0 to 65535 for the value. NEO's Fixture Library stores attribute information about your fixtures. The library is divided into fixture brands. This helps to organize the wide range of fixtures that are available into manageable groups. - Page 214 User’s Manual Table 1: Common Attributes Attribute Description Color wheel (color changer, color A wheel-shaped device containing circles of colored media (gels) that attaches to a luminaire in order scroller) to create a colored beam of light. Can be manually controlled or motorized and controlled via a dimmer. Gobo A thin plate with a design cut out of it that can be placed in the path of the light beam, causing a pattern to be projected.
-
Page 215: Neo Concepts And Terminology
NEO NOTES & TIPS: The behavior is not used when the channel group in included inside a cue. Override (LTP) - Also known as "Latest Takes Precedence". This behavior will apply the channel levels set in the group to output channels and take over control of that channel. -
Page 216: Cues
Blocking is most commonly applied to an entire cue to create a known or fixed lighting state in the show. The first cue should always be blocked and in NEO this will be done automatically for you as a Smart Block. -
Page 217: Fixture Block
Cues are set up and managed via the "Cue List Editor". See "Cue List Editor" for more information. Cue Lists To easily manage and organize of a large number of cues for a production, NEO enables cues to be grouped into "Cue Lists". -
Page 218: Cue Channels
Tracking behavior will be applied regardless of if the cues are run sequentially or out of order. The tracking mode is set per show in NEO and can be changed at any time in the system properties. The tracking switch will be stored with the show to avoid the chance of a hybrid show running on a tracking setup or the other way around. -
Page 219: Recording Modes
To facilitate the management of large numbers of effects, effects can be given simple labels that describe what the effect does. Whenever you need to find or select an effect within NEO you can use the filters to narrow down the list. -
Page 220: Exclusive Groups
8. Telnet Interface Telnet allows a programmer to connect to NEO remotely using a hand-held device or similar. Commands can be sent from the remote device using the command language used by the Command Line interface. -
Page 221: Shortcuts
A shortcut is a quick route to a particular setting or feature that is used frequently. There are many places that shortcuts can be assigned within NEO. A shortcut may select some fixtures, run a cue, start an effect, apply a setting, or just about any operation. -
Page 222: Computer Concepts
User’s Manual COMPUTER CONCEPTS In order to use the NEO console or the Hyperion software on a PC, it is necessary to understand a few basic computer concepts. 1. Trackball A trackball is available for mouse-like pointer movement from the NEO console. The buttons labeled "Left" and "Right"... -
Page 223: Timecode
Firebird SQL Server is a type of database. A database is an electronic way of storing information on your computer. When you use NEO, your entire lighting configuration is stored in a SQL Server database. This means that you can switch off your computer, even unplug everything, and NEO will still remember your set-up. -
Page 224: Let's Get Started
Patch display key in the DISPLAY tile. The first time you open this window, NEO's software will ask you if you want to patch all channels 1 to 1 or start with no channels patched at all. Selecting the "Blank Slate" option will open the channel display with nothing assigned. -
Page 225: Console Default Settings
Default Channel Display Window If this is the first time you have used the NEO console, you should see the window above displayed on your screen. Each channel in the system is represented by a cell in a two dimensional grid. - Page 226 The lights connected to this channel should now be displaying 30% of their maximum output. Un-select channel 1 by pressing BKSP or Backspace. NEO NOTES & TIPS: An active channel is any channel with an output value above 0. 2 2 4...
-
Page 227: Storing And Editing Cues
NEO NOTES & TIPS: If you do not have a scroll wheel on your mouse, use the + and - keys as replacements. Channels can also be selected in large numbers by holding the mouse down and dragging it over the channels you... - Page 228 User’s Manual STEP 1 Open the patching window by pressing the Patch display button or by clicking on the "Patch" icon at the bottom of the Command Line interface or press the F7 key on you keyboard. Dimmer Patch Window STEP 2 Below the label "Available Fixtures"...
-
Page 229: Controlling A Moving Light
This is because the dimmers that where patched to these channels are now in use by the Mac 250 that we just patched. NEO will allow you to overlap patch information but by default it will assume this undesirable and automatically unpatch the channels for you. -
Page 230: Creating A Basic Cue List
NEO NOTES & TIPS: This guide assumes HYBRID tracking mode was selected on start up. NEO NOTES & TIPS: NEO allows you to create multiple cue lists and play back multiple cue lists at the same time. For this example we will focus on a single cue list. Also, in this example we are not covering the use of the effects engine, but only basic cues. - Page 231 STEP 4 The "Create new cue" dialog box will be displayed. NEO will automatically pick the active cue list (If you have just installed then this will be the only cue list) and set the cue number to the next available cue. Press the "OK" button to record this cue.
-
Page 232: The Cue List Editor
User’s Manual STEP 2 Double click on channel 8 to bring it up to 100%. STEP 3 Unselect channel 8 and select channel 9. Set the value of channel 9 to 80%. STEP 4 Now that the third scene is set, click on the "Record Cue" or press control-c. STEP 5 In the resulting "Create New Cue"... -
Page 233: Running The Show
At any time we can return to the previous cue by clicking on the "Back" button and can stop a cue execution (i.e. Fade In) by clicking on the "Stop" button. NEO NOTES & TIPS: A show can be run either via the Show Editor as per the example above, or via the Show Runners. -
Page 234: Reference / Window Overview
In practice there is." - Yogi Berra The reference section is divided by the various windows in NEO. To find information about a particular section of the software start by identifying the window you are currently in. The window you are in may have been opened from a parent window. -
Page 235: Command Window Options
Set background color - Use this option change the background color of the command history window. The standard NEO color chooser will allow you to select any color from palette. Be aware that it is possible to choose a color that will make the text unreadable. -
Page 236: Channel Commands
COLOR then color wheel 1 is selected by default. To select color wheel 2 the command should read COLOR2. NEO NOTES & TIPS: 24 / 30 gobo2 @ 235 - Set the gobo wheel 2 on the fixture patched to desk channel 24 through 30 to DMX value 235. - Page 237 If the selected channel is an intelligent fixture then the software will apply the value to the dimmer property unless a different attribute is specified. NEO NOTES & TIPS: 1+2+3+7+19/33 @ 25 - This will set channels 1, 2, 3, 7 and channels 19 through 33 to 25% of full.
-
Page 238: Other Commands
User’s Manual NEO NOTES & TIPS: 24/30 zoom @ 23 fade 2.4 - This will set the zoom property of fixtures 24 through to 30 to 23 degrees and will take 2.4 seconds to reach this value from the current zoom attribute value. - Page 239 DIM DMX Channels @ DMX Value NEO NOTES & TIPS: dim 1+4 @ 164 - The command will capture dmx dimmers 1 & 4 at the dmx value 164. To release a captured DMX dimmer enter an "rel" at the end of the DMX channel list. If no channels are specified then the command will release all captured DMX dimmers.
- Page 240 The above syntax can be used to set a channel group to a specific value. Any number of groups can be applied and the same syntax as selecting channels is used as the number list. NEO NOTES & TIPS: Grp 1,3,8 @ 50 - The command will set the channel groups 1, 3 and 8 at 50%. 2 3 8...
- Page 241 "Selected" keyword the currently selected channel will be recorded. NEO NOTES & TIPS: Grp "Back lights" sel rec - The command will create a new group or add to the existing group called "Back Lights" and add the currently selected channels.
- Page 242 GO, STOP, BACK, and RESET to control the playback. NEO NOTES & TIPS: cue "Act 1" go - This will execute the next cue on the cue list "Act 1" if this cue list is not the active cue list then it will become the active cue list and the first cue will be executed.
- Page 243 • Selected - Record only the selected channels to the cue. NEO NOTES & TIPS: Cue "Act 1" 5.3 "Sunrise" 5 - The command will record the active channels into cue 5.3 of the "Act 1" cue list. If the cue list does not exists it will be created. Also if the cue does not exists it will also be created.
-
Page 244: Hardware Interfaces
CueServer CueServer is a lighting control solution for of stand-alone architectural and show control. NEO is now able to directly integrate with these products by exporting a cue list directly to the device. The CueServer tab will allow you to select... -
Page 245: Hardware Submasters
NEO Lighting Control Console the cue list you want to upload and the actions you want for each of the buttons. NEO will then take care of creating the necessary resources containing your show data and upload it in one operation. -
Page 246: Hardware Shortcuts
4. Window Layout Options When NEO is shutdown and restarted the position and size of the windows are remembered. The next time you use the software you will notice that the windows will re-open in the same state as they were last left. - Page 247 NEO Lighting Control Console Click on the "Save window layout & settings" to save the current position and size of all the windows to a file on your computer. A save dialog box will appear asking for a name and location to store your layout. Enter a valid name and click "Save".
Need help?
Do you have a question about the NEO and is the answer not in the manual?
Questions and answers
Replugged the monitor in to NEO ;ighting console and now touchscreen function does not work and need a solution to fix. Cable in plugged in all of the way.
To fix the touchscreen function on the Strand Lighting NEO console after replugging the monitor, follow these steps:
1. Go to the Touchscreen Calibration option in the settings.
2. Click on Setup and follow the on-screen instructions to identify the touchscreen.
3. If the touchscreen is not functioning correctly, press the Calibrate button.
4. Follow the on-screen instructions to complete the calibration.
5. You may need to touch the screen multiple times until it gathers enough data.
This should restore touchscreen functionality.
This answer is automatically generated