Kenwood TK-3180 Function Reference
Hide thumbs
Also See for TK-3180:
- Service manual (70 pages) ,
- Manuale di istruzioni (50 pages) ,
- Instruction manual (304 pages)

Related Manuals for Kenwood TK-3180


Summary of Contents for Kenwood TK-3180
- Page 1 Function Reference TK-2180/ 3180/ TK-2180/ 3180/ 7180/ 8180 7180/ 8180 Version: 1.11 Last Updated: Aug, 2004 Language: English Type:...
-
Page 3: Table Of Contents
CONTENTS 3.4.2 Battery Status/Warning ......... 20 Sub Display........... 21 Main Display ..........21 3.6.1 Zone Name............ 21 1 BASIC FUNCTION ........1 3.6.2 Zone Name Text Length........ 22 3.6.3 Channel Name ..........22 Functions and Panel Layout ......1 3.6.4 GID Name ............. 22 1.1.1 TK-2180/ 3180.......... - Page 4 9 HORN ALERT...........37 15.3.1 Clear to Transpond........51 15.4 Trunking System ........... 51 Switching the Horn Alert ON/OFF....37 15.4.1 Transpond Delay Time ......51 Horn Alert Operation using Option Signaling and LTR ID............37 16 CONVENTIONAL GROUP ....... 52 9.2.1 Conventional Group ........
- Page 5 17.1.20 Decode ID (Block IDs)......60 19.2 Tone Off ............74 17.2 Group ID ............61 19.3 Direct OST ............ 74 17.2.1 Encode/ Decode ID ......... 61 19.4 OST Table............. 76 17.2.2 GID Name ..........61 19.5 Standard QT ..........76 17.2.3 Transmit Power ........
- Page 6 22.1.1 Caller ID Display........94 22.9.13 ACK Delay Time........121 22.1.2 PTT ID Sidetone........94 22.9.14 Transmit Delay Time (Receive Capture)121 22.2 Selective Call Function ......... 95 22.9.15 Data Transmit Modulation Delay Time .. 122 22.9.16 Random Access (Contention) ....122 22.2.1 Making a Selective Call ......
- Page 7 24.1.3 Emergency Cycle ........137 26.2.10 TOR or Channel Busy ......148 24.1.4 Locator Tone 1 Duration......137 26.2.11 TXS ............148 24.1.5 Transmit Duration........137 26.2.12 AUX Out Status Message 1 - 3 ..... 148 24.1.6 Locator Tone 2 Duration......138 24.1.7 Receive Duration........
- Page 9 About this Manual Table 1-1 Comparison List for New/Old Function Names This manual describes the functions of the 180-Series New Name Old Name Mobile and Portable and how to configure the various 2-tone 2 Tone functions. 3 Reference Level 3 Point Adjustments Adjustments 5 Reference Level 5 Point Adjustments...
- Page 10 Start of Text Acknowledgement Switch ANI Board Automatic Numbering Identification Board Talk Around Antenna Telephone AQUA Kenwood’s audio signal processing IC Tone Operated Relay Auxiliary Time-out Timer Busy Channel Lockout Transmission, Transmitter The beginning of transmission TX LED Transmission LED...
- Page 11 About Trademark • The transceiver displays battery status. (TK-2180/ 3180 only) IBM® is a trademark or a registered trademark of Interna- • This transceiver has a time display function. tional Business Machines Corporation. Microsoft Windows® 98, Windows® Me, Windows® 2000, Windows® XP and Windows logo are registered About the Programming Software trademarks of Microsoft Corporation.
-
Page 13: Basic Function
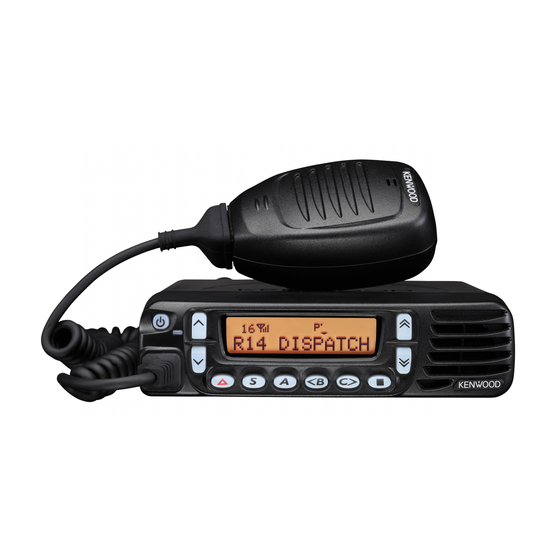
1 BASIC FUNCTION Functions and Panel Layout AUX key You can activate the assigned function with this key. Speaker 1.1.1 TK-2180/ 3180 The speaker emits the received audio signals and alert tones. LCD Display The channel number and the transceiver’s status appear on this display. - Page 14 1 BASIC FUNCTION PF keys Table 1-2 Assigning Signals to the 8-pin External Connector Press any key to activate a function assigned to each function key. Input/ Pin Name Description Number Output Table 1-1 Assigning Signals to the 25-pin External Connector Output- MIC Backlight Control...
- Page 15 1 BASIC FUNCTION Input/ Input/ Name Option Description Name Option Description Output Output Scrambler Scrambler Input TX OUT AGND A-GND VGS-1 A-GND VGS-1 Scrambler Scrambler Output CODE 3 OPT6 VGS-1 Input VGS-1 Scrambler Scrambler Output (TK-2180/ 3180) VGS-1 Output (TK-7180/ 8180) VGS-1 Scrambler Table 1-4 Assigning Signals to the 14-pin External...
-
Page 16: Zone Description
Channel Data Range [MHz] Step [KHz] Channel Data TK-2180 136 - 174 2.5/ 5.0/ 6.25/ 7.5 400 - 470 *1 TK-3180 5.0/ 6.25 450 - 520 Trunking System Data Trunking System Data TK-7180 136 - 174 2.5/ 5.0/ 6.25/ 7.5... -
Page 17: Channel Spacing
TK-2180/ 3180 Channel Spacing [kHz] Model Wide Narrow TK-2180/ 7180 12.5 TK-7180/ 8180 TK-3180/ 8180 12.5 2. Select the Squelch Level. Configuration using KPG-89D The Squelch Level changes according to the • Configuring the Channel Spacing (Wide/Narrow) to selection. a channel (Refer to 6.3.9 Wide/Narrow.) Common •... -
Page 18: Compander
1 BASIC FUNCTION Configuration using KPG-89D • Configuring the Squelch Level to the transceiver (Refer to 6.7.4 Conventional tab - Squelch Level.) • Assigning functions to the PF keys (Refer to 6.8 Key Assignment.) TK-2180/ 3180 Squelch Level key TK-7180/ 8180 The "... -
Page 19: Beat Shift
1 BASIC FUNCTION Beat Shift Transceiver Operation #Enabling the Key Lock function This function eliminates the problems of the transceiver’s 1. Press and hold the PF Key Lock key for more internal beat caused by internal oscillators. than one second to enable the Key Lock function. -
Page 20: Call Key
1 BASIC FUNCTION 1.11 Call Key Configuration Operation You can directly select and transmit the DTMF code by pressing the keypad of This function allows you to transmit FleetSync, Status, 2- the transceiver. tone, or DTMF code with a single operation. You can select the Autodial List You can directly transmit Status, 2-tone, and DTMF codes configured with KPG-89D. -
Page 21: Battery Saver
1 BASIC FUNCTION 1.13 Battery Saver Table 1-13 Operation of the Power Switch Status Memory Configuration Operation (TK-2180/ 3180 only) The transceiver is turned ON when This function allows the transceiver to receive connecting the power connector after intermittently in order to reduce power consumption. removing it while the transceiver was turned The transceiver receives intermittently in the following Enabled... - Page 22 1 BASIC FUNCTION Configuration using KPG-89D • Configuring the Mic Line (Refer to 6.15.5 Modulation Line tab - Mic Line.) • Configuring the MI2 Line (Refer to 6.15.5 Modulation Line tab - MI2 Line.) • Configuring the DI Line (Refer to 6.15.5 Modulation Line tab - Di Line.) •...
-
Page 23: Basic Operation
2 BASIC OPERATION Turning the Transceiver ON/ 2.1.1 Turning the Transceiver ON TK-2180/ 3180 You can turn the transceiver ON/OFF by pressing the Power switch. You can also turn the transceiver ON using the Ignition Sense terminal. (Refer to 8 Ignition Sense.) TK-7180/ 8180 When Data is Written in the Transceiver and No Password is Configured:... -
Page 24: Turning The Transceiver Off
2 BASIC OPERATION 2.1.2 Turning the Transceiver OFF Press the Power switch to turn the transceiver OFF. You can also turn ON/OFF the transceiver using the Ignition Sense function. (Refer to 8 Ignition Sense.) TK-2180/ 3180 Adjusting the Volume TK-7180/ 8180 You can increase the Volume level by turning the Volume control clockwise and decrease it by turning the control The CH/GID Name or Zone-CH/GID number... -
Page 25: Changing The Ch/Gid
2 BASIC OPERATION The Zone number decreases in steps of 1. Channel Entry • Press and hold the PF Zone Down key for more than one second. This function allows you to directly change the CH/GID The Zone number decreases in steps of 1 number. -
Page 26: Home Ch/Gid
2 BASIC OPERATION Note: Transceiver Operation " When no key is pressed before the Mode Reset Timer # Jumping to the Home Channel/Group ID expires in Channel Entry Mode, the display returns to the 1. Press the Home CH/GID key. last display. -
Page 27: Direct Ch/Gid
2 BASIC OPERATION # Changing the Home Channel/Group ID Direct CH/GID 1. Select the CH/GID to be used as the Home CH/ GID. This function allows you to jump to the registered CH/GID with a press of a key. You can jump to the CH/GID in a different Zone, instantly. -
Page 28: Receive
2 BASIC OPERATION # Changing the Direct CH/GID Receive 1. Select the CH/GID to be used as the Direct CH/ GID. 2.9.1 Conventional Group The transceiver emits the received tone only when the received QT/DQT code matches with the configured QT/ DQT code. -
Page 29: Transmit
2 BASIC OPERATION 2.10 Transmit Configuration using KPG-89D • Configuring the Transmit Frequency (Refer to 6.4.4 Transmit Frequency.) 2.10.1 Conventional Group • Configuring the Encode ID (Refer to 6.6.3 Encode ID.) The transceiver transmits the programmed QT/DQT while pressing the PTT switch to transmit. When the transmitted QT/DQT code matches the QT/DQT code configured in the receiving party’s transceiver, you can communicate with the receiving party. -
Page 30: Display
3 DISPLAY The transceiver has the following display and indicator. 3.3 LCD Display LED (TX/Busy) The LCD Display of the transceiver is as follows. LCD Display ! TX-2180/3180 Backlight 3.1 BUSY LED 図 3-1 TK-2180/3180 LCD The BUSY LED lights green when receiving the following signals. -
Page 31: Lcd Brightness1
3 DISPLAY The backlight LED lights when pressing any key other Icon Function than the PTT switch and/or turning the Volume Control. • Monitor On icon The Backlight lights for approximately 5 seconds and This icon displays the status of the turns Off when no key is pressed after it turns On. -
Page 32: Signal Strength Indicator
3 DISPLAY This function notifies and warns the battery's Icon Function remaining status to the user. • AUX B/VOX icon The battery status is displayed in 4 levels when this The status of the AUX B is displayed for function is enabled. the TK-7180/ 8180 and the status of the (Middle) VOX function is displayed for the TK-... -
Page 33: Sub Display
3 DISPLAY 3.5 Sub Display Sub LCD Function Display • Zone number The Sub display can display 3 characters. You can 1 - 128 The selected Zone number appears. select the items to be displayed on the Sub display using KPG-89D. •... -
Page 34: Zone Name Text Length
Group ID. You can assign the GID Name to recognize Function Configuration each Group ID easily. Zone Name Text Length 3 You can configure the GID Name using KPG-91D. Zone Name KENWOOD GID Name -CHANNEL1- ! Configuration using KPG-89D • Configuring a GID Name (Refer to 6.6.5 GID Name.) Displayed Characters 3.6.5 Display Character... -
Page 35: Power-On Text
3 DISPLAY 3.6.6 Power-on Text You can configure a text that appears when the transceiver is turned ON. The configured message appears for two seconds after the transceiver is turned ON. You can configure the Power-on Text using KPG-89D. Note: "... -
Page 36: Sound
4 SOUND Tone Pattern 4.1.2 Control Tone This tone sounds when accepting the operation. The following tones are available. Table 4-3 Control Tone List Table 4-1 Tone List Function Description Tone Classification Description, Type This tone sounds when the function The tone notifies you that the Key Beep A is enabled by pressing the key. -
Page 37: Warning Tone
4 SOUND 4.1.3 Warning Tone 4.1.4 Locator Tone This tone sounds to warn you for many functions. This tone sounds when starting/finishing the automatic transmission in Emergency Mode. Table 4-4 Warning Tone List Table 4-5 Locator Tone List Function Description Function Description This tone sounds until the PTT... -
Page 38: Maximum Volume
4 SOUND TK-7180/ 8180 Tone Volume Offset # Selecting “Preset” in Minimum Volume Type This function allows you to configure the offset level from The volume of the transceiver is automatically the volume level. You can use this function when configured to the Minimum Volume level when the adjusting the volume level of the tone. -
Page 39: Selectable Tone Level
4 SOUND Selectable Tone Level Table 4-8 Alert Tone Pattern Alert Tone Pattern Description This function allows you to adjust the Tone Volume using You can configure the frequency of the PF key. the tone. You can configure the The volume level of the tone is configured to the Optional frequency between 400 and 2500 Hz Frequency Features window the Common - Page2 tab - Low Volume... -
Page 40: Ptt Proceed Tone
4 SOUND In Conventional Group, you can enable/disable this tone 4.10 Proceed Tone Delay Time for each channel. In Trunking system, you can enable/disable this tone This function allows the caller to emit the Proceed Tone when transmitting the Dispatch ID or Telephone ID. This when the configured Proceed Tone Delay Time expires. -
Page 41: Public Address
4 SOUND Configuration using KPG-89D • Assigning functions to the Mic keys (Refer to FPRG 6.8 Key Assignment.) 4.12 Public Address (TK-7180/ 8180 only) This function allows you to use the transceiver and exterior speakers as a hailer. When you speak into the microphone, the voice sounds from the exterior speaker (PA function). -
Page 42: Password Function
5 PASSWORD FUNCTION The transceiver has a password function for transceiver Key Name Operation operation and the configuration data. Press: Delete a number. Hold: Delete all numbers. Confirm the selected value and the number. Transceiver Password [Side 2]/ [!] [0] - [9] Enter a number. -
Page 43: Read Authorization Password
5 PASSWORD FUNCTION Read Authorization Table 5-2 Key Operation Password Key Name Operation Increase/decrease the number This password protects the configuration data and prevents Selector/ [ ]/ [ (0 - 9) the operating frequencies from being read by unauthorized The transceiver returns to the persons. -
Page 44: Overwrite Password
5 PASSWORD FUNCTION Overwrite Password Operation for activating Clone Mode This function prevents the operating frequencies from being unintentionally. You must enter the Overwrite Password from the PC Selector or [ ]/ [ when writing the configuration data to the transceiver Enter the first digit. -
Page 45: Embedded Message Function
6 EMBEDDED MESSAGE FUNCTION This function allows you to embed a text message • Reading the configuration data from the (combination of alphabets and numerals) in the Transceiver (Refer to FPRG 7.1 Read Data from transceiver. the Transceiver.) Embedded Message This function allows you to store a maximum of 64 characters in the transceiver. -
Page 46: Communication Port
7 COMMUNICATION PORT The TK-2180/ 3180 has 2 external communication ports Table 7-3 Available Functions (TK-7180/ 8180) to which you can assign separate functions. The TK- 7180/ 8180 has 3 external communication ports to which you can assign separate functions. Communication port Function COM 0... - Page 47 7 COMMUNICATION PORT Yes: Assigned function -: Available function Combi- No: Unavailable function nation port Data + None Data COM 0 COM 1 COM 2 COM 0 COM 1 COM 2 COM 0 COM 1 COM 2 COM 0 COM 1 COM 2 COM 0 COM 1...
-
Page 48: Ignition Sense
8 IGNITION SENSE This function allows you to turn the transceiver ON/OFF 8.1.2 Turning the Transceiver ON/OFF using the status of the Ignition Sense terminal. The with the Ignition Sense Function Ignition Sense terminal will be High when the engine is and the Power Switch running and it will be Low when the engine is not running. -
Page 49: Horn Alert
9 HORN ALERT The TK-7180/ 8180 has a Horn Alert output terminal that will function with the following features. • Individual call using optional signaling (DTMF, 2-tone) • GID/Fix ID in LTR Trunking System • FleetSync Status No. 89 TK-7180/ 8180 With this function enabled, a user can be alerted that the transceiver has received a call since the horn will sound # Disabling the Horn Alert Function... -
Page 50: Trunking System
9 HORN ALERT Table 9-2 Conditions for the Horn Alert to be activated in a Table 9-3 Conditions to Activate the Horn Alert Function in Conventional Group a Trunking System Signaling Configuration Signaling Configuration Conditions Conditions to to Activate Activate the Audio QT/DQT Optional... -
Page 51: Off-Hook Horn Alert
9 HORN ALERT Table 9-4 Horn Alert Logic Signal Operation 9.4.2 Off-hook Horn Alert Configuration Description This function allows you to configure the Horn Alert function to operate in conjunction with the Mic hook The HOR terminal becomes active status. for 3 times every 500 ms. -
Page 52: Horn Alert Mode
9 HORN ALERT 9.4.3 Horn Alert Mode This function allows you to configure the control method to enable/disable the Horn Alert function. You can configure Horn Alert Mode using KPG-89D The following Horn Alert modes are available. Table 9-7 Horn Alert Mode Type Configuration Description It resets the Horn Alert stand-by status when... -
Page 53: Key Assignment
10 KEY ASSIGNMENT You can assign functions to the Selector and the PF Function Name Description keys. Press the PF Auto Reply Message key to switch the Auto Reply Message On/Off Configuration using KPG-89D Auto Reply when the VGS-1 is installed to the Message transceiver. - Page 54 Function Name Description Function Name Description Press the PF Display Character key to Press the PF Scan key to start/stop Scan switch the Main Display to the CH/GID scanning. (Refer to 23 Scan.) Display Character Name display or the Zone-CH/GID Press the PF Scan Delete/Add key to add Number display.
- Page 55 10 KEY ASSIGNMENT Function Name Description Press the PF VOX key to enable/disable the VOX function. You can also configure the VOX Gain Level. This function is available only for TK-2180/ 3180. (Refer to 28 VOX.) Press the PF Zone Down key to decrease the Zone number in steps of 1.
-
Page 56: Time-Out Timer
11 TIME-OUT TIMER This function restricts the continuous transmission time 11.1.3 TOT Rekey Time (TOT). This function prevents the user from occupying a repeater The function is used to configure the time from when the frequency for a long period of time when the repeater is Time-out Timer starts operating to the time when the shared with other users. -
Page 57: Trunking System
11 TIME-OUT TIMER 11.2 Trunking System You can configure the following items in a Trunking system. • Time-out Timer (Dispatch) • Time-out Timer (Telephone) 11.2.1 Time-out Timer (Dispatch) The Time-out Timer (Dispatch) restricts the continuous transmission when a user communicates with the Dispatcher ID. -
Page 58: Busy Channel Lockout
12 BUSY CHANNEL LOCKOUT 12.1 Busy Channel Lockout Transceiver operation 1. Press the PTT switch while the transmission is restricted with the Busy Channel Lockout function. This function automatically prevents a transmission so as not to interfere other communications. 2. Release the PTT switch, then press the switch again within 500 ms. -
Page 59: Talk Around
13 TALK AROUND This function allows you to communicate to another 13.2 Trunking System transceiver without using a repeater. When the Talk Around function is enabled, you can transmit on the receive frequency and Encode ID of the Home Repeater of the selected Zone. 13.1 Conventional Group This function allows you to transmit on the receive Transmit... -
Page 60: Ta Busy Channel Lockout
13 TALK AROUND Configuration using KPG-89D Configuration using KPG-89D • • Configuring the Talk Around function (Refer to Configuring the TA key (Refer to FPRG 6.5.17 TA FPRG 6.6.13 Talk Around.) Key.) • Assigning functions to the PF keys (Refer to FPRG 6.8 Key Assignment.) 13.2.1 TA Busy Channel Lockout This function automatically restricts the transmission so... -
Page 61: Ptt Id
14 PTT ID This is the identification code transmitted when the PTT 14.2 PTT ID switch is pressed and/or released. (CH/GID Information) By using this ID, the base station (dispatcher) can identify the caller without asking for the caller’s name. PTT ID (CH/GID Information) allows you to select the You can configure the following items to PTT ID using timing to send the PTT ID. -
Page 62: Restricted Id In Ta
14 PTT ID " You can select the ID configured in FleetSync window > ID List tab for List 1 - 100 only. Configuration using KPG-89D • Configuring the PTT ID (Conventional Group) (Refer to FPRG 6.3.12 PTT ID.) • Configuring the PTT ID (Trunking System) (Refer to FPRG 6.6.8 PTT ID.) 14.3 Restricted ID in TA... -
Page 63: Transpond
15 TRANSPOND This function allows you to send the Acknowledge signal 15.3 Conventional Group when receiving a call. The transceiver transmits the Transpond Tone when the Acknowledge is transmitted. The dispatcher can also confirm that the transceiver is 15.3.1 Clear to Transpond within the communication range, or outside of the communication range. -
Page 64: Conventional Group
16 CONVENTIONAL GROUP The Conventional Groups are groups of Simplex and Configuration using KPG-89D Semi-duplex Conventional Channels. • Configuring the Data Zone-CH/GID (Refer to You can configure the Zone to the Conventional Group FPRG 6.2.2 Data Zone-CH/GID.) using KPG-89D. 16.1.3 Home Channel This function allows you to jump to the frequently used 16.1 Zone Channel with a press of the key. -
Page 65: Audio Control
16 CONVENTIONAL GROUP 16.1.6 Audio Control 16.1.10 TOT Reset Time This function allows you to configure the conditions to The TOT Reset Time is the function to reset the Time-out disable the Mute function using the QT/DQT and Option Timer. (Refer to 11.1.4 TOT Reset Time.) Signaling. -
Page 66: Channel
16 CONVENTIONAL GROUP 16.2 Channel Configuration using KPG-89D • Configuring the QT/DQT Decode (Refer to FPRG 6.3.5 QT/DQT Decode.) You can configure the following functions relating to the Conventional Group Channel using KPG-89D. • Receive Frequency 16.2.4 QT/DQT Encode • Transmit Frequency •... -
Page 67: Wide/Narrow
16 CONVENTIONAL GROUP 16.2.7 Wide/Narrow 16.2.11 Beat Shift This function allows you to select the operational This function eliminates the problems of the transceiver’s bandwidth for the channel. internal beat caused by internal oscillators. You can enable/disable this function when the VGS-1 is installed You can select Wide or Narrow using KPG-89D. -
Page 68: Voice Scrambler
16 CONVENTIONAL GROUP 16.2.15 Voice Scrambler This function allows you to scramble the voice transmission for private communications. (Refer to 29 Voice Scrambler.) You can enable/disable the Voice Scrambler function using KPG-89D. Configuration using KPG-89D • Configuring the Voice Scrambler function (Refer to FPRG 6.3.17 Voice Scrambler.) 16.2.16 Scrambler Code You can configure the Scrambler Code. -
Page 69: Ltr Trunking
17 LTR TRUNKING LTR Trunking Systems are multiple repeater systems that 17.1 Zone utilize the LTR Trunking protocol. Each transceiver has own Group ID so that various calls can be processed You can configure the following functions to the LTR easily. -
Page 70: Wide/Narrow
17 LTR TRUNKING Configuration using KPG-89D 17.1.7 Home GID Operator Selectable • Configuring the Scan Weight (Refer to FPRG This function allows a user to configure the Home GID. 6.5.2 Scan Weight.) When this function is enabled, the user can change the Home GID by selecting the channel to be configured as the Home GID and pressing and holding the PF Home 17.1.3 Wide/Narrow... -
Page 71: Audio Control
17 LTR TRUNKING 17.1.10 Audio Control 17.1.14 Auto Telephone Search This function allows you to configure the conditions to This function allows the transceiver to search for an disable the Mute function using the QT/DQT and Optional available repeater and automatically link to the repeater. Signaling. -
Page 72: Fix Id
17 LTR TRUNKING 17.1.17 Fix ID Note: " The TX Inhibit (Block IDs) function is disabled when the Zone/ Group ID is changed. The Fix ID is the LTR ID having higher priority than the Group ID. The transceiver automatically switches to the "... -
Page 73: Group Id
17 LTR TRUNKING 17.2 Group ID 17.2.3 Transmit Power Transmit Power is the transmission power of the You can configure the following functions to the LTR transceiver. (Refer to 1.4 Transmit Output Power.) Trunking System Group ID using KPG-89D. Press the PF Low Transmission Power key to alternate •... -
Page 74: Horn Alert
17 LTR TRUNKING Table 17-1 Call Indicator Operation 17.2.9 Transpond Received ID Operation You can enable/disable the Transpond function using KPG-89D. (Refer to 15 Transpond.) The “CAL” icon appears on the sub display to notify the user that the transceiver received a call. -
Page 75: Scrambler Code
17 LTR TRUNKING 17.2.14 Scrambler Code Configuration using KPG-89D • Configuring the Home Repeater (Refer to FPRG Configuring the Scrambler Code. 6.4.2 Home Repeater.) You can configure the Scrambler Code using KPG-89D. (Refer to 29 Voice Scrambler.) 17.3.3 Repeater Information Table There are 2 types of Scrambler function: uilt-in and optional Voice Scrambler Board . -
Page 76: Telephone Interconnect
17 LTR TRUNKING 17.4 Telephone Interconnect Configuration using KPG-89D • Assigning functions to the PF keys (Refer to FPRG 6.8 Key Assignment.) In LTR Trunking Systems, you can connect to the PSTN (Public Switched Telephone Network) via the RIC (Repeater Inter Connect). 17.4.2 Auto Telephone Search 17.4.1 Connecting to the Phone Line This function allows the transceiver to search for an... -
Page 77: Free System Ringback
17 LTR TRUNKING The “ ” icon appears when the transceiver is connected to the phone line. TK-2180/ 3180 TK-2180/ 3180 TK-7180/ 8180 The transceiver emits the Ringer Tone when the TK-7180/ 8180 Repeater becomes available. If no repeaters are available for 60 seconds, the Note: Deny Tone sounds and the Auto Telephone Search "... -
Page 78: System Search For Voice Channels
17 LTR TRUNKING 17.5.1 System Search for Voice 17.5.2 System Search for Data Channels Channels Two types of System Search is available: Manual and You can select “Auto” from the System Search pulldown Auto. menu. The System Search does not work when “Manual” or “Disable”... -
Page 79: Arq Mode
17 LTR TRUNKING 17.7.1 Transceiver Operation When Using the ARQ Function in the External Modem Transmit Attempting to make a Receive connection When the DTC terminal of the external modem is low, the for 6 times. Delay Tone Proceed Tone transceiver starts the ARQ operation. -
Page 80: Signaling
18 SIGNALING Signaling consists of Optional Signaling (DTMF, 2-tone Configuration using KPG-89D and FleetSync) and the QT/DQT that performs selective • Configuring the QT/DQT Decode (Refer to FPRG call and Mute function control. 6.3.5 QT/DQT Decode.) • Configuring the QT/DQT Encode (Refer to FPRG 6.3.6 QT/DQT Encode.) 18.1 QT/DQT Decode/Encode 18.1.1 With STE... -
Page 81: Signaling (Audio Control)
18 SIGNALING 18.3 Signaling (Audio Control) Table 18-4 Conditions to Disable the Mute Function and Operation of the Transceiver This function allows you to configure the conditions to Condition Operation disable the Mute function using the QT/DQT or LTR ID The LTR ID disables the Mute function. -
Page 82: Trunking System
18 SIGNALING Configuration using KPG-89D 18.6 Monitor • Configuring the Signaling (Decode) (Refer to FPRG 6.2.5 Optional Signaling Decode Condition.) This function allows the transceiver to unmute and enter receive mode. The operation of this function varies between a Conventional Group and a Trunking system. 18.4.2 Trunking System This function allows a user to monitor the channel before transmitting. -
Page 83: Operations During Scan In Conventional Group
18 SIGNALING # PF Monitor Momentary key 18.6.1 Operations during Scan in Conventional Group 1. Press the PF Monitor Momentary key. The “ ” appears while this key is pressed. In Conventional Group, the transceiver mutes only with a The QT/DQT Signaling becomes Inactive when carrier. - Page 84 18 SIGNALING TK-2180/ 3180 TK-2180/ 3180 TK-7180/ 8180 TK-7180/ 8180 • Press the PF Squelch Off key. • Release the PF Squelch Off Momentary key. The “ ” icon disappears If the QT/DQT is The “ ” icon disappears. configured to the current channel, the If the QT/DQT is configured to the current transceiver returns to the Signaling Squelch.
-
Page 85: Operations During Scan In Conventional Group
18 SIGNALING 18.7.1 Operations during Scan in Conventional Group The “ ” appears when the PF Squelch Off key is pressed during scan. The transceiver pauses scan and disables the Mute function. The transceiver when the PF Squelch Off key is pressed if it is not in receiving mode. The transceiver resumes scan after the Key Dwell Time expires if it is not in receiving mode. -
Page 86: Ost
19 OST This function allows you to change the Decode/Encode 19.1 OST Status Memory combination of the QT/DQT Signaling without changing the transmit/receive frequencies. This function allows a user to stack the OST code This is used when there are several Talk Groups using configured to each channel even if the transceiver is QT/DQT codes on the same frequency. - Page 87 Transceiver Operation 1. Press and hold the [0] - [9] key for more than 1 second. The OST Name appears for 2 seconds. When the number of memories is less than 9, start from the step 3. TK-2180/ 3180 TK-7180/ 8180 TK-2180/ 3180 The display returns to the channel display after 2 seconds.
-
Page 88: Ost Table
19 OST 19.4 OST Table This function allows you to configure QT/DQT Decode/ Encode pair for OST. You can configure a maximum of 40 pairs. You can configure the following functions in the OST Table. Table 19-1 OST Table Configuration OST Table Function You can assign name to the OST... -
Page 89: Dtmf
20 DTMF This transceiver supports DTMF (Dual Tone Multiple 20.1.2 Store & Send Frequency) as a signaling mode. DTMF signaling uses 2 different frequency tones This function allows a user to store an entered DTMF simultaneously. You can use DTMF for PTT ID, an string using the Mic keypad, and then transmit it all at individual call, transmit a telephone number to the phone once. - Page 90 3. Repeat step 2 if necessary. TK-2180/ 3180 TK-2180/ 3180 TK-7180/ 8180 TK-7180/ 8180 2. Select a character using Selector or [ ]/[ ]. 4. Press the PTT switch to make a voice call and The entered code appears on the display from send the DTMF code.
-
Page 91: Keypad Auto Ptt
20 DTMF 20.1.3 Keypad Auto PTT This function allows you to transmit the DTMF Tones when pressing [0] - [9], [*] and [#] on the Keypad. You can enable/disable the Keypad Auto PTT function using KPG-89D. TK-2180/ 3180 Table 20-2 DTMF Tone Key Operation Frequency DTMF Digit 941.000 + 1336.000 Hz... -
Page 92: Autodial List Selection
20 DTMF Configuration using KPG-89D • Assigning functions to the PF keys (Refer to FPRG 6.8 Key Assignment.) 20.1.4 Autodial List Selection TK-2180/ 3180 This function allows a user to select the DTMF code registered in the Auto Dial Memory List and transmit it. The user can use this function when the Store &... -
Page 93: Connect Id (Bot)
20 DTMF TK-2180/ 3180 TK-2180/ 3180 TK-7180/ 8180 TK-7180/ 8180 2. Press [*] and [0]. 2. Press [*] twice. The previously transmitted DTMF code appears. The DTMF code configured to the Beginning of Transmit appears. Press [S] to cancel transmitting the code. Press [S] to cancel transmitting the code. -
Page 94: Encode
20 DTMF 20.2.1 DTMF Speed You can configure the DTMF automatic transmission speed when automatically transmitting PTT ID, Autodial, Store & Send, BOT, or EOT. You can select the DTMF automatic transmission speed TK-2180/ 3180 (digit/sec) or configure the Digit Time. You can configure the DTMF Speed using KPG-89D. -
Page 95: First Digit Time
20 DTMF 20.2.3 First Digit Time Configuration using KPG-89D • Configuring the DTMF Hold Time (Refer to FPRG This function allows you to adjust the extension time for 6.10.1 Encode tab - DTMF Hold Time.) the transceiver to transmit the first digit of the DTMF string. -
Page 96: Store & Send
20 DTMF 20.2.9 Store & Send 20.3.2 Transpond/ Alert Tone Transpond/ Alert Tone This function allows a user to store entered DTMF codes The transceiver performs the using the Keypad, then transmit them at one time. You function when the code matches. The selected Transpond and Alert Tone is performed can send a DTMF string that consists of a maximum of 30 operations in... -
Page 97: Stun
20 DTMF • The status of Transpond resets in the following Operation Conditions conditions. Stun Response is the transceiver’s response when the Stun Code matches. Table 20-6 Condition to Reset the Transpond Status The following Stun Response operations are available. Operation Conditions •... -
Page 98: Clear To Transpond
20 DTMF 20.3.5 Clear to Transpond Configuration using KPG-89D • Configuring the Name (Refer to FPRG 6.10.3 Auto This function allows the transceiver to wait before Dial List tab - DTMF Name.) performing the Transpond function until the channel is •... - Page 99 20 DTMF Transceiver Operation 4. Select the List name using Selector, [Up]/ [Down], or Keypad. # Configuring/modifying the Autodial List 1. Press the PF Autodial Programming key. The first List number appears. No List number appears when the Autodial List is not configured.
- Page 100 20 DTMF “OverWrt?” appears when data exists in the 3. Press [A] or [#] after selecting the List. memory. “DELETE?” appears on the display. TK-2180/ 3180 TK-2180/ 3180 TK-7180/ 8180 TK-7180/ 8180 8. Press [S] or [*]. 4. Press [S] or [*]. The data is written and the Autodial List The Autodial List is deleted.
-
Page 101: 21 2-Tone
21 2-TONE The transceiver supports 2-tone signaling. 2-tone is a pair of 2 different tones. A user can use 2- tone signaling to make an individual call. The 2-tone signalling is a series of different tones (or one tone ) having frequencies between 288.5 and 3106.0 Hz. TK-2180/ 3180 Note: This function is available only in Conventional Group. -
Page 102: Duration Of 1St Tone
21 2-TONE 21.2.1 Duration of 1st Tone 21.2.5 First Tone Delay Time This function allows you to configure the 1st Tone Encode The First Digit Delay Time is the delay time between the configured in the 2-tone Encode Memory List. time that the transceiver begins transmission and the time that it ends the 2-tone transmission. -
Page 103: Decode
21 2-TONE Configuration using KPG-89D Table 21-2 Format Combination List • Configuring the Single Tone (Refer to FPRG Combination Combination Pattern Standby 6.11.1 Encode tab - Single Tone.) • A-B (The transceiver • Configuring a 2-tone Name (Refer to FPRG 6.11.1 waits for receiving A Encode tab - 2-tone Name.) Tone and B Tone.) -
Page 104: A Tone/ B Tone/ C Tone/ D Tone
21 2-TONE Transpond Alert Operation Auto Reset Timer Operation The transceiver transmits the The match status of the DTMF resets Monitor Transpond Tone. when the Auto Reset Timer expires. Other than The transceiver transmits the Alert Configuration using KPG-89D Tone. •... - Page 105 21 2-TONE Operation Condition Timer Auto Reset Timer expires. expires. " The status of Transpond resets in the following conditions. This Transpond code is held when the transmission is disabled with the Busy Channel Lockout function. Table 21-6 Condition to Reset the Transpond Status Operation Condition One of the following keys is pressed.
-
Page 106: Fleetsync
22 FLEETSYNC FleetSync, developed by Kenwood, utilizes MSK Configuration using KPG-89D (Minimum Shift Keying) modulation to exchange data • Configuring the PTT ID (Channel) (Refer to FPRG between transceivers. It identifies individual transceivers, 6.3.12 PTT ID.) and allows for text messages and GPS data •... -
Page 107: Selective Call Function
22 FLEETSYNC 22.2 Selective Call Function 22.2.1 Making a Selective Call A user can make a Selective Call by selecting the party This function allows you to make a call using the from the List or using the Manual Dialing function. FleetSync ID. - Page 108 22 FLEETSYNC TK-2180/ 3180 TK-2180/ 3180 TK-7180/ 8180 TK-7180/ 8180 2. Press and hold [S] or [*] for more than 1 2. Select the List number. second. • Common The transceiver enters Selcall ID Entry Mode. Press [B]/ [C] to increase/decrease the List The last used ID appears on the display.
-
Page 109: Receiving A Selective Call
22 FLEETSYNC # Using the Keypad Individual Call/ Group Call • Enter the ID using [0] - [9]. A user can respond to the party that appears on the # Deleting the entered character display by pressing the PTT switch or [Side 2]/ [!]. •... - Page 110 22 FLEETSYNC # When the ID is registered in the ID List (Group # When no ID is registered in the ID List: Call): TK-2180/ 3180 TK-2180/ 3180 TK-7180/ 8180 TK-7180/ 8180 # When no ID is registered in the ID List (Group Supervisor Call/Broadcast Call Call): A user can respond to the party that appears on the...
-
Page 111: Id List
22 FLEETSYNC # When the ID is registered in the ID List ID List Operation (Broadcast Call): Enable/disable the transmission to the receiving party. When the transmision is inhibited, the status does not appear on the ID Selection window and a user TX Inhibit cannot select the ID in Message Mode. - Page 112 22 FLEETSYNC 2. Select the List number. Status Message Description • Common The transceiver sends the Status Message Press [B]/ [C] to increase/decrease the List via serial command. This message is sent PC Command number. when the transceiver is connected to a PC or the KDS-100 (MDT).
- Page 113 22 FLEETSYNC # When the Status Message is properly sent # When the Status Message is not properly to the receiving party: since the receiving party is busy: “COMPLETE” appears on the display. “BUSY” appears on the display. TK-2180/ 3180 TK-2180/ 3180 TK-7180/ 8180 TK-7180/ 8180...
- Page 114 22 FLEETSYNC # When the Status Message is properly sent 2. Press and hold [S] for more than 1 second. to the receiving party: The transceiver enters the Status Code Entry Mode. “COMPLETE” appears on the display. The last transmitted the Status Code appears on the display.
-
Page 115: Receiving The Status Message
22 FLEETSYNC # When you cancel sending the Status Transceiver Operation Message: 1. “RECV DATA” appears on the main display when press [S1] while “SEND DATA” is on the the transceiver starts receiving data. display. “CANCEL” appears on the display and the transmission is canceled. -
Page 116: Reserved Status Of The Status Message104
22 FLEETSYNC # When no Status Message is configured in the Table 22-8 Reserved Status List Status List: Enable/disable the The Status number appears. Operation at Status Input. Status Function the receiving Manual party Dial Control Normal Status 10 - 79 User Status Reception Operation Default Status... -
Page 117: Status Message Stack
22 FLEETSYNC You can configure the Status Message to be stacked *1 You can enable/disable the Status 80 - 99 when using the Manual using KPG-89D. Dialing function with KPG-89D. (Refer to 22.3.13 Status 80 - 99 (Special).) Note: The transceiver can stack a maximum of 15 Status Messages. -
Page 118: Aux Output Status Message
22 FLEETSYNC To enable this function, you must configure the Status Configuration using KPG-89D Message to the AUX IN terminal. • Configuring the Power-off Status Message (Refer You can configure the Aux Input Status Message using to FPRG 6.12.7 Target tab - Power-off Status KPG-89D. -
Page 119: Status 80 - 99 (Special)
22 FLEETSYNC Configuration using KPG-89D 22.4 Short Message Function • Configuring the Target Fleet (Refer to FPRG 6.12.7 Target tab - Target Fleet.) This function allows the transceiver to transmit/receive a maximum of 48 characters. • Configuring the Target ID (Refer to FPRG 6.12.7 Target tab - Target ID.) With this function, you can reliably send information to the transceiver. -
Page 120: Receiving The Short Message
22 FLEETSYNC # When the Short Message is properly sent to the 22.4.2 Receiving the Short Message receiving party: “COMPLETE” appears on the display. This received Short Message data can be transferred in the following way. Table 22-12 Short Message Output Short Message Description The received Short Message appears... -
Page 121: Short Message Stack
22 FLEETSYNC 3. The “ ” icon blinks. Configuration using KPG-89D The received Short Message appears on the • Configuring the Short Message Stack (Refer to display. FPRG 6.12.2 General 2 tab - Short Message Stack.) A user can scroll the message from right to left when the Short Message is longer than 12 characters. -
Page 122: Long Message Function
22 FLEETSYNC # When the Long Message is not properly sent to 22.5 Long Message Function the receiving party: “NO REPLY” appears on the display. This function allows the transceiver to transmit/receive a maximum of 4096 characters. With this function, a user can reliably send information to the transceiver. -
Page 123: Long Message On Data Zone-Ch/Gid
22 FLEETSYNC 22.6 GPS Function (TK-7180/ 8180 only) This function allows the TK-7180/8180 transceiver to send its current location data. TK-2180/ 3180 The transceiver transmits the GPS data using the communication port of the transceiver. To use this function, you must connect the GPS receiver unit to the communication port. -
Page 124: Base Fleet/Id
22 FLEETSYNC 22.6.1 Base Fleet/ID The transceiver sends the GPS data in conjunction You can configure the FleetSync ID to send the GPS with the PTT operation. You can select the timing to data. send the GPS data from BOT/ EOT/ and Both. You can configure the Base Fleet/ID using KPG-89D. -
Page 125: Gps Report Mode
22 FLEETSYNC Status 22.6.3 GPS Report Mode The transceiver sends the GPS data with the This function allows you to select the transmission FleetSync Status Message. method: Transmit the GPS data automatically or transmit after receiving the command. Transmit You can configure the GPS Report Mode using KPG-89D. The GPS Report Mode has the following functions. -
Page 126: Gps Report Interval Time (Ignition On)
22 FLEETSYNC 22.6.5 GPS Report Interval Time 22.6.8 GPS Message Type (Ignition On) This function allows the transceiver to change the length of the message to send the GPS data. This function allows the transceiver to send the GPS data at the configured intervals when “Auto”... -
Page 127: Gps Data Storage
22 FLEETSYNC 22.6.10 GPS Data Storage This function allows the transceiver to store the FleetSync GPS data in the VGS-1. The transceiver can store the GPS data at the GPS Report Interval Time. The transceiver can send the GPS TK-2180/ 3180 data or it can be read by a PC. - Page 128 22 FLEETSYNC # Short Message # Time Stamp “Mnn” appears on the sub display. 24-hour format The received Short Message appears on the main display. TK-2180/ 3180 TK-2180/ 3180 TK-7180/ 8180 12-hour format TK-7180/ 8180 # Switching the Message Display 1.
-
Page 129: Stores The Latest Received Messages
22 FLEETSYNC Press [A] or [#] to return to the Stack List window without deleting messages. TK-2180/ 3180 TK-2180/ 3180 TK-7180/ 8180 2. Press [A] or [#]. TK-7180/ 8180 “DELETE” appears on the display. 22.7.1 Stores the Latest Received Messages This function allows you to select how to stack the Caller ID, Status Message and Short Message. -
Page 130: Caller Id Stack
22 FLEETSYNC 22.7.2 Caller ID Stack 22.8 Timer Function This function allows the transceiver to store the IDs of the This function allows the transceiver’s time to be adjusted. callers to the Stack Memory. A user can use this function to add the Time Stamp to the The transceiver can store a maximum of three IDs. -
Page 131: Own Fleet/Id
22 FLEETSYNC • Alert Tone (Paging Call) Note: A user cannot make a Interfleet Call regardless of the configuration of this function when making a Interfleet Call • Alert Tone (Status/Short Message Call) with the PC Command. • Alert Tone (Emergency Response) Configuration using KPG-89D •... -
Page 132: Auto Reset Timer
22 FLEETSYNC 22.9.5 Auto Reset Timer 22.9.7 Manual Dialing This function allows a user to reset the LED, Alert Tone, This function allows a user to directly enter the Fleet and Monitor, and the LCD to the previous display after a the ID number. -
Page 133: Gtc Count
22 FLEETSYNC 22.9.9 GTC Count Configuration using KPG-89D • Configuring the Transmit Busy Wait Time (Refer to This function allows you to configure the number of times FPRG 6.12.3 Parameter tab - Transmit Busy Wait to transmit the GTC. Time.) GTC (Go To Channel) is a message that allows the transmitting party to take the receiving party to the data 22.9.12 Maximum ACK Wait Time... -
Page 134: Data Transmit Modulation Delay Time
22 FLEETSYNC can reliably send the data even if the receiving party’s Configuration using KPG-89D transceiver is performing Scan or using the Battery Saver • Configuring the Random Access function (Refer to function. FPRG 6.12.3 Parameter tab - Random Access.) You can configure the Transmit Delay Time using KPG- 89D. -
Page 135: Alert Tone (Individual Call)
22 FLEETSYNC Table 22-24 Auto Reset Timer Operation Configuration using KPG-89D • Configuring Alert Tone (Other Selective Calls) Message Display (Refer to FPRG 6.12.2 General 2 tab - Alert Tone Operation Type (Other Selective Calls).) “STM/SDM” appears on the display when receiving a call. -
Page 136: Pc Interface Protocol
22 FLEETSYNC Configuration using KPG-89D • Configuring Alert Tone (Emergency Response) (Refer to FPRG 6.12.2 General 2 tab - Alert Tone (Emergency Response).) 22.9.25 PC Interface Protocol There are 2 types of PC Interface Protocol (Version 1, Version 2). The Version 1 is the same protocol that is used by the 80 and 150-series. -
Page 137: Scan
23 SCAN Scan allows the transceiver to monitor other channels. 23.1 Scan Operation When the transceiver detects activity, it stops scanning and unmutes a Conventional Group. This allows a user to talk and listen to the person transmitting without 23.1.1 Conditions to Activate Scan changing the channels. -
Page 138: Manually Changing The Zone-Ch/Gid During Scan
23 SCAN 23.1.4 Manually Changing the Zone- Return Operation CH/GID during Scan The transceiver pauses scanning using the Direct CH/GID 1 - 5 key. The Lookback function of the The transceiver performs the following operation when Priority Scan will not be activated. changing the Zone-CH/GID while the following window Enabled The transceiver returns to the selected channel and... -
Page 139: Operations While Making Scan In Trunking System
23 SCAN The transceiver pauses scan when the received QT/ LTR ID - Optional Signaling OR Function DQT matches. The transceiver unmutes and waits for The transceiver stops scan when the Decode LTR ID receipt of the Optional Signaling. matches the Group ID that is configured in the Scan The transceiver mutes and resumes scan after the List. -
Page 140: Multi Scan
23 SCAN • When scan pauses during scan The transceiver scans the Priority Channel even if no Priority Channel is configured in the selected Zone. The transceiver pauses scanning. The “ ” You must select “Multi” in the Scan Type to activate the icon blinks. -
Page 141: Priority Scan
23 SCAN Transceiver Operation The transceiver makes Single Scan/ Multi Scan/ List Scan to scan the Priority Channel at the interval time Activating Scan configured in the Scan Information window > Lookback 1. Press the PF Scan key. Time A or Lookback Time B. The transceiver starts scanning. -
Page 142: Group Scan
23 SCAN # Priority Channel 2 23.7 Configuring Scan The following “ ” icon appears. You can configure the following functions that are relevant to scan using KPG-89D. • Scan Del/Add • Scan List • Scan List Table TK-2180/ 3180 •... -
Page 143: Scan List
23 SCAN Note: Table 23-4 Priority 1 Operation " The Scan Del/Add function does not work even if the PF Scan Del/Add key is pressed. Priority 1 Operation " You can make the Scan Del/Add function when scan pauses None No channel is configured as the Priority 1. -
Page 144: Priority 2/ Priority 2 Zone-Ch
23 SCAN 3. Press [C]. Priority 2 Operation The Priority Channel alternates in the following You can configure the selected channel as order. Selected Priority 2. You cannot select the Priority 2 using Normal > Priority 1 > Priority2 > Prirority1 & 2 > the KPG-89D. -
Page 145: Dropout Delay Time
23 SCAN Configuration using KPG-89D Configuration using KPG-89D • • Configuring the Revert CH/GID (Refer to FPRG Configuring the Dwell Time (Refer to FPRG 6.9.7 6.9.5 Revert CH/GID.) Dwell Time.) 23.7.7 Dropout Delay Time 23.7.9 Lookback Dropout Delay Time is the time from when the received This function allows the transceiver to receive the Priority signal ends to when the transceiver resumes scan. -
Page 146: Ac Control
23 SCAN 23.7.11 AC Control Table 23-7 Off-hook Scan Operation Off-hook This function allows a user to activate the Carrier Squelch Operation Scan after deactivating the QT/DQT on the Priority Channel during Priority Scan. The user can quickly jump to the The transceiver activates scan when the PF Check Scan key is pressed regardless of the status of... -
Page 147: Priority Channel Stop Tone
23 SCAN The transceiver pauses scan after moving to the last received Zone-CH/GID. “RCL” appears on the sub display. TK-2180/ 3180 TK-7180/ 8180 # Resuming Scan • Press the PF CH/GID Recall key while the transceiver is moving to the Last Called Zone- CH/GID. -
Page 148: Emergency Mode
24 EMERGENCY MODE # Exiting from Emergency Mode The Emergency Mode can be activated by a user or a man down switch in case of emergency. With this 1. Use one of the following methods to exit from function enabled, you can send a message to the the Emergency Mode. -
Page 149: Emergency Ch/Gid Type
24 EMERGENCY MODE 24.1.1 Emergency CH/GID Type 24.1.3 Emergency Cycle You can configure the type of CH/GID that operates in This function allows you to configure the time for Emergency Mode. switching between transmission and reception in Emergency Mode. You can configure the Emergency Channel Type using KPG-89D. -
Page 150: Locator Tone 2 Duration
24 EMERGENCY MODE • Configuring the Transmit Duration (Refer to FPRG Table 24-4 Emergency Display Operation 6.14.5 Transmit Duration.) Emergency Display Operation The current Selected CH/GID 24.1.6 Locator Tone 2 Duration Selected appears even when if the transceiver enters the Emergency Mode. The Locator Tone 2 Duration notifies a user that the A pre-programmed message transceiver has ended automatic transmission in the... -
Page 151: Emergency Key Delay Time
24 EMERGENCY MODE 24.1.11 Emergency Key Delay Time 24.1.14 Emergency LED You can configure the duration from the time when the PF This function allows the transceiver to turn On the TX Emergency key is pressed to the time when the LED and BUSY LED when the transceiver transmits in transceiver enters the Emergency Mode. -
Page 152: Man Down Pre-Alert
24 EMERGENCY MODE Configuration using KPG-89D 24.1.20 Emergency ID • Configuring the Man Down Delay Time (Refer to This function allows you to configure the code to be sent FPRG 6.14.16 Man Down Delay Time.) or the control type each time the transceiver starts the automatic transmission/ reception in the Emergency Mode. -
Page 153: Emergency Call Fleet
24 EMERGENCY MODE 24.1.22 Emergency Call Fleet This function allows you to configure the Call Fleet to be sent first in the Emergency Mode when “FleetSync” is selected in the Emergency ID. You can configure the Emergency Call Fleet using KPG- 89D. -
Page 154: Data Communication
25 DATA COMMUNICATION You can perform data communications by using the Configuration using KPG-89D FleetSync function or by connecting an external modem • Configuring the Status Message on Data Zone-CH/ or MDT to the transceiver. GID function (Refer to FPRG 6.12.3 Parameter tab - Status Message on Data Zone-CH/GID.) •... -
Page 155: Com Port
25 DATA COMMUNICATION 25.1.5 COM port Data Override Operation The transceiver key control has priority. The COM port is a serial communication port. You can If the transceiver receives the select the usage of each serial communication port. transmission request on the PF Ext. PTT port or PF Data PTT port, it ignores the The TK-7180/ 8180 has 3 external communication ports transmission request. -
Page 156: Function Port
26 FUNCTION PORT The TK-7180/ 8180 transceiver has Programmable Signal Input/Output Description Function ports (AUX Input/AUX Output). name The following input/output ports are assigned to the D- Auxiliary Input/Output sub 25-pin connector on the back panel. AUX I/O 1 Input/Output Active Low with Table 26-1 Assigning Signals to the D-sub 25-pin Ω... -
Page 157: External Ptt (Voice)
26 FUNCTION PORT Note: Data PTT Configuration " You cannot use the PF Data PTT port, PF Ext. PTT (Voice) port, You can configure the STE (Squelch Tail and the PF Ext. PTT (Data) port at the same time. Eliminator) to be transmitted after transmitting "... -
Page 158: Ch/Gid Select A-D
26 FUNCTION PORT 26.1.6 Speaker Mute External PTT Configuration (Voice) The speaker audio output line mutes when this port is You can configure the STE (Squelch Tail used. Eliminator) to be transmitted after transmitting the QT/DQT code configured in the The transceiver mutes when the PF Speaker Mute port w/STE Conventional Group channel using the PF Ext. -
Page 159: External Hook
26 FUNCTION PORT 26.1.9 External Hook • Emergency Audio • Emergency LED This port functions the same as the Local Mic Hook. The PF key does not work while this port is active. The transceiver enters the On-hook status when the PF Ext. -
Page 160: Cor
26 FUNCTION PORT 26.2.2 COR 26.2.8 Channel Busy This port notifies a user that the transceiver is receiving a This port notifies a user that the remote control request Carrier. from the external device is rejected. This port becomes active when receiving a Carrier. This port becomes active in the following conditions. -
Page 161: Remote Ch/Gid List
27 REMOTE CH/GID LIST This function allows the transceiver to jump to one of 15 AUX Input Port Zone-CH/GIDs using the CH/GID Select A - CH/GID Target CH/ CH/GID CH/GID CH/GID CH/GID Select D ports. Select D Select C Select B Select A Remote CH/GID... -
Page 162: Vox
28 VOX This function allows a user to transmit by speaking into Note: The status of the VOX function key is stored even if the transceiver is turned OFF. the microphone without using the PTT switch. The user can use this function when the user cannot Configuration using KPG-89D press the PTT switch. -
Page 163: Vox Delay Time
28 VOX 2. Adjust the VOX Gain Level using [B]/ [C], Selector, 28.1.3 TX Inhibit while Receiving or [ ]/ [ This function is used to restrict the VOX transmission while the transceiver is receiving signals. You can configure the TX Inhibit while Receiving function using KPG-89D. - Page 164 28 VOX Table 28-2 VOX Proceed Tone Operation VOX Proceed Tone Operation The transceiver emits the Proceed Tone Check (Enable) when the VOX function is enabled. The transceiver does not emit the Uncheck (Disable) Proceed Tone even if the VOX function is enabled.
-
Page 165: Voice Scrambler
29 VOICE SCRAMBLER This function allows the transceiver to scramble the voice for private or secure communications. There are 2 types of Scrambler function: Built-in and optional voice scrambler board. The Transcrypt SC20-460 is one example of an optional scrambler board that may be plugged into the internal TK-2180/ 3180 option board connector in the transceiver. -
Page 166: Scrambler Status Memory (Scrambler) . 153 Sc20-460 Scrambler
29 VOICE SCRAMBLER 29.1.3 SC20-460 Scrambler You can install the SC20-460 Scrambler in the transceiver if a higher security level is required. You can configure the SC20-460 Scrambler by selecting the “Voice Scrambler” in Extended Function > Optional TK-2180/ 3180 Board. -
Page 167: Scrambler Status Memory (Sc20-460 Scrambler)
29 VOICE SCRAMBLER 29.1.4 Scrambler Status Memory (SC20-460 Scrambler) This function allows the transceiver to store the SC20- 460 Scrambler status and the Scrambler code. When the Scrambler Status Memory function enabled, the Scrambler On/ Off configuration is also read when reading data from the transceiver. -
Page 168: Clock
30 CLOCK The transceiver is equipped with an internal clock IC. Configuration using KPG-89D With the IC, the current time can be displayed on the • Assigning functions to the PF keys (Refer to 6.8 LCD. Key Assignment.) The Clock Function has the following four functions. •... -
Page 169: Adjustment Time
30 CLOCK 6. Turn the transceiver OFF after you complete configuring the minute. The time is now adjusted. TK-2180/ 3180 TK-2180/ 3180 TK-7180/ 8180 3. Select the month and press [S]. TK-7180/ 8180 Note: " The Key-entry Error tone sounds if you press [S] when the entered value is invalid. -
Page 170: Vgs
31 VGS This function allows a user to record and playback Configuration using KPG-89D recorded voice. It can be used for the Voice Guide • Configuring the Auto Recording function (Refer to function and the GPS data storage function at the same FPRG 6.7.6 VGS-1 tab - Auto Recording.) time. -
Page 171: Auto Reply Message
31 VGS Transceiver Operation 31.3 Auto Reply Message # Recording Voice This function allows a user to record the voice message 1. Press and hold the PF Playback key for more even if he/she is away from the transceiver. than 1 second. You can enable this function by using the FleetSync The transceiver enters the Voice Memo Mode Individual Call. -
Page 172: Message Playback
31 VGS Configuration using KPG-89D • Playing back the recorded voice on the Auto Recording Channel • Configuring the Auto Reply Message function The recording type, time, and date appear on (Refer to FPRG 6.7.6 VGS-1 tab - Auto Reply the display. - Page 173 31 VGS # Deleting the Recording Channel 1. Select the recording channel to delete using Selector, the PF Zone Up and PF Zone Down key. TK-2180/ 3180 TK-2180/ 3180 TK-7180/ 8180 • Complete playing back the recorded message When the message recorded in the last TK-7180/ 8180 recording channel is played, the “END OF MSG”...
-
Page 174: Voice Guide
31 VGS 2. Press [S] or [*]. Table 31-2 Voice Type of the Zone-CH/GID Guide All messages are deleted and EMPTY appears Selected Zone- on the display. Key Function Voice Type CH/GID # Storing the Recorded Voice Data in the flash memory of the VGS-1 1. -
Page 175: Gps Data Storage
31 VGS The transceiver activates the Voice Guide function in 31.6 GPS Data Storage the following status and emits the following announce. Table 31-4 Status of the Transceiver and Voice Type (TK-7180/ 8180 only) This function allows the transceiver to store the FleetSync Category Status Voice Type... - Page 176 31 VGS Reading GPS Data Using a PC The transceiver (normally base station) can request the mobile transceivers to send the stored GPS data using the FleetSync PC protocol. To use this function, connect the transceiver equipped with the VGS-1 to a PC.
- Page 177 INDEX Base Fleet/ID .............. 112 BASIC FUNCTION............1 Battery Saver (TK-2180/ 3180 only) ....... 9 Battery Status/Warning (TK-2180/ 3180 only) ....20 Symbols BCL Override ............46, 53 Beat Shift ..............7, 55 Beginning of Transmit ........... 49 * and # Digit Time............83 Broadcast Cal ..............
- Page 178 Data CH/GID Dwell Time ........142, 147 Data Communication........... 142 Data Communication Configuration ......142 First Digit Delay Time............ 82 Data Delay Time ............58 First Digit Time.............. 83 Data Override (TK-7180/ 8180 only) ......143 First Tone Delay Time........... 90 Data PTT..............
- Page 179 Jumping to the Specified Zone-CH/GID using the Number of Retries............121 External Device Connected to the Transceiver... 149 Number of Times ............113 Off-hook Decode (TK-7180/ 8180 only) ......70 Key Assignment ............41 Off-hook Horn Alert ............39 Key Lock (TK-2180/ 3180 only)........7 Off-hook Scan (TK-7180/ 8180 only) ......
- Page 180 Signaling ............... 68 Signaling (Audio Control) ..........69 Signaling (Decode) ............69 QT/DQT Decode ............54 Single Scan..............127 QT/DQT Decode/Encode ..........68 Sound................24 QT/DQT Encode ............54 Speaker................1 Speaker Attenuation (TK-2180/ 3180 only)....28 Speaker Mute.............. 146 Squelch .................
- Page 181 Transmit Delay Time (Receive Capture)..... 121 Zone Add ..............53, 59 Transmit Duration............137 Zone Description............. 4 Transmit Frequency ............54 Zone Name ............22, 52, 57 Transmit Output Power ........... 4 Zone Name Text Length ..........22 Transmit Power ............54, 61 Transmit/Receive Frequency ..........