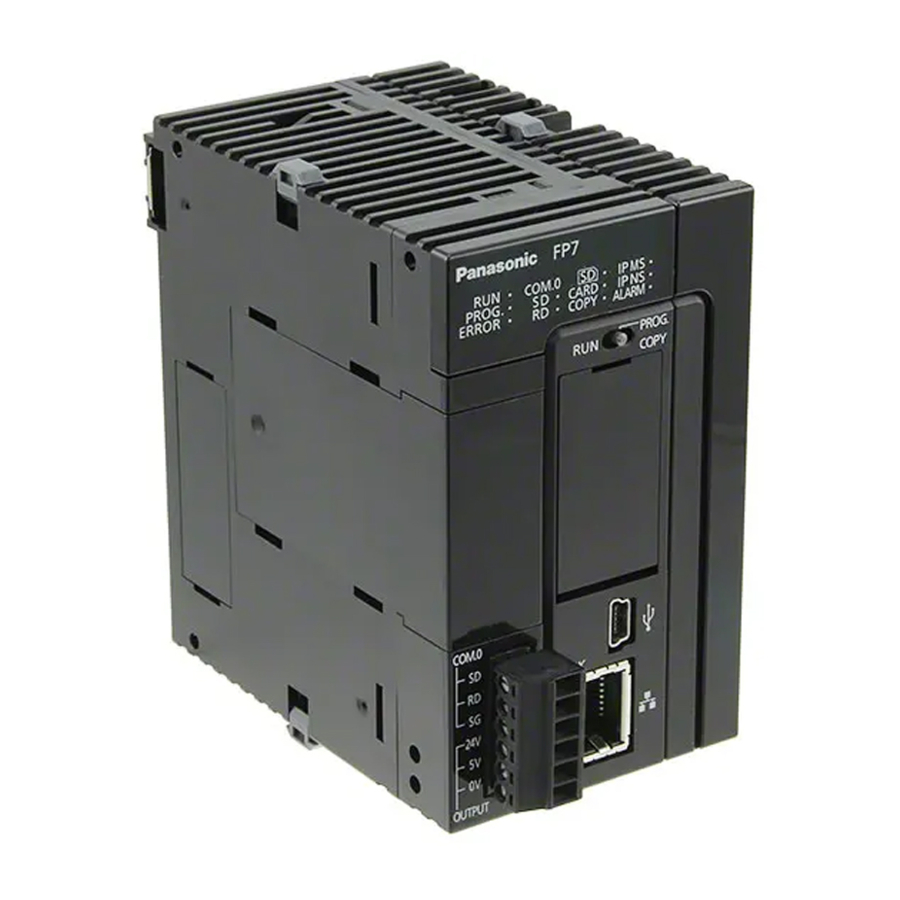
Panasonic FP7 User Manual
Multi input/output unit
Hide thumbs
Also See for FP7:
- Command reference manual (1222 pages) ,
- User manual (275 pages) ,
- Additional functions manual (45 pages)
Table of Contents
Advertisement
Quick Links
Download this manual
See also:
User Manual
Advertisement
Table of Contents
Troubleshooting

Related Manuals for Panasonic FP7


Summary of Contents for Panasonic FP7
- Page 2 It could lead to an electric shock. Copyright / Trademarks -This manual and its contents are copyrighted. Panasonic -You may not copy this manual, in whole or part, without written consent of Industrial Devices SUNX Co., Ltd.
- Page 3 Types of Manual • There are different types of users manual for the FP7 series, as listed below. Please refer to a relevant manual for the unit and purpose of your use. • The manuals can be downloaded on our website: http://industrial.panasonic.com/ac/e/dl_center/manual/...
- Page 4 Table of Contents Unit name or purpose of Manual name Manual code FP7 High-speed counter Unit FP7 High-speed counter Unit Users Manual WUME-FP7HSC FP7 Pulse Output Unit FP7 Pulse Output Unit Users Manual WUME-FP7PG FP7 Positioning Unit FP7 Positioning Unit Users Manual...
-
Page 5: Table Of Contents
Table of Contents Table of Contents 1. Unit Functions and Restrictions ........1-1 Unit Functions and Operation ..............1-2 1.1.1 Unit Functions ..................1-2 1.1.2 Unit Type and Product Number ............... 1-3 Restrictions on Units Combination ............1-4 1.2.1 Restrictions by Power Consumption ............1-4 1.2.2 Applicable Versions of FPWIN GR7 and Units ........ - Page 6 Table of Contents 3.2.3 Output Wiring ..................3-10 Connection over Wire-pressed Terminal Cable ........3-11 3.3.1 Specifications of Wire-pressed Terminal Cable ........3-11 3.3.2 Assembly of Connector for Wire-pressed Terminal Cable ....3-11 4. Unit Allocation ..............4-1 Unit Allocation ..................4-2 4.1.1 Number of Occupied I/O Points for the Unit ..........
- Page 7 Table of Contents 6.2.1 External Interrupt Input ................6-6 6.2.2 Comparison Match Interrupt ..............6-8 7. Counter Function ............... 7-1 Counter Function .................. 7-2 7.1.1 Overview of Counter Function ..............7-2 7.1.2 Configuration Using Tool Software ............7-4 7.1.3 Linear Counter and Ring Counter ............7-6 7.1.4 Selection of Count Methods ..............
- Page 8 Table of Contents 9. Pulse Output / PWM Output Function ......9-1 Pulse Output / PWM Output Function ............ 9-2 9.1.1 Overview of Pulse Output / PWM Output Function ......... 9-2 9.1.2 Pulse Output Function Settings ............... 9-3 9.1.3 Pulse Start Logic ..................9-3 9.1.4 Configuration Using Tool Software ............
- Page 9 Table of Contents 10.3 Initial Operation Check ..............10-10 10.3.1 Safety Circuit Design ................10-10 10.3.2 Before Turning On the Power ............. 10-11 10.3.3 Power-on and Power-off Sequences ..........10-12 10.3.4 After Turning On the Power ..............10-13 10.4 Setting of Positioning Function ............10-14 10.4.1 I/O Allocation of Positioning Function ..........
- Page 10 Table of Contents 10.10.2 E-point Control (Single Speed Positioning) ........10-48 10.10.3 P-point Control (Double Speed Positioning) ........10-50 10.10.4 C-point Control ................10-52 10.10.5 J-point Control (JOG Positioning)............ 10-54 10.10.6 J-point Control (JOG Positioning: Speed Changes)......10-57 10.10.7 Cautions on Programming ............... 10-60 10.11 Repeat Operation ................
- Page 11 Table of Contents 12.2 Troubleshooting .................. 12-4 12.2.1 ERR LED Turns ON on the Unit ............12-4 12.2.2 What to Do When Positioning Error Occurs .......... 12-6 12.2.3 ERR LED is Flashing on the Unit ............12-8 13. Specifications ..............13-1 13.1 Specifications ..................
- Page 12 Table of Contents 13.5.4 Positioning Table Area ................ 13-50 13.6 Dimensions..................13-56...
-
Page 13: Unit Functions And Restrictions
Unit Functions and Restrictions... -
Page 14: Unit Functions And Operation
Input for positioning: Max. 4 channels (Note) Comparison match output: Max. 8 points Output Pulse output or PWM output: Max. 4 channels Positioning pulse output: Max. 4 channels (Note): The positioning function is available only for FP7 Multi I/O Unit (H type). -
Page 15: Unit Type And Product Number
Positioning controls can be selected the follwoing four patterns; E-point control, P-point control, C-point control and J-point control. (Note): The positioning function is available only for FP7 Multi I/O Unit (H type). 1.1.2 Unit Type and Product Number Unit type and available functions... -
Page 16: Restrictions On Units Combination
Current consumption FP7 Multi Input/Output Unit AFP7MXY32DWD 100 mA or less FP7 Multi Input/Output Unit (H type) AFP7MXY32DWDH 100mA or less 1.2.2 Applicable Versions of FPWIN GR7 and Units For using the multi input/output unit, the following versions of FPWIN GR7 and units are required. -
Page 17: Restrictions On Interrupt Function
1.2 Restrictions on Units Combination (Note): When a mark "*" is displayed in the INT column, it indicates that the mode setting switch on the side of the unit is set to "use the interrupt function". 1.2.3 Restrictions on Interrupt Function The multi input/output unit can start an interrupt program of the CPU unit using an interrupt input or counter comparison match flag. -
Page 18: Restrictions On I/O Allocation
Unit Functions and Restrictions 1.2.4 Restrictions on I/O Allocation • Any one of functions allocated to the same I/O number can be used. The inputs that are not allocated to any functions can be used as general inputs. • Functions to be allocated are specified on the configuration dialog box of tool software FPWIN GR7. - Page 19 1.2 Restrictions on Units Combination Output signal Function Terminal I/O no. Comparison Pulse output PWM output Positioning CMP0 CMP1 CMP2 CMP3 CMP4 CH0 CLR CMP5 CH1 CLR CMP6 CH2 CLR CMP7 CH3 CLR PLS0 A PLS0 A PWM0 PLS0 B PLS0 B PLS1 A PLS1 A...
- Page 20 Unit Functions and Restrictions...
-
Page 21: Names And Functions Of Parts
Names and Functions of Parts... -
Page 22: Names And Functions Of Parts
Names and Functions of Parts 2.1 Names and Functions of Parts 2.1.1 Names and Functions of Parts Names and functions of parts Name Function Operation monitor Indicates the operation mode, error occurrence state and input and output ①... -
Page 23: Operation Monitor Leds
2.1 Names and Functions of Parts 2.1.2 Operation monitor LEDs Description Color LED ON LED OFF Flashing Power supply of the unit Blue - ― Input signal monitor (Note 1) X0-XF Green Displays the status of the input signal. (Note 2) Y0-YF Output signal monitor (Note 1) Green... - Page 24 Names and Functions of Parts...
-
Page 25: Input/Output Specifications And Wiring
Input/Output Specifications and Wiring... -
Page 26: Characteristics Of Input/Output Circuits
3.1 Input/Output Specifications 3.1.1 Characteristics of Input/Output Circuits The I/O circuits of the FP7 Multi I/O Unit incorporate the following mechanism. Make the setting of the actual inputs/outputs and the settings on the software be the same. Input circuit A circuit for detecting an input voltage and switching an input impedance is built in. - Page 27 3.1 Input/Output Specifications External connection diagram In Sink output mode or Push-pull output In Source output mode or Push-pull output (negative logic) mode (positive logic) mode (Note 1): The COM0 to COM3 are independent common terminals. They are not internally connected. (Note 2): The two plus terminals (A19 and B19) on the output side are connected internally, and the two minus terminals (A20 and B20) are connected internally.
-
Page 28: Input Specifications
Input/Output Specifications and Wiring 3.1.3 Input Specifications Specifications Item 5 - 24 V mode 12 - 24 V mode Insulation system Digital isolator Rated input voltage 5V / 12V / 24V DC (Note 1) Approx. 2 mA to approx. 10 mA Rated input current (It automatically varies according to the input voltage.) Approx. - Page 29 3.1 Input/Output Specifications Internal circuit diagram and external connection diagram ① ② 5V±10% 12V±10% 24V±10% ① Ω Ω Ω Ω R1=10 k , R2a=4.3 k , R2b=5.6 k , R2c=510 ① ② Voltage detection circuit Internal circuit Characteristics of input circuit •...
-
Page 30: Output Specifications
Input/Output Specifications and Wiring 3.1.4 Output Specifications Item Specifications Insulation system Digital isolator Output device MOSFET Output method (Note 1) Nch open drain / Pch open drain / Push-pull Rated load voltage 5 V DC to 24 V DC Allowable load voltage range 4.75 V DC to 26.4 V DC Max. - Page 31 3.1 Input/Output Specifications Internal circuit diagram and external connection diagram Setting mode Internal circuit diagram and external connection diagram Sink output Source output Push-pull negative logic output When the operation result output Y is 1, the Pch turns off and Nch turns on, and energization to the load is performed.
-
Page 32: Wiring Of Input And Output
Input/Output Specifications and Wiring 3.2 Wiring of Input and Output 3.2.1 Common Precautions to Input and Output Wiring position Arrange the wiring so that the input and output wiring are separated, and these wirings are separated from the power wiring, as much as possible. Do not route them through the same duct or tie them in a bundle. - Page 33 3.2 Wiring of Input and Output Precaution when using LED-equipped lead switch When a LED is connected in series to an input contact such as LED-equipped lead switch, make sure that the on voltage applied to the PLC input terminal is greater than 21.6V DC. In particular, take care when connecting a number of switches in series.
-
Page 34: Output Wiring
Input/Output Specifications and Wiring 3.2.3 Output Wiring The following figures show the case when they are connected with the sink output. Protective circuit for inductive loads With an inductive load, a protective circuit should be installed in parallel with the load. ... -
Page 35: Connection Over Wire-Pressed Terminal Cable
Manufacturer Composition of parts Required quantity Housing (40P) 1 x 1 set Panasonic made Semi-cover (40P) 2 x 1 set 5-pin contact (for AWG #22 and #24) 8 x 1 set (Note): One set is provided for the product. If you need more connectors, purchase AFP2801 (2 sets/pack). - Page 36 Input/Output Specifications and Wiring 2. Insert the wire without removing its insulation until it stops, and lightly grip the tool. 3. After press-fitting the wire, insert it into the housing. 4. When all wires have been inserted, fit the semi-cover into place. KEY POINTS Contact puller pin to redo wiring •...
-
Page 37: Unit Allocation
Unit Allocation... -
Page 38: Unit Allocation
Unit Allocation 4.1 Unit Allocation 4.1.1 Number of Occupied I/O Points for the Unit The input and output starts from the same I/O numbers in FP7 series. For the multi I/O unit, the following number of words is occupied. Product number... - Page 39 4.1 Unit Allocation Output contact Section I/O no. Function Y0-Y7 Comparison output or positioning (Deviation counter clear) External output Y8-YF Pulse output / PWM output or positioning (Pulse output CW/CCW or pulse output) Y10-Y17 Counter (Softwrae reset, mask), counter hold function (Enable, input logic) Y18-Y1F Pulse output / PWM output (Enable, start) Y20-Y27...
-
Page 40: Registration In I/O Map
0 and the multi I/O unit is allocated to the slot number 1. PROCEDURE 1. Select "Options" > "FP7 Configuration" > "I/O map" in the menu bar. The "I/O map" dialog box will be displayed. -
Page 41: Multi I/O Unit Setting
Multi I/O Unit Setting... -
Page 42: Basic Setup
Multi I/O Unit Setting 5.1 Basic Setup The settings of the multi I/O unit are specified in the configuration menu of FPWIN GR7. The input voltage mode, input time constant and output polarity can be switched by the setting of the software. The default setting for the output is "Output OFF". Change the setting according to purposes. - Page 43 5.1 Basic Setup Basic setting item Setting Related Default Settings item page Set whether or not to announce a double word access error Double word when it occurs. error Announce P.12-4 annunciation Announce / Not announce Set whether or not to announce a warning when it occurs. Warning Announce P.12-8...
-
Page 44: Output Terminal Setting
Multi I/O Unit Setting 5.2 Output Terminal Setting 5.2.1 Overview On Multi Input/Output Unit, the allocation of output terminal polarities and output numbers can be switched by the setting of the software. • Output terminal polarities can be selected from sink, source, P-type push-pull (positive logic) and N-type push-pull (negative logic). - Page 45 5.2 Output Terminal Setting Setting example of output terminal polarity • By default, "Output OFF" is selected. • For using the unit like a general digital output unit, select "Sink output" for all points or "Source output" for all points in "Output terminal polarity". •...
-
Page 46: Allocation Of Contacts To Output Terminals
Multi I/O Unit Setting 5.2.2 Allocation of Contacts to Output Terminals The contact allocation function to output terminals is a function to allocate Y contacts to output terminals by four points. The arrangement can be changed from the initial state and the same Y contact can be allocated to multiple terminals. -
Page 47: Application To Differential Output
5.2 Output Terminal Setting 5.2.3 Application to Differential Output It is possible to allocate one memory output for operation to two output circuits and obtain the differential output by applying the contact allocation functions of output terminal polarities and output terminals. •... - Page 48 Multi I/O Unit Setting Configuration using FPWIN GR7 PROCEDURE 1. Select "Options" > "Multi I/O Unit Setting" in the menu bar. 2. Select a unit. The basic setup screen of "Multi I/O Unit Setting" will be displayed. 3. Set "Output terminal polarity". Set the terminal number B11-B14 to Sink, and B15-B18 to Source.
- Page 49 5.2 Output Terminal Setting The terminal layout displayed on the left side of the Multi I/O Unit Setting dialog box is updated according to this setting. The both terminals B11-B14 and B15-B18 are set to Y108-Y10B. The terminals B11-B14 are minus outputs as they are set to Sink, and the terminals B15-B18 are plus outputs as they are set to Source.
-
Page 50: Application Setting
Multi I/O Unit Setting 5.3 Application Setting 5.3.1 Overview Set applications according to functions to be used as necessary. The following figure shows the case that high-speed counters are allocated to the inputs (X100 to X103) of the multi I/O unit of the starting word number 10. -
Page 51: Setting Items By Use
5.3 Application Setting 5.3.2 Setting Items by Use Interrupt (INT0-INT7: Selectable by one point.) Setting item Settings Unused / Comparison match output (when comparison values match) / Comparison match output (OFF->ON) / (ON->OFF) / Comparison match output (OFF->ON) / Function setting Comparison match output (ON->OFF) / Interrupt terminal input (OFF->ON) / Interrupt terminal input (ON->OFF) - Page 52 Multi I/O Unit Setting Pulse output / PWM output (PLS0-PLS3 / PWM0-PWM3: Selectable by channel.) Setting item Settings Unused / PLS output - Direction distinction / Function setting PLS output - Individual output / PLS output - Phase output / PLS output - Comparison match stop / PWM output When start signal rises Data update timing...
-
Page 53: Interrupt Function
Interrupt Function... -
Page 54: Interrupt Function
Interrupt Function 6.1 Interrupt Function 6.1.1 Overview of Interrupt Function • The multi input/output unit can start an interrupt program of the CPU unit using an interrupt input signal or counter comparison match flag. • If the activation condition is met, the interrupt program of a corresponding program number will be activated. - Page 55 6.1 Interrupt Function PROCEDURE 1. Select "Options" > "Multi I/O Unit Setting" in the menu bar. The "Mufti I/O Unit Setting" dialog box will be displayed. Select a unit to be used. 2. Select "Interrupt" from the "Selection of function" tree, and double-click an interrupt number to which the interrupt input is allocated.
-
Page 56: Overview Of Interrupt Program
Interrupt Function 6.1.4 Overview of Interrupt Program Use the following instructions to execute the activation of an interrupt program. Instructions used for interrupt program activation Described Instruction Function area Allows the interrupt process for the CPU. Prohibits the interrupt process for the CPU. IMASK Allows or prohibits the interrupt process of each unit. -
Page 57: Precautions For Use
6.1 Interrupt Function Corresponding interrupt program numbers Interrupt Multi I/O unit Designation of the first operand of IMASK and program no. Interrupt no. ICLR instructions IMASK instruction INTPG 10 INT0 (Input X8 or EQ0) bit no. 15 INTPG 11 INT1 (Input X9 or EQ1) 0 0 0 0 0 0 0 0 Higher 8 bits 0: Fixed... -
Page 58: Execution Example Of Interrupt Function
Interrupt Function 6.2 Execution Example of Interrupt Function 6.2.1 External Interrupt Input Overview • The following figure shows the example that the output (Y160) from the 32-point output unit is output at a high speed by the processing of an interrupt program when inputting the external input (INT0) of the multi I/O unit (X108) in the state that the interlock input (X140) is input to the 32-point input unit. - Page 59 6.2 Execution Example of Interrupt Function Time chart In the case of normal processing The output delays by the scan time. In the case of interrupt processing The signal is output with a slight delay. Program example • Describe the interrupt enable instruction before the ED instruction, and describe a program to be executed by the interrupt processing after the ED instruction.
-
Page 60: Comparison Match Interrupt
Interrupt Function 6.2.2 Comparison Match Interrupt Overview • The high-speed counters are allocated to the inputs (X100-X103) of the multi I/O unit. (For the interrupt occurred when comparison values match) • The interrupt (INT0) occurs when the counted pulse number agrees with the "comparison output setting value"... - Page 61 6.2 Execution Example of Interrupt Function Configuration • Select "High-speed counter" in the "Selection of function" tree, allocate high-speed counter inputs to the inputs (X100-X103), and select "Direction distinction". • Select "Comparison match output" in the "Selection of function" tree, select "High-speed counter CH0"...
- Page 62 Interrupt Function Time chart (For the interrupt occurred when comparison values match) CH0 IN-A (X100) CH0 IN-B (X101) CH0 RST (X102) CH0 MASK (X103) (UM144-145) (UM110-111) CMP0 (Y100) (INT0) (X140) (Y160) Comparison output ⓐ ① The count value is reset when the reset signal turns on. setting value Counter elapsed The comparison output turns on when the elapsed value is smaller than the...
- Page 63 6.2 Execution Example of Interrupt Function Time chart (For the interrupt occurred when comparison values match) CH0 IN-A (X100) CH0 IN-B (X101) CH0 RST (X102) CH0 MASK (X103) (UM00144-UM00145) (UM00110-UM00111) CMP0 (Y100) (INT0) (X140) (Y160) Comparison output ⓐ ① The count value is reset when the reset signal turns on.
- Page 64 Interrupt Function Program example • Describe the interrupt enable instruction before the ED instruction, and describe a program to be executed by the interrupt processing after the ED instruction. • The interrupt program number corresponding to the match output CMP0 (EQ0) is INTPG10. (...
-
Page 65: Counter Function
Counter Function... -
Page 66: Counter Function
Counter Function 7.1 Counter Function 7.1.1 Overview of Counter Function • The count function is used to count the number of input pulses and reflect it to the elapsed value. The freqeuncies of input pulses can also be measured. • When an external output is necessary, use this function in combination with the comparison function. - Page 67 7.1 Counter Function REFERENCE Besides the purpose which counts input pulses from external devices, • pulses generated by them can be counted internally when using the pulse output/PWM output function. For details of the counter for the pulse output/PWM output, also refer to "9 Pulse Output / PWM Output Function".
-
Page 68: Configuration Using Tool Software
Counter Function 7.1.2 Configuration Using Tool Software The setting of the counter function is specified in the configuration menu of FPWIN GR7. Setting method The following procedure shows the case that "High-speed counter (Phase input)" is allocated to the inputs (X100-103) of the multi I/O unit registered in the starting word number 10. It also describes the procedure when the multi I/O unit has been already allocated in the I/O map. - Page 69 7.1 Counter Function The following figure shows the example that "High-speed counter (Phase input)" is allocated to the inputs (X100-X103) of multi I/O unit. The output for control is automatically allocated to the outputs (Y110-Y111) of the unit's internal I/O. The set values will be effective when they are downloaded with programs or other configuration information as a project.
-
Page 70: Linear Counter And Ring Counter
Counter Function 7.1.3 Linear Counter and Ring Counter The operation changes depending on the types of counter as below. Operational difference between the counter types Comparison Linear counter Ring counter item Upper limit Lower limit Lower limit Upper limit Operation Count value Roll... - Page 71 7.1 Counter Function Linear counter operation The overflow or underflow is detected when the count value exceeds the upper or lower limit. (Example): The following figure shows the time when the underflow occurs. When the underflow occurs, the elapsed value will be held at the lower limit. Once the underflow clear signal turns on, the count will restart from the lower limit.
-
Page 72: Selection Of Count Methods
Counter Function 7.1.4 Selection of Count Methods • Select from the following three types according to input devices to be connected. • In the case of phase input, the count operation varies depending on the settings of multiplication factor as shown on the next page. ... - Page 73 7.1 Counter Function Count operation of direction distinction input Multi- Time chart plica- tion Addition Subtraction factor Input A Input B multiple Count operation of individual input Multi- Time chart plica- tion Addition Subtraction factor multiple Count operation of phase input Multi- Time chart plica-...
-
Page 74: Control Signals
Counter Function 7.2 Control Signals 7.2.1 Reset and Mask • The reset and mask operations can be performed with the counter for external inputs. • The both operations can be performed by the inputs from external input terminals or user programs. -
Page 75: Read/Write Of Elapsed Value
7.3 Read/Write of Elapsed Value 7.3 Read/Write of Elapsed Value 7.3.1 Elapsed Value When Power Turns On • The default for the elapsed value when the power turns on is "0". • The count value when the power turns on can be set to any value as necessary. It can be set to an arbitrary value in the configuration menu of the tool software or user programs. -
Page 76: Elapsed Value Hold Function
Counter Function 7.4 Elapsed Value Hold Function 7.4.1 Overview • The elapsed value hold function is a function which holds the elapsed value of the counter at the time of the trigger input signal from an external device. • The elapsed value hold function is available only for CH0 and CH1. Each elapsed value is transferred to the hold value areas allocated to each channel. -
Page 77: Operation
7.4 Elapsed Value Hold Function 7.4.2 Operation The following time chart shows the case that the "elapsed value hold function" is set for the high-speed counter CH0 and it is enabled when the input logic of a trigger signal is (ON -> OFF). -
Page 78: Input Frequency Measurement Function
Counter Function 7.5 Input Frequency Measurement Function 7.5.1 Overview • The measurement function is to measure the changes in the count values of the high-speed counter for external outputs and to output them as frequencies. • Measuring results are stored in unit memories (UM). They can be read by user programs if necessary. -
Page 79: Comparison Output Function
Comparison Output Function... -
Page 80: Comparison Output Function
Comparison Output Function 8.1 Comparison Output Function 8.1.1 Overview of Comparison Output Function • The comparison output function is used for comparing the "counter elapsed value by external input" or "pulse output counter elapsed value of pulse output/PWM output" to an arbitrary "comparison output setting value"... -
Page 81: Comparison Output And Comparison Match Signal
8.1 Comparison Output Function KEY POINTS • When selecting "Compare" in the comparison output setting, "comparison output setting value" and "counter elapsed value" are compared whether the counter function is used or not. Note that the output turns on when the comparison output condition is met like the case that both "counter initial value"... -
Page 82: Configuration Using Tool Software
Comparison Output Function 8.1.3 Configuration Using Tool Software The setting of the comparison output function is specified in the configuration menu of FPWIN GR7. Setting method The following procedure describes the process when the multi I/O unit has been already allocated in the I/O map. - Page 83 8.1 Comparison Output Function 7. Press the [OK] button. The selected condition will be registered on the "Multi I/O Unit Setting" dialog box. The following figure shows the example that the output compared to "High-speed counter (Direction distinction)" is allocated to the output (Y100) of multi I/O unit. The control input for monitoring is automatically allocated to the input (X110) of the unit's internal I/O.
-
Page 84: Execution Example Of Comparison Output Function
Comparison Output Function 8.2 Execution Example of Comparison Output Function 8.2.1 Comparison Output of Counter for External Input Overview This function is used for comparing the elapsed value of the high-speed counter CH0 for external inputs to "comparison output setting value" specified in advance, and turning on the comparison output (CMP0: output number Y100) when they meet the comparison condition. - Page 85 8.2 Execution Example of Comparison Output Function Time chart • The comparison output (CMP0: output number Y100) turns on when the elapsed value reaches the comparison output setting value and meets the condition which satisfies the comparison condition "ON when elapsed value is larger than or equal to setting value". •...
- Page 86 Comparison Output Function...
-
Page 87: Pulse Output / Pwm Output Function
Pulse Output / PWM Output Function... -
Page 88: Pulse Output / Pwm Output Function
Pulse Output / PWM Output Function 9.1 Pulse Output / PWM Output Function 9.1.1 Overview of Pulse Output / PWM Output Function • The pulse output can be performed up to 500 kHz using the pulse output function, and it can be applied to a simple position control. -
Page 89: Pulse Output Function Settings
9.1 Pulse Output / PWM Output Function 9.1.2 Pulse Output Function Settings The following five output modes are provided for the pulse output/PWM output. They can be selected in the configuration menu of FPWIN GR7. Types of pulse output function settings Setting Description This mode is used to perform the pulse output for PLS A and the direction output for... -
Page 90: Configuration Using Tool Software
Pulse Output / PWM Output Function 9.1.4 Configuration Using Tool Software The setting of the pulse output/PWM output function is specified in the configuration menu of FPWIN GR7. Setting method The following procedure describes the process when the multi I/O unit has been already allocated in the I/O map. - Page 91 9.1 Pulse Output / PWM Output Function 5. Press the [OK] button. The selected condition will be registered on the "Multi I/O Unit Setting" dialog box. The following figure shows the example that "Pulse output (Direction distinction)" is allocated to the outputs (Y108-Y109) of multi I/O unit. The control inputs for monitoring are allocated to the inputs of the unit internal I/O (X118-X119), and the control output is allocated to the outputs (Y118/Y11C/Y128/Y12C) automatically.
-
Page 92: Data Update Timing (Output Frequency)
Pulse Output / PWM Output Function 9.1.5 Data Update Timing (Output Frequency) The following three modes are provided for the both pulse output and PWM output as the timing of changing the data of output frequencies. Updating data when PLS start signal rises In this mode, the data update is performed with the data when a PLS start signal turns on. - Page 93 9.1 Pulse Output / PWM Output Function Updating data when unit memory (UM) is rewritten In this mode, the data update is performed with the data when the unit memories (UM) are rewritten The frequency value changed at this timing will be reflected when the outputting pulse falls next time.
-
Page 94: Data Update Timing (Duty Ratio)
Pulse Output / PWM Output Function 9.1.6 Data Update Timing (Duty Ratio) The following three modes are provided as the timing of changing the data of duty ratio at the time of PWM output. Updating data when PLS start signal rises In this mode, the data update is performed with the data when a PLS start signal turns on. - Page 95 9.1 Pulse Output / PWM Output Function Updating data when unit memory (UM) is rewritten In this mode, the data update is performed with the data when the unit memories (UM) are rewritten The frequency value changed at this timing will be reflected when the outputting pulse falls next time.
-
Page 96: Control Signals
Pulse Output / PWM Output Function 9.2 Control Signals 9.2.1 Enable and Start The pulse output/PWM output function is controlled by user programs. Functions of each signal Signal name Description Enables or disables the pulse output/PWM output function. PLSx EN Enable PWMx EN... -
Page 97: Read/Write Of Pls/Pwm Counter Elapsed Value
9.3 Read/Write of PLS/PWM Counter Elapsed Value 9.3 Read/Write of PLS/PWM Counter Elapsed Value 9.3.1 Elapsed Value When Power Turns On • The default for the elapsed value when the power turns on is "0". • The count value when the power turns on can be set to any value as necessary. It can be set to an arbitrary value in the configuration menu of the tool software or user programs. -
Page 98: Execution Example Of Pulse Output / Pwm Output Function
Pulse Output / PWM Output Function 9.4 Execution Example of Pulse Output / PWM Output Function 9.4.1 Setting Example of Pulse Output Overview The pulse output is performed in the direction distinction mode. It is controlled by the switch input (X140/X141/X142) connected to the 32-point input unit. - Page 99 9.4 Execution Example of Pulse Output / PWM Output Function Time chart If the rising of the start signal is detected when the enable input is on, pulses will be output. When the enable input turns off, the pulse output will stop. PLS0 EN ①...
-
Page 100: Setting Example Of Pulse Output (Frequency Change)
Pulse Output / PWM Output Function 9.4.2 Setting Example of Pulse Output (Frequency Change) Overview The pulse output is performed in the direction distinction mode. It is controlled by the switch input (X140/X141/X142X143) connected to the 32-point input unit. If the start input (X141) turns on when the enable input (X140) is on, the pulse output will start. - Page 101 9.4 Execution Example of Pulse Output / PWM Output Function Time chart If the rising of the start signal is detected when the enable input is on, pulses will be output. When the enable input turns off, the pulse output will stop. The speed changes according to the speed change input.
-
Page 102: Setting Example Of Pulse Output (Comparison Match Stop)
Pulse Output / PWM Output Function 9.4.3 Setting Example of Pulse Output (Comparison Match Stop) Overview The pulse output is performed in the individual output mode. It is controlled by the switch input (X140/X141) connected to the 32-point input unit. If the start input (X141) turns on when the enable input (X140) is on, the pulse output will start. - Page 103 9.4 Execution Example of Pulse Output / PWM Output Function Time chart If the rising of the start signal is detected when the enable input is on, pulses will be output. The pulse output counter reaches the comparison value, the pulse output will stop. ①...
-
Page 104: Setting Example Of Pwm Output
Pulse Output / PWM Output Function 9.4.4 Setting Example of PWM Output Overview The PWM output is performed. It is controlled by the switch input (X140/X141) connected to the 32-point input unit. If the start input (X141) turns on when the enable input (X140) is on, the PWM output will start. - Page 105 9.4 Execution Example of Pulse Output / PWM Output Function Time chart If the rising of the start signal is detected when the enable input is on, pulses will be output. When the enable input turns off, the pulse output will stop. PWM0 EN ①...
- Page 106 Pulse Output / PWM Output Function 9-20...
-
Page 107: Positioning Function (H Type)
Positioning Function (H type) -
Page 108: Positioning Function
Positioning Function (H type) 10.1 Positioning Function 10.1.1 Overview of Positioning Function The positioning control can be performed when the unit is used in combination with a stepping motor or servo motor equipped with a driver of pulse string input type. •... - Page 109 10.1 Positioning Function Outline of specifications Item Specifications Remarks No. of output Max. 4 channels (The total of positioning, pulse output and PWM channels output) Occupied I/O X0 to XF, Y4 to YF (Note 1) Per unit numbers Home input, Near home input, Limit + input, Limit - input, J-point Control input Per channel control positioning start input...
-
Page 110: Control Mode
Positioning Function (H type) 10.1.2 Control Mode There are mainly four control modes. Control mode type Related Item Description page There are four modes, E-point control, P-point control, C-point control and J- point control. Each control is executed by turning on an allocated output (Y30-Y34) using user programs. -
Page 111: Wiring
10.2 Wiring 10.2 Wiring 10.2.1 Connection Diagram with Servo Motor Amplifier Connection example using sink output Controller Amplifier FP7 MXY32DWDH A5II, A5IIE, A5, A5E series * The processing of shielded wires varies Terminal depending on each device. 2 kΩ... - Page 112 Positioning Function (H type) Connection example using push-pull negative logic output Controller Amplifier FP7 MXY32DWDH A5II, A5IIE, A5, A5E series * The processing of shielded wires varies Terminal depending on each device. 2 kΩ PULS1 CW pulse Command pulse input 2 command output 220 Ω...
- Page 113 10.2 Wiring Connection example using differential output Controller Amplifier FP7 MXY32DWDH A5II, A5IIE, A5, A5E series * The processing of shielded wires varies Terminal depending on each device. 2 kΩ PULS1 CW pulse Command pulse input 2 command output 220 Ω...
-
Page 114: Connections With Servo Motor Amplifier
Positioning Function (H type) 10.2.2 Connections with Servo Motor Amplifier Connections of each signal and precautions Signal type Point Connect the output allocated to each channel and the command pulse input of servo amplifier. Pulse command output Connect a resistor (2 kΩ) for limiting currents. ... -
Page 115: Connection With Stepping Motor Driver
10.2 Wiring 10.2.3 Connection with Stepping Motor Driver Connections of each signal and precautions Signal type Point Connect the output allocated to each channel and the command pulse input of motor driver. Pulse command output Use twisted-pair cables for the connection. ... -
Page 116: Initial Operation Check
Positioning Function (H type) 10.3 Initial Operation Check 10.3.1 Safety Circuit Design System configuration example Installation of the over limit switch Items to check the safety circuit Item Description Safety circuit based on Install the safety circuit recommended by the manufacturer of the motor ①... -
Page 117: Before Turning On The Power
10.3 Initial Operation Check 10.3.2 Before Turning On the Power System configuration example Items to check before turning on the power Item Description Checking connections to Check to make sure the various devices have been connected as ① the various devices indicated by the design. -
Page 118: Power-On And Power-Off Sequences
Positioning Function (H type) 10.3.3 Power-on and Power-off Sequences Power-on sequence When turning on the power to the system incorporating the unit, consider the nature and states of any external devices connected to the system, and take sufficient care so that turning on the power will not initiate unexpected movements. -
Page 119: After Turning On The Power
10.3 Initial Operation Check 10.3.4 After Turning On the Power System configuration example Check each item in the following four major steps. Items to check after turning on the power Item Description Checking the installation of Check to make sure the safety circuit (wiring and installation of over ①... -
Page 120: Setting Of Positioning Function
Positioning Function (H type) 10.4 Setting of Positioning Function 10.4.1 I/O Allocation of Positioning Function Input (External terminals) I/O number Axis 1 Axis 2 Axis 3 Axis 4 Signal Application name Terminal Terminal Terminal Terminal Home input Near home input (Note 1) JPOS J point control... - Page 121 10.4 Setting of Positioning Function Output (External terminals) I/O number Axis 1 Axis 2 Axis 3 Axis 4 Signal Application name Terminal Terminal Terminal Terminal Deviation counter clear PLS A Pulse output CW or Pulse output PLS B Pulse output CCW or Sign output ...
-
Page 122: Configuration Using Tool Software
Positioning Function (H type) 10.4.2 Configuration Using Tool Software The setting of the positioning function is specified in the configuration menu of FPWIN GR7. Setting method The following procedure describes the process when the Multi I/O Unit (H type) has been already allocated in the I/O map. - Page 123 10.4 Setting of Positioning Function 3. Click "Positioning" in the "Selection of function" tree, and double-click an input number (or output number) to which the positioning function is allocated. The "Positioning Advanced" dialog box will be displayed. Go to step 4. 4.
- Page 124 Positioning Function (H type) 5. Set "Counter elapsed value" and "Counter upper and lower limit values" as necessary. 6. Press the [OK] button. In the following example, the positioning function for two channels (CH0 and CH1) are allocated to the Multi I/O Unit (H type). The control inputs of CH0 are allocated to the inputs (X100-X103) of the internal I/O and the control inputs of CH1 are allocated to the inputs (X104-X107) automatically.
-
Page 125: Positioning Table Settings (Configurator Pmx)
10.5 Positioning Table Settings (Configurator PMX) 10.5 Positioning Table Settings (Configurator PMX) 10.5.1 Used Channel Setting The following procedure describes the process when the Multi I/O Unit (H type) has been already allocated in the I/O map and the positioning function has been allocated in the "Multi I/O Unit Setting"... - Page 126 Positioning Function (H type) "Configurator PMX" will be activated. 2. Select "Channel setting" > "Used channel setting" from the menu bar. The "Used channel setting" dialog box will be displayed. 3. Select the control method of the used axes, and press the [OK] button. In the initial condition, the allocated channel numbers are selected for single control.
- Page 127 10.5 Positioning Table Settings (Configurator PMX) KEY POINTS • When interpolation control is selected, the data table will be changed to that of the channel numbers of X and Y axes, and [Interpolation] will be displayed on the tab. 10-21...
-
Page 128: Parameter Settings
Positioning Function (H type) 10.5.2 Parameter Settings Use the Configurator PMX to allocate the most fundamental parameters for positioning control, such as the motor rotation direction, pulse output method (CW/CCW and Pulse/Sign), home input, limit input logic, and positioning control. The following procedure is explained on the condition that the Configurator PMX has already started. - Page 129 10.5 Positioning Table Settings (Configurator PMX) Default Parameter name Settings (Unit) DOG method 1, DOG method 2, DOG method 3, Home Home return method Not use position method, Data set method, Not use Home return Limit (-) Limit (-) direction, Limit (+) direction direction direction Home return...
- Page 130 Positioning Function (H type) PROCEDURE 1. Select "Channel setting" > "Parameter settings" from the menu bar. The "Parameter settings" dialog box will be displayed. 2. Make necessary parameter settings according to the application and press the [OK] button. The settings will be stored as part of positioning parameter data. 10-24...
-
Page 131: Creating Positioning Data Table
10.5 Positioning Table Settings (Configurator PMX) 10.5.3 Creating Positioning Data Table The positioning data tables are divided into sheets for each axis, and 20 tables ranging no. 1 to no. 20 can be set. For independent axis control Default Parameter name Settings (Unit) - Page 132 Positioning Function (H type) For interpolation control Default Parameter name Settings (Unit) E: End Select one from the following operation patterns. Operation pattern point E: End point, C: Continuance point, P: Pass point Select a specification method of speed. Linear Linear (Composite speed): Specify the speed combining the speed of Interpolation operation...
- Page 133 10.5 Positioning Table Settings (Configurator PMX) Table numbers and activation of positioning • Table numbers on the Configurator PMX are specified in user programs. • The unit executes the control under the conditions set in the table by turning on the positioning start contact corrensponding to a desired channel number (axis number) and table number.
-
Page 134: Saving Positioning Parameters
Positioning Function (H type) 10.5.4 Saving Positioning Parameters Saving positioning parameters Information on positioning parameters and positioning data tables set on Configurator PMX is saved as part of program files. PROCEDURE 1. Select "File" > "Save changes and exit" from the menu bar. A confirmation message box will be displayed. -
Page 135: Check On Parameter Data
10.5 Positioning Table Settings (Configurator PMX) 10.5.5 Check on Parameter Data The following procedure is explained on the condition that the Configurator PMX has already started. PROCEDURE 1. Select "Debug" > "Check Parameter and Data Values" from the menu bar. A message box will be displayed to show the check result. -
Page 136: Read/Write Of Elapsed Value
Positioning Function (H type) 10.6 Read/Write of Elapsed Value 10.6.1 Elapsed Value (Current Value) Area • They are stored as 2-word 32-bit data in the axis information area of unit memories. • The elapsed value area will be reset when the power supply turns off. It will be held when switching the mode from RUN to PROG. -
Page 137: Stop Control
10.7 Stop Control 10.7 Stop Control 10.7.1 Type of Stop Operations Type of stop operations Name Time chart Occurrence condition and operation Once the system stop contact (Y44) f[Hz] turns on, an active operation will stop and the pulse outputs of all channels will immediately stop. - Page 138 Positioning Function (H type) Execution of stop operations Stop controls are executed when the following I/O signals turn on. 1. System stop > 2. Emergency stop > 3. Limit stop > 4. Deceleration stop Allocation of I/O numbers (External inputs) I/O number Axis 1 Axis 2...
-
Page 139: Characteristics Of Stop Operations
10.7 Stop Control 10.7.2 Characteristics of Stop Operations Priority of stop operations When stop control requests are made simultaneously, the stop operations are executed according to the following priority. 1. System stop > 2. Emergency stop > 3. Limit stop > 4. Deceleration stop ... -
Page 140: Jog Operation
Positioning Function (H type) 10.8 JOG Operation 10.8.1 Setting and Operation of JOG Operation An operation in which the motor is rotated only while operation commands are being input is called JOG operation. This is used to forcibly rotate the motor using input from an external switch, for instance when to make adjustments. - Page 141 10.8 JOG Operation The parameters for JOG operations are specified in the positioning parameter setting menus of Configuration PMX. Settings Item Value Startup speed 1,000 Hz JOG acceleration time 100 ms Axis setting area JOG deceleration time 200 ms JOG target speed 20,000 Hz ...
- Page 142 Positioning Function (H type) Operation at limit input Condition Direction Limit status Operation Over limit input (+): ON Not executable, Error occurs. Forward Over limit input (-): ON Executable At startup Over limit input (+): ON Executable Reverse Over limit input (-): ON Not executable, Error occurs.
-
Page 143: Setting And Operation Of Jog Operation (Speed Changes)
10.8 JOG Operation 10.8.2 Setting and Operation of JOG Operation (Speed Changes) It is possible to change a target speed during the JOG operation. The target speed is changed by rewriting unit memories using a user program. Operation diagram f [Hz] 20,000Hz 10,000Hz... -
Page 144: Speed Changes In Jog Operation
Positioning Function (H type) Configurator PMX settings Allocation of I/O signals I/O number Signal name Application Axis 1 Axis 2 Axis 3 Axis 4 JOG+ JOG operation start (Forward) JOG- JOG operation start (Reverse) Sample program The execution condition is set to be always executed. CH No.0 Start JOG forward operation Rewrite the target speed... -
Page 145: Home Return
10.9 Home Return 10.9 Home Return 10.9.1 Types of Home Return Operations The home return is specified in the positioning parameter setting dialog box for each axis. Name Operation diagram Operation and application The leading edge of the first home input is set as a home position after the detection of the leading edge of the near home input. -
Page 146: Operation Patterns Of Home Return Operation
Positioning Function (H type) 10.9.2 Operation Patterns of Home Return Operation The operations vary according to selected home return methods and the difference in current positions. DOG method 1 (Edge detection of near home switch + Home switch, based on front end) The leading edge of the first home switch is set as a home position after the detection of the leading edge of the near home switch. - Page 147 10.9 Home Return DOG method 2 (Edge detection of near home switch) The leading edge of the near home switch is detected and it is set as a home position. DOG method 3 (Edge detection of near home switch + Home switch, based on back end) The leading edge of the first home switch in the home return direction is set as a home position after the detection of the trailing edge (back end) of the near home switch.
- Page 148 Positioning Function (H type) Home position method (Edge detection of home switch) Moves the current position to the home return direction, and stops at the position where the leading edge of the first home switch is detected. This coordinate is set as a home position. ...
-
Page 149: Settings And Operations Of Home Return
10.9 Home Return 10.9.3 Settings and Operations of Home Return • The parameters for home return operations are specified in the positioning paramter setting menus of Configuration PMX. • When the home return start contact turns on, the pulse output starts and the home return operation is performed. - Page 150 Positioning Function (H type) Settings Item Setting example Home return method DOG method 1 Home return direction Limit (-) direction Home return acceleration time (ms) 100 ms Axis setting area Home return deceleration time (ms) 100 ms Home return target speed 10000 pps Home return creep speed 1000 pps...
- Page 151 10.9 Home Return Operation at limit input Condition Direction Limit status Operation Over limit input (+): ON Executable (Note2) (Note 3) Forward Over limit input (-): ON Executable (Note3) At startup Over limit input (+): ON Executable (Note 3) Reverse Over limit input (-): ON Executable (Note 2) (Note 3)
-
Page 152: Positioning Control
Positioning Function (H type) 10.10 Positioning Control 10.10.1 Types of Positioning Controls Operation pattern A: Available, -: Not available Inter- Name Time chart Operation and application Repeat pola- tion f[Hz] This is a method of control which is initiated up to an end point, and is E-point referred to as “E-point control". - Page 153 10.10 Positioning Control Selection of positioning operation modes Positioning operation modes are selected on Configurator PMX. • For the E-point control, input settings in one row. • For P-point, C-point and J-point controls, they should be combined with E-point control of the next step as a pair and the setting should be input in two rows.
-
Page 154: E-Point Control (Single Speed Positioning)
Positioning Function (H type) 10.10.2 E-point Control (Single Speed Positioning) When the positioning table start contact or positioning simultaneous start contact turns on, the pulse output starts and the positioning control operation is performed. Operation diagram f[Hz] Table 1 20,000Hz 100,000 pulses 1,000Hz... - Page 155 10.10 Positioning Control Configurator PMX settings Allocation of I/O signals I/O number Signal name Application Axis 1 Axis 2 Axis 3 Axis 4 BUSY Control flag Positioning table start MPOS Positioning simultaneous start Sample program The execution condition is differential execution. CH No.0 MV.US S1:UM00209...
-
Page 156: P-Point Control (Double Speed Positioning)
Positioning Function (H type) 10.10.3 P-point Control (Double Speed Positioning) When the positioning table start contact or positioning simultaneous start contact turns on, the pulse output starts and the positioning control operation is performed. Operation diagram f [Hz] Table 1 Table 2 20,000Hz 10,000Hz... - Page 157 10.10 Positioning Control Configurator PMX settings Allocation of I/O signals I/O number Signal name Application Axis 1 Axis 2 Axis 3 Axis 4 BUSY Control flag Positioning table start MPOS Positioning simultaneous start Sample program The execution condition is differential execution. CH No.0 MV.US S1:UM00209...
-
Page 158: C-Point Control
Positioning Function (H type) 10.10.4 C-point Control When the positioning table start contact or positioning simultaneous start contact turns on, the pulse output starts and the positioning control operation is performed. Operation diagram f [Hz] Table 1 Table 2 20,000Hz 10,000Hz 100,000... - Page 159 10.10 Positioning Control Configurator PMX settings Allocation of I/O signals I/O number Signal name Application Axis 1 Axis 2 Axis 3 Axis 4 BUSY Control flag Positioning table start MPOS Positioning simultaneous start Sample program The execution condition is differential execution. CH No.0 MV.US S1:UM00209...
-
Page 160: J-Point Control (Jog Positioning)
Positioning Function (H type) 10.10.5 J-point Control (JOG Positioning) • When the positioning table start contact or positioning simultaneous start contact turns on, the pulse output starts. In the J-point control, the unit operates at a taret speed after the startup, and starts the position control when the J-point control positioning start input (X1, X5 or Y50, Y51) turns on. - Page 161 10.10 Positioning Control Settings The parameters for position control operations are specified in the positioning parameter setting menus and data tables of Configuration PMX. Item Setting example Startup speed 1,000 Hz Axis setting area J point change speed 10,000 Hz Table no.
- Page 162 Positioning Function (H type) Sample program The execution condition is differential execution. CH No.0 MV.US S1:UM00209 Table no.1 ( ) specification CH No.0 Positioning ( ) table start BUSY 10-56...
-
Page 163: J-Point Control (Jog Positioning: Speed Changes)
10.10 Positioning Control 10.10.6 J-point Control (JOG Positioning: Speed Changes) • In the J-point control, the speed can be changed while controlling the speed after the start. • After starting the J-point control, the unit operates at the speed specified in the positioning parameters of Configurator PMX. - Page 164 Positioning Function (H type) Characteristics of acceleration/deceleration zone when changing speeds • The speed of speed change zone changes by approx. 100 us when changing the speed in the J-point control. The speed variation is obtained by the following formula. (J-point table target speed - Startup speed) / (J-point table acceleration time or J-point table deceleration time) ...
- Page 165 10.10 Positioning Control Allocation of I/O signals I/O number Signal name Application Axis 1 Axis 2 Axis 3 Axis 4 BUSY Control flag Positioning table start MPOS Positioning simultaneous start JPOS SP J point control speed change Sample program The execution condition is differential execution.
-
Page 166: Cautions On Programming
Positioning Function (H type) KEY POINTS • Specify parameters for the start of operation in the positioning data table. The parameters for changing speeds are specified in "Channel setting" > "Parameter settings" menu. For details of parameter settings, refer to "10.5.2 Parameter Settings". -
Page 167: Repeat Operation
10.11 Repeat Operation 10.11 Repeat Operation 10.11.1 Overview of Repeat Operation When the positioning table start contact is on, the unit repeats the operation set in the positioning table. Conditions of repeat control Item Repeat control is available Repeat control is unavailable E-point control, P-point control + E-point JOG operation, J-point control, Interpolation Operation pattern... - Page 168 Positioning Function (H type) Configurator PMX setting items The repeat count is specified for executing the repeat control in Configurator PMX. Parameter name Unit Default Settings 0 or 1 Not repeat an operation. Repeat an operation for a specified Positioning repeat count times 2 to 254...
-
Page 169: Settings And Operations Of Repeat Operation
10.11 Repeat Operation 10.11.2 Settings and Operations of Repeat Operation • When the positioning table start contact or positioning simultaneous start contact turns on, the pulse output starts. • After starting the instruction, the unit executes the pulse output for a specified repeat count and then stops the operation. - Page 170 Positioning Function (H type) Settings The parameter for the repeat count is specified in the positioning parameter setting menus of Configuration PMX. Item Setting example Axis setting Turn on the single axis setting for an appropriate axis. Common area Positioning repeat count Pulse output control code Set in accordance with system configuration.
- Page 171 10.11 Repeat Operation Sample program The execution condition is differential execution. CH No.0 MV.US S1:UM00209 Table no.1 ( ) specification CH No.0 Positioning ( ) table start BUSY 10-65...
-
Page 172: Stop Operation During Repeat Operation
Positioning Function (H type) 10.11.3 Stop Operation During Repeat Operation When setting the repeat function, the operation at the time of deceleration stop varies as follows. Operation at the time of deceleration stop (Repeating E-point control) When the unit detects a deceleration stop, the unit will come to a stop after repeating positioning control N+2 times. -
Page 173: Linear Interpolation Control
10.12 Linear Interpolation Control 10.12 Linear Interpolation Control 10.12.1 Overview The interpolation control is available under the following conditions. Combinations of interpolation control Interpolation axis 1 Interpolation axis 2 X-axis Y-axis X-axis Y-axis Conditions of interpolation control Condition under which interpolation control is executable Item Executable Not executable... -
Page 174: Setting And Operation Of Linear Interpolation
Positioning Function (H type) 10.12.2 Setting and Operation of Linear Interpolation The example below is a case of E-point control with the unit installed in slot 1. The X axis is set to the 1st axis and the Y axis is set to the 2nd axis. The movement amount setting is the increment method, and the unit is set to pulse. - Page 175 10.12 Linear Interpolation Control Settings Item Setting example Axis setting Turn on the single axis setting for an appropriate axis. Common area Positioning repeat count Pulse output control code Set in accordance with system configuration. Axis setting area Startup speed 1,000 Hz Operation pattern E: End point...
-
Page 176: Operational Difference Between Speed Parameters
Positioning Function (H type) 10.13 Operational Difference Between Speed Parameters 10.13.1 Startup Speed • The startup speed is the parameter for setting the initial speed when starting each operation and the speed when finishing each operation. • The startup speed is common to each control of the JOG operation, home return, E-point control, P-point control, C-point control and J-point control operations. -
Page 177: Operation Patterns And Start Speed Settings
10.13 Operational Difference Between Speed Parameters 10.13.2 Operation Patterns and Start Speed Settings Operation Startup speed setting pattern ① Startup speed operation ② Target speed ① Startup speed ② Target speed Home return ③ Creep speed ① Startup speed E-point control ②... -
Page 178: Other Characteristics
• When the power is turned on again, data is preset in the parameters saved in the non- volatile memory within FP7 CPU Unit. • The contents of unit memories will be held when changing the RUN mode to PROG. mode. -
Page 179: Other Functions
Other Functions... -
Page 180: Creating Of Ladder Programs Using Templates
Other Functions 11.1 Creating of Ladder Programs Using Templates 11.1.1 Overview of Template Input Function In FPWIN GR7, it is possible to select unit memory numbers using templates and easily create ladder programs. Appearance of Template input screen Select Unit Select an arbitrary unit from connected units. -
Page 181: Creating Reading/Writing Program
11.1 Creating of Ladder Programs Using Templates 11.1.2 Creating Reading/Writing Program PROCEDURE The following procedure describes the process when the multi I/O unit has been already allocated in the I/O map. 1. Select "Edit" > "Template input" in the menu bar. The template input screen will open. - Page 182 Other Functions 3. Click the "Read" button. Once a program is created, specify an arbitrary operand. KEY POINTS • Using the template input for changing operands The template input can also be used for changing the operands of created programs or for inputting commands manually. After moving the cursor to a position you want to change and select the unit memory, click the "Operand"...
-
Page 183: Troubleshooting
Troubleshooting... -
Page 184: Confirming Errors Using Self-Diagnostic Function
12.1 Confirming Errors Using Self-diagnostic Function 12.1.1 Checking the LED Display of Unit FP7 Multi I/O Unit has a self-diagnostic function which identifies errors and stops operation if necessary. The types of the self-diagnostic function are alarms, errors and warnings. When an error occurs, check the ERR.LED state and error type, and monitor the unit memory in... -
Page 185: Operation Mode When An Error Occurs
12.1 Confirming Errors Using Self-diagnostic Function 12.1.2 Operation Mode When an Error Occurs • When an alarm or error occurs, the unti stops the operation in the usual case. When a warning occurs, the unit continues the operation. The operation mode of the CPU unit when a unit error occurs can be changed in "CPU configuration"... -
Page 186: Troubleshooting
Alarm code Code Code Name Situation storage Solution destination There is a Reboot the unit. If the alarm still occurs, Unit alarm (H possibility that an consult your Panasonic representative. UM00064 type only) error occurred in the main unit. 12-4... - Page 187 There is a Reboot the unit. If the alarm still occurs, possibility that an consult your Panasonic representative. System error UM00066 error occurred in the main unit. Positioning The setting error for Refer to “12.2.2 What to Do When...
-
Page 188: What To Do When Positioning Error Occurs
Troubleshooting 12.2.2 What to Do When Positioning Error Occurs Checking the description of positioning errors The following are detailed error codes among self-diagnostic errors when the error code 44 (positioning error) occurs. Monitor the unit memory (UM00207) where the code is stored, and confirm the solution appropriate to the code. - Page 189 12.2 Troubleshooting Error Operation when an error Error name Description code occurs and solution Table setting error The combination of tables is incorrect. The set value of the operation pattern is Operation pattern error incorrect. Positioning acceleration The set value of the positioning start time is time error out of the range.
-
Page 190: Err Led Is Flashing On The Unit
Troubleshooting 12.2.3 ERR LED is Flashing on the Unit Situation A warning occurred. The setting content is wrong. A warning also occurs in the initial state at the time of factory shipment as the output setting is not configured. ... - Page 191 12.2 Troubleshooting REFERENCE For details of the pulse output/PWM output flag (UM00015E/UM00015F), • refer to "13.4.9 Pulse Output / PWM Output Monitor Setting Area". • For details of the unit memory (UM00062), refer to "13.4.1 Alarm/Error/Warning". 12-9...
- Page 192 Troubleshooting 12-10...
-
Page 193: Specifications
Specifications... - Page 194 Specifications 13-2...
-
Page 195: General Specifications
13.1 Specifications 13.1 Specifications 13.1.1 General Specifications Item Specifications Operating ambient 0 °C to +55 °C temperature Storage ambient -40 °C to +70 °C temperature Operating 10 to 95%RH (at 25 °C with no-condensing) ambient humidity Storage ambient 10 to 95%RH (at 25 °C with no-condensing) humidity Bewteen input terminal and output terminals 500V AC for 1 minute... -
Page 196: Function Specifications ( Afp7Mxy32Dwd/ Afp7Mxy32Dwdh)
Specifications 13.1.2 Function Specifications ( AFP7MXY32DWD/ AFP7MXY32DWDH) Item Specifications No. of external Input: 16 points, Output: 16 points inputs/outputs No. of occupied AFP7MXY32DWD: Input/Output: 64 points each (4 words) inputs/outputs AFP7MXY32DWDH: Input/Output: 96 points each (6 words) Input time constant 0 / 0.5 μs / 1 μs / 1.5 μs / 2 μs / 4 μs / 8 μs / 16 μs / 32 μs / 64 μs / 96 μs / 128 μs / setting 256 μs / 2 ms / 4 ms / 8 ms (Note 1) -
Page 197: Positioning Function Specifications (Afp7Mxy32Dwdh)
13.1 Specifications 13.1.3 Positioning Function Specifications (AFP7MXY32DWDH) Item Specifications Number of axes Max. 4 axes controlled Position setting mode Increment, Absolute Output interface Transistor open collector output, Push-pull, Line driver (Note 1) Pulse output method Pulse/Sign, CW/CCW Max. output frequency 500 kHz Outptu pulse duty ratio When using table setting mode: 50% (Fixed) -
Page 198: Allocation Of I/O Numbers
Specifications 13.2 Allocation of I/O Numbers 13.2.1 Input External terminals Functions Terminal Counter Interrupt Com- Pulse Positioning Counter elapsed input parison output output (H type) value hold CH0 IN-A CH0 Z CH0 DOG CH0 IN-B CH0 JPOS CH0 RST CH0 LMT+ CH0 MASK CH0 LMT-... - Page 199 13.2 Allocation of I/O Numbers Signal name Description INTx This is the interrupt signal of external inputs. CHx IN-A This is the A phase (or CW/pulse) input signal for the counter. CHx IN-B This is the B phase (or CW/pulse) input signal for the counter. CHx RST This is the reset signal of counters.
- Page 200 Specifications Internal terminals Functions Terminal Counter Interrupt Com- Pulse Positioning Counter elapsed input parison output output (H type) value hold CMP0 CMP1 CMP2 CMP3 CMP4 CMP5 CMP6 CMP7 PLS0 A PWM0 PLS0 B PLS1 A PWM1 PLS1 B PLS2 A PWM2 PLS2 B PLS3 A...
- Page 201 13.2 Allocation of I/O Numbers Functions Terminal Counter Interrupt Com- Pulse Positioning Counter elapsed input parison output output (H type) value hold CH0 BUSY CH1 BUSY CH2 BUSY CH3 BUSY CH0 FIN CH1 FIN CH2 FIN CH3 FIN CH0 HFIN CH1 HFIN CH2 HFIN CH3 HFIN...
-
Page 202: Output
Specifications 13.2.2 Output External terminals Functions Terminal Counter Interrupt Com- Pulse Positioning Counter elapsed input parison output output (H type) value hold CMP0 CMP1 CMP2 CMP3 CMP4 CH0 CLR CMP5 CH1 CLR CMP6 CH2 CLR CMP7 CH3 CLR PLS0 A PWM0 PLS0 A PLS0 B... - Page 203 13.2 Allocation of I/O Numbers Internal I/O Functions Terminal Counter Interrupt Com- Pulse Positioning Counter elapsed input parison output output (H type) value hold CH0 SOFT RST CH0 MASK CH1 RST CH1 MASK CH2 SOFT CH0 LATCH CH2 SOFT MASK TRG LOG CH3 SOFT...
- Page 204 Specifications Functions Terminal Counter Interrupt Com- Pulse Positioning Counter elapsed input parison output output (H type) value hold CH0 POS CH1 POS CH2 POS CH3 POS MPOS CH0 HOME CH1 HOME CH2 HOME CH3 HOME CH0 JOG+ CH1 JOG+ CH2 JOG+ CH3 JOG+ 13-12...
- Page 205 13.2 Allocation of I/O Numbers Functions Terminal Counter Interrupt Com- Pulse Positioning Counter elapsed input parison output output (H type) value hold CH0 JOG- CH1 JOG- CH2 JOG- CH3 JOG- SYS STP -Y47 CH0 EMG STP CH1 EMG STP CH2 EMG STP CH3 EMG STP CH0 DEC STP CH1 DEC STP...
- Page 206 Specifications Signal name Description CHx SOFT RST This is the reset signal for the counter. The counter is reset to its preset value. CHx SOFT MASK This is the mask signal for the counter. Counting is disabled when this signal is on. CHx LATCH EN This is the enable signal for the elpased value hold function.
-
Page 207: List Of Unit Memories
13.3 List of Unit Memories 13.3 List of Unit Memories 13.3.1 Role of Unit Memories Unit memories are arithmetic memories to access the monitor area and configuration information area of the unit. Accessing unit memories The marks described in the list of unit memories on the next page indicate the following contents. - Page 208 Specifications • Be sure not to execute reading or writing in the reserved areas for the system. • An error will occur if the access by one word (read, write) is executed to an area to which only the access by two words is allowed. REFERENCE Programs for reading and writing values from unit memories can be easily •...
-
Page 209: List Of Unit Memories (Afp7Mxy32Dwd/ Afp7Mxy32Dwdh
13.3 List of Unit Memories 13.3.2 List of Unit Memories (AFP7MXY32DWD/ AFP7MXY32DWDH) A: Available, -: Not available Unit memory no. Access Item Content (Hex.) unit UM 00000-UM 00061 (Reserved for system) UM 00062 Error alarm setting UM 00063 Double word access error occurrence address Alarm/Error/ UM 00064 Unit error code 1... - Page 210 Specifications A: Available, -: Not available Unit memory no. Access Item Content (Hex.) unit UM 00128-UM 00129 UM 0012A-UM 0012B Counter upper limit value UM 0012C-UM 0012D UM 0012E-UM 0012F High-speed UM 00130-UM 00131 counter UM 00132-UM 00133 Counter input frequency measurement value UM 00134-UM 00135 UM 00136-UM 00137...
- Page 211 13.3 List of Unit Memories A: Available, -: Not available Unit memory no. Access Item Content (Hex.) unit UM 00178-UM 00179 UM 0017A-UM 0017B PLS/PWM counter lower limit value UM 0017C-UM 0017D UM 0017E-UM 0017F Pulse output UM 00180-UM 00181 PWM output UM 00182-UM 00183 PLS/PWM counter upper limit...
-
Page 212: List Of Unit Memories (Afp7Mxy32Dwdh)
Specifications 13.3.3 List of Unit Memories (AFP7MXY32DWDH) The following is the list of unit memories for the positioning function. A: Available, -: Not available Unit memory no. Access Description (Hex.) unit UM 00200 Axis setting UM 00201 UM 00202 Positioning repeat count UM 00203 UM 00204 UM 00205-UM 00206... - Page 213 13.3 List of Unit Memories A: Available, -: Not available Unit memory no. Access Description unit (Hex.) UM 00246-UM 00263 (Reserved for system) UM 00264 Pulse output control code UM 00265-UM 00266 Startup speed UM 00267 Home return method UM 00268 Home return direction UM 00269 Home return acceleration time...
- Page 214 Specifications A: Available, -: Not available Unit memory no. Access Description unit (Hex.) UM 002A0 Pulse output control code UM 002A1-UM 002A2 Startup speed UM 002A3 Home return method UM 002A4 Home return direction UM 002A5 Home return acceleration time UM 002A6 Home return deceleration time UM 002A7-UM 002A8...
- Page 215 13.3 List of Unit Memories A: Available, -: Not available Unit memory no. Access Description unit (Hex.) UM 0032C Control code UM 0032D Control pattern UM 0032E Positioning acceleration time UM 0032F Positioning deceleration time Table no. 1 UM 00330-UM 00331 Positioning target speed UM 00332-UM 00333 Positioning movement amount...
- Page 216 Specifications A: Available, -: Not available Unit memory no. Access Description unit (Hex.) UM 00426 Control code UM 00427 Control pattern UM 00428 Positioning acceleration time UM 00429 Positioning deceleration time Table no. 1 UM 0042A-UM 0042B Positioning target speed UM 0042C-UM 0042D Positioning movement amount UM 0042E...
- Page 217 13.3 List of Unit Memories A: Available, -: Not available Unit memory no. Access Description unit (Hex.) UM 00520 Control code UM 00521 Control pattern UM 00522 Positioning acceleration time UM 00523 Positioning deceleration time Table no. 1 UM 00524-UM 00525 Positioning target speed UM 00526-UM 00527 Positioning movement amount...
- Page 218 Specifications A: Available, -: Not available Unit memory no. Access Description unit (Hex.) UM 0061A Control code UM 0061B Control pattern UM 0051C Positioning acceleration time UM 0051D Positioning deceleration time Table no. 1 UM 0051E-UM 0051F Positioning target speed UM 00520-UM 00521 Positioning movement amount UM 00522...
-
Page 219: Unit Memory Detailed Information
13.4 Unit Memory Detailed Information 13.4 Unit Memory Detailed Information 13.4.1 Alarm/Error/Warning Error alarm setting Unit memory no. Name Setting range and description (Hex) Set whether or not to announce abnormality when a double word UM 00062 Error alarm setting access error or warning occurs. -
Page 220: Input Setting
Specifications 13.4.2 Input Setting Input setting Unit memory no. Name Default Setting range and description (Hex) Input voltage / Input time UM00100 H 2222 constant setting (X0-X7) Set values indicating input voltage and input time constant. Input voltage / Input time UM00101 H 2222... - Page 221 13.4 Unit Memory Detailed Information Input setting (Input time constant high resolution) Unit memory no. Name Default Setting range and description (Hex) Input time UM00070 constant setting H FFFF (X0-X7) Set values indicating input time constant (high resolution). Input time UM00071 constant setting H FFFF...
-
Page 222: Output Setting
Specifications 13.4.3 Output Setting Output terminal polarity setting Unit memory no. Name Default Setting range and description (Hex) Output polarity UM00104 H FFFF Set the value indicating output polarity. setting Allocation of unit memories UM no. UM00104 Bit no. b15-b12 b11-b8 b7-b4... - Page 223 13.4 Unit Memory Detailed Information KEY POINTS • Set to agree the poloarities of outputs to wirings. For details of the output specifications, refer to "3.1.4 Output Specifications". Output contact terminal interrupt setting Unit memory no. Name Default Setting range and description (Hex)...
-
Page 224: Interrupt Setting Area
Specifications 13.4.4 Interrupt Setting Area Interrupt setting Unit memory no. Name Default Setting range and description (Hex) Interrupt setting UM00108 H FFFF (INT0-INT3) Specify conditions to occur the interrupts INT0 to INT7 when using the interrupt function. Interrupt setting UM00109 H FFFF (INT4-INT7) - Page 225 13.4 Unit Memory Detailed Information KEY POINTS • Target channels of the match interrupt when using the comparison output function are specified in the area of the comparison output function. Refer to “13.4.7 Comparison Output Setting Area”. • The above INT numbers are different from interrupt program numbers INTPG.
-
Page 226: Counter Mode Setting Area
Specifications 13.4.5 Counter Mode Setting Area Counter mode setting Unit memory no. Name Default Setting range and description (Hex) Counter mode UM0010C H 0F0F setting (CH0-CH1) Specify a counter mode. Counter mode UM 0010D H 0F0F setting (CH2-CH3) Allocation of unit memories UM no. -
Page 227: Counter Monitor Setting Area
13.4 Unit Memory Detailed Information 13.4.6 Counter Monitor Setting Area Unit memory Name Default Setting range and description (Hex) UM 00110 Counter elapsed UM 00111 value (CH0) UM 00112 Counter elapsed Stores counter elapsed values. They can be UM 00113 value (CH1) written using user programs. - Page 228 Specifications Unit memory Name Default Setting range and description (Hex) Counter input UM 00130 frequency UM 00131 measurement value (CH0) Counter input UM 00132 frequency Stores the measurement values of frequencies of UM 00133 measurement counter input. value (CH1) Range: 0 to 500,000 Counter input Unsigned 32-bit frequency...
-
Page 229: Comparison Output Setting Area
13.4 Unit Memory Detailed Information 13.4.7 Comparison Output Setting Area Unit memory Name Default Setting range and description (Hex) Comparison counter UM 00140 HFFFF allocation Specify conditions to turn on the comparison (CMP0-CMP3) outputs CMP0 to CMP7 when using the Comparison comparison function. - Page 230 Specifications Setting value (UM00141/UM00140) Function Setting value Comparison output setting Counter channel to be compared HSC-CH0 HSC-CH1 ON when elapsed value is External input counter smaller than setting value HSC-CH2 HSC-CH3 HSC-CH0 HSC-CH1 ON when elapsed value is larger External input counter than or equal to setting value HSC-CH2 HSC-CH3...
-
Page 231: Pulse Output / Pwm Output Setting Area
13.4 Unit Memory Detailed Information 13.4.8 Pulse Output / PWM Output Setting Area Unit memory Name Default Setting range and description (Hex) Pulse/PWM Specify the data update timing and output mode function setting UM 0015C H FFFF of pulse output or PWM output when using the (PLS0-PLS3 pulse output function or PWM output function. - Page 232 Specifications Setting value (UM0015C) Function Setting value Function Data update timing Output mode When PWMx start signal rises When PWMx start signal rises or comparison output is executed When PWMx start signal rises or data is updated Direction distinction When PLSx start signal rises Individual Direction distinction When PLSx start signal rises or comparison output is...
-
Page 233: Pulse Output / Pwm Output Monitor Setting Area
13.4 Unit Memory Detailed Information 13.4.9 Pulse Output / PWM Output Monitor Setting Area Unit memory no. Name Default Setting range and description (Hex) Pulse/PWM status flag UM 0015E H 1414 (PLS0-PLS1 The setting status can be monitored when using / PWM0-PWM1) the pulse output function or PWM output Pulse/PWM status... - Page 234 Specifications Unit memory Name Default Setting range and description (Hex) UM 00160 PLS/PWM output Stores the frequencies of pulse output or PWM UM 00161 frequency (CH0) output. They can also be written using user programs. UM 00162 PLS/PWM output (For pulse output) UM 00163 frequency (CH1) Range: 0 to 500,000...
- Page 235 13.4 Unit Memory Detailed Information Unit memory Name Default Setting range and description (Hex) PLS/PWM output UM 00178 counter lower UM 00179 limit value (CH0) PLS/PWM output UM 0017A counter lower Set the lower limit value of the counter for pulse UM 0017B limit value (CH1) output/PWM output.
-
Page 236: Unit Memory Detailed Information (H Type)
Specifications 13.5 Unit Memory Detailed Information (H type) 13.5.1 Common Area A: Available, -: Not available Unit memory Name Default Description (Hex) Stores used channels (axes) and usage methods. Monitor using binary display. bit no, Settings Not use CH0 (0) / Use (1) Not use CH1 (0) / Use (1) Not use CH2 (0) / Use (1) UM 00200... - Page 237 13.5 Unit Memory Detailed Information (H type) A: Available, -: Not available Unit memory Name Default Description (Hex) Starting table UM 00209 number (CH0) Specify the table number to be started when a Starting table UM 0020A positioning start signal is input. number (CH1) Setting value: 1 to 20 Starting table...
-
Page 238: Axis Information Area
Specifications 13.5.2 Axis Information Area A: Available, -: Not available Unit memory Name Default Description (Hex) Stores the monitor values of the positioning table Active or execution UM 0021E numbers during the execution or on the completion of done table (CH0) each channel. -
Page 239: Axis Setting Area
13.5 Unit Memory Detailed Information (H type) 13.5.3 Axis Setting Area A: Available, -: Not available Unit memory Name Default Description (Hex) Stores the settings of pulse output, home position, near home position, and limit signal of each channel. Monitor in binary format. bit no, Item Settings... - Page 240 Specifications A: Available, -: Not available Unit memory Name Default Description (Hex) Stores the settings of the deceleration time for the home return of each channel in decimal. It indicates Home return the time from the home return target speed to the UM 0026A U100 deceleration time...
- Page 241 13.5 Unit Memory Detailed Information (H type) A: Available, -: Not available Unit memory Name Default Description (Hex) UM 0027A Reserved for system -UM 00281 (Note 1): The unit memory numbers in the above table are for CH0. As for the numbers for CH1 to CH3, refer to "Correspondence table of unit memory numbers".
- Page 242 Specifications 13.5.4 Positioning Table Area A: Available, -: Not available Unit memory Name Default Description (Hex) Stores the settings of the position specification method for the positioning operation. bit no, Item Settings UM 0032C Control code Control 0: Increment mode method 1: Absolute mode 1-15...
- Page 243 13.5 Unit Memory Detailed Information (H type) Correspondence table of unit memory numbers Unit memory number (Hex.) Table Name Control code UM0032C UM00426 UM00520 UM0061A Control pattern UM0032D UM00427 UM00521 UM0061B Positioning acceleration time UM0032E UM00428 UM00522 UM0061C Positioning deceleration time UM0032F UM00429 UM00523...
- Page 244 Specifications Unit memory number (Hex.) Table Name Control code UM00354 UM0044E UM00548 UM00642 Control pattern UM00355 UM0044F UM00549 UM00643 Positioning acceleration time UM00356 UM00450 UM0054A UM00644 Positioning deceleration time UM00357 UM00451 UM0054B UM00645 UM00358 UM00452 UM0054C UM00646 Positioning target speed -UM00359 -UM00453 -UM0054D...
- Page 245 13.5 Unit Memory Detailed Information (H type) Unit memory number (Hex.) Table Name Control code UM0037C UM00476 UM00570 UM0066A Control pattern UM0037D UM00477 UM00571 UM0066B Positioning acceleration time UM0037E UM00478 UM00572 UM0066C Positioning deceleration time UM0037F UM00479 UM00573 UM0066D UM00380 UM0047A UM00574 UM0066E...
- Page 246 Specifications Unit memory number (Hex.) Table Name Control code UM003A4 UM0049E UM00598 UM00692 Control pattern UM003A5 UM0049F UM00599 UM00693 Positioning acceleration time UM003A6 UM004A0 UM0059A UM00694 Positioning deceleration time UM003A7 UM004A1 UM0059B UM00695 UM003A8 UM004A2 UM0059C UM00696 Positioning target speed -UM003A9 -UM004A3 -UM0059D...
- Page 247 13.5 Unit Memory Detailed Information (H type) Unit memory number (Hex.) Table Name Control code UM003CC UM004C6 UM005C0 UM006BA Control pattern UM003CD UM004C7 UM005C1 UM006BB Positioning acceleration time UM003CE UM004C8 UM005C2 UM006BC Positioning deceleration time UM003CF UM004C9 UM005C3 UM006BD UM003D0 UM004CA UM005C4 UM006BE...
- Page 248 Specifications 13.6 Dimensions (19) (Unit: mm) 13-56...
- Page 249 Record of changes Manual No. Date Record of Changes WUME-FP7MXY-01 Apr. 2016 1st Edition WUME-FP7MXY-02 Sep. 2016 2nd Edition Error correction ・Corrected the terminal diagram and external connection diagram. (Chapter 3.1.2) ・Corrected the common method of input specifications. (Chapter 3.1.3) Added new model.