Sign In
Upload
Manuals
Brands
DIGI Manuals
Network Router
TransPort LR54
DIGI TransPort LR54 Manuals
Manuals and User Guides for DIGI TransPort LR54. We have
5
DIGI TransPort LR54 manuals available for free PDF download: User Manual, Hardware Reference Manual, Quick Start Manual
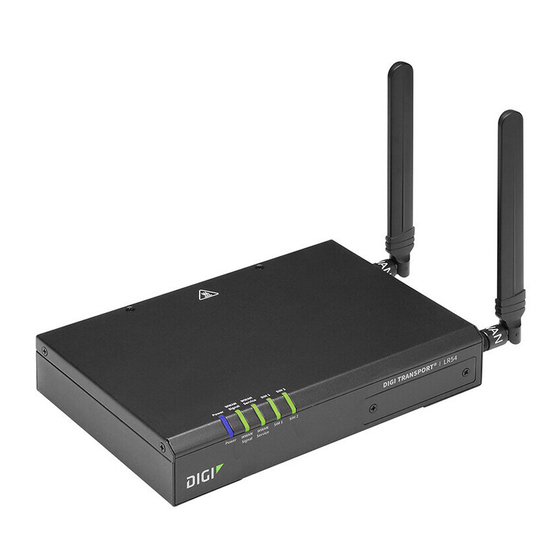
Digi TransPort LR54 User Manual (1113 pages)
Brand:
Digi
| Category:
Network Router
| Size: 17 MB
Table of Contents
Revision History-90002386
2
Table of Contents
9
What's New in Digi LR54 Version 22.8
21
Digi LR54 Quick Start
22
Step 1: Connect Your Device
22
Step 2: Connect DC Power
23
Step 3: Set up Access to Digi Remote Manager
23
Step 4: Register Your Device
23
Step 5: Complete Setup
24
Step 6: Configure Cellular APN
24
Digi LR54 Hardware Reference
25
LR54 Key Features
25
Digi LR54 Front and Back Views
25
Digi LR54 Leds
26
Digi LR54 Serial Connector Pinout
27
QR Code Definition
27
Hardware Setup
29
Install SIM Cards
30
Apply Dielectric Grease over SIM Contacts
30
Tips for Improving Cellular Signal Strength
31
Digi LR54 Mounting Options
31
Attach Mounting Brackets to the Device
31
Mount the Digi LR54 on a Wall
32
Hang the Digi LR54 on a Wall
32
Connect Data Cables
33
Connect Antennas
33
LR54 Power Connector
33
Firmware Configuration
34
Review LR54 Default Settings
35
Local Webui
35
Digi Remote Manager
35
Default Interface Configuration
35
Other Default Configuration Settings
38
Change the Default Password for the Admin User
38
Reset Default Ssids and Pre-Shared Keys for the Preconfigured Wi-Fi Access Points
40
Configuration Methods
42
Using Digi Remote Manager
43
Using the Local Web Interface
43
Log out of the Web Interface
44
Use the Local REST API to Configure the LR54 Device
44
Use the GET Method to Return Device Configuration Information
45
Use the POST Method to Modify Device Configuration Parameters and List Arrays
47
Use the DELETE Method to Remove Items from a List Array
47
Using the Command Line
49
Access the Command Line Interface
49
Log in to the Command Line Interface
49
Exit the Command Line Interface
50
Central Management
51
Digi Remote Manager Support
52
Certificate-Based Enhanced Security
52
Configure Your Device for Digi Remote Manager Support
52
Collect Device Health Data and Set the Sample Interval
59
Enable Event Log Upload to Digi Remote Manager
62
Log into Digi Remote Manager
64
Use Digi Remote Manager to View and Manage Your Device
65
Add a Device to Digi Remote Manager
65
Configure Multiple LR54 Devices by Using Digi Remote Manager Configurations
66
View Digi Remote Manager Connection Status
67
Learn more
68
Interfaces
69
Wide Area Networks (Wans)
70
Wide Area Networks (Wans) and Wireless Wide Area Networks (Wwans)
71
Configure WAN/WWAN Priority and Default Route Metrics
71
WAN/WWAN Failover
74
Configure Surelink Active Recovery to Detect WAN/WWAN Failures
75
Configure the Device to Reboot When a Failure Is Detected
86
Disable Surelink
95
Example: Use a Ping Test for WAN Failover from Ethernet to Cellular
99
Using Ethernet Devices in a WAN
102
Using Cellular Modems in a Wireless WAN (WWAN)
102
Configure a Wide Area Network (WAN)
126
Configure a Wireless Wide Area Network (WWAN)
134
Show WAN and WWAN Status and Statistics
145
Delete a WAN or WWAN
146
Default Outbound WAN/WWAN Ports
148
Local Area Networks (Lans)
149
About Local Area Networks (Lans)
150
Configure a Local Area Network (LAN)
150
Change the Default LAN Subnet
158
Example: Configure Two Lans
159
Show LAN Status and Statistics
169
Delete a LAN
171
DHCP Servers
173
Create a Virtual LAN (VLAN) Route
191
Default Services Listening on LAN Ports
194
Configure an Interface to Operate in Passthrough Mode
194
Bridging
201
Edit the Preconfigured LAN1 Bridge
202
Configure a Bridge
206
Show Surelink Status and Statistics
209
Show Surelink Status for All Interfaces
209
Show Surelink Status for a Specific Interface
210
Show Surelink Status for All Ipsec Tunnels
210
Show Surelink Status for a Specific Ipsec Tunnel
211
Show Surelink Status for All Openvpn Clients
211
Show Surelink Status for a Specific Openvpn Client
212
Serial Port
213
Default Serial Port Configuration
213
Serial Mode Options
213
View Serial Port Information
213
Configure Login Mode
214
Configure Remote Access Mode
216
Configure Application Mode
232
Configure PPP Dial-In Mode
234
Configure UDP Serial Mode
241
Configure Modbus Mode
251
Show Serial Status and Statistics
255
Log Serial Port Messages
256
Wi-Fi
259
Wi-Fi Configuration
259
Default Access Point SSID and Password
259
Default Wi-Fi Configuration
259
Configure the Wi-Fi Radio's Channel
261
Configure the Wi-Fi Radio to Support DFS Channels in Client Mode
263
Required Configuration Items
263
Configure the Wi-Fi Radio's Band and Protocol
265
Configure the Wi-Fi Radio's Transmit Power
268
Configure an Open Wi-Fi Access Point
270
Configure a Wi-Fi Access Point with Personal Security
276
Configure a Wi-Fi Access Point with Enterprise Security
284
Isolate Wi-Fi Clients
292
Isolate Clients Connected to the same Access Point
292
Isolate Clients Connected to Different Access Points
293
Configure a Wi-Fi Client and Add Client Networks
300
Show Wi-Fi Access Point Status and Statistics
309
Show Wi-Fi Client Status and Statistics
311
Hotspot
313
Hotspot Authentication Modes
314
Hotspot DHCP Server
315
Hotspot Security
315
Hotspot Configuration
316
Enable Hotspot Using the Default Configuration
317
Change the Default Hotspot SSID
322
Change the Default Hotspot IP Address and Subnet
324
Change the Default Hotspot Bandwidth Limits
327
Add an Ethernet Port to the Default Hotspot
329
Use Policy Routes with Hotspot
332
Create a New Hotspot
332
Configure the Hotspot to Use Local Shared Password Authentication
345
Configure the Hotspot to Use RADIUS Shared Password Authentication
348
Configure the Hotspot to Use RADIUS Users Authentication
352
Configure the Hotspot to Use Hotspotsystem Authentication
356
Show Hotspot Status and Statistics
360
Customize the Hotspot Login Page
362
Edit Sample Hotspot HTML Pages
363
Upload Custom Hotspot HTML Pages
364
Restore Hotspot Default Sample Pages
366
Hotspot RADIUS Attributes
367
Routing
368
IP Routing
369
Configure a Static Route
370
Delete a Static Route
373
Policy-Based Routing
375
Configure a Routing Policy
376
Example: Dual WAN Policy-Based Routing
385
Example: Domain-Based Routing with Dual WAN
388
Example: Route Traffic to a Specific WAN Interface Based on the Client MAC Address
392
Routing Services
397
Configure Routing Services
398
Show the Routing Table
401
Dynamic DNS
403
Configure Dynamic DNS
404
Virtual Router Redundancy Protocol (VRRP)
409
Vrrp
410
Configure VRRP
410
Configure VRRP
414
Example: VRRP/VRRP+ Configuration
422
Configure Device One (Master Device)
422
Configure Device Two (Backup Device)
426
Show VRRP Status and Statistics
432
Virtual Private Networks (VPN)
435
Ipsec
436
Ipsec Data Protection
436
Ipsec Mode
436
Ipsec Modes
436
Internet Key Exchange (IKE) Settings
436
Authentication
437
Configure an Ipsec Tunnel
437
Configure Ipsec Failover
464
Configure Surelink Active Recovery for Ipsec
467
Show Ipsec Status and Statistics
475
Debug an Ipsec Configuration
476
Configure a Simple Certificate Enrollment Protocol Client
478
Example: SCEP Client Configuration with Fortinet SCEP Server
485
Show SCEP Client Status and Information
490
Openvpn
493
Configure an Openvpn Server
494
Configure an Openvpn Authentication Group and User
503
Configure an Openvpn Client by Using an .Ovpn File
508
Configure an Openvpn Client Without Using an .Ovpn File
511
Configure Surelink Active Recovery for Openvpn
516
Show Openvpn Server Status and Statistics
524
Show Openvpn Client Status and Statistics
525
Generic Routing Encapsulation (GRE)
527
Configuring a GRE Tunnel
527
Show GRE Tunnels
532
Example: GRE Tunnel over an Ipsec Tunnel
533
L2Tp
549
Configure a PPP-Over-L2TP Tunnel
549
Configure Surelink Active Recovery for PPP-Over-L2TP
559
L2TP with Ipsec
567
Show L2TP Tunnel Status
567
L2Tpv3 Ethernet
569
Configure an L2Tpv3 Tunnel
569
Show L2TPV3 Tunnel Status
574
Nemo
575
Configure a NEMO Tunnel
575
Show NEMO Status
581
Allow Remote Access for Web Administration and SSH
584
Configure the Web Administration Service
588
Configure SSH Access
598
Use SSH with Key Authentication
606
Generating SSH Key Pairs
606
Configure Telnet Access
609
Configure DNS
614
Show DNS Server
620
Simple Network Management Protocol (SNMP)
622
SNMP Security
622
Configure Simple Network Management Protocol (SNMP)
622
Download Mibs
627
Location Information
629
Configure the Location Service
630
Configure the Device to Use a User-Defined Static Location
632
Configure the Device to Accept Location Messages from External Sources
634
Forward Location Information to a Remote Host
639
Configure Geofencing
646
Show Location Information
658
Modbus Gateway
659
Configure the Modbus Gateway
660
Show Modbus Gateway Status and Statistics
673
System Time
677
Configure the System Time
677
Manually Set the System Date and Time
681
Network Time Protocol
681
Configure the Device as an NTP Server
682
Show Status and Statistics of the NTP Server
687
Configure a Multicast Route
688
Ethernet Network Bonding
692
Enable Service Discovery (Mdns)
697
Use the Iperf Service
701
Example Performance Test Using Iperf3
706
Configure the Ping Responder Service
707
Example Performance Test Using Iperf3
711
Develop Python Applications
713
Set up the LR54 for Python Development
714
Create and Test a Python Application
714
Python Modules
716
The Use(Led) Function
745
Releasing the Leds to System Control
745
Set up the LR54 to Automatically Run Your Applications
754
Configure Scripts to Run Automatically
754
Show Script Information
762
Stop a Script that Is Currently Running
762
Start an Interactive Python Session
764
Run a Python Application at the Shell Prompt
764
Configure Scripts to Run Manually
766
Task One: Upload the Application
766
Task Two: Configure the Application to Run Automatically
768
Start a Manual Script
772
User Authentication
774
LR54 User Authentication
775
User Authentication Methods
775
Add a New Authentication Method
777
Delete an Authentication Method
779
Rearrange the Position of Authentication Methods
781
Authentication Groups
783
Change the Access Rights for a Predefined Group
785
Add an Authentication Group
787
Delete an Authentication Group
792
Local Users
794
Change a Local User's Password
795
Configure a Local User
797
Delete a Local User
805
Terminal Access Controller Access-Control System Plus (TACACS+)
808
TACACS+ User Configuration
809
TACACS+ Server Failover and Fallback to Local Authentication
810
Configure Your LR54 Device to Use a TACACS+ Server
810
Remote Authentication Dial-In User Service (RADIUS)
815
RADIUS User Configuration
816
RADIUS Server Failover and Fallback to Local Configuration
816
Configure Your LR54 Device to Use a RADIUS Server
817
Ldap
821
LDAP User Configuration
822
LDAP Server Failover and Fallback to Local Configuration
823
Configure Your LR54 Device to Use an LDAP Server
823
Configure Serial Authentication
828
Disable Shell Access
831
Set the Idle Timeout for LR54 Users
832
Example User Configuration
835
Example 1: Administrator User with Local Authentication
835
Example 2: RADIUS, TACACS+, and Local Authentication for One User
838
Firewall Configuration
846
Create a Custom Firewall Zone
846
Configure the Firewall Zone for a Network Interface
848
Delete a Custom Firewall Zone
850
Port Forwarding Rules
852
Configure Port Forwarding
852
Delete a Port Forwarding Rule
857
Packet Filtering
860
Configure Packet Filtering
860
Enable or Disable a Packet Filtering Rule
864
Delete a Packet Filtering Rule
866
Configure Custom Firewall Rules
868
Configure Captive Portals
871
Delete Captive Portals
875
Configure Quality of Service Options
876
Web Filtering
888
Configure Web Filtering with Cisco Umbrella
888
Configure Web Filtering with Manual DNS Servers
891
Verify Your Web Filtering Configuration
894
Show Web Filter Service Information
896
Upload a New LXC Container
898
Configure a Container
899
Starting and Stopping the Container
902
Starting the Container
902
Stopping the Container
904
View the Status of Containers
904
Show Status of All Containers
904
Show Status of a Specific Container
905
Schedule a Script to Run in the Container
905
Create a Custom Container
908
Create the Custom Container File
908
Test the Custom Container File
909
System Administration
910
Review Device Status
911
Configure System Information
913
Update System Firmware
915
Manage Firmware Updates Using Digi Remote Manager
915
Certificate Management for Firmware Images
915
Downgrading
915
Dual Boot Behavior
919
How to Recover a LR54 that will Not Boot
920
Update Cellular Module Firmware
921
Update Modem Firmware over the Air (OTA)
922
Update Modem Firmware by Using a Local Firmware File
924
Reboot Your LR54 Device
925
Reboot Your Device Immediately
925
Schedule Reboots of Your Device
926
Erase Device Configuration and Reset to Factory Defaults
928
Configure the LR54 Device to Use Custom Factory Default Settings
931
Advertisement
Digi TransPort LR54 User Manual (931 pages)
Brand:
Digi
| Category:
Network Router
| Size: 16 MB
Table of Contents
Revision History-90002386
2
Table of Contents
11
What's New in Digi LR54 Version 21.5
20
Digi LR54 Quick Start
22
Step 1: Connect Your Device
22
Step 2: Connect DC Power
23
Step 3: Set up Access to Digi Remote Manager
23
Step 4: Register Your Device
23
Step 5: Complete Setup
24
Step 6: Configure Cellular APN
24
Digi LR54 Hardware Reference
25
LR54 Key Features
25
Digi LR54 Hardware Specifications
25
Digi LR54 Front and Back Views
25
Digi LR54 Leds
26
Digi LR54 Serial Connector Pinout
27
Hardware Setup
28
Install SIM Cards
29
Tips for Improving Cellular Signal Strength
29
Digi LR54 Mounting Options
29
Attach Mounting Brackets to the Device
30
Mount the Digi LR54 on a Wall
31
Hang the Digi LR54 on a Wall
31
Connect Data Cables
31
Connect Antennas
31
Digi LR54 Mounting Options
32
Attach Mounting Brackets to the Device
32
Mount the Digi LR54 on a Wall
33
Hang the Digi LR54 on a Wall
33
Configuration and Management
35
Review LR54 Default Settings
36
Local Webui
36
Digi Remote Manager
36
Default Interface Configuration
36
Other Default Configuration Settings
39
Change the Default Password for the Admin User
39
Reset Default Ssids and Pre-Shared Keys for the Preconfigured Wi-Fi Access Points
41
Configuration Methods
43
Using Digi Remote Manager
44
Access Digi Remote Manager
44
Using the Web Interface
44
Log out of the Web Interface
45
Using the Command Line
46
Access the Command Line Interface
46
Log in to the Command Line Interface
46
Exit the Command Line Interface
47
Interfaces
48
Wide Area Networks (Wans)
49
Wide Area Networks (Wans) and Wireless Wide Area Networks (Wwans)
50
Configure WAN/WWAN Priority and Default Route Metrics
50
WAN/WWAN Failover
53
Configure Surelink Active Recovery to Detect WAN/WWAN Failures
54
Configure the Device to Reboot When a Failure Is Detected
62
Disable Surelink
71
Example: Use a Ping Test for WAN Failover from Ethernet to Cellular
75
Using Ethernet Devices in a WAN
78
Using Cellular Modems in a Wireless WAN (WWAN)
78
Configure a Wide Area Network (WAN)
101
Configure a Wireless Wide Area Network (WWAN)
108
Show WAN and WWAN Status and Statistics
119
Delete a WAN or WWAN
120
Default Outbound WAN/WWAN Ports
122
Local Area Networks (Lans)
123
About Local Area Networks (Lans)
124
Configure a LAN
124
Example: Configure Two Lans
131
Show LAN Status and Statistics
141
Delete a LAN
143
DHCP Servers
145
Create a Virtual LAN (VLAN) Route
161
Default Services Listening on LAN Ports
164
Bridging
165
Edit the Preconfigured LAN1 Bridge
166
Configure a Bridge
169
Serial Port
174
Configure the Serial Port
174
Configure UDP Serial Mode
186
Show Serial Status and Statistics
189
Log Serial Port Messages
189
Wi-Fi
192
Wi-Fi Configuration
192
Default Access Point SSID and Password
192
Default Wi-Fi Configuration
192
Configure the Wi-Fi Radio's Channel
194
Configure the Wi-Fi Radio to Support DFS Channels in Client Mode
196
Required Configuration Items
196
Configure the Wi-Fi Radio's Band and Protocol
198
Configure the Wi-Fi Radio's Transmit Power
200
Configure an Open Wi-Fi Access Point
202
Configure a Wi-Fi Access Point with Personal Security
209
Configure a Wi-Fi Access Point with Enterprise Security
216
Isolate Wi-Fi Clients
225
Isolate Clients Connected to the same Access Point
225
Isolate Clients Connected to Different Access Points
226
Configure a Wi-Fi Client and Add Client Networks
233
Show Wi-Fi Access Point Status and Statistics
240
Show Wi-Fi Client Status and Statistics
241
Hotspot
243
Hotspot Authentication Modes
244
Hotspot DHCP Server
245
Hotspot Security
245
Hotspot Configuration
246
Enable Hotspot Using the Default Configuration
247
Change the Default Hotspot SSID
252
Change the Default Hotspot IP Address and Subnet
254
Change the Default Hotspot Bandwidth Limits
257
Add an Ethernet Port to the Default Hotspot
259
Use Policy Routes with Hotspot
261
Create a New Hotspot
262
Configure the Hotspot to Use Local Shared Password Authentication
275
Configure the Hotspot to Use RADIUS Shared Password Authentication
277
Configure the Hotspot to Use RADIUS Users Authentication
281
Configure the Hotspot to Use Hotspotsystem Authentication
285
Show Hotspot Status and Statistics
288
Customize the Hotspot Login Page
291
Edit Sample Hotspot HTML Pages
292
Upload Custom Hotspot HTML Pages
293
Restore Hotspot Default Sample Pages
295
Hotspot RADIUS Attributes
296
Routing
297
IP Routing
298
Configure a Static Route
299
Delete a Static Route
302
Policy-Based Routing
304
Configure a Routing Policy
304
Example: Dual WAN Policy-Based Routing
313
Example: Route Traffic to a Specific WAN Interface Based on the Client MAC Address
316
Routing Services
321
Configure Routing Services
322
Show the Routing Table
325
Dynamic DNS
327
Configure Dynamic DNS
327
Virtual Router Redundancy Protocol (VRRP)
333
Vrrp
333
Configure VRRP
334
Configure VRRP
337
Example: VRRP/VRRP+ Configuration
345
Configure Device One (Master Device)
346
Configure Device Two (Backup Device)
350
Show VRRP Status and Statistics
356
Virtual Private Networks (VPN)
358
Ipsec
359
Ipsec Data Protection
359
Ipsec Modes
359
Internet Key Exchange (IKE) Settings
359
Authentication
360
Configure an Ipsec Tunnel
360
Configure Ipsec Failover
385
Configure Surelink Active Recovery for Ipsec
388
Show Ipsec Status and Statistics
395
Debug an Ipsec Configuration
396
Configure a Simple Certificate Enrollment Protocol Client
397
Example: SCEP Client Configuration with Fortinet SCEP Server
401
Openvpn
407
Configure an Openvpn Server
408
Configure an Openvpn Authentication Group and User
417
Configure an Openvpn Client by Using an .Ovpn File
421
Configure an Openvpn Client Without Using an .Ovpn File
424
Configure Surelink Active Recovery for Openvpn
428
Show Openvpn Server Status and Statistics
436
Show Openvpn Client Status and Statistics
437
Generic Routing Encapsulation (GRE)
439
Configuring a GRE Tunnel
439
Show GRE Tunnels
444
Example: GRE Tunnel over an Ipsec Tunnel
445
Nemo
460
Configure a NEMO Tunnel
461
Show NEMO Status
467
Services
470
Allow Remote Access for Web Administration and SSH
470
Configure the Web Administration Service
473
Configure SSH Access
483
Use SSH with Key Authentication
489
Generating SSH Key Pairs
489
Configure Telnet Access
492
Configure DNS
497
Show DNS Server
503
Simple Network Management Protocol (SNMP)
504
SNMP Security
504
Configure Simple Network Management Protocol (SNMP)
504
Download Mibs
509
Location Information
510
Configure the Location Service
511
Configure the Device to Use a User-Defined Static Location
513
Configure the Device to Accept Location Messages from External Sources
515
Forward Location Information to a Remote Host
519
Configure Geofencing
525
Show Location Information
537
Modbus Gateway
538
Configure the Modbus Gateway
539
Show Modbus Gateway Status and Statistics
552
System Time
555
Configure the System Time
555
Network Time Protocol
558
Show Status and Statistics of the NTP Server
558
Configure the Device as an NTP Server
559
Configure a Multicast Route
565
Ethernet Network Bonding
568
Enable Service Discovery (Mdns)
570
Use the Iperf Service
574
Example Performance Test Using Iperf3
578
Configure the Ping Responder Service
579
Example Performance Test Using Iperf3
583
Applications
585
Configure Applications to Run Automatically
585
Task One: Upload the Application
585
Task Two: Configure the Application to Run Automatically
587
Run a Python Application at the Shell Prompt
591
Start an Interactive Python Session
593
Digidevice Module
595
Use Digidevice.cli to Execute CLI Commands
596
Use Digidevice.datapoint to Upload Custom Datapoints to Digi Remote Manager
597
Use Digidevice.config for Device Configuration
599
Use Python to Respond to Digi Remote Manager SCI Requests
602
Use Digidevice Runtime to Access the Runtime Database
610
Use Python to Upload the Device Name to Digi Remote Manager
612
Use Python to Access the Device Location Data
614
The Digidevice Led Submodule
618
Use Python to Send and Receive SMS Messages
620
Use the Human Interface Device (HID) Module
623
Help for the Hid Module
624
Use Python to Access Serial Ports
625
Use the Paho MQTT Python Library
626
Use the Local REST API to Configure the LR54 Device
629
Use the GET Method to Return Device Configuration Information
629
Use the POST Method to Modify Device Configuration Parameters and Add Items to a List Array
631
Use the DELETE Method to Remove Items from a List Array
632
Stop a Script that Is Currently Running
633
Show Script Information
633
User Authentication
636
LR54 User Authentication
636
User Authentication Methods
636
Add a New Authentication Method
638
Delete an Authentication Method
640
Rearrange the Position of Authentication Methods
642
Authentication Groups
644
Change the Access Rights for a Predefined Group
645
Add an Authentication Group
647
Delete an Authentication Group
651
Local Users
653
Change a Local User's Password
654
Configure a Local User
656
Delete a Local User
664
Terminal Access Controller Access-Control System Plus (TACACS+)
666
TACACS+ User Configuration
667
TACACS+ Server Failover and Fallback to Local Authentication
668
Configure Your LR54 Device to Use a TACACS+ Server
668
Remote Authentication Dial-In User Service (RADIUS)
672
RADIUS User Configuration
673
RADIUS Server Failover and Fallback to Local Configuration
673
Configure Your LR54 Device to Use a RADIUS Server
674
Ldap
677
LDAP User Configuration
679
LDAP Server Failover and Fallback to Local Configuration
680
Configure Your LR54 Device to Use an LDAP Server
680
Configure Serial Authentication
685
Disable Shell Access
687
Set the Idle Timeout for LR54 Users
689
Example User Configuration
692
Example 1: Administrator User with Local Authentication
692
Example 2: RADIUS, TACACS+, and Local Authentication for One User
694
Digi TransPort LR54 User Manual (512 pages)
WR Routers
Brand:
Digi
| Category:
Network Router
| Size: 3 MB
Table of Contents
Applicable Models
3
Table of Contents
5
What's New in Digi Transport Version 4.5
14
Configuration and Management
15
Using the Web Interface
16
Log in to the Web Interface
16
Log out of the Web Interface
16
Using the Command Line
17
Access the Command Line Interface
17
Log in to the Command Line Interface
17
Exit the Command Line Interface
17
Execute a Command from the Web Interface
18
Display Command and Parameter Help Using the ? Character
18
Revert Command Settings Using the ! Character
19
Auto-Complete Commands and Parameters
19
Enter Configuration Commands
19
Display Status and Statistics Using Show Commands
20
Enter Strings in Configuration Commands
20
Interfaces
21
Ethernet Interfaces
22
Configure Ethernet Interfaces
22
Show Ethernet Status and Statistics
23
Cellular Interfaces
26
Configure Cellular Interfaces
26
Show Cellular Status and Statistics
27
Unlock a SIM Card
29
Signal Strength for 4G Cellular Connections
29
Signal Strength for 3G and 2G Cellular Connections
29
Tips for Improving Cellular Signal Strength
30
Wi-Fi Interfaces
31
Configure the Wi-Fi Module Channel
32
Configure the Wi-Fi Module Band and Protocol
32
Configure a Wi-Fi Access Point with no Security
33
Configure a Wi-Fi Access Point with Enterprise Security
34
Show Wi-Fi Access Point Status and Statistics
36
Configure a Wi-Fi Client and Add Client Networks
37
Show Wi-Fi Client Status and Statistics
39
Serial Interface
40
Configure the Serial Interface
40
Show Serial Status and Statistics
42
Local Area Networks (Lans)
44
About Local Area Networks (Lans)
44
Configure a LAN
45
Show LAN Status and Statistics
46
Delete a LAN
48
DHCP Servers
48
Configure a DHCP Server
48
Show DHCP Server Settings
53
DHCP Relay
53
Wide Area Networks (Wans)
56
Using Ethernet Interfaces in a WAN
56
Using Cellular Interfaces in a WAN
56
WAN Priority and Default Route Metrics
57
WAN Failover
57
Active Vs. Passive Failure Detection
58
Configure a Wide Area Network (WAN)
61
Assigning Priority to Wans
61
Configuring a WAN for Ipv6
61
Show WAN Status and Statistics
64
Delete a WAN
66
Ipv6
67
Common Ipv6 Address Types
67
Auto Address Assignment
68
Prefix Delegation
69
More Information on Ipv6
69
Configure a LAN for Ipv6
69
Enable Ipv6 on a LAN
69
Show LAN Ipv6 Status
70
Configure a WAN for Ipv6
71
Enable Ipv6 on a WAN
71
Configure Prefix Delegation on a WAN
71
Show WAN Ipv6 Status
72
Security
73
Local Users
74
User Access Levels
74
Configure a User
75
Delete a User
77
Change a User's Password
77
Firewall Management with IP Filters
79
IP Filter Source and Destination Options
79
IP Filter Criteria Options
80
IP Filter Rule Priority
80
Add an IP Filter Rule
80
Delete an IP Filter Rule
81
Edit an IP Filter Rule
81
Enable or Disable an IP Filter Rule
82
Show IP Filter Rules
82
IP Filter Examples
84
Certificate and Key Management
88
Create a Private Key File
88
Create a Diffie Hellman Key File
88
List Private Key Files
88
Upload a Private Key File
89
Delete a Private Key File
89
Create a Certificate Signing Request (CSR)
89
Remote Authentication Dial-In User Service (RADIUS)
90
Set up a RADIUS Server
90
Set up a RADIUS Backup Server
90
Use the Local-Auth Parameter
90
Configure a RADIUS Server
91
Hotspot
94
Hotspot Authentication Modes
95
Selecting a LAN to be Used by the Hotspot
96
Hotspot DHCP Server
96
Hotspot Security
96
Hotspot Configuration
97
Enable the Hotspot Using the Default Configuration
98
Configure the Hotspot with Click-Through Authentication
102
Configure the Hotspot with a Local Shared Password
108
Configure the Hotspot with a RADIUS Shared Password
114
Configure the Hotspot with RADIUS Users Authentication
122
Configure the Hotspot to Use Hotspotsystem
130
Show Hotspot Status and Statistics
135
Show Current Hotspot Configuration
135
Customize the Hotspot Login Page
136
Edit Sample Hotspot Html Pages
137
Upload Custom Hotspot HTML Pages
137
Use a Remote Webserver
139
Hotspot RADIUS Attributes
139
Services and Applications
142
Location Information
142
Enable the GNSS Module
142
Configure the Device to Accept Location Messages from External Sources
142
Forward Location Information to a Remote Host
145
Show Location Information
149
Auto-Run Commands
151
Python
152
Run a Python Application at the Command Line
152
Show Running Python Applications
152
Stop a Python Application
152
Run an Interactive Python Session
153
Configure a Python Application to Run Automatically at Startup
153
Digidevice Module
155
Log Messages for Python Applications
157
Port Forwarding
158
Add a Port Forwarding Rule
158
Delete a Port Forwarding Rule
159
Enable or Disable a Port Forwarding Rule
159
Show Port Forwarding Rules
160
Using an SSH Server
160
Configure a Secure Shell (SSH) Server
160
Use SSH to Connect to the Transport Command-Line Interface
160
Terminate an SSH Connection
161
Using SSH with Key Authentication
161
Using SSH with Certificate Authentication
162
Example: Use an SSL Certificate Authentication
164
Example: Use an SSL Certificate Authentication with Shared Account
165
Remote Management
167
Remote Manager
168
Configure Digi Remote Manager
168
Show Digi Remote Manager Connection Status
170
Enable Health Reporting and Set Sample Interval
170
Using Simple Network Management Protocol (SNMP)
171
Configure Snmpv1 and Snmpv2
172
Configure Snmpv3
172
Routing
174
IP Routing
175
Configure General IP Settings
175
Configure a Static Route
176
Show the Ipv4 Routing Table
177
Delete a Static Route
177
Routing Rules
178
Dynamic DNS
180
Configure Dynamic DNS
180
Web Filtering (Opendns)
181
Configure Web Filtering Using Cisco Umbrella
181
Clear Device ID
182
Dynamic Mobile Network Routing (DMNR)
182
Configure Verizon DMNR
182
Show DMNR Status
183
Quality of Service (Qos)
184
Configure Qos
184
Show Qos Configuration and Status
186
Virtual Router Redundancy Protocol (VRRP)
187
Configure VRRP Protocol
187
Show VRRP Status and Statistics
189
Virtual Private Networks (VPN)
191
Ipsec
191
Configure an Ipsec Tunnel
192
Example: Ipsec Tunnel between a Transport LR54 and Transport WR44
196
Debug an Ipsec Configuration
198
Show Ipsec Status and Statistics
199
Ipsec Xauth Authentication
199
Openvpn
203
Configure an Openvpn Server for Routing Mode and Certificate Authentication
204
Configure an Openvpn Server to Use Username and Password Authentication
207
Configure an Openvpn Server to Use RADIUS Authentication
208
Configure an Openvpn Client for Routing Mode and Certificate Authentication
209
Configure an Openvpn Client to Use Username and Password Authentication
211
Configure Ciphers and Digests for Use on the Openvpn Tunnel
212
Configure Keepalives on the Openvpn Tunnels
213
Configure Renegotiation on the Openvpn Tunnels
214
Configure Pushing Routes to Openvpn Clients
215
Configure an Openvpn Client and Server for Bridge Mode
216
Show Openvpn Server Status and Statistics
217
Show Openvpn Client Status and Statistics
217
Debug an Openvpn Tunnel
218
Example: Openvpn Tunnel in Routing Mode with Username and Password Authentication
219
Example: Openvpn Tunnel in Bridging Mode Using Certificate Authentication
220
Generic Routing Encapsulation (GRE)
221
Configuring a GRE Tunnel
221
Show GRE Tunnels
224
Example: GRE Tunnel over an Ipsec Tunnel
225
System Settings
231
Configure System Settings
231
Show System Information
233
System Date and Time
233
Network Time Protocol
234
Set the Date and Time Manually
238
Set the Time Zone and Daylight Saving Time
238
Show System Date and Time
238
Configure Power Button Power down Behavior
239
Configure Power Delays for Power Ignition Sensor
239
Update System Firmware
240
Certificate Management for Firmware Images
241
Manage Firmware Updates Using Digi Remote Manager
242
Failover and Recovery During System Update
242
How to Recover a WR54, LR54, or LR54-FIPS that will Not Boot
243
Update Cellular Module Firmware
244
Reboot the Device
244
Reset the Device to Factory Defaults
246
Configuration Files
248
Default Configuration Files
248
Configuration File Sections
248
Shared Configuration Files and Device-Specific Passwords
249
Save Configuration Settings to a File
249
Switch Configuration Files
249
Use Multiple Configuration Files to Test Configurations on Remote Devices
250
Filesystem
253
File System
253
Create a Directory
253
Display Directory Contents
254
Change the Current Directory
254
Delete a Directory
255
Display File Contents
256
Copy a File
256
Rename a File
257
Delete a File
258
Upload and Download Files
259
Diagnostics and Troubleshooting
262
Logs
262
Configure Options for Event and System Logs
262
Configure Syslog Servers
263
Display Logs
264
Find and Filter Log File Entries
265
Save Logs to a File
265
Download Log Files
266
Clear Logs
266
Event Log Levels
266
Analyze Traffic
267
Capture Data Traffic
267
Example Filters for Capturing Data Traffic
268
Show Captured Data Traffic
269
Clear Captured Data Traffic
270
Save Captured Data Traffic to a File
270
Use the "Ping" Command to Troubleshoot Network Connections
271
Stop Ping Commands
271
Ping to Check Internet Connection
271
Use the "Traceroute" Command to Diagnose IP Routing Problems
271
Use the "Show Tech-Support" Command
272
Troubleshooting
274
Ethernet LED Does Not Illuminate
274
Device Cannot Communicate on WAN/ETH1 Port
275
Device Cannot Communicate on ETH2, ETH3, or ETH4 Ports
277
Verify Cellular Connectivity
279
Check Cellular Signal Strength
283
Verify Serial Connectivity
283
Advertisement
Digi TransPort LR54 Hardware Reference Manual (21 pages)
Brand:
Digi
| Category:
Wireless Router
| Size: 0 MB
Table of Contents
Customer Support
2
Sim
2
Table of Contents
4
Digi LR54/LR54W
7
Digi LR54/LR54W Key Features
7
Digi LR54/LR54W Hardware Specifications
7
Digi LR54 Front and Back Views
8
Digi LR54 Mounting Options
8
Attach Mounting Brackets to the Device
9
Mount the Digi LR54 on a Wall
10
Hang the Digi LR54 on a Wall
10
Digi LR54/LR54W Serial Connector Pinout
11
Digi LR54 Leds
12
Power
12
WWAN Signal
12
WWAN Service
12
Sim 1
12
Wi-Fi 2.4 Ghz LED (Wi-Fi Models Only)
13
Wi-Fi 5 Ghz LED (Wi-Fi Models Only)
13
Ethernet 1-4 Link and Activity (on Rear Panel)
13
Tips for Improving Cellular Signal Strength
13
Reset the Device to Factory Defaults
13
Digi LR54 Regulatory and Safety Statements
15
RF Exposure Statement
16
Federal Communication (FCC) Part 15 Class B
16
Radio Frequency Interference (RFI) (FCC 15.105)
16
European Community - CE Mark Declaration of Conformity (Doc)
16
CE Mark (Europe)
16
Maximum Transmit Power for Radio Frequencies
17
Innovation, Science, and Economic Development Canada (IC) Certifications
18
Rohs Compliance Statement
18
Safety Statements
19
Important Safety Information
19
5.10 Ignition of Flammable Atmospheres
19
Warnings for Use of Wireless Devices
19
Potentially Hazardous Atmospheres
20
Safety in Aircraft
20
Safety in Hospitals
20
Pacemakers
20
Persons with Pacemakers
20
DIGI TransPort LR54 Quick Start Manual (2 pages)
Brand:
DIGI
| Category:
Network Router
| Size: 0 MB
Table of Contents
Connect
1
Configure
2
Digi Remote Manager
2
Digi Services and Support
2
Advertisement
Related Products
Digi TransPort LR54-AA401
Digi TransPort LR54-AW401
Digi TransPort LR54-DA301
Digi TransPort WR44
Digi TransPort WR41
Digi TransPort
Digi Transport WR41-U
Digi Transport WR41-E
Digi Transport WR41-C
Digi TransPort WR44 RR
DIGI Categories
Network Router
Control Unit
Modem
Gateway
Server
More DIGI Manuals
Login
Sign In
OR
Sign in with Facebook
Sign in with Google
Upload manual
Upload from disk
Upload from URL