Table of Contents
Advertisement
Advertisement
Table of Contents

Subscribe to Our Youtube Channel
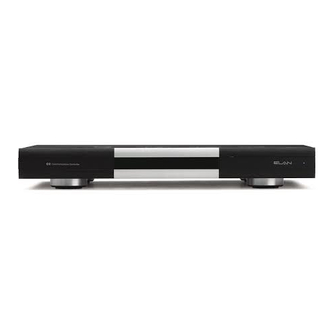
Related Manuals for Elan C2 Communications Controller


Summary of Contents for Elan C2 Communications Controller
-
Page 3: Purpose Of This Manual
Preface Purpose of This Manual This manual provides step-by-step installation instructions and connection examples, along with basic user information for installation and ongoing use of the C2 Communications Controller. This manual is written for the installer of this equipment. Organization... -
Page 4: Safety Information
-These appliances should never be placed near or over a radiator or heat register. These appliances should not be placed in a built-in installation such as a bookcase or cabinet that may impede the flow of air through the ventilation openings. Page 2 © ELAN Home Systems 2009 • All rights reserved. - Page 5 Lightning Storms—Unplug this apparatus during lightning storms or when unused for long periods of time. © ELAN Home Systems 2009 • All rights reserved. Page 3...
- Page 6 IMPORTANT USER INFORMATION The ELAN Home Systems C2 Communications Controller complies with Part 68 of the FCC rules and the require- ments adopted by the ACTA. On the bottom side of this equipment is a label that contains, among other informa- tion, a product identifier in the format US:AAAEQ##TXXXX.
- Page 7 C2 from surge-related damage, it does not completely eliminate the possibility of surges entering into the system through the telco line due to near or direct lightning strikes. ELAN Home Systems does not warranty this, or any product against surge-related damage; nor does this warning imply that, if surge protection is installed and the unit is subsequently damaged by surge, ELAN Home Systems would repair or replace the unit under warranty.
- Page 8 E L A N H O M E S Y S T E M S INSTALLATION MANUAL Page 6 © ELAN Home Systems 2009 • All rights reserved.
-
Page 9: Table Of Contents
Chapter 2: C2 System Design Overview Stand-Alone Stereo System Application .................... 23 S66A Design Application ........................24 S86A Design Application ........................25 S128P Application ..........................26 Trigger Input Design Application ......................27 © ELAN Home Systems 2009 • All rights reserved. Page 7... - Page 10 C2 Communications Controller Specifications ..................57 Appendix B: Door Stations Introduction ............................58 Door Stations Models ........................58 Specifications ..........................59 PreWiring & Installing The Door Stations ..................59 Page 8 © ELAN Home Systems 2009 • All rights reserved.
- Page 11 DSF3 & DSC3 Installation ....................... 63 DSC3 Doorbell Button Installation ....................64 DSS3 Installation ..........................64 Appendix C: Rack Mounting C2 Communications Controller Mounting Specifications ..............66 Limited Warranty ........................... Back Page © ELAN Home Systems 2009 • All rights reserved. Page 9...
- Page 12 E L A N H O M E S Y S T E M S INSTALLATION MANUAL Items in package: • C2 Communication Controller • Rack Mount Brackets • Power Cord • Installation Manual Page 10 © ELAN Home Systems 2009 • All rights reserved.
-
Page 13: Chapter 1: Introduction Introduction
Enhanced ESD protection, transient voltage surge protection, and phone-line conditioning circuitry guarantee years of enjoyment from your C2. A high-output door speaker amplifier and sensitive door microphone ensure superior two-way door communications. © ELAN Home Systems 2009 • All rights reserved. Page 11... -
Page 14: The C2 And Your Phone Line
The C2 provides communications features for up to two separate phone lines from your local telephone provider. The best thing about the C2 Communications Controller is that it does not require special or proprietary phones. Any touch-tone phone, including cordless, are all that is required for... -
Page 15: Home Automation
• When dialing out to an automated service that requires the use of “#” to access services and enter information (i.e., banking by phone or credit card company). © ELAN Home Systems 2009 • All rights reserved. Page 13... -
Page 16: Quick Reference Telephone Features Guide
PRINTER’S INSTRUCTIONS: P/N: 9900870 RevA - INK 2/2: BLACK + PMS167/ BLACK + PMS167 - MATERIAL: 230G GLOSS ART - SIZE: 3.75’’ X 8.5’’ - SCALE: 1-1 Included with the C2 Communications Controller, you will find two “Quick Reference” Must Be RoHS Compliant Telephone Feature Cards. -
Page 17: A Quick Explanation
(to speak with the door station that most recently had it’s DB pressed), then 2 (speak with Door Station 2), then 3 (speak with Door Station 3), then 1 (speak with Door Station1), then 7 (speak with Door Station 7) and so on. © ELAN Home Systems 2009 • All rights reserved. Page 15... -
Page 18: Fax Machines, Modems, And Caller Id Boxes
The 0 can be initiated either by the person performing the page or by a person picking up another extension. Page 16 © ELAN Home Systems 2009 • All rights reserved. -
Page 19: Incoming Calls While Paging
• If, while communicating via a door station, there is an incoming call, you will hear an alert over the handset every fourth ring. To access the caller, press the flash-hook button. To re-access the door station you must press the #,3 (D) keys again. © ELAN Home Systems 2009 • All rights reserved. Page 17... -
Page 20: Panel Functions
Power Indicator LED Door Station Speaker Output Level Line 2 Music-On-Hold Level Door Chime Output Level Front Access Door (Shown Open) Table 1-1: C2 Front Panel Controls & Indicators Page 18 © ELAN Home Systems 2009 • All rights reserved. -
Page 21: Front Panel Led Description
Relay 1, #,1,2 for Relay 2 etc.) Default is OFF. Indicates Power Power Indicator Solid ON (Blue) Switch is set to the ON position. Default is Table 1-2: C2 Front Panel LED’s © ELAN Home Systems 2009 • All rights reserved. Page 19... -
Page 22: Rear
Door Station Bus Removable Locking Connector Music-On-Hold Input Jack RCA Mono Trigger Inputs-Volume Control Override-Relay Power-Relays Removable Locking Connectors VIA!NET IN/OUT RJ-45 AC Power Cord Table 1-3: C2 Rear Panel Connections Page 20 © ELAN Home Systems 2009 • All rights reserved. -
Page 23: Front Panel Adjustments
E L A N H O M E S Y S T E M S INSTALLATION MANUAL Front Panel Adjustments Figure 1-5 shows the front panel pot adjustments for the C2 Communications Controller. Turn potentiometers clockwise to increase or counterclockwise to decrease the various levels. Figure 1-6: Front Panel Adjustments... -
Page 24: C2 Front Panel Dip Switch Settings
1) Trouble accessing a second call while on the line with the first call. 2) Losing the first call after accessing a second call. Page 22 © ELAN Home Systems 2009 • All rights reserved. -
Page 25: Chapter 2: C2 System Design Overview Stand-Alone Stereo System Application
RELAY 3 RELAY 4 DOOR STATION AUDIO LOOP (MONO) VIA!NET STEREO SYSTEM (RECEIVER, PRE-AMP, POWER AMP) Z•POWER To Telephone DEDICATED TUNER FOR MUSIC-ON-HOLD Devices Figure 2-1: Stand-Alone Stereo Design Overview © ELAN Home Systems 2009 • All rights reserved. Page 23... -
Page 26: S66A Design Application
AUDIO LOOP (MONO) VIA!NET To Telephone Devices LOW VOLTAGE RELAYS FOR LIGHTING, SPRINKLERS, GARAGE DOOR, ETC ELAN ELAN DOOR STATION #1 DOOR STATION #2 Figure 2-2: S66A Design Overview Page 24 © ELAN Home Systems 2009 • All rights reserved. -
Page 27: S86A Design Application
AUDIO LOOP (MONO) VIA!NET To Telephone Devices LOW VOLTAGE RELAYS FOR LIGHTING, SPRINKLERS, GARAGE DOOR, ETC ELAN ELAN DOOR STATION #1 DOOR STATION #2 Figure 2-3: S86P Design Overview © ELAN Home Systems 2009 • All rights reserved. Page 25... -
Page 28: S128P Application
AUDIO LOOP (MONO) VIA!NET To Telephone Devices LOW VOLTAGE RELAYS FOR LIGHTING, SPRINKLERS, GARAGE DOOR, ETC ELAN ELAN DOOR STATION #1 DOOR STATION #2 Figure 2-4: S128P Design Overview Page 26 © ELAN Home Systems 2009 • All rights reserved. -
Page 29: Trigger Input Design Application
DRIVEWAY SENSORS MOTION SENSORS TRIGGERS DB 1 DB 2 POWER OUTPUTS INPUTS VIA!NET LIGHTED DOORBELL TRIGGERS DB 1 DB 2 POWER OUTPUTS INPUTS VIA!NET Figure 2-5: Trigger Input Design Overview © ELAN Home Systems 2009 • All rights reserved. Page 27... -
Page 30: Relay Design Application
TRIGGERS +12V NC C NO NC C NO NC C NO NC C NO INPUTS POWER RELAY 1 RELAY 2 RELAY 3 RELAY 4 Figure 2-6: Relay Design Overview Page 28 © ELAN Home Systems 2009 • All rights reserved. -
Page 31: Chapter 3: C2 System Connections Overview
C2 Rear Panel Connections The following section describes connections to the C2 Communications Controller. C2 to VMOS or VSOS Volume Controls When connecting rotary Volume Controls with Override to the C2, simply connect “+” from the C2’s VCO connector to “VC+”... -
Page 32: C2 To Pvse Electronic Volume Control Precision Panel
OVERRIDE OVERRIDE WHITE/BLUE Orange ORANGE Wh/Orange WHITE/ORANGE GREEN Green WHITE/GREEN Wh/Green BROWN Cat-5 Brown WHITE/BROWN Wh/Brown CABLE Figure 3-3: C2 to PVSE Electronic Volume Control Precision Panel Wiring Pinout Page 30 © ELAN Home Systems 2009 • All rights reserved. -
Page 33: C2 Trigger Outputs
Activates when doorbell from Door Station 2 is pressed.Use DB2 if you want trigger automat- ed events when the doorbell from Door Station 2 is pressed, see Figure 3-22 and Figure 3-26 for applications. Use a 3.5mm stereo interconnect cable. © ELAN Home Systems 2009 • All rights reserved. Page 31... -
Page 34: C2 Relays
RELAY #2 N.O. RELAY #3 COM DRY CONTACT RELAY #3 N.O. GARAGE DOOR RELAY #4 COM RELAY RELAY #4 N.O. Figure 3-6: C2 to RELAY Wiring Using Internal Power Supply Page 32 © ELAN Home Systems 2009 • All rights reserved. -
Page 35: C2 To Incoming Co & Phones
NOTE: If using a VBRM Video Balun, Cat-5 network cable is recommended to be used. IF a video balun is not used ELAN recommends 18 AWG wire. For DSC3 runs over 500 feet you must double wire the power inputs. © ELAN Home Systems 2009 • All rights reserved. Page 33... -
Page 36: Elan Home Systems 2009 • All Rights Reserved
WHITE/GREEN BROWN WHITE/BROWN CABLE DSC3 DOOR STATION Figure 3-9: C2 to DSC3 Door Station Wiring Pinout (Option 2) CAUTION: DO NOT combine these two methods on a single destination. Page 34 © ELAN Home Systems 2009 • All rights reserved. -
Page 37: C2 To Trigger Inputs
NOTE: Trigger inputs 1 and 2 will always trigger the door chime assigned to Door Station 1 and Door Station 2 respectively. Chimes can be changed to suit a particular need. © ELAN Home Systems 2009 • All rights reserved. Page 35... -
Page 38: Typical Telephone Service Connections
Ring boosters are available from your phone company for a nominal fee. ELAN strongly recommends the use of telephone line surge protection between the incoming phone line and the C2 Phone Input. Page 36 © ELAN Home Systems 2009 • All rights reserved. -
Page 39: Connecting Telephone Extensions To The Th48 Telephone Expansion Hub
Line 2 TIP - White/Orange Line 2 RING - Orange 1 2 3 4 5 6 RJ14 Connection Figure 3-13: Connecting Telephone Service to the TH31 SRG Telephone Master Hub © ELAN Home Systems 2009 • All rights reserved. Page 37... -
Page 40: New Construction
Telephone Master Hub (4 Lines x 8 Phones) Model TH48 EXP ANSION HUB Z•POWER Espansion Telephones Ports DUAL TELEPHONE WALLPLATES 4-TWISTED PAIR TELEPHONE WIRE (CAT-5) Figure 3-14: New Construction Application Page 38 © ELAN Home Systems 2009 • All rights reserved. -
Page 41: Retrofit
Ports SATELLITE TV MODEM LINE Z•POWER FAX LINE TH48 TELEPHONE Telephone Expansion Hub (4 Lines x 8 Phones) Model TH48 EXPANSION HUB Espansion Telephones Ports Figure 3-15: Retrofit Application © ELAN Home Systems 2009 • All rights reserved. Page 39... -
Page 42: Connecting The C2 To A Multi-Line Telephone System
RING Pair 1 Blue Wh/Blue ELAN recommends that telephone RJ-45 jacks be wired to the T568A standard. Figure 3-16: Connecting Telephone Service to the TH31 SRG Telephone Master Hub Page 40 © ELAN Home Systems 2009 • All rights reserved. -
Page 43: Digital Subscriber Line (Dsl)
C2 TELCO input. MODEM Filter From Incoming Phone Service LINE PHONE TELCO Demarcation LINE 1/2 LINE 1/2 PHONE House Point Phones Figure 3-17: DSL Filters © ELAN Home Systems 2009 • All rights reserved. Page 41... -
Page 44: Standalone Connections (Without An Elan Multi-Room Controller)
C2’s Page and Doorbell signals to be heard through the speakers connected to the receiver. Stereo Receiver Pre Out Main In PG/DB OUT MOH IN AUDIO LOOP (MONO) Figure 3-19: C2 to a Stereo Receiver Pre-Out Main-In Jacks Page 42 © ELAN Home Systems 2009 • All rights reserved. -
Page 45: Stereo Receiver - Tape Loop
Stereo Receiver Tape Out Tape In PG/DB OUT MOH IN AUDIO LOOP (MONO) Figure 3-20: C2 to a Stereo Receiver Through the Tape In/Tape Out Jacks © ELAN Home Systems 2009 • All rights reserved. Page 43... -
Page 46: Paging & Door Chime Using Two Independent Stereo Systems
THE A/B SWITCH'S A/B SWITCH DEF AULT INPUT PRIORITY INPUT A/B SWITCH OUTPUT PRE-AMP #2 OUT POWER AMP #2 IN Figure 3-21: Page & Door Chime using Two Independent Stereo Systems Page 44 © ELAN Home Systems 2009 • All rights reserved. -
Page 47: C2 Trigger Outputs To Sim2 Sensor Integration Module
DB1 Triggers Camera Video on VIA! Touch Panel LOCAL SYSTEM TRIGGERS 3.5mm Stereo Interconnect Cable DB 1 DB 2+ OUTPUTS INPUTS C2 Rear Figure 3-22: C2 to SIM2 Connections © ELAN Home Systems 2009 • All rights reserved. Page 45... -
Page 48: Elan Multi-Room Controller-Based Connections
NC C NO NC C NO NC C NO NC C NO DB 1 DB 2 MOH IN OUTPUTS INPUTS POWER RELAY 1 RELAY 2 RELAY 3 RELAY 4 AUDIO LOOP (MONO) C2 Rear Figure 3-23: C2 ELAN S66A interconnects Page 46 © ELAN Home Systems 2009 • All rights reserved. -
Page 49: C2 To S86A
DB 1 DB 2 MOH IN OUTPUTS INPUTS POWER RELAY 1 RELAY 2 RELAY 3 RELAY 4 AUDIO LOOP (MONO) C2 Rear Figure 3-24: C2 To ELAN S86A interconnects © ELAN Home Systems 2009 • All rights reserved. Page 47... -
Page 50: C2 To S86A Multi-Chassis Connections
Interconnect Cables Interconnect Cable TRIGGERS TRIGGERS DB 1 DB 2 DB 1 DB 2 INPUTS OUTPUTS INPUTS OUTPUTS C2 Rear C2 Rear Figure 3-26: C2 To ELAN S86A interconnects Page 48 © ELAN Home Systems 2009 • All rights reserved. -
Page 51: C2 To S128P
DB 1 DB 2 MOH IN OUTPUTS INPUTS POWER RELAY 1 RELAY 2 RELAY 3 RELAY 4 AUDIO LOOP (MONO) C2 Rear Figure 3-24: C2 To ELAN S128P interconnects © ELAN Home Systems 2009 • All rights reserved. Page 49... -
Page 52: C2 To S128P Multi-Chassis Connections
Interconnect Cable Interconnect Cables TRIGGERS TRIGGERS DB 1 DB 2 DB 1 DB 2 OUTPUTS INPUTS INPUTS OUTPUTS C2 Rear COM2 Rear Figure 3-26 C2 To ELAN S128P interconnects Page 50 © ELAN Home Systems 2009 • All rights reserved. -
Page 53: Chapter 4: Troubleshooting
Time too short. (#2) and move it to the UP position (85ms) (see page 1-10 for seconds during details). conversation. If problem still exists, call ELAN Technical Support at 1-800- 622-ELAN. © ELAN Home Systems 2009 • All rights reserved. Page 51... - Page 54 STATION OUTPUT LEVEL Adjustment control located behind Audio cuts too low. the Access door on the C2 Front Panel clockwise. out during If problem still exists, call ELAN Technical Support at 1-800- speech. 622-ELAN. Page 52 © ELAN Home Systems 2009 • All rights reserved.
- Page 55 Verify the correct connections for the doorbell, (see Chapter 3 not lighted. may be wired for proper Door Station connectivity for Connections). backwards. If problem still exists, call ELAN Technical Support at 1-800- 622-ELAN. © ELAN Home Systems 2009 • All rights reserved. Page 53...
- Page 56 ID, (see Appendix B for DIP switch assignments). speaker(s) fall DIP switches If problem still exists, call ELAN Technical Support at 1-800- in and out. may be set to 622-ELAN. the same ID. Page 54 © ELAN Home Systems 2009 • All rights reserved.
- Page 57 The adjustment pots are located too low/high. need to be beneath the Access door on the front of the C2. adjusted. If problem still exists, call ELAN Technical Support at 1-800- 622-ELAN. © ELAN Home Systems 2009 • All rights reserved. Page 55...
-
Page 58: Technical Support
If, after carefully following the steps in the Troubleshooting section, you are unable to resolve issues with the installation or operation of the C2, please call ELAN Technical Support at 1-800-622-ELAN (3526). Page 56 © ELAN Home Systems 2009 • All rights reserved. -
Page 59: Appendix A: Specifications
RJ-14 “Telco” interface Cat-5 Communications Wire Dimensions w/Feet (1U w/o Feet) 17 W X 2 3/8 H X 12 1/2 D (in.) 432 W X 60 H X 318 D (mm) © ELAN Home Systems 2009 • All rights reserved. Page 57... -
Page 60: Appendix B: Door Stations
Appendix B: Door Stations Introduction ELAN’s new DS3 Series Door Station and the C2 Communications Controller provide you with full two-way communications and door latch control from your touch-tone telephones. A simple #-D (for Door) from any touch-tone phone allows you to speak with visitors at the door. -
Page 61: Specifications
138 W X 97 H (mm) DSS3 Specifications DSS3 Dimensions 5 1/2 W X 3 8/10 H (in) X 9/10 D (in) 138 W X 97 H (mm) X 23 D (mm) © ELAN Home Systems 2009 • All rights reserved. Page 59... -
Page 62: Prewiring & Installing The Door Stations
COLOR CCTV CAMERA / DOOR STATION Black To Video Balun via Cat-5 White To Door Green Latch Recommended Mounting Height: 4.5ft. to 5.5 ft. Doorbell Button Figure B-1: Recommended Camera Height Page 60 © ELAN Home Systems 2009 • All rights reserved. -
Page 63: Door Station Dip Switch Settings
Locate and adjust the DIP switches to indicate the desired door station for your location, i.e., front door = Door Station 1, back door = Door Station 2 etc. (see Figure B-3). SWITCHES -DS+ 1RL2 DSF3 OR DSS3 DSC3 Figure B-3: DIP Switch Locations © ELAN Home Systems 2009 • All rights reserved. Page 61... -
Page 64: Vbrm Video Balun
Communications Controller to provide door chime and door station communications functionality. Use Cat-5 for these connections. Cat-5 network cable must be used if using the DSC3 in conjunction with the VBRM Video Balun. Page 62 © ELAN Home Systems 2009 • All rights reserved. -
Page 65: Non Vbrm Applications
BLACK = ( - ) 18/2 (for Power) RED = (+) PWR3 Power Supply 1RL2 +DB- -DS+ To ELAN V8, S128P, or S86A Video Controller Figure B-5: DSC3 Without VBRM © ELAN Home Systems 2009 • All rights reserved. Page 63... -
Page 66: Dsc3 Doorbell Button Installation
Camera rear of the camera module is located in the Wire upper right corner when viewed from the rear! Figure B-7: Camera Wire Orientation Page 64 © ELAN Home Systems 2009 • All rights reserved. - Page 67 NOTE: Be sure to pull the doorbell push button wires through the back of the DBK1000 Door Station Rough-in Box. © ELAN Home Systems 2009 • All rights reserved. Page 65...
-
Page 68: Dss3 Installation
4) Mount the door station to the surface bracket, as illustrated in Figure B-8. Note the orientation of the Mounting Plate flanges. Figure B-8: Mounting the DSS3 Door Station Page 66 © ELAN Home Systems 2009 • All rights reserved. -
Page 69: Appendix C: Rack Mounting
2. Ensure that the brackets are flush with the front of the C2. Install each of the eight screws (included) through the side mounting flanges into the holes in the sides of the unit as shown in Figure C-2. Hand tighten screws! Over-tightening could cause damage to the C2 Communications Controller. Figure: C-2. - Page 70 E L A N H O M E S Y S T E M S INSTALLATION MANUAL Notes: Page 68 © ELAN Home Systems 2009 • All rights reserved.
- Page 71 Notes:...
- Page 72 P/N 9900991 REV: F...
-
Page 73: Limited Warranty
Limited Warranty ELAN HOME SYSTEMS L.L.C. (“ELAN”) warrants the C2 Communications Controller to be free from defects in materials and workmanship for the period of two years (2 years) from date of purchase. If within the applicable warranty period above purchaser discovers that such item was not as warranted above and promptly notifies ELAN in writing, ELAN shall repair or replace the item at the company's option.
Need help?
Do you have a question about the C2 Communications Controller and is the answer not in the manual?
Questions and answers