Table of Contents
Advertisement
Advertisement
Table of Contents

Related Manuals for Christie CP2000-X


Summary of Contents for Christie CP2000-X
- Page 1 CP2000-X U S E R M A N U A L 020-100031-01...
-
Page 3: Table Of Contents
2.9 Maximizing Light Output ..................2-27 2.10 Basic Image Alignment ..................2-27 2.11 Offset and Boresight Alignment ................2-28 2.12 Fold Mirror and Convergence Adjustments ............2-31 2.13 Calibrating the CP2000-X System ................. 2-32 Basic 3.1 Projector Basics ......................3-1 Operation 3.2 Power-up Procedure .................... - Page 4 A Glossary ........................A-1 B ASCII Messages ......................B-1 C System Integration ...................... C-1 D Repacking the Projector ....................D-1 Due to continuing research, all information in this manual is subject to change without notice CP2000-X User Manual 020-100031-01 Rev. 1 (03-2009)
-
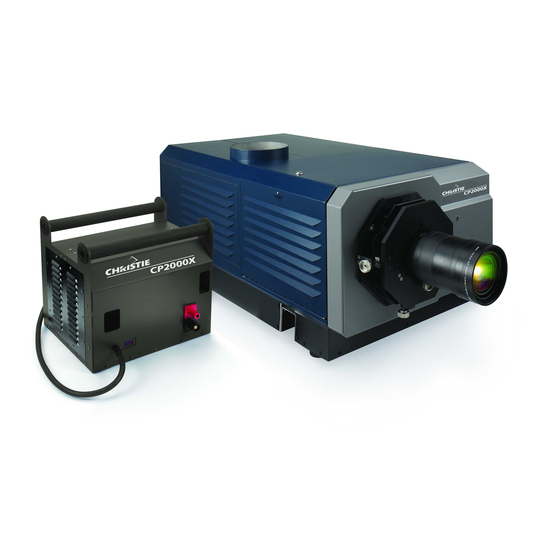
Page 5: The Projector
Expand its versatility even further by connecting non-cinema DVI source material for multimedia presentations from a variety of formats—the powerful CP2000-X is perfect for any large audience venue demanding effortless installation and operation. - Page 6 STACKING & RIGGING: stacked and, if desired, flown with another framed projection head using the Roadie 25K/CP2000-X Stacking and Rigging Kit and standard rigging techniques to secure the two frames together. Each frame provides precision roll, pitch and yaw adjustments of the projector for precision image alignments. Corresponding lamp ballasts can be located up to 100 feet away, flown or not.
-
Page 7: List Of Components
INTRODUCTION The following components make up a complete CP2000-X system (see Figure List of 3.1): Components Projection Head. Includes: Line cord Touch Panel Controller with mounting hardware and 3-ft. cable Standard and high-security keys for lamp and igniter service access, plus assorted Allen keys ... -
Page 8: Purchase Record And Service Contacts
Should you encounter a problem with any part of the projector and require assistance, contact your dealer or one of the Christie service depots listed on the back cover of this manual. In most cases, CP servicing is performed on site. If you have purchased the projector, fill out the information on the following page and keep with your records. -
Page 9: Installation & Setup
Install Lens, Lamp and Heat Extractor STEP 3 Refer to 2.4, Installing a Lens, Lamp & Cooling for instructions. STEP 4 CP2000-X User Manual 020-100031-01 Rev . 1 (03-2009) - Page 10 Figure 2.2. Access to Cinema and Non- content through DVI or Cinema Ports Christie’s Cine-IPM 2K, you must remove the access panel located on the underside of the projector near the air filter. Drill an exit hole or leave the panel off.
- Page 11 Section 6, Specifications for details. Then set the ballast AC on/off switch to ON and listen for the internal cooling fan start-up. NOTE: There is no other indication of “ballast ON” status. Figure 2.4. Ballast Connection and Power-up CP2000-X User Manual 020-100031-01 Rev . 1 (03-2009)
- Page 12 Remainder of projection head will be off Set Lamp Type and Cable Length STEP 6 NOTE: Service/installer required. WARNING Explosion hazard. Keep the projection head OFF until you have defined which lamp type is installed. CP2000-X User Manual 020-100031-01 Rev. 1 (03-2009)
-
Page 13: Installation Considerations
For other lens functions, refer to 2.8, Offset and Boresight Alignment and 3.8, Working With the Lens. Although the CP2000-X is carefully engineered to deliver an exceptional quality Installation high-brightness, high-resolution output, your final display results could still be Considerations compromised if the projector is improperly installed. -
Page 14: Rear Screen Installations
INSTALLATION & SETUP Figure 2.7. Audience Coverage with a Flat Screen NOTE: CP2000-X high-contrast lenses are designed primarily for use with flat screens, but the projector’s depth-of-field range allows the lens to be focused on mildly curved screens as well. While focus remains sharp in the corners, there may be significant pincushion distortion, primarily at the top of the screen. - Page 15 Alternatively, if the area of unused pixels is considered minimal, you may prefer to use the projector’s software control to slightly stretch the image either horizontally or CP2000-X User Manual 020-100031-01 Rev . 1 (03-2009)
-
Page 16: Projector Position And Mounting
In addition, both throw distance (the distance Position and between the projector and screen) and vertical position (the height of the projector in Mounting relation to the screen) must be determined for every new installation. Both depend on CP2000-X User Manual 020-100031-01 Rev. 1 (03-2009) - Page 17 2) Remember that throw distances are calculated from the screen to the front bezel of the projector rather than its foot centers. To figure throw distance from foot centers, add 8.74” (22.2 cm). CP2000-X User Manual 020-100031-01 Rev . 1 (03-2009)
- Page 18 In addition, please keep in mind that due to lens manufacturing tolerances for lens focal length, actual throw distance can vary ±5% or more between lenses described as having the same throw ratio. 2-10 CP2000-X User Manual 020-100031-01 Rev. 1 (03-2009)
-
Page 19: Installation And Setup
See Tilting and Special Orientations, below. CP2000-X User Manual 2-11 020-100031-01 Rev . 1 (03-2009) - Page 20 (such as 270 pixels) and expressed as a percentage (270 pixels=50%) of half of the image height. This concept of image movement is illustrated in the example below: Figure 2.13. Example of Alternative Offset Specification 2-12 CP2000-X User Manual 020-100031-01 Rev. 1 (03-2009)
- Page 21 Make sure your mounting structure is reasonably level then adjust one or more projector feet as necessary to fine-tune. WARNING Do not invert this projector. CP2000-X User Manual 2-13 020-100031-01 Rev . 1 (03-2009)
- Page 22 15 (see Figure 2.19. below). This limit ensures safe lamp operation and proper position of the liquid cooling Figure 2.18. Maximum Tilt reservoir in the projector. WARNING Tilt only as shown. 2-14 CP2000-X User Manual 020-100031-01 Rev. 1 (03-2009)
- Page 23 If desired, the lamp ballast can also be hoisted and flown from its integral rigging bars. Follow the instructions provided with the FredFrame kit. CP2000-X User Manual 2-15 020-100031-01 Rev . 1 (03-2009)
-
Page 24: Installing A Lens, Lamp And Cooling
(not required with a side-by-side projector row). Never stack more than 2 projection heads together, and do not attempt to move stacked projectors without proper transport equipment. Installing a Lens, Lamp & Cooling 2-16 CP2000-X User Manual 020-100031-01 Rev. 1 (03-2009) - Page 25 At the front of the INSTALL THE AUXILIARY LENS MOUNT ON THE PROJECTOR: projector, install the auxiliary lens mount hardware as described in the instructions provided with Christie’s Auxiliary Lens Mount Kit. Clamp the 1.25x INSTALL THE 1.25x ANAMORPHIC or 1.26x WIDE CONVERTER LENS: anamorphic or 1.26x Wide Converter lens mount in place, following the instructions...
- Page 26 * For this projector, the 2.0 kW is available in CDXL (maximum performance) only ** Available as CDXL (maximum performance) or original CXL (less expensive). Refer to full specifications in Section 8. 2-18 CP2000-X User Manual 020-100031-01 Rev. 1 (03-2009)
- Page 27 Cooling for 2.0 or 3.0 kW lamps For any CP2000-X with any lamp, install the Christie extractor fan and duct to pull warm exhaust air from the projector at a minimum rate of 450 CFM (for 2 or 3 kW lamps) or 600 CFM (for 4.5 kW or higher lamps).
- Page 28 Follow the installation guidelines provided below; securing all INSTALLATION: components in the order that best suits your site and installation requirements. WARNING Do not operate the projector without the Christie Extractor components installed. INSTALL DUCT ON PROJECTOR: Figure 2.24 below. Align either the 6- inch or 6-foot duct at the projector’s...
- Page 29 The Christie 6-ft. duct-with-fan weighs approximately 22 lb. The Christie 6-in. duct-with-fan weighs approximately 15 lb. Use third-party extractors only if the minimum of 600 CFM airflow can be maintained. Three safety cables are provided, and are all mandatory SECURE SAFETY CABLES: whenever the fan/duct assembly is suspended.
- Page 30 Measured linear ft/min x 0.34 = CFM NOTE: If the duct becomes significantly blocked – or if a fan fails – the projector should trigger an error message before becoming overheated or unsafe. Regardless, check airflow regularly. 2-22 CP2000-X User Manual 020-100031-01 Rev. 1 (03-2009)
-
Page 31: Installing And Connecting Sources
To display NON-CINEMA: alternative content from a DVI source or from Christie’s Cine-IPM 2K, remove the access panel located on the underside of the projector near the air filter. Connect two independent sources, or connect the Cine-IPM 2K to both ports for 10-bit processing. -
Page 32: Connecting For Communications
RS232 acceptable for using a PC/laptop to run Christie’s DCP Librarian or to download new software, but is too slow for server communications and does not support ASCII messaging to the TPC (which requires Ethernet). -
Page 33: Connecting The Ballast
Remove the ballast cover to access and read the Input Power Range Switch. Toggle the switch left for use with 200 VAC supplies, or toggle right for 400 VAC supplies. Attach the ground lug to Earth Ground. CP2000-X User Manual 2-25 020-100031-01 Rev . 1 (03-2009) -
Page 34: Initial Power-Up
Particularly in a projector rented for temporary installation, the setting may have to be changed from its last use. Adjustment range is 2-30m (6½-100 ft.). : Power up the CP2000-X system as described in 3.2 Power-up Procedure. POWER-UP Maximizing... -
Page 35: Basic Image Alignment
COARSE FOCUS: Do a quick preliminary focus and (if available) zoom adjustment with the primary lens only (see 3.8, Working with the Lens). Do not worry about consistency across the image at this point, just center focus. CP2000-X User Manual 2-27 020-100031-01 Rev . 1 (03-2009) -
Page 36: Offset And Boresight Alignment
Figure 2.34. Offsets projector lens at the center of the image. Refer back to Vertical & Horizontal Position. In short throw theatres with stadium seating, use a combination of offset and aiming. 2-28 CP2000-X User Manual 020-100031-01 Rev. 1 (03-2009) - Page 37 (and as close to the vertical center as possible), then move closer to the projector while watching the image on the paper. CP2000-X User Manual 2-29 020-100031-01 Rev . 1 (03-2009)
- Page 38 Figure 2.39. Adjust Top Focus focused in front of the screen or behind the screen. If the bottom is well focused, skip to Step 11. 2-30 CP2000-X User Manual 020-100031-01 Rev. 1 (03-2009)
-
Page 39: Fold Mirror And Convergence Adjustments
Qualified service technicians can correct as described on the color label provided inside the projection head. NOTE: Custom Convergence Kit required (available separately). CP2000-X User Manual 2-31 020-100031-01 Rev . 1 (03-2009) -
Page 40: Calibrating The Cp2000-X System
NOTE: Use full white test pattern. NOTE: DCP Librarian described here is licensed software intended for Christie 2.13 Calibrating the installers only. Many of its functions are now available at the TPC. CP2000-X System DCP Librarian is a comprehensive Windows-based software application used for... - Page 41 If there are changes to the environment in the future (for example, a new screen is installed), the CP2000-X should be re-calibrated. Also note that correction for proper color balance sometimes reduces overall light output. NOTE: Most gamut functions are also now available in the TPC Gamut menu (password required).
-
Page 43: Basic Operation
Section 2, Installation and Setup. Basics Components/Features Chief CP2000-X components are identified and explained below. Figure 3.1. Basic Projector and Related Components Air Filter Intake air flows through the filter before circulating in the front compartment to cool the main electronics. - Page 44 CP2000-X ballast, and 2) it protects against over-current conditions of 50A or more. The breaker must be ON in order to enable normal CP2000-X system power-up and operation. If faulty or major excessive AC is detected, the breaker will “trip” to OFF in order to prevent damage.
- Page 45 450 or 600 cf/m airflow required of all models. See Section 2, Installation & Setup. Internal Connections All necessary components and links—the TPC, both Ethernet ports, ETHERNET HUB: and the projector’s internal processing hardware—are factory-connected to an internal multi-port hub. CP2000-X User Manual 020-100031-01 Rev . 1 (03-2009)
- Page 46 3D devices can be defined in projector software. Lamp Any CP2000-X lamp—2, 3, 4.5, or 6 kW—can be used with the universal 7 kW ballast. The lamp door must remain closed and locked for all normal operation. Trained operators (only) can access the lamp via security key.
-
Page 47: Power-Up Procedure
Christie key fob, and cannot be duplicated. If you lose or damage a key, contact your dealer or Christie for a new security lock and key set—... - Page 48 100% of the maximum power acceptable for the installed lamp. If this re-try also fails, a new lamp is likely needed. NOTES: For complete power-up troubleshooting, see Section 5, Troubleshooting. CP2000-X User Manual 020-100031-01 Rev. 1 (03-2009)
-
Page 49: Power-Down Procedure
On/Off toggling of the lamp, shutter, user test patterns, and pre-configured displays. Basic status and/or diagnostic information about projector components. Versions of software components currently installed. Figure 3.2. Map of TPC User Access Rights CP2000-X User Manual 020-100031-01 Rev . 1 (03-2009) - Page 50 TPC and the rest of the projector. Check that TPC cabling is intact, and try again. Review Section 7, Troubleshooting and, if the problem persists, contact your network administrator. CP2000-X User Manual 020-100031-01 Rev. 1 (03-2009)
-
Page 51: Using The Touch Panel Controller
TPC Main Menu Figure 3.3. Main Menu Functions NOTE: Using the small Status and User buttons in the bottom corners does not affect the projected display image. CP2000-X User Manual 020-100031-01 Rev . 1 (03-2009) - Page 52 Such data does not trigger warnings or error conditions. The small colored indicators or “virtual ENVIRONMENT / DIAGNOSTIC INDICATORS: LEDs” for environmental and diagnostic information are green during normal 3-10 CP2000-X User Manual 020-100031-01 Rev. 1 (03-2009)
- Page 53 Diagnostics showing a “?” icon indicate an unknown status caused by a problem during initialization. Try re-booting the projector. In addition, a full-screen flashing red alarm window appears on the TPC for failed interlocks (mandatory), over-temperature (optional), and fan problems (optional). CP2000-X User Manual 3-11 020-100031-01 Rev . 1 (03-2009)
- Page 54 Figure 3.4. “System” Status Menu For All Users (SAMPLE VIEWS) NOTE: The Status:System menu shown here is available to all users. For information about the password-protected Status:Server, Status:Diag and Status:Interrogator menus, please see 3.10, Working With Servers and Diagnostics. 3-12 CP2000-X User Manual 020-100031-01 Rev. 1 (03-2009)
- Page 55 FPGA Code Valid FPGA Initialize FPGA No-Load Jumper FPGA Done FPGA Register Read/Write UART 0 UART 1 Ethernet Synchronous Serial Port File System GPI Macro A/D Macro Formatter Board (a.k.a. Formatter Interface Board) CP2000-X User Manual 3-13 020-100031-01 Rev . 1 (03-2009)
- Page 56 If it is an interlock failure, power will no longer reach the lamp (DC output is stopped), and the lamp button on the TPC Main menu will be disabled. See Table 3.2. 3-14 CP2000-X User Manual 020-100031-01 Rev. 1 (03-2009)
- Page 57 2) When you have restored interlock integrity, the lamp button on the TPC Main menu is automatically re-enabled. CP2000-X User Manual 3-15 020-100031-01 Rev . 1 (03-2009)
- Page 58 Understanding Versions in Your Projector Consult the About menu to determine the current level of a hardware or software component installed in your projector. Upgrading any of these components requires a qualified Christie service technician. 3-16 CP2000-X User Manual 020-100031-01 Rev. 1 (03-2009)
- Page 59 SAVING YOUR SETTINGS: menu. Using the Custom 1 and 2 Menus As shown in Figure 3.7and Figure 3.8, clearing or checking the “Use PCF” checkbox determines which Custom settings are available for use. CP2000-X User Manual 3-17 020-100031-01 Rev . 1 (03-2009)
- Page 60 “alternative” displays require that one or more display parameters be individually adjusted—clear the “Use PCF” checkbox so that all Custom parameters are enabled. Figure 3.8. Custom:Page-1 Menu—Creating Custom PCFs and Other Settings 3-18 CP2000-X User Manual 020-100031-01 Rev. 1 (03-2009)
- Page 61 See Table 5.1 for a more complete list. IMPORTANT: Attempting to use cinema processing when the incoming DVI vertical frequency is too high can cause a TPC start-up error. Turn cinema option OFF, then cycle power off/on. CP2000-X User Manual 3-19 020-100031-01 Rev . 1 (03-2009)
- Page 62 * These components are part of any pre-defined PCF (Projector Configuration File) that controls image processing for a given source. When the “Use PCF” checkbox is checked (), these components disappear from the Custom menu and are protected from further change. 3-20 CP2000-X User Manual 020-100031-01 Rev. 1 (03-2009)
- Page 63 Helps synchronize the output to the viewing. Output Delay (Time) Offset (in μ) 3D stereo sync output in relation to dark time interval. Positive offset = delay, negative offset = start early. See “NOTES” below. CP2000-X User Manual 3-21 020-100031-01 Rev . 1 (03-2009)
- Page 64 1 complete image. For all 3D use, the bottom value is 2, indicating that two frames—left and right—are combined into every complete display frame. Set to the highest rate possible without image cropping. 3-22 CP2000-X User Manual 020-100031-01 Rev. 1 (03-2009)
- Page 65 Lamp History, Test Patterns and User—that enable installers, administrators and advanced users to define numerous system operating parameters, load and/or display test patterns, work with lamp settings, and set up users and their TPC access rights. CP2000-X User Manual 3-23 020-100031-01 Rev . 1 (03-2009)
- Page 66 LiteLOC is enabled, a heavy line shows the chosen LiteLOC setting. In addition, the New Lamp button activates a window for entering the serial number of a newly installed lamp. This button is also available with an 3-24 CP2000-X User Manual 020-100031-01 Rev. 1 (03-2009)
- Page 67 Indicates current light output (shown as solid vertical bar) and LiteLOC level set (Meter Reading) (single horizontal line). Consider the value at the top of the meter as arbitrary— i.e., not representing actual lumens or fL. CP2000-X User Manual 3-25 020-100031-01 Rev . 1 (03-2009)
- Page 68 The bottom window contains an alphabetical list of all remaining test patterns. Together, both windows form the master pull-down list of test patterns available in the Advanced Preferences menu. Figure 3.15. Advanced: Test Pattern Menu Functions 3-26 CP2000-X User Manual 020-100031-01 Rev. 1 (03-2009)
- Page 69 Enter a new 1-8 character password for the current login or when adding a new user. Non-editable at other times. Confirm PW Re-enter the 1-8 character password entered in Password box. Editable when changing the current password or when adding a user. CP2000-X User Manual 3-27 020-100031-01 Rev . 1 (03-2009)
- Page 70 3. Re-enter the new password in the Confirm PW box 4. Press Save Who is currently logged on? 1. Enter the User Menu—the User Name displayed is currently logged on. TPC Admin Submenus 3-28 CP2000-X User Manual 020-100031-01 Rev. 1 (03-2009)
- Page 71 Custom menu for implementation in the projector whenever a matching input signal is encountered. Note that for any source, the projector relies on Source file settings as well as Screen file settings. See also Admin: Screen menu. CP2000-X User Manual 3-29 020-100031-01 Rev . 1 (03-2009)
- Page 72 You may have to experiment with the values to accurately zoom in on a precise area, and you must also define offset (see below) if you want to zoom in on an area other than the center. 3-30 CP2000-X User Manual 020-100031-01 Rev. 1 (03-2009)
- Page 73 PCF, and is independent of Source settings. Consider screen files as convenient compensations for physical limitations in the environment. You will typically need one or two screen files per site. CP2000-X User Manual 3-31 020-100031-01 Rev . 1 (03-2009)
- Page 74 Thus upper right and lower left coordinates are not available to define the area. Incoming data will then automatically resize to fill the reduced rectangular area defined by the new coordinates, and any display pixels outside of this area remain off (black). 3-32 CP2000-X User Manual 020-100031-01 Rev. 1 (03-2009)
- Page 75 If desired, any “black bars” (unused pixels) could then be cropped off using the cropping control. Although disabling the letterbox control also fills the defined presentation area, any extra data beyond this area—whether top-and-bottom or left-and- right—will be discarded. CP2000-X User Manual 3-33 020-100031-01 Rev . 1 (03-2009)
- Page 76 MCGDs, naming them as desired. To use an MCGD file as the reference file for target color processing (such as with a certain source and/or lens), select it in the Custom menu. Figure 3.23. Admin:Gamut Menu Functions 3-34 CP2000-X User Manual 020-100031-01 Rev. 1 (03-2009)
- Page 77 (channel) can then use any desired MCGD file as the basis for the color corrections needed for a target color. MCGD files are chosen in the Custom menu. NOTE: Once created, user-created MCGD files can be deleted only by using Christie’s licensed DCP Librarian software. CP2000-X User Manual 3-35...
- Page 78 Do not enable the tolerance box if exact color performance is more crucial than overall image brightness, such as in telecine applications. 3-36 CP2000-X User Manual 020-100031-01 Rev. 1 (03-2009)
- Page 79 Implement your current Ethernet Configuration settings. * * Changes in the IP Config menu automatically change the projector IP address appearing in the Admin: General menu, which identifies which projector the TPC is currently set to control. CP2000-X User Manual 3-37 020-100031-01 Rev . 1 (03-2009)
- Page 80 TPC to define these new settings in the projection head: NOTES: 1) Password-protected; requires a Christie installer login. 2) Projector can be on the network during these changes, if desired.
- Page 81 TPC lamp readings are interpolated, and they can set whether Status menu temperatures appear in Celsius (default) or Fahrenheit. A typical Admin: General submenu appears below. CP2000-X User Manual 3-39 020-100031-01 Rev . 1 (03-2009)
- Page 82 TPC responses. Note that when the memory card becomes full, logging continues by simply writing over the oldest entries. Error Message Enabled When enabled, an error message will be sent via Ethernet whenever an alarm condition is encountered. 3-40 CP2000-X User Manual 020-100031-01 Rev. 1 (03-2009)
- Page 83 (Starting a Presentation) software originally shipped with the projector, the installer typically connects a laptop and uses Christie’s DCP Librarian setup software to download all necessary configuration files to the projector for use at the TPC. To change to a new source—i.e., a new presentation or display—do the following (See Figure 3.27):...
- Page 84 Try a different display file. If the image is still incorrect, the display setup may first have to be re-configured with new settings. Contact the trained operator responsible for updating display setups. 3-42 CP2000-X User Manual 020-100031-01 Rev. 1 (03-2009)
-
Page 85: Remote Control Of The Touch Panel Controller
Figure 3.28. Where applicable, a message can expand to include additional parameters of related data. Figure 3.28. The 3 Message Formats (SHADED MESSAGE IS FROM PROJ.) CP2000-X User Manual 3-43 020-100031-01 Rev . 1 (03-2009) - Page 86 New line - if the text can be displayed on more than one line, this will cause the next character to be displayed at the start of the line that follows the current one. 0x1B control code (ESC) 3-44 CP2000-X User Manual 020-100031-01 Rev. 1 (03-2009)
- Page 87 IMPORTANT: To prevent shutdown of the socket, program the controller to send a PNG? every 5-10 minutes. You must close the application and shut down the socket properly SHUTDOWN: before shutting down the controller. CP2000-X User Manual 3-45 020-100031-01 Rev . 1 (03-2009)
-
Page 88: Working With The Lamp
(the light level is read from an internal light sensor). 3-46 CP2000-X User Manual 020-100031-01 Rev. 1 (03-2009) - Page 89 Brightness will change accordingly, new values will appear for amps, volts and watts, and the blue light output bar graph will move above or below the LiteLOC line, depending on the new setting. CP2000-X User Manual 3-47 020-100031-01 Rev . 1 (03-2009)
- Page 90 NOTES: 1) Before adjusting, a 10-minute warm-up is recommended. 2) You can adjust lamp position either before or after adjustment of Lamp Power or LiteLOC 3-48 CP2000-X User Manual 020-100031-01 Rev. 1 (03-2009)
- Page 91 4. Repeat Steps 1-3 as necessary. 5. Repeat Steps 1-4, but reading at the screen instead of at the lens. 6. Reset Lamp Power or LiteLOC if desired. Stand-by Mode CP2000-X User Manual 3-49 020-100031-01 Rev . 1 (03-2009)
- Page 92 Over time, as the theatre screen ages and dust and dirt collects on the port window, the theatre may no longer be achieving the expected footlamberts as reported by the TPC. It is a good idea to periodically recalibrate footlamberts (refer back to Figure 3.26). 3-50 CP2000-X User Manual 020-100031-01 Rev. 1 (03-2009)
-
Page 93: Working With The Lens
TILT should be changed to help compensate for significant differences in screen and lens height. Refer back to Section 2. NOTE: Vertical offset ranges are shown in Figure 2.34. Focus CP2000-X User Manual 3-51 020-100031-01 Rev . 1 (03-2009) -
Page 94: Working With 3D
“single” perceived image appears with much the same depth and perspective we sense in the real world. The CP2000-X requires a 3D-capable SMPTE source and a few special What Do I Need for 3D? hardware/software setups described here. -
Page 95: System Requirements
BASIC OPERATION System Requirements CP2000-X projector. Includes all standard 3D components EFIB (Enhanced Formatter Interface Board): TPC software v2.3c or higher Main projector software v8.0 or higher Two HD-SDI cinema signals (left and right) connected to the projector’s SMPTE... - Page 96 Other expected hardware configurations with a single 3D source input are shown in Other Hardware Setups Figure3.38. NOTE: For future reference. Single 3D input is not currently supported. Figure 3.38. Single-Input 3D Systems (currently not supported) 3-54 CP2000-X User Manual 020-100031-01 Rev. 1 (03-2009)
- Page 97 3D system that Figure 3.40. Setup for 3D incoming 3D stereo sync information is included with the two L/R image data inputs rather than routed separately to the GPIO port. CP2000-X User Manual 3-55 020-100031-01 Rev . 1 (03-2009)
- Page 98 Ghosting or cross talk indicates that the eyes are detecting portions of the opposing frame due to an “out-of-sync” system. Adjust Dark Time and/or Output Delay so that the projector’s display output is synchronized with the gating (switching) of your glasses. 3-56 CP2000-X User Manual 020-100031-01 Rev. 1 (03-2009)
-
Page 99: Working With Servers And Diagnostics
CP2000-X User Manual 3-57 020-100031-01 Rev . 1 (03-2009) - Page 100 The Status: Diag menu provides status information about projector components and TPC Diag Menu the current cinema source, and enables log files for each device to be saved to the TPC’s storage card for diagnostics. Figure 3.43. Status:Diag Menu 3-58 CP2000-X User Manual 020-100031-01 Rev. 1 (03-2009)
- Page 101 3) Interrogator is also accessible through a separate login and password (different from the service login). Contact Christie tech support for assistance and password. Figure 3.44. Status: Interrogator Menu CP2000-X User Manual 3-59 020-100031-01 Rev .
-
Page 103: Cinema Operation
CP2000-X projection head—see right. The identical cinema ports use the SMPTE 292M bit-serial interface standard, and will auto-detect cinema Figure 4.1. Cinema Source Connections source formats shown in Table 4.1. CP2000-X User Manual 020-100031-01 Rev . 1 (03-2009) -
Page 104: Image Formats
Figure 4.2. Standard Cinema Formats Achieving either of these displays from a wide variety of incoming source material depends on proper settings in the projector as well as certain theatre conditions. CP2000-X User Manual 020-100031-01 Rev. 1 (03-2009) - Page 105 The screen shown in Figure 4.4 at right also has a bottom mask. Add masks for “scope” Figure 4.4. Top Masking for Scope Open masks for “flat” CP2000-X User Manual 020-100031-01 Rev . 1 (03-2009)
- Page 106 Refer to Figure 4-6 for a summary of the basic factors affecting cinema displays in a Figure 4.5. Side Masking for Flat variety of theatres. Figure 4.6. Basic Ways to Achieve Flat & Scope Displays CP2000-X User Manual 020-100031-01 Rev. 1 (03-2009)
-
Page 107: Selecting The Cinema Source
(Figure 4-7). To change to a new feature, do the following: Make sure the CP2000-X and TPC are both powered up and operating normally. On the Touch Panel Controller, select the Main menu tab. -
Page 108: Adjusting The Cinema Display
If you feel the cinema display is incorrect or faulty, contact the trained operator in your theatre who can correct or further customize the display file settings. CP2000-X User Manual 020-100031-01 Rev. 1 (03-2009) -
Page 109: Non-Cinema Operation
This section explains how to display “alternative content” originating from a standard definition or high definition non-cinema source such as a PC or other graphics devices, or from Christie’s Cine-IPM 2K. Such a source routes to a DVI (Digital Visual Interface) port in the CP2000-X projection head, and can bypass cinema processing when necessary. - Page 110 Figure 5.2. Proposed Dual-link and Twin-link DVI Configurations NOTES: 1) Neither the Christie dual-link adapter nor the proposed 3 -party twin-link source (and cables) shown here are currently available. 2) Using both DVI ports with the Christie CP2000-X User Manual 020-100031-01 Rev. 1 (03-2009)
-
Page 111: Selecting The Source
: With a non-cinema source connected to the TO SELECT A NON-CINEMA SOURCE CP2000-X, use the Main menu on the Touch Panel Controller to select the channel C ontroller button representing the desired non-cinema source. Once selected, the button will darken and the projected display will change according to the corresponding file settings. -
Page 113: Maintenance
UV radiation. WARNING FIRE HAZARD. Keep hands, clothes, and all combustible material at least 1m away from the concentrated light beam of the lamp. CP2000-X User Manual 020-100031-01 Rev . 1 (03-2009) - Page 114 Wear Protective Clothing Never open the lamp door unless you are wearing authorized protective clothing such as that included in a Christie Protective Clothing Safety Kit #598900-095. Recommended protective clothing includes—but may not be limited to—protective gloves, latex lab gloves, double-layer 0.040” acetate face shield, and a quilted ballistic nylon jacket or a welder’s jacket.
-
Page 115: Maintaining Proper Cooling
(LAD) located nearby. The LAD should be nearly white or light grey in color. Liquid Cooler The liquid cooler system circulates liquid to and from the DMDs in the CP2000-X projection head, keeping their operating temperature at an acceptable level. -
Page 116: Maintenance & Cleaning
See below. Inspect the mirror surface (reflector) for cleanliness only during a LAMP REFLECTOR: lamp replacement, when the lamp is out. If necessary, clean as described below— CP2000-X User Manual 020-100031-01 Rev. 1 (03-2009) - Page 117 Roll a lens tissue around a swab and soak in lens cleaning solution. Tissue should be damp but not dripping. Gently wipe the surface using a figure-8 motion. Repeat until blemish is removed. CP2000-X User Manual 020-100031-01 Rev . 1 (03-2009)
-
Page 118: Cleaning The Reflector
(LAD) just beyond the filter opening. The LAD should be nearly white in color—if very dark (rare), it may have to be replaced by a qualified service technician. Contact Christie or your dealer. CP2000-X User Manual 020-100031-01 Rev. 1 (03-2009) -
Page 119: Replacing The Lamp & Filter
Check its condition monthly in all projectors. Lamp Replacement NOTE: For this procedure you will need a compatible Christie Xenon CDXL or CXL Procedure lamp as shown in Section 8, Specifications—never install a lamp intended for a different model or projector. - Page 120 (Figure 6.1, left). Hand-tighten only. IMPORTANT: Handle by the cathode/anode end shafts only, never the glass. Do not over-tighten. Do not stress the glass. CP2000-X User Manual 020-100031-01 Rev. 1 (03-2009)
- Page 121 IMPORTANT: Proper electrical contact prevents resistance in the lamp connectors. If you accidentally touch the quartz body of the lamp with your bare hands, clean it as described in 6.3, Maintenance and Cleaning. CP2000-X User Manual 020-100031-01 Rev . 1 (03-2009)
- Page 122 (2.0, 3.0, 4.5 or 6.0 kW) in the Touch Panel Controller’s Install: Lamp menu before igniting the new lamp. This setting establishes the proper range of power available for the installed lamp, ensuring that the new lamp is neither underpowered nor over- driven. 6-10 CP2000-X User Manual 020-100031-01 Rev. 1 (03-2009)
- Page 123 Slide the old filter up and discard. Insert the new air filter, following the labeling for proper inside/outside orientation. Slide all the way down into its slot. WARNING Use only Christie filters. Never operate the projector without the filter installed. STEPS 5-6 ...
-
Page 124: Replacing A Lens
Release the lens-locking lever (UP position). Pull out lens and replace with a different high-contrast primary lens as described in 2.1, Assembly and Connection of Components. Secure with lens locking lever (down position). 6-12 CP2000-X User Manual 020-100031-01 Rev. 1 (03-2009) -
Page 125: Troubleshooting
If the lamp does not ignite after a second try, replace the lamp. If there is no “buzzing” indicating that the igniter is attempting ignition, there may be a problem with the igniter (Christie service required). If there is a brief “buzz” attempting ignition but a lamp does not ignite, the lamp likely needs to be replaced. -
Page 126: Tpc
IPSM and/or Compact Flash memory card. Save backups to a PC/laptop only, not the TPC (contact your administrator). If the locations of button presses on the screen seem to be misinterpreted, the TPC screen may need recalibrating. CP2000-X User Manual 020-100031-01 Rev. 1 (03-2009) -
Page 127: Ethernet
Make sure the IP octets for the projector and the server (Eth1 port) match. CineCanvas does not have the correct projector IP address. Check the IP address of the projector and server and change if necessary. They should match. CP2000-X User Manual 020-100031-01 Rev . 1 (03-2009) -
Page 128: Non-Cinema Displays
Sizing and positioning options may be adjusted poorly for the incoming source signal. Use an auxiliary lens for typical HDTV and anamorphic DVD sources that have been re-sized and vertically stretched via 3 -party software. Symptom CP2000-X User Manual 020-100031-01 Rev. 1 (03-2009) - Page 129 Touch Panel Controller’s Advanced menu. NOTE: password-protected. Or, if you do not have access to the Touch Panel Controller’s Advanced menu and cannot adjust the processing path, use your 3rd-party input source to crop off the streaks. CP2000-X User Manual 020-100031-01 Rev . 1 (03-2009)
-
Page 131: Specifications
* 70% = image moved by distance of 410 pixels left or right (40% of image half-width). * Simultaneous vertical/horizontal offsetting may limit the range of each. See illustrations in 2.3, Projector Position and Mounting. CP2000-X User Manual 020-100031-01 Rev . 1 (03-2009) -
Page 132: Cinema Inputs
Max. operating voltage 46 VDC Max. start-up voltage 155 VDC Max. current consumption 180 A Max. power consumption 6600 W Connector type Female CAM Lock receptacle (+red) Male CAM Lock receptacle (–black) * With extractor CP2000-X User Manual 020-100031-01 Rev. 1 (03-2009) -
Page 133: Audible Noise
CISPR 22: 2003 +A1:2004 / EN55022: 1998 +A2:2003, Class A — Information Technology Equipment EMC Immunity CISPR 24:1997 / EN55024:1998 +A1:2001 +A2:2003 EMC Requirements – Information Technology Equipment Operating Environment CP2000-X User Manual 020-100031-01 Rev . 1 (03-2009) - Page 134 25.6” x 49.0” x 20” (65 cm x 124.5 cm x 50.8 cm) Size with Anamorph (W x L x H ) 25.6” x 64.6” x 20” (65 cm x 164.1 cm x 50.8 cm) (incl. auxiliary lens mount & lens) CP2000-X User Manual 020-100031-01 Rev. 1 (03-2009)
- Page 135 SPECIFICATIONS CP2000-X User Manual 020-100031-01 Rev . 1 (03-2009)
- Page 136 Touch Panel Controller with mounting hardware and 3-ft. cable Security keys for lamp and igniter service access, plus assorted Allen keys CP2000-X User’s Manual Lamp Ballast (3-phase 7 kW for all lamps in all countries) Choice of lamp kit (incl. protective gear) ...
-
Page 137: A Glossary
The ratio of the width of an image to its height, such as the 4:3 aspect ratio common in video output. Also expressed as decimal number, such as 1.77, 1.85 or 2.39. The larger the decimal, the wider and “less square” the image. CP2000-X User Manual 020-100031-01 Rev. 1 (03-3009) - Page 138 The projector (via its TPC) offers up to 32 channel choices over several Main menu pages. Checkbox A menu item that indicates whether an option is currently in effect (checked) or not (unchecked). CP2000-X User Manual 020-100031-01 Rev. 1 (03-2009)
- Page 139 The alignment of the red, green, and blue light elements of a projected image so that they appear as a single element. In this projector, convergence can be adjusted by Christie service personnel only. Curved Screen A projection screen which is slightly concave for improved screen gain. Curved screens usually have screen gains which are greater than 1 but viewing angles much °...
- Page 140 GVG Grass Valley Group (formerly part of Tektronix). More specifically, the .gvg file format used for compressed video, audio, and timecode stream transfer in the Profile CP2000-X User Manual 020-100031-01 Rev. 1 (03-2009)
- Page 141 It is caused when the lens surface is not parallel to the screen. LampLOC A Christie software feature where samples of output light from a projector guide the precise position of the lamp along 3 axes—vertical, horizontal and distance to lens—...
- Page 142 The Line of Best Viewing is along the line of reflection. LiteLOC A Christie software feature where samples of output light from a projector trigger automatic adjustments in the lamp ballast power in order to maintain a constant light output.
- Page 143 Even though post production officially begins on the last day of principal photography, post production facilities such as editing are utilized from very early in the production phase in order to save time. CP2000-X User Manual 020-100031-01 Rev. 1 (03-3009)
- Page 144 Also known as Y/C. Scan Frequency The horizontal or vertical frequency at which images are generated. Also known as scan rate or refresh rate. Scan Line One horizontal line on the display. SECAM CP2000-X User Manual 020-100031-01 Rev. 1 (03-2009)
- Page 145 Switcher A signal selector—specifically, the Marquee Signal Switcher formerly manufactured by Christie—can be connected for adding more sources to a projector. Sync The part of the video signal that stabilizes the picture. Sync can occur in three forms: 1.
- Page 146 A high-end analog component video signal. Sometimes called YUV, Component, or Y, R-Y, B-Y, the YPbPr signal by-passes video decoding. YUV See YPbPr. Zoom The adjustment of image size by means of a zoom lens. A-10 CP2000-X User Manual 020-100031-01 Rev. 1 (03-2009)
-
Page 147: B Ascii Messages
Selects the source type and packing mode for the current input. If cinema source A or B: 0 = 4:2:2 unpacked, 10-bit color 1 = 4:2:2 packed, 12-bit color 2 = 4:4:4 unpacked, 10-bit color CP2000-X User Manual 020-100031-01 Rev. 1 (03-3009) - Page 148 “0” for logging time. (LPC?) What lamp is installed? (LPC!”123456”) The current lamp is serial# 123456 Lamp Hours of Use (LPH) (LPH 0528) The #hours logged on the current lamp (0-9999). Lamp Intensity (LPI) CP2000-X User Manual 020-100031-01 Rev. 1 (03-2009)
- Page 149 (PWR 1) Turn the projector (lamp) on (PWR! 000) The projector (lamp) is off (PWR! 001) The projector (lamp) is on Processing Mode (PRM) (PRM 0) Current processing of incoming source data, where 0= CP2000-X User Manual 020-100031-01 Rev. 1 (03-3009)
- Page 150 Open or close the electronic “quick douser”, where 0 = (SHU 1) open and 1 = closed System Status (SST) Method of reading projector information. See Messages With Multiple Parameters later in this Appendix. CP2000-X User Manual 020-100031-01 Rev. 1 (03-2009)
- Page 151 NOTE: The type of error and text parameters are enclosed together in quotation marks, separated by a colon and space. In the table below, the text explanation appears as -----. CP2000-X User Manual 020-100031-01 Rev. 1 (03-3009)
- Page 152 0021 Lamp, Failed to Ignite 0022 Lamp, Ignition Failed on 2 Strike 0023 Lamp Off (detected by no light or current) 0024 Light Sensor Reading Failure 0030 SSM, Communication Failure (System Supervisor Module) CP2000-X User Manual 020-100031-01 Rev. 1 (03-2009)
- Page 153 (65535 01002 ERR 002 “System Warning: 8010 00051 Prism, Temperature Warning”) (65535 01002 ERR 002 “System Warning: 8020 00001 Lamp, Life Expired”) (65535 01002 ERR 002 “System Warning: 8032 00001 SSM Read Failed”) CP2000-X User Manual 020-100031-01 Rev. 1 (03-3009)
- Page 154 (SST?0) projector information only. For a specific single-status inquiry, include both P1 and P2 in the request—for example, asks what version of SSM main software is (SST?4 3) installed. CP2000-X User Manual 020-100031-01 Rev. 1 (03-2009)
- Page 155 22 = Interface (ARM Main) 23 = Interface (FPGA) 24 = Interface (PIC) 25 = Processor (DSP Boot) 26 = Processor (DSP Main) 27 = Processor (DSP Diag.) 28 = Processor (DSP FPGA) CP2000-X User Manual 020-100031-01 Rev. 1 (03-3009)
- Page 156 2 = Low voltage power supply 3 = System Supervisor Module (SSM) 10 = Space remaining on TPC’s IPSM 11 = Space remaining on TPC Storage Card 12 = Space remaining in TPC memory B-10 CP2000-X User Manual 020-100031-01 Rev. 1 (03-2009)
-
Page 157: System Integration
TPC recognizes Ethernet only), and is too slow for servers. Cine-IPM 2K Connect the Cine-IPM 2K’s custom RS-232 cable from the rear of the Cine-IPM 2K to the CP2000-X serial port labeled “ ” located on the underside of the RS-232B projection head—you must remove a small cover for... - Page 158 In the TPC’s Custom 3D Control menu, set Output GPO according to the pins wired in the GPIO cable (see Figure C.1). For instance, if you have wired pins #10 (+) and #29 (–) to your 3D device, set Output GPO to GPO #2. CP2000-X User Manual 020-100031-01 Rev. 1 (03-2009)
-
Page 159: D Repacking The Projector
A p p e n d i x D Repacking the Projector If you need to relocate or ship the CP2000-X, repack the projection head with the original packing materials used for shipping. Figure D-1. Packing the Projection Head 1. Set the plastic base on the pallet. Set foot braces aside. - Page 161 Using with Proj., 2-24 ASCII Messaging Contrast Ratio, 1-2, 8-1 and Text Parameters, 3-44 Convergence Adjustment, 2-31 Components and Structure, 3-44 Cooling Formats, 3-43 Liquid Cooling System, 2-23 Setup & Shutdown, 3-45 CP2000-X User Manual INDEX-1 020-100031-01 Rev. 1 (03-3009)
- Page 162 Recalibrating, 3-50 Cooling, 6-3 Formats, Flat & Scope, 2-8, 4-2, 4-5 Cradle Position (Anode), 2-19 Frame Rate N Expiry Setting, 3-24 M, 3-21, 3-22, 3-55 Failure to Ignite, 3-46, 7-1 FredFrame, 2-15 INDEX-2 CP2000-X User Manual 020-100031-01 Rev. 1 (03-3009)
- Page 163 Masking, 2-33, 4-3 Restore, 3-30, 3-32, 3-35, 3-37 MCGD "OnSite" File, 3-34 Measured (MCGD) in Gamut Menu, 3-35 Rigging. See Hoisting Menus. See individual menu names RS-232 How to Connect, 2-24 Metadata, 3-57 CP2000-X User Manual INDEX-3 020-100031-01 Rev. 1 (03-3009)
- Page 164 White Tolerance in Gamut Menu, 3-35 Advanced Menu, 3-23 Who Should Use This Manual, 1-4 Advanced/Lamp History Menu, 3-26 Advanced/Lamp Menu, 3-24 Advanced/Preferences Menu, 3-23 Advanced/Test Pattern Menu, 3-26 Zoom Adjustment (Primary Lens), 3-51 Advanced/User Menu, 3-27 INDEX-4 CP2000-X User Manual 020-100031-01 Rev. 1 (03-3009)
Need help?
Do you have a question about the CP2000-X and is the answer not in the manual?
Questions and answers