Table of Contents
Advertisement
Quick Links
I/O Configurator (NFC version)
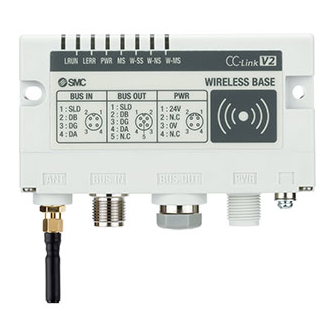
EX600-WEN# (Wireless Base)
EX600-WPN# (Wireless Base)
EX600-WSV# (Wireless Remote)
EXW1-BMJA# (Compact Wireless Base)
EXW1-BECAC (Compact Wireless Base)
EXW1-BENAC1 (Compact Wireless Base)
EXW1-BPNAC1 (Compact Wireless Base)
EXW1-RDXNE4## (Compact Wireless Remote)
EXW1-RDYNE4## (Compact Wireless Remote)
EXW1-RDM#E3## (Compact Wireless Remote)
EXW1-RL#PA#C (Compact Wireless Remote)
PRODUCT NAME
Model / Series / Product Number
No.EX##-OMV0017-G
Advertisement
Table of Contents

Related Manuals for SMC Networks EXW1-BENAC1


Summary of Contents for SMC Networks EXW1-BENAC1
- Page 1 EX600-WEN# (Wireless Base) EX600-WPN# (Wireless Base) EX600-WSV# (Wireless Remote) EXW1-BMJA# (Compact Wireless Base) EXW1-BECAC (Compact Wireless Base) EXW1-BENAC1 (Compact Wireless Base) EXW1-BPNAC1 (Compact Wireless Base) EXW1-RDXNE4## (Compact Wireless Remote) EXW1-RDYNE4## (Compact Wireless Remote) EXW1-RDM#E3## (Compact Wireless Remote) EXW1-RL#PA#C (Compact Wireless Remote)
-
Page 2: Table Of Contents
Contents Introduction ......................3 License Agreement ........................3 About the I/O Configurator (NFC version) ................... 4 SMC wireless system (system configuration) ................6 System compatibility ........................7 About this manual ........................12 Basic operations with the I/O Configurator (NFC version) ........13 Download the I/O Configurator (NFC version) ................ - Page 3 Wireless system parameter list................114 Troubleshooting ....................140 Specifications / technical information / supplementary information ..... 142 Terminology ..........................142 No.EX##-OMV0017-G...
-
Page 4: Introduction
1. Introduction License Agreement SMC Corporation (hereinafter referred to as "SMC") hereby grants the user (regardless of whether the user is a corporation or an individual) a license to use this software "I/O Configurator" (hereinafter referred to as "Software") according to this License agreement (hereinafter referred to as "Agreement") under the articles listed below. -
Page 5: About The I/O Configurator (Nfc Version)
About the I/O Configurator (NFC version) With the I/O Configurator (NFC version), the status of a wireless system can be checked and all parameters of a wireless unit can be set from a PC using an NFC reader / writer. The status can be checked without logging in (Monitor mode). - Page 6 The following products support the I/O Configurator (NFC version). EX600-WEN# Wireless Base (manifold type) EX600-WPN# Wireless Base (manifold type) EXW1-BMJA# Compact Wireless Base EXW1-BECAC Compact Wireless Base EXW1-BENAC1 Compact Wireless Base EXW1-BPNAC1 Compact Wireless Base EX600-WSV# Wireless Remote (manifold type) EXW1-RDXNE4## Compact Wireless Remote EXW1-RDYNE4## Compact Wireless Remote...
-
Page 7: Smc Wireless System (System Configuration)
SMC wireless system (system configuration) PLC compatible with EX600-W and EXW1 series communication protocols. <Base> EX600-W Series EXW1 series For settings and other information, refer to the operation manual for EX600-WEN/WPN*. <Remote> EXW1 series EX600-W Series For settings and other information, refer to the operation manuals for EX600-WSV* and the connected digital and analog units. -
Page 8: System Compatibility
System compatibility Mixed use with EX600-W Series Although it is possible to use with EX600-W series, the operating conditions must comply with the specifications of the existing wireless system. Note that the following functions may be restricted: •Communication distance The maximum communication distance will vary depending upon the system configuration. Please see the details in the table on the next page. - Page 9 *5: This configuration consists solely of EX600-W series units; refer to the operation manual of the product in use for the further details. 〇 System configuration example 1 Wireless Base : EXW1-BENAC1 Wireless Remote : EXW1 series, EXA1 series (EXW1-*-SA-*L only) <Wireless Base> <Wireless Remote>...
- Page 10 〇System configuration 2 Wireless Base : EXW1-BENAC1 Wireless Remote: EXW1 series, EX600-W series <Wireless Base> <Wireless Remote> EX600-W series EXW1 series No.EX##-OMV0017-G...
- Page 11 〇System configuration 3 Wireless Base : EXW1-BENAC1 Wireless Remote: EX600-W Series <Wireless Base> <Wireless Remote> EX600-W Series -10- No.EX##-OMV0017-G...
- Page 12 〇System configuration 4 Wireless Base: EX600-W Series Wireless Remote: EXW1 Series <Wireless Base> EX600-W series <Wireless Remote> EXW1-RL* EXW1-RD* 〇System configuration 5 Wireless Base: EX600-W Series Wireless Remote: EXW1 Series, EX600-W Series <Wireless Base> EX600-W Series <Wireless Remote> EX600-W Series EXW1 Series -11- No.EX##-OMV0017-G...
-
Page 13: About This Manual
〇 System configuration 6 Wireless Base: EX600-W series Wireless Remote: EX600-W series For system configurations of EX600-W series, refer to the operation manual of the product in use for the further details. About this manual This manual can be used with the I/O Configurator (NFC version) ver. 2.12.0. -12- No.EX##-OMV0017-G... -
Page 14: Basic Operations With The I/O Configurator (Nfc Version)
2. Basic operations with the I/O Configurator (NFC version) Download the I/O Configurator (NFC version) (1) On the SMC website (https://www.smcworld.com), select [Documents/Download] and click [Operation Manuals]. (2) Select the Fieldbus System Serial Transmission System. -13- No.EX##-OMV0017-G... - Page 15 (3) Select the protocol supported by the product (Example: EtherNet/IP compatible). (4) Scroll down the page of the Fieldbus Serial Transmission System and click the Configuration File for the I/O Configurator (NFC version). The download will begin. Older versions of the I/O Configurator (NFC version) can be downloaded as well as the latest version. Download the version which is suitable for your device.
-
Page 16: Start The I/O Configurator (Nfc Version)
Start the I/O Configurator (NFC version) (1) Unzip the downloaded zip file. (2) Double-click "IOConfigurator.exe". The I/O Configurator (NFC version) will start up. To move IOConfigurator.exe to the desktop or another location, move the folder of the I/O Configurator, or create a shortcut of IOConfigurator.exe and invoke and use the program through it. - Page 17 - Basic characteristics Item Explanation The I/O Configurator (NFC version) revision details will appear by clicking the [?] button. Version information button The Refresh button updates the Wireless Base / Remote module information displayed on the application window. The information on the window is not updated automatically. Refresh button Always click the Refresh button when moving to a tab or after parameter settings.
-
Page 18: Monitor Mode And Administrator Mode
Monitor mode and Administrator mode The user can select from Monitor mode and Administrator mode using the I/O Configurator (NFC version) depending on the functions that are to be used. - Monitor mode Wireless unit information or I/O map and parameter settings can be read. Parameters cannot be set. The Forced output function cannot be used. - Page 19 - Troubleshooting Read error: Confirm that the NFC reader / writer is connected to the PC. Confirm that the NFC reader / writer is held near the NFC antenna approach area. When frozen: Remove the NFC reader / writer from the PC and connect it again. After taking the above actions, click the [Refresh] button.
-
Page 20: Basic Operational Flow For Settings And Monitoring
Basic operational flow for settings and monitoring To change settings, switch to Administrator mode to operate the I/O Configurator. In Administrator mode, a timeout occurs after 300 seconds of inactivity and the application returns to Monitor mode. A timeout countdown is displayed to the right of the "Administrator mode" label. - The NFC communication is not accessed all the time. - Page 21 Operational flow when changing settings A rough operational flow during setting changing operations is shown below (operations performed in Administrator mode). (1) Select the tab that you wish to check (2) Display the setting item that you wish to check (3) Click [Refresh] (4) Check the present settings and values (5) Change the necessary item and value settings...
-
Page 22: Explanation Of Screens
Explanation of screens The tabs available on the I/O Configurator (NFC version) consist of the [Information], [I/O monitor], [Properties], and [Parameter] tabs. On an EXW1-series Base unit, [Event] and [Wireless] tabs are displayed to the right of the [Properties] tab. An outline of each tab is explained below. - Page 23 ⚫ I/O monitor tab The wireless unit I/O data can be monitored. The display can be switched between input and output displays by clicking the tabs at the top of the status display area. With a Base unit (EXW1-BMJA#) that supports CC-Link, the display can be switched between Bit area and Word area.
- Page 24 ⚫ Properties tab Settings of a connected wireless unit can be changed in the Properties tab. The area displayed for making settings can be changed by selecting a radio button in the "Control panel". -23- No.EX##-OMV0017-G...
- Page 25 ⚫ Event tab Displayed on an EXW1-series Base unit, this tab makes it possible to check the event information (errors, etc.) of the Wireless Base or Wireless Remotes. ⚫ Wireless tab Displayed on an EXW1-series Base unit, this tab makes it possible to check wireless log data. -24- No.EX##-OMV0017-G...
- Page 26 ●Parameter tab This tab makes it possible to check and change the parameters of the Wireless Base or Wireless Remotes. -25- No.EX##-OMV0017-G...
-
Page 27: Setting Of The Wireless Unit System
3. Setting of the wireless unit system Installation of the SMC wireless system (Base and Remote) so that it can be controlled by an upper level controller is described here. Grayed out items do not use the I/O Configurator. Refer to the operation manual for each product. -
Page 28: Reading And Obtaining Device Information
Reading and obtaining device information Start up the I/O Configurator and initiate NFC read-in with the Information tab to obtain information for each unit and the system. The displayed parameters depend on the unit. Unit information Description System configuration ● Unit information area The unit information area indicates the module information. -
Page 29: Entry Of Individual Identification (Edit Tag)
● System configuration area System configuration shows the configuration information of the Wireless Base / Remote modules. "Error" appears to the right of a unit name when an error occurs. Connected I/O units can be checked by double-clicking on the name of a displayed wireless unit or clicking on the "▶"... -
Page 30: Remote Setting
Remote setting Set the parameters of a Remote unit as required. - I/O points and parameter setting - The setting will be applied when the Remote is turned on (or reset). ● I/O points and parameter setting Set the occupied I/O points and parameters for the module in [Remote setting]. Settable parameters depend on the unit being set (refer to "5.3 Properties tab"... - Page 31 Remote unit setting items (example using compact wireless unit EXW1-RDXNE4## / EXW1-RDYNE4## / EXW1-RDM#E3##) Parameter name Set value Initial value Input size* 16 points (16 bits) 16 points (16 bits) Output size (includes valves)* 16 points (16 bits) 16 points (16 bits) Wireless signal Active / Idle Active...
-
Page 32: Base Setting
Base setting Make the Base unit settings. Set the communication environment using the PLC, make unit settings, etc. - Communication environment with PLC ([Ethernet setting], [CC-Link Setting]) - I/O points and parameter setting - System setting - OPC UA setting ●... - Page 33 Ethernet setting items (example using manifold-type wireless unit EX600-WEN) Parameter name Set value Initial value MAC address Manual / DHCP / Remote Control IP address type Manual IP address Enter value 192.168.0.1 Auto MDI/MDI-X Auto / MDI / MDIX Auto Duplex Full Duplex / Half Duplex Full Duplex...
- Page 34 ● I/O points and parameter setting Set the occupied I/O points and parameters for the module using [Base setting]. Base unit setting screen (example using EX600-WEN) ¥ The parameters below can be set (refer to "5.3 Properties tab"). Base unit setting items (example using manifold-type wireless unit EX600-WEN# / EX600-WPN#) Parameter name Set value Initial value...
- Page 35 ● System setting Change the parameter settings as required. System setting screen (example using EXW1-BMJA#) ¥ ¥ The parameters below can be set. Settable parameters depend on the unit being set (refer to "5.3 Properties tab" for details). System setting items (example using compact Wireless Base EXW1-BMJA#) Parameter Set value Initial value...
- Page 36 Power Transmission Level High/Middle/Low High Wireless communication Active/Idle Active Protocol V.1.0/V.2.0 V.2.0 System setting items (example using compact Wireless Base EXW1-BENAC1) Parameter Set value Initial value I/O mapping Manual / Auto Manual System input size 16, 128,256,512,768,1024,1280, 2048 points/256 byte...
- Page 37 System setting items (example using manifold-type Wireless Base EX600-WEN# / EX600-WPN#) Parameter Set value Initial value I/O mapping Manual / Auto Manual (EX600-WEN#) Auto (EX600-WPN#, fixed) System input size 16, 128 to 1280 points (2 bytes to 160 bytes) in 128- 1280 points/160 byte point (16-byte) units System output size...
- Page 38 ● OPC UA setting Change the parameter settings as required. System setting screen (example using EXW1-BPNAC1) ¥ ¥ The parameters below can be set. Settable parameters depend on the unit being set (refer to "5.3 Properties tab" for details). OPC UA setting items (example using compact Wireless Base Parameter Set value Initial value...
- Page 39 ● Frequency channel select function (F.C.S.) With a EXW1 series Base unit, the frequency channel can be selected. Only protocol V.2.0 is supported. Specify protocol V.2.0 in [System setting]. * The number of selectable frequency channels varies depending on the country in use. Refer to the operation manual for the product in use.
- Page 40 Set using the [Frequency Channel Select Window]. Item Description Read button Retrieves the current channel selection configuration. The W-LAN indicators make it possible to select frequency channels corresponding to W-LAN Channel W-LAN channel at one time. (2) indicators * In the example above, W-LAN Channel: CH.10 is selected. The W-CH indicators make it possible to select frequencies for each CH.
-
Page 41: Pairing
Pairing Pairing is required for communication between a Base and Remote. A Base is paired with a Remote after they are switched to pairing mode. Pairing and registration between a Base and Remote enables wireless communication. Operational flow during pairing Switch the Remote to pairing mode * The EXW1-RD# is set to pairing mode by factory default. -
Page 42: Pairing Procedure
Pairing procedure 3.5.1 (1) Switch the Remote to pairing mode Connect to the Remote using NFC, select the (a) [Properties] tab and then click (b) [Refresh]. Select (d) [Pairing mode] from (c) [Pairing setting] on the (a) [Properties] tab and then click (e) [Reset module]. - Page 43 (2) Switch the Base to pairing mode Connect to the Base using NFC, select the (a) [Properties] tab and then click (b) [Refresh]. Select (d) [Pairing mode] from (c) [Remote registration] on the (a) [Properties] tab and then click (e) [Reset module].
- Page 44 (3) Pair and register the Base and Remote (a) Clicking [Refresh] causes Remotes in pairing mode to be listed in the Free Remotes area. (b) Select the Remote that is to be rIstered, Change the Input size and Output size settings as required. (c) specify a wireless channel and then (d) click ▲...
- Page 45 * Input size / Output size setting In protocol V.2.0, it is possible to configure remotes (such as EXW1-RL*PA*C) with variable input/output occupied bytes.* Refer to the "I/O Map" section in the Operation Manual for each product for the range of Input/Output size to be set. The Remote that is to be registered on the specified wireless channel moves to the Registered Remotes area.
- Page 46 Click (a) [Reset module] and (b) [Refresh] and check that the registration status changes to Registered. Base setting screen ¥ ¥ * The example below shows two Remote modules registered on channel 1 and channel 2. Base setting screen ¥ ¥...
- Page 47 (4) Disable the pairing mode of the Base (Normal mode) Connect to the Base using NFC, (a) Select [Normal mode] (b) Click [Reset module] to reseIhe Base. (c) Check connection with registerd Remotes. ¥ ¥ -46- No.EX##-OMV0017-G...
-
Page 48: Dummy Remote
Dummy Remote Set dummy Remotes to secure reserved area in memory and enable Remotes to be added and registered later, without changes to mapping, even after the system has been configured. Register dummy Remotes using the Base. ¥ ¥ (a) Change the operating mode of the Wireless Base unit (a)-1 Set Remote registration on the Wireless Base unit to "Pairing mode". -
Page 49: Software Control
Software Control "HOLD/CLR setting (unit): Software control" of "Base / Remote setting", the output operation for when the Ethernet communication is disconnected, can be selected for valve output or output unit independently, in 1- point units, using "CLEAR", "HOLD", or "SET". The values for the Hold / Clear for each valve output or output unit are stored in the unit with outputs. - Page 50 (3) Upper case letters are used to express the current status of Clear / Hold. The settable values are C (CLEAR), H (HOLD) or S (SET). Enter 8 characters. When the required values have been entered, click the "Save all" to store the data. * When CLEAR or HOLD is set for HOLD/CLR/SET, the window below will be displayed.
-
Page 51: Using A Setting File
Using a setting file The [Export] button in the Properties tab enables the setting of the connected unit using the current NFC reader / writer to be saved to a PC in the format of ".smc". Importing as explained in the next item enables the unit setting to be reflected in other units. - Page 52 ◆ Procedure for importing the settings (1) Click the "Import" button. ¥ (2) Select the required file and click [Open]. Select "Yes" to execute the import of settings. -51- No.EX##-OMV0017-G...
- Page 53 - Export/import settings (EX600 series) Base Remote Item EX600- EX600- EX600- WEN# WPN# WSV# HOLD/CLR (unit) Input size Output size (includes valves) in which includes a valve density Wireless signal Base settings/Remote settings AD refresh time (sec) Unit address order Power Supply Voltage Monitor (Control/Input) Power Supply Voltage Monitor...
- Page 54 - Import / Export settings (EXW1 series Base) EXW1- EXW1- EXW1- EXW1- Item BMJA# BECAC BENAC1 BPNAC1 Remote Normal / pairing modes registration / FCS Setting pairing setting IP address type IP address Subnet Mask Default Gateway Ethernet setting Auto MDI / MDI-X Duplex Speed Security Mode...
- Page 55 - Import / Export settings (EXW1 series Remote) Remote Item EXW1- EXW1- EXW1- RDXNE4# RDYNE4# RDM#E3## HOLD/CLR (unit) Input size Output size (includes valves) in which includes a valve density of Remote setting Wireless signal Power Supply Voltage Monitor (Control/Input) Power Supply Voltage Monitor (Output) Output Action of Upper Communication Output action when wireless community to cut off.
-
Page 56: Reading Of Factory Data
Reading of factory data Click the [Read factory data] button to initialize or check the parameters in the window currently opened in the [Properties] tab (excluding Remote unit registration and pairing setting). In order to reflect the setting, turn off the power and on again or click [Reset module] when the power is on. Turn on the power supply if the power is off. -
Page 57: Initialization Of The Product
3.10 Initialization of the product To initialize the product, in the [Properties] tab, click [Product initialization] in [Base setting] or [Remote setting]. ¥ ¥ - After executing initialization, this function saves and reflects the setting, and updates the information in the window. The operation is not reversible. Care should be taken. - With an EXW1-RD#, initializing the product results in switching to pairing mode. - Page 58 Some values settable by the I/O Configurator (Web version) are included in the initialization items. Refer to the table below for the set items to be initialized. Initialization items (I/O Configurator (NFC version) (EX600 series)) Base Remote Initialized items EX600-WEN# EX600-WPN# EX600-WSV# HOLD / CLR (unit)
-
Page 59: I/O Monitoring
4. I/O monitoring In the [I/O monitor] tab, the I/O mapping data can be monitored. Input Shows the input mapping information of the wireless unit. ¥ - Input display Display Description ADRS Displays the input map address. Wireless unit channel. W.ch (Wireless channel of the Base is displayed as [- -]. -
Page 60: Output
Output Shows the output mapping information of the wireless unit. ¥ ¥ - Output display Display Description Forced output mode can be selected by clicking [Enforce ON]. Enforce ON * Refer to "4.4 Forced output" for details on operation. ADRS Displays the output map address. -
Page 61: Detailed Input / Output Information
Detailed Input / output information The IO Detail window will open by double-clicking the line of an address of the I/O unit which is connected to the wireless unit. ¥ ¥ Double-click The diagnostic error type is represented by different background colours. The meaning of a background colour can be checked by clicking [>>]. -
Page 62: Forced Output
Forced output Forced output conditions 4.4.1 The I/O Configurator (NFC version) can directly command the Wireless Base / Remote. Operating conditions for forced output. [Forced output from the Wireless Base] [Forced output from the Wireless Remote] Forced output Login to Administrator mode. Login to Administrator mode. - Page 63 The window below appears when the mode is changed to forced output mode. Select the output unit to change to forced output and double-click it. ¥ ¥ Double-click -62- No.EX##-OMV0017-G...
- Page 64 In the [IO Detail] window, select the bit (B0 to B7) to change to forced output and set to "1". The set value is output by clicking the [Enforce] button at the bottom of the window. The power supply for the output unit is necessary to activate the output equipment for forced output mode. Refer to the Operation Manual for the SMC Wireless System for details of the power supply for output.
- Page 65 Forced output (analog unit) For forced output for an analog unit, enter the values according to the analog range. The analog range can be selected by the I/O Configurator (Web version). Enter the values. The analog value will be output by clicking the [Enforce] button.
- Page 66 Exiting forced output mode Remove the check mark in the "Enforce ON" box to exit forced output mode. In the dialog box, to confirm exiting forced output mode, select [Yes]. Continue by clicking [Yes] on the following window. Forced output mode is exited.
-
Page 67: Screen Details Of The I/O Configurator (Nfc Version)
5. Screen details of the I/O Configurator (NFC version) Information tab The Information tab consists of "Unit information", "System configuration" and "Description". ¥ ¥ Unit information Description System configuration Unit information area 5.1.1 The unit information area indicates the module information. - Unit information display NFC access Display... -
Page 68: System Configuration Area
System configuration area 5.1.2 The system configuration area shows the configuration information of the Wireless Base / Remote module. Wireless Base Unit selected Dummy Remotes (reserved) Error indication: any error is shown here Wireless Remote Connected I/O units can be checked by double-clicking on a wireless unit displayed in the system configuration area or clicking on the "▶"... -
Page 69: Description Area
Description area 5.1.3 Description of the unit selected in the system configuration area. Information tab, description 5.1.4 Wireless unit (manifold type) 5.1.4.1 1) Communication unit ¥ ¥ -68- No.EX##-OMV0017-G... - Page 70 - Description display (communication unit) Display Description Part No Wireless unit product number. Wireless unit PID. Wireless unit user tag number. The wireless unit status is displayed in 4 bytes as hexadecimal numbers. ◆ Display for diagnostic information error Diagnostic information 3 Diagnostic information 1 Unit status Diagnostic information 2...
- Page 71 2) Valve ¥ ¥ - Description display (valve) Display Description Part No Wireless Base / Remote product number. Mapped position for the valve. Displays the mapped position of the selected digital input Unit No. unit. Refer to "5.3.2 Properties", "Unit address order" for details on mapped position. Displays the mapped diagnostic data bits for the selected valve.
- Page 72 IO unit (digital) 5.1.4.2 Digital input unit (product number: EX600-DX#D) ¥ ¥ Digital output unit (product number: EX600-DY#B) ¥ ¥ -71- No.EX##-OMV0017-G...
- Page 73 Digital input / output unit (product number: EX600-DM#F) ¥ ¥ ¥ - Description display (digital unit) Display Description Part No Displays the product number of the digital unit (input, output, input / output). Displays the mapped position of the digital unit (input, output, input / output). Unit No.
- Page 74 IO unit (analog) 5.1.4.3 Analog input unit (product number: EX600-AXA) Status display: No error: (OK) Error: (name of error) Analog output unit (product number: EX600-AYA) Status display: No error: (OK) Error: (name of error) -73- No.EX##-OMV0017-G...
- Page 75 Analog input / output unit (product number: EX600-AMB) ¥ Status display: No error: (OK) Error: (name of error) - Description display (analog unit) Display Description Part No Displays the product number of the analog unit (input, output, input / output). Displays the mapped position of the analog unit (input, output, input / output).
-
Page 76: I/O Monitor Tab
I/O monitor tab In the I/O monitor tab, the wireless unit I/O mapping data can be monitored when the power status is "Power on". Diagnostic information or details of input / output can be checked by double-clicking any address line in the display. -
Page 77: Output Tab
* Refer to "4.4 Forced output" for details of operation. Base unit: EX600-WEN*, EX600-WPN* 0 to 159 EXW1-BECAC 0 to 1472 ADRS Displays the output map address. EXW1-BENAC1 0 to 1439 EXW1-BPNAC1 0 to 1307 Remote unit: 0 to 15 Wireless unit channel. W.ch --, ch001 to 127 (Wireless channel of the Base is displayed as [- -]. -
Page 78: Io Details
IO details 5.2.3 The IO Details window will open by double-clicking the line of an address of the I/O unit which is connected to the wireless unit. ¥ ¥ Double-click -77- No.EX##-OMV0017-G... - Page 79 IO unit information and input / output data can be checked in the IO Detail window. The diagnostic error type is represented by different background colours. The meaning of a background colour can be checked by clicking [>>]. - Background colour Background Display Description...
-
Page 80: Information Tab, Description
Information tab, description 5.2.4 Wireless unit (manifold type (valve)) 5.2.4.1 ¥ ¥ ¥ - IO details (manifold type (valve)) Display Description Displays the PID of the Wireless Base / Remote to which the selected valve is connected. Unit TAG Displays the tag of the Wireless Base / Remote to which the selected valve is connected. Displays the channel name of the Wireless Base / Remote to which the selected valve is W.ch connected. - Page 81 IO unit (digital) 5.2.4.2 Digital input unit (product number: EX600-DX#D) ¥ ¥ Digital output unit (product number: EX600-DY#B) ¥ ¥ -80- No.EX##-OMV0017-G...
- Page 82 Digital input / output unit (product number: EX600-DM#F) ¥ ¥ ¥ - IO unit information (digital unit) Display Description Displays the PID of the Wireless Base / Remote to which the digital unit (input, output, input / output) is connected. Displays the tag of the Wireless Base / Remote to which the digital unit (input, output, input / Unit TAG output) is connected.
- Page 83 IO unit (analog) 5.2.4.3 Analog input unit (product number: EX600-AXA) IO unit information ¥ Status display: Input / output value of the ¥ ¥ No error: (OK) channel Error: (name of error) Analog output unit (product number: EX600-AYA) ¥ IO unit information Status display: No error: (OK) ¥...
- Page 84 Analog input / output unit (product number: EX600-AMB) IO unit information ¥ Status display: No error: (OK) Error: (name of error) Input / output value of the channel - IO unit information (analog unit) Display Description Displays the PID of the Wireless Base / Remote to which the analog unit (input, output, input / output) is connected.
- Page 85 - Channel status (analog output unit) Data format Displayed analog value +/-□□□ mA (current range) 12-bit resolution, 11-bit resolution +/-□□□ V (voltage range) +/-□□---□ Scaled - Channel status (analog input / output unit) Data format Displayed analog value +/-□□□ mA (current range): Input or output value 12-bit resolution, 11-bit resolution +/-□□□...
-
Page 86: Properties Tab
Properties tab The settings of a currently connected wireless unit can be changed in the Properties tab. The procedure consists of a control panel and parameters. ¥ ¥ Control panel Parameters -85- No.EX##-OMV0017-G... -
Page 87: Control Panel
Control panel 5.3.1 A control panel for changing the displayed parameters consists of 4 radio buttons and 3 buttons. ¥ ¥ - Radio buttons for selecting the parameters to display (Base unit). Name Function Switch to the Base unit parameters. Occupied points for the module input / output Base setting can be set. -
Page 88: Properties
- Control panel buttons Name Functions Set parameters are reflected once power is supplied to the wireless unit. Click Reset module [Reset module] in order to reflect parameters that were set while power was still being supplied. Button to export the configuration of the wireless unit to a PC (saved as file type Export ".smc"). - Page 89 - Base unit parameters Parameter Set value Initial value Description name Define all settings that are in output operation status when fieldbus communication is disconnected. CLEAR: Clear the output. CLEAR HOLD/CLR CLEAR HOLD: Fix the output at the current value. HOLD (unit) Software Control: CLEAR, HOLD or SET for individual...
- Page 90 (2) Ethernet setting Ethernet setting display. Displayed for a Base unit that supports EtherNet/IP. ¥ ¥ - Wireless Base manifold type (EX600-WEN*) Parameter name Set value Initial value Note MAC address MAC address of the product is displayed. Select the IP address setting mode. Select the mode suitable for your network environment.
- Page 91 - The compact Wireless Base (EXW1-BENAC1) Parameter name Set value Initial value Note MAC address MAC address of the product is displayed. Select the IP address setting mode. Select the mode suitable for your network environment. Manual: The IP address is set by inputting it directly.
- Page 92 (3) CC-Link setting CC-Link setting display. Displayed for a Base unit that supports CC-Link (EXW1-BMJA#). ¥ ¥ - CC-Link parameters Parameter name Set value Initial value Note Operating mode 1 to 8 CC-Link version, number of occupied stations, etc. 156 kbps / 625 kbps Set the communication speed.
- Page 93 (a) Operating mode setting This setting specifies a CC-Link operating mode. Setting range: 1 to 8 CC-Link setting Occupied area Number of Operating Number of registerable Bit area Word area mode CC-Link Ver. Extended cyclic occupied units RX/RY RWr/RWw stations 1.10 64/64 1.10...
- Page 94 (4) System setting System setting display. ¥ ¥ -93- No.EX##-OMV0017-G...
- Page 95 - Compact Wireless Base (EXW1-BMJA#) Parameter Set value Initial value Note I/O mapping Manual Manual Specifies an I/O mapping method. * "Manual" is fixed for EXW1-BMJA#. Diagnostic Advanced Advanced Specifies diagnostic information to map to the Word area. allocation Setting range: Advanced Detailed (System diagnosis + Remote connection / diagnosis / registration information) * "Advanced"...
- Page 96 - Compact Wireless Base (EXW1-BECAC) Parameter Set value Initial value Note I/O mapping Auto Auto Specifies an I/O mapping method. * " Auto" is fixed for EXW1-BECAC. Diagnostic None / Simple / Advanced Set the diagnostic information allocated to the I/O map. Refer to the allocation Advanced "Diagnostic allocation"...
- Page 97 - Compact Wireless Base (EXW1-BENAC1) Parameter Set value Initial value Note I/O mapping Manual / Auto Manual Specifies an I/O mapping method. System input 16, 128, 256, 512, 2048 points/ Set the number of inputs which can be controlled by the entire...
- Page 98 - Compact Wireless Base (EXW1-BENAC1) (continued) Parameter Set value Initial value Note Time Unsynchroni The time information is the time that the product recognizes. It is Information used for a timestamping event and other logs. Until "synchronization" is performed, it displays the time elapsed since startup.
- Page 99 - Compact Wireless Base (EXW1-BPNAC1) Parameter Set value Initial value Note I/O mapping Auto Auto Specifies an I/O mapping method. * " Auto" is fixed for EXW1-BPNAC1. Diagnostic None / Simple / Advanced Set the diagnostic information allocated to the I/O map. Refer to the allocation Advanced "Diagnostic allocation"...
- Page 100 - Wireless unit (manifold type) (EX600-WEN# / EX600-WPN# etc.) Parameter Set value Initial value Note I/O mapping Manual / Auto Manual Define the I/O mapping of the entire wireless system including the (EX600- Wireless Remote unit registered to the Wireless Base unit. WEN#) Auto: All I/O points mapped to the Wireless Base unit and Wireless Remote unit are identified and mapped automatically.
- Page 101 ⚫ Protocol setting Refer to the table below for wireless communication protocols. To pair an EXW1-series unit with an EX600-W-series unit, V.1.0 must be set. This also applies when building a wireless system consisting of both EXW1 and EX600-W series. - V.1.0: The same wireless communication method as EX600-W is used, and the [frequency channel selecting function (F.C.S.)] are not available.
- Page 102 (5) Remote registration For this wireless system, it is necessary to register the PID for each product to establish communication without interference from another network. The Remote unit registration display consists of "Registered Remotes", "Remote registration buttons", "Free Remotes", "Pairing", and "Dummy" items. * Registration of Remotes needs to be performed with power supplied.
- Page 103 (5)-b Remote registration buttons Remote registration buttons are only enabled when wireless units are in pairing mode. - Remote registration button display Display Description Select the channel used to register the Remote to the Wireless Base. W.ch (Only channels available for registration will be displayed) Move the Wireless Remote from Free Remotes to Registered Remotes.
- Page 104 (5)-d Pairing The radio buttons used for pairing are only settable in Administrator mode. They can be set even when power is off. - Pairing radio button display Item Description Change to normal (non-pairing) mode. Indicates that the current status is Normal (pairing Normal mode disabled) mode.
- Page 105 (5)-f FCS Setting (Frequency Channel Select) The frequency channel can be selected using this function. This function is only supported by protocol V.2.0. Specify protocol V.2.0 in [System setting]. FCS Setting cannot be used if communication with subordinate Remotes uses a mixture of protocols. Ensure that only Remote units that support protocol V.2.0 are registered to the Base with which FCS Setting is to be used.
- Page 106 The Frequency Channel Select Window is displayed. Item Description Read button Retrieves the current channel selection configuration. The W-LAN indicators make it possible to select frequency channels corresponding to W-LAN Channel W-LAN channel at one time. (2) indicators * In the example above, W-LAN Channel: CH.10 is selected. The W-CH indicators make it possible to select frequencies for each CH.
- Page 107 (6) Remote setting The parameters of a Remote unit can be changed as required. ¥ ¥ -106- No.EX##-OMV0017-G...
- Page 108 - Remote parameters Compact wireless unit (EXW1-RDXNE4## / EXW1-RDYNE4## / EXW1-RDM#E3## etc.) Parameter Set value Initial value Note Fixed 16 points 16 points For the EXW1-RD#, the number is fixed at 16 (16 bits). Input size* (16 bits) (16 bits) * Although the number of occupied inputs of EXW1-RDM# is fixed at 16 (16 bits), only the lower 8 bits are available.
- Page 109 Wireless unit (manifold type) (EX600-WSV#) Parameter Set value Initial value Note Define all settings that are in the output operation status when fieldbus communication is disconnected. CLEAR: Clear the output. HOLD/CLR CLEAR / HOLD / HOLD: Fix the output at the current value. CLEAR (unit) Software Control...
- Page 110 (7) Pairing setting Setting for wireless communication between the Wireless Base unit and Wireless Remote unit. It is necessary to set the operating mode to pairing when registering the Wireless Remote to Wireless Base. ¥ ¥ - Radio buttons for selecting the pairing mode. Item Description Change to normal (non-pairing) mode.
-
Page 111: Event Tab
Properties tab. < EXW1-BECAC> * Time synchronization needs to be performed from EtherCAT Distributed Clocks. < EXW1-BENAC1 / EXW1-BPNAC1> * Time synchronization needs to be performed from OPC UA Local Discovery or [System setting] on the Properties tab. Unit The unit number is displayed. - Page 112 ● Error codes The table below shows error codes with corresponding details and diagnostics maps. Diagnostics map Bit no. Error code Description Item Except for EXW1-BMJ EXW1-BMJ Detection of a short circuit of US1 or 6 or 7 Detection of the range upper limit Detection of the range lower limit Detection of unconnected load System...
-
Page 113: Wireless Tab
Wireless tab The Wireless tab displays the wireless log data. ¥ ¥ - Wireless tab display Display Description Received data for the Wireless Base is displayed on the Input / Output tabs Input tab, and sent data is displayed on the Output tab. The wireless channel is displayed. -
Page 114: Parameter Tab
Parameter tab Parameter tab consists of 2 areas, "System configuration" and "Parameter". The parameters of unit can be changed as required. ¥ - Wireless tab display Display Description Click to display remote unit parameters in the parameter Part No. area. Click to display the parameters of the selected IO unit in the Unit No. -
Page 115: Wireless System Parameter List
6. Wireless system parameter list - Wireless Base unit (EX600-WEN#) setting parameters Setting Classificat Parameter name Set value Initial value when Note power is off Setting the output operation when the HOLD/CLR CLEAR / HOLD / Software CLEAR Available fieldbus communication is (unit) Control disconnected. - Page 116 Setting Classificat Parameter name Set value Initial value when Note power is off Normal mode: Wireless Remote cannot be registered. a) Pairing Normal / pairing modes Normal mode Available (Communication with the registered Remote will be established). Remote Pairing mode: registratio Wireless Remote can be registered.
- Page 117 - Wireless Base unit (EX600-WPN#) setting parameters Setting Classification Parameter name Set value Initial value when Note power is off Setting the output operation when HOLD/CLR CLEAR / HOLD / Software CLEAR Available the fieldbus communication is (unit) Control disconnected. 0 to 128 points (0 to 16 bytes) 128 points /...
- Page 118 - Compact Wireless Base unit (EXW1-BMJA#) setting parameters Setting Initial when Classification Parameter name Set value Note value power is Operating 1 to 8 Available mode CC-Link 156 kbps / 625 kbps / 2.5 Mbps / b) Speed 156 kbps Available setting 5 Mbps / 10 Mbps...
- Page 119 - Compact Wireless Base unit (EXW1-BECAC) setting parameters Setting Initial when Classification Parameter name Set value Note value power is a) I/O mapping Auto Auto Available Fixed at "Auto". Diagnostic information is allocated Diagnostic None / Simple / Advanced Advanced Available to the head of the input data of the allocation I/O map.
- Page 120 - Compact Wireless Base unit (EXW1-BENAC1) setting parameters Setting when Classification Parameter name Set value Initial value Note power is When the total size (byte) of the I/O mapping is an odd number, 1 a) I/O mapping Manual / Auto...
- Page 121 - Compact Wireless Base unit (EXW1-BENAC1) setting parameters (continured) Setting when Classification Parameter name Set value Initial value Note power is a) Security Mode Sign & Encrypt / Sign / None Sign & Encrypt Available Basic256Sha256 Enable Enable Aes128_Sha256_ This is not settable...
- Page 122 - Compact Wireless Base unit (EXW1-BPNAC1) setting parameters Setting when Classification Parameter name Set value Initial value Note power is a) I/O mapping Auto Auto Available Fixed at "Auto". Diagnostic information is allocated to the head d) Diagnostic allocation None / Simple / Advanced Advanced Available of the input data of the...
- Page 123 - Compact Wireless Remote unit (EXW1-RDXNE4##) setting parameters Setting Classificat Parameter name Set value Initial value when power Note is off a) Input size 16 points / 2 byte 16 points / 2 byte Fixed b) Output size 0 points / 0 byte 0 points / 0 byte Fixed Wireless...
- Page 124 - Compact Wireless Remote unit (EXW1-RDXNE4##) diagnostic parameters Classification Parameter name Display value Note 0 — 4294967295 ON/OFF count upper limit value Ch #:ON/OFF Counter (0 to 0xFFFFFFFF) Value Clr(Clear) Clears the Input ON/OFF counter to 0. 0: No error 1: Error Ch 7-0:Exceeded ON/OFF 0x00-0xFF...
- Page 125 - Compact Wireless Remote unit (EXW1-RDYNE4##) setting parameters Setting Classificat Parameter name Set value Initial value when power Note is off a) Input size 0 points / 0 byte 0 points / 0 byte Fixed b) Output size 16 points / 2 byte 16 points / 2 byte Fixed Wireless...
- Page 126 - Compact Wireless Remote unit (EXW1-RDYNE4##) setting parameters (continured) Classificat Setting when Parameter name Set value Initial value Note power is off Short Circuit Enable/Disable Enable Not available Detection(Output) b) Restart After ShortCircuit Auto/Manual Manual Not available 1: Generates an error. Ch 7-0: 0;...
- Page 127 - Compact Wireless Remote unit (EXW1-RDYNE4##) setting parameters (continured) Classificat Setting when Parameter name Set value Initial value Note power is off 0: Hold the output Ch 7-0: 1: Depend on output state Bit0:Channel 0 Hold State for Fieldbus 0x00-0xFF 0xFF Not available Idel...
- Page 128 - Compact Wireless Remote unit (EXW1-RDYNE4##) setting diagnostic (continured) Classification Parameter name Display value Note 0 — 4294967295 Ch #:ON/OFF Counter ON/OFF count upper limit value (0 to 0xFFFFFFFF) Value Clr(Clear) Clears the Input ON/OFF counter to 0. 0: No error 1: Error Ch 7-0:Exceeded 0x00-0xFF...
- Page 129 - Compact Wireless Remote unit (EXW1-RDM#E3##) setting parameters Setting Classificati Parameter name Set value Initial value when power Note is off a) Input size 16 points / 2 byte 16 points / 2 byte Fixed b) Output size 16 points / 2 byte 16 points / 2 byte Fixed If set to "Idle", the wireless...
- Page 130 - Compact Wireless Remote unit (EXW1-RDM#E3##) setting parameters (continured) Classificati Setting when Parameter name Set value Initial value Note power is off Short Circuit Enable/Disable Enable Not available Detection(Output) b) Restart After ShortCircuit Auto/Manual Manual Not available 1: Generates an error. Ch 7-0: 0;...
- Page 131 - Compact Wireless Remote unit (EXW1-RDM#E3##) diagnostic parameters Classification Parameter name Display value Note 0 — 4294967295 ON/OFF count upper limit value (0 to 0xFFFFFFFF) a) Ch #:ON/OFF Counter Value Clr(Clear) Clears the Input ON/OFF counter to 0. 0: No error 1: Error Ch 7-0:Exceeded ON/OFF Parameter Tab...
- Page 132 - Compact Wireless Remote unit (EXW1-RLAPA8C(ClassA)) setting parameters Setting Classificati Parameter name Set value Initial value when power Note is off Generated error when US1 power supply voltage goes under a) Brown-out Detection for US1 Enable/Disable Enable Not vailable approx. 16 V. Either of the following: Short Circuit Detection(L+, •L+ power supply...
- Page 133 - Compact Wireless Remote unit (EXW1-RLAPA8C(ClassA)) setting parameters (continued) Setting Classificat Parameter when Set value Initial value Note name power is Swap the byte order of the process Pd Byte Direct / Swap 16 bit / Swap 32 bit / data, which is exchanged between Direct Swap all...
- Page 134 - Compact Wireless Remote unit (EXW1-RLBPA7C(ClassB)) setting parameters Setting Classificati Parameter name Set value Initial value when power Note is off Generated error when US1 power supply voltage goes under a) Brown-out Detection for US1 Enable/Disable Enable Not vailable approx. 16 V. Generated error when US2 power supply voltage...
- Page 135 - Compact Wireless Remote unit (EXW1-RLBPA7C(ClassB)) setting parameters (continued) Setting Classificat Parameter when Set value Initial value Note name power is Swap the byte order of the process Pd Byte Direct / Swap 16 bit / Swap 32 bit / data, which is exchanged between Direct Swap all...
- Page 136 - Compact Wireless Remote unit (EXW1-RLBPA7C(ClassB)) setting parameters (continued) Setting Classificat Parameter when Set value Initial value Note name power is Swap the byte order of the process Pd Byte Direct / Swap 16 bit / Swap 32 bit / data, which is exchanged between Direct Swap all...
- Page 137 - Compact Wireless Remote unit (EXW1-RLAPA8C(ClassA) / EXW1-RLBPA7C(ClassB)) diagnostic parameters Classification Parameter name Display value Note NO_DEVICE、 DEACTIVATED、 PORT_DIAG PREOPERATE、 a) PortStatusInfo OPERATE、 DI_C/Q、 DO_C/Q 0: Process data valid 1: process data invalid Bit0:input b) PortQualityInfo 0x00 to 0xFF Bit1:output Bit2 to 7:Reserved c) RevisionID 0x00-0xFF...
- Page 138 - Wireless Remote unit (EXA1-20-SA/EXA1-30-SA/EXA1-40-SA/EXA1-60-SA) setting parameters Classificati Setting when Parameter name Set value Initial value Note power is off a) Brown-out Detection for US1 Enable/Disable Enable Not available Parameter b) Communication failure Clear/Hold Hold Not available Short Circuit Detection Enable/Disable Enable Not available...
- Page 139 - Wireless Remote unit (EXA1-20-SA/EXA1-30-SA/EXA1-40-SA/EXA1-60-SA) setting parameters (continued) Classificati Setting when Parameter name Set value Initial value Note power is off Direct / Swap 16 bit / a) Pd Byte swap Enable Not available Swap 32 bit / Swap all Power ON / 1:Power b) L+ Power On Not available...
- Page 140 Part No (EX600-WEN#) (EX600-WPN#) (EX600-WSV#) Characters which can be input (EXW1-BMJA#) are half-width characters (EXW1-BECAC) (alphabet, numbers, symbols) Information Max. 15 characters (EXW1-BENAC1) Available representable in ASCII code. (EXW1-BPNAC1) Half-width katakana cannot be (EXW1-RDXNE4#) entered. (EXW1-RDYNE4#) (EXW1-RDM#E3) (EXW1-RLAPA8C) (EXW1-RLBPA7C) -139-...
-
Page 141: Troubleshooting
7. Troubleshooting Problem Problem Possible causes Inspection and countermeasures 1: Adjust the NFC reader / writer so that it is positioned at the centre of the NFC antenna 1. The NFC reader / writer (circled part). The Wireless Base / has moved away from the 2-1: Remove the NFC reader / writer from Remote unit information... - Page 142 Problem Problem Possible causes Inspection and countermeasures 1. Connected with higher Not possible to change 1. Disconnect the unit from the higher unit. unit. to forced output mode. 2. Login from the Administrator mode. 2. Mode is Monitor mode. The Wireless Remote follows the input / The Wireless Remote The Wireless Remote output size when it was registered to the...
-
Page 143: Specifications / Technical Information / Supplementary Information
8. Specifications / technical information / supplementary information Terminology Term Definition Administrator mode allows the user to configure the wireless units. Wireless Base / Administrator mode Remote become settable. A broken wire to the input or output equipment has been detected by the diagnostic Broken line detection function. - Page 144 Term Definition Occupied points for the module input / Number of I/O points that can be controlled by a module. output Registration of the PID (Product ID) of the Wireless Remote unit to be connected to the Pairing Wireless Base unit. Registration occurs at the initial setting, then the wireless system will activate.
- Page 145 EXW1-RDXNE4# Addition of EXW1-RL# series and Parameter tab 2.11.0 EXW1-RDYNE4# EXW1-RDM#E3 EXW1-BMJA# EXW1-BECAC EXW1-RL# EX600-WEN# EX600-WPN# EX600-WSV# EXW1-RDXNE4# EXW1-RDYNE4# Addition of EXW1-BENAC1,EXW1-BPNAC1 series 2.12.0 EXW1-RDM#E3 EXW1-RD* and EXA1 parameters added to Parameter tab EXW1-BMJA# EXW1-BECAC EXW1-BENAC1 EXW1-BPNAC1 EXW1-RL# -144- No.EX##-OMV0017-G...
- Page 146 Revision history A: Contents revised in several places. [August 2018] B: Contents are added. [August 2018] C: Contents revised in several places. [November 2019] D: Content changes [March 2022] E: Content changes [July 2023] F: Content changes [December 2023] G: Content changes [February 2024] Tel: + 81 3 5207 8249 Fax: +81 3 5298 5362 https://www.smcworld.com Note:...
Need help?
Do you have a question about the EXW1-BENAC1 and is the answer not in the manual?
Questions and answers