
Related Manuals for HPE ProLiant DL360 Gen11


Summary of Contents for HPE ProLiant DL360 Gen11
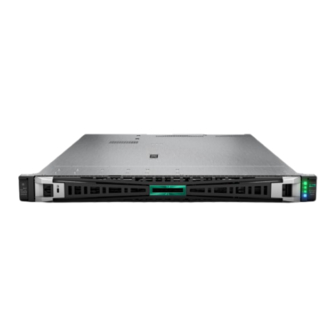
- Page 1 HPE ProLiant DL360 Gen11 Server User Guide HPE ProLiant DL360 Gen11 Server User Guide Part Number: 30-1311EFD2-001 Published: February 2023 Edition: 1...
- Page 2 HPE ProLiant DL360 Gen11 Server User Guide HPE ProLiant DL360 Gen11 Server User Guide Abstract Abstract This document is for the person who installs, administers, and troubleshoots servers and storage systems. Hewlett Packard Enterprise assumes you are qualified in the servicing of computer equipment and trained in recognizing hazards in products with hazardous energy levels.
-
Page 3: Table Of Contents
DIMM label identification DIMM slot locations Drive boxes and numbering Hot-plug fans HPE Basic Drive LED definitions HPE NS204i-u Boot Device components HPE NS204i-u Boot Device LED definitions Setup Optional services Setting up the server Operational requirements Space and airflow requirements... - Page 4 Installing an 8SFF optical drive Installing the 4LFF display port/USB option Installing the 4LFF optical drive OS boot device Installing boot device drives Installing the HPE NS204i Boot Device Power supply options Installing a redundant hot-plug power supply Processor and heatsink options Processor cautions...
- Page 5 Systems Insight Display cabling Intrusion detection switch cabling Serial port cabling Smart storage battery/capacitor cabling bby_086 Configuration resources Updating firmware or system ROM Configuring the server Configuring storage controllers Managing the HPE NS204i Boot Device Deploying an OS Configuring security Optimizing the server...
- Page 6 Environmental specifications Mechanical specifications Power supply specifications HPE 800 W Flex Slot Platinum Hot-plug Low Halogen Power Supply HPE 1000 W Flex Slot Titanium Hot-plug Power Supply HPE 1600 W Flex Slot Platinum Hot-plug Low Halogen Power Supply Hot-plug power supply calculations...
-
Page 7: Component Identification
USB 2.0 port (optional) iLO Service Port USB 3.2 Gen 1 port Drive bays This option can be replaced by 2SFF drive bays. The operating system does not recognize this port as a USB port. HPE ProLiant DL360 Gen11 Server User Guide... -
Page 8: Front Panel Leds And Buttons
Solid amber = System in standby Off = No power present Health LED Solid green = Normal Flashing green = iLO is rebooting. Flashing amber = System degraded Flashing red = System critical HPE ProLiant DL360 Gen11 Server User Guide... -
Page 9: Uid Button Functionality
The UID button can be used to identify a specific server in a rack or display the Server Health Summary when the server will not power on. For more information, see the latest HPE iLO User Guide on the Hewlett Packard Enterprise website Hewlett Packard Enterprise website . -
Page 10: Systems Insight Display Leds
Amber = Incorrectly installed PCI riser cage Over temp LED Off = Normal Amber = High system temperature detected Power cap LED Off = System is in standby, or no cap is set. Solid green = Power cap applied HPE ProLiant DL360 Gen11 Server User Guide... -
Page 11: Systems Insight Display Combined Led Descriptions
Green The PCI riser cage is not seated properly. Fan (amber) Amber Green One fan has failed or has been removed. Fan (amber) Green Two or more fans have failed or been removed. HPE ProLiant DL360 Gen11 Server User Guide... -
Page 12: Rear Panel Components
Rear panel components Rear panel components Item Item Description Description Slot 1 PCIe5 Slot 2 PCIe5 Slot 3 PCIe5 (optional - requires second processor) Power supply 2 (PS2) Power supply 1 (PS1) Video (VGA) port HPE ProLiant DL360 Gen11 Server User Guide... -
Page 13: Rear Panel Leds
Solid green = Link exists. link LED Off = No link exists. UID LED Solid blue = Identification is activated. Flashing blue = System is being managed remotely. Off = Identification is deactivated. HPE ProLiant DL360 Gen11 Server User Guide... -
Page 14: System Board Components
LP SlimSAS port 1 Primary riser connector Front I/O connector & USB 3.2 Gen 1 port OCP slot 14 backup power connector SATA optical port Socket 1 MCIO port 1 11-18 x8 SlimSAS ports HPE ProLiant DL360 Gen11 Server User Guide... -
Page 15: Heatsink And Processor Socket Components
System maintenance switch descriptions DIMM label identification DIMM label identification DIMM slot locations DIMM slot locations Heatsink and processor socket components Heatsink and processor socket components A high-performance heatsink is shown. Your heatsink might look different. HPE ProLiant DL360 Gen11 Server User Guide... -
Page 16: Closed-Loop Liquid Cooling Heatsink Components
Maximum Usage Limitation will not be provided, repaired, or replaced under a warranty or service contract. Contact your local HPE sales representative for additional information. The tubes of the liquid cooling heatsink are prefilled with coolant. In the unlikely event of a spill or leak of this... -
Page 17: System Maintenance Switch Descriptions
Off—iLO security is enabled. On—iLO security is disabled. Reserved Reserved Reserved Off—Power-on password is enabled. On—Power-on password is disabled. 1 , 2 3 f—No function On—Restore default manufacturing settings Reserved Reserved Reserved Reserved Reserved HPE ProLiant DL360 Gen11 Server User Guide... -
Page 18: Dimm Label Identification
To determine DIMM characteristics, see the label attached to the DIMM. The information in this section helps you to use the label to locate specific information about the DIMM. For more information about product features, specifications, options, configurations, and compatibility, see the HPE DDR5 SmartMemory QuickSpecs: https://www.hpe.com/docs/server-memory... -
Page 19: Dimm Slot Locations
Item Description Description Box 1 Box 2 8 SFF drive bay numbering 8 SFF drive bay numbering 8 SFF + 2 SFF drive bay numbering 8 SFF + 2 SFF drive bay numbering HPE ProLiant DL360 Gen11 Server User Guide... -
Page 20: Hot-Plug Fans
High-performance fans are required for some configurations. They are also required for ASHRAE-compliant configurations. For more information on ASHRAE-compliant configurations, see the Hewlett Packard Enterprise website https://www.hpe.com/servers/ASHRAE https://www.hpe.com/servers/ASHRAE. The server supports variable fan speeds. The fans operate at minimum speed until a temperature change requires a fan speed increase to cool the server. -
Page 21: Hpe Basic Drive Led Definitions
HPE Basic Drive LED definitions Basic Drive LED definitions The HPE Basic drive carrier has the following LEDs: Amber/blue LED—Managed by the drive backplane in conjunction with the storage controller and is used to indicate drive status. Green LED—Managed by the drive itself and indicates the drive activity. -
Page 22: Hpe Ns204I-U Boot Device Components
HPE NS204i-u Boot Device components HPE NS204i-u Boot Device components Item Description Item Description Boot device cage M.2 slots Boot device carriers HPE NS204i-u Boot Device LED definitions HPE NS204i-u Boot Device LED definitions HPE ProLiant DL360 Gen11 Server User Guide... -
Page 23: Setup
Subtopics Optional services Optional services Setting up the server Setting up the server Operational requirements Operational requirements Rack warnings and cautions Rack warnings and cautions Server warnings and cautions Server warnings and cautions HPE ProLiant DL360 Gen11 Server User Guide... -
Page 24: Optional Services
HPE support services offer upgraded service levels to expand the standard product warranty with easy‑to‑buy, easy‑to‑use support packages that will help you make the most of your server investments. Some of the HPE support services for hardware, software, or both are: HPE Pointnext Tech Care –... -
Page 25: Operational Requirements
For remote management, use the iLO virtual power button. Operational requirements Operational requirements When preparing the site and planning the installation for the HPE ProLiant DL360 Gen11 Server, be sure to observe the following general operational requirements: Space and airflow requirements... -
Page 26: Temperature Requirements
NEMA locking-style plugs or those complying with IEC 60309 are considered suitable for this purpose. Using common power outlet strips for the server is not recommended. HPE ProLiant DL360 Gen11 Server User Guide... -
Page 27: Rack Warnings And Cautions
You must fully understand the static and dynamic load carrying capacity of the server and be sure that it can accommodate the weight of the server. Be sure sufficient clearance exists for cabling, installation and removal of the server, and movement of the rack doors. HPE ProLiant DL360 Gen11 Server User Guide... -
Page 28: Server Warnings And Cautions
Use a wrist strap connected by a ground cord to a grounded workstation or computer chassis. Wrist straps are flexible straps with a minimum of 1 megohm ±10 percent resistance in the ground cords. To provide proper ground, wear the strap snug HPE ProLiant DL360 Gen11 Server User Guide... -
Page 29: Operations
BIOS configuration settings—Use the backup and restore function in UEFI System Utilities. For more information, see the UEFI user guide (https://www.hpe.com/info/UEFI-manuals https://www.hpe.com/info/UEFI-manuals). Custom default system settings Security passwords including those required for power-on and BIOS admin access, persistent memory, and Server Configuration Lock (for HPE Trusted Supply Chain servers) HPE ProLiant DL360 Gen11 Server User Guide... -
Page 30: Power Down The Server
Customer iLO user name, password, and DNS name iLO configuration settings For servers managed by HPE GreenLake for Compute Ops Management , make sure that you have your HPE GreenLake account ID. For more information, https://www.hpe.com/info/com-docs https://www.hpe.com/info/com-docs. Power down the server Power down the server Before powering down the server for any upgrade or maintenance procedures, perform a backup of critical server data and programs. -
Page 31: Release The Cable Management Arm
Release the cable management arm and swing away from the rack. Remove the server from the rack Remove the server from the rack Prerequisites Prerequisites Before you perform this procedure, review the: Rack warnings and cautions HPE ProLiant DL360 Gen11 Server User Guide... -
Page 32: Remove The Access Panel
1. Power down the server. 2. Extend the server from the rack . 3. Open or unlock the locking latch, slide the access panel to the rear of the chassis, and remove the access panel. HPE ProLiant DL360 Gen11 Server User Guide... -
Page 33: Remove The Primary Pcie Riser Cage
4. Do one of the following: a. Extend the server from the rack . b. Remove the server from the rack . 5. Remove the access panel . 6. Remove the PCI riser cage. HPE ProLiant DL360 Gen11 Server User Guide... -
Page 34: Install The Primary Pcie Riser Cage
1. Install the PCI riser cage. 2. Install the access panel . 3. Install the server into the rack . 4. Connect each power cord to the server. 5. Connect each power cord to the power source. HPE ProLiant DL360 Gen11 Server User Guide... -
Page 35: Removing A Hot-Plug Sas/Sata/Nvme Drive
Accessing the Systems Insight Display Accessing the Systems Insight Display About this task About this task The Systems Insight Display is only available on SFF platforms. Procedure Procedure 1. Press and release the panel. HPE ProLiant DL360 Gen11 Server User Guide... - Page 36 Allow the panel to extend past the rear of the server approximately 1.25 cm (0.5 in). 2. Push down on the latch. The access panel slides to a closed position. 3. Tighten the security screw on the latch, if needed. HPE ProLiant DL360 Gen11 Server User Guide...
- Page 37 Drive cages Energy pack options Energy pack options Hard drives Hard drives Management Management Memory Memory Networking Networking Optical drives and media bays Optical drives and media bays OS boot device OS boot device HPE ProLiant DL360 Gen11 Server User Guide...
- Page 38 CAUTION: To prevent damage to electrical components, properly ground the server before beginning any CAUTION: installation procedure. Improper grounding can cause electrostatic discharge. 2. Back up all server data. HPE ProLiant DL360 Gen11 Server User Guide...
- Page 39 The components included with the hardware option kit T-10 Torx screwdriver Procedure Procedure 1. Power down the server. 2. Remove all power: a. Disconnect each power cord from the power source. b. Disconnect each power cord from the server. HPE ProLiant DL360 Gen11 Server User Guide...
- Page 40 5. Remove the rear wall blank or riser cage. 6. Remove the OCP adapter blank. 7. Install the storage controller. 8. Connect the cables. 9. Install the access panel . 10. Slide the server into the rack. HPE ProLiant DL360 Gen11 Server User Guide...
- Page 41 3. Do one of the following: a. Extend the server from the rack . b. Remove the server from the rack . 4. Remove the access panel . 5. Remove any fan blanks. 6. Remove all standard fans. HPE ProLiant DL360 Gen11 Server User Guide...
- Page 42 Installing a 2 SFF drive cage Installing a 2 SFF drive cage Installing a 2 SFF drive cage Prerequisites Prerequisites Be sure you have the following: The components included with the option kit HPE ProLiant DL360 Gen11 Server User Guide...
- Page 43 4. Do one of the following: a. Extend the server from the rack. b. Remove the server from the rack. 5. Remove the universal media bay blank. 6. Install the 2 SFF drive cage. HPE ProLiant DL360 Gen11 Server User Guide...
- Page 44 12. Install the server in the rack. 13. Connect each power cord to the server. 14. Connect each power cord to the power source. 15. Power up the server. Energy pack options Energy pack options HPE ProLiant DL360 Gen11 Server User Guide...
- Page 45 HPE Smart Storage Battery HPE Smart Storage Hybrid Capacitor One energy pack supports multiple devices. After it is installed, the status of the energy pack appears in HPE iLO. For more information, see the iLO user guide: https://www.hpe.com/support/ilo6 https://www.hpe.com/support/ilo6...
- Page 46 Remove the server from the rack . 4. Remove the access panel . 5. Install the energy pack. 6. If needed, connect the extension cable. 7. Connect the cable to the system board. HPE ProLiant DL360 Gen11 Server User Guide...
- Page 47 Removal of the NVMe SSD before the device has completed and ceased signal/traffic flow can cause loss of data. Drives with the same capacity provide the greatest storage space efficiency when grouped into the same drive array. HPE ProLiant DL360 Gen11 Server User Guide...
- Page 48 CAUTION: To prevent improper cooling and thermal damage, do not operate the server unless all drive and device bays CAUTION: are populated with either a component or a blank. Procedure Procedure 1. Remove the drive blank: LFF drive blank SFF drive blank 2. Prepare the drive. LFF drive SFF drive HPE ProLiant DL360 Gen11 Server User Guide...
- Page 49 Installing the Systems Insight Display Installing the serial port option Installing the serial port option Installing the Systems Insight Display Installing the Systems Insight Display Prerequisites Prerequisites Before installing this option, be sure you have the following: HPE ProLiant DL360 Gen11 Server User Guide...
- Page 50 Extend the server from the rack . Remove the server from the rack . 6. Remove the access panel . 7. Remove the SID blank. 8. Guide the SID cable through the front of the server. HPE ProLiant DL360 Gen11 Server User Guide...
- Page 51 9. Using a T-10 Torx screwdriver, install the SID module . 10. Connect the SID cable to the system board. HPE ProLiant DL360 Gen11 Server User Guide...
- Page 52 CAUTION: installation procedure. Improper grounding can cause electrostatic discharge. 2. Back up all server data. 3. Power down the server. 4. Remove all power: a. Disconnect each power cord from the power source. HPE ProLiant DL360 Gen11 Server User Guide...
- Page 53 Remove the server from the rack . 6. Remove the access panel . 7. Remove the serial port blank. 8. Using a 5mm nut driver, install the serial cable. 9. Connect the serial cable to the system board. HPE ProLiant DL360 Gen11 Server User Guide...
- Page 54 Memory population information For specific memory population information, see the memory population guidelines on the Hewlett Packard Enterprise website (https://www.hpe.com/docs/server-memory https://www.hpe.com/docs/server-memory). DIMM-processor compatibility DIMM-processor compatibility Fourth-generation Intel Xeon Scalable processors support DDR5-4800 DIMMs. HPE ProLiant DL360 Gen11 Server User Guide...
- Page 55 Extend the server from the rack . b. Remove the server from the rack . 4. Remove the access panel . 5. Open the DIMM slot latches. 6. Install the DIMM blank. HPE ProLiant DL360 Gen11 Server User Guide...
- Page 56 3. Do one of the following: a. Extend the server from the rack . b. Remove the server from the rack . 4. Remove the access panel . 5. Open the DIMM slot latches. 6. Install the DIMM. HPE ProLiant DL360 Gen11 Server User Guide...
- Page 57 Before you begin this procedure, make sure that the components included with the hardware option kit are available. Procedure Procedure 1. Power down the server. 2. Remove all power: a. Disconnect each power cord from the power source. b. Disconnect each power cord from the server. HPE ProLiant DL360 Gen11 Server User Guide...
- Page 58 5. Remove the rear wall blank or riser cage. 6. Remove the OCP adapter blank. 7. Install the network adapter. 8. Connect the cables. 9. Install the access panel . 10. Slide the server into the rack. HPE ProLiant DL360 Gen11 Server User Guide...
- Page 59 6. Remove the access panel . 7. Do one of the following: To install an adapter in slot 1 of the primary riser: a. Remove the primary PCI riser cage. b. Remove the blank. c. Install the adapter. HPE ProLiant DL360 Gen11 Server User Guide...
- Page 60 Installing the 8 SFF display port/USB option Prerequisites Prerequisites Before installing this option, be sure that you have the following: The components included with the hardware option kit T-10 Torx screwdriver Procedure Procedure HPE ProLiant DL360 Gen11 Server User Guide...
- Page 61 Extend the server from the rack . b. Remove the server from the rack . 5. Remove the access panel . 6. Remove the bay blank. 7. Install the 8SFF display port/USB/optical option. HPE ProLiant DL360 Gen11 Server User Guide...
- Page 62 Disconnect each power cord from the power source. b. Disconnect each power cord from the server. 3. Do one of the following: a. Extend the server from the rack . b. Remove the server from the rack . HPE ProLiant DL360 Gen11 Server User Guide...
- Page 63 4. Remove the access panel . 5. Remove the optical drive blank. 6. Install the optical drive. 7. Connect the optical drive cable. HPE ProLiant DL360 Gen11 Server User Guide...
- Page 64 3. Do one of the following: a. Extend the server from the rack . b. Remove the server from the rack . 4. Using a Torx T-10 screwdriver, remove the 4LFF display port/USB blank. HPE ProLiant DL360 Gen11 Server User Guide...
- Page 65 5. Install the 4LFF display port/USB module. 6. Remove the access panel . 7. Connect the cable to the system board. HPE ProLiant DL360 Gen11 Server User Guide...
- Page 66 Disconnect each power cord from the server. 4. Do one of the following: a. Extend the server from the rack . b. Remove the server from the rack . 5. Remove the LFF optical drive bay blank. HPE ProLiant DL360 Gen11 Server User Guide...
- Page 67 6. Install the optical drive. 7. Remove the access panel . 8. Connect the cable to the system board. HPE ProLiant DL360 Gen11 Server User Guide...
- Page 68 Installing boot device drives Installing the HPE NS204i Boot Device Installing the HPE NS204i Boot Device Installing boot device drives Installing boot device drives Procedure Procedure 1. Push the button to pull out the carrier. HPE ProLiant DL360 Gen11 Server User Guide...
- Page 69 3. Insert the SSD into the M.2 slot at a 45° angle (callout 1). 4. Carefully press the SSD down to the horizontal position (callout 2). 5. Install the SSD mounting screw (callout 3). HPE ProLiant DL360 Gen11 Server User Guide...
- Page 70 About this task Note the following: The HPE NS204i-u Gen11 NVMe Hot Plug Boot Optimized Storage Device is a PCIe3 x4 custom form-factor module that includes two hot pluggable 2280 M.2 NVMe SSDs. HPE NS204i-u Boot Device auto-creates a RAID1 volume during boot, therefore does not require configuration.
- Page 71 7. Remove the slot 2 bracket from the primary riser cage. 8. Install the boot device cage. 9. Install the boot device drives . 10. Install the boot device. To install the external boot device: a. Install the latch. HPE ProLiant DL360 Gen11 Server User Guide...
- Page 72 Install the device into the riser cage. c. Install the riser cage. To install the internal boot device: a. Install the mounting bracket. HPE ProLiant DL360 Gen11 Server User Guide...
- Page 73 14. Connect each power cord to the server. 15. Connect each power cord to the power source. 16. Power up the server. 17. Verify the Online/Activity LEDs on the HPE NS204i Boot Device are solid green . Results Results The installation is complete.
- Page 74 WARNING: To reduce the risk of personal injury from hot surfaces, allow the power supply or power supply blank to WARNING: cool before touching it. 4. Insert the power supply into the power supply bay until it clicks into place. HPE ProLiant DL360 Gen11 Server User Guide...
- Page 75 IMPORTANT: If installing a processor with a faster speed, update the system ROM before installing the processor. To IMPORTANT: download firmware, go to the Hewlett Packard Enterprise Support Center website ( https://www.hpe.com/info/dl360gen11-docs). https://www.hpe.com/info/dl360gen11-docs Installing the processor Installing the processor HPE ProLiant DL360 Gen11 Server User Guide...
- Page 76 1. If you are using the same heatsink, apply the full content of the thermal grease syringes on top of the processor. Follow the pattern shown in the following image. 2. If you are using a new heatsink, remove the protective film from the thermal interface material. 3. Set the anti-tilt wires to the locked position. HPE ProLiant DL360 Gen11 Server User Guide...
- Page 77 The following illustration calls out the keying feature tabs that secure the processor. Different processor carriers will have these tabs in different locations. 5. Attach the heatsink to the processor carrier: a. Align the pin 1 indicator on the processor carrier with that on the heatsink. HPE ProLiant DL360 Gen11 Server User Guide...
- Page 78 There will be an audible click to indicate that the heatsink is properly latched on the processor carrier. 6. Perform the following verification steps: a. Verify that the tabs on the processor carrier are securely latched on the heatsink. HPE ProLiant DL360 Gen11 Server User Guide...
- Page 79 Verify that the pin 1 indicators on the processor and processor carrier are aligned. c. Verity that the processor is properly secured by the carrier snaps. HPE ProLiant DL360 Gen11 Server User Guide...
- Page 80 Carefully lower the processor-heatsink module onto the bolster plate guide posts. The posts are keyed so that the module can only be installed one way. Make sure that the module is properly seated on the bolster plate before securing the screws. HPE ProLiant DL360 Gen11 Server User Guide...
- Page 81 Use a T-30 Torx screwdriver to tighten one pair of diagonally opposite heatsink screws (callouts 1 to 2), and then tighten the other pair of heatsink screws (callouts 3 to 4). 9. Install the air baffle and other removed hardware components. HPE ProLiant DL360 Gen11 Server User Guide...
- Page 82 Rack mounting options Rack mounting options Use the quick-deploy, toolless HPE rack rail option to install the server in a standard four-post server. The rail design supports installation on server of different mounting interfaces. For cable management, the rack rail kit might include one or both of the following options:...
- Page 83 Rail number labels on the chassis Rail #3 and #5 Rail identifier stamps on the inner rail of the friction rack rail Rail identifier stamps on the mounting rail of the friction rack rail HPE ProLiant DL360 Gen11 Server User Guide...
- Page 84 2. Identify the rack rails. The front end of the rails is marked as FRONT LEFT FRONT LEFT or FRONT RIGHT FRONT RIGHT. The other end of the rails is marked as REAR REAR. HPE ProLiant DL360 Gen11 Server User Guide...
- Page 85 3. Extend the rack rails to align with the depth of the rack. 4. Install the rack rails. For round-hole or square-hole racks: For threaded round-hole racks: HPE ProLiant DL360 Gen11 Server User Guide...
- Page 86 5. Install the server into the rack . Installing the server into the rack Installing the server into the rack HPE ProLiant DL360 Gen11 Server User Guide...
- Page 87 2. Install the server into the rack: a. Insert the inner rails into the slide rails (callout 1). b. Slide the server into the rack until the chassis ears are flush against the rack posts (callout 2). HPE ProLiant DL360 Gen11 Server User Guide...
- Page 88 Connect each power cord to the power source. 6. If installed, close the cable management arm. Installing the rack rail hook-and-loop strap Installing the rack rail hook-and-loop strap About this task About this task HPE ProLiant DL360 Gen11 Server User Guide...
- Page 89 Prerequisites Before you perform this procedure, review the Rack warnings and cautions. Procedure Procedure 1. Connect and secure all peripheral cables and power cords to the rear panel. 2. (Optional) Rotate the bracket. HPE ProLiant DL360 Gen11 Server User Guide...
- Page 90 3. Install the CMA. 4. Open the cable clamps. HPE ProLiant DL360 Gen11 Server User Guide...
- Page 91 Otherwise, the cables might snag on other equipment installed in the server when the server is extended from or returned to the server. Route the peripheral cables and power cords through the cable clamps and/or straps. 6. Close the cable clamps. HPE ProLiant DL360 Gen11 Server User Guide...
- Page 92 PCIe5 slot description Primary PCI riser cage options Primary PCI riser cage options Secondary PCI riser options Secondary PCI riser options PCIe5 slot description PCIe5 slot description Item Item Description Description Definition Definition HPE ProLiant DL360 Gen11 Server User Guide...
- Page 93 Installing an expansion board in slot 1 Prerequisites Prerequisites Before installing this option, be sure you have the following: The components included with the hardware option kit T-10 Torx screwdriver Procedure Procedure 1. Observe the following alerts: HPE ProLiant DL360 Gen11 Server User Guide...
- Page 94 Installing an expansion board in slot 2 Prerequisites Prerequisites Before installing this option, be sure you have the following: The components included with the hardware option kit T-10 Torx screwdriver Procedure Procedure 1. Observe the following alerts: HPE ProLiant DL360 Gen11 Server User Guide...
- Page 95 9. Use a T-10 Torx screwdriver to Install the expansion board. 10. Connect any required internal or external cables to the expansion board. 11. Install the primary PCIe riser cage. 12. Install the access panel. 13. Install the server in the rack. HPE ProLiant DL360 Gen11 Server User Guide...
- Page 96 7. Remove the primary PCI riser cage. 8. Install the GPU bracket. 9. Install the GPU in the riser cage. If installing a GPU requiring greater than 75W, connect the power cable to the primary riser power connector. HPE ProLiant DL360 Gen11 Server User Guide...
- Page 97 WARNING: To reduce the risk of personal injury from hot surfaces, allow the drives and the internal system WARNING: components to cool before touching them. CAUTION: To prevent damage to electrical components, properly ground the server before beginning any CAUTION: HPE ProLiant DL360 Gen11 Server User Guide...
- Page 98 This option requires a dual processor configuration. Before installing this option, be sure you have the following: The components included with the hardware option kit Any expansion boards or controllers you plan to install HPE ProLiant DL360 Gen11 Server User Guide...
- Page 99 4. Remove the access panel . 5. Remove the primary PCI riser cage. 6. Use a T-10 Torx screwdriver to remove the slot 2 bracket from the primary riser cage. 7. Remove the secondary riser blank. HPE ProLiant DL360 Gen11 Server User Guide...
- Page 100 8. Using a T-15 Torx screwdriver, remove the rear riser support bracket. 9. Install the full-height riser support bracket. 10. Install the riser cage. Primary HPE ProLiant DL360 Gen11 Server User Guide...
- Page 101 11. Install the access panel . 12. Install the server in the rack. 13. Connect each power cord to the server. 14. Connect each power cord to the power source. 15. Power up the server . HPE ProLiant DL360 Gen11 Server User Guide...
- Page 102 5. Do one of the following: a. Extend the server from the rack . b. Remove the server from the rack . 6. Remove the access panel . 7. Remove the secondary riser: Secondary full-height Secondary low-profile HPE ProLiant DL360 Gen11 Server User Guide...
- Page 103 Secondary half-height: a. Remove the blank. b. Using a Torx T-10 screwdriver, install the controller. 9. Connect any required internal or external cables to the expansion board. 10. Install the access panel . HPE ProLiant DL360 Gen11 Server User Guide...
- Page 104 Installing the Chassis Intrusion Detection switch option Trusted Platform Module 2.0 guidelines Trusted Platform Module 2.0 guidelines Installing the bezel Installing the bezel Procedure Procedure 1. Install the bezel. 2. Using a Kensington security lock, lock the bezel. HPE ProLiant DL360 Gen11 Server User Guide...
- Page 105 Extend the server from the rack . b. Remove the server from the rack . 4. Remove the access panel . 5. Install the chassis intrusion detection switch behind the power supply bays. HPE ProLiant DL360 Gen11 Server User Guide...
- Page 106 Recovery Mode after BitLocker detects a possible compromise of system integrity. HPE is not liable for blocked data access caused by improper TPM use. For operating instructions, see the documentation for the HPE ProLiant DL360 Gen11 Server User Guide...
- Page 107 Grip the body of the cable connector. Do not pull on the cable itself because this action can damage the internal wires of the cable or the pins on the port. If a cable does not disconnect easily, check for any release latch that must be pressed to disconnect the cable. HPE ProLiant DL360 Gen11 Server User Guide...
- Page 108 Use the cable part number or search feature to find your diagram. Table 1. SFF cables Table 1. SFF cables Component cabling Component cabling Cable part number Cable part number 8SFF drive backplane cabling P43732-001 P45610-001 P43730-001 P43733-001 P43731-001 HPE ProLiant DL360 Gen11 Server User Guide...
- Page 109 Table 4. Power cables Table 4. Power cables Component cabling Component cabling Cable part number Cable part number Power cabling P43726-001 P43729-001 869667-001 Right ear power switch cable P43727-001 Smart storage battery cabling P45618-001 HPE ProLiant DL360 Gen11 Server User Guide...
- Page 110 Serial port cabling Smart storage battery/capacitor cabling Smart storage battery/capacitor cabling bby_086 bby_086 8 SFF drive backplane cabling 8 SFF drive backplane cabling 8 SFF box 1: System board 8 SFF box 1: System board HPE ProLiant DL360 Gen11 Server User Guide...
- Page 111 Cable part number Cable part number Color Color From From P43730-001 Orange Drive backplane System board Option kit: P48897-B21 8 SFF box 1: System board (balanced, CPU1/CPU2) 8 SFF box 1: System board (balanced, CPU1/CPU2) HPE ProLiant DL360 Gen11 Server User Guide...
- Page 112 Cable part number Cable part number Color Color From From P43731-001 Orange Drive backplane System board Option kit: P48896-B21 8 SFF box 1: Primary type-p controller 8 SFF box 1: Primary type-p controller HPE ProLiant DL360 Gen11 Server User Guide...
- Page 113 Cable part number Cable part number Color Color From From P45617-001 Orange Drive backplane Primary type-p controller Option kit: P48909-B21 8 SFF box 1: Primary type-o controller 8 SFF box 1: Primary type-o controller HPE ProLiant DL360 Gen11 Server User Guide...
- Page 114 Cable part number Cable part number Color Color From From P48963-001 Orange Drive backplane Primary type-o controller Option kit: P52416-B21 8 SFF box 1: Primary type-o controller 8 SFF box 1: Primary type-o controller HPE ProLiant DL360 Gen11 Server User Guide...
- Page 115 Cable part number Color Color From From P45612-001 Pink Drive backplane Primary type-p controller P45613-001 Yellow Drive backplane Primary type-p controller P45614-001 Blue Drive backplane Primary type-p controller P45615-001 Orange Drive backplane Primary type-p controller HPE ProLiant DL360 Gen11 Server User Guide...
- Page 116 Color From From P45610-001 Orange Drive backplane Primary type-o controller Option kit: P48909-B21 2 SFF drive backplane cabling 2 SFF drive backplane cabling 2 SFF side-by-side: System board 2 SFF side-by-side: System board HPE ProLiant DL360 Gen11 Server User Guide...
- Page 117 From P43738-001 Orange 2 SFF backplane System board SlimSAS port Option kit: P48899-B21 2 SFF side-by-side: System board 2 SFF side-by-side: System board Cable part number Cable part number Color Color From From HPE ProLiant DL360 Gen11 Server User Guide...
- Page 118 Option kit: P48910-B21 2 SFF side-by-side: Rear MCIO port 2 SFF side-by-side: Rear MCIO port Cable part number Cable part number Color Color From From P45608-001 Orange 2 SFF backplane CPU1 MCIO port 1 HPE ProLiant DL360 Gen11 Server User Guide...
- Page 119 2 SFF side-by-side: Secondary type-o controller 2 SFF side-by-side: Secondary type-o controller Cable part number Cable part number Color Color From From P48961-001 Orange 2 SFF backplane OCP slot 15 port 1 Option kit: P48910-B21 HPE ProLiant DL360 Gen11 Server User Guide...
- Page 120 4 LFF box 1: Primary type-o controller 4 LFF box 1: Primary type-o controller Cable part number Cable part number Color Color From From P48958-001 Orange Drive backplane Primary type-o controller port 1 Option kit: P48913-B21 HPE ProLiant DL360 Gen11 Server User Guide...
- Page 121 NS204i-u cabling Internal NS204i-u power Internal NS204i-u power Cable part number Cable part number Color Color From From P48956-001 Orange NS204i-u boot device System board Option kit: P48920-B21 Internal NS204i-u data Internal NS204i-u data HPE ProLiant DL360 Gen11 Server User Guide...
- Page 122 Riser cage NS204i-u power Riser cage NS204i-u power Cable part number Cable part number Color Color From From P54088-001 Orange NS204i-u boot device System board Option kit: P54702-B21 Riser cage NS204i-u data Riser cage NS204i-u data HPE ProLiant DL360 Gen11 Server User Guide...
- Page 123 OCP slot 15 port 2 OCP slot 15 port 2 Cable part number Cable part number Color Color From From P43734-001 Orange OCP slot 15 port 2 Socket 2 MCIO connector Option kit: P52417-B21 HPE ProLiant DL360 Gen11 Server User Guide...
- Page 124 Cable part number Cable part number Color Color From From P43735-001 Orange OCP slot 15 port 1 Socket 1 MCIO port 1 Option kit: P52417-B21 OCP slot 14 port 2 OCP slot 14 port 2 HPE ProLiant DL360 Gen11 Server User Guide...
- Page 125 OCP slot 14 port 2 Socket 1 MCIO port 1 Option kit: P52417-B21 Power cabling Power cabling Power switch Power switch Cable part number Cable part number Color Color From From P43727-001 Orange Power switch System board HPE ProLiant DL360 Gen11 Server User Guide...
- Page 126 8 SFF backplane power 8 SFF backplane power Cable part number Cable part number Color Color From From P43729-001 Orange 8 SFF backplane System board Option kit: P48895-B21 2 SFF backplane power 2 SFF backplane power HPE ProLiant DL360 Gen11 Server User Guide...
- Page 127 Option kit: P48899-B21 IO cabling IO cabling SFF optical disk drive cabling SFF optical disk drive cabling Cable part number Cable part number Color Color From From P45622-001 Orange SFF optical disk drive System board HPE ProLiant DL360 Gen11 Server User Guide...
- Page 128 LFF optical disk drive cabling Cable part number Cable part number Color Color From From P45621-001 Orange LFF optical disc drive System board Option kit: P48914-B21 LFF front display port/USB cabling LFF front display port/USB cabling HPE ProLiant DL360 Gen11 Server User Guide...
- Page 129 System board Option kit: P48928-B21 Systems Insight Display cabling Systems Insight Display cabling Cable part number Cable part number Color Color From From P48971-001 Orange Systems Insight Display System board module Option kit: P48927-B21 HPE ProLiant DL360 Gen11 Server User Guide...
- Page 130 Cable part number Color Color From From P47751-001 Orange Intrusion detection switch System board Option kit: P48922-B21 Serial port cabling Serial port cabling Cable part number Cable part number Color Color From From HPE ProLiant DL360 Gen11 Server User Guide...
- Page 131 Some utilities might not apply to your server. For information about server compatibility with the products listed in this chapter, see the product QuickSpecs (https://www.hpe.com/info/dl360gen11-docs). Products ordered from HPE Factory Express might have already been configured with some or all the configurations in this chapter. To determine if any additional setup is required, see your HPE Factory Express order.
- Page 132 Updating firmware or system ROM Updating firmware or system ROM Download service packs Service Pack for ProLiant (SPP) https://www.hpe.com/servers/spp/download https://www.hpe.com/servers/spp/download HPE Synergy software releases and HPE Synergy Service Packs (SSPs) https://www.hpe.com/info/synergy-sw-release-information https://www.hpe.com/info/synergy-sw-release-information Deploy service packs to a single server Smart Update Manager (SUM) https://www.hpe.com/info/sum-docs...
- Page 133 For servers running HPE OneView, do not use another tool, such as iLO, to delete or change certain settings. For more information about using HPE OneView and iLO to manage the same server, see the iLO user guide at https://www.hpe.com/support/ilo6.
- Page 134 Managing the HPE Managing the HPE NS204i Boot Device NS204i Boot Device For more information on supported features and maintenance information for the HPE NS204i Boot Device , see the HPE NS204 Boot Device User Guide: https://www.hpe.com/support/NS204-UG https://www.hpe.com/support/NS204-UG Deploying an OS Deploying an OS For a list of supported operating systems, see the HPE Servers Support &...
- Page 135 Configure and use the Server Configuration Lock feature on HPE Server Configuration Lock User Guide for HPE ProLiant servers Trusted Supply Chain servers and other servers that have the and HPE Synergy Server Configuration Lock feature enabled. https://www.hpe.com/info/server-config-lock-UG-en https://www.hpe.com/info/server-config-lock-UG-en Optimizing the server...
- Page 136 Error Message Guide for HPE ProLiant Gen11 servers and HPE Synergy provides a list of error messages and information to assist with interpreting and resolving error messages.
- Page 137 Depending on the installed options and the regional location where the server was purchased, the server can be configured with one of the following power supplies: HPE 800 W Flex Slot Platinum Hot-plug Low Halogen Power Supply HPE 1000 W Flex Slot Titanium Hot-plug Power Supply...
- Page 138 Subtopics Subtopics HPE 800 W Flex Slot Platinum Hot-plug Low Halogen Power Supply HPE 800 W Flex Slot Platinum Hot-plug Low Halogen Power Supply HPE 1000 W Flex Slot Titanium Hot-plug Power Supply HPE 1000 W Flex Slot Titanium Hot-plug Power Supply...
- Page 139 Maximum peak power 1000 W at 100 VAC to 127 VAC 1000 W at 200 VAC to 240 VAC HPE 1600 W Flex Slot Platinum Hot-plug Low Halogen Power Supply HPE 1600 W Flex Slot Platinum Hot-plug Low Halogen Power Supply Specification...
- Page 140 Information to collect Information to collect Technical support registration number (if applicable) Product name, model or version, and serial number Operating system name and version Firmware version Error messages Product-specific reports and logs HPE ProLiant DL360 Gen11 Server User Guide...
- Page 141 IMPORTANT: IMPORTANT: Access to some updates might require product entitlement when accessed through the Hewlett Packard Enterprise Support Center. You must have an HPE Onepass set up with relevant entitlements. Remote support Remote support Remote support is available with supported devices as part of your warranty or contractual support agreement. It provides intelligent event diagnosis, and automatic, secure submission of hardware event notifications to Hewlett Packard Enterprise, which initiates a fast and accurate resolution based on the service level of your product.
- Page 142 Feedback button and icons (located at the bottom of an opened document) on the Hewlett Packard Enterprise Support Center portal (https://www.hpe.com/support/hpesc https://www.hpe.com/support/hpesc) to send any errors, suggestions, or comments. All document information is captured by the process. HPE ProLiant DL360 Gen11 Server User Guide...
Need help?
Do you have a question about the ProLiant DL360 Gen11 and is the answer not in the manual?
Questions and answers