
Subscribe to Our Youtube Channel
Related Manuals for Landoll Brillion 3631-30


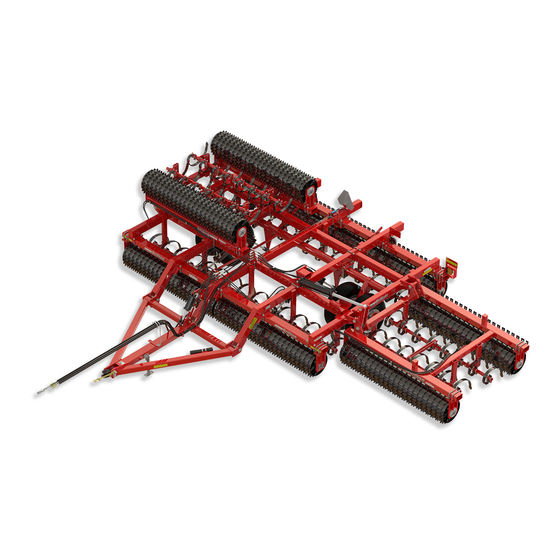
Summary of Contents for Landoll Brillion 3631-30
- Page 1 ‘ Pulvi-Mulcher 3631-30 Model Operator’s Manual LANDOLL COMPANY, LLC 1900 North Street Marysville, Kansas 66508 (785) 562-5381 800-428-5655 ~ WWW.LANDOLL.COM F-982-0223...
- Page 2 Manuals for 3631-30 Pulvi-Mulcher Manual Number Manual Type F-982 Operator’s Manual F-981 Parts Manual F-984 3631-25 / 3631-30 Coil Tine Harrow Kit, Instruction Sheet...
- Page 3 DANGER DO NOT operate or perform any maintenance tasks on this equipment until you have completed the following: 1. Receive proper training to operate this equipment safely. 2. Read and understand the operator’s manual. 3. Be thoroughly trained on inspection and repair procedures. Failure to comply with this warning may result in serious injury or possibly death.
- Page 5 Table of Contents Safety Information Introduction ........... . 1-1 Description of Unit .
- Page 6 TABLE OF CONTENTS Purging the Hydraulic System ........2-31 Purge the Lift Cylinders .
- Page 7 TABLE OF CONTENTS Operation Tractor Preparation ..........3-2 Pulvi-Mulcher Preparation.
- Page 8 TABLE OF CONTENTS F-982-0223...
- Page 9 Failure to comply with this warning can result in within 10 days of retail purchase, using the Landoll personal injury or death, damage to the implement Corporation Ag Products on-line registration process.
- Page 10 TABLE OF CONTENTS SAFETY INFORMATION Safety • When applying decals to the implement, be sure to clean the surface to remove any dirt or residue. Where possible, sign placement should protect the NOTE sign from abrasion, damage, or obstruction from mud, Investigation has shown that nearly 1/3 of all farm dirt, oil etc.
- Page 11 TABLE OF CONTENTS SAFETY INFORMATION Safety Instructions for Towing Protective Equipment Vehicles • Wear protective clothing & equipment appropriate for the job. Avoid loose fitting clothing. The maximum travel speed is the lesser of • Because prolonged exposure to loud noise can cause •...
- Page 12 TABLE OF CONTENTS SAFETY INFORMATION Safety Chain • Attach the chain to the tractor drawbar support or specified anchor location. Never attach the chain to Use a Safety Chain to help control drawn machinery an intermediate support. Allow only enough slack in should it separate from the Tractor Drawbar.
- Page 13 196678 mile/h 144193 ITEM 14 ITEM 10 ITEM 11 ITEM 12 528933 528938 528934 144193 A LANDOLL PRODUCT ITEM 9 ITEM 13 214146 170510 CAUTION Landoll Company, LLC PULVIMULCHER Marysville, Kansas MOVING MACHINES CAN CAUSE INJURY. KEEP AWAY! www.landoll.com 1. KEEP AWAY FROM MOVING TRACTORS OR IMPLEMENTS.
- Page 14 TABLE OF CONTENTS SAFETY INFORMATION 3630-25 Decal Drawbar Figure 1-4: Decal Locations (1 of 5) F-982-0223...
- Page 15 TABLE OF CONTENTS SAFETY INFORMATION Front View Rear View Figure 1-5: Decal Locations (2 of 5) F-982-0223...
- Page 16 TABLE OF CONTENTS SAFETY INFORMATION Side Views 3630-30NC Decal CtrSide Figure 1-6: Decal Locations (3 of 5) F-982-0223...
- Page 17 TABLE OF CONTENTS SAFETY INFORMATION 3630-30NC Decal RHWing Figure 1-7: Decal Locations, Right Hand Wing (4 of 5) F-982-0223...
- Page 18 TABLE OF CONTENTS SAFETY INFORMATION 3630-30NC Decal LHWing Figure 1-8: Decal Locations, Left Hand Wing (5 of 5) 1-10 F-982-0223...
- Page 19 Chapter 2 TABLE OF CONTENTS Assembly Frame Installation CAUTION NOTE Do not work on or under this machine unless Prior to starting assembly refer to Figure 2-3 for proper securely blocked and supported by a hoist or frame placement dimensions. After laying out the tractor or by other sufficient means.
- Page 20 TABLE OF CONTENTS ASSEMBLY Locknut,3/4-10 Bolt, 3/4-10 x 2-1/2 Front Roller Support Front Roller Frame Asm Bolt, 3/4-10 x 2-1/2 Locknut, 3/4-10 Figure 2-1: Front Roller Support F-982-0223...
- Page 21 TABLE OF CONTENTS ASSEMBLY 79 11/16" 36" 79 11/16" Front Rear 79 11/16" 36" 79 11/16" Top View Figure 2-2: Center Frame Dimensions F-982-0223...
- Page 22 TABLE OF CONTENTS ASSEMBLY Figure 2-3: Right Hand Center Frame F-982-0223...
- Page 23 TABLE OF CONTENTS ASSEMBLY Figure 2-4: Center Frame F-982-0223...
- Page 24 TABLE OF CONTENTS ASSEMBLY Rockshaft Installation 1. Spread open the six UHMV Bearings and place them onto the Rockshaft. Make sure the mounting surface is free of rust or dirt. See Figure 2-6. WARNING 2. Position the Rockshaft into the Frame Mounts. Place the Lift Cap Bearing and fasten with 3/4-10 x 2 Bolts Do not attempt to lift heavy parts (such as the and Locknuts.
- Page 25 TABLE OF CONTENTS ASSEMBLY Tire and Wheel Installation WARNING Use a torque wrench to assure proper torque. Insufficient torque can cause stud breakage and damage the wheel pilots. Over torque can stress the studs and strip the threads. NOTE All tire/wheel assemblies are mounted with the Valve 8 BOLT Stem facing outward from Hub and Spindle.
- Page 26 TABLE OF CONTENTS ASSEMBLY Rockshaft Cylinder and Transport Lock Installation 1. Attach 4-1/2 x 14 hydraulic cylinder rod end to Rockshaft Arm with provided pin. See Figure 2-9. 2. Align base end of cylinder between the frame lug. Attach the Transport Lock to the base end of the cylinder, by sliding the 3 Hole Pin through the top hole of the Transport Lock and through the Frame Lugs and Rockshaft Cylinder Base End.
- Page 27 TABLE OF CONTENTS ASSEMBLY Washer, 2-1/2 x 1-1/4 x 3/4 Cotter Pin Roll Pin 3/16 x 2 3/8 x 2-1/4 Clevis Pin, 1 x 2-1/2 Washer,1.25 x Pin,1-1/4 1.875 x 14ga 3 Hole Washer, 1 x 1-1/2 x 18ga Transport Lock Transport Lock Clamp...
- Page 28 TABLE OF CONTENTS ASSEMBLY Drawbar Installation (Manual Jack) 1. Attach the bottom of the Hitch Leveler to the Drawbar by removing the 5/16 x 2 Roll Pin, 1-1/4 x 2-1/2 12ga Washer and 1-1/4 x 12-1/2 Pin. Position the Hitch Leveler between the center lugs and reinstall the 1-1/4 x 12-1/2 Pin, 1-1/4 x 2-1/2 12ga Washer and 1-1/4 x 2 Roll Pin.
- Page 29 TABLE OF CONTENTS ASSEMBLY Figure 2-9: Drawbar Installation F-982-0223 2-11...
- Page 30 TABLE OF CONTENTS ASSEMBLY Drawbar w/ Hydraulic Jack Installation 1. Attach bottom of the Jack Tube to the Jack Base with Hyd Cyl Jack Pivot Tube. Place 1-34 Thrust Washers on each 3 x 8 end of the Jack Pivot Tube and secure with 5/16 x Elbow, 90, 2-1/2 Slotted Pin.
- Page 31 TABLE OF CONTENTS ASSEMBLY Figure 2-11: Drawbar w/ Hydraulic Jack Installation F-982-0223 2-13...
- Page 32 TABLE OF CONTENTS ASSEMBLY Drawbar Leveling Installation IMPORTANT Remove and discard the 5/8-11 x 10 Bolt, Flat Washer 1. Assemble the Leveling Cylinder Bracket to the center and Hex Nut that is holding the Hitch Leveler together, of the Front Roller Frame Tube with 3/4-10 U-Bolts so that the outer portion can pivot rearward.
- Page 33 TABLE OF CONTENTS ASSEMBLY Table provided for general use. NOTES: F-982-0223 2-15...
- Page 34 TABLE OF CONTENTS ASSEMBLY Manual Holder and Wrenches Installation Attach the Manual Holder to the frame using 1/4-20 x 1 Bolts, Flat Washers and Locknuts. Attach the two Open End/Box End Wrenches to the side of the Center Frame and the two Open End Wrenches to the side of the Hitch Leveler.
- Page 35 TABLE OF CONTENTS ASSEMBLY Wing Fold Hydraulic Cylinder NOTE Installation To reduce the Wing down float (droop) when turning around with the machine raised, install Optional Wing Ports on front cylinders are rear facing. Ports on rear Fold 4 x 29-3/4 Hydraulic Cylinders with Internal Stop cylinders are front facing.
- Page 36 TABLE OF CONTENTS ASSEMBLY Table provided for general use. NOTES: 2-18 F-982-0223...
- Page 37 TABLE OF CONTENTS ASSEMBLY Tooth Control Center Frame Hydraulics Cylinder Installation WARNING Install the base end 4-1/2 x 8 Rephasing Hydraulic Cylinders to the Cylinder Anchors on the front of the LH Escaping fluid under pressure can be nearly and RH Center Frames with the vendor supplied invisible and have enough force to penetrate the hardware.
- Page 38 TABLE OF CONTENTS ASSEMBLY Plumb Tooth Control Circuit 3. Install fittings and hoses for Tooth Control Hydraulic Cylinders. See Figures 2-17, 2-18 and 2-19. On each 1. Install Limit Valve fittings. See Figures 2-17 and side, wrap both hoses near the hinge pin area with 26 2-19.
- Page 39 TABLE OF CONTENTS ASSEMBLY Figure 2-17: Hydraulic Tooth Control Layout F-982-0223 2-21...
- Page 40 TABLE OF CONTENTS ASSEMBLY Figure 2-18: Hydraulic Tooth Control Schematic 2-22 F-982-0223...
- Page 41 TABLE OF CONTENTS ASSEMBLY Plumb Fold Circuit Gauge 1. Attach Fold/Down Pressure Valve to Frame Bracket Fold Hose Fold/Down with 3/8-16 x 1 Bolts, Flat and Lock Washers and Cylinder Base Pressure attach Relief Valve to Frame Bracket with a 1/4-20 x Manifold Fold Hose 2-1/4 Bolts, Flat Washers and Locknuts.
- Page 42 TABLE OF CONTENTS ASSEMBLY Figure 2-21: Down Pressure Valve Schematic 2-24 F-982-0223...
- Page 43 TABLE OF CONTENTS ASSEMBLY Lorem ipsum Figure 2-22: Fold Hydraulic Layout F-982-0223 2-25...
- Page 44 TABLE OF CONTENTS ASSEMBLY Figure 2-23: Fold Hydraulic Schematic 2-26 F-982-0223...
- Page 45 TABLE OF CONTENTS ASSEMBLY Table provided for general use. NOTES: F-982-0223 2-27...
- Page 46 TABLE OF CONTENTS ASSEMBLY Plumb Lift Circuit CAUTION 1. Attach the Counter Balance Valve to the inside frame A Restrictor is used in the base end of the Hitch bracket with 5/16-18 x Bolt, Flat Washer, Lock Leveling 4 x 16 Cylinder. Removal of this restrictor Washer and Nut, See Figures 2-25 and 2-26.
- Page 47 TABLE OF CONTENTS ASSEMBLY Figure 2-25: Hydraulic Lift Layout F-982-0223 2-29...
- Page 48 TABLE OF CONTENTS ASSEMBLY Figure 2-26: Hydraulic Lift Schematic 2-30 F-982-0223...
- Page 49 TABLE OF CONTENTS ASSEMBLY Purging the Hydraulic Purge the Lift Cylinders System Slowly raise machine and continue to hold hydraulic lever until lift and leveling cylinders are completely extended. Lift Cylinders are rephasing in extend. Hold leveler in WARNING raise to purge Lift Cylinders. Lower and raise unit completely extend and retract Escaping hydraulic fluid can cause serious cylinders 5-6 times to purge air from the lift circuit.
- Page 50 TABLE OF CONTENTS ASSEMBLY Table provided for general use. NOTES: 2-32 F-982-0223...
- Page 51 TABLE OF CONTENTS ASSEMBLY Center Frame Tooth Tube Installation Verify Tooth Tube Bearings are positioned in the proper hole. Bottom Hole: Roller with 24" Diameter Wheels. See Figure 2-30. 1. After marking the tubes for the shank locations, slide the 170" Tooth Tubes into the Tooth Tube Bearings. See Figure 2-31.
- Page 52 TABLE OF CONTENTS ASSEMBLY Center Frame Shank Mounting Dimensions Mark the tubes for Shank locations prior to installing the tubes. See Figure 2-31. NOTE Do Not mount the Shanks to the Tubes at this time. Top View Center Frame Shank Locations 5"...
- Page 53 TABLE OF CONTENTS ASSEMBLY Center Frame Tooth Control Brackets Mounting Dimensions Top View Center Frame Tooth Control Linkage All dimensions are for reference only 2-1/8" 2-1/8" 2 Places 2 Places Tooth Control Clamp Tooth Control 5" Clamp w/cutout Front Tooth Control Clamp Tooth 2"...
- Page 54 TABLE OF CONTENTS ASSEMBLY Center Frame Tooth Control 3. Position a Tooth Control Bracket on top of the right Rear Tooth Tube while straddling the Tooth Control Installation Tube. Insert 1 x 6-1/2 Pins. Place a 1" Flat Washer on each side of the Pin against the Tooth Control Bracket and secure with 5/16 x 2 Roll Pins.
- Page 55 TABLE OF CONTENTS ASSEMBLY Hydraulic Cylinder, 4-1/2 x 8 Front Tooth Control Tube 3630-30NC OpToothCtrl Bolt, 5/8-11 x 5 Tooth Control Bracket Flat Washer,1" Roll Pin, 5/16 x 2 Bolt, 5/8-11 x 5 Pin, 1 x 6-1/2 Flat Washer,1" Locknut,5/8-11 4 Hole Plate Clamp Plate...
- Page 56 TABLE OF CONTENTS ASSEMBLY Shank Installation Assemble Points to Shanks as shown in Figure 2-34. Mount the Shanks to the Tooth Control Tubes using two Engage Transport Locks 1/2-13 x 5 Bolts and Locknut. See Figure 2-31 for Center It is easier to bolt the points to the shanks before Shank Mounting Dimensions.
- Page 57 TABLE OF CONTENTS ASSEMBLY Table provided for general use. NOTES: F-982-0223 2-39...
- Page 58 TABLE OF CONTENTS ASSEMBLY Shank Depth Control 3. Slide the Depth Stop Assembly through the Depth Stop Guide to the Depth Stop Clamp. Position the Installation Depth Stop Assembly over the Depth Stop Clamp Lug and align the Top Hole of the Depth Stop Clamp for 1.
- Page 59 TABLE OF CONTENTS ASSEMBLY Top View Shank Depth Control All dimensions are for reference only Frame Front Depth Stop Cross Tube Assemble Limit Valve Mount Front Middle Tooth 7-1/2" Tube 9-1/8" Depth Stop Depth Stop Clamp Clamp Depth Stop Assemble Position for Rollers with 24"...
- Page 60 TABLE OF CONTENTS ASSEMBLY Center Frame 2-Row Harrow Installation 1. Remove 1 x 7-5/16 Pin from each Frame Adjuster Mount located on the inside of the Outer Frame Tube. Insert a Harrow Adjustment Tube into each Frame Adjuster Mount and re-insert 1 x 7-5/16 Pin in the bottom hole.
- Page 61 TABLE OF CONTENTS ASSEMBLY Figure 2-35: Center Frame 2-Row Harrow Installation F-982-0223 2-43...
- Page 62 TABLE OF CONTENTS ASSEMBLY Figure 2-36: Center Frame 2-Row Harrow Dimensions 2-44 F-982-0223...
- Page 63 TABLE OF CONTENTS ASSEMBLY Table provided for general use. NOTES: F-982-0223 2-45...
- Page 64 TABLE OF CONTENTS ASSEMBLY LED Warning Lamp 6. Repeat for the Left Side (Yellow Tape). 7. Plug the 7-Pin Harness 4-Pin Weather pack plug into Installation the Flasher Control Module, then route the harness along the inner RH Frame Tube, down the Drawbar NOTE and through the Hose Holder following the hydraulic Be sure when assembling Lamps onto Bracket that the...
- Page 65 TABLE OF CONTENTS ASSEMBLY Figure 2-39: Electrical Layout F-982-0223 2-47...
- Page 66 TABLE OF CONTENTS ASSEMBLY Figure 2-40: Electrical Dimensions 2-48 F-982-0223...
- Page 67 TABLE OF CONTENTS ASSEMBLY Bearing Hanger and Wing 2. Attach Bearing Hanger to Wing Frame on the Bottom with 3/4-10 x 2-1/4 Bolts and Locknuts. Do Not Rest Installation Tighten at this Time. Place the Wing Rest Bracket over the outside of the Bearing Hanger. Assemble the 1.
- Page 68 TABLE OF CONTENTS ASSEMBLY Wing to Frame Installation Washer, 1. Insert two Flange Bearings into each Wing Frame 1-1/4 x 2-1/2 x 12ga Hinge. Remove existing Pin and Hardware from Center Frame Hinge Lug. Position the Wing Frame Roll Pin, Hinges between the Center Frame Hinge Lugs and 5/16 x 2 align the holes.
- Page 69 TABLE OF CONTENTS ASSEMBLY Figure 2-45: Wing Hinge to Frame Installation F-982-0223 2-51...
- Page 70 TABLE OF CONTENTS ASSEMBLY Wing Lift Assembly WARNING Do not attempt to lift heavy parts (such as the frame, rock shaft, and pull hitch) manually. Use a hoist or a fork lift to move these parts into position. 1. Spread open the two UHMV Bearings and place them onto the Wing Lift.
- Page 71 TABLE OF CONTENTS ASSEMBLY Elbow, 90 8MOR x 10MJ Bolt,3/4-10 x 2 RH Wing Lift UHMW Bearing Right Hand Locknut, 1/2-13 x 5 Hyd Cyl 4 x 14 Locknut, Tire and 3/4-10 Wheel Asm Lift Cap Bearing LH Wing Lift Bolt,1/2-13 x 5 Left Hand Hub and...
- Page 72 TABLE OF CONTENTS ASSEMBLY Table provided for general use. NOTES: 2-54 F-982-0223...
- Page 73 TABLE OF CONTENTS ASSEMBLY Left and Right Hand Wing Roller Installation NOTE Roller Axle Assembly clamped end must be on the outer extremity of the Wing. 1. Apply anti-seize to each Roller Stub Shafts. Each Roller Stub Shaft will utilize a Dirt Shield, a 14ga Shim Washer (thinner), and two 11ga Shim Washers (thicker).
- Page 74 TABLE OF CONTENTS ASSEMBLY Figure 2-48: Left Hand Wing Roller Installation 2-56 F-982-0223...
- Page 75 TABLE OF CONTENTS ASSEMBLY Figure 2-49: Right Hand Wing Roller Installation F-982-0223 2-57...
- Page 76 TABLE OF CONTENTS ASSEMBLY Wing Tooth Control Cylinder Installation Install the base end 4 x 8 Rephasing Hydraulic Cylinders to the Cylinder Anchors on the front of the LH and RH Wing Frames with the vendor supplied hardware. Adjust the Anchor Nuts to achieve a distance of approximately 6-1/2"...
- Page 77 TABLE OF CONTENTS ASSEMBLY Wing Tooth Tube Installation Tooth Tube Tooth Tube Verify Tooth Tube Bearings are positioned in the proper Bearing hole. Bottom Hole: Roller with 24" Diameter Wheels. See Figure 2-55. 1. After marking the tubes for the shank locations, slide the 80"...
- Page 78 TABLE OF CONTENTS ASSEMBLY Wing Shank Mounting Dimensions Mark the tubes for Shank locations prior to installing the tubes. Do Not mount the Shanks to the tubes at this time. Top View LH Wing Shank Locations Front Hinge Stop Tooth Tube Tooth Tube Tooth Tube Bearing...
- Page 79 TABLE OF CONTENTS ASSEMBLY Top View RH Wing Shank Locations Front Hinge Stop Tooth Tube Tooth Tube Tooth Tube Bearing Bearing Tooth Tube Stop 3630-30NC OpRHWingShankDim Tooth Tube Stop Tooth Tube Bearing Bearing Tooth Tube Figure 2-54: Right Hand Wing Shank Mounting Dimensions F-982-0223 2-61...
- Page 80 TABLE OF CONTENTS ASSEMBLY Wing Tooth Control Mounting Dimensions Top View LH Wing Tooth Control Linkage All dimensions are for reference only 3/16" 8-1/2" 2 Places Front Hinge Cylinder Stop Tooth Tube Tooth Tube Tooth Tube Bearing Tooth Control Bearing Clamp Tooth Tube T ooth Control...
- Page 81 TABLE OF CONTENTS ASSEMBLY Top View RH Wing Tooth Control Linkage All dimensions are for reference only 3/16" 4" 2 Places Front Hinge Cylinder Stop Tooth Tube Tooth Tube Tooth Tube Tooth Control Bearing Bearing Clamp Tooth Tube Tooth Tube Tooth Tube Bearing Bearing...
- Page 82 TABLE OF CONTENTS ASSEMBLY Table provided for general use. NOTES: 2-64 F-982-0223...
- Page 83 TABLE OF CONTENTS ASSEMBLY Wing Tooth Control 3. Position a Tooth Control Clamp w/cutout on top of the right Rear Tooth Tube while straddling the Tooth Installation Control Tube. Insert 1 x 6-1/2 Pins. Place a 1" Flat Washer on each side of the Pin against the Tooth NOTE Control Clamp and fasten with 5/16 x 2 Roll Pins.
- Page 84 TABLE OF CONTENTS ASSEMBLY Hydraulic Cylinder, 4 x 8 RePhasing Tooth Control Tube Front Bolt, 5/8-11 x 5 Tooth Control Bracket Tooth Control Bracket Roll Pin, Bolt, 5/16 x 2 5/8-11 x 5 Pin, Flat Washer,1" 1 x 6-1/2 Clamp Plate Locknut, 5/8-11 4 Hole...
- Page 85 TABLE OF CONTENTS ASSEMBLY Hydraulic Cylinder 4 x 8 RePhasing Tooth Control Tube 3630-30NC OpRHWingToothCtrl Front Tooth Bolt, Control Bracket 5/8-11 x 5 Tooth Tooth Control Clamp Control Bracket Flat Washer,1" Roll Pin,5/16 x 2 Pin,1 x 6-1/2 Flat Washer,1" Bolt, 5/8-11 x 5 Clamp Plate...
- Page 86 TABLE OF CONTENTS ASSEMBLY Plumb Wing Tooth Control Purging the Tooth Control Cylinders Cylinders 1. Install fitting into 4 x 8 Wing Rephasing Hydraulic Pulvi-Mulcher Tooth Control Cylinders are series Cylinders. See Figures 2-18 and 2-19. cylinders that rephase on retract. 2.
- Page 87 TABLE OF CONTENTS ASSEMBLY Wing Shank Installation 2. Assemble Points to Shanks as shown in Figure 2-64. 3. Mount the Shanks to the Wing Tooth Control Tubes 1. Engage Transport Locks using two 1/2-13 x 5 Bolts and Locknut. See Figures 2-57 and 2-58 for Left and Right hand Shank NOTE Mounting Dimensions.
- Page 88 TABLE OF CONTENTS ASSEMBLY Wing 2-Row Harrow 2. The LH and RH Wing 2-Bar Harrow comes factory assembled. Lift Harrow Assembly and slide the Installation Harrow 3 x 3 Tube into the cut-out portion of the Harrow Adjustment Tube and insert a 1/2-13 U-Bolt 1.
- Page 89 TABLE OF CONTENTS ASSEMBLY Figure 2-62: Right Hand Wing Harrow F-982-0223 2-71...
- Page 90 TABLE OF CONTENTS ASSEMBLY 8 1/2" Harrow 2 1/4" Assembly Front Hinge 3x3 Harrow Tube Rear Hinge Harrow 14 1/2" Adjustment Tube U-Bolt,1/2-13 3x3 Harrow Tube Harrow Harrow Adjustment Assembly Tube Figure 2-63: Left Hand Wing Harrow Dimension 2-72 F-982-0223...
- Page 91 TABLE OF CONTENTS ASSEMBLY 7 3/4" Harrow 2" Assembly Front Hinge 3x3 Harrow Tube Rear Hinge Harrow 13 3/4" Adjustment Tube U-Bolt,1/2-13 3x3 Harrow Harrow Tube Adjustment Harrow Tube Assembly Figure 2-64: Right Hand Wing Harrow Dimension F-982-0223 2-73...
- Page 92 TABLE OF CONTENTS ASSEMBLY Roller Clamp Spacer 3. If there is a gap between the Axle Clamp and the Wheel Stop, install the appropriate Clamp Spacer Installation with 3/8-16 x 1-3/4 Bolt and Locknut. See Figure 2-69. 1. Raise the Machine and install Transport Locks. Wings See Maintenance Section for a list of other Kits that are should be unfolded.
- Page 93 TABLE OF CONTENTS ASSEMBLY Table provided for general use. NOTES: F-982-0223 2-75...
- Page 94 TABLE OF CONTENTS ASSEMBLY Center Rear Scraper 2. Assemble the Scraper Tube to the Center Scraper Brackets with a 3/8-16 U-Bolts, Scrapers and Flanged Installation Locknuts. Center the Scraper between the Notched Wheels and adjust the Scraper so that there is a 1/4 1.
- Page 95 TABLE OF CONTENTS ASSEMBLY Figure 2-67: Center Rear Scraper Mounting Dimensions F-982-0223 2-77...
- Page 96 TABLE OF CONTENTS ASSEMBLY Wing Rear Scraper 2. Assemble the Scraper Tube to the Wing Scraper Brackets with a 3/8-16 U-Bolts, Scrapers and Flanged Installation Locknuts. Center the Scraper between the Notched Wheels and adjust the Scraper so that there is a 1/4 1.
- Page 97 TABLE OF CONTENTS ASSEMBLY 3/8" 19 5/8" 60" Wing Scraper Bracket Hinge RH Wing Frame Scraper Tube RH Wing Rear Scrapers 3/4" 3/8" 60" 16 5/8" 3/8" Wing Scraper Bracket Hinge LH Wing Frame Scraper Tube LH Wing Rear Scrapers 3/4"...
- Page 98 TABLE OF CONTENTS ASSEMBLY Center Front Scrapers - Optional Installation similar to Rear Scrapers, See Page 2-76. Refer to the Mounting Dimension, See Figure 2-75. U-Bolt,5/8-11 Scraper Bracket U-Bolt,3/8-16 Flanged Locknut, 5/8-11 3630-30NC CtrFrontScraper U-Bolt,3/8-16 Scraper Flanged Locknut,3/8-16 Tube Figure 2-70: Center Front Scrapers Installation - Optional 2-80 F-982-0223...
- Page 99 TABLE OF CONTENTS ASSEMBLY Center Front Scraper Mounting Dimensions Figure 2-71: Center Front Scraper Mounting Dimensions F-982-0223 2-81...
- Page 100 TABLE OF CONTENTS ASSEMBLY Wing Front Scraper Installation - Optional Installation similar to Rear Wing Scrapers. See Page 2-78. Refer to the Mounting Dimensions. See Figure 2-77. Wing Scraper U-Bolt, Bracket 5/8-11 Flanged Locknut, Tube 5/8-11 U-Bolt, 5/8-11 Wing Scraper Bracket U-Bolt,3/8-16 Flanged Locknut, 5/8-11...
- Page 101 TABLE OF CONTENTS ASSEMBLY Wing Front Scraper Mounting Dimensions 19-5/8" 60" 3/8" Wing Scraper Bracket Hinge Frame Scraper Tube RH Wing Optional Front Scrapers View from the inside of the machine looking forward 3/4" 3/8" 3630-30NC OpWingFrontScraperDim 60" 16-5/8" 3/8" Wing Scraper Bracket Hinge...
- Page 102 TABLE OF CONTENTS ASSEMBLY Table provided for general use. NOTES: 2-84 F-982-0223...
- Page 103 TABLE OF CONTENTS ASSEMBLY Rear 3-Bar Coil Tine Harrow Kit - Optional Kit Part Number 213908. Figure 2-74: Rear 3 Bar Coil Tine Harrow Kit - Optional F-982-0223 2-85...
- Page 104 TABLE OF CONTENTS ASSEMBLY Rear 3-Bar Coil Tine Harrow Without Lift Installation CAUTION Thick Washer Do not work on or under this machine unless securely blocked and supported by a hoist or Harrow Arm tractor or by other sufficient means. Locknut,Flange Assembly 5/8-11...
- Page 105 TABLE OF CONTENTS ASSEMBLY Figure 2-77: Center Rear Harrow Mounting Dimensions F-982-0223 2-87...
- Page 106 TABLE OF CONTENTS ASSEMBLY Figure 2-78: Rear Wing Harrow Mounting Dimensions 2-88 F-982-0223...
- Page 107 TABLE OF CONTENTS ASSEMBLY Land Leveler Installation - 2. Slide the Center and Wing Levelers up into the mount slot and insert 1/2-13 x 3 Bolt. On the opposite side Optional place the 1 x 1-1/2 Bushing over the bolt and into the opening.
- Page 108 TABLE OF CONTENTS ASSEMBLY Figure 2-80: Land Leveler Center Mounting Dimensions 2-90 F-982-0223...
- Page 109 TABLE OF CONTENTS ASSEMBLY Hinge RH Wing Leveler Frame Mount 9-1/2" RH Wing Leveler 44" 22-1/2" RH Wing Land Leveler Hinge LH Wing Leveler Frame Mount 9-1/2" LH Wing Leveler 22-1/2" 44" 3630-30NC OpLandLevelerWingDim LH Wing Land Leveler Figure 2-81: Land Leveler Wing Mounting Dimensions F-982-0223 2-91...
- Page 110 TABLE OF CONTENTS ASSEMBLY Center V-Leveler Installation - Optional Kit Part Number 214024 V-Leveler Wing and Land Leveler Wing Installation is similar. Refer to Wing Placement Dimensions, See Figure 2-85. 1. Place the cutout of the V-Leveler Bracket on top and center it on the Drawbar Rear Cross Tube.
- Page 111 TABLE OF CONTENTS ASSEMBLY Figure 2-82: V-Leveler Installation - Optional F-982-0223 2-93...
- Page 112 TABLE OF CONTENTS ASSEMBLY Rear Hitch Installation - 4. Secure with tie wraps. 5. Insert the Tandem Harness Adapter into the bulkhead Optional plate and secure with two 1/4-20 x 1 Bolts and Locknuts. Kit Part Number 214025 6. Hook up Tandem Haul Adapter to tractor side of 1.
- Page 113 TABLE OF CONTENTS ASSEMBLY Wing Fold Hydraulic Cylinder Attach the optional 4 x 29-3/4 Hydraulic Cylinders with Internal Stop to the Front and Rear Frame Lugs with the With Internal Stop - Optional vendor supplied hardware. Block Cylinder Rod Ends up from the frame to allow for Order four 229388 Hydraulic Cylinders with Internal Stop rod movement when purging the Fold Circuit.
- Page 114 TABLE OF CONTENTS ASSEMBLY Table provided for general use. NOTES: 2-96 F-982-0223...
- Page 115 Chapter 3 TABLE OF CONTENTS Operation DANGER DANGER DANGER DANGER Never allow anyone to ride on the 3631 Always lock the tractor drawbar in the center Pulvi-Mulcher at any time. Allowing a person to position when transporting the unit. Failure to do ride on the machine can inflict serious personal so can result in serious injury or death and cause injury or death to that person.
- Page 116 TABLE OF CONTENTS OPERATION Tractor Preparation Attaching to the Tractor The Brillion 3631 Pulvi-Mulcher is designed to be pulled 1. Align the Tractor Drawbar with the machine. Raise or by tractor equipped with a double lip or clevis type hitch. If lower the Hitch, as needed, using the Jack.
- Page 117 TABLE OF CONTENTS OPERATION Hydraulic Lift System The Lift Circuit with machine raised requires approximately 4.9 gallons of hydraulic oil. With machine lowered 4.5 gallons of hydraulic oil is WARNING required. Escaping hydraulic fluid can cause serious Hydraulic Fold System personnel injury.
- Page 118 TABLE OF CONTENTS OPERATION To fold the Pulvi-Mulcher, stop and raise the machine with If making adjustment all Tooth Tube Bearing should be the hydraulic lift system. Engage the fold system circuit on assembled in the same position. See Figure 3-4. the tractor to retract the Wing Cylinders until the cylinders 2.
- Page 119 TABLE OF CONTENTS OPERATION NOTE Ensure Tooth Tubes are parallel to the frame prior to making any adjustments. Depth Stop Indicator Depth Adjuster Tube Depth Adjuster Tube Guide Depth Stop 24" Notch Wheel Assemble Valve Poppet Position Depth Stop Depth Handle Stop Pin Depth Stop...
- Page 120 TABLE OF CONTENTS OPERATION General Operation Operation of Rockshaft Transport Lock 1. The minimum horsepower requirements are typically 10-12 horsepower per foot of width. This will vary Be sure both Rockshaft Transport Locks are either widely due to speed, depth, moisture, residue and locked or unlocked.
- Page 121 TABLE OF CONTENTS OPERATION Lift Transport Lock in Unlocked (Field) Position Transport Position Slot Transport Lock Field Position U-Channel Slot Transport Lock Transport Lock Strap Clevis Lift Cylinder Hair Pin Transport Lock Bracket Lever Transport Lock U-Channel Transport Lock 3630-30NC OpLiftTransport Lock-Open Lift Cylinder Strap Transport Lock...
- Page 122 TABLE OF CONTENTS OPERATION Drawbar Leveler Transport Lock in Unlocked (Field) Position Bent Pin Hair Pin Transport Lock LH Frame Hitch Pull Bracket 4 x 16 Cylinder Transport Lock Hair Pin 3630-25&30NC OpDrawbarLevelerTL Bent Pin Drawbar Leveler Transport Lock in Locked (Transport) Position Figure 3-6: Drawbar Leveler Lock Positions F-982-0223...
- Page 123 TABLE OF CONTENTS OPERATION Drawbar Turnbuckle Adjustment The Pulvi-Mulcher drawbar is designed to float in Field Position and lock into a set position in transport. Depending on tractor hitch height, the Turnbuckle may need to be adjusted to level machine front to rear in transport.
- Page 124 TABLE OF CONTENTS OPERATION Coil Tine Harrow 1. Adjust the Harrow Coil Tine pitch at the rear of the implement, by removing the Harrow Adjustment The Pulvi-Mulcher is equipped with a Coil Tine Harrow to Spring Pins from the Angle Adjustment Tubes and remove the ridges caused by the shanks and tire tracks rotating the tube to the desired angle.
- Page 125 TABLE OF CONTENTS OPERATION Land Leveler/V-Leveler - V-Leveler Height Adjustment To raise or lower the Wing Leveler Bars, remove the Optional 1/2-13 x 3 bolts. To raise or lower the Center Section, remove the 1 x 8 Pin and two 1 x 12-3/4 Pins on the The purpose of the Pulvi-Mulcher Land Leveler and Drawbar.
- Page 126 TABLE OF CONTENTS OPERATION Scraper Adjustment The Pulvi-Mulcher, if equipped with notched rear wheels will have scrapers. To adjust scrapers; lower machine on level surface. Push wheels against welded stop, add spacer if needed. See Figures 4-5 and 4-6. Adjust scrapers to 1/4"...
- Page 127 TABLE OF CONTENTS OPERATION Transport for the chain on the tractor. Do not pull the implement by the Safety Chain. 1. Check and follow all federal, state, and local • Regularly inspect the Safety Chain for worn, requirements before transporting the Pulvi-Mulcher. stretched, or broken links and ends.
- Page 128 TABLE OF CONTENTS OPERATION 7. Know the transport heights and widths of the unit before transporting. Use caution when transporting near bridges and power lines. WARNING Electrocution can occur without direct contact. 8. Raise the machine to full transport height. 9.
- Page 129 Chapter 4 TABLE OF CONTENTS Maintenance General Torque Specifications (rev. 4/97) This chart provides tightening torques for general purpose applications when special torques are not specified on process or drawing. Assembly torques apply to plated nuts and capscrews assembled without supplemental lubrication (as received condition). They do not apply if special graphite moly-disulfide or other extreme pressure lubricants are used.
- Page 130 TABLE OF CONTENTS MAINTENANCE Hydraulic Fitting Torque Specifications 37 degree JIC, ORS, &ORB (REV. 10/97 This chart provides tightening torques for general purpose applications when special torques are not specified on process or drawing. Assembly torques apply to plated nuts and capscrews assembled without supplemental lubrication (as received condition). They do not apply if special graphite moly-disulfide or other extreme pressure lubricants are used.
- Page 131 TABLE OF CONTENTS MAINTENANCE Tires Hydraulic Maintenance Recommended tire sizes are 480/45R17 and should be IMPORTANT inflated to 73 PSI. Unfold, lower the unit to the ground, and relieve When Re-Installing the 3/4-16 Flange Nuts tighten to 50 hydraulic pressure before attempting to service any foot-pounds using the sequence in Figure 4-1.
- Page 132 TABLE OF CONTENTS MAINTENANCE Lubrication Maintenance The 3631 Pulvi-Mulcher is equipped with maintenance free bearings in the lifts, leveler, and wings hinges. These areas require no lubrication. Pulverizer axle roller assembly bearings are sealed with a triple lip seal and are non-lubricable. Grease Turnbuckle every 50 hrs or yearly to prevent seizure.
- Page 133 TABLE OF CONTENTS MAINTENANCE Roller Axle Assembly Clamp Tightening After an initial run of 5-10 hours, check the Roller Axle Tighten the Clamp bolts evenly to achieve equal spacing Assemblies to ensure that the wheels are tight to one between clamp section. Torque to 75 ft-lbs. Thereafter another.
- Page 134 TABLE OF CONTENTS MAINTENANCE Clamp End Spacers - Installation is the same for either kit. 1. Place the two Axle Spacers between the Axle Clamp Optional and the Wheel Stop. The Clamp End Spacer Kits are used to eliminate space 2.
- Page 135 TABLE OF CONTENTS MAINTENANCE Kit Part Number 204831 - 1" Axle Spacer Kit Part Number 204832 - 1-1/4" Axle Spacer Kit Part Number 204833 - 1-1/2" Axle Spacer 1. Place the two Axle Spacers between the Axle Clamp and the Wheel Stop. 2.
- Page 136 TABLE OF CONTENTS MAINTENANCE LED Warning Lamps Storage When plugging in the LED 7-Pin Connector: 1. The service life of the Pulvi-Mulcher will be extended by proper off-season storage practices. Prior to 1. Make sure the tractor has a good clean receptacle, storing the unit, complete the following procedures: free of dirt and corrosion.
- Page 137 TABLE OF CONTENTS MAINTENANCE Maintenance Chart (Subject to change without notice) Initial Run-In 20 Hours 50 Hours 100 Hours/Annually Storage Fasteners, Wheel Hub Bolts Grease: Turnbuckle Adjust Scraper if equipped Grease Wheel Hub Repack Wheel Hub Bearings Tighten Roller Axle Wheels and Clamps ** Clean machine Grease after cleaning...
- Page 138 TABLE OF CONTENTS MAINTENANCE Table provided for general use. NOTES: 4-10 F-982-0223...
- Page 139 Chapter 5 TABLE OF CONTENTS Specifications *Specifications subject to change with or without notice. Table 5-1: Model Specifications (1 of 3) F-982-0223...
- Page 140 TABLE OF CONTENTS SPECIFICATIONS Table 5-2: Model Specifications (2 of 3) F-982-0223...
- Page 141 TABLE OF CONTENTS SPECIFICATIONS Table 5-3: Model Specifications (3 of 3) F-982-0223...
- Page 142 TABLE OF CONTENTS SPECIFICATIONS Table provided for general use. NOTES: F-982-0223...
- Page 143 Document Control Revision Log: Date Form # Improvement(s): Description and Comments 02/2019 Initial Release 05/2019 F-982-0519 ECN 44848 - Changed Wing Fold Cylinders 09/2020 F-982-0920 ECN 45489 - Updated Harrow Asm ECN 46460 - Updated Fold Hyd Box Asm Added Wing Fold Hydraulic Cylinder with Internal Stop - Option 02/2023 F-982-0223 ECN 46460, 47741, 47749, 48289, 48314 - Replumbed Fold Circuit, Hose Asm’s...
- Page 144 Equipment from Landoll Company, LLC is built to exacting standards ensured by ISO 9001 registration at all Landoll manufacturing facilities. Pulvi-Mulcher 3631-30 Models Operator’s Manual Re-Order Part Number F-982 LANDOLL COMPANY, LLC 1900 North Street Marysville, Kansas 66508 (785) 562-5381 800-428-5655 ~ WWW.LANDOLL.COM...
Need help?
Do you have a question about the Brillion 3631-30 and is the answer not in the manual?
Questions and answers