
Subscribe to Our Youtube Channel
Related Manuals for Weinmann OXYMAT 3


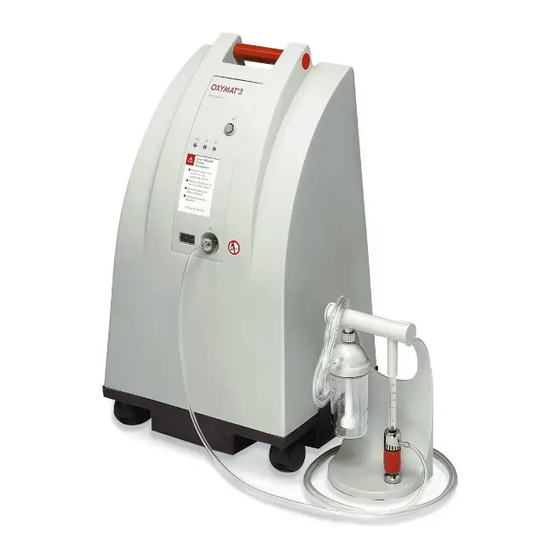
Summary of Contents for Weinmann OXYMAT 3
- Page 1 Servicing and repair instructions OXYMAT 3 Oxygen Concentrator from Appliance No. 8000...
-
Page 2: Table Of Contents
6.1 Visual and acoustic signals from OXYMAT 3 ....19 9.3 Disinfectants ....74 6.1.1... -
Page 3: Introduction
In the event of a guarantee claim, OXYMAT 3 should be returned to Weinmann. In 1982, Weinmann introduced the first oxygen concentrator to the market. -
Page 4: Overview
28 Connection, flow OXYMAT 3 23 Connection, long 29 Connection for 25 Humidifier tube to tubes glass of OXYMAT 3 (20 m) (3 m or 10 m) bubble humidifier 27 Flow control knob 24 Flow control knob Overview... -
Page 5: Functional Description
2. Functional description OXYMAT 3 is a time-controlled appliance, i.e. the changeover time remains constant; only the pressure is monitored. Layout The appliance essentially consists of three compo- nents: • the compressor, • the O system, • the electronic/pneumatic control. - Page 6 The level of oxygen concentration depends on the Oxygen concentration set flow and is available within a few minutes. The waste air is expelled to the rear via a noise suppressor on the underside of the appliance. The electronic control with microprocessor consists of one circuit board.
- Page 7 ( lamp flashes) and an acoustic warning (intermittent tone) sounds. Further information on displays and alarms can be found in Chapter “6.1 Visual and acoustic signals from OXYMAT 3” on page 19“. Functional description...
-
Page 8: Servicing
5,000 operating hours. 3.2 Implementation Servicing the OXYMAT 3 involves changing the coarse dust filter and the suction filter and performing a final check (see "5. Functional check" on page 10). The filters are located on the back of the appliance. -
Page 9: Disposal
4. Hygienic Preparation 4.1 No change of patient Proceed as described in the operating instructions for the OXYMAT 3. 4.2 Change of patient or reuse • Dispose of extension tubes and nasal cannu- las, and replace with new parts. -
Page 10: Functional Check
For environmental reasons a capacitor back- from the set values during your functional up unit has been installed instead of a battery check, OXYMAT 3 must not be used again un- to serve the power failure alarm function. til the faults have been rectified. -
Page 11: Checking The Coarse Dust Filter
5.3.5 Checking the main switch and LED displays 1. Connect the power cord to OXYMAT 3 and to a wall socket. 2. Connect the dosage monitor or the flowmeter to the oxygen outlet... -
Page 12: Checking The Dosage Monitor For Leaks
3. Switch on the OXYMAT 3 at the On/Off O/ I knob . The following LED displays will ap- pear: – The power indicator (green LED) lights O / I – The fault indicator (red LED) and status Oxygen appliance! -
Page 13: Checking The Operating Hours Meter
5.3.9 Checking the O concentration 0 0 0 0 0 0 Leave the OXYMAT 3 to run for at least 10 minutes How to calibrate the oxygen sensor: before starting the measurement. 1. Connect the oxygen measuring device to the... -
Page 14: Checking The Mains Failure Alarm
5.3.10 Checking the mains failure alarm Note: As power is supplied to the alarm function via a capacitor, the OXYMAT 3 should first be operated for 5 minutes to allow the capacitor to charge. 1. Pull the power cord from the socket or from the device. -
Page 15: Checking The Indirect Status Indicator (Yellow Led) With Appliance Closed
– the pressure is checked for about 20 s with the compressor switched off. An artificial leak is created in the OXYMAT 3, and this results in the oxygen concentration falling be- low 82 %. Functional check... -
Page 16: Checking The Indirect Status Indicator (Yellow Led) With The Appliance Open
– the pressure is checked for about 20 s with the compressor switched off. An artificial leak is created in the OXYMAT 3, and this results in the oxygen concentration falling be- low 82 %. 6. Check that the yellow status indicator is on while this is happening. -
Page 17: System Pressure Test
7. Remove the pressure gauge. 2. Switch the OXYMAT 3 on. 8. Perform a functional check (see "5. Functional 3. After 10 minutes, attach the pressure gauge to check"... -
Page 18: Checking The O System For Leaks
15. Remove the dosage unit or flowmeter insert the mains plug in a wall socket. from the appliance. 11. Switch the OXYMAT 3 on. 16. Remove the pressure gauge. Caution! 17. Attach the tube Risk of injury or death! Beware of live or moving components. -
Page 19: Troubleshooting
6. Implausible pressure measurement 6. Implausible pressure measurement 7. Leak in O system Since the OXYMAT 3 has a time control, there must be a defined pressure pattern over time. This 1. Power failure pressure pattern is measured by the pressure The energy for a power failure alarm is supplied by sensor and analyzed by the appliance software. -
Page 20: Signal Patterns
6.1.2 Signal patterns The alarm signal patterns are in accordance with EN 475 (see Table of Signal Patterns). To make it possible to distinguish the alarm sources, this standard assigns specific signal patterns to individual error situations (see Table of Error Situations). Since it is possible that two or more errors may occur at the same time, the alarms are weighted by the software and the appropriate alarm pattern is output. -
Page 21: Deactivating The Signal Functions
The signal patterns for the buzzer consist of 2 identical pulse sequences, repeated every 10 seconds. Each pulse sequence consists of 5 individual pulses (see Table of Signal Patterns). Table of Signal Patterns: Buzzer pattern Pulse interval Pulse duration / ms Pulse interval/ ms for one pulse between 3rd and... -
Page 22: Remedies
6.2 Remedies Fault Cause Localisation Remedy Check mains lead for secure connection. If applicable, check No power. whether power is available No motor noises, at the mains (e.g. with a power indicator does lamp). not light up, mains Replace fuse (see "5.3.4 failure alarm sounds. - Page 23 The following faults are based on a defective circuit. They occur with the compressor and fan running. Caution ! Always pull out the mains plug before working on electrical components. Remember that all coding switches on the circuit board during normal operation. must closed Fault...
- Page 24 Fault Cause Localisation Remedy Each time the appliance is Warm-up phase not switched on, the overpressure Wait for one minute. yet complete. alarm is blocked for No underpressure minute. alarm. Circuit board Replace the circuit board defective. (7.9, page 40). Miniature fuse in non- Compressor and fan not Check fuse...
- Page 25 Compressor overpressure Change board faulty. valves activate after 30 s. (7.9, page 40). Leak occurred since Switch OXYMAT 3 off then on Eliminate leak. last switching on. again to initiate self-test. Check indirect status indicator If yellow LED does not light Pressure sensor faulty.
- Page 26 Fault Cause Localisation Remedy Comply with maximum Appliance was ambient temperature of operated at an 40 °C. After operating for Accumulated heat warmed the ambient temperature a short time, the temperature sensor after of > 41 °C, or was accumulated heat is Temperature alarm switching off.
-
Page 27: Concentration Outside Tolerance Range
6.3 O concentration outside tolerance range If the check described in “5.3.9 Checking the O – Then check the O concentration again as concentration” on page 13 indicates an oxygen described in “5.3.9 Checking the O con- concentration of less than 91% at a flow of 4 l/min centration”. -
Page 28: Repair Information And Repair Instructions
7. Repair information and repair instructions 7.1 General Repairs to OXYMAT 3 must always be carried out at an ESD workplace! • Please follow the safety instructions on page 4 of • Conduct a functional check after repair every the operating instructions for OXYMAT 3. -
Page 29: Opening The Appliance
7.3 Opening the appliance Tools required: • Spanner set WM 14249, • Allen key 6 mm. Caution ! If the appliance is standing on a table, lock the castors. 1. Disconnect the plug from the socket and pull 2. Remove the connecting nipple with union nut the power cord from the appliance. -
Page 30: Closing The Appliance
7.4 Closing the appliance Tools required: • Spanner set WM 14249, • Allen key 6 mm. Caution ! If the appliance is standing on a table, please lock the castors. 1. Carefully slide the housing over the foam sections. 2. Position the housing on the frame in such a way that the enclosure wall engages with the groove all the way round. - Page 31 The illustration opposite shows the installation position of the compressor with its electrical and pneumatic connections. 4. Disconnect the electrical connection. 5. Pull off the tubes – Take the appropriate spanner from the spanner set and position it between the coupling and the inlet/outlet of the compressor.
- Page 32 10. Place the two tubes sideways across the frame. 11. Then insert the compressor: – Grasp the compressor in such a way that you are able to read the letters on the cylinder head the right way round. – Insert the front screws of the compressor into the vibration damper –...
-
Page 33: Replacing The Compressor (From Appliance No. 13351 To 14999)
19. Before assembling the housing, subject the 20. Close the appliance (see "7.4 Closing the compressor to a test run: appliance" on page 30). – Connect the power cord to the 21. Perform a functional check (see "5. Functional appliance and to a socket. check"... - Page 34 4. Disconnect the electrical connection. 5. Pull off the tubes – Loosen clip on tube with the water- pump pliers. – Now pull off the tube. 6. To remove the defective compressor, always take hold of it at the cylinder head. cylinder head Caution ! The cylinder head may still be hot!
- Page 35 13. Push clip onto tube . Then connect tube to the compressor inlet and tube to the compressor outlet. Now attach tube to the compressor outlet with the aid of clip the water-pump pliers. 14. Attach the connector of the compressor to the power supply socket and lay the cables neatly into the groove.
-
Page 36: Replacing The Compressor (From Appliance No. 15000)
7.7 Replacing the compressor (from appliance no. 15000) Tools required: • Spanner set WM 14249, • Allen key 6 mm. • Hexagon socket wrench 8 mm, • Water-pump pliers. 1. Open the housing (see "7.3 Opening the appliance" on page 29). 2. - Page 37 5. Disconnect the electrical connection. 6. Pull off the tubes – Loosen clip on tube with the water- pump pliers. – Now pull off the tube. 7. To remove the defective compressor, always take hold of it at the cylinder head. cylinder head Caution ! The cylinder head may still be hot!
- Page 38 14. Push clip onto tube . Then connect tube to the compressor inlet and tube to the compressor outlet. Now attach tube to the compressor outlet with the aid of clip the water-pump pliers. 15. Attach the connector of the compressor to the power supply socket and lay the cables neatly into the groove.
-
Page 39: Replacing The Operating Hours Meter
7.8 Replacing the operating hours meter Tools required: • Spanner set WM 14249, • Allen key 6 mm. 1. Open the appliance (see "7.3 Opening the appliance" on page 29). 2. Carefully lift the operating panel out of the foam section. 3. -
Page 40: Replacing The Circuit Board
7.9 Replacing the circuit board This repair must always be carried out at an ESD workplace. Tools required: • Spanner set WM 14249, • Allen key 6 mm, • Cross-head screwdriver size1, • Flat nose pliers. 1. Open the appliance (see "7.3 Opening the appliance"... - Page 41 10. Disconnect the connector for the meter from the printed circuit board. 11. Unscrew the four screws 12. Place the circuit board on your ESD workplace. 13. Carefully place the new circuit board the operating panel and secure with the four screws 14.
-
Page 42: Replacing The Fan
7.10 Replacing the fan Tools required: • Spanner set WM 14249, • Allen key 6 mm. 1. Open the appliance (see "7.3 Opening the appliance" on page 29). 2. Loosen the straps , without pulling the strap out of the fastener, and place them next to the appliance. -
Page 43: Replace Adsorption Containers (Mac Valves)
Caution ! If you do not feel any air flow, remember to disconnect the appliance from the power before taking any further action! 11. Switch off the appliance and pull the power cord from the socket and from the appliance. 12. - Page 44 3. Remove the foam section Replace both ADS containers as follows: 4. Loosen the Y-connector by pushing back the sleeve (e.g. using a spanner from the set) and pull out the angular bush. 5. Pull the ADS container out of the foam section.
- Page 45 1. Take a new ADS container and ensure that there is a pressure seal on the thread of the double nipple. Caution ! The pressure seal has a profile on one side, known as the sealing lip. This sealing lip must be pointing towards the magnetic valve ! 2.
-
Page 46: Replace Adsorption Container (Plastic Magnetic Valve Block)
10. Before assembling the OXYMAT 3, check it for leaks: – Connect the dosage unit or flowmeter to the oxygen outlet – Connect the power cord to the appliance and to a socket. – Switch on the appliance. – Set a flow of 4 l/min. - Page 47 2. Loosen the straps without pulling the strap out of the fastener and place them next to the appliance. 3. Take off the foam section Replace both ADS containers as follows: 4. Undo the Y-connector by pushing back the sleeve (e.g. using a spanner from the set) and pull out the angular bush.
- Page 48 Important! The cable for the 230 V voltage supply must be routed in the left-hand side of the foam section. 11. Before you assemble the OXYMAT 3, check it for leaks: – Connect the dosage unit or the flowmeter to the oxygen outlet –...
-
Page 49: Replace Adsorption Containers (Aluminum Magnetic Valve Block)
Warning! Do not use liquids or foaming agents to check for leaks in the region of the solenoid valve, as moisture could penetrate into the solenoid valve, thereby causing corrosion which could prevent it functioning properly. 12. If you discover a leak, rectify it. 13. - Page 50 3. Take off the foam section Replace both ADS containers as follows: 4. Undo the Y-connector by pushing back the sleeve (e.g. using a spanner from the set) and pull out the angular bush. 5. Take the right-hand ADS container out of the foam section.
- Page 51 Test In order to ascertain whether the ADS container really needs changing, you should weigh it. A container needs changing when it has absorbed approximately 50 g of moisture, i.e. when it is approximately 50 g heavier. Expiry weight = original weight + 50 g. The two containers should always be changed at the same time.
- Page 52 Important! The cable for the 230 V voltage supply must be routed in the left-hand side of the foam section. 13. Before you assemble the OXYMAT 3, please check for leaks: – connect the dosage unit or the flowmeter to the oxygen outlet –...
-
Page 53: Replace Cover
7.14 Replace cover Tools required: • Spanner set WM 14249, • Allen key 6 mm, • Open-ended spanner SW 17. 1. Open the appliance (see "7.3 Opening the appliance" on page 29). 2. Remove the adsorption container (see Section 7.11, 7.12 or 7.13 depending on model). 3. -
Page 54: Replacing The Pressure Reducer
7.15 Replacing the pressure reducer Tools required: • Spanner set WM 14249, • Allen key 6 mm, • Open-ended spanner SW 17. 1. Open the appliance (see "7.3 Opening the appliance" on page 29). 2. Loosen the straps , without pulling the strap out of the fastener, and place them next to the appliance. - Page 55 8. Carefully pull the oxygen tank out of the foam section 9. Remove the tube from the inlet to the oxygen tank by pushing back the sleeve of the angular bush (e.g. using a spanner from the set) and pulling out the tube. 10.
- Page 56 18. Slide the tube into the shutoff valve far as it will go. 19. Before assembling the OXYMAT 3, check all connection points for leaks: – Connect the dosage unit or flowmeter to the oxygen outlet –...
-
Page 57: Replacing The Frame (Up To Appliance No. 19999)
7.16 Replacing the frame (up to appliance no. 19999) Tools required: • Spanner set WM 14249, • Allen key 6 mm, • Side nippers. Note: It is easier to change the frame if you have another person to help you. 1. - Page 58 6. Place one arm around the entire foam sections. 7. With the other arm, support yourself against the frame and lift up the foam sections (including ADS containers, oxygen tank, cooler, fan and operating panel). Note: If two people are working together, one of you can lift up the foam sections with both arms whilst the other holds the frame steady.
-
Page 59: Replacing The Frame (From Appliance No. 20000)
7.17 Replacing the frame (from appliance no. 20000) Tools required: • Spanner set WM 14249, • Allen key 6 mm, • Hexagon socket wrench 8 mm, • Water-pump pliers. Note: It is easier to change the frame if you have another person to help you. 1. -
Page 60: Replacing Magnetic Valves With Valve Block (Up To Appliance No. 34999)
The valve block was fitted in a variant with Valve block WM 13179 is fitted as standard on aluminum housing (WM 13177) in concentrators OXYMAT 3 oxygen concentrators from appliance with appliance numbers from 35000 to 39999. number 40000. Old appliances can be This variant is no longer available. - Page 61 3. Remove the foam section 4. Loosen the Y-connector by pushing back the sleeve (e.g. using a spanner from the set) and pull out the angular bush. Remove the outlet piping system WM 13265 from the appliance. 5. Disconnect plugs from the board.
- Page 62 Unscrew the piping systems 1. Unscrew the connections to the air inlet and exhaust hoses and remove the parts. These are: – Connecting tube, long WM 13277 – Connecting tube, short WM 13276 – Push-in connector WM 13146 – Piping system, inlet WM 13270 For concentrators up to appliance no.
- Page 63 Prepare second ADS container 1. Replace the pressure seal of the double nipple with the sealing ring and place the sealing ring in the screwed connector 2. Screw screwed connector onto the double nipple of the ADS container using a torque wrench SW 17.
- Page 64 5. Connect up the piping system. To do so, proceed as follows: – For all concentrators: Push the piping system (ADS container) firmly into the connection on the side of the valve block. – For concentrators from appliance No. 20000 onwards: Connect the exhaust hose to the rear angle connector of the valve block.
- Page 65 ADS container piping system onto the angle connector of the left ADS container. 9. Before assembling the OXYMAT 3, check it for leaks: – Connect the dosage unit flowmeter to the oxygen outlet –...
-
Page 66: Replace Magnetic Valve Block
Caution! Do not use liquids or foaming agents to check for leaks in the region of the solenoid valve 54, as moisture could penetrate into the solenoid valve, thereby causing corrosion which could prevent it functioning properly. 10. If you discover a leak, rectify it. 11. - Page 67 2. Loosen the straps without pulling the strap out of the fastener and put next to the appliance. 3. Take off the foam section 4. Undo the Y-connector by pushing back the sleeve (e.g. using a spanner from the set) and pull out the angular bush.
- Page 68 12. Release the connection between the ADS container and the magnetic valve by taking the spring clip out of the adapter for the valve block. 13. Take the ADS container off the magnetic valve. 14. Moisten the O-ring with oxygen lubricant WM 14902 15.
-
Page 69: Spare Parts
8. Spare parts 8.1 List of spare parts Note: The item numbers in the following table match the numbers in the text of these service and repair instructions. Item no. Description Order No. Handle for lifting or moving WM 13610 Push-button for On/Off knob WM 13515 Operating hours meter... - Page 70 Item no. Description Order No. WM 13185 Adsorption container, packs of 2 WM 13225 Magnetic valve, repair set WM 13152 Magnetic valve, replacement,repair set WM 13159 Pressure seal WM 13244 Tube, PU 4 x 1, 740 long WM 13108 Frame, fitted* (up to appliance no. 19999) WM 13171 Frame, fitted* (from appliance no.
- Page 71 Item no. Description Order No. Piping, inlet, WM 13270 consisting of: – T-joint WM 13274 – Hose, PA, 8 x 1. 65 long WM 13271 – Hose, PA, 8 x 1. 115 long WM 13272 – Elbow connector. WM 13273 Tube set, inlet, pressure sensor WM 13255 comprising:...
-
Page 72: Maintenance Set
Item no. Description Order No. Sealing ring 8-11-1.5 WM 13233 Fuse insert IEC 127-2-T-L 400 mA WM 13426 Fuse insert IEC 127-2-T-L 400 mA WM 13426 Fuse insert IEC 127-2-T-L 1.25 A WM 13427 Control panel, printed WM 13510 for dosage monitor: measuring tube, compl., 5 l WM 13725 measuring tube, compl., 3 l... -
Page 73: Tools, Testing Equipment, Disinfectants
Below is a list of all tools and test equipment used in these service and repair instructions. The particular tools and test equipment required are explained in the relevant chapters. Special tools can be purchased from the manufacturer Weinmann. 9.1 General tools and test equipment •... -
Page 74: Disinfectants
• Oxygen cylinder with adjustable WM 33100 pressure reducer HIT, • STURTEVANT RICHMONT Torque indicator spanner measuring range: 1.2 to 6 Nm permanently set to: 2.5 ± 0 .1 Nm Hahn + Kolb order no.: 52249-200 • STURTEVANT RICHMONT Tool with T-handle open-ended spanner SW17 Hahn + Kolb order no.: 52250-200 Order from:... -
Page 75: Technical Data
10. Technical Data OXYMAT 3 Product category according to 93/42/EEC Dimensions W x H x D in mm 400 x 700 x 350 Weight approx. 20 kg Temperature range: – Operation + 10 to + 40 °C – Storage – 20 to + 70 °C... -
Page 76: Arrangement Of The Pcbs
10.1 Arrangement of the PCBs Technical Data... -
Page 77: Technical Changes
11. Technical Changes Technical change from Device No. Date EPP foam section 4, bottom front, Item WM 13119 13.000 13.11.00 replaced by front plate, assembled WM 13625. Vibration damper Item WM 13125 replaced by 13.000 13.11.00 “Vibration damper, complete”, WM 13143. Item compressor type 2650 WM 13355 is replaced by compressor type 2660. -
Page 78: Repair And Inspection Log
12. Repair and inspection log Repair and inspection log... -
Page 79: Test Report
13. Test report Test report in accordance with service and repair instructions for OXYMAT 3 Medical retailer: IK-No.: • Patient Name: First name: Health insurance No.: Address: • Appliance Appliance: Oxygen concentrator Oxymat 3 Manufacturer: Weinmann Device No.: Year of construction: Operating hours: •... - Page 80 • Maintenance Maintenance carried out after 5,000/10,000 etc. operating hours or once every year in accordance with service instructions Replacement of suction filter WM 13190 Replacement of coarse dust filter WM 13631 Maintenance report completed Faults and possible causes Repair necessary: •...
- Page 84 For decades Weinmann has been developing, producing and marketing medical devices for markets around the world. In cooperation with our partners we design economic health systems for diagnosis and therapy in Sleep Medicine, Home Mechanical Ventilation, Oxygen Medicine and Emergency Medicine.
Need help?
Do you have a question about the OXYMAT 3 and is the answer not in the manual?
Questions and answers