Table of Contents
Advertisement
Quick Links
LIFE-BASE
Portable unit
LIFE-BASE light XS
LIFE-BASE light
LIFE-BASE 1 NG XS
Instructions for Use
LIFE-BASE 1 NG
LIFE-BASE 1 NG XL
LIFE-BASE Mini II
Read the instructions for use before using this product. Failure to
observe the instructions for use can result in serious injury or death.
LIFE-BASE III
LIFE-BASE 3 NG
LIFE-BASE 4 NG
Advertisement
Table of Contents

Related Manuals for Weinmann LIFE-BASE light XS


Summary of Contents for Weinmann LIFE-BASE light XS
- Page 1 LIFE-BASE Portable unit LIFE-BASE light XS LIFE-BASE 1 NG LIFE-BASE III LIFE-BASE light LIFE-BASE 1 NG XL LIFE-BASE 3 NG LIFE-BASE 1 NG XS LIFE-BASE Mini II LIFE-BASE 4 NG Instructions for Use Read the instructions for use before using this product. Failure to...
-
Page 2: Table Of Contents
Table of Content Table of Content Introduction About this document ..............5 Explanation of warnings ..............5 Safety Intended purpose ................7 Intended application areas ............8 Possible side-effects and complications .......... 8 Exclusions and restrictions of intended purpose ......8 Clinical benefits of the product ............ - Page 3 Table of Content Checking the screws on the wall mounting ........85 Checking the pole mounting ............85 Checking the bag ................ 86 Checking the system for leaks ............87 5.10 Rectifying leaks in the system ............88 Operation Fastening the portable unit to a wall mounting or ceiling mounting .................
- Page 4 Table of Content Disposal 12.1 Portable units and accessories without a charging interface ..160 12.2 Portable units and accessories with a charging interface .... 160 12.3 Contaminated parts ..............160 Scope of supply 13.1 Accessories and other parts ............161 Technical data Symbols Warranty...
-
Page 5: Introduction
1 Introduction Introduction 1.1 About this document This document describes all possible versions of the portable unit. Functions, accessories and other parts which are described in this document or shown in the images depend on the version purchased and are not always available. Diagrams in these instructions for use serve to improve basic understanding and may differ from the actual design. - Page 6 1 Introduction Warnings in actions Warnings can relate to individual actions. To avoid interrupting the reading flow, these warnings are embedded in the action. The symbols and signal words described above are used. Example of an embedded warning: 1. Suspend the portable unit on the pole using the pole mounting.
-
Page 7: Safety
2 Safety Safety The instructions for use form part of the portable unit. If the instructions for use and the following safety information are not fully complied with, the treatment may fail or be compromised. This could cause severe or life-threatening injuries to the patient and user. -
Page 8: Intended Application Areas
2 Safety 2.1.3 Intended users Users within the scope of the intended medical purpose are medical personnel trained for emergency medicine. This includes: • Emergency physicians • Intensive medicine specialists • Paramedics • Other similar 2.1.4 Contraindications There are no known contraindications for the use of this product. 2.2 Intended application areas •... -
Page 9: Clinical Benefits Of The Product
2 Safety • Use by non-authorized users / non-medical personnel • Operation in connection with non-authorized devices and accessories 2.5 Clinical benefits of the product The portable unit LIFE-BASE including accessories offers no clinical benefits per se, yet it does support the clinical benefits of the medical devices in the MEDUMAT, MEDUVENT, MEDUCORE, MODUL and OXYWAY series which are attached to said system as well as a combination of these medical devices by providing... -
Page 10: Preventing A Device Failure
Do not make any modifications to the construction of the portable unit or accessories. Only allow modifications to the portable unit to be made by WEINMANN Emergency. 2.8 Ensuring good hygiene practices 2.8.1 Hygienically reprocessing the portable unit... -
Page 11: Safe Use Of The Portable Unit And Accessories
Furthermore, the biocompatibility requirements may not be met and the fitness for use may be restricted. Only use medical devices and accessories approved by WEINMANN Emergency. LIFE-BASE... -
Page 12: Description
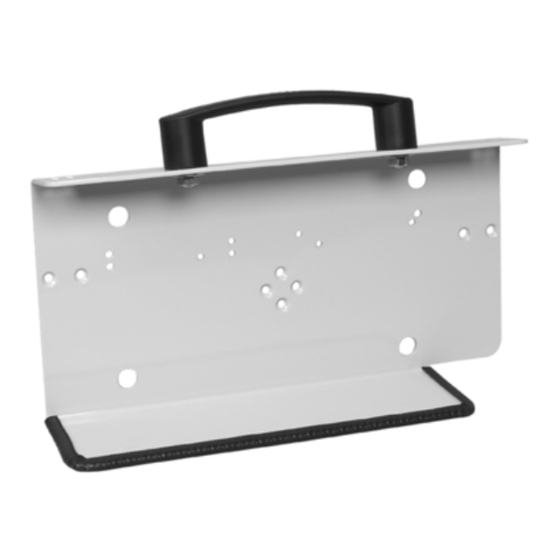
3 Description Description 3.1 Overview 3.1.1 LIFE-BASE light XS No. Name Description Loop for shoulder strap Serves to fasten the shoulder strap to the portable unit. Handle Serves to lift and carry the portable unit. • Serves to fasten the breathing circuit of the ventilator. - Page 13 3 Description 3.1.2 LIFE-BASE light No. Name Description Handle Serves to lift and carry the portable unit. Loop for shoulder strap Serves to fasten the shoulder strap to the portable unit. LIFE-BASE...
- Page 14 3 Description 3.1.3 LIFE-BASE 1 NG XS No. Name Description Handle Serves to lift and carry the portable unit. Spacer plate Serves to fasten the devices on the portable unit. Cross-bar Serves to fasten the portable unit to the wall mounting. Serves to fasten the low-pressure hose of the ventilator if you are not Loop for tension belt (long) using a protective bag.
- Page 15 3 Description 3.1.4 LIFE-BASE 1 NG No. Name Description Loop for shoulder strap Serves to fasten the shoulder strap to the portable unit. Snap fastener Fixes the protective bag to the portable unit. Cross-bar Serves to fasten the portable unit to the wall mounting. Vibration absorber (only with Reduces vibrations and impacts in order to protect the device.
- Page 16 3 Description 3.1.5 LIFE-BASE 1 NG XL No. Name Description Loop for shoulder strap Serves to fasten the shoulder strap to the portable unit. Snap fastener Fixes the protective bag to the portable unit. Cross-bar Serves to fasten the portable unit to the wall mounting. Spacer plate Serves to fasten the devices on the portable unit.
- Page 17 3 Description 3.1.6 LIFE-BASE Mini II No. Name Description Handle Serves to lift and carry the portable unit. Loop for shoulder strap Serves to fasten the shoulder strap to the portable unit. Patient valve bracket Holds the patient valve on the portable unit. Snap fastener Fixes the accessories bag to the portable unit.
- Page 18 3 Description 3.1.7 LIFE-BASE III and LIFE-BASE 3 NG No. Name Description Loop for shoulder strap Serves to fasten the shoulder strap to the portable unit. Snap fastener Fixes the protective bag to the portable unit. Spacer plate Serves to fasten the devices on the portable unit. (only with LIFE-BASE 3 NG) Cross-bar Serves to fasten the portable unit to the wall mounting.
- Page 19 3 Description 3.1.8 LIFE-BASE 4 NG With protective hoops Without protective hoops No. Name Description Loop for shoulder strap Serves to fasten the shoulder strap to the portable unit. Hanger Serves to suspend the portable unit on a pole. Knurled screw Fixes the hanger in place.
-
Page 20: Accessories And Other Parts
3 Description 3.2 Accessories and other parts 3.2.1 Straps Strap Name Description Shoulder strap Serves to lift and carry for attachment the portable unit. to the handle Shoulder strap Serves to lift and carry for attachment the portable unit. to the loops LIFE-BASE... - Page 21 3 Description Strap Name Description • Fastens the low-pressure hose of the ventilator. • Secures the portable unit if it is fastened to a pole or equipment rail with the holding claws. Tension belt (short) • Fastens the breathing circuit of the ventilator.
- Page 22 3 Description 3.2.2 Bags Name Description • Protects the portable unit and the devices attached to it from soiling. • Serves to hold the accessories. Protective bag with or without accessories bags Inner accessories bag Serves to hold the accessories. for protective bags Further protective bags and accessories bags can be found in the scope of supply...
- Page 23 3 Description 3.2.3 Holding brackets Holding bracket Name Description Wall mounting Serves to hold the portable unit BASE-STATION 1 NG in an emergency vehicle. Wall mounting Serves to hold the portable unit BASE-STATION Mini II in an emergency vehicle. Wall mounting Serves to hold the portable unit BASE-STATION 3 NG in an emergency vehicle.
- Page 24 3 Description Holding bracket Name Description Ceiling mounting Serves to hold the portable unit BASE-STATION 1 NG in an ambulance. Fastens the portable unit or Retaining claw the wall mounting on an equipment rail. Fastens the portable unit Pole mounting to a pole.
-
Page 25: Assembly
4 Assembly Assembly This section describes the assembly of all versions of the portable unit and accessories. If there are significant differences in the assembly of the versions, these are explained. Otherwise, assembly is the same for all versions. 4.1 Attaching the protective bag to the portable unit 4.1.1 Attaching the protective bag for LIFE-BASE light... - Page 26 4 Assembly 5. If available: Feed the breathing circuit on the front through the opening on the protective bag. 6. Close the hook and loop fasteners on the front of the protective bag. Result The protective bag is attached to the portable unit. 4.1.2 Attaching the protective bag for LIFE-BASE 1 NG XS 1.
- Page 27 4 Assembly • Pull the top of the protective bag over the portable unit up to the handle. With the monitor/defibrillator: Guide the slot on the protective bag over the bottom of the portable unit from the front. 3. Close the hook and loop fastener on the back of the portable unit.
- Page 28 4 Assembly 5. Close the hook and loop fasteners below and next to the handle. 6. Connect the accessories to the device. 7. With the ventilator: • Close the protective bag window. • Clamp the breathing circuit in the space between the portable unit and the ventilator.
- Page 29 4 Assembly 4.1.3 Attaching the protective bag for LIFE-BASE 1 NG and LIFE-BASE 1 NG XL 1. Place the portable unit on a flat, firm surface. 2. With LIFE-BASE 1 NG: Position the portable unit from behind on the base of the protective bag With LIFE-BASE 1 NG XL: Guide the bottom of the portable unit from behind into...
- Page 30 4 Assembly 4. If available: Feed the breathing circuit through the opening on the protective bag. 5. Close the magnetic locks or hook and loop fasteners on the front and back of the protective bag. Result The protective bag is attached to the portable unit. 4.1.4 Attaching the protective bag for LIFE-BASE III, LIFE-BASE 3 NG and LIFE-BASE 4 NG 1.
- Page 31 4 Assembly 3. Pull the protective bag over the portable unit from behind (2). 4. Close the snap fasteners on the portable unit. 5. With LIFE-BASE 4 NG with brackets: Fasten the hook and loop straps to the protective hoops. 6.
-
Page 32: Attaching The Accessories Bag To The Portable Unit Or Protective Bag
4 Assembly 4.2 Attaching the accessories bag to the portable unit or protective bag 4.2.1 Attaching the side accessories bag Applies to Protective bags with attachable accessories bags 1. Hook in the zipper on the accessories bag in the zipper on the protective bag. - Page 33 4 Assembly 4.2.2 Attaching the inside accessories bag Cleaning agents 90% isopropanol solution required 1. Degrease the portable unit using isopropanol solution. 2. Determine the position of the hook and loop fastener on the portable unit. 3. Adhere the hook part of the hook and loop fastener to the portable unit.
- Page 34 4 Assembly 4.2.3 Attaching the accessories bag for LIFE-BASE 1 NG 1. Open the hook and loop fasteners on the back of the accessories bag. 2. Feed the hook and loop straps through the loops on the protective bag. 3. Close the hook and loop fasteners on the back of the accessories bag.
- Page 35 4 Assembly 4.2.4 Attaching the accessories bag for LIFE-BASE Mini II 1. Fasten the accessories bag to the portable unit with the snap fasteners. 2. Close the hook and loop fastener on the back of the portable unit. Result The accessories bag is attached to the portable unit. 4.2.5 Attaching the accessories bag for LIFE-BASE 4 NG 1.
-
Page 36: Attaching The Belt To The Portable Unit
4 Assembly 2. Fasten the retaining strap to the accessories bag with the hook and loop fastener. Result The accessories bag is attached to the protective bag. 4.3 Attaching the belt to the portable unit 4.3.1 Attaching the shoulder strap to the handle Applies to LIFE-BASE 1 NG XS 1. - Page 37 The shoulder strap is attached to the portable unit. 4.3.3 Attaching the tension belts to the portable unit Applies to • LIFE-BASE light XS • LIFE-BASE 1 NG XS 1. Feed the tension belts through the loops on the protective bag.
-
Page 38: Attaching The Oxygen Cylinder To The Portable Unit
4 Assembly 2. Close the hook and loop fasteners on the tension belts. Result The tension belts are attached to the portable unit. 4.4 Attaching the oxygen cylinder to the portable unit Damage to cylinder brackets! The tensioning force of the cylinder brackets can be set differently. If the cylinder brackets can only be closed by applying significant force, the brackets may be overstretched and damaged. - Page 39 4 Assembly 1. Open the latches (1) on the cylinder brackets. 2. Unhook the tensioning hoop (2) from the lock-in position on the cylinder brackets. 3. Insert the oxygen cylinder from the front or side into the portable unit. Notice! Damage to cylinder brackets! Turn the tensioning hoop to adapt the length of the cylinder brackets precisely to the oxygen cylinder.
- Page 40 4 Assembly 5. Hook the tensioning hoop (1) into the lock-in position on the cylinder brackets. 6. Close the latches on the cylinder brackets (2). 7. Check the oxygen cylinder for firm fit. When doing so, note: • The latches on the cylinder brackets must not come open. •...
- Page 41 4 Assembly 1. Open the latches on the cylinder brackets (1). 2. Unhook the retaining bolt (2). 3. Insert the oxygen cylinder from the side into the portable unit. Notice! Damage to cylinder brackets! Turn the retaining bolt to adapt the tensioning force of the cylinder brackets precisely to the oxygen cylinder.
- Page 42 4 Assembly 5. Hook in the retaining bolt (1). 6. Close the latches (2) on the cylinder brackets. 7. Check the oxygen cylinder for firm fit. When doing so, note: • The latches on the cylinder brackets must not come open. •...
-
Page 43: Attaching The Devices To The Portable Unit
4 Assembly 4.5 Attaching the devices to the portable unit 4.5.1 Attaching the device to LIFE-BASE light XS Applies to • MEDUMAT Standard • MEDUVENT Standard Required auxiliary Screwdriver with crosshead PH1 equipment 1. Position the device with the control panel membrane facing downwards. - Page 44 4 Assembly MEDUVENT Standard 10 mm 4. Use 4 screws 100 and 4 protective disks 104 to screw the device to the portable unit. 5. Connect the device to the power supply according to the instructions for use. 6. Complete attachment of the device to the portable unit (see "4.5.7 Completing assembly", page 80).
- Page 45 4 Assembly The attachment of MEDUMAT Transport to LIFE-BASE light is described in a separate section (see "4.5.4 Attaching the device to LIFE-BASE 1 NG and LIFE-BASE 4 NG (with protective hoops)", page 51). Required auxiliary Screwdriver with crosshead PH1 equipment 1.
- Page 46 4 Assembly LIFE-BASE light 10 mm MEDUMAT Easy 5. Use 2 screws 100 and 2 protective disks 104 to screw the device to the portable unit. 6. Complete attachment of the device to the portable unit (see "4.5.7 Completing assembly", page 80).
- Page 47 4 Assembly MEDUMAT Standard WM 9878 MEDUMAT Standard MEDUCORE Standard WM 9713 MEDUCORE Standard WM 9728 MEDUVENT Standard 2. Determine the holes for the device on the spacer plate. 3. Place the spacer plate on the device. When doing so, note: The holes for the device and the spacer plate must be aligned on top of each other.
- Page 48 4 Assembly 10 mm MEDUMAT Standard 4. Use screws 100 and protective disks 104 to screw the device to the spacer plate. Device Part Number MEDUMAT Standard MEDUVENT Standard MEDUCORE Standard MEDUCORE Standard 5. Connect the device to the power supply according to the instructions for use.
- Page 49 4 Assembly MEDUMAT Standard WM 9878 MEDUCORE Standard MEDUMAT Standard WM 9713 MEDUCORE Standard WM 9728 MEDUVENT Standard 6. Determine the hole for the cable clamp on the spacer plate. 7. Place the cable for the power supply in the cable clamp 105. LIFE-BASE...
- Page 50 4 Assembly 12 mm MEDUMAT Standard 8. Screw 1 cable clamp 105 and 1 protective disk 104 to the spacer plate using 1 screw 101. When doing so, note: The flat side of the cable clamp faces down. LIFE-BASE...
- Page 51 4 Assembly 16 mm MEDUMAT Standard 9. Use 4 screws 102 to screw the spacer plate to the portable unit. When doing so, note: The holes for the portable unit and the spacer plate must be aligned on top of each other. 10.
- Page 52 4 Assembly 3. Insert 4 rings 108, 4 sleeves 109 and 4 basic elements 107 into the drill holes on the portable unit. 30 mm 4. Use 4 screws 103, 4 protective disks 104 and 4 plain washers 106 to screw the device to the portable unit. When doing so, note: The holes for the portable unit and the device must be aligned on top of each other.
- Page 53 4 Assembly 4.5.5 Attaching devices to LIFE-BASE 1 NG XL, LIFE-BASE 3 NG and LIFE-BASE 4 NG (without protective hoops) Attaching the ventilator Applies to • MEDUMAT Standard • MEDUVENT Standard • MEDUMAT Easy Required auxiliary Screwdriver with crosshead PH1 equipment 1.
- Page 54 4 Assembly MEDUMAT Easy MEDUMAT Standard MEDUMAT Easy MEDUVENT Standard 4. Determine the holes for the device on the spacer plate. 5. Place the spacer plate on the device. When doing so, note: • Every device has a certain position. •...
- Page 55 4 Assembly 10 mm MEDUMAT Standard 6. Use screws 100 and protective disks 104 to screw the device to the spacer plate. Device Part Number MEDUMAT Standard MEDUVENT Standard MEDUMAT Easy 7. If available: Connect the device to the power supply according to the instructions for use.
- Page 56 4 Assembly 12 mm MEDUMAT Standard 9. With MEDUMAT Standard : Screw 1 cable clamp 105 and 1 protective disk 104 to the spacer plate using 1 screw 101. When doing so, note: The flat side of the cable clamp faces down.
- Page 57 4 Assembly MEDUMAT Standard 11. With LIFE-BASE 1 NG XL: Guide the low-pressure hose away to the left. 12. With LIFE-BASE 1 NG XL: • Undo the knurled screws. • Pull out the hangers. • Tighten the knurled screws. 13. Place the portable unit with holes above each other on the spacer plate.
- Page 58 4 Assembly LIFE-BASE 1 NG XL MEDUMAT Standard 16 mm 14. With LIFE-BASE 1 NG XL: Use 4 screws 102 to screw the spacer plate to the portable unit With LIFE-BASE 3 NG: Use 4 screws 102 and 4 protective disks 104 to screw the spacer plate to the portable unit.
- Page 59 4 Assembly Attaching the monitor/defibrillator Applies to • MEDUCORE Standard • MEDUCORE Standard Required auxiliary Screwdriver with crosshead PH1 equipment 1. If available: Fasten the shoulder strap to the portable unit (see "4.3 Attaching the belt to the portable unit", page 36).
-
Page 60: Use Screws 100 And Protective Disks 104 To Screw The Device To The Spacer Plate
4 Assembly • The holes for the device and the spacer plate must be aligned on top of each other. 10 mm MEDUCORE Standard 5. Use screws 100 and protective disks 104 to screw the device to the spacer plate. Device Part Number... - Page 61 4 Assembly 7. With MEDUCORE Standard on LIFE-BASE 3 NG: Place the cable for the power supply in the cable clamp 105. 12 mm MEDUCORE Standard 8. With MEDUCORE Standard on LIFE-BASE 3 NG: Screw 1 cable clamp 105 and 1 protective disk 104 to the spacer plate using 1 screw 101.
- Page 62 4 Assembly • Tighten the knurled screws. 10. Place the portable unit with holes above each other on the spacer plate. LIFE-BASE 3 NG 16 mm MEDUCORE Standard 11. With LIFE-BASE 3 NG: Use 4 screws 102 and 4 protective disks 104 to screw the spacer plate to the portable unit With LIFE-BASE 1 NG XL: Use 4 screws 102 to screw the spacer plate to the portable unit.
-
Page 63: Medumat Standard
4 Assembly 12. Complete attachment of the device to the portable unit (see "4.5.7 Completing assembly", page 80). Result The device is attached to the portable unit. Attaching the ventilator and MEDUCORE Standard Applies to • MEDUMAT Standard • MEDUVENT Standard •... - Page 64 4 Assembly MEDUMAT Standard MEDUCORE Standard MEDUMAT Easy MEDUVENT Standard 4. Determine the holes for the devices on the spacer plate. 5. Place the spacer plate on the devices. When doing so, note: • Every device has a certain position. •...
-
Page 65: If Available: Connect The Device To The Power Supply According To The Instructions For Use
4 Assembly MEDUCORE Standard 10 mm MEDUMAT Standard 6. Use 6 screws 100 and 6 protective disks 104 to screw the spacer plate to the devices. 7. If available: Connect the devices to the power supply according to the instructions for use. 8. - Page 66 4 Assembly MEDUCORE Standard 12 mm MEDUMAT Standard 9. With MEDUMAT Standard : Screw 2 cable clamps 105 and 2 protective disks 104 to the spacer plate using 2 screws 101. When doing so, note: The flat side of the cable clamps faces down.
- Page 67 4 Assembly MEDUCORE Standard 12 mm MEDUVENT Standard 10. With MEDUVENT Standard: Screw 2 cable clamps 105 and 2 protective disks 104 to the spacer plate using 2 screws 101. When doing so, note: The flat side of the cable clamps faces down.
- Page 68 4 Assembly 12. With LIFE-BASE 1 NG XL: • Undo the knurled screws. • Pull out the hangers. • Tighten the knurled screws. 13. Place the portable unit with holes above each other on the spacer plate. LIFE-BASE...
- Page 69 4 Assembly LIFE-BASE 1 NG XL MEDUCORE Standard 16 mm MEDUMAT Standard 14. With LIFE-BASE 1 NG XL: Use 4 screws 102 to screw the spacer plate to the portable unit With LIFE-BASE 3 NG: Use 4 screws 102 and 4 protective disks 104 to screw the spacer plate to the portable unit.
-
Page 70: Attaching The Ventilator And Meducore Standard
4 Assembly Attaching the ventilator and MEDUCORE Standard Applies to • MEDUMAT Standard • MEDUMAT Easy • MEDUCORE Standard Required auxiliary Screwdriver with crosshead PH1 equipment 1. If available: Fasten the shoulder strap to the portable unit (see "4.3 Attaching the belt to the portable unit", page 36). -
Page 71: Meducore Standard
4 Assembly MEDUCORE Standard MEDUMAT Standard MEDUCORE Standard on LIFE-BASE 3 NG MEDUMAT Easy MEDUCORE Standard on LIFE-BASE 1 NG XL 4. Determine the holes for the devices on the spacer plate. 5. Place the spacer plate on the devices. When doing so, note: •... - Page 72 4 Assembly MEDUCORE Standard 10 mm MEDUMAT Standard 6. Use screws 100 and protective disks 104 to screw the spacer plate to the devices. Device Part Number MEDUCORE Standard with MEDUMAT Standard MEDUCORE Standard with MEDUMAT Easy on LIFE-BASE 1 NG XL MEDUCORE Standard with MEDUMAT Easy on LIFE-BASE 3 NG...
- Page 73 4 Assembly 8. If available: Place the cable for the power supply in the cable clamp 105. MEDUCORE Standard 12 mm MEDUMAT Standard 9. With MEDUCORE Standard with MEDUMAT Standard Screw 2 cable clamps 105 and 2 protective disks 104 to the spacer plate using 2 screws 101.
- Page 74 4 Assembly MEDUCORE Standard 12 mm MEDUMAT Easy 10. With MEDUCORE Standard with MEDUMAT Easy LIFE-BASE 3 NG: Screw 1 cable clamp 105 and 1 protective disk 104 to the spacer plate using 1 screw 101. When doing so, note: The flat side of the cable clamp faces down.
- Page 75 4 Assembly 12. With LIFE-BASE 1 NG XL: • Undo the knurled screws. • Pull out the hangers. • Tighten the knurled screws. 13. Place the portable unit with holes above each other on the spacer plate. LIFE-BASE...
- Page 76 4 Assembly LIFE-BASE 1 NG XL MEDUCORE Standard 16 mm MEDUMAT Standard 14. With LIFE-BASE 1 NG XL: Use 4 screws 102 to screw the spacer plate to the portable unit With LIFE-BASE 3 NG: Use 4 screws 102 and 4 protective disks 104 to screw the spacer plate to the portable unit.
- Page 77 4 Assembly 4.5.6 Attaching the device to LIFE-BASE Mini II Applies to • MEDUMAT Standard • MEDUMAT Easy • MODUL Required auxiliary Screwdriver with crosshead PH1 equipment 1. If available: Fasten the shoulder strap to the portable unit (see "4.3 Attaching the belt to the portable unit", page 36).
- Page 78 4 Assembly MODUL MEDUMAT Easy MEDUMAT Standard 3. Determine the holes for the device on the portable unit. LIFE-BASE...
- Page 79 4 Assembly 10 mm 4. Use 2 screws 100 and 2 protective disks 104 to screw the device to the portable unit. When doing so, note: • MEDUMAT Easy can be attached individually or together with MODUL to the portable unit. •...
- Page 80 4 Assembly 4.5.7 Completing assembly Requirement The device is attached to the portable unit. 1. If available: Attach the protective bag to the portable unit (see "4.1 Attaching the protective bag to the portable unit", page 25). 2. If available: Attach the accessories bag to the portable unit or protective bag (see "4.2 Attaching the accessories bag to the portable unit or protective bag", page...
-
Page 81: Function Check
5 Function check Function check Risk of fire and explosion as a result of oxygen! Compressed oxygen can quickly enrich the atmosphere with oxygen and lead to fire or explosion of combustible substances. Ensure adequate ventilation. Never smoke in the vicinity of fittings carrying oxygen. ... -
Page 82: Intervals
The LED for the external power supply must light up. • The battery status indicator must light up or flash. 4. If parts are damaged: Either have the portable unit repaired by WEINMANN Emergency or replace it. Result The portable unit has been checked visually. LIFE-BASE... -
Page 83: Checking The Cylinder Brackets
38). 4. Check the cylinder brackets for corrosion. 5. If the cylinder brackets show signs of corrosion: Have the cylinder brackets replaced by WEINMANN Emergency. Result The cylinder brackets have been checked. 5.4 Checking the locking of the wall mounting or ceiling mounting 1. -
Page 84: Checking The Lock Of The Retaining Claws
The portable unit must not get stuck when removed. 4. If the lock of the wall mounting or ceiling mounting does not function properly: Have the lock replaced by WEINMANN Emergency. Result The lock on the wall mounting or ceiling mounting has been checked. -
Page 85: Checking The Screws On The Wall Mounting
5 Function check 5.6 Checking the screws on the wall mounting 1. Undo the screws. When doing so, note: The threads must turn smoothly. 2. If the screws do not function perfectly: Replace the screws. Result The screws on the wall mounting have been checked. 5.7 Checking the pole mounting 1. -
Page 86: Checking The Bag
5 Function check 5.8 Checking the bag This section describes the function check for all bags which can be used with the portable unit. Depending on the bag you have purchased, not all the parts described in this section may be available for testing. -
Page 87: Checking The System For Leaks
5 Function check 5.9 Checking the system for leaks Requirement The device is connected to the oxygen supply. 1. Observe the instructions for use for devices and pressure reducers. 2. Switch off all equipment. 3. Check whether all the hose connections sit securely. 4. -
Page 88: Rectifying Leaks In The System
5 Function check Pressure Oxygen level in the oxygen cylinder 200 bar Full 100 bar Half full < 50 bar 6. If the contents indicator of the pressure reducer displays < 50 bar: Replace oxygen cylinder. 7. Close the oxygen cylinder by hand. 8. - Page 89 8. Check the system for leaks (see "5.9 Checking the system for leaks", page 87). 9. If the system still has a leak: Have the damaged system repaired by WEINMANN Emergency. Result The leak in the system has been rectified. LIFE-BASE...
-
Page 90: Operation
6 Operation Operation 6.1 Fastening the portable unit to a wall mounting or ceiling mounting Applies to Wall mounting or Portable unit ceiling mounting LIFE-BASE 1 NG XS BASE-STATION 1 NG LIFE-BASE 1 NG BASE-STATION Mini II LIFE-BASE 1 NG XL LIFE-BASE Mini II BASE-STATION Mini II LIFE-BASE III... - Page 91 6 Operation Warning! Risk of injury due to inadequate fastening of the portable unit! Check that the red control pin (1) is flush with the top edge of the locking mechanism (2) and does not protrude. Result The portable unit is fastened to the wall mounting or ceiling mounting.
-
Page 92: Removing The Portable Unit From The Wall Mounting Or Ceiling Mounting
6 Operation 6.2 Removing the portable unit from the wall mounting or ceiling mounting Risk of injury from falling objects! The portable unit can fall out of the wall mounting or ceiling mounting and injure individuals or damage devices. Hold the portable unit securely when removing it from the wall mounting or ceiling mounting. - Page 93 6 Operation 1. Grasp the handle with one hand. 2. Push the locking mechanism upwards. LIFE-BASE...
- Page 94 6 Operation 3. Swivel the portable unit forwards slightly. 4. Remove the portable unit from the rail. Result The portable unit has been removed from the wall mounting or ceiling mounting. LIFE-BASE...
-
Page 95: Fastening The Portable Unit To The Pole Or Equipment Rail
6 Operation 6.3 Fastening the portable unit to the pole or equipment rail Risk of injury due to inadequate fastening of the portable unit! If the portable unit is not fastened properly or only suspended loosely using the hangers or holding claws, the portable unit may fall off or be thrown around inside the emergency vehicle and injure people. - Page 96 6 Operation 6.3.2 Fastening the portable unit with hangers Applies to • LIFE-BASE 1 NG • LIFE-BASE 1 NG XL • LIFE-BASE III • LIFE-BASE 3 NG • LIFE-BASE 4 NG 1. Undo the knurled screws. 2. Pull out the hangers. 3.
- Page 97 6 Operation 5. Suspend the portable unit on the pole or equipment rail Result The portable unit is fastened to a pole or equipment rail with hangers. LIFE-BASE...
- Page 98 6 Operation 6.3.3 Fastening the portable unit with a protective bag Applies to LIFE-BASE 1 NG XS Requirement A protective bag is fastened to the portable unit. 1. Open the magnetic locks on the belts on the rear of the protective bag. 2.
- Page 99 6 Operation 6.3.4 Fastening the portable unit with holding claws Applies to LIFE-BASE light XS 1. Suspend the portable unit on the pole or equipment rail with the two holding claws. Warning! Risk of injury due to inadequate fastening of the portable unit! Fasten 2 tension belts to the pole or equipment rail.
- Page 100 Only use the pole mounting in the stationary area. Only fasten the portable unit to poles with a diameter of 19 mm-40 mm. Applies to • LIFE-BASE light XS • LIFE-BASE light • BASE-STATION 1 NG Requirement The pole mounting is attached horizontally or vertically to the portable unit or the wall mounting.
- Page 101 6 Operation 6.3.6 Fastening the portable unit with retaining claws Applies to • LIFE-BASE light XS • LIFE-BASE light Requirement The retaining claws are attached to the portable unit. 1. Suspend the portable unit on the equipment rail using the retaining claws.
- Page 102 6 Operation 6.3.7 Fastening the wall mounting with retaining claws Applies to • BASE-STATION 1 NG without screws • BASE-STATION Mini II • BASE-STATION 3 NG Requirement The retaining claws are attached to the wall mounting. 1. Suspend the wall mounting on the equipment rail using the retaining claws.
-
Page 103: Removing The Portable Unit From The Pole Or Equipment Rail
6 Operation 6.4 Removing the portable unit from the pole or equipment rail 6.4.1 Removing LIFE-BASE Mini II Applies to LIFE-BASE Mini II 1. Remove the portable unit from the pole or equipment rail. Result LIFE-BASE Mini II has been removed from the pole or equipment rail. - Page 104 6 Operation 2. Remove the portable unit from the pole or equipment rail. 3. Push the hangers back to their original position. 4. Tighten the knurled screws. Result The portable unit has been removed from the pole or equipment rail. LIFE-BASE...
- Page 105 6 Operation 6.4.3 Removing the portable unit with protective bag Applies to LIFE-BASE 1 NG XS 1. Undo the belt straps by lifting the belt buckle. 2. Open the magnetic locks on the belts on the rear of the protective bag. 3.
- Page 106 6 Operation 6.4.4 Removing the portable unit with holding claws Applies to LIFE-BASE light XS 1. Undo 2 tension belts from the pole or equipment rail. 2. Remove the portable unit from the pole or equipment rail. Result The portable unit has been removed from the pole or equipment rail.
- Page 107 6 Operation 6.4.5 Removing the portable unit or wall mounting with pole mounting Applies to • LIFE-BASE light XS • LIFE-BASE light • BASE-STATION 1 NG 1. Hold the portable unit with one hand. 2. Loosen the locking screw. 3. Remove the portable unit from the pole or equipment rail.
- Page 108 6 Operation 6.4.6 Removing the portable unit with retaining claws Applies to • LIFE-BASE light XS • LIFE-BASE light 1. Push the locking levers downwards until the lock disengages. 2. Remove the portable unit from the equipment rail. Result The portable unit has been removed from the equipment rail.
-
Page 109: Storing Device Accessories
6 Operation 1. Push the locking levers downwards until the lock disengages. 2. With BASE-STATION Mini II and BASE-STATION 3 NG: Undo the screws. 3. Remove the wall mounting from the equipment rail. Result The wall mounting has been removed from the equipment rail. 6.5 Storing device accessories Device accessories can be stored in protective bags and accessories bags or fastened with tension belts and hook and loop straps to... -
Page 110: Disassembly
7 Disassembly Disassembly This section describes the disassembly of all versions of the portable unit and accessories. If there are significant differences in the disassembly of the versions, these are explained. Otherwise, disassembly is the same for all versions. 7.1 Removing the protective bag from the portable unit 7.1.1 Removing the protective bag for LIFE-BASE light... - Page 111 7 Disassembly 7.1.2 Removing the protective bag for LIFE-BASE 1 NG XS 1. Place the portable unit on a flat, firm surface. 2. With the ventilator: • Open the hook and loop fasteners on the tension belts. • Remove the breathing circuit from the portable unit. With the monitor/defibrillator: •...
- Page 112 7 Disassembly 4. Open the hook and loop fasteners below and next to the handle. 5. Pull the protective bag off the handle. 6. Pull the portable unit backwards out of the protective bag. Result The protective bag is removed from the portable unit. LIFE-BASE...
- Page 113 7 Disassembly 7.1.3 Removing the protective bag for LIFE-BASE 1 NG and LIFE-BASE 1 NG XL 1. Place the portable unit on a flat, firm surface. 2. Open the magnetic locks or hook and loop fasteners on the front and back of the protective bag. 3.
- Page 114 7 Disassembly 7.1.4 Removing the protective bag for LIFE-BASE III, LIFE-BASE 3 NG and LIFE-BASE 4 NG 1. Place the portable unit on a flat, firm surface. 2. Open the clips or magnetic locks on the protective bag. 3. With LIFE-BASE 4 NG with brackets: Undo the hook and loop straps on the protective hoops.
-
Page 115: Removing The Accessories Bag From The Portable Unit Or Protective Bag
7 Disassembly 5. Pull the protective bag backwards off the portable unit. 6. Remove the portable unit from the protective bag. Result The protective bag is removed from the portable unit. 7.2 Removing the accessories bag from the portable unit or protective bag 7.2.1 Removing the side accessories bag Applies to Protective bags with attachable accessories bags... - Page 116 7 Disassembly 7.2.2 Removing the inside accessories bag 1. Pull the inside accessories bag off the portable unit. Result The inside accessories bag is removed from the portable unit. 7.2.3 Removing the accessories bag for LIFE-BASE 1 NG 1. Open the hook and loop fasteners on the back of the accessories bag.
- Page 117 7 Disassembly 3. Remove the accessories bag from the protective bag. Result The accessories bag is removed from the protective bag. 7.2.4 Removing the accessories bag for LIFE-BASE Mini II 1. Open the hook and loop fastener on the back of the portable unit.
-
Page 118: Remove The Accessories Bag From The Protective Bag
7 Disassembly 7.2.5 Removing the accessories bag for LIFE-BASE 4 NG 1. Open the hook and loop fastener on the retaining strap. 2. Pull the retaining strap out of the loop on the side of the protective bag. 3. Remove the accessories bag from the protective bag. Result The accessories bag is removed from the protective bag. -
Page 119: Removing The Belt From The Portable Unit
7 Disassembly 7.3 Removing the belt from the portable unit 7.3.1 Removing the shoulder strap from the handle Applies to LIFE-BASE 1 NG XS 1. Open the hook and loop fastener on the shoulder strap. 2. Remove the shoulder strap from the handle. Result The shoulder strap is removed from the handle. - Page 120 2. Remove the shoulder strap from the portable unit. Result The shoulder strap is removed from the portable unit. 7.3.3 Removing the tension belts Applies to • LIFE-BASE light XS • LIFE-BASE 1 NG XS 1. Open the hook and loop fastener on the tension belts. LIFE-BASE...
-
Page 121: Removing The Oxygen Cylinder From The Portable Unit
7 Disassembly 2. Remove the tension belts from the portable unit. Result The tension belts are removed from the portable unit. 7.4 Removing the oxygen cylinder from the portable unit 7.4.1 Disassembling the oxygen cylinder Ø 105 mm Applies to •... - Page 122 7 Disassembly 3. Pull the oxygen cylinder out of the cylinder brackets. Result The oxygen cylinder is removed from the portable unit. 7.4.2 Disassembling the oxygen cylinder Ø 115 mm-120 mm Applies to LIFE-BASE 4 NG 1. Open the latches (1) on the cylinder brackets. 2.
-
Page 123: Removing The Device From The Portable Unit
7 Disassembly 3. Pull the oxygen cylinder out of the cylinder brackets. Result The oxygen cylinder is removed from the portable unit. 7.5 Removing the device from the portable unit 7.5.1 Preparing disassembly 1. If available: Remove the portable unit from the wall mounting or ceiling mounting (see "6.2 Removing the portable unit from the wall mounting or ceiling mounting", page 92) -
Page 124: Remove The Accessories Bag From The Portable Unit
(see "7.2 Removing the accessories bag from the portable unit or protective bag", page 115). Result The portable unit is prepared for disassembly of the device. 7.5.2 Removing the device from LIFE-BASE light XS Applies to • MEDUMAT Standard •... - Page 125 7 Disassembly 4. Remove the portable unit from the device. Result The device is removed from the portable unit. 7.5.3 Removing the device from LIFE-BASE light and LIFE-BASE III Applies to • MEDUMAT Standard • MEDUMAT Easy • MODUL The removal of MEDUMAT Transport from LIFE-BASE light is described in a separate section (see "7.5.5 Removing the device from LIFE-BASE 1 NG and LIFE-BASE 4 NG (with protective...
- Page 126 7 Disassembly 3. Remove the portable unit from the device. 4. Remove the shoulder strap from the portable unit (see "7.3 Removing the belt from the portable unit", page 119). Result The device is removed from the portable unit. 7.5.4 Removing the device from LIFE-BASE 1 NG XS Applies to •...
- Page 127 7 Disassembly MEDUMAT Standard 4. Undo the screws 100, protective disks 104, cable clamp 105 and screw 101 from the spacer plate. Device Part Number MEDUMAT Standard MEDUVENT Standard MEDUCORE Standard MEDUCORE Standard 5. Disconnect the device from the power supply according to the instructions for use.
- Page 128 7 Disassembly 6. Remove the spacer plate from the device. Result The device is removed from the portable unit. 7.5.5 Removing the device from LIFE-BASE 1 NG and LIFE-BASE 4 NG (with protective hoops) Applies to MEDUMAT Transport Required auxiliary Screwdriver with crosshead PH1 equipment Requirement...
- Page 129 7 Disassembly 4. Remove 4 rings 108, 4 sleeves 109 and 4 basic elements 107 from the portable unit. 5. If available: Remove the shoulder strap from the portable unit (see "7.3 Removing the belt from the portable unit", page 119).
- Page 130 7 Disassembly Figure without device 1. With LIFE-BASE 1 NG XL: • Undo the knurled screws. • Pull out the hangers. • Tighten the knurled screws. 2. Place the portable unit and device with the control panel membrane facing downwards. LIFE-BASE...
- Page 131 7 Disassembly LIFE-BASE 1 NG XL MEDUMAT Standard 3. With LIFE-BASE 1 NG XL: Undo 4 screws 102 from the portable unit With LIFE-BASE 3 NG: Undo 4 screws 102 and 4 protective disks 104 from the portable unit. 4. Remove the portable unit from the spacer plate. LIFE-BASE...
- Page 132 7 Disassembly MEDUMAT Standard 5. With MEDUMAT Standard : Undo 1 cable clamp 105, 1 protective disk 104 and 1 screw 101 from the spacer plate. MEDUVENT Standard 6. With MEDUVENT Standard: Undo 1 cable clamp 105, 1 protective disk 104 and 1 screw 101 from the spacer plate. 7.
- Page 133 7 Disassembly MEDUMAT Standard 8. Undo the screws 100 and protective disks 104 from the spacer plate. Device Part Number MEDUMAT Standard MEDUVENT Standard MEDUMAT Easy 9. Remove the spacer plate from the device. 10. If available: Remove the shoulder strap from the portable unit (see "7.3 Removing the belt from the portable unit", page 119).
-
Page 134: Required Auxiliary Equipment
7 Disassembly Disassembling the monitor/defibrillator Applies to • MEDUCORE Standard • MEDUCORE Standard Required auxiliary Screwdriver with crosshead PH1 equipment Requirement Disassembly is prepared (see "7.5.1 Preparing disassembly", page 123). Figure without device 1. With LIFE-BASE 1 NG XL: • Undo the knurled screws. - Page 135 7 Disassembly MEDUCORE Standard LIFE-BASE 3 NG 3. With LIFE-BASE 3 NG: Undo 4 screws 102 and 4 protective disks 104 from the portable unit with LIFE-BASE 1 NG XL: Undo 4 screws 102 from the portable unit. 4. Remove the portable unit from the spacer plate. LIFE-BASE...
- Page 136 7 Disassembly MEDUCORE Standard 5. With MEDUCORE Standard on LIFE-BASE 3 NG: Undo 1 cable clamp 105, 1 protective disk 104 and 1 screw 101 from the spacer plate. 6. Disconnect the device from the power supply according to the instructions for use. MEDUCORE Standard 7.
- Page 137 7 Disassembly Device Part Number MEDUCORE Standard MEDUCORE Standard on LIFE-BASE 1 NG XL MEDUCORE Standard on LIFE-BASE 3 NG 8. Remove the spacer plate from the device. 9. If available: Remove the shoulder strap from the portable unit (see "7.3 Removing the belt from the portable unit", page 119).
- Page 138 7 Disassembly Removing the ventilator and MEDUCORE Standard Applies to • MEDUMAT Standard • MEDUVENT Standard • MEDUMAT Easy • MEDUCORE Standard Required auxiliary Screwdriver with crosshead PH1 equipment Requirement Disassembly is prepared (see "7.5.1 Preparing disassembly", page 123). Figure without devices 1.
- Page 139 7 Disassembly MEDUCORE Standard MEDUMAT Standard LIFE-BASE 1 NG XL 3. With LIFE-BASE 1 NG XL: Undo 4 screws 102 from the portable unit With LIFE-BASE 3 NG: Undo 4 screws 102 and 4 protective disks 104 from the portable unit. 4.
- Page 140 7 Disassembly MEDUCORE Standard MEDUMAT Standard 5. With MEDUCORE Standard with MEDUMAT Standard Undo 2 cable clamps 105, 2 protective disks 104 and 2 screws 101 from the spacer plate. MEDUCORE Standard MEDUVENT Standard 6. With MEDUCORE Standard with MEDUVENT Standard: Undo 2 cable clamps 105, 2 protective disks 104 and 2 screws 101 from the spacer plate.
- Page 141 7 Disassembly 7. If available: Disconnect the devices from the power supply according to the instructions for use. MEDUCORE Standard MEDUMAT Standard 8. Undo 6 screws 100 and 6 protective disks 104 from the spacer plate. 9. Remove the spacer plate from the devices. 10.
- Page 142 7 Disassembly Removing the ventilator and MEDUCORE Standard Applies to • MEDUMAT Standard • MEDUMAT Easy • MEDUCORE Standard Required auxiliary Screwdriver with crosshead PH1 equipment Requirement Disassembly is prepared (see "7.5.1 Preparing disassembly", page 123). Figure without devices 1. With LIFE-BASE 1 NG XL: •...
- Page 143 7 Disassembly LIFE-BASE 1 NG XL MEDUCORE Standard MEDUMAT Standard 3. With LIFE-BASE 1 NG XL: Undo 4 screws 102 from the portable unit With LIFE-BASE 3 NG: Undo 4 screws 102 and 4 protective disks 104 from the portable unit. 4.
- Page 144 7 Disassembly MEDUCORE Standard MEDUMAT Standard 5. With MEDUCORE Standard with MEDUMAT Standard Undo 2 cable clamps 105, 2 protective disks 104 and 2 screws 101 from the spacer plate. MEDUCORE Standard MEDUMAT Easy 6. With MEDUCORE Standard with MEDUMAT Easy LIFE-BASE 3 NG: Undo 1 cable clamp 105, 1 protective disk 104 and 1 screw 101 from the spacer plate.
- Page 145 7 Disassembly 7. If available: Disconnect the devices from the power supply according to the instructions for use. MEDUCORE Standard MEDUMAT Standard 8. Undo the screws 100 and protective disks 104 from the spacer plate. Device Part Number MEDUCORE Standard with MEDUMAT Standard MEDUCORE Standard with MEDUMAT Easy...
- Page 146 7 Disassembly 7.5.7 Removing the device from LIFE-BASE Mini II Applies to • MEDUMAT Standard • MEDUMAT Easy • MODUL Required auxiliary Screwdriver with crosshead PH1 equipment Requirement Disassembly is prepared (see "7.5.1 Preparing disassembly", page 123). 1. Place the portable unit on the narrow, closed side. LIFE-BASE...
- Page 147 7 Disassembly 2. Undo 2 screws 100 and 2 protective disks 104 from the portable unit. 3. Remove the device from the portable unit. 4. Remove the shoulder strap from the portable unit (see "7.3 Removing the belt from the portable unit", page 119).
-
Page 148: Hygienic Reprocessing
The following sections describe the activities required for hygienic reprocessing. Read this section in full before starting hygienic reprocessing. If you have any queries on hygienic reprocessing, please contact the manufacturer WEINMANN Emergency. Risk of infection resulting from insufficient hygienic reprocessing! - Page 149 8 Hygienic reprocessing Loss of mechanical or electrical safety resulting from reprocessing of the device and accessories with unsuitable cleaning agents and disinfectants! Using incorrect cleaning agents and disinfectants might cause damage to the surface of the device and/or accessories, as well as impairing electrical and insulating properties.
-
Page 150: Intervals
8 Hygienic reprocessing 8.1 Intervals Part Interval After At least At least each use* 1x weekly 1x monthly Portable unit including – accessories Protective bags – *In the case of visible soiling or suspected contamination. 8.2 Preparing hygienic reprocessing Requirement •... -
Page 151: Cleaning Parts Manually
8 Hygienic reprocessing 6. If available: Remove the protective bags and accessories bags from the portable unit (see "7 Disassembly", page 110). 7. Remove the devices from the portable unit (see "7.5 Removing the device from the portable unit", page 123). -
Page 152: Wipe Disinfecting Parts
8 Hygienic reprocessing 5. With cables: Wrap a disposable cloth around the cable and pull the cable through the cloth. 6. If soiling is still visible: Repeat the manual cleaning. 7. Wipe down the parts with a damp cloth in order to remove cleaning agent residue. -
Page 153: Reprocessing Parts Mechanically
8 Hygienic reprocessing • Uneven surfaces and grooves (e.g.,hook and loop fasteners, zippers, belt buckles) must be sufficiently wetted with the disinfectant. • The exposure time stated by the manufacturer of the disinfectant must be observed. 3. With cables: Wrap a disposable cloth around the cable and pull the cable through the cloth. -
Page 154: Preparing Parts For Reuse
8 Hygienic reprocessing 3. Brush the soiled areas for at least 2 minutes under running faucet water using a cleaning brush until they look clean. 4. Rinse the cleaned areas for 2 minutes under running faucet water. 5. If necessary: Open the bags. 6. -
Page 155: Cleaning And Disinfection Plan
8 Hygienic reprocessing 8.7 Cleaning and disinfection plan Level of Description disinfection A germ-killing process with a sterilizing agent High Level under non-sterile conditions. The process kills Disinfection all types of microbial life with the exception of a large number of bacterial spores. A germ-killing process using a disinfectant that Intermediate Level kills viruses, mycobacteria, fungi and vegetative... - Page 156 8 Hygienic reprocessing Level of Immersion Mechani- Manual Wipe disin- Steriliza- Part disinfec- disinfec- cal repro- cleaning fection tion tion tion cessing Power supply Wipe down with ® neodisher Wipe down MediClean all surfaces forte once with Intermediate (Dr. Weigert). Charging Incidin™...
-
Page 157: Maintenance
9 Maintenance Maintenance 9.1 Intervals Part Interval Maintenance by Portable unit Wall mounting and Maintenance-free – ceiling mounting Accessories Individual intervals apply Manufacturer or for the devices. Refer to a technician specifically Device the instructions for use authorized by supplied with the devices. the manufacturer LIFE-BASE... -
Page 158: Storage
10 Storage 10 Storage Material damage due to incorrect storage! Silicone and rubber parts can become brittle and fragile due to incorrect storage, thus resulting in material damage. Protect silicone and rubber parts from UV light and direct sunlight. ... -
Page 159: Transport
11 Transport 11 Transport You can transport a portable unit in the following ways: • In the protective bag from WEINMANN Emergency • By the handle • With the shoulder strap LIFE-BASE... -
Page 160: Disposal
12 Disposal 12 Disposal 12.1 Portable units and accessories without a charging interface Do not dispose of the portable unit in household waste. Consult an authorized, certified waste disposal company for the proper disposal of the portable unit. 12.2 Portable units and accessories with a charging interface Environmental hazard from electronic waste! Electronic waste poses an environmental hazard and must be... -
Page 161: Scope Of Supply
Additional Name UDI-DI Article number information Portable units LIFE-BASE light For MEDUMAT Transport 04054685132347 WM 28370 For: LIFE-BASE light XS MEDUMAT Standard 04054685000288 WM 9890 MEDUVENT Standard For: LIFE-BASE 1 NG XS with MEDUMAT Standard 04054685006174 WM 9871 charging interface... - Page 162 13 Scope of supply Additional Name UDI-DI Article number information For: LIFE-BASE 1 NG XL with MEDUMAT Standard 04054685000844 WM 8278 charging interface MEDUCORE Standard LIFE-BASE 1 NG XL with For MEDUCORE Standard 04054685057435 WM 9674 charging interface For: MEDUMAT Standard LIFE-BASE Mini II 04054685050269 WM 8123...
- Page 163 13 Scope of supply Additional Name UDI-DI Article number information LIFE-BASE 4 NG with charging interface, for oxygen cylinders For MEDUMAT Standard 04054685276249 WM 9758 with integrated pressure reducer LIFE-BASE 4 NG for oxygen cylinders with For MEDUMAT Easy 04054685276904 WM 9751 integrated pressure reducer...
- Page 164 13 Scope of supply Additional Name UDI-DI Article number information BASE-STATION 1 NG, For: ceiling mounting with LIFE-BASE 1 NG XS, charging interface LIFE-BASE 1 NG, 04054685057299 WM 9660 (12 V vehicle LIFE-BASE 1 NG XL, combination plug). LIFE-BASE Mini II For: LIFE-BASE 1 NG XS, BASE-STATION 1 NG,...
- Page 165 13 Scope of supply Additional Name UDI-DI Article number information BASE-STATION Mini II with charging interface (12 V vehicle For LIFE-BASE Mini II 04054685051464 WM 8264 combination plug) for fastening to equipment rails For: LIFE-BASE III, BASE-STATION 3 NG 04054685050795 WM 8190 LIFE-BASE 3 NG, LIFE-BASE 4 NG...
- Page 166 13 Scope of supply Additional Name UDI-DI Article number information For: MEDUMAT Standard Protective bag with MEDUMAT Standard accessories bag for – WM 9716 MEDUMAT Easy LIFE-BASE 1 NG XL MEDUCORE Standard MEDUCORE Standard For: MEDUMAT Standard Protective bag for MEDUMAT Standard –...
- Page 167 13 Scope of supply Additional Name UDI-DI Article number information Protective bag with For: accessories bag for MEDUMAT Standard LIFE-BASE 4 NG for MEDUVENT Standard, – WM 9753 oxygen cylinders with MODUL, integrated pressure MEDUCORE Standard reducer MEDUCORE Standard For: Protective bag for MEDUMAT Standard LIFE-BASE 4 NG for...
- Page 168 13 Scope of supply Additional Name UDI-DI Article number information Protective bag with accessories bags (large) – – WM 9816 for LIFE-BASE 1 NG XL Insert for For: accommodating paddles LIFE-BASE 1 NG XS, – WM 45202 in protective bag for LIFE-BASE 1 NG XL MEDUCORE Standard Accessories bags...
- Page 169 Set of 2, tension belt for fastening of breathing For LIFE-BASE 1 NG XS – WM 15973 circuit to protective bag Tension belt for fastening the low-pressure hose for – – WM 9894 LIFE-BASE light XS, LIFE-BASE 1 NG XS LIFE-BASE...
- Page 170 13 Scope of supply Additional Name UDI-DI Article number information For: Tension belt for fastening LIFE-BASE light XS, of breathing circuit to LIFE-BASE 1 NG XS, – WM 9668 protective bag LIFE-BASE 1 NG, LIFE-BASE 1 NG XL Hook and loop strap...
- Page 171 WM 9683 LIFE-BASE 4 NG Retaining claws and pole mountings For: Kit, retaining claw BASE-STATION, for fastening to – WM 15795 LIFE-BASE light XS, equipment rail LIFE-BASE light Kit, retaining claw For: with locking screw BASE-STATION Mini II, – WM 15881...
- Page 172 13 Scope of supply 13.1.1 Other parts of portable units Additional No. Name UDI-DI Article number information Oval-head screw – – WM 51399 M4 × 10 Oval-head screw – – WM 51402 M4 × 12 Oval-head screw – – WM 51406 M4 ×...
-
Page 173: Technical Data
14 Technical data 14 Technical data LIFE- LIFE- LIFE- LIFE- BASE light XS BASE light BASE 1 NG XS BASE 1 NG Classification acc. to (EU) 2017/745 EN 1789 EN 60601-1 Standards used EN 60601-1-12 RTCA DO-160G 218 mm x 345 mm x 220 mm x 415 mm x... - Page 174 14 Technical data LIFE- LIFE-BASE 3 NG, LIFE-BASE Mini II LIFE-BASE 4 NG BASE 1 NG XL LIFE-BASE III Classification according to (EU) 2017/745 EN 1789 EN 60601-1 Standards used EN 60601-1-12 RTCA DO-160G 427 mm x 464 mm x 465 mm x 465 mm x Dimensions...
-
Page 175: Symbols
15 Symbols 15 Symbols Symbol Description Catalogue number Serial number Manufacturer Date of manufacture CE marking (confirms that the product complies with the applicable European directives) Unique Device Identifier - UDI: Enables unambiguous identification of (xx)xxxxxxxxxxxxxx (xx)xxxxx specific medical devices on the market Medical device Do not dispose of device in household waste Observe the instructions for use... - Page 176 15 Symbols Symbol Description Maximum weight Do not iron Wash at 30°C Do not tumble dry Shows how to release the lock and remove the portable unit from the wall mounting Input voltage 12-15 V LIFE-BASE...
-
Page 177: Warranty
16 Warranty 16 Warranty Starting from the date of purchase, WEINMANN Emergency offers the customer a limited manufacturer's warranty on a new original WEINMANN Emergency product or replacement parts installed by WEINMANN Emergency in accordance with applicable warranty terms and conditions for the particular device and the warranty periods listed below. -
Page 178: Declaration Of Conformity
17 Declaration of Conformity 17 Declaration of Conformity WEINMANN Emergency Medical Technology GmbH + Co. KG declares herewith that the product complies fully with the respective regulations of the Medical Device Regulation (EU) 2017/745. The unabridged text of the Declaration of Conformity can be found on our website at: www.weinmann-emergency.com. - Page 180 Manufacturer Center for Production, Logistics, Service WEINMANN Emergency WEINMANN Emergency Medical Technology GmbH + Co. KG Medical Technology GmbH + Co. KG Frohbösestraße 12 Siebenstücken 14 22525 Hamburg 24558 Henstedt-Ulzburg GERMANY GERMANY T: +49 40 88 18 96-120 E: customerservice@weinmann-emt.de...
Need help?
Do you have a question about the LIFE-BASE light XS and is the answer not in the manual?
Questions and answers