Sirona GALILEOS Service Manual
Hide thumbs
Also See for GALILEOS:
- Maintenance instructions manual (46 pages) ,
- Maintenance manual (30 pages) ,
- Getting started manual (26 pages)
Table of Contents
Advertisement
Quick Links
Advertisement
Table of Contents

Related Manuals for Sirona GALILEOS


Summary of Contents for Sirona GALILEOS
- Page 1 MSKOMNO kÉï=~ë=çÑW== d^ifiblp pÉêîáÅÉ=j~åì~ä båÖäáëÜ GALILEOS Service Manual...
-
Page 3: Table Of Contents
2.10 Radiation protection ..................2.11 Safety checks....................Unit description......................Unit classes and versions ................3.1.1 "GALILEOS Comfort" and "GALILEOS Compact" ......Hardware....................... 3.2.1 Information on the unit ............... 3.2.2 Installation versions................3.2.3 Modules and components ..............3.2.3.1 Slide ....................3.2.3.2 Stand.................... - Page 4 4.3.2.3 Resetting the FaceScan configuration to factory default settings ..Reading unit data ..................4.4.1 Reading the unit data of the GALILEOS via "Extended Details"..4.4.2 Reading FACESCAN unit data over the network....... Using demo mode – operation without radiation release ......
- Page 5 Sirona Dental Systems GmbH Service Manual GALILEOS Messages ......................... Help messages ..................... System messages ..................Status messages and displays..............Error messages ..................... 5.4.1 Error code: Ex yy zz ................5.4.2 Ex - Error type ..................5.4.3 yy - Location..................5.4.4 General handling of error messages..........
- Page 6 Sirona Dental Systems GmbH Service Manual GALILEOS Error analysis of X-RAY control signal path ..........6.8.1 Error analysis of X-RAY control signal path: up to unit serial number 3199 (with board DX41) 6.8.2 Error analysis of X-RAY control signal path: from unit serial number 3201 (without board DX41) Fault diagnosis of the X-ray detector and on board DX89 ......
- Page 7 Sirona Dental Systems GmbH Service Manual GALILEOS Mechanical adjustments................193 7.6.1 Ring center adjustment ..............193 7.6.2 Adjusting the swivel arm ..............195 7.6.3 Diaphragm adjustment ............... 197 7.6.3.1 Adjusting the "type 1" diaphragm (up to serial no. 2200) ....197 7.6.3.2 Adjusting the "Type 2"...
- Page 8 Sirona Dental Systems GmbH Service Manual GALILEOS S007: Error logging memory ................ 8.6.1 S007: Test step 1 ................8.6.2 S007: Test step 2 ................8.6.3 S007: Test step 5 ................8.6.3.1 Displaying the log with a web browser ..........S008: Update service ...................
- Page 9 Rotary knob on the swivel arm ..............306 9.4.1 Replacing the rotary knob ..............306 Control panel....................307 9.5.1 Replacing the Easypad user interface (GALILEOS Comfort) or Multipad (GALILEOS Compact) 9.5.1.1 What has to be done after replacing the user interface? ....308 9.5.2 Laying of cables when replacing the user interface ......
- Page 10 Sirona Dental Systems GmbH Service Manual GALILEOS FaceScan ..................... 9.9.1 Replacing the scan unit ..............9.9.1.1 Removing the defective scan unit ........... 9.9.1.2 Attaching new scan unit ..............9.9.1.3 What has to be done after replacing the scanner unit?....9.9.2 Replacing the PoE module..............
- Page 11 Sirona Dental Systems GmbH Service Manual GALILEOS Maintenance ......................10.1 Calibrating the unit ..................10.2 Checking the height adjustment ..............10.3 Checking the fan and temperature sensor ........... 10.4 Checking the cables for damage..............10.5 Checking the idling rollers ................
-
Page 12: About This Service Manual
In addition to this manual, you need the following documents: ETL GALILEOS Spare parts list ● GALILEOS List of Spare Parts: Order no. 61 25 699 GALILEOS wiring diagrams Wiring diagrams ● GALILEOS Wiring References: Order no. 61 25 640... -
Page 13: Tools And Auxiliary Materials
1.3 Tools and auxiliary materials Tools and auxiliary materials Tools and auxiliary materials Tools and auxiliary materials: GALILEOS ● GALILEOS service set: Order No. 6146562 ● Screwdriver set (slot and Phillips) ● Torx offset screwdrivers TX10, TX20, TX25 (included in the scope of supply) ●... -
Page 14: Structure Of The Document
1 About this Service Manual Sirona Dental Systems GmbH 1.4 Structure of the document Service Manual GALILEOS Structure of the document Structure of the document 1.4.1 Identification of danger levels Identification of danger levels To prevent personal injury and material damage, please observe the warning and safety information provided in this document. -
Page 15: Safety Instructions
For reasons of product safety, this product may be operated only with original Sirona accessories or third-party accessories expressly approved by Sirona. The user is responsible for any damage resulting from the use of non-approved accessories. Fixed connection... -
Page 16: Condensation
2 Safety instructions Sirona Dental Systems GmbH 2.6 Condensation Service Manual GALILEOS Condensation Condensation Safety information for condensation: Service engineer Extreme fluctuations of temperature may cause condensation inside the unit. Do not switch the unit on before it has reached normal room temperature. -
Page 17: Unit Description
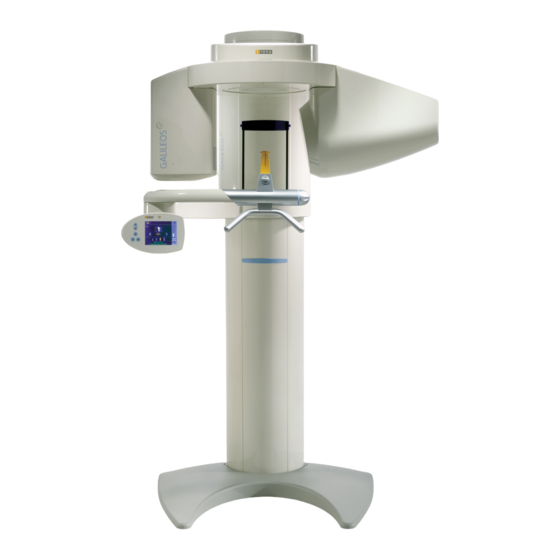
Sirona Dental Systems GmbH 3 Unit description Service Manual GALILEOS 3.1 Unit classes and versions Unit description Unit description Unit classes and versions Unit classes and versions GALILEOS unit* Control panel Facescan (optional) *The unit is prepared for optional operation with Facescan from the... -
Page 18: Galileos Comfort" And "Galileos Compact
The "Comfort" and "Compact" unit classes differ by the equipment of the "GALILEOS Comfort" and "GALILEOS Compact" control panel (B). While the GALILEOS Comfort has a control panel with GALILEOS Comfort a color touchscreen (Easypad), the Compact has a simpler control panel with a single-line display (Multipad). -
Page 19: Hardware
Sirona Dental Systems GmbH 3 Unit description Service Manual GALILEOS 3.2 Hardware Hardware Hardware 3.2.1 Information on the unit Information on the unit The following symbols are applied to the unit: Accompanying documents Observe accompanying documents. The Operating Instructions are provided on an electronic data carrier. -
Page 20: Installation Versions
3 Unit description Sirona Dental Systems GmbH 3.2 Hardware Service Manual GALILEOS 3.2.2 Installation versions Installation versions The unit can be equipped with... ● a 1-3 m coiled cable with release button inside the treatment room (A) or ... ● a remote control with or without coiled cable (B+C) located outside the X-ray room (see also installation instructions). -
Page 21: Modules And Components
Sirona Dental Systems GmbH 3 Unit description Service Manual GALILEOS 3.2 Hardware 3.2.3 Modules and components Modules and components Modules and components: GALILEOS Slide Stand Remote control [ → 24] FACESCAN [ → 24] (optional) 61 25 665 D3437 D3437.076.01.15.02 06.2012... -
Page 22: Slide
3 Unit description Sirona Dental Systems GmbH 3.2 Hardware Service Manual GALILEOS Slide 3.2.3.1 Slide DX11 DX6* DX89 DX7* GALILEOS Comfort DX71* GALILEOS Compact Component Designation Function Boards Open loop/closed loop control in general DX11 Controller board DX6* Open loop/closed loop tube... -
Page 23: Stand
Sirona Dental Systems GmbH 3 Unit description Service Manual GALILEOS 3.2 Hardware Stand 3.2.3.2 Stand Stand: GALILEOS DX32* DX41** Component Designation Function Boards DX32* Power supply board DX41** Interface board Motor Linear movement of height adjustment *) From unit serial number 3101, new units are supplied with a new version of the board DX32 (see chapter "Board photos [ →... -
Page 24: Remote Control
3 Unit description Sirona Dental Systems GmbH 3.2 Hardware Service Manual GALILEOS Remote control 3.2.3.3 Remote control Component Designation Function Board DX42 Display board for remote control DX42 3.2.3.4 Facescan Facescan Component Designation Function Boards FACESCAN Modular board Power supply board 61 25 665 D3437 D3437.076.01.15.02 06.2012... -
Page 25: Cabling Overview
Sirona Dental Systems GmbH 3 Unit description Service Manual GALILEOS 3.2 Hardware 3.2.4 Cabling overview Cabling overview DX11 DX89 DX32 Power switch Line filter Wago terminal 61 25 665 D3437 D3437.076.01.15.02 06.2012... - Page 26 3 Unit description Sirona Dental Systems GmbH 3.2 Hardware Service Manual GALILEOS DX11 DX89 DX7/DX71 Power switch 61 25 665 D3437 D3437.076.01.15.02 06.2012...
- Page 27 Sirona Dental Systems GmbH 3 Unit description Service Manual GALILEOS 3.2 Hardware DX11 DX89 L13 L27 L28* DX7/DX71 L28* * Cable L28 cannot be replaced on X-ray detectors with a serial number ≥ 5000. Power switch 61 25 665 D3437...
- Page 28 3 Unit description Sirona Dental Systems GmbH 3.2 Hardware Service Manual GALILEOS Cabling up to serial number 3199 L25/L26 DX42 DX41 Media converter 61 25 665 D3437 D3437.076.01.15.02 06.2012...
- Page 29 Sirona Dental Systems GmbH 3 Unit description Service Manual GALILEOS 3.2 Hardware Cabling from serial number 3201 L108 L117 L25/L26 DX42 L108 L117 Media converter 61 25 665 D3437 D3437.076.01.15.02 06.2012...
- Page 30 3 Unit description Sirona Dental Systems GmbH 3.2 Hardware Service Manual GALILEOS Facescan cabling L77 L78 DX11 DX89 FACESCAN Power switch 61 25 665 D3437 D3437.076.01.15.02 06.2012...
-
Page 31: Board Photos
Board photos 3.2.5.1 Boards in the slide Boards in the slide Boards DX1/DX11 Installed up to unit serial number 8499 for "GALILEOS Comfort" and 48499 for "GALILEOS Compact". GALILEOS DX1 new version, approx. March 2011 61 25 665 D3437 D3437.076.01.15.02 06.2012... - Page 32 Service Manual GALILEOS Boards DX1/DX11 Installed from units with a serial number of 8500 and above for "GALILEOS Comfort", and 48500 and above for "GALILEOS Compact" IMPORTANT The DX1/DX11V2 board can only be operated with unit software version V04.04.00 or higher.
- Page 33 Sirona Dental Systems GmbH 3 Unit description Service Manual GALILEOS 3.2 Hardware Board DX6 This board is not available as a spare part or a repair part. X-ray tube assemblies can only be ordered as complete units. 61 25 665 D3437...
- Page 34 Service Manual GALILEOS Board DX7 DX7: GALILEOS restriction This board is only used in the "GALILEOS Comfort" (not in "GALILEOS Compact"). The board is not available as a spare part or a repair part. The Easypad can only be ordered as a complete unit.
- Page 35 Sirona Dental Systems GmbH 3 Unit description Service Manual GALILEOS 3.2 Hardware Board DX71 This board is only used in the "GALILEOS Compact" (not in "GALILEOS Comfort"). 61 25 665 D3437 D3437.076.01.15.02 06.2012...
- Page 36 3 Unit description Sirona Dental Systems GmbH 3.2 Hardware Service Manual GALILEOS DX89: GALILEOS Board DX89 61 25 665 D3437 D3437.076.01.15.02 06.2012...
-
Page 37: Boards In The Stand
Boards in the stand 3.2.5.2 Boards in the stand Board DX32 Up to device serial number 3199 Board DX32 DX32: GALILEOS: from serial no. 3201 From device serial number 3201 Line filter DX41: GALILEOS 61 25 665 D3437 D3437.076.01.15.02 06.2012... - Page 38 3 Unit description Sirona Dental Systems GmbH 3.2 Hardware Service Manual GALILEOS Board DX41 This board is not available as a repair part or spare part. Board DX41 is omitted in units with a serial number of 3201 and above.
-
Page 39: Board In The Remote Control
Sirona Dental Systems GmbH 3 Unit description Service Manual GALILEOS 3.2 Hardware Board in the remote control 3.2.5.3 Board in the remote control Board DX42 This board is not available as a spare part or a repair part. 61 25 665 D3437... -
Page 40: Boards In Facescan)
3 Unit description Sirona Dental Systems GmbH 3.2 Hardware Service Manual GALILEOS Boards in Facescan) 3.2.5.4 Boards in Facescan) FACESCAN modular board This modular board is not available as a spare part or a repair part. Facescan can only be ordered as a complete unit. - Page 41 Sirona Dental Systems GmbH 3 Unit description Service Manual GALILEOS 3.2 Hardware PoE power supply board 61 25 665 D3437 D3437.076.01.15.02 06.2012...
-
Page 42: Covers
3 Unit description Sirona Dental Systems GmbH 3.2 Hardware Service Manual GALILEOS 3.2.6 Covers Covers When removing covers, always remember that direct sunlight or bright room lighting can cause system malfunctions due to activated light barriers. Therefore: avoid direct sunlight and bright room lighting above the unit! Reattach all covers. - Page 43 Sirona Dental Systems GmbH 3 Unit description Service Manual GALILEOS 3.2 Hardware Covers: GALILEOS GALILEOS 61 25 665 D3437 D3437.076.01.15.02 06.2012...
- Page 44 3 Unit description Sirona Dental Systems GmbH 3.2 Hardware Service Manual GALILEOS Profile covers, top and bottom Intermediate piece Tube assembly cover, front Tube assembly cover, rear Cover for ring center (in units without head fixation device) Acquisition unit for head fixation device (in units with head...
-
Page 45: Technical Data
Sirona Dental Systems GmbH 3 Unit description Service Manual GALILEOS 3.2 Hardware 3.2.7 Technical data Technical data Chassis: Model designation GALILEOS Nominal voltage: 200 V – 240 V Permissible fluctuation: ±10% Permissible drop under load: Rated current: Nominal power output: 0.6 kW at 85 kV/7mA... - Page 46 3 Unit description Sirona Dental Systems GmbH 3.2 Hardware Service Manual GALILEOS Scan time approx. 14 s Number of single exposures Reconstruction: Marking of focal spot: Automatic exposure blocking: The duration of automatic exposure blocking (cooling period) depends on the set kV/mA level and the actual exposure time.
- Page 47 Sirona Dental Systems GmbH 3 Unit description Service Manual GALILEOS 3.2 Hardware Minimum requirements for Processor: DualCore from 1.6 GHz reconstruction PC (included in the scope of supply): RAM: 2 GB RAM Hard disks: > 200 GB Operating system: Windows XP Professional Service Pack 2...
-
Page 48: Diagrams
3 Unit description Sirona Dental Systems GmbH 3.2 Hardware Service Manual GALILEOS Diagrams 3.2.7.1 Diagrams Cooling curve of tube housing Cooling curve of X-ray tube Heating curve of tube housing 61 25 665 D3437 D3437.076.01.15.02 06.2012... - Page 49 Sirona Dental Systems GmbH 3 Unit description Service Manual GALILEOS 3.2 Hardware Central X-ray beam 10° Anode angle 61 25 665 D3437 D3437.076.01.15.02 06.2012...
-
Page 50: Software/Compatibility
– DX7-L5 – DX71 – DX11 02.61.01 DX41 02.30.00 DX89 01.10.06 DX89 FPGA 01.13.01 The main software V03.03.02 is run-compatible as of GALILEOS Software V1.2. Main software V03.04.00 GALILEOS Remote control Board Software Board Software 02.88.00 DX42 02.46.04 02.58.03 DX7-L0 02.22.00... - Page 51 – DX7-L5 – DX71 – DX11 02.64.00 DX41 02.30.00 DX89 01.12.07 DX89 FPGA 01.13.01 The main software V03.04.02 is run-compatible as of GALILEOS Software V1.4.3. Main software V03.05.00 GALILEOS Remote control Board Software Board Software 02.88.00 DX42 02.47.00 02.60.00 DX7-L0 02.22.00...
- Page 52 DX89 01.17.00 DX89 FPGA 01.15.00 For "GALILEOS Comfort": The main software V03.06.01 is run- compatible from GALILEOS Software V1.5 or above. For "GALILEOS Compact": The main software V03.06.01 is run- compatible from GALILEOS Software V1.6 or above. Main software V03.06.02...
- Page 53 Sirona Dental Systems GmbH 3 Unit description Service Manual GALILEOS 3.3 Software/compatibility Main software V03.07.00 GALILEOS Remote control Board Software Board Software 02.93.00 DX42 02.48.00 02.63.00 DX7-L0 02.26.00 DX7-L1 02.26.00 DX7-L2 02.26.00 DX7-L3 02.26.00 DX7-L4 02.03.00 DX7-L5 02.01.00 DX71 02.40.00 DX11 02.71.00...
- Page 54 3 Unit description Sirona Dental Systems GmbH 3.3 Software/compatibility Service Manual GALILEOS Main software V04.04.00 GALILEOS Remote control Board Software Board Software 03.05.00 DX42 02.54.00 02.77.01 DX7-L0 02.29.00 DX7-L1 02.29.00 DX7-L2 02.27.00 DX7-L3 02.27.00 DX7-L4 02.04.00 DX7-L5 02.02.00 DX71 02.54.00 DX11 04.04.01...
- Page 55 Sirona Dental Systems GmbH 3 Unit description Service Manual GALILEOS 3.3 Software/compatibility Main software V04.07.01 GALILEOS Remote control Board Software Board Software 03.05.00 DX42 02.55.00 02.79.00 DX7-L0 02.29.00 DX7-L1 02.29.00 DX7-L2 02.27.00 DX7-L3 02.27.00 DX7-L4 02.04.00 DX7-L5 02.02.00 DX71 02.54.00 DX11 04.07.01...
-
Page 56: Facescan Firmware
SIDEXIS 2.2. V1.5 Requires unit main software V 03.05.00 and SIDEXIS 2.3. V1.6 For "GALILEOS Comfort": Requires unit main software V 03.05.00 and SIDEXIS 2.3 or above. For "GALILEOS Compact": Requires unit main software V 03.06.01 and SIDEXIS 2.3 or above. - Page 57 Service Manual GALILEOS 3.3 Software/compatibility GALILEOS Remarks Software index V1.7.2 For "GALILEOS Comfort": Requires unit main software V 03.05.00 and SIDEXIS 2.3 or above. For "GALILEOS Compact": Requires unit main software V 03.06.02 and SIDEXIS 2.3 or above. V1.7.4 For "GALILEOS Comfort": Requires unit main software V 03.05.00 and SIDEXIS 2.3 or...
-
Page 58: General Operating Procedures
4 General operating procedures Sirona Dental Systems GmbH 4.1 Switching the unit on Service Manual GALILEOS General operating procedures General operating procedures Switching the unit on Switching the unit on WARNING X-rays Be sure to observe the radiation protection regulations applicable in your country. -
Page 59: Switching The "Galileos Comfort" On
4 General operating procedures Service Manual GALILEOS 4.1 Switching the unit on 4.1.1 Switching the "GALILEOS Comfort" on Switching the "GALILEOS Comfort" on NOTICE The surface of the touchscreen is sensitive. The touchscreen can be damaged or its surface scratched. -
Page 60: Switching The "Galileos Compact" On
Sirona Dental Systems GmbH 4.1 Switching the unit on Service Manual GALILEOS 4.1.2 Switching the "GALILEOS Compact" on 1. Turn the main switch (A) to position I. Switching the "GALILEOS Compact" on 2. Wait for approx. 1 minute. The X-ray radiation indicator (B) lights up for approx. 1 second as a functional check. -
Page 61: Updating The Firmware
Updating the unit firmware GALILEOS software update Read the information provided on the software CD supplied with the unit and on the SIRONA dealer page on the Internet very carefully. These sources always contain the latest information on software updates. "SIDEXIS Manager"... - Page 62 The update file is located on the unit software CD. It is delivered with each DX11 replacement board and also included in the country set. The contents of the CD can be downloaded from the Dealer domain of the SIRONA Internet home page (under Product Info/X-ray Systems): www.sirona.com "OK"...
- Page 63 Sirona Dental Systems GmbH 4 General operating procedures Service Manual GALILEOS 4.2 Updating the firmware NOTICE Unit inoperability! Before starting the software update, make sure that no unit movements are active. Otherwise the system may become inoperable in rare cases.
- Page 64 4 General operating procedures Sirona Dental Systems GmbH 4.2 Updating the firmware Service Manual GALILEOS NOTICE Effectiveness of the software update The unit must be restarted after every software update. The new DX11 version will not run until the unit has been rebooted (see also chapter "Measures following replacement of boards [ →...
-
Page 65: Update Mode
Sirona Dental Systems GmbH 4 General operating procedures Service Manual GALILEOS 4.2 Updating the firmware Update mode 4.2.1.1 Update mode Update mode: GALILEOS "Automatic" You can select two different update modes via the tabs "Main version" ● "Automatic" updated to the latest... -
Page 66: Check Program Releases
NOTE: From unit serial number 8500 (for "GALILEOS Comfort") or 48500 (for "GALILEOS Compact") and above, a DX11_FPGA version is also displayed in addition to this list. -
Page 67: Updating The Facescan Firmware
Sirona Dental Systems GmbH 4 General operating procedures Service Manual GALILEOS 4.2 Updating the firmware 4.2.2 Updating the Facescan firmware Updating the Facescan firmware There are two ways of updating the Facescan firmware: ● Option 1: Update via USB stick [ → 67] The program data on the Facescan unit is completely overwritten. - Page 68 FACESCAN modular board, GALILEOS must be switched off. Otherwise the update will not be completed. Instead, the configuration data stored on the USB stick will be uploaded to GALILEOS. 1. Insert the USB stick into the USB port (U) of the FACESCAN modular board.
- Page 69 Sirona Dental Systems GmbH 4 General operating procedures Service Manual GALILEOS 4.2 Updating the firmware Checking the update 1. Plug the Facescan USB stick into a PC. 2. Open the "facescan_settings.log" log file in a text editor. 3. Check the entries in the log file.
-
Page 70: Option 2: Firmware Update Via The Network
7. Wait around a minute until the green LED on the Facescan unit begins to light up. 8. Only if the SIRONA browser is not being used: Refresh the browser display (e.g. in Windows® Internet Explorer: press [F5]). The update is completed. -
Page 71: Configuring The Unit
Sirona Dental Systems GmbH 4 General operating procedures Service Manual GALILEOS 4.3 Configuring the unit Configuring the unit Configuring the unit 4.3.1 Configuring the unit via the SIDEXIS Manager Configuring the unit via the SIDEXIS Manager SIDEXIS configuration: GALILEOS The X-ray component must be set up and enabled using the SIDEXIS Manager. - Page 72 Always switch the device on before inserting the USB stick! Before the Facescan USB stick can be inserted into the USB socket of the FACESCAN modular board, GALILEOS must be switched on. Otherwise, the Facescan configuration data will be reset to the factory settings.
- Page 73 Sirona Dental Systems GmbH 4 General operating procedures Service Manual GALILEOS 4.3 Configuring the unit Checking the configuration 1. Insert the Facescan USB stick into a PC. 2. With a text editor program, open the log file "facescan_settings.log". 3. Check the entries in the log file.
- Page 74 4 General operating procedures Sirona Dental Systems GmbH 4.3 Configuring the unit Service Manual GALILEOS Syntax of the configuration file "facescan_settings.cfg" 4.3.2.1.1 Syntax of the configuration file "facescan_settings.cfg" IMPORTANT Pay attention to the syntax! Text entries should never have a space before and after "=".
-
Page 75: Type 2: Configuration Over A Network Cable (Peer-To-Peer)
The PC employed must be in the 192.168.16.xx network; otherwise, no network connection can be achieved. ➢ Using a network cable, connect the PC directly to the GALILEOS media converter with installed Facescan. Opening the web dialog / general types 1 Opening the web dialog 1. -
Page 76: Resetting The Facescan Configuration To Factory Default Settings
4 General operating procedures Sirona Dental Systems GmbH 4.3 Configuring the unit Service Manual GALILEOS Resetting the Facescan configuration to factory default settings 4.3.2.3 Resetting the Facescan configuration to factory default settings Opening the web dialog "Facescan Configuration" 1. In SIDEXIS Manager, start the application. -
Page 77: Reading Unit Data
Reading the unit data of the GALILEOS via "Extended Details" "SIDEXIS Manager" 1. Start the under "Start"/"Programs"/"SIDEXIS"/ Reading the unit data of the GALILEOS via "Extended Details" Selecting more details in GALILEOS "SIDEXIS XG" "Configuration of the X-ray components" 2. Click on "Configuration of the X-ray components"... -
Page 78: Reading Facescan Unit Data Over The Network
4 General operating procedures Sirona Dental Systems GmbH 4.4 Reading unit data Service Manual GALILEOS 4.4.2 Reading Facescan unit data over the network Reading FACESCAN unit data over the network Opening the web dialog "Facescan Configuration" 1. In SIDEXIS Manager, start the application. -
Page 79: Using Demo Mode - Operation Without Radiation Release
Using demo mode – operation without radiation release GALILEOS demo mode For demo use, the "X-ray detector dummy for GALILEOS" (Order No. 61 19 007) should be used instead of the actual X-ray detector. For further information, please refer to the instructions included with the dummy. - Page 80 4 General operating procedures Sirona Dental Systems GmbH 4.5 Using demo mode – operation without radiation release Service Manual GALILEOS 4. Set dip switch S2 (DX6) to position 2. IMPORTANT: If switch S2 is not set to position 2 in demo mode before switching off the unit, various error messages will display when the unit is turned back on.
-
Page 81: Switching Off Demo Mode
Sirona Dental Systems GmbH 4 General operating procedures Service Manual GALILEOS 4.5 Using demo mode – operation without radiation release 4.5.2 Switching off demo mode Switching off demo mode 1. Switch off the unit. DANGER Potentially lethal shock hazard! It is essential to switch off the unit and to wait at least another 4 minutes before taking off the covers of the X-ray tube assembly. -
Page 82: Messages
Help messages: GALILEOS The help messages are displayed as help codes (Hx xx) on the Easypad touchscreen (GALILEOS Comfort) or on the Multipad display (GALILEOS Compact) as well as on the display of the remote control (if present). The codes tell you how to operate the system if radiation release is not possible due to a previous operator error. - Page 83 Correct SIDEXIS XG 3D preselection. "Get existing exposure" H4 20 IMPORTANT: Do not switch the system off until the help message has disappeared. ● Get exposure with "Sirona Control Admin" "Operator’s Manual" (see SIDEXIS XG (REF 59 62 134). 61 25 665 D3437...
-
Page 84: System Messages
5.2 System messages Service Manual GALILEOS System messages System messages GALILEOS system messages System codes are only displayed on the Multipad (GALILEOS Compact) and the remote control. System messages are displayed in plain text on the Easypad (GALILEOS Comfort). System code Description... -
Page 85: Error Messages
The error messages are displayed as error codes (Ex yy zz) on the Easypad touchscreen (GALILEOS Comfort) or on the Multipad display (GALILEOS Compact) as well as on the remote control display (if there is one). The codes provide you with error type, error location and troubleshooting information. - Page 86 5 Messages Sirona Dental Systems GmbH 5.4 Error messages Service Manual GALILEOS Description Error group Actions required The system detects that This error group includes all errors ● Restart the unit: a key was pressed that indicate invalid signal states 1.
-
Page 87: Yy - Location
- Location Identifier yy defines the location or logical function unit where the error has occurred. Location/Function unit Board X-ray tube assembly Easypad user interface (GALILEOS Comfort) Multipad user interface (GALILEOS Compact) DX71 System hardware DX11/DX1 System software DX11/DX1... -
Page 88: List Of Error Messages
Error code Description Actions required E6 06 01 General error during module ● Please contact the Sirona Customer S. [ → 61] initialization Service Center (CSC) to find out whether a bug fix by means of a software update is possible and perform such an update if necessary. - Page 89 Module failed in TTP (detected on ● Check the CAN bus. S. [ → 128] master side) ● Please contact the Sirona Customer S. [ → 61] Service Center (CSC) to find out This error may also occur in whether a bug fix by means of a...
- Page 90 5 Messages Sirona Dental Systems GmbH 5.5 List of error messages Service Manual GALILEOS E7 06 10 Error code Description Actions required E7 06 10 Module is stuck in bootloader stage. ● Check board DX6 (note LED states). S. [ → 134] If the board remains in the bootloader S.
- Page 91 If a CAN bus error had been reported before ... ● Check the CAN bus. S. [ → 128] ● Please contact the Sirona Customer S. [ → 61] Service Center (CSC) to find out whether a bug fix by means of a software update is possible and perform such an update if necessary.
- Page 92 E6 06 56 Actions required E6 06 56 Error during auto-compensation. ● Please contact the Sirona Customer S. [ → 61] Service Center (CSC) to find out whether a bug fix by means of a software update is possible and perform such an update if necessary.
- Page 93 S. [ → 342], ● If no light is visible: Replace the tube S. [ → 310] assembly. Error code Description E6 06 68 GALILEOS Actions required E6 06 68 Tube assembly output after ● Replace the tube assembly. S. [ → 310] exposure does not match the expected value.
-
Page 94: Location 07: Easypad/Dx7
Error code Description Actions required E6 07 01 General error during module ● Please contact the Sirona Customer S. [ → 61] initialization Service Center (CSC) to find out whether a bug fix by means of a software update is possible and perform such an update if necessary. - Page 95 Module failed in TTP (detected on ● Check the CAN bus. S. [ → 128] master side). ● Please contact the Sirona Customer S. [ → 61] Service Center (CSC) to find out This error may also occur in whether a bug fix by means of a...
- Page 96 5 Messages Sirona Dental Systems GmbH 5.5 List of error messages Service Manual GALILEOS E7 07 10 Error code Description Actions required E7 07 10 Module is stuck in bootloader stage. ● Check user interface with electronics (DX7) (note LED states).
- Page 97 Sirona Dental Systems GmbH 5 Messages Service Manual GALILEOS 5.5 List of error messages E3 07 30/33/34/35/36 GALILEOS Error code Description Actions required E3 07 30 Up/down keys pressed on power- ● Restart the unit: S. [ → 307] 1. Switch off the unit.
-
Page 98: Location 10: System Hardware
E1 10 04 Flash file system formatting in ● Wait until the error code automatically progress. disappears (approx. 2 - 3 mins). E1 10 05: GALILEOS Error code Description Actions required E1 10 05 Flash file system is not ready for ●... - Page 99 Sirona Dental Systems GmbH 5 Messages Service Manual GALILEOS 5.5 List of error messages E1 10 07 GALILEOS Error code Description Actions required E1 10 07 The unit is not ready for operation. If this error is displayed after a longer period of S.
- Page 100 5 Messages Sirona Dental Systems GmbH 5.5 List of error messages Service Manual GALILEOS E1 10 23/24/25/26 GALILEOS Error code Description Actions required E1 10 23 Board DX89 does not have valid ● Perform service routine S009.7 (copy data S. [ → 245], data via the X-ray detector.
-
Page 101: Location 11: Power Pc/Board Dx11
Description Actions required E6 11 01 Program sequence error. ● Please contact the Sirona Customer S. [ → 61] Service Center (CSC) to find out whether a bug fix by means of a software update is possible and perform such an update if necessary. - Page 102 ● If necessary, obtain a new remote control functions. To continue to work with from the manufacturer. this unit, you must unplug the A remote control for another Sirona unit or a remote control and restart the unit. third-party manufacturer unit may have been connected.
-
Page 103: Location 12: Can Bus
Sirona Dental Systems GmbH 5 Messages Service Manual GALILEOS 5.5 List of error messages E1 11 19 GALILEOS Error code Description Actions required E1 11 19 No image data available. ● Check TDI signal (synchronized readout S. [ → 362] sequence)/cable L13, replace cable L13 if necessary. -
Page 104: Location 14: Digital Extension, Sidexis Xg
If the error occurs repeatedly ... S. [ → 238], ● Perform network diagnosis with the S. [ → 61] support of the Sirona Customer Service Center (CSC) and check the setting of the network card if necessary, again seeking assistance from the Sirona Customer Service Center. - Page 105 Sirona Dental Systems GmbH 5 Messages Service Manual GALILEOS 5.5 List of error messages E6 14 10/12 GALILEOS Error code Description Actions required E6 14 10 Clock signals for sensor image ● Check cable L13 for crushed spots and S. [ → 362]...
-
Page 106: Location 15: Configuration, Update
Error code Description Actions required E6 15 10 Update file for module is corrupt. ● Obtain latest update file from the Sirona S. [ → 61] Customer Service Center (CSC) or the Sirona home page and perform software update. 61 25 665 D3437... -
Page 107: Location 41: Media Interface Card
E6 41 01 General module initialization error. ● If the error is a software error known to the S. [ → 61], Sirona Customer Service Center (CSC), a S. [ → 343] software update (bug fix) must be performed. ● Replace board DX41. - Page 108 (detected on master side). ● Replace board DX41. S. [ → 343], This error may also occur in ● Please contact the Sirona Customer S. [ → 61] connection with other causal error Service Center (CSC) to find out whether...
- Page 109 Sirona Dental Systems GmbH 5 Messages Service Manual GALILEOS 5.5 List of error messages E7 41 10 Error code Description Actions required E7 41 10 Module is stuck in bootloader stage. ● Check operating status of board (note S. [ → 134] LED states).
- Page 110 5 Messages Sirona Dental Systems GmbH 5.5 List of error messages Service Manual GALILEOS E6 41 23 Error code Description Actions required E6 41 23 Hardware fault at controller input on ● see section Error analysis of X-RAY S. [ → 142] board DX41.
-
Page 111: Location 42: Remote Control
S. [ → 343] ● Please contact the Sirona Customer Service Center (CSC) to find out whether a bug fix by means of a software update is possible and perform such an update if necessary. - Page 112 DX42, replace module if necessary S. [ → 61] ● Replace board DX42. ● Please contact the Sirona Customer Service Center (CSC) to find out whether a bug fix by means of a software update is possible and perform such an update if necessary.
- Page 113 If the board remains in the bootloader stage ... S. [ → 61] ● Repeat the software update. ● Replace remote control, see Installation Instructions. E7 42 12 GALILEOS Error code Description Actions required E7 42 12 Unit is not ready for operation This error is a sequential fault.
- Page 114 5 Messages Sirona Dental Systems GmbH 5.5 List of error messages Service Manual GALILEOS E7 42 21 GALILEOS Error code Description Actions required E7 42 21 No CAN bus connection. DX11 does ● Check configuration (with or without S. [ → 343], not start.
-
Page 115: Location 71: Multipad, Board Dx71
Error code Description Actions required E6 71 01 General error during module ● Please contact the Sirona Customer S. [ → 61] initialization Service Center (CSC) to find out whether a bug fix by means of a software update is possible and perform such an update if necessary. - Page 116 (detected on master side) ● Replace board DX71. S. [ → 343], ● Please contact the Sirona Customer S. [ → 61] Service Center (CSC) to find out whether a bug fix by means of a software update is possible and perform such an update if necessary.
- Page 117 Sirona Dental Systems GmbH 5 Messages Service Manual GALILEOS 5.5 List of error messages E6 71 12 Error code Description Actions required E7 71 12 Unit is not ready for operation ● Check the CAN bus. S. [ → 128] This error is a sequential fault.
- Page 118 5 Messages Sirona Dental Systems GmbH 5.5 List of error messages Service Manual GALILEOS E3 71 30/33/34/35/36/37/38/39/40/41 Error code Description Actions required E3 71 30 Up/down keys pressed on power- ● Restart the unit: 1. Switch off the unit. E3 71 33 Light localizer key pressed during 2.
-
Page 119: Location 89: X-Ray Detector
Error code Description Actions required E6 89 01 General error during module ● Please contact the Sirona Customer S. [ → 61], initialization Service Center (CSC) to find out whether S. [ → 141], a bug fix by means of a software update is possible and perform such an update if S. - Page 120 Data transfer error or dialog error to ● Check the CAN bus. S. [ → 128], module (master side) ● Please contact the Sirona Customer S. [ → 61] Service Center (CSC) to find out whether a bug fix by means of a software update is possible and perform such an update if necessary.
- Page 121 S. [ → 134], ● Check board DX89, replace if necessary. S. [ → 343] ● Please contact the Sirona Customer Service Center (CSC) to find out whether a bug fix by means of a software update is possible and perform such an update if necessary.
- Page 122 5 Messages Sirona Dental Systems GmbH 5.5 List of error messages Service Manual GALILEOS E6 89 21 Error code Description Actions required E6 89 21 File system error. ● Check board DX89, replace if necessary. S. [ → 134], S. [ → 343]...
- Page 123 Sirona Dental Systems GmbH 5 Messages Service Manual GALILEOS 5.5 List of error messages E7 89 28 Error code Description Actions required E7 89 28 FPGA (field programmable gate ● Restart the unit: array) on board DX89 is defective or 1.
- Page 124 5 Messages Sirona Dental Systems GmbH 5.5 List of error messages Service Manual GALILEOS E6 89 33 Error code Description Actions required E6 89 33 Board DX89 has detected an image ● Check cable L13, replace if necessary. S. [ → 141], signal at the wrong point of time.
-
Page 125: Troubleshooting
Sirona Dental Systems GmbH 6 Troubleshooting Service Manual GALILEOS 6.1 Error logging memory Troubleshooting Troubleshooting DANGER Potentially lethal shock hazard! It is essential to switch off the unit and wait at least 1 minute before removing a cover. Switch OFF the X-ray unit before connecting a measuring instrument. -
Page 126: Example Of Error Logging Data
● Rescue request Sidexis Timeout These entry data may also occur after "Recording stopped" or "Cancel" and indicate an exceptional circumstance. You can supply important information for error diagnosis in coordination with the Sirona Customer Service Center. Entry data [Error] E6 07 06... - Page 127 Detailed error bytes for an error 0x10 0x00 0x00 0x00 0x00 0x00 0x00 occurrence 0x00 Entry data SidErr: ERR_SOCKET_ERROR Detail of network error (for Sirona only) [Error Sidexis] SockErr: Detail of network error (for Sirona only) Entry data [Stringname] Key Act...
-
Page 128: Checking The Can Bus
6.2 Checking the CAN bus Service Manual GALILEOS Checking the CAN bus Checking the CAN bus CAN bus safety GALILEOS NOTICE Risk of damage to unit The power supply MUST be plugged in and switched on when cables are attached and plugged in. For example, if no power cable is connected to the DX71, the module has no ground connection to the unit and there is no potential equalization. - Page 129 Sirona Dental Systems GmbH 6 Troubleshooting Service Manual GALILEOS 6.2 Checking the CAN bus 61 25 665 D3437 D3437.076.01.15.02 06.2012...
- Page 130 6 Troubleshooting Sirona Dental Systems GmbH 6.2 Checking the CAN bus Service Manual GALILEOS 61 25 665 D3437 D3437.076.01.15.02 06.2012...
- Page 131 Sirona Dental Systems GmbH 6 Troubleshooting Service Manual GALILEOS 6.2 Checking the CAN bus 61 25 665 D3437 D3437.076.01.15.02 06.2012...
-
Page 132: Checking The Can Bus With The Diagnostic Function Of Board Dx1
6 Troubleshooting Sirona Dental Systems GmbH 6.2 Checking the CAN bus Service Manual GALILEOS 6.2.1 Checking the CAN bus with the diagnostic function of board DX1 Checking the CAN bus with the diagnostic function of board DX1 Board DX1 features a diagnostic function for diagnosing malfunctions of the CAN bus via LEDs V700 and V701 (see wiring diagrams). - Page 133 Sirona Dental Systems GmbH 6 Troubleshooting Service Manual GALILEOS 6.2 Checking the CAN bus Jumper outside If the jumpers are set to the outer position, the module is connected (i.e. the connector is plugged in). XXXX Jumper inside If the jumpers are set to the inner position, the module is connected (i.e.
-
Page 134: Checking The Boards
6 Troubleshooting Sirona Dental Systems GmbH 6.3 Checking the boards Service Manual GALILEOS Checking the boards Checking the boards 61 25 665 D3437 D3437.076.01.15.02 06.2012... - Page 135 Sirona Dental Systems GmbH 6 Troubleshooting Service Manual GALILEOS 6.3 Checking the boards GALILEOS LEDs Important LEDs on the boards (see also wiring diagrams) Board LEDs Normal operation Malfunction Bootloader V100 not lit V101 not lit V108 not lit V110...
-
Page 136: Checking Board Dx32
6 Troubleshooting Sirona Dental Systems GmbH 6.3 Checking the boards Service Manual GALILEOS 6.3.1 Checking board DX32 Checking board DX32 61 25 665 D3437 D3437.076.01.15.02 06.2012... - Page 137 Sirona Dental Systems GmbH 6 Troubleshooting Service Manual GALILEOS 6.3 Checking the boards 61 25 665 D3437 D3437.076.01.15.02 06.2012...
-
Page 138: Checking The Motors
6 Troubleshooting Sirona Dental Systems GmbH 6.4 Checking the motors Service Manual GALILEOS Checking the motors Checking the motors 61 25 665 D3437 D3437.076.01.15.02 06.2012... -
Page 139: Checking The Light Barriers
Sirona Dental Systems GmbH 6 Troubleshooting Service Manual GALILEOS 6.5 Checking the light barriers Checking the light barriers Checking the light barriers 61 25 665 D3437 D3437.076.01.15.02 06.2012... -
Page 140: Device Leakage Current Too High
6 Troubleshooting Sirona Dental Systems GmbH 6.6 Device leakage current too high Service Manual GALILEOS Device leakage current too high Device leakage current too high 61 25 665 D3437 D3437.076.01.15.02 06.2012... -
Page 141: Checking The Cables
6.7 Checking the cables Checking the cables Checking the cables Checking the GALILEOS cables NOTICE You can use a standard Cat5 cable as a test cable for L8 (up to unit serial number 3201), L10, L12, L40 and L37. This cable must not be permanently installed. -
Page 142: Error Analysis Of X-Ray Control Signal Path
6 Troubleshooting Sirona Dental Systems GmbH 6.8 Error analysis of X-RAY control signal path Service Manual GALILEOS Error analysis of X-RAY control signal path Error analysis of X-RAY control signal path 6.8.1 Error analysis of X-RAY control signal path: up to unit... - Page 143 Sirona Dental Systems GmbH 6 Troubleshooting Service Manual GALILEOS 6.8 Error analysis of X-RAY control signal path E3 42 31 occurs once after the unit is switched on: E3 41 20 occurs once after the unit is switched on: E3 41 24 occurs once during operation of...
- Page 144 6 Troubleshooting Sirona Dental Systems GmbH 6.8 Error analysis of X-RAY control signal path Service Manual GALILEOS E6 13 43 occurs once during operation of the unit: H321 is triggered at start of exposure: 61 25 665 D3437 D3437.076.01.15.02 06.2012...
- Page 145 Sirona Dental Systems GmbH 6 Troubleshooting Service Manual GALILEOS 6.8 Error analysis of X-RAY control signal path without installed remote control Error messages E3 13 40 + E3 41 20 occur in combination after the unit is switched on: 61 25 665 D3437...
- Page 146 6 Troubleshooting Sirona Dental Systems GmbH 6.8 Error analysis of X-RAY control signal path Service Manual GALILEOS with and without installed remote control Error messages Error code Description Actions required E3 41 20 Faulty detection of release signal by ● Replace board DX41.
-
Page 147: Error Analysis Of X-Ray Control Signal Path: From Unit Serial Number
Sirona Dental Systems GmbH 6 Troubleshooting Service Manual GALILEOS 6.8 Error analysis of X-RAY control signal path 6.8.2 Error analysis of X-RAY control signal path: from unit serial number 3201 (without board DX41) Error analysis of X-RAY control signal path: from unit serial number 3201 (without board DX41) - Page 148 6 Troubleshooting Sirona Dental Systems GmbH 6.8 Error analysis of X-RAY control signal path Service Manual GALILEOS E6 13 43 occurs once during operation of the unit: H321 is triggered at start of exposure: 61 25 665 D3437 D3437.076.01.15.02 06.2012...
- Page 149 Sirona Dental Systems GmbH 6 Troubleshooting Service Manual GALILEOS 6.8 Error analysis of X-RAY control signal path without installed remote control Error messages E3 13 40 occurs after the unit is switched 61 25 665 D3437 D3437.076.01.15.02 06.2012...
- Page 150 6 Troubleshooting Sirona Dental Systems GmbH 6.8 Error analysis of X-RAY control signal path Service Manual GALILEOS with and without installed remote control Error messages Error code Description Actions required E3 13 40 Short circuit in signal path between ● Replace cable L117 or L108.
-
Page 151: Fault Diagnosis Of The X-Ray Detector And On Board Dx89
Sirona Dental Systems GmbH 6 Troubleshooting Service Manual GALILEOS 6.9 Fault diagnosis of the X-ray detector and on board DX89 Fault diagnosis of the X-ray detector and on board DX89 Fault diagnosis of the X-ray detector and on board DX89... -
Page 152: Leds On Board Dx89
6 Troubleshooting Sirona Dental Systems GmbH 6.9 Fault diagnosis of the X-ray detector and on board DX89 Service Manual GALILEOS 6.9.1 LEDs on board DX89 LEDs on board DX89 The diodes PLL_FPGA, PLL_CCD as well as (A) (image memory test) and (D) (gettering) in particular should be observed (LED statuses and their significance in case of an error [ →... -
Page 153: Led Statuses And Their Significance In Case Of An Error
LED statuses and their significance in case of an error For X-ray detector errors, it is usually necessary to send the extended details of the unit to the Sirona Customer Service Center (CSC). The results of the LED inquiry described below also must be added to the extended details. -
Page 154: Leds Of Operating Voltages
6 Troubleshooting Sirona Dental Systems GmbH 6.9 Fault diagnosis of the X-ray detector and on board DX89 Service Manual GALILEOS Image memory test LED on: Image memory test is o.k. LED off: Based on the PLL_FPGA LED, check whether the FPGA on DX89 has started properly: ●... -
Page 155: Adjusting/Calibrating The Unit
Sirona Dental Systems GmbH 7 Adjusting/calibrating the unit Service Manual GALILEOS Adjusting/calibrating the unit Adjusting/calibrating the unit DANGER X-rays When performing the following tests, be sure to observe the radiation protection regulations applicable in your country (see Operating Instructions). DANGER X-rays "Radiation"... - Page 156 Sirona Dental Systems GmbH Service Manual GALILEOS Adjusting the height of the unit during calibration: GALILEOS As of unit software version V 03.04.00, you can even adjust the height of the unit during the calibration procedure. If the unit is ready for an "Image acquisition"...
-
Page 157: General Information About Unit Adjustment And Calibration
General information about unit adjustment and calibration General information about unit adjustment and calibration Checking the mechanical unit adjustment: GALILEOS Start by checking the mechanical unit adjustment. This step is a prerequisite for the subsequent adjustment and calibration of the unit. -
Page 158: Displays And Help Messages During Adjustment/Calibration
7 Adjusting/calibrating the unit Sirona Dental Systems GmbH 7.1 General information about unit adjustment and calibration Service Manual GALILEOS 7.1.1 Displays and help messages during adjustment/ calibration Displays and help messages during adjustment/calibration The most frequent help and status messages during calibration are listed below. -
Page 159: Service Functions" Menu
Sirona Dental Systems GmbH 7 Adjusting/calibrating the unit Service Manual GALILEOS 7.1 General information about unit adjustment and calibration 7.1.2 "Service Functions" menu "Service Functions" menu Message window Tabs Preview image Status column Tools pictograph Message window The message window displays text messages about the calibration process. - Page 160 Due to the varying geometry of the "GALILEOS Comfort" and the "GALILEOS Compact" diaphragms, the preview images displayed in these submenus differ slightly.
-
Page 161: Calling The "Adjustment/Calibration" Menu
Sirona Dental Systems GmbH 7 Adjusting/calibrating the unit Service Manual GALILEOS 7.1 General information about unit adjustment and calibration Calling the "Adjustment/Calibration" menu 7.1.2.1 Calling the "Adjustment/Calibration" menu Call in GALILEOS "Service functions" You can call the menu via SIDEXIS XG: "Utilities"... -
Page 162: Enabling Exposure Readiness
✔ Taking an exposure Call the "Service functions" menu. Taking an exposure in GALILEOS ✔ Select the corresponding tab. ✔ SIDEXIS XG must be ready for exposure. 1. Press the R key to move the unit into the starting position. -
Page 163: Test Phantoms For Adjustment And Calibration
Sirona Dental Systems GmbH 7 Adjusting/calibrating the unit Service Manual GALILEOS 7.1 General information about unit adjustment and calibration 7.1.6 Test phantoms for adjustment and calibration Test phantoms for adjustment and calibration 7.1.6.1 Distortion phantom Distortion phantom You must clip the distortion phantom onto the X-ray detector cover for the radiation field check [ →... -
Page 164: Geometry Phantom
This phantom must be removed again for all other calibration steps. Up to unit serial number 8,699 IMPORTANT (GALILEOS Comfort) and 48,699 This geometry phantom is not suitable for calibration with Facescan. (GALILEOS Compact) 61 25 665 D3437... - Page 165 7 Adjusting/calibrating the unit Service Manual GALILEOS 7.1 General information about unit adjustment and calibration From unit serial number 8,700 (GALILEOS Comfort) and 48,700 (GALILEOS Compact) IMPORTANT Once it has been inserted into the bite block holder, the geometry phantom must be aligned vertically and horizontally with the spirit level, so that calibration can be performed correctly.
-
Page 166: Constancy Test Phantom
7 Adjusting/calibrating the unit Sirona Dental Systems GmbH 7.2 Checking the mechanical system adjustment Service Manual GALILEOS Constancy test phantom 7.1.6.3 Constancy test phantom The constancy test phantom is inserted in the bite block holder of the unit for for the constancy and acceptance tests as well as for the check of the mechanical unit adjustment [ →... -
Page 167: Adjustment And Calibration Via The "Service Functions" Menu
Sirona Dental Systems GmbH 7 Adjusting/calibrating the unit Service Manual GALILEOS 7.3 Adjustment and calibration via the "Service Functions" menu Adjustment and calibration via the "Service Functions" menu Adjustment and calibration via the "Service Functions" menu 7.3.1 Diaphragm image Diaphragm image 7.3.1.1... - Page 168 7 Adjusting/calibrating the unit Sirona Dental Systems GmbH 7.3 Adjustment and calibration via the "Service Functions" menu Service Manual GALILEOS Adjustment OK Adjustment not OK Permissible tolerance: 30 pixels ± 5 pixels The brightness distribution along the border surrounding the image on all sides must be uniform (A).
- Page 169 Sirona Dental Systems GmbH 7 Adjusting/calibrating the unit Service Manual GALILEOS 7.3 Adjustment and calibration via the "Service Functions" menu Adjustment OK Adjustment not OK, diaphragm not centered Adjustment not OK, diaphragm too small Permissible tolerance: 65 pixels ± 5 pixels 61 25 665 D3437 D3437.076.01.15.02 06.2012...
- Page 170 7 Adjusting/calibrating the unit Sirona Dental Systems GmbH 7.3 Adjustment and calibration via the "Service Functions" menu Service Manual GALILEOS The brightness distribution along the surrounding border must be uniform (A). A shadow in the image indicates horizontal or vertical displacement of the diaphragm.
-
Page 171: Type 3" Diaphragm
Sirona Dental Systems GmbH 7 Adjusting/calibrating the unit Service Manual GALILEOS 7.3 Adjustment and calibration via the "Service Functions" menu "Type 3" diaphragm 7.3.1.2 "Type 3" diaphragm ✔ Adjusting the "diaphragm open" "Service functions" menu is called [ → 161]. - Page 172 7 Adjusting/calibrating the unit Sirona Dental Systems GmbH 7.3 Adjustment and calibration via the "Service Functions" menu Service Manual GALILEOS Adjustment OK Adjustment not OK Permissible tolerance: 30 pixels ± 5 pixels The brightness distribution along the border surrounding the image on all sides must be uniform (A).
- Page 173 Sirona Dental Systems GmbH 7 Adjusting/calibrating the unit Service Manual GALILEOS 7.3 Adjustment and calibration via the "Service Functions" menu Adjustment OK Adjustment not OK, diaphragm not centered Adjustment not OK, diaphragm too small Permissible tolerance: 65 pixels ± 5 pixels 61 25 665 D3437 D3437.076.01.15.02 06.2012...
- Page 174 7 Adjusting/calibrating the unit Sirona Dental Systems GmbH 7.3 Adjustment and calibration via the "Service Functions" menu Service Manual GALILEOS The brightness distribution along the surrounding border must be uniform (A). A shadow in the image indicates horizontal or vertical displacement of the diaphragm.
- Page 175 Sirona Dental Systems GmbH 7 Adjusting/calibrating the unit Service Manual GALILEOS 7.3 Adjustment and calibration via the "Service Functions" menu Adjustment OK Adjustment not OK The upper edge of the lower lead diaphragm must be within tolerance, i.e. lie inside of the auxiliary lies (A).
- Page 176 7 Adjusting/calibrating the unit Sirona Dental Systems GmbH 7.3 Adjustment and calibration via the "Service Functions" menu Service Manual GALILEOS ✔ Adjustment of the "Lower jaw" "Service functions" menu is called [ → 161]. diaphragm setting ✔ "Diaphragm" tab is selected.
- Page 177 Sirona Dental Systems GmbH 7 Adjusting/calibrating the unit Service Manual GALILEOS 7.3 Adjustment and calibration via the "Service Functions" menu Adjustment OK Adjustment not OK The lower edge of the lower lead diaphragm must be within tolerance, i.e. lie inside of the auxiliary lies (A).
-
Page 178: Checking The Radiation Field
If the lighting strips still light up during the re-check of the beam field, contact the SIRONA Customer Service Center (CSC) to solve the problem. 6. To confirm that the lighting strips on the distortion phantom are lit, click the check box underneath the message window. -
Page 179: Dosimetry
Sirona Dental Systems GmbH 7 Adjusting/calibrating the unit Service Manual GALILEOS 7.3 Adjustment and calibration via the "Service Functions" menu 7.3.3 Dosimetry Dosimetry A dosimeter for pulsed radiation (e.g. Mult-O-Meter 512L) is required for dosimetry. ✔ "Service functions" menu is called [ → 161]. - Page 180 7 Adjusting/calibrating the unit Sirona Dental Systems GmbH 7.3 Adjustment and calibration via the "Service Functions" menu Service Manual GALILEOS 6. Then read off the dose from the Mult-O-Meter. The value must be between 1.2 and 2.3 mGray. If the value is outside the permissible range (1.2 to 2.3 mGray), check the X-ray tube...
-
Page 181: Sensor Adjustment
Step b) until calibration is OK and/or possible. If you have repeated the procedure three times and still have not attained a positive result, please contact the SIRONA Customer Service Center (CSC). "Save values" 5. If the adjustment is OK or possible, click the button. -
Page 182: Iris Adjustment
Step b) until calibration is OK and/or possible. If you have repeated the procedure three times and still have not attained a positive result, please contact the SIRONA Customer Service Center (CSC). "Save values" 5. If the calibration is OK or possible, click the button. -
Page 183: Shading Calibration
Sirona Dental Systems GmbH 7 Adjusting/calibrating the unit Service Manual GALILEOS 7.3 Adjustment and calibration via the "Service Functions" menu 7.3.6 Shading calibration Shading calibration ✔ "Service exposure " menu is called [ → 161]. "Shading" 1. Click the tab. - Page 184 Step b) until calibration is OK and/or possible. If you have repeated the procedure three times and still have not attained a positive result, please contact the SIRONA Customer Service Center (CSC). IMPORTANT: No foreign bodies may be visible on the shading exposure.
-
Page 185: Distortion Calibration
OK. If you have repeated the procedure three times and still have not attained a positive result, please contact the SIRONA Customer Service Center (CSC). 61 25 665 D3437... - Page 186 7 Adjusting/calibrating the unit Sirona Dental Systems GmbH 7.3 Adjustment and calibration via the "Service Functions" menu Service Manual GALILEOS "Save values" 7. If the calibration is OK or possible, click the button. The calibration is saved. The distortion calibration is now complete.
-
Page 187: Geometry Calibration
For an installed and configured Facescan: The face scanner is automatically calibrated during the geometry calibration of GALILEOS. In this case, make sure that the normal room lighting is switched on during the calibration process. The room does not have to be darkened during calibration. - Page 188 [ → 166]. Adjust the unit if necessary and then repeat the calibration. If this still does not lead to a positive result, please contact the SIRONA Customer Service Center (CSC). "Save values" 8. If the calibration is OK or possible, click the button.
-
Page 189: Service
Sirona Dental Systems GmbH 7 Adjusting/calibrating the unit Service Manual GALILEOS 7.3 Adjustment and calibration via the "Service Functions" menu 7.3.9 Service Service "Service" You can create a test image with the tab card. It is not necessary to execute this menu for the calibration of the unit! ✔... -
Page 190: Performing A White Balance For Facescan
7 Adjusting/calibrating the unit Sirona Dental Systems GmbH 7.4 Performing a white balance for Facescan Service Manual GALILEOS Performing a white balance for Facescan Performing a white balance for Facescan IMPORTANT Constant lighting conditions If the lighting conditions during the white balance process are different from those during the subsequent Facescan process, this will lead to inaccurate colors. -
Page 191: Checking And Adjusting The Touchscreen
Sirona Dental Systems GmbH 7 Adjusting/calibrating the unit Service Manual GALILEOS 7.5 Checking and adjusting the touchscreen Checking and adjusting the touchscreen 1. Switch the unit on. Checking and adjusting the touchscreen Once the unit software has started up, the start screen is displayed on the touchscreen. - Page 192 7 Adjusting/calibrating the unit Sirona Dental Systems GmbH 7.5 Checking and adjusting the touchscreen Service Manual GALILEOS 6. Touch the center of the green square in the bottom left corner of the screen. The fifth adjustment screen appears on the display.
-
Page 193: Mechanical Adjustments
Sirona Dental Systems GmbH 7 Adjusting/calibrating the unit Service Manual GALILEOS 7.6 Mechanical adjustments Mechanical adjustments Mechanical adjustments 7.6.1 Ring center adjustment Ring center adjustment NOTICE Perform this adjustment only if the measured values are out of tolerance [ → 166]. - Page 194 7 Adjusting/calibrating the unit Sirona Dental Systems GmbH 7.6 Mechanical adjustments Service Manual GALILEOS Move the ring center to the left or right: NOTICE! Do not undo the screws completely! Loosen the four screws (C) slightly. 5. Correct the position carefully and then retighten the screws.
-
Page 195: Adjusting The Swivel Arm
Sirona Dental Systems GmbH 7 Adjusting/calibrating the unit Service Manual GALILEOS 7.6 Mechanical adjustments 7.6.2 Adjusting the swivel arm Adjusting the swivel arm NOTICE Perform this adjustment only if the measured values are out of tolerance [ → 166]. 1. Remove the "swivel arm cover". - Page 196 7 Adjusting/calibrating the unit Sirona Dental Systems GmbH 7.6 Mechanical adjustments Service Manual GALILEOS 4. Re-attach the "swivel arm cover". To do this, position the nose (C) in the groove of the swivel arm and press the cover on until it snaps in place.
-
Page 197: Diaphragm Adjustment
Sirona Dental Systems GmbH 7 Adjusting/calibrating the unit Service Manual GALILEOS 7.6 Mechanical adjustments 7.6.3 Diaphragm adjustment Diaphragm adjustment With the "Type 3" diaphragm: Preparations Pull off the adjusting knob with the silicone ring. 2. Remove the "Front tube assembly" and "Rear tube assembly" covers. -
Page 198: Adjusting The "Type 2" Diaphragm (Serial No. 2201 And Higher)
7 Adjusting/calibrating the unit Sirona Dental Systems GmbH 7.6 Mechanical adjustments Service Manual GALILEOS Adjusting the "Type 2" diaphragm (serial no. 2201 and higher) 7.6.3.2 Adjusting the "Type 2" diaphragm (serial no. 2201 and higher) Horizontal and vertical diaphragm adjustment 1. - Page 199 Sirona Dental Systems GmbH 7 Adjusting/calibrating the unit Service Manual GALILEOS 7.6 Mechanical adjustments Adjusting the diaphragm size In order to adjust the size of the diaphragm opening, adjust the diaphragm distance. 1. Loosen screw (D) slightly (approx. 1 turn).
-
Page 200: Adjusting The "Type 3" Diaphragm
7 Adjusting/calibrating the unit Sirona Dental Systems GmbH 7.6 Mechanical adjustments Service Manual GALILEOS Adjusting the "Type 3" diaphragm 7.6.3.3 Adjusting the "Type 3" diaphragm Adjusting the complete diaphragm unit If the exposure taken in the "diaphragm open" diaphragm setting is not OK, the complete diaphragm unit must be adjusted. - Page 201 Sirona Dental Systems GmbH 7 Adjusting/calibrating the unit Service Manual GALILEOS 7.6 Mechanical adjustments Adjusting the lower lead diaphragm If the exposure taken in the "upper jaw" diaphragm setting is not OK, the lower lead diaphragm must be adjusted. 1. Set the rotary knob on the tube assembly to the "maxillary exposure"...
-
Page 202: Service
8 Service Sirona Dental Systems GmbH 8.1 Overview of service routines Service Manual GALILEOS Service Service Overview of service routines Overview of service routines 8.1.1 List of all service routines available for selection List of all service routines available for selection... - Page 203 Sirona Dental Systems GmbH 8 Service Service Manual GALILEOS 8.1 Overview of service routines Service routine Function S017.14 Enable/disable certain lines of the welcome screen S. [ → 266] (for "GALILEOS Comfort") S017.15 Activate/deactivate the acoustic signal for end of exposure S.
-
Page 204: Alphabetical List Of Service Routine Functions
8 Service Sirona Dental Systems GmbH 8.1 Overview of service routines Service Manual GALILEOS 8.1.2 Alphabetical list of service routine functions Alphabetical list of service routine functions Function Service routine Acoustic signal for end of exposure, activate/deactivate S017.15 S [ → 268]. - Page 205 Sirona Dental Systems GmbH 8 Service Service Manual GALILEOS 8.1 Overview of service routines Function Service routine Select the diaphragm type S017.25 S. [ → 270] Subnet mask, manual input S037.4 S. [ → 283] Subnet mask, set to defaults S037.2...
-
Page 206: Service Menu And Service Routines
8 Service Sirona Dental Systems GmbH 8.2 Service menu and service routines Service Manual GALILEOS Service menu and service routines Service menu and service routines You can use the service routines to check the function of certain unit components and modules, as well as to set important unit parameters. - Page 207 Sirona Dental Systems GmbH 8 Service Service Manual GALILEOS 8.2 Service menu and service routines X RAY Radiation can be released. X RAY Active! Caution! Radiation is being released. Selection field 1 Display fields for service routines, test steps, values, unit parameters, etc.
-
Page 208: Multipad
8 Service Sirona Dental Systems GmbH 8.2 Service menu and service routines Service Manual GALILEOS Multipad 8.2.1.2 Multipad 61 25 665 D3437 D3437.076.01.15.02 06.2012... - Page 209 Sirona Dental Systems GmbH 8 Service Service Manual GALILEOS 8.2 Service menu and service routines X-ray lamp Caution! Radiation is being released. Selection field 1 Display fields for service routines, test (8 digits) steps, values, unit parameters, etc. Selection field 2...
-
Page 210: Basic Operating Procedures In The Service Menu
8 Service Sirona Dental Systems GmbH 8.3 Basic operating procedures in the service menu Service Manual GALILEOS Basic operating procedures in the service menu Basic operating procedures in the service menu 8.3.1 Activating the service menu Activating the service menu 8.3.1.1... - Page 211 Sirona Dental Systems GmbH 8 Service Service Manual GALILEOS 8.3 Basic operating procedures in the service menu 3. To select level 4 (service menu/access), touch the wrench symbol (C). 4. Switch to the service menu: Press and hold down the Service key (D) until the patient symbol keys light up (E-H) (approx.
-
Page 212: Multipad
8 Service Sirona Dental Systems GmbH 8.3 Basic operating procedures in the service menu Service Manual GALILEOS Multipad 8.3.1.2 1. Press and hold down Service key (D) until the patient symbol keys Multipad light up (E-H) (approx. 2 s). 2. Then press the patient symbol keys in the sequence F – H – E within the next 4 s. -
Page 213: Selecting Service Routines And Test Steps
Sirona Dental Systems GmbH 8 Service Service Manual GALILEOS 8.3 Basic operating procedures in the service menu 8.3.2 Selecting service routines and test steps Selecting service routines and test steps 8.3.2.1 Selecting a service routine Selecting a service routine ✔... -
Page 214: Selecting A Test Step
✔ Selecting a test step The service menu must be selected [ → 210]. Selecting a test step in GALILEOS ✔ The required service routine must be selected [ → 213]. ➢ Select the required test step in selection field 2 with arrow keys (C) and confirm your selection by pressing Service key (B). -
Page 215: Service Routines With Security Access
Sirona Dental Systems GmbH 8 Service Service Manual GALILEOS 8.3 Basic operating procedures in the service menu Multipad: The parameters or IDs of the selected service routine are displayed on the Multipad. The Multipad does not show which service routine or test step is currently active. - Page 216 8 Service Sirona Dental Systems GmbH 8.3 Basic operating procedures in the service menu Service Manual GALILEOS 2. Confirm security access by once again selecting the number of the main routine (2 in the example) with the arrow keys in selection field 2 (C) and press the Service key (B) to confirm your selection.
-
Page 217: Select Parameters
Sirona Dental Systems GmbH 8 Service Service Manual GALILEOS 8.3 Basic operating procedures in the service menu Following this double selection and confirmation via the Service key, the service routine is activated. 8.3.3 Select parameters Select parameters Easypad touchscreen If arrow keys are displayed in the selection fields once the required service routine has been selected, you can use these arrow keys to choose between different parameters. - Page 218 Once the selected parameter has been changed (in this case the code for the activation of the remote control), the Memory key (C) lights up. Selecting parameters in GALILEOS Multipad Example You want to run service routine S017.6 to activate the remote control.
-
Page 219: Saving Parameters
Saving parameters Once one or a number of parameters have been selected via a service routine, the current selection must be saved so that it is applied in the unit. Title: Saving parameters in GALILEOS Easypad touchscreen Example You want to run service routine S017.6 to save the selected option "Remote control enabled". -
Page 220: Exiting The Test Step And Service Routine
In service menu S017, touch the Service key (A) to go to the next test step in the service routine. Exiting test steps_service routines in GALILEOS Multipad Press the Service key (A) or the up arrow key above selection field 3 (B) to go back to the menu for selecting service routines. -
Page 221: S002: Radiation Without Rotary Movement, Selectable Kv/Ma Level And
Sirona Dental Systems GmbH 8 Service Service Manual GALILEOS 8.4 S002: Radiation without rotary movement, selectable kV/mA level and maximum radiation time S002: Radiation without rotary movement, selectable kV/mA level and maximum radiation time S002: Radiation without rotary movement, selectable kV/mA level and maximum radiation time... - Page 222 8 Service Sirona Dental Systems GmbH 8.4 S002: Radiation without rotary movement, selectable kV/mA level and maximum radiation time Service Manual GALILEOS 1. Call service routine S002.5 [ → 213]. 2. Use the arrow keys (A) to select the required kV/mA level and the required radiation time (see table).
-
Page 223: S005: General X-Ray Tube Assembly Service
Tube type GALILEOS IMPORTANT Only CB tube D151 R (indicator number 03) is permissible for use with the GALILEOS volume tomography unit. ➢ Call service routine S005.1 [ → 213]. Selection field 1 shows the indicator number of the installed tube type. - Page 224 8 Service Sirona Dental Systems GmbH 8.5 S005: General X-ray tube assembly service Service Manual GALILEOS If the tube type is invalid ... 1. Confirm the security access [ → 215]. Selection field 1 shows the indicator number of the (invalid) tube type detected by the X-ray tube assembly.
-
Page 225: S005: Test Step 4
Sirona Dental Systems GmbH 8 Service Service Manual GALILEOS 8.5 S005: General X-ray tube assembly service 8.5.2 S005: Test step 4 S005: Test step 4 Fan test Selection field Code Function Fan off* Fan on * Factory setting 1. Call service routine S005.4 [ → 213]. -
Page 226: S005: Test Step 5
8 Service Sirona Dental Systems GmbH 8.5 S005: General X-ray tube assembly service Service Manual GALILEOS 8.5.3 S005: Test step 5 S005: Test step 5 Temperature sensor test, single tank 1. Call service routine S005.5 [ → 213]. After the service routine has been selected, selection field 1 displays the single tank temperature in °C. -
Page 227: S005: Test Step 8
Sirona Dental Systems GmbH 8 Service Service Manual GALILEOS 8.5 S005: General X-ray tube assembly service 8.5.4 S005: Test step 8 S005: Test step 8 Automatic adjustment of pulse preheating 1. Call service routine S005.8 [ → 213]. An inactive progress indicator in selection field 1 and the message "FFFF"... - Page 228 8 Service Sirona Dental Systems GmbH 8.5 S005: General X-ray tube assembly service Service Manual GALILEOS A progress indicator is displayed during the service function. 3. After the adjustment has been performed, exit the service routine [ → 220]. 61 25 665 D3437...
-
Page 229: S007: Error Logging Memory
S007: Test step 1 Display error logging memory In addition to service routine S007.1, you can also use the extended detail query in SiXABCon to check the error logging memory. Title only for GALILEOS Easypad touchscreen Symbol on the control Status... - Page 230 8 Service Sirona Dental Systems GmbH 8.6 S007: Error logging memory Service Manual GALILEOS 3. Use the arrow keys (A) in selection field 1 to select the required error event (66 in the example). The corresponding error message is displayed in selection field 2 [ →...
- Page 231 Sirona Dental Systems GmbH 8 Service Service Manual GALILEOS 8.6 S007: Error logging memory 3. Use the arrow keys (B) to scroll and display the corresponding error code [ → 82], the time, and the date of the error event in selection field 4.
-
Page 232: S007: Test Step 2
8 Service Sirona Dental Systems GmbH 8.6 S007: Error logging memory Service Manual GALILEOS 8.6.2 S007: Test step 2 S007: Test step 2 Clearing error logging memory 1. Call service routine S007.2 [ → 213]. The system's readiness to clear the memory is indicated by the display message "FFFF"... - Page 233 Sirona Dental Systems GmbH 8 Service Service Manual GALILEOS 8.6 S007: Error logging memory 2. To clear the memory, press the Memory key (A) (R key (B) (Easypad) or LED above the R key (B) (Multipad) lights up) followed by the R key (B).
- Page 234 8 Service Sirona Dental Systems GmbH 8.6 S007: Error logging memory Service Manual GALILEOS Once the memory has been cleared, the message "0000" is displayed in selection field 1. 3. Exit the service routine [ → 220]. 61 25 665 D3437...
-
Page 235: S007: Test Step 5
S007: Test step 5 Enabling CAN bus logging in the web interface NOTICE This service routine may only be called up subject to the approval of and with the support of the Sirona Customer Service Center (CSC). Selection field Parameters Function... -
Page 236: Displaying The Log With A Web Browser
8 Service Sirona Dental Systems GmbH 8.6 S007: Error logging memory Service Manual GALILEOS Displaying the log with a web browser 8.6.3.1 Displaying the log with a web browser 1. Enter the following web address on a PC (with internet access) - Page 237 Service Manual GALILEOS 8.6 S007: Error logging memory The CAN bus protocol is displayed in the browser and can be saved as an HTML page, printed out, or sent to the Sirona Customer Service Center (CSC). 61 25 665 D3437...
-
Page 238: S008: Update Service
8.7.1 S008: Test step 2 S008: Test step 2 Overview of module software versions Title only for GALILEOS Easypad touchscreen 1. Call service routine S008.2 [ → 213]. The software versions currently installed on the modules are displayed on an info screen on the touchscreen display. - Page 239 Sirona Dental Systems GmbH 8 Service Service Manual GALILEOS 8.7 S008: Update service Multipad 1. Call service routine S008.2 [ → 213]. "SYSTEMSOFTWARE" is displayed on the display line of the Multipad. 2. Select the required module in selection field 1 with the arrow keys (A) and confirm your selection by pressing the Memory key (B).
-
Page 240: S008: Test Step 3
8 Service Sirona Dental Systems GmbH 8.7 S008: Update service Service Manual GALILEOS 8.7.2 S008: Test step 3 S008: Test step 3 Confirming the unit serial number IMPORTANT If the backup copy of the old unit serial number does not match the new one after replacing a module, the entry of the serial number is activated. -
Page 241: S009: Flash File System
Sirona Dental Systems GmbH 8 Service Service Manual GALILEOS 8.8 S009: Flash file system S009: Flash file system S009: Flash file system IMPORTANT The unit has to be completely recalibrated after formatting the flash file system [ → 155]. When the flash file system is formatted, the content of the error logging memory is lost. - Page 242 8 Service Sirona Dental Systems GmbH 8.8 S009: Flash file system Service Manual GALILEOS Flash file system formatting in progress. This process takes approx. 5-6 mins and is visualized by a progress indicator. The end of this process is indicated by the message "0000" in selection field 2.
-
Page 243: S009: Test Step 5
Sirona Dental Systems GmbH 8 Service Service Manual GALILEOS 8.8 S009: Flash file system 8.8.2 S009: Test step 5 S009: Test step 5 Test flash file system 1. Call service routine S009.5 [ → 213]. S009.5 GALILEOS 2. To test the flash file system, press the Memory key (A) (R key (Easypad) or LED above R key (Multipad) lights up) followed by the R key (B). - Page 244 8 Service Sirona Dental Systems GmbH 8.8 S009: Flash file system Service Manual GALILEOS Once the system has passed the test without errors, "OK" appears in selection field 1. If the test fails, "ERROR" is displayed. In this case, the flash file system must be formatted with service routine S009.4 [ →...
-
Page 245: S009: Test Step 7
Sirona Dental Systems GmbH 8 Service Service Manual GALILEOS 8.8 S009: Flash file system 8.8.3 S009: Test step 7 S009: Test step 7 Save/restore DX89 data 1. Call service routine S009.7 [ → 213]. After you select this service routine, the following can be displayed in selection field 1: DX89 ⇒... - Page 246 8 Service Sirona Dental Systems GmbH 8.8 S009: Flash file system Service Manual GALILEOS 2. To trigger the memory process, press the Memory key (A) (R key (B) (Easypad) or LED above the R key (B) (Multipad) lights up) followed by the R key (B).
-
Page 247: S011: Dosimetry (Without Ring Movement)
Sirona Dental Systems GmbH 8 Service Service Manual GALILEOS 8.9 S011: Dosimetry (without ring movement) S011: Dosimetry (without ring movement) S011: Dosimetry (without ring movement) WARNING Unit is radiating X-rays Excess exposure to X-rays is detrimental to health. ➢ Use the prescribed accessories for radiation protection. -
Page 248: S011: Test Step 9
8 Service Sirona Dental Systems GmbH 8.9 S011: Dosimetry (without ring movement) Service Manual GALILEOS 2. Initiate the radiation. Radiation uses 200 pulses and 85kV/42mAs. IMPORTANT: If you let go of the release button before the maximum radiation time has elapsed, radiation is terminated prematurely and the exposure is interrupted. -
Page 249: S012: Can Bus Service
Sirona Dental Systems GmbH 8 Service Service Manual GALILEOS 8.10 S012: CAN bus service 8.10 S012: CAN bus service S012: CAN bus service SHZ** Function S012 CAN bus service S012.1 Presence display of modules * SR=service routine, ** SHZ=security access... - Page 250 8 Service Sirona Dental Systems GmbH 8.10 S012: CAN bus service Service Manual GALILEOS S012.1: GALILEOS Checking the module ➢ Use the arrow keys (A) in selection field 1 to select the required module. The counter value of the CAN bus events processed so far (since the last switch-on of the unit) of the selected module is displayed in selection field 2 with the presence code of the module ("L"...
- Page 251 Sirona Dental Systems GmbH 8 Service Service Manual GALILEOS 8.10 S012: CAN bus service Clearing the counter for the module 1. To delete the counter, press the T key (B). The counter is then reset to "0". 2. Exit the service routine [ → 220].
-
Page 252: S017: Configuration Service
8 Service Sirona Dental Systems GmbH 8.11 S017: Configuration service Service Manual GALILEOS 8.11 S017: Configuration service S017: Configuration service SA** Function S017 Unit configuration S017.2 Confirming the unit version S017.3 Enter the country group code S017.4 Select a language (for "GALILEOS Comfort") - Page 253 Sirona Dental Systems GmbH 8 Service Service Manual GALILEOS 8.11 S017: Configuration service 1. Call service routine S017.2 [ → 220]. Once the service routine has been selected, the code for the current setting is displayed in selection field 1.
-
Page 254: S017: Test Step 3
8 Service Sirona Dental Systems GmbH 8.11 S017: Configuration service Service Manual GALILEOS 8.11.2 S017: Test step 3 S017: Test step 3 Enter the country group code Selection field Code Function Worldwide* Asia * Factory setting 1. Call service routine S017.3 [ → 213]. - Page 255 Sirona Dental Systems GmbH 8 Service Service Manual GALILEOS 8.11 S017: Configuration service 2. Use arrow keys (A) to select the required country group code in selection field 1 (see table). Once the country group code has been selected, Memory key (B) (Easypad) or the LED above Memory key (B) (Multipad) lights up.
-
Page 256: S017: Test Step 4
8 Service Sirona Dental Systems GmbH 8.11 S017: Configuration service Service Manual GALILEOS 8.11.3 S017: Test step 4 S017: Test step 4 Select a language Selection field Code Function* English English French Italian Dutch Spanish Russian Portuguese Chinese (PRC) Korean... - Page 257 Sirona Dental Systems GmbH 8 Service Service Manual GALILEOS 8.11 S017: Configuration service 2. Use the arrow keys (A) to select the code for the required language in selection field 1 (see table). Once the language has been selected, the Memory key (B) lights 3.
-
Page 258: S017: Test Step 5
8 Service Sirona Dental Systems GmbH 8.11 S017: Configuration service Service Manual GALILEOS 8.11.4 S017: Test step 5 S017: Test step 5 Select a language set IMPORTANT A software update must be performed [ → 61] every time the language set changes, in order to install the corresponding languages in the system. -
Page 259: S017: Test Step 6
Sirona Dental Systems GmbH 8 Service Service Manual GALILEOS 8.11 S017: Configuration service 8.11.5 S017: Test step 6 S017: Test step 6 Enable/disable the remote control Selection field Code Function Remote control disabled* Remote control enabled * Factory setting 1. Call service routine S017.6 [ → 213]. - Page 260 8 Service Sirona Dental Systems GmbH 8.11 S017: Configuration service Service Manual GALILEOS 2. Use arrow keys (A) to select the code for the required setting in selection field 1 (see table). Once the required setting has been selected, Memory key (B) (Easypad) or the LED above Memory key (B) (Multipad) lights up.
-
Page 261: S017: Test Step 7
Sirona Dental Systems GmbH 8 Service Service Manual GALILEOS 8.11 S017: Configuration service 8.11.6 S017: Test step 7 S017: Test step 7 Configuring the switching plate for the swivel arm Selection field Code Function up to unit serial number 1079... - Page 262 8 Service Sirona Dental Systems GmbH 8.11 S017: Configuration service Service Manual GALILEOS 2. Use arrow keys (A) to select the required country group code in selection field 1 (see table). Once the required setting has been selected, Memory key (B) (Easypad) or the LED above Memory key (B) (Multipad) lights up.
-
Page 263: S017: Test Step 9
Sirona Dental Systems GmbH 8 Service Service Manual GALILEOS 8.11 S017: Configuration service 8.11.7 S017: Test step 9 S017: Test step 9 Activate/deactivate operation with board DX41 This service routine is used to configure operation of the system with or without module DX41. - Page 264 8 Service Sirona Dental Systems GmbH 8.11 S017: Configuration service Service Manual GALILEOS 2. Use arrow keys (A) to select the required code in selection field 1 (see table). Once the required setting has been selected, Memory key (B) (Easypad) or the LED above Memory key (B) (Multipad) lights up.
-
Page 265: S017: Test Step 13
Sirona Dental Systems GmbH 8 Service Service Manual GALILEOS 8.11 S017: Configuration service 8.11.8 S017: Test step 13 S017: Test step 13 Enable/disable the welcome screen Selection field Code Function Welcome screen disabled Welcome screen enabled* * Factory setting 1. Call service routine S017.13 [ → 213]. -
Page 266: S017: Test Step 14
8 Service Sirona Dental Systems GmbH 8.11 S017: Configuration service Service Manual GALILEOS 8.11.9 S017: Test step 14 S017: Test step 14 Enable/disable certain lines of the welcome screen Selection field Code Meaning/Function First name Last name Date of birth... - Page 267 Sirona Dental Systems GmbH 8 Service Service Manual GALILEOS 8.11 S017: Configuration service 3. Use the arrow keys (B) to select the code for the required state of the line selected in selection field 1 in selection field 2 (see table).
-
Page 268: 10S017: Test Step 15
8 Service Sirona Dental Systems GmbH 8.11 S017: Configuration service Service Manual GALILEOS 8.11.10 S017: Test step 15 S017: Test step 15 Selection field Code Function Acoustic signal indicating the end of the exposure is disabled Acoustic signal indicating the end of the... - Page 269 Sirona Dental Systems GmbH 8 Service Service Manual GALILEOS 8.11 S017: Configuration service 2. Use arrow keys (A) to select the required setting in selection field 1 (see table). Once the required setting has been selected, Memory key (B) (Easypad) or the LED above Memory key (B) (Multipad) lights up.
-
Page 270: 11S017: Test Step 25
8 Service Sirona Dental Systems GmbH 8.11 S017: Configuration service Service Manual GALILEOS 8.11.11 S017: Test step 25 S017: Test step 25 Select the diaphragm type Selection field Code Function Type 1 diaphragm ("GALILEOS Compact") Type 1/Type 2 diaphragm ("GALILEOS Comfort") Type 3 diaphragm ("GALILEOS Compact") - Page 271 Sirona Dental Systems GmbH 8 Service Service Manual GALILEOS 8.11 S017: Configuration service 2. Use arrow keys (A) to select the required code in selection field 1 (see table). Once the required setting has been selected, Memory key (B) (Easypad) or the LED above Memory key (B) (Multipad) lights up.
-
Page 272: S018: Service For Height Adjustment
8 Service Sirona Dental Systems GmbH 8.12 S018: Service for height adjustment Service Manual GALILEOS 8.12 S018: Service for height adjustment S018: Service for height adjustment SA** Function S018 Service for height adjustment S018.2 Set the maximum travel height S018.3 Undo the maximum travel height setting S018.4... - Page 273 Sirona Dental Systems GmbH 8 Service Service Manual GALILEOS 8.12 S018: Service for height adjustment 3. To save the maximum travel height, press Memory key (B) (R key (C) lights up) followed by R key (C). 4. Set the mechanical limit stop at the unit: Loosen nut (D) and move mechanical limit stop (E) for the limit switch until it engages.
-
Page 274: S018: Test Step 3
8 Service Sirona Dental Systems GmbH 8.12 S018: Service for height adjustment Service Manual GALILEOS 8.12.2 S018: Test step 3 S018: Test step 3 Undo the maximum travel height setting 1. Call service routine S018.3 [ → 213]. S018_3 GALILEOS Once the service routine has been selected, the current height position is displayed in selection field 1. -
Page 275: S018: Test Step 4
Sirona Dental Systems GmbH 8 Service Service Manual GALILEOS 8.12 S018: Service for height adjustment 8.12.3 S018: Test step 4 S018: Test step 4 Check the height adjustment sensor system This service routine is used to move the unit up or down as far as the limit switches using the Up/Down keys on the control panel. - Page 276 8 Service Sirona Dental Systems GmbH 8.12 S018: Service for height adjustment Service Manual GALILEOS 2. Use UP/DOWN keys (A) on the control panel to move the unit up and down and use patient symbol keys (F) to check the switching states.
-
Page 277: S037: Network Service
Sirona Dental Systems GmbH 8 Service Service Manual GALILEOS 8.13 S037: Network service 8.13 S037: Network service S037: Network service SA** Function S037 Network service S037.1 Displaying the network data S037.2 Delete network addresses or set them to factory defaults S037.3... - Page 278 8 Service Sirona Dental Systems GmbH 8.13 S037: Network service Service Manual GALILEOS 1. Call service routine S037.1 [ → 213]. Once the service routine has been selected, the IP address of the unit is displayed in selection field 1.
-
Page 279: S037: Test Step 2
Sirona Dental Systems GmbH 8 Service Service Manual GALILEOS 8.13 S037: Network service 8.13.2 S037: Test step 2 S037: Test step 2 Setting the default IP address, default gateway address and default subnet mask S037.2 GALILEOS IMPORTANT The network address can only be restored to the factory setting (default value) in fixed address boot mode (STATIC or no DHCP). - Page 280 8 Service Sirona Dental Systems GmbH 8.13 S037: Network service Service Manual GALILEOS 2. Before restoring the factory settings, check the network data that is still in the system: A = Show IP address B = Show default gateway C = Show subnet mask...
-
Page 281: S037: Test Step 3
Sirona Dental Systems GmbH 8 Service Service Manual GALILEOS 8.13 S037: Network service 8.13.3 S037: Test step 3 S037: Test step 3 Configuring boot mode S037.3 GALILEOS Selection field Parameters Meaning DYNAMIC Automatic address assignment (DHCP/AutoIP) STATIC Fixed address* * Factory setting 1. - Page 282 8 Service Sirona Dental Systems GmbH 8.13 S037: Network service Service Manual GALILEOS 2. Use arrow keys (A) to select the required boot mode "automatic address assignment" (DYNAMIC) or "fixed address" (STATIC) in selection field 1 (see table). Memory key (B) (Easypad) or the LED above Memory key (B) (Multipad) lights up.
-
Page 283: S037: Test Step
Sirona Dental Systems GmbH 8 Service Service Manual GALILEOS 8.13 S037: Network service 8.13.4 S037: Test step 4 S037: Test step 4 Manual input of static network settings (IP address, default gateway address, and subnet mask) S037.4 GALILEOS This service routine cannot run in DYNAMIC mode (T key is blocked). - Page 284 8 Service Sirona Dental Systems GmbH 8.13 S037: Network service Service Manual GALILEOS 1. Call service routine S017.4 [ → 213]. Once the service routine has been selected, the IP address of the unit is displayed in selection field 1.
- Page 285 Sirona Dental Systems GmbH 8 Service Service Manual GALILEOS 8.13 S037: Network service 4. Now use the patient symbol keys to select the required number pad 1-4 (A-D) (see also table): A = Number pad B1 B = Number pad B2...
- Page 286 8 Service Sirona Dental Systems GmbH 8.13 S037: Network service Service Manual GALILEOS 5. Use arrow keys (E) to select the digit to be changed in selection field 1 ("Digit No. 12" in the example). The corresponding patient symbol key (D) or the LED above the corresponding patient symbol key (D) lights up.
- Page 287 Sirona Dental Systems GmbH 8 Service Service Manual GALILEOS 8.13 S037: Network service 6. To change the value for the digit, use arrow keys (F) in selection field Memory key (G) (Easypad) or the LED above Memory key (G) (Multipad) lights up.
-
Page 288: Repair
Modifications to this unit which might affect the safety of the system owner, patients or other persons are prohibited by law! For reasons of product safety, this product may be operated only with original Sirona accessories or third-party accessories expressly approved by Sirona. -
Page 289: Safety Checks
Measures following replacement of boards. Also check whether the current software CD or the SIRONA dealer page contains any additional more up-to-date information about module replacement. Be sure to follow the instructions about how to proceed following module replacement. -
Page 290: Height Adjustment Motor (M1_4)/Spindle
For this purpose, Sirona recommends using the free height adjustment service kit, REF. 62 57 518. This service kit is used to prevent automatic downward movement of the slide during service by fixing the slide and the spindle holder. - Page 291 Sirona Dental Systems GmbH 9 Repair Service Manual GALILEOS 9.2 Height adjustment motor (M1_4)/spindle Moving the slide with the "height adjustment" service kit, REF. 62 9.2.1.1.1 57 518 Moving the slide with the "height adjustment" service kit, REF. 62 57 518 Move the slide 1.
- Page 292 5. After reaching the desired target position, secure the position again using the two screws (E). CAUTION! Before replacing the height adjustment motor, the slide must be secured in this position. Locking the slide: GALILEOS 61 25 665 D3437 D3437.076.01.15.02 06.2012...
- Page 293 Sirona Dental Systems GmbH 9 Repair Service Manual GALILEOS 9.2 Height adjustment motor (M1_4)/spindle Locking the slide 1. Make a mark at the position of the upper limit stop. 2. Loosen nut (G) on the upper profile clamp (H) and remove the upper limit stop (J) from the stand.
-
Page 294: Removing Board Dx32
Removing board DX32 2. Move the stand to a height of 1260 (Easypad display) 3. Disconnect GALILEOS from the power supply. 4. Remove the cable ties (A) from cable L2. 5. Loosen all the left-hand screws (B) of the protective plates (E). - Page 295 Sirona Dental Systems GmbH 9 Repair Service Manual GALILEOS 9.2 Height adjustment motor (M1_4)/spindle DX32 X100 6. Unscrew the remaining screws from the protective plates (E). 7. Remove the covering plates (E) (top and bottom) from the connection box (F) of board DX32.
-
Page 296: Replacing The Height Adjustment Motor/Spindle
9 Repair Sirona Dental Systems GmbH 9.2 Height adjustment motor (M1_4)/spindle Service Manual GALILEOS 9.2.3 Replacing the height adjustment motor/spindle Replacing the height adjustment motor/spindle Removing the spindle 1. Loosen the two screws (E) on the spindle holder (F) (if you have not already done so) [ →... - Page 297 Sirona Dental Systems GmbH 9 Repair Service Manual GALILEOS 9.2 Height adjustment motor (M1_4)/spindle Installing the new motor Install the height adjustment motor in the reverse order of removal. Please observe the following: Nuts: When fastening the motor, make sure that all three screws are tightened uniformly and protrude approx.
-
Page 298: Laying Of Cables When Replacing The Height Adjustment Motor
9 Repair Sirona Dental Systems GmbH 9.2 Height adjustment motor (M1_4)/spindle Service Manual GALILEOS 9.2.4 Laying of cables when replacing the height adjustment motor 1. Plug connector X2 (O) into board DX32. Laying of cables when replacing the height adjustment motor 2. - Page 299 Sirona Dental Systems GmbH 9 Repair Service Manual GALILEOS 9.2 Height adjustment motor (M1_4)/spindle 3. Attach cable L2 first to the lower strain relief (photo on the left) and then to the upper strain relief (photo on the right) (Q) of board DX32.
-
Page 300: What Has To Be Done After Replacing The Height Adjustment Motor
9 Repair Sirona Dental Systems GmbH 9.2 Height adjustment motor (M1_4)/spindle Service Manual GALILEOS 6. Lay the motor cable in the cable harness (V) on the rear of the unit and secure in position with the cable clamps. 7. Route the cable into the arm. -
Page 301: Ring Motor (M1_3)
Sirona Dental Systems GmbH 9 Repair Service Manual GALILEOS 9.3 Ring motor (M1_3) Ring motor (M1_3) Ring motor (M1_3) 9.3.1 Replacing the ring motor Replacing the ring motor Removing the covers ➢ Remove the "arm cover". Removing the defective motor... - Page 302 9 Repair Sirona Dental Systems GmbH 9.3 Ring motor (M1_3) Service Manual GALILEOS Installing the new motor 1. Insert the new motor including coupling and absorber in the ring. Tip: While inserting the motor, turn it back and forth slightly until the pinion engages in the ring gear.
-
Page 303: Replacing The Pinion At The Ring Motor
Sirona Dental Systems GmbH 9 Repair Service Manual GALILEOS 9.3 Ring motor (M1_3) 9.3.2 Replacing the pinion at the ring motor Replacing the pinion at the ring motor Removing the covers ➢ Remove the "arm cover". Removing the motor ➢ Remove the ring motor as described in the chapter Replacing the ring motor [ →... - Page 304 9 Repair Sirona Dental Systems GmbH 9.3 Ring motor (M1_3) Service Manual GALILEOS Replacing the pinion 1. Loosen the set screws (A) and pull off the defective pinion (B). 2. IMPORTANT: Ensure that the pinion is seated in the coupling so that the set screws (A) are sitting on the flattened surface (C) of the pinion during subsequent tightening to prevent the pinion from turning.
-
Page 305: Laying Of Cables When Replacing The Ring Motor
Sirona Dental Systems GmbH 9 Repair Service Manual GALILEOS 9.3 Ring motor (M1_3) 9.3.3 Laying of cables when replacing the ring motor Laying of cables when replacing the ring motor 1. Lay the cable (G) parallel to cable L3 and secure it with the clamps. -
Page 306: Rotary Knob On The Swivel Arm
9 Repair Sirona Dental Systems GmbH 9.4 Rotary knob on the swivel arm Service Manual GALILEOS Rotary knob on the swivel arm Rotary knob on the swivel arm 9.4.1 Replacing the rotary knob Replacing the rotary knob Removing the rotary knob 1. -
Page 307: Control Panel
9.5.1 Replacing the Easypad user interface (GALILEOS Comfort) or Multipad (GALILEOS Compact) Replacing the Easypad user interface (GALILEOS Comfort) or Multipad (GALILEOS Compact) GALILEOS Compact GALILEOS Comfort 1. Press into slit (A) of the housing cover with a screwdriver (do not pry!) and remove the defective user interface from the control panel. -
Page 308: What Has To Be Done After Replacing The User Interface
5. Update the nameplate at the control panel cover. To do so, affix the supplied label as shown in the figure. 6. For "GALILEOS Comfort" (Easypad) only: Cable L10 (green cable) must be equipped with ferrite core (B), unless this has already been done. -
Page 309: Laying Of Cables When Replacing The User Interface
Sirona Dental Systems GmbH 9 Repair Service Manual GALILEOS 9.5 Control panel 9.5.2 Laying of cables when replacing the user interface Laying of cables when replacing the user interface Easypad 1. Plug the green cable L10 (A) into connector X103 on board DX7. -
Page 310: X-Ray Tube Unit
9 Repair Sirona Dental Systems GmbH 9.6 X-ray tube unit Service Manual GALILEOS X-ray tube unit X-ray tube unit DANGER Potentially lethal shock hazard! It is essential to switch the unit off and to wait at least another 4 minutes before starting the repair or taking off a cover panel! 9.6.1... - Page 311 Sirona Dental Systems GmbH 9 Repair Service Manual GALILEOS 9.6 X-ray tube unit 1. Loosen the two lower screws (A) (approx. 2 to 3 turns). 2. Push the diaphragm (B) upward and then toward the front. 3. Unscrew the two sleeves (C) with washers.
- Page 312 9 Repair Sirona Dental Systems GmbH 9.6 X-ray tube unit Service Manual GALILEOS "Type 3" diaphragm 1. Loosen the two lower screws (A) (approx. 2 to 3 turns). 2. Push the diaphragm (B) upward and then toward the front. Removing the defective X-ray tube assembly 1.
- Page 313 Sirona Dental Systems GmbH 9 Repair Service Manual GALILEOS 9.6 X-ray tube unit 3. Loosen the two rear screws (C) on the tube assembly. 4. CAUTION! The tube assembly is heavy! Hold the tube assembly firmly in place, loosen the two front screws (D) (3-4 turns) and remove the tube assembly toward the front.
- Page 314 9 Repair Sirona Dental Systems GmbH 9.6 X-ray tube unit Service Manual GALILEOS With the "Type 1" diaphragm unit: 1. Remove the retaining ring (L). 2. Remove the copper filter (M) and the aluminum filter (D). 3. Unscrew the two sleeves (C) with washers.
- Page 315 Sirona Dental Systems GmbH 9 Repair Service Manual GALILEOS 9.6 X-ray tube unit Installing the diaphragm unit ➢ NOTICE! Do not forget to re-install the filters or in the case of "Type 1" diaphragm unit, the primary diaphragm. The diaphragm is installed in the reverse order to removal.
-
Page 316: Cables And Connectors For Replacement Of The X-Ray Tube Assembly
9 Repair Sirona Dental Systems GmbH 9.6 X-ray tube unit Service Manual GALILEOS 9.6.2 Cables and connectors for replacement of the X-ray tube assembly Cables and connectors for replacement of the X-ray tube assembly 61 25 665 D3437 D3437.076.01.15.02 06.2012... -
Page 317: What Has To Be Done After Replacing The X-Ray Tube Assembly
Sirona Dental Systems GmbH 9 Repair Service Manual GALILEOS 9.6 X-ray tube unit Cable L5 → Socket J6 on board DX6 Cable L6 → Socket J2/J3 on board DX6 Grounding cable → Connector X304 on board DX6 Cable L3 → Connector X3 on board DX6 Laying cables correctly on the cover plate Cable L15 →... -
Page 318: Fan (X-Ray Tube Assembly)
9 Repair Sirona Dental Systems GmbH 9.7 Fan (X-ray tube assembly) Service Manual GALILEOS Fan (X-ray tube assembly) Fan (X-ray tube assembly) 9.7.1 Replacing the fan Replacing the fan 1. Remove the "Front tube assembly cover". 2. NOTICE! Cable! Loosen the three screws (A) and carefully remove the cover plate including the fan. -
Page 319: X-Ray Detector
Sirona Dental Systems GmbH 9 Repair Service Manual GALILEOS 9.8 X-ray detector X-ray detector X-ray detector 9.8.1 Replace X-ray detector Replace X-ray detector IMPORTANT For Facescan units: The FaceScan must be removed [ → 325] from units with FacescanFacescan fitted before the X-ray detector can be replaced. - Page 320 9 Repair Sirona Dental Systems GmbH 9.8 X-ray detector Service Manual GALILEOS 4. NOTICE! Make sure that the grounding cable does not slip into the ring. Secure it with a cable tie or piece of adhesive tape if necessary. Loosen screw (G) and disconnect the grounding cable (H).
- Page 321 Sirona Dental Systems GmbH 9 Repair Service Manual GALILEOS 9.8 X-ray detector Installing the X-ray detector 1. Hook the new x-ray detector into holder (K) from above, using the ring on the unit. The dead weight of the X-ray detector will cause it to tilt into the correct position.
- Page 322 9 Repair Sirona Dental Systems GmbH 9.8 X-ray detector Service Manual GALILEOS 5. Connect the grounding cable from the ring with screw (G) as well as with washer (L), serrated washer (M) and contact washer (N). 61 25 665 D3437...
- Page 323 Sirona Dental Systems GmbH 9 Repair Service Manual GALILEOS 9.8 X-ray detector 6. NOTICE! Ensure that cable L13 is correctly laid in the nut (O) of the X-ray detector. Route the cable L13 as illustrated in the diagram, and attach the cover shielding on the X-ray detector housing using the 2 clamps (D) and screws (B).
-
Page 324: What Has To Be Done After Replacing The X-Ray Detector
9 Repair Sirona Dental Systems GmbH 9.8 X-ray detector Service Manual GALILEOS Attaching the covers 1. Remove the plastic cap (P) in front of the input window of the new X- ray detector. Depending on the hardware version of your unit, the plastic cap may differ slightly from the one shown in this diagram. -
Page 325: Facescan
Sirona Dental Systems GmbH 9 Repair Service Manual GALILEOS 9.9 Facescan Facescan Facescan 9.9.1 Replacing the scan unit Replacing the scan unit 9.9.1.1 Removing the defective scan unit Removing the defective scan unit Removing the covers 1. Undo the four screws (K) and remove the two covers (J). - Page 326 9 Repair Sirona Dental Systems GmbH 9.9 Facescan Service Manual GALILEOS Disconnecting electrical connections 1. Disconnect cable L78.3 from cable L78.4. 2. Remove the cable L78.4 from the clamp (Z). 3. Pull cable L78.4 from socket X2 of the FACESCAN modular board.
-
Page 327: Attaching New Scan Unit
Sirona Dental Systems GmbH 9 Repair Service Manual GALILEOS 9.9 Facescan Attaching the transport locks ➢ Screw the transport lock (B) to the Facescan using the wing screws (A) (for return shipping). Removing the scan unit 1. Unscrew the securing screws (E). - Page 328 9 Repair Sirona Dental Systems GmbH 9.9 Facescan Service Manual GALILEOS 1. Hang the scan unit from behind in the inlets of the X-ray detector. 2. Attach the scan unit loosely with 6 screws (D) - do not screw tightly! 3.
- Page 329 Sirona Dental Systems GmbH 9 Repair Service Manual GALILEOS 9.9 Facescan 8. Move the safety screw (E) on both sides from the parked position (L) (delivered condition) to the function position (M). 9. Screw the scan unit down from below with the safety screws (E). In so doing, the screws should pierce through the housing of the X-ray detector.
- Page 330 9 Repair Sirona Dental Systems GmbH 9.9 Facescan Service Manual GALILEOS Connecting scan unit electrically Connecting Facescan electrically 1. Loosen the two screws (S). 2. Remove the protective plate (T). The FACESCAN modular board is open. 3. Read the MAC address on the FACESCAN modular board at position (X) and note this down.
- Page 331 1. Remove the protective caps (E) from the four cameras. IMPORTANT Permitted cleaning agents - A dry, lint-free cloth - A cleaning agent approved by Sirona An up-to-date list of approved agents can be downloaded from the "www.sirona.com" "SERVICE" "Care Internet at the address .
-
Page 332: What Has To Be Done After Replacing The Scanner Unit
9 Repair Sirona Dental Systems GmbH 9.9 Facescan Service Manual GALILEOS 5. Read the serial number on the identification plate (S) and record this on the device certificate. 6. Screw the right end cap (J) with two screws (K) down on the scan unit. -
Page 333: Replacing The Poe Module
Sirona Dental Systems GmbH 9 Repair Service Manual GALILEOS 9.9 Facescan 9.9.2 Replacing the PoE module Replacing the PoE module 9.9.2.1 Removing the faulty PoE module Removing the faulty PoE module 1. Remove the bottom profile cover [ → 42]. - Page 334 9 Repair Sirona Dental Systems GmbH 9.9 Facescan Service Manual GALILEOS 5. Push the cable cover (I) upwards. 6. Unplug the Ethernet cable L77 from the POE socket of the PoE module. 7. Unscrew the two screws (K) and the nuts (L) and remove the PoE module.
-
Page 335: Installing The New Poe Module
Sirona Dental Systems GmbH 9 Repair Service Manual GALILEOS 9.9 Facescan Installing the new PoE module 9.9.2.2 1. Put the PoE module (P) on the thread bolts (H) of the mains filter plate Installing the new PoE module (J) (the serrated washer must sit behind the fitting plate of the PoE module). - Page 336 9 Repair Sirona Dental Systems GmbH 9.9 Facescan Service Manual GALILEOS 5. Pull cable L7 from the SC:SC socket. 6. Plug cable L7 into the BU2 socket of the PoE module. 7. Plug cable L71 into the BU1 socket of the PoE module.
- Page 337 Sirona Dental Systems GmbH 9 Repair Service Manual GALILEOS 9.9 Facescan 10. Connect cable L77.BN (brown) to terminal K1.1 (orange). 11. Connect cable L77.WH (white) to terminal K1.2 (orange). 12. Fasten cable L76 as low as possible downwards with the cable clamp (G).
-
Page 338: Head Fixation Device
9 Repair Sirona Dental Systems GmbH 9.10 Head fixation device Service Manual GALILEOS 9.10 Head fixation device Head fixation device 9.10.1 Replacing receptacle element for head fixation (for unit with head fixation device) Replacing receptacle element for head fixation (for unit with head fixation device) Remove defective receptacle element. - Page 339 (E) is exposed. Adjust the light localizer. Adjusting the light localizer (GALILEOS) 1. CAUTION! Keep a minimum distance of 100 mm between the eye and the laser. Do not look directly into the laser beam.
- Page 340 9 Repair Sirona Dental Systems GmbH 9.10 Head fixation device Service Manual GALILEOS 2. Align the acquisition unit. To do this, move the rotary knobs on the head fixation device to a vertical position. Then align the acquisition unit so that the laser light is shown in the middle of the vertical knobs of the head fixation device and the bite holder.
-
Page 341: Light Barriers
Sirona Dental Systems GmbH 9 Repair Service Manual GALILEOS 9.11 Light barriers 9.11 Light barriers Light barriers 9.11.1 Replacing the light barriers Replacing the light barriers The following light barriers can be replaced: ● Light barrier at ring motor, starting position of rotation: V1_3 ●... -
Page 342: Boards
You will find more up-to-date information and supplements concerning this subject on the latest GALILEOS XG CD and on the Sirona dealer page on the Internet. For this reason, you should always check for the latest information on the replacement of modules and performing updates before you start replacing any modules or boards. -
Page 343: Replacing Boards
Please observe the usual precautionary measures for handling printed circuit boards (ESD). Touch a ground point to discharge static electricity before touching any boards. Replacing PC boards: GALILEOS *) Board DX41 is omitted in units with serial numbers of 3201 and higher. 61 25 665 D3437 D3437.076.01.15.02 06.2012... -
Page 344: 1Replacing Pc Board Dx1
9 Repair Sirona Dental Systems GmbH 9.12 Boards Service Manual GALILEOS Replacing PC board DX1 9.12.2.1 Replacing PC board DX1 IMPORTANT The software version of the "DX1/DX11 board" must be compatible with the main software version of the unit. 1. Remove the "arm cover". -
Page 345: 3Replacing Board Dx32
Sirona Dental Systems GmbH 9 Repair Service Manual GALILEOS 9.12 Boards In the case of boards with REF 62 82 052 (DX1) and REF 63 17 9.12.2.2.2 056 (DX11) In the case of boards with REF 62 82 052 (DX1) and REF 63 17 056 (DX11) ✔... -
Page 346: 4Replace Board Dx89
9 Repair Sirona Dental Systems GmbH 9.12 Boards Service Manual GALILEOS Replace board DX89 9.12.2.4 Replace board DX89 1. Remove the "x-ray detector cover". 2. Carefully pull cover plate (A) upwards to remove it from the X-ray detector. 3. Remove the four screws (B) and remove the defective DX89 board from the X-ray detector. -
Page 347: Measures Following Replacement Of Boards
9.12.3 Measures following replacement of boards Measures following replacement of boards Board replacement measures: GALILEOS After replacing boards or modules containing boards, check to make sure that the software version of the module corresponds to the current software status of the system. The software versions of the modules can be queried by running service routine S008.2 or using the extended detail... - Page 348 ● Inserting a ● Switch the unit on. S. [ → 61] Stand ● Only for GALILEOS up to serial ● Perform a software update of the unit number 3200 to a version V03.03.01 or higher. 61 25 665 D3437...
- Page 349 Sirona Dental Systems GmbH 9 Repair Service Manual GALILEOS 9.12 Boards Board Constellation Actions Page new DX42 DX42 Inserting a Remote new DX42 ● Inserting a ● Switch the unit on. S. [ → 61] control GALILEOS Comfort ● ● Perform a software update of the unit to a version V03.03.01 or higher.
-
Page 350: 1After Changing The Dx11 Board
The Memory key lights up. 11. Acknowledge any additional error messages with the R key . 12. Confirm the "GALILEOS Comfort" system class (03): To do this, first press the Memory key (R key lights up) and then the R key. - Page 351 The unit serial number is located on the nameplate of the unit. NOTICE! If the serial number is incorrect, exit the update process and contact the Sirona Customer Service Center. 21. Switch off the unit. 22. Wait for approx. 1 minute. Then switch the unit back on.
- Page 352 ● GALILEOS Comfort ● System software version V03.03.01 or higher IMPORTANT: Exchange is only possible within the same system class, e.g. the DX11 must come from a "GALILEOS Comfort" unit if it is to be installed in a "GALILEOS Comfort" unit. NOTICE After inserting the board, you must reconfigure the IP address to match the IP address of the existing X-ray component.
- Page 353 Sirona Dental Systems GmbH 9 Repair Service Manual GALILEOS 9.12 Boards 14. Call the service routine S017 and perform the unit configuration (test step 2-15) [ → 252]. The board DX41 must be configured using the service routine S017.9. In units with a serial number of 1080 and above, the switching plate configuration of the swivel arm must be set or checked using service routine S017.7.
- Page 354 The LED above the Memory key lights up. 11. Acknowledge any additional error messages with the R key . 12. Confirm the "GALILEOS Compact" system class (04): To do this, first press the Memory key (LED above the R key lights up) and then the R key.
- Page 355 The unit serial number is located on the nameplate of the unit. NOTICE! If the serial number is incorrect, exit the update process and contact the Sirona Customer Service Center. 21. Switch off the unit. 22. Wait for approx. 1 minute. Then switch the unit back on.
- Page 356 ● GALILEOS Compact ● System software version V03.03.01 or higher IMPORTANT: Exchange is only possible within the same system class, e.g. the DX11 must come from a "GALILEOS Compact" unit if it is to be installed in a "GALILEOS Compact" unit. NOTICE After inserting the board, you must reconfigure the IP address to match the IP address of the existing X-ray component.
- Page 357 Sirona Dental Systems GmbH 9 Repair Service Manual GALILEOS 9.12 Boards 14. Call the service routine S017 and perform the unit configuration (test step 2-15) [ → 252]. The board DX41 must be configured using the service routine S017.9. In units with a serial number of 1080 and above, the switching plate configuration of the swivel arm must be set or checked using service routine S017.7.
-
Page 358: Cable
9 Repair Sirona Dental Systems GmbH 9.13 Cable Service Manual GALILEOS 9.13 Cable Cable 9.13.1 Replacing energy chain 1 completely Replacing energy chain 1 completely Removing the defective energy chain Remove energy chain IMPORTANT Remove cable ties For the following steps, all necessary cable ties should be removed with wire cutters. - Page 359 Sirona Dental Systems GmbH 9 Repair Service Manual GALILEOS 9.13 Cable 4. If not present: Mark the position of the screw (B) on the stand. 5. Make a note of the position of the screw (B) for when you later install the new energy chain.
- Page 360 9 Repair Sirona Dental Systems GmbH 9.13 Cable Service Manual GALILEOS 9. Remove the cable covers (I) and (J) of the right-hand cable duct. 10. Remove the energy chain along with the mains filter plate from the stand. Installing the new energy chain Installing the energy chain 1.
- Page 361 Sirona Dental Systems GmbH 9 Repair Service Manual GALILEOS 9.13 Cable IMPORTANT Possible assembly errors The one end piece has been removed to make the new energy chain easier to lay . The missing end piece is enclosed. ➢ Attach this end piece to the energy chain only when the energy chain has been laid in the stand.
-
Page 362: Replacing Cables
9 Repair Sirona Dental Systems GmbH 9.13 Cable Service Manual GALILEOS 9.13.2 Replacing cables Replacing cables CAUTION Switch the unit off before you start replacing cables or removing connectors. NOTICE Be careful not to twist the cables or kink the fiber-optic light guides when installing them. -
Page 363: 1Replacing Fiber-Optic Cable L5, L6 Or L15
Sirona Dental Systems GmbH 9 Repair Service Manual GALILEOS 9.13 Cable Replacing fiber-optic cable L5, L6 or L15 9.13.2.1 Replacing fiber-optic cable L5, L6 or L15 IMPORTANT: If a radius limiter is not yet installed: When replacing one cable, all existing fiber-optic cables (L5, L6 or L15) should be retrofitted with the radius limiters included with delivery! The radius limiters improve torsional and bending force tolerance. -
Page 364: 2Cable Replacement (L3, L5, L6, And L15)/Laying The Cable
9 Repair Sirona Dental Systems GmbH 9.13 Cable Service Manual GALILEOS Cable replacement (L3, L5, L6, and L15)/Laying the cable/ 9.13.2.2 corrugated tube at the rotation unit Cable replacement (L3, L5, L6, and L15)/Laying the cable/corrugated tube at the rotation unit... - Page 365 Sirona Dental Systems GmbH 9 Repair Service Manual GALILEOS 9.13 Cable 8. Slide the corrugated tube over the spiral spring. 9. Remove the fabric tube and the pull wire. Laying the corrugated tube or cable at 1. Lay the corrugated tubes and cables back in their original position.
-
Page 366: 3Replacing Cable L7/L117 Or L108 In Cable Track 2
9 Repair Sirona Dental Systems GmbH 9.13 Cable Service Manual GALILEOS Replacing cable L7/L117 or L108 in cable track 2 9.13.2.3 Replacing cable L7/L117 or L108 in cable track 2 1. Switch the unit on. 2. Move the slide downward to a pleasant working position using the Up/ Down keys on the control panel. - Page 367 Sirona Dental Systems GmbH 9 Repair Service Manual GALILEOS 9.13 Cable 14. Remove the motor-side end piece from the cable track. 15. With defective cable L7/L117: Unscrew cable L7/L117 from the interface board and remove the shield. If cable L7/L117 should be intact and used again, this step is not necessary.
-
Page 368: 4Replacing Cable L1 Or Grounding Strap In Cable Track
9 Repair Sirona Dental Systems GmbH 9.13 Cable Service Manual GALILEOS 21. CAUTION! Push the green cable. The white cable is carried along. In this way, you can prevent the sensitive fiber optic cable from being damaged. Push both cables (together) into the cable track up to the cable markings. -
Page 369: Maintenance
Sirona Dental Systems GmbH 10 Maintenance Service Manual GALILEOS 10.1 Calibrating the unit Maintenance Maintenance DANGER Potentially lethal shock hazard! It is essential to switch the unit off and to wait at least 1 minute, or 4 minutes if disconnecting the tube assembly (cable L3), before starting... -
Page 370: Checking The Height Adjustment
10 Maintenance Sirona Dental Systems GmbH 10.2 Checking the height adjustment Service Manual GALILEOS 10.2 Checking the height adjustment Checking the height adjustment Check the threaded rod and motor for ➢ Perform a visual inspection of height adjustment motor (A) and abrasion spindle (B) for abrasion. -
Page 371: Checking The Fan And Temperature Sensor
Check cable L19, replace if necessary. Check whether an audible signal can be ➢ Use the Up/Down keys on the control panel to move the unit up and Checking height adjustment signal: GALILEOS heard during height adjustment down. An acoustic signal must be audible. -
Page 372: Checking The Idling Rollers
10 Maintenance Sirona Dental Systems GmbH 10.5 Checking the idling rollers Service Manual GALILEOS 10.5 Checking the idling rollers Checking the idling rollers Check whether the idling rollers (A) are ➢ Manually turn the ring (B) and check it for smooth and easy movement. -
Page 373: Checking The Grounding Straps
Sirona Dental Systems GmbH 10 Maintenance Service Manual GALILEOS 10.6 Checking the grounding straps 10.6 Checking the grounding straps Checking the grounding straps Grounding strap in the stand 61 25 665 D3437 D3437.076.01.15.02 06.2012... - Page 374 Sirona Dental Systems GmbH 10.6 Checking the grounding straps Service Manual GALILEOS Grounding strap on the image detector: GALILEOS Grounding strap on the image detector Check whether the grounding straps 1. Perform a visual and “hands-on” inspection of the grounding straps to...
-
Page 375: Checking The Cable Shields
10 Maintenance Service Manual GALILEOS 10.7 Checking the cable shields 10.7 Checking the cable shields Checking the cable shields Shield on the tube assembly Shield on the X-ray detector: GALILEOS Shield on the X-ray detector 61 25 665 D3437 D3437.076.01.15.02 06.2012... - Page 376 10 Maintenance Sirona Dental Systems GmbH 10.7 Checking the cable shields Service Manual GALILEOS Shield on the housing Check whether the cable shielding is OK ➢ Perform a visual and “hands-on” inspection of the cable shields to ensure that they have complete and firm contact at the positions marked.
-
Page 377: Checking The Protective Ground Wires
Sirona Dental Systems GmbH 10 Maintenance Service Manual GALILEOS 10.8 Checking the protective ground wires 10.8 Checking the protective ground wires Checking the protective ground wires General - Ground wire test DANGER Potentially lethal shock hazard! It is essential to switch the unit off and to wait at least one more 1 minute before beginning the check! 1. - Page 378 Tip:Do not connect the power cable and the second ground wire to the building installation yet. Check the device leakage current first [ → 382]. Measuring point A - GALILEOS ground wire test 61 25 665 D3437 D3437.076.01.15.02 06.2012...
- Page 379 Sirona Dental Systems GmbH 10 Maintenance Service Manual GALILEOS 10.8 Checking the protective ground wires Measuring point A: Central ground wire Up to unit serial number GALILEOS Comfort 8,999 GALILEOS Compact 48,999 61 25 665 D3437 D3437.076.01.15.02 06.2012...
- Page 380 10 Maintenance Sirona Dental Systems GmbH 10.8 Checking the protective ground wires Service Manual GALILEOS From unit serial number GALILEOS Comfort 9,000 GALILEOS Compact 49,000 Checking measuring points B and C - protective ground wire Measuring points B and C: GNYE power connection and 2nd ground...
- Page 381 Sirona Dental Systems GmbH 10 Maintenance Service Manual GALILEOS 10.8 Checking the protective ground wires Checking measuring points D and E - protective ground wire Measuring points D and E: Board cage DX32 and tube assembly housing Board cage DX32...
-
Page 382: Checking The Device Leakage Current
10 Maintenance Sirona Dental Systems GmbH 10.9 Checking the device leakage current Service Manual GALILEOS 10.9 Checking the device leakage current Checking the device leakage current DANGER Potentially lethal shock hazard! It is essential to switch the unit off and to wait at least one more 1 minute... - Page 383 Sirona Dental Systems GmbH 10 Maintenance Service Manual GALILEOS 10.9 Checking the device leakage current 1. Switch the line voltage off at the main switch of the building installation. 2. Disconnect the power cable and the second protective ground wire from the building installation.
-
Page 384: Dismantling And Disposal
11 Dismantling and disposal Sirona Dental Systems GmbH 11.1 Dismantling and reinstallation Service Manual GALILEOS Dismantling and disposal Dismantling and disposal 11.1 Dismantling and reinstallation Dismantling and reinstallation When dismantling and reinstalling the system, proceed according to the installation instructions for new installation in order to guarantee its proper functioning and stability. - Page 385 Sirona Dental Systems GmbH 11 Dismantling and disposal Service Manual GALILEOS 11.2 Disposal In Germany: To initiate return of the electrical device, please send a disposal order to "enretec GmbH". 1. You can find a form for placing a disposal order on the company's homepage (www.enretec.de) under the menu item "Entsorgung...
-
Page 386: Service Manual History
Version 13: Full revision of the manual including new document structure. New version of board DX1/DX11 and new X-ray detector integrated. Service routine S05.3 added. Name change: "GALILEOS" and "GALILEOS GAX5" changed to "GALILEOS Comfort" and "GALILEOS Compact". Version 14: Software version V04.07.00 and V04.07.01 added. - Page 388 tÉ=êÉëÉêîÉ=íÜÉ=êáÖÜí=íç=ã~âÉ=~åó=~äíÉê~íáçåë=ïÜáÅÜ=ã~ó=ÄÉ=êÉèìáêÉÇ=ÇìÉ=íç=íÉÅÜåáÅ~ä=áãéêçîÉãÉåíëK «=páêçå~=aÉåí~ä=póëíÉãë=dãÄe=OMNO péê~ÅÜÉW ÉåÖäáëÅÜ mêáåíÉÇ=áå=dÉêã~åó aPQPTKMTSKMNKNRKMO MSKOMNO ûKJkêKW= NNR=TNN páêçå~=aÉåí~ä=póëíÉãë=dãÄe áå=íÜÉ=rp^W SN=OR=SSR=aPQPT c~Äêáâëíê~≈É=PN páêçå~=aÉåí~ä=póëíÉãë=ii` lêÇÉê=kç SQSOR=_ÉåëÜÉáã QUPR=páêçå~=aêáîÉI=pìáíÉ=NMM dÉêã~åó `Ü~êäçííÉI=k`=OUOTP ïïïKëáêçå~KÅçã...
Need help?
Do you have a question about the GALILEOS and is the answer not in the manual?
Questions and answers