Table of Contents
Advertisement
Quick Links
Advertisement
Table of Contents

Related Manuals for Beta Enduro RR 350 2015


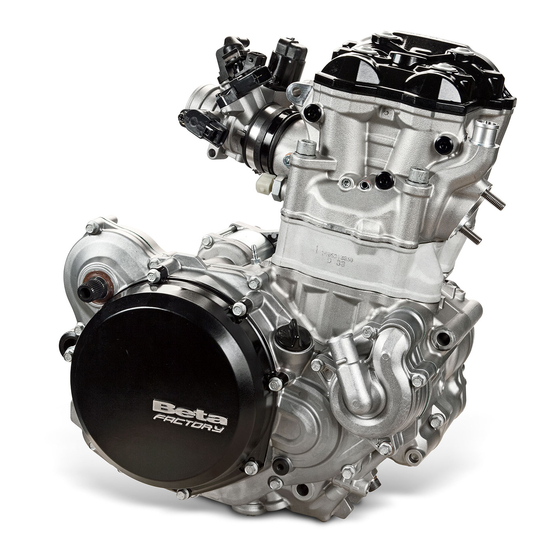
Summary of Contents for Beta Enduro RR 350 2015
-
Page 2: Table Of Contents
2.8.1 ELECTRIC KICK-START UNIT KICKStARtER 2.10 EXtERNAL GEARSHIft UNIt 2.11 CRANKSHAft, GEARBoX UNIt AND INtERNAL GEARSHIft 2.11.1 NUT ON LEFT SIDE OF CRANKSHAFT 2.11.2 OPENING CRANKCASE 2.11.3 CRANKSHAFT 2.11.4 INTERNAL GEARSHIFT UNIT AND COMPLETE GEARBOX 2.12 DISASSEMBLY of PARtS fRoM CRANKCASES 2.12.1 RIGHT CRANKCASE HALF... - Page 3 INDEX 3.9.2 ASSEMBLY OF KICKSTART DEVICE 3.17.9 CYLINDER HEAD: ASSEMBLY OF VALVE UNIT 3.17.10 CYLINDER HEAD: REPOSITIONING CALIBRATED 3.10 ELECTRICAL STARTER UNIT AND MAIN GEAR 79 DISCS, ASSEMBLY OF FINGER FOLLOWER SHAFTS AND FINGER FOLLOWERS AND COUPLING THE 3.10.1 CHECKING ELECTRICAL STARTER DEVICE SPARK PLUG ELEMENTS 3.17.11...
-
Page 4: Informative Note
www.betamotor.com PREAMBLE This publication has been written in order to make operations for inspection, maintenance and repairs of the motorcycle engine known and understandable to the user of the motorcycle and to the technical assistance operator. Read this entire manual with care before operating the engine. Sufficient knowledge of the components that make up the engine and of all the procedures to be followed for inspection and maintenance con- tribute to lengthen the life of the engine. -
Page 5: Hot Parts
www.betamotor.com • Coolant Do not remove the radiator cap when the en- gine is still hot. When coolant is pressurised, it • In some situations, the ethylene glycol contai- can spurt out violently and cause burns. ned in the coolant is flammable and its flame •... - Page 6 www.betamotor.com tECHNICAL fEAtURES of ENGINE Single cylinder, 4-stroke, liquid-cooled with countershaft type and electric starting Bore x stroke RR 350 88x57,4 Bore x stroke RR 400 88x63,4 Bore x stroke RR 450 95x60,8 Bore x stroke RR 498 100x60,8 Displacement [cm³] RR 350 349,1 Displacement [cm³] RR 400 Displacement [cm³] RR 450...
- Page 7 www.betamotor.com SPECIAL EQUIPMENt Symbology Engine support code 3625132 000; Two-leg extractor code 3625081 000; Internal bearing puller code 006140160 000; Extractor for timing gear code 006140150 000; Flywheel Extractor code 3625173 000; Value Piston ring compression band code 006140170 000; Tightening Torque Chain-tensioner release tool code 006140050 000; Valves assembly-disassembly jaw code 0100043 000; Tool for valves assembly-disassembly code 006140030 000; 10. Special ring pliers code 3625097 000; 11. Crankshaft blocking device code 006140110 000; 12. Loctite 243 code 3625001 000; Loctite 243/ 14. Silicone paste for gaskets code 3625000 000; Sichel 100M 15. 36mm socket wrench code 3625000 000; 16. Spark plug wrench code 020440100 000; 17. Connecting rod disassembly tool code 006140070 000; 18. Thickness gauge code 006140210 000; 19. Valve guide gauge code 006140180 000; 20. Clutch cap tool code 006140040 000; Silicone paste 21. Carburettor adjustment spanner code 006140200 000; 22. Engine fixing code 006140140 000.
- Page 8 REMovING tHE ENGINE fRoM tHE vEHICLE Carefully wash the vehicle Before removing the engine from the vehicle, empty the following liquids: • Motor oil; • Gear/clutch unit oil; • Coolant. In order to access the oil drain plug, remove the engine guard connected to the frame by means of the three screws 1.
- Page 9 Place the vehicle onto an adequate stand. To dismount the tank, remove the seat, complete- ly loosen the two screws 5 fixing the tank to the frame and screw 6 (one per side) which fixes the side to the radiator. In the carburettor versions, disconnect petrol tube 7 from the cock, which must be set to OFF.
- Page 10 Disconnect electric connectors 9 and 10. Remove the tank along with the sides. Disconnect the water hoses from the engine and from the right radiator. Remove the left radiator with pipes.
- Page 11 Disconnect the spark plug cap. Cut all straps binding the engine’s electric system to the clutch pipe and to the frame. Disconnect the engine ventilation pipes. Disconnect the connectors indicated in the figure. Electric connectors to disconnect in the carburettor ver- sions.
- Page 12 Loosen the carburettor/throttle body straps from the air filter sleeve and from the manifold. Remove the screw of the carburettor/throttle body 12 cover and the cover itself. Disconnect rear stop connector 13.
- Page 13 Loosen the adjustment nuts and release the gas cables. Carburettor version gas cables. Injection versions gas cables. Disconnect the electric connectors indicated in the figure, relative to the carburettor/throttle body.
- Page 14 Remove the frame guards 14 (one each side) and the pinion guard 15. Remove the rear wheel nut. Extract the pin enough to allow the wheel to advance towards the front of the vehicle. Rotate the rear wheel lifting the chain in the pinion zone, so that the chain of the pinion itself is released.
- Page 15 Release and remove the brake pedal return spring Remove the kickstarter lever.. Remove the seat rail lower fixing screws 19 (one each side) and loosen the upper screws 20 (one each side).
- Page 16 Remove the carburetor to the gas cable. Remove the carburettor or throttle body, based on the specific version. Remove upper shock-absorber pin 21.
- Page 17 Remove the swingarm pin 22. Move the complete swing-arm unit towards the rear. Remove the engine pins 23. Extract the engine from the frame and apply it to the specific stand code 3625132 000 using speci- fic front fixing bracket code 006140140 000.
-
Page 18: Engine Disassembly
ENGINE DISASSEMBLY tHERMAL UNIt The thermal unit is made up of the head, cylinder and piston. Before removing the cylinder head, bring the piston to the TDC and block the crankshaft: Proceed as shown hereafter. The four screws 1 of the cylinder head cover 2. Remove the 4 screws 1, the cylinder head cover 2 as well as the 4 screw gaskets 3. - Page 19 Remove the crankshaft blocking screw 6, remove the copper washer 7 and put the screw (or tool 006140110 000) back into its seat without tightening it all the way. After having engaged the 6th gear, turn the transmission shaft 8 anti-clockwise - using an open-end spanner or the likes, - until the lines 9 on the toothed profiles of the camshafts are aligned.
- Page 20 2.1.1 CYLINDER HEAD: DISASSEM- BLING MECHANICAL TEN- SIONER A chain which is not well-tensioned can cause: • excessive vibrations for the chain which could make it jump teeth on the camshafts thus dama- ging the engine; • incorrect and premature wear of the support bea- rings of the camshafts.
- Page 21 2.1.2 CYLINDER HEAD: DISAS- SEMBLING CAMSHAFT SUPPORT, CHAIN GUIDE AND SPARK PLUG SEAT O-RING To remove the camshafts, disassemble the camshaft support 2 and the chain guide 3. Then loosen the seven screws 1 of the camshaft support, starting with the outer ones (indicated in blue in the figure) and then the inner ones.
-
Page 22: Cylinder Head: Removing Camshafts
2.1.3 CYLINDER HEAD: REMOVING CAMSHAFTS Lift the intake camshaft 1, pull out the bearing 2 and remove the chain 3 from the gear on the shaft. Attention: the hydraulic tensioner must already have been removed in order to remove the camshaf- Removal of intake camshaft 1, bearing 2. In order to remove the exhaust camshaft 4, repeat the operations described for removal of the intake camshaft. - Page 23 2.1.4 CYLINDER HEAD: COUPLING FROM CYLIN- Five screws fasten the head to the cylinder. Remove the cylinder head screw 1 on the out- side of the chain-side cylinder head. Chain-side head fixing screw. Remove the four cylinder head fixing screws 2, in a criss-cross pattern.
- Page 24 Remove the head gasket 4 and the two centring bushes 5. Cylinder head elements: 1) M6x80 screw; 2) M10x1.25 cylinder head screws; 3) Complete cylinder head; 4) Cylinder-head gasket; 5) Centring bushes.
- Page 25 2.1.5 DISASSEMBLING CYLIN- DER AND PISTON Lift up the cylinder 1 a few centimetres, remo- ve the two centring bushes 2 (both located on the chain side) to prevent them from falling inside the crankcases and continue on remo- ving the cylinder. Remove the cylinder gasket Cylinder removal.
- Page 26 In figure you can see the piston 5 (bottom view), the circlip 4 and the pin bolt 6. Bottom view of piston 5, elastic ring 4 and pin bolt 6. DISASSEMBLY of IGNItIoN UNIt, tIMING CHAIN AND GUIDES The ignition unit is made up of the flywheel (or ro- tor), the pick-up and the stator which is one with the flywheel cover.
- Page 27 Be careful of the two centring pins 5 on the crankcase half. Two centring pins 5 dedicated to the flywheel cover (carburettor version). Two centring pins 5 dedicated to the flywheel cover (injection version). Remove the tightening nut 6 which fastens the flywheel 7 to the crankshaft.
- Page 28 To remove the flywheel, screw the relevant extrac- tor A (code 3625173) onto the threaded segment on the flywheel and, using a box spanner, tighten the screw on the extractor. Starter flywheel removal (carburettor version) with special gear puller A. Starter flywheel removal (injection version) with spe- cial gear puller A.
- Page 29 2.2.2 TIMING CHAIN AND GUI- Remove the fixing screws 1 of the mobile 2 and fixed pad 3. Extract pad 2, then pad 3, by pulling them upwards. Fixing screws 1 of mobile 2 and fixed pad 3. Extract the two pads, pulling them towards the top part of the engine.
- Page 30 Remove the screw 4 and extract the oil jet 5. Remove the two screws 6 and then the chain guard Pay close attention to the respective bushes while extracting the mobile and fixed pads and the timing chain. Chain guard and oil jet. Pay close attention to the respective bushes while extracting the mobile and fixed guides and the ti- ming chain.
- Page 31 2.2.3 PICK-UP Once the timing chain guard has been remo- ved, the pick-up 1 can be disassembled, by re- moving the two fixing screws 2. Two screws 2 for fixing pick-up 1. PINIoN AND SPACER In order to remove the pinion 1, loosen the screw completely 2 and take off the washer 3.
-
Page 32: Clutch Unit And Coolant Pump Cover
CLUtCH UNIt AND Coo- LANt PUMP CovER In order to access the clutch unit, the outer clutch cover 1 must be removed by loosening the six screws 2. Outer clutch cover 1 and respective screws 2. On the other hand, when doing a complete overhaul of the clutch unit, of the other elements housed in the outer right side of the crankcase half or of the engine, the inner clutch cover 3 must be removed... - Page 33 Pay attention to the two reference pins A pla- ced between the right crankcase half and the inner clutch cover while disassembling. Two centring pins A for cover coupling Inner clutch. Remove the complete hydraulic actuator 7 -if the tube was disconnect from the actuator- outer left side crankcase half by loosening the three screws 8 which fasten it to the crankcase...
- Page 34 Remove the 4 screws 10 which fasten the clutch cap 11 to the inner hub. Remove the clutch cap together with the four wa- shers and relative springs. Clutch cap 11 and four screws 10. Extract the whole pressure plate unit 12 and the clutch disc pack 13.
- Page 35 To unscrew the nut 15, the inner hub must be blocked with a relevant tool A (code 006140040000). Then remove the nut and relative safety wa- sher. ATTENTION: don’t use pneumatic wrench Extract the inner hub 16, the washer 17, the basket 18, the roller cage 19 and the centre Removal of inner hub nut with relevant tool G.
- Page 36 ENGINE LUBRICAtIoN CIR- CUIt The high-pressure pump (or delivery) 1 - with less displacement - sends the oil purified by the paper filter 2, to the crank mechanism 3, to the piston oil jets 4, to the tensioner 5 and to the cylinder head jets and camshafts* 6.
- Page 37 2.5.1 OIL PUMPS CONTROL GE- The two oil pumps are controlled by a gear unit driven by the clutch gear. In detail, gear 1 meshes with the clutch case, and 2 is the oil pump control gear. To dismount gear 1, remove circlip 3 and thrust washers 4 (one below the gear).
-
Page 38: Low-Pressure Oil Pump And By-Pass Valve
2.5.3 LOW-PRESSURE OIL PUMP AND BY-PASS VALVE The low-pressure pump and the one-way valve are located in the left-hand side crankcase (on the out- side) inside the ignition unit compartment. They are enclosed under the cover 1, which removed by ex- tracting the three screws 2. - Page 39 2.5.4 OIL PRESSURE CONTROL VALVE The pressure control valve is located in the bot- tom of the right-hand side crankcase near the motor oil drain plug. The valve consists of the ball 1 and the spring 2 kept in place by the screw 3 and washer 4. To dismount, simply remove the protection rivet with a 6mm drill tip.
- Page 40 CoUNtERSHAft The countershaft has the task of balancing a part of the inertial forces produced by the crank mechanism. The countershaft is mainly made up of the shaft 1 and counterweight 2. The elastic washer 7 and nut 8 have the task of assuring coupling of the complete shaft to the base.
- Page 41 PRIMARY GEAR The primary gear 1, located in the right crankca- se, is fastened to the crankshaft. In order to disassemble it, remove the nut 2 which must first be previously heated using a blow-dryer or similar instrument. ATTENTION! The nut 1 must be turned clockwise to be un- Primary gear 1 and relative nut 2.
-
Page 42: Electric Ignition
ELECtRIC IGNItIoN Electric ignition can be carried out by means of the start motor 1 which meshes on the gearwheel 4 with the function of torque limiter. The gearwheel 4 (torque limiter) transmits motion to the idler wheel 7, which will then mesh with the starter gear 9. -
Page 43: Electric Kick-Start Unit
2.8.1 ELECTRIC KICK-START UNIT Remove the two screws 4 which fasten the start motor to the crankcase and pull out the start motor. Screws 4 fixing start motor to crankcase. To extract kick-start gear 5, disassemble the pri- mary gear (see par. 2.7), the safety stops 6 and The kickstart gear is pulled out by hand. -
Page 44: Kickstarter
KICKStARtER The kickstarter is made up of the pedal which, atta- ched to the kickstarter shaft 1, moves the kickstar- ter gear 2. This gear moves the idler wheel 3 which then meshes with the clutch gear. The device moves back thanks to the spring 4. Kickstarter mechanism. - Page 45 Using a pair of pliers, pull the end A of the spring 4 from the hole on the crankcase and bring it to a rest position having it turn anti- clockwise. Releasing spring from crankcase. Turn the shaft anti-clockwise and pull it off to- gether with the sleeve 9, the spring 10 and the thrust washer 11.
-
Page 46: External Gearshift Unit
2.10 EXtERNAL GEARSHIft UNIt The external gearshift is made up of the drive shaft 1 upon which the movable and fixed pawls are ap- plied. The fixed pawl constitutes the drive of the movable pawl which then has the task of engaging the stop cam 2. -
Page 47: Crankshaft, Gearbox Unit And Internal Gearshift
2.11 CRANKSHAft, GEARBoX UNIt AND INtERNAL GE- ARSHIft To access the crankshaft, gearbox unit and inter- nal gearshift, the left and right crankcases must be detached. Here are the needed instructions. 2.11.1 NUT ON LEFT SIDE OF CRANKSHAFT In order to loosen the nut 1 on the left-hand side of the crankshaft, heat it with a blow-dryer or similar instrument. -
Page 48: Opening Crankcase
2.11.2 OPENING CRANKCASE Remove the 15 screws 1 which close the crankcase. Remove the 13 locking screws 1 on the left side casing and the 4 screws 2 on the right side casing. Screws 1 for blocking left side casing. Screws 2 for blocking right side casing. - Page 49 Loosen the two screws A which fasten the engi- ne to the support stand. Two screws A blocking engine to engine support stand. Hit the left crankcase half 2 lightly with a rub- ber or plastic hammer until it detaches from the right crankcase half 3.
-
Page 50: Crankshaft
2.11.3 CRANKSHAFT Remove the crankshaft fixing screw. The crankshaft 1 can be pulled out by hand. Should there be resistance, tap the right end of the crankshaft lightly with a plastic or rubber hammer. Extraction of crankshaft. 2.11.4 INTERNAL GEARSHIFT UNIT AND COMPLETE GEARBOX The internal gearshift unit is made up of the desmodromic device 1 upon which the fork 2 and... - Page 51 Extract the forks together with the drive bushes Extraction of forks from gearbox unit. ATTENTION: Make sure the circlip on the secondary shaft has been removed (par. 1.9). Circlip removal. Proceed to extract the complete gearbox unit including the primary 6 and secondary unit 7. Extraction of complete gearbox unit: 6 primary unit, 7 Secondary unit.
-
Page 52: Right Crankcase Half
2.12 DISASSEMBLY PARtS fRoM CRANKCASES Once the crankcases have been detached, it is ne- cessary to remove the various components atta- ched to it. The correct positioning of some bearings applied to the crankcase halves is ensured by locking devices such as plates or simple screws. -
Page 53: Left Crankcase Half
2.12.1.2 EXTRACTION COUNTER- SHAFT SUPPORT BEARING To extract the countershaft bearing, use the ex- tractor A (code 3625081) together with extrac- tor B (code 006140160000). It is recommen- ded to apply the two aluminium plates to be placed between the legs of the extractor and the crankcase half. -
Page 54: Inner Oil Filter
2.12.2.1 INNER OIL FILTER The inner oil filter 1 must be pulled out from the inside of the left crankcase. Its removal can be ai- ded by using a soft pin to push it from the outside towards the inside, tapping with a small hammer. Disassembly of inner filter. -
Page 55: Engine Assembly And Controls
ENGINE ASSEMBLY AND CoNtRoLS Before reassembling the eng ine, a series of impor tant controls must be carried out to ensure correct functioning of the eng i- ne. The bearings must be replaced if they play or get jammed during rotation. It is however recommended to refer to the pe- riodical maintenance table. -
Page 56: Crankcase Halves
CRANKCASE HALvES The crankcase halves have some elements that need to have their integrity and use status checked. Hereafter the controls and assembly operations of the individual elements coupled to the crankcase EXPLODED VIEW OF ENGINE CRANKCASE HALF halves will be described. Clean the threading and oil passages thoroughly using a degreaser and com- 1) Complete engine block;... -
Page 57: External Right Side
3.1.1 EXTERNAL RIGHT SIDE Pull out the crankshaft oil seal 1 and replace it. Check that the oil seal fixing plate 2 is not bent. If so, have it replaced. Control the integrity of the oil incline 3. Should it be worn, have it replaced. Check the state of use of the kickstart ramp 4. - Page 58 The crankcase half will definitely need to be repla- ced when: • the oil pump crankcase A shows deep scratches or meshing signs; • the two pins B for the idler wheel and torque li- miter show traces of abnormal wear or meshing. Keeping the tightener on the lever 25 facing to- wards the crankcase half, apply the spacer 27 onto it, by inserting the smaller diameter segment in the...
-
Page 59: Support Bearing
INSERTION OF OIL SEAL 3.1.1.1 COUNTERSHAFT SUPPORT BEARING In order to insert the oil seal and countershaft support bearing proceed as follows. Grease the oil seal and bearing housing. Insert the new oil seal 1 greasing the inside of it. Application of oil seal 1. -
Page 60: Internal Right Side
3.1.2 INTERNAL RIGHT SIDE Check the flatness of the crankshaft bearing retain- ing plates 1, of the main shaft bearing retaining plate 2, of the secondary shaft bearing retaining plate 3, and of the desmodromic device bearing retaining plate 4. The table below carries the indications for application of the fixing screws of these plates and for fixing the desmodromic device support bearing. -
Page 61: External Left Side
Make sure the piston oil jets 7 are positioned correctly and free of obstructions. Make sure that O-ring 9 is correctly positioned by checking its state. Should the O-rings have cracks or deformations, they must be replaced. 3.1.3 EXTERNAL LEFT SIDE Make sure the calibrated screw 1 and the jet Piston oil jet O-ring and detail of passage hole. -
Page 62: Sinistro Lato Interno
3.1.4 SINISTRO LATO INTERNO Pulire accuratamente il filtro interno e verificare l’in- tegrità sia della rete metallica che del dispositivo di aggancio; qualora il filtro risultasse deteriorato in qual- cuna di queste parti sostituirlo. Locking devices Verificare lo stato delle due piastrine 1 di ritegno cu- scinetto di banco e qualora dovessero risultare de- formate sostituirle. -
Page 63: Checking Crankshaft And Connecting Rod
CHECKING CRANKSHAft AND CoNNECtING RoD After having checked the state of wear of the coupling surfaces, check the offset of the half shaft axes by placing the crankshaft in betwe- en two tailstocks or similar instrument. Control the maximum measurement variation during a complete turn, using comparators positioned on the coupling surfaces with the crankshaft bearings. - Page 64 Make sure that the chain control gear is free of chipping or signs of abnormal wear. Replace the crankshaft should it be deteriorated. The distance between the two opposite sides of the half shafts must be: 64mm±0,05 (350cc, 390cc) 65mm±0,05 (430cc, 480cc) 64mm±0,05 (350cc, 390cc) 65mm±0,05 (430cc, 480cc) Crankshaft oil passages.
-
Page 65: Assembling Complete Crankshaft
Use a bore meter to check the inside diame- ter of the connecting rod foot which must not exceed the following service limit: scope of service 18,04mm (350cc, 390cc) 19,04mm (430cc, 480cc) Remember that the measurement must be made placing the axis of the feeler in parallel with the axis of the connecting rod. -
Page 66: Gearbox Unit: Controls And Reassembly
GEARBoX UNIt: CoNtRoLS AND REASSEMBLY The gearbox unit is made up of the gearshift and of the gearbox itself. The gearshift is then divided into external and internal gearshift. The following are the verifications and procedures for checking and reassembling these units to the engine. -
Page 67: Primary Unit Assembly
3.4.2 PRIMARY UNIT ASSEMBLY Before proceeding with reassembly, clean all the elements thoroughly and oil them with gear oil. Always replace the circlips. Clamp the mainshaft 1 (using protective jaws), so that the grooved end faces downwards. Insert onto the lower cylinder part of the shaft: the roller cage 2, the 5th gear (3) (turning the front claw clutches upwards), the 26x32x1.5 thrust washer 4 and the circlip 5. -
Page 68: Secondary Unit Assembly
3.4.3 SECONDARY UNIT ASSEMBLY Before proceeding with reassembly, clean all the elements thoroughly and oil them with gear oil. Always replace the circlips. Clamp the secondary shaft 20 (using protective jaws), so that the grooved end faces downwards. EXPLODED VIEW OF SECONDARY UNIT Insert onto the lower cylinder part: the roller cage 15, the 2nd gear (19) (so that the front claw clutches 4) Thrust washer;... - Page 69 3.4.4 CHECKING FORKS, FORK PINS AND DESMO- DROMIC DEVICE The internal gearshift is made up of: • two forks 13 which drive two gears on the se- condary unit; • one fork 14 which drives one gear on the pri- mary unit;...
- Page 70 Make sure the distance A between the outer faces of the fork is not less than that indicated below: Minimum acceptable distance: 4.25mm Check to make sure that the inside diameter D of the fork pin seats is below the limit: Fork inside diameter limit: 13,83mm Make sure that the fork pins upon which they slide have an outside diameter above the limit (to be...
-
Page 71: Gearshift
ASSEMBLY INtER- NAL GEARBoX AND GE- ARSHIft Insert the entire primary 1 and secondary unit 2 into the respective seats on the left crankcase half simultaneously. Remember to oil the gears abundantly with gear oil and to grease the shaf- ts supporting them in the areas where they are coupled with the bearing with graphitic grease. - Page 72 Introduce the forks together with the drive bushes on the gear tracks. To be precise; the smaller fork 5 drives the sliding gear on the primary unit, while the other two (6) drive the sliding gears on the se- condary unit. Note: the two forks 6 are interchangeable and their positioning is univocal, since the drive pin must face the desmodromic device. If none of the components...
- Page 73 Position the two forks 6 of the secondary unit in the external guides of the desmodromic device 8 and, just like the primary unit fork, insert the fork pin first in the pins and then in its proper seat. Remember to oil the shafts, forks and the de- smodromic device abundantly with gear oil.
-
Page 74: Closing Engine Block
CLoSING ENGINE BLoCK Press the right crankcase half towards the left, being careful that the shafts and pins on the crankcase fit into the respective housings and that the crankcase half is not upside-down. To facilitate progressive ne- aring and aligning of the two crankcase halves, con- nect two screws on opposite sides and tighten them bit by bit. - Page 75 BLoCKING CRANKSHAft toP DEAD CENtRE AND tIGHtENING oN tHE LEft SIDE of tHE CRANKSHAft To block the crankshaft in the Top Dead Centre, insert the special conical-end screw To block the crankshaft, apply only the screw 38 to 38, without applying washer 37, or the special the crankcase.
-
Page 76: External Gearshift
EXtERNAL GEARSHIft Before reassembling the external gearshift, check its state of use. While for the stop cam it is enou- gh to make sure it’s free from abnormal wear or meshing, the gearshift drive shaft needs more in- depth inspections. 3.8.1 CHECKING COMPLETE... - Page 77 EXPLODED VIEW OF GEARSHIFT For reassembly, couple the movable pawl 9 to 5) Thrust washer 14x30x1; the drive shaft 10 and, while compressing it, 6) Gearshift return spring; insert the spring 8 between the movable pawl 7) Spring guide; and the drive shaft. Then apply the spring gui- 8) Pawl return spring;...
-
Page 78: Assembly Of External Gearshift
3.8.2 ASSEMBLY OF EXTERNAL GE- ARSHIFT Keeping the stop lever moved 1 in such a way that the spring is compressed, position the stop cam 2 on the protruding end of the desmodromic ge- arshift (external right crankcase). The stop cam has only one correct position which is determined by the particular shape of the end of the desmodromic device and of the bottom part of the stop cam. - Page 79 EXPLODED VIEW OF COMPLETE KICKSTART SHAFT Widen the circlip 10, thus slipping off the wa- sher 11, and the kickstart gear 2 as well the 2) Kickstart gear; roller bearing 12 and the washer 11. This frees 3) Kickstart shaft; 8) Kickstart return spring;...
- Page 80 3.9.2 ASSEMBLY OF KICKSTART DE- VICE Insert the complete kickstart shaft in its housing keeping the thin-striped facing outwards and ma- king sure that the ramp A on the kickstart sleeve is positioned below the ramp B bolted onto the right crankcase (external side).
- Page 81 3.10 ELECtRICAL StARtER UNIt AND MAIN GEAR Carry out the following controls before assem- bly. 3.10.1 CHECKING ELECTRICAL STARTER DEVICE ELE- MENTS Idler wheel 1. Make sure that the teeth of all the gearwheels of the device are intact, free from chipping or signs or abnormal wear.
- Page 82 3.10.2 COUPLING IGNITION PRIMARY GEARS TO THE MO- Thoroughly degrease the conical part A on the right side of the crankshaft and B of the primary gear. Conical segment A on right side of crankshaft. Conical segment B main gear. Lubricate the segment C of the starter gear 1 with motor oil and couple it to the crankshaft.
- Page 83 Grease the two pins D and E with graphitic grease. Couple the idler wheel 7 to the pin D and ap- 10Nm ply the circlip 8. Couple the torque limiter 4 to the pin E tur- ning the gearwheel with the smaller diameter towards the crankcase half.
-
Page 84: Oil Pumps: Control And Reassembly
3.11 oIL PUMPS: CoNtRoL AND REASSEMBLY As shown in paragraph 1.5, the motor is equipped with two oil pumps: one is the low pressure (suc- tion) pump (higher displacement) located in the outside of the left crankcase half and the other high-pressure pump (lower displacement) located on the outside of the right crankcase half. - Page 85 Should the sliding surfaces with the rotors present deep or evident traces of corrosion, replace the de- teriorated part (in this case, the crankcase). To measure the radial play between the internal and external rotor and between the external rotor and the crankcase, proceed as follows: Insert the two rotors in their specific seat with the reference dot facing the inside of the engine.
- Page 86 3.11.1 ASSEMBLY OF LOW PRESSURE PUMP Insert the internal rotor 1 on the shaft 2 so that the dot on the face of the rotor faces inwards. Then in- sert the roller 3 on the shaft. Shaft, low pressure pump, internal rotor and roller unit.
- Page 87 3.11.2 ASSEMBLY HIGH- PRESSURE PUMP CONTROL GEAR Lubricate the area where the pump is housed (outside right crankcase half), and insert the roller in its hole 1. Then insert the internal rotor 2 and the external rotor 3, making sure to position them with the reference dot facing the inside of the engine.
- Page 88 3.11.3 CHECKING AND ASSEMBLY OF PRESSURE CONTROL VALVE The pressure control valve is made up of a ball 43, spring 42, calibrated washer 41 and screw 40. Check the length of the free spring on this compo- nent: Service limit: 29.5mm Tighten the screw at a torque of 20Nm.
-
Page 89: 3.11.4 Checking And Assembly Of Oil Pumps
3.11.4 CHECKING AND ASSEMBLY OF OIL PUMPS CONTROL GEARS The oil pumps are controlled by a gear cascade driven by the clutch gear. The gearwheels, being made of plastic, must not have chips, grains or signs of abnormal wear. If pump control idler wheel support pin 1 should be dismounted, reconnect it to the crankcase. - Page 90 3.11.5 PAPER OIL FILTER INSERTION Lubricate the rubber gasket on the filter. Insert the filter 1 into its housing and push it towards the in- side of the engine as far as it can go. Application of paper oil filter. Insert the O-ring 2 onto the oil filter cover 3 and apply the unit to the crankcase.
- Page 91 3.11.6 CHECKING AND COUPLING COUNTERSHAFT Check the state of use of the areas where the shaft rests on the bearing. Should they show signs of abnormal wear, have the shaft repla- ced. Make sure that the toothed segment of the EXPLODED VIEW OF COUNTERSHAFT shaft does not have traces of abnormal wear.
- Page 92 While keeping the countershaft in place, insert the counterweight on the left side depending on the position set by the grooved shaft. Coupling counterweight to countershaft. Detail of grooved profiles for coupling. Then couple the elastic washer and the nut 1 after having applied medium strength threadlocker on their threading.
-
Page 93: Clutch Unit
3.12 CLUtCH UNIt Before reassembling the clutch unit, carry out some controls on the various components de- scribed below. 3.12.1 CHECKING CLUTCH BASKET, ROLLER BEARING AND IN- TERNAL CENTRE BEARING Before reassembling the clutch basket, make sure that the sides of the teeth A, dedicated to main transmission and B dedicated to meshing with the kickstart idler gear and oil pumps, have no superficial nicks or abnormal wear. - Page 94 Check the state of use of the silent-blocks as fol- lows. Clamp the gear B intended to mesh with kickstart idler gear, using protective elements. Ro- tate the clutch basket. If there is play between the basket and the gear unit, replace the clutch basket. Check the state of use of the centre bearing 1 which must have no traces of meshing or abnormal wear.
- Page 95 Also check the distortion of the steel discs. This operation is done by placing the steel discs on a perfectly flat surface and using a thickness gauge to check that the clearance between the disc and the surface is not greater than: allowable distortion steel discs: 0.10mm Measuring steel disc distortion.
- Page 96 3.12.5 CHECKING THRUST BEARING DEVICE Check the state of use of the thrust bearing and the surfaces upon which it rests. In order to check the thrusting bearing, just see if it slides. When the device is assembled, simulate rotation of the front centre bearing A respect to the rear one B.
- Page 97 To unscrew the nut 8, the inner hub must be blo- cked with a relevant tool A (code 0061400400); the tightening torque is fixed at 120Nm after having applied medium strength threadlocker. Having tightened the nut, bend to two blocking flaps on the safety plate. 120Nm Blocking inner hub with specific tool Code 0061400400.
- Page 98 Insert the clutch rod in the seat B from the left side of the engine, turning the smaller section towards the inside of the engine. Insertion of clutch rod in housing B. Apply the gasket 5, the complete hydraulic actuator 10Nm 6 the M6x30 screw 7 and the two M6x20 screws 8 to the left crankcase half.
- Page 99 3.13 CooLANt PUMP The water pump must guarantee, depending on EXPLODED VIEW OF WATER PUMP the set rotation speed, the correct flow rate of the 1) Drive shaft coolant in order to extract the needed amount of 2) O-ring 5.5x1; heat from the thermal unit.
- Page 100 3.13.2 ASSEMBLY OF PUMP UNIT Heat the concerned area to couple the bearings 3 to the inner clutch cover. They must be pushed until they are flush with the shoulders on the pump body. Grease the oil seal housing. Position the oil seal 4 so that Bordo più...
- Page 101 3.14 ASSEMBLY of CoMPLEtE CLUtCH CovER Apply a new gasket 1 placed between the right crankcase half and the inner clutch cover using the two reference pins 2 to keep it in place. Positioning of gasket 1 and centring pins 2. Couple the inner clutch cover to the right crankca- se half and turn the water pump impeller until the pump shaft inserts perfectly in the housing on the...
- Page 102 Couple the water pump cover to the inner clutch 10Nm cover applying the four M6x40 screws, making sure to apply the copper washer 3 to the lower screw of the pump cover. Tighten all thirteen screws at a torque of 10Nm fol- lowing a criss-cross pattern.
-
Page 103: Ignition System
3.15 CHECKING CoU- PLING of tIMING CHAIN, fIXED AND MoBILE GUI- The chain has the task of transmitting motion from the crankshaft to the camshafts present on the cylin- der head. The links must be checked to make sure there is no excessive radial or axial play between them. -
Page 104: Checking Ignition System
3.16.1 CHECKING IGNITION SYSTEM Degrease the various elements and carry on with the controls. The main control is the one concerning the electrical ve- rification which can be done by using a standard tester. The resistance values detected at the terminal heads must respect those carried in the table (at 20°C). - Page 105 Degrease the conical segment of the crankshaft, ap- ply the Woodruff key 21 in the appropriate groove on the crankshaft, couple the flywheel 18, the elastic washer 19 and the nut 20, after having applied the threading with Loctite 243 / Sichel 100M medium strength threadlocker.
- Page 106 Reposition the plate 5 which must be inserted in the re- levant guides and pressed towards the outside of the cover. When coupling it to the left crankcase half, apply a drop of gasket paste (code 3625000000) in the two zones B, in order to ensure perfect sealing between the cover and the crankcase half in the concerned zone.
-
Page 107: Thermal Unit
Notice that a 12x6.3x1 copper washer 4 must be ap- plied to the screw. 10Nm Tighten the screws at a torque of 10Nm. Flywheel cover coupled to crankcase. 3.17 tHERMAL UNIt Before assembling the thermal unit, thorough con- trols must be carried out on the cylinder, piston, pin bolt, piston rings, cylinder head and the timing unit described hereafter. - Page 108 Check the size of the pin bolt seat located on the piston and the size of the pin bolt. This last control must be made at the end of the pin bolt itself in the area where it is engaged with the piston. Size [mm] Displacement [cm³]...
-
Page 109: Checking The Cylinder
3.17.2 CHECKING THE CYLINDER Make sure the bore is within the service limits of the relevant class carried in the table below. Carry out measurement at a distance A from the top face of the cylinder (surface between cylinder and cylinder head). -
Page 110: Cylinder Head: Disassembly And Checking Auxiliary Devices
3.17.3 CYLINDER HEAD: DISASSEM- BLY AND CHECKING AUXILIA- RY DEVICES Before disassembling the cylinder head, clean the entire unit thoroughly. The various elements must be cleaned and named bit by bit as they are disas- sembled. Proceed as follows for disassembly and inspection of the cylinder head. -
Page 111: Finger Follower/Shafts Unit
3.17.3.2 FINGER FOLLOWER/SHAFTS UNIT Disassemble the two caps 1 which keep the finger follower shafts in place. Make sure the face of the cap facing the shaft does not have deep traces or signs of wear. If so, replace the caps. Check the state of use of the two O-rings betwe- en the caps and the cylinder head. - Page 112 3.17.3.3 SHIMS (CALIBRATED DISCS) FOR VALVE PLAY ADJUSTMENT Using a magnet, pull out the calibrated discs 1 from the seats in the cups. Once the calibrated discs are extracted, measure them with a thickness gauge. Removal of calibrated discs from seats. The calibrated discs range from 2.00 to 3.30 accor- ding to the intervals carried in the table below.
-
Page 113: Cylinder Head: Disassembling And Checking Valve Units
3.17.4 CYLINDER HEAD: DISAS- SEMBLING AND CHECKING VALVE UNITS Clamp the spring removal jaw A (code 0100043 000) and apply the spring removal tool onto it B (code 006140030 000). Then position the cylin- der head and disassemble the springs. Placing cylinder head on device for disas- sembling valve springs. -
Page 114: Springs
3.17.4.1 SPRINGS Each valve is retained by a spring. The length of the- se springs must be checked while they are loose: service limit = 42,5mm Should the springs be shorter, have them replaced. Measuring length of free spring. 3.17.4.2 VALVE GUIDES, VALVES AND SEATS Make sure that the valve guides are free from scratches or any type of nicks. - Page 115 Taking the valve out, the paint will be missing in the contact zone. Its width must not be greater than the following service limit: Width service limit of valve seat contact zone: 1,9 mm. The contact zone can principally take on three diffe- rent appearances, as shown in the figure: A - correct;...
- Page 116 3.17.4.3 VALVE STEM SEAL AND LOWER STOP WASHER Should there be excessive oil consumption or a white-like exhaust smoke which cannot be blamed on the oil-scraper rings on the piston, replace the valve stem seals 1, intended to prevent excess oil leakage.
-
Page 117: Checking Camshafts
3.17.6 CHECKING CAMSHAFTS Verify the zones A and B on the camshafts making sure they have no traces of meshing or abnormal wear. Make sure the sides of the teeth C are not chipped or have no trace of abnormal wear. The zone A comes into contact with the cylin- der head becoming part of a hydrodynamic support bearing. - Page 118 Make sure that the cylinder segment D of the de- compressor is not worn or chipped. Should it be deteriorated, replace the decompres- sor shaft. In order to extract it, remove the Benzing ring 4 and pull the shaft out. Operate inversely to reassemble it.
-
Page 119: Cylinder Head: Insertion Of Inner Cup And Valve Stem Seal
3.17.8 CYLINDER HEAD: INSER- TION OF INNER CUP AND VALVE STEM SEAL If the lower cups and valve stem seals were disassembled*, reassemble them as follows. First insert the lower cup 1 facing the flat part downwards. Lubricate the upper part of the valve guide lightly and insert the valve stem seal 2. -
Page 120: Cylinder Head: Assembly Of Valve Unit
3.17.9 CYLINDER HEAD: ASSEMBLY OF VALVE UNIT Clamp the spring removal jaw A (code 0100043 000) and apply the spring removal tool onto it B (code 006140030 000). Insert the valve stem in the valve guide* from the combustion chamber side. Place the valve in the specific lower housing of the jaw and introduce: •... - Page 121 3.17.10 CYLINDER HEAD: REPO- SITIONING CALIBRATED DISCS, ASSEMBLY OF FIN- GER FOLLOWER SHAFTS AND FINGER FOLLOWERS COUPLING SPARK PLUG Clamp the cylinder head using protective jaws, gripping it at the head connection A. Put the calibrated discs 1 back in place in their original positions (if not deteriorated see par.1.17.3.3).
-
Page 122: Cylinder Head: Insertion Of Oil Jets Centring Pins And Spark Plug O-Ring
3.17.11 CYLINDER HEAD: INSERTION OF OIL JETS, CENTRING PINS AND SPARK PLUG O-RING Insert the oil jets 1 with the O-rings 2 in their speci- fic seats on the cylinder head. Oil jet with O-ring. Note the flat part A for reference on the side of the jet. -
Page 123: Piston: Application Of Piston Rings And Oil-Scraper Rings
3.17.12 PISTON: APPLICATION OF PISTON RINGS AND OIL- SCRAPER RINGS Oil the ring seats abundantly and apply the central oil-scraper ring in the lower seat of the piston 1 paying close attention that the two ends face one another but do NOT overlap. The two ends must be aligned in axis with the pin bolt. -
Page 124: Application Of Piston To Cylinder
Abundantly lubricate the seats for the pin bolt with motor oil and the circlip 5 in the left pin bolt seat, being careful to position it so that the lug on the circlip inserts itself in the specific seat on the pi- ston. - Page 125 Press the piston downwards having the higher segment of the skirt protrude a bit from the band. Rest the unit on the cylinder, making sure that the contact zones of the band rest correctly on the cylinder surface. For this pur- pose, make sure that the upper edge C of the band is perfectly aligned with the contact sur- face of the cylinder.
- Page 126 3.17.14 APPLICATION PISTON- CYLINDER COUPLING CRANKCASE Apply a new piston-cylinder gasket 1 to the crankcase and couple the two centring bushes to the left crankca- se 2. Lubricate the foot of the connecting rod abundantly with motor oil. Application of cylinder/crankcase gasket and of cen- tring bushes.
- Page 127 Once the pin bolt reaches its housing in the foot of the connecting rod, push the pin bolt inside until it is inserted all the way. Apply the lug to the circlip 3 in the pin bolt seat. Insert the cylindrical part of the special tool A into the pin bolt and, having one of the two flat surfaces of the tool coincide with the part of the circlip to be inserted, turn and push the...
-
Page 128: Coupling Head To Cylinder
Apply to the cylinder the two guide bushes 4 and the gasket 5 coupling with the cylinder head. Application of guide bushes 4 and gasket 5 to cylinder. 3.17.15 COUPLING HEAD TO CYLIN- Introduce the timing chain in the compartment on the cylinder head. - Page 129 3.17.16 COUPLING CAMSHAFTS TO CYLINDER HEAD AND PHASING Couple the bearings to the camshafts and lubri- cate them with motor oil. Widening the timing chain, insert the exhaust camshaft upon whose gearwheel the timing chain must be placed. It is advisable already in this phase to position the shaft so that the re- ference notches A are horizontal with the cams facing upwards according to the approximate...
- Page 130 Lift the chain again and insert the intake camshaft placing the chain on the gearwheel. Place the shaft so that the cams face upwards according to the ap- proximate direction D and the references E carved on the gear are horizontal. Position the bearing in the same way as for the exhaust camshaft.
- Page 131 Lubricate the entire camshaft unit with motor oil and apply the support 1, making sure it is perfectly engaged both on the shafts and on the centring pins. Note: check the presence of the oil jets (par 1.17.11). Apply the chain guide 2 and insert the three M7x38 screws 3 in the holes on the chain side and the four M7x33 screws 4 in the four remai- ning holes.
-
Page 132: Valve Play
Tighten the seven screws by hand until they are flush. Check the correct position of the camshaft bearings once more (page 116). Proceed with tightening in two moments, following the order indicated in the figure. Carry out the first tightening operation at a torque of 8Nm and the second at 10Nm. - Page 133 Check valve play Couple the hydraulic Is the valve play tensioner to the correct? engine (par 2.17.18) Is the tensioner Disassemble the coupled to the camshaft support engine? (par 1.1.1) Disassemble the tensioner (par 1.1.1) Incorrect play on intake side? First dissemble the intake Disassemble only the camshaft and then the...
-
Page 134: Checking And Coupling Of Mechanical Tensioner To Engine
3.17.18 CHECKING AND COUPLING OF MECHANICAL TENSIONER TO ENGINE The mechanical tensioner consists in: 1. a piston; 2. a spring; 3. a support; 4. a cap Make sure the piston shows no signs of abnormal meshing. 1 mm Insert the piston into the support and push it until it sticks out of the edge of the support by approxi- mately 1 millimetre. - Page 135 I n s e r t t h e s p r i n g i n t h e s u p p o r t a n d a p - p l y t h e c a p t o b e t i g h t e n e d a t a t o r q u e o f 8 N m .
-
Page 136: Coupling Cylinder Head Cover Gaskets And Cylinder Head Cover
3.17.19 COUPLING CYLINDER HEAD COVER GASKETS AND CYLIN- DER HEAD COVER Apply the spark plug gasket 1 to the camshaft sup- port inserting the two pegs A in the specific seats and positioning it so that it recopies the shape on the support. -
Page 137: Pinion Coupling
Place the complete cover on the cylinder head making sure that the gasket covers the surface correctly. Apply the four rubber rings 3 to the cover and insert the four screws 4 which fasten the cover to the cylinder head. Tighten the screws in a criss-cross pattern at a torque of 8Nm. -
Page 138: Coupling Oil Caps
3.20 CoUPLING oIL CAPS Couple the engine oil drain plug 24 in the lower part of the right crankcase, complete with O-ring 25, with wire metal filter 27 and O-ring 26. Tighten at a 20Nm torque. Apply the magnetic screw 28 with the O-ring 29 to the gear oil drain hole: tighten at a torque of 20Nm. - Page 139 3.21 CoUPLING GEARSHIft LEvER Couple the gearshift lever to the drive shaft by positioning it so that the part A of the lever coincides with the upper edge of the oil level inspection window. Tighten the screw 1 at a torque of 10Nm after having applied medium strength threadlocker.
-
Page 140: Reassembly Of Engine In The Vehicle
REASSEMBLY of ENGINE IN tHE vEHICLE Insert the engine in the frame. We recommend in- sertion from the frame’s left side. Insert the engine pins 1. Insertion of engine pins. Insert the upper shock absorber pin 2 and the swin- garm pin 3. - Page 141 Apply head connections. 35Nm 35Nm 35Nm 35Nm Fasten the nuts and bolts following the table 35Nm below Attachment Screw Torque [Nm] Threadlocker Bracket for head connection M8 x 20 Medium resistance to frame. Front attachment Bracket for head connection M8 x 16 Medium resistance to frame.
- Page 142 Make sure the filter box sleeve is correctly inserted inside the carburetor, fasten the two filter box side and manifold side straps. In the carburettor versions, set the gas cables on the right side of the frame and make them pass through the head connections.
- Page 143 Apply the carburettor/throttle body cover and the relative screw. Connect the stop connectors. Connect the electric connectors indicated in the figure, relative to the carburettor/throttle body.
- Page 144 Apply the unit clutch actuator to the two fixing screws 6. Fasten at 10Nm. 10Nm Apply the spark plug cap. Apply the start motor cable and fasten the nut at 10 Nm. Cover the connection using the specific protec- tive cap. Make the electric cables from the engine (stator and pick-up) pass through the head connections.
- Page 145 Connect the connectors indicated in the figure.. Carburettor version.. Injection version. Insert the connectors and cables in the recess on the frame. Apply the straps as in the figure. Electric connectors in the recess (carburettor ver- sions). Electric connectors in the recess (injection versions)..
- Page 146 Connect the ventilation pipes to the engine. Fix the cables from the engine to the gear actuator tube. 10Nm Apply the left radiator to the frame. Apply the screws and fasten at 10Nm. Apply the protective grid. 10Nm...
- Page 147 Connect the radiators to the engine. Fasten the clamp straps and introduce the co- olant liquid, letting the air bleed through the screw cap A. Apply the loading cap and fasten the bleed screw at 10Nm. Spurgo aria. Apply the silencer to the vehicle, then the ex- haust manifold;...
- Page 148 Apply the Kickstart lever. Apply the medium- resistance sealant threading on the screw and fasten at 25Nm. Apply the brake pedal return spring 7. Mount the chain on the pinion.. 10Nm 25Nm Move the wheel towards the rear, mounting the adjustment frames according to the image.
- Page 149 Apply the pinion guard 10 and the frame side guards 11 and 12. Fasten the screws at 10Nm and apply the fixing straps between the side guards and frame. 10Nm 10Nm 10Nm Apply the tank making sure the gas cable is between the tank and frame.
- Page 150 In the injection versions, apply the tank as follows. Connect the connectors indicated in the figure. Insert the tank in its seat. Connect the quick-release petrol couplings. Attention! Make sure that the petrol quick-release couplings are properly set. Apply the seat. Reapply the paramotor plate with the tree fixing screws, once the motorcycle is removed from the stand.
- Page 151 tABLE of tIGHtENING toRQUES of ENGINE CoMPoNENtS Threading diameter x Torque Fixing Quantity Threadlocker Notes length [mm] [Nm] Outside right crankcase half Loctite 243/ Oil seal fixing plate M5 x 10 Sichel 100M Loctite 243/ Oil incline M5 x 10 Sichel 100M Loctite 243/ Kickstart ramp...
- Page 152 Threading diameter Torque Fixing Quantity Threadlocker Notes x length [mm] [Nm] Engine lubrication Medium Oil jet strength Loctite 243/ Oil pump covers M5 x 10 Sichel 100M Loctite 243/ Chain oil jet M5 x 12 Sichel 100M Oil pressure control screw M12 x 10 Paper oil filter cap M6 x 16...
- Page 153 Threading Torque Fixing diameter x length Quantity Threadlocker Notes [Nm] [mm] Engine lubrication Finger follower shaft caps Lubricate threading Cylinder head and washers. Follow a criss-cross pattern Cylinder head Follow a criss-cross Camshaft support M7 x 38 pattern Follow a criss-cross Camshaft support M7 x 33 pattern...
- Page 154 ENGINE/fRAME tABLE of tIGHtENING toRQUES Threading Torque Fixing diameter x worm Quantity Threadlocker Notes [Nm] [mm] Front engine pin M10 x 1,25 Lower engine pin M10 x 1,25 Head connection bracket to Loctite243/ M8x20 front frame Sichel 100M Head connection bracket to Loctite243/ M8x16 rear frame...
- Page 155 RECoMMENDED ENGINE MAINtENANCE The required engine maintenance is strongly depending on the level of use and on the accordingly done periodic checks and service. The below mentioned maintenance intervals are for standard competition use, subject to the condition that the engine was never running under extraordinary conditions and the periodic service was done accurately.
- Page 156 RECoMMENDED LUBRICANtS AND LIQUIDS APPLICATION PRODUCT QUANTITY Gearbox and clutch 800 ml* - 750ml** Liqui Moly racing 10W40 Engine Liqui Moly racing Synth 10W50 800 ml* - 750ml** COOLANT Liqui Moly Coolant ready mix RAF 12 PLUS 1300 ml* * Following the complete engine revision. ** Following routine maintenance interventions.
- Page 157 NotE:...
Need help?
Do you have a question about the Enduro RR 350 2015 and is the answer not in the manual?
Questions and answers