Table of Contents
Advertisement
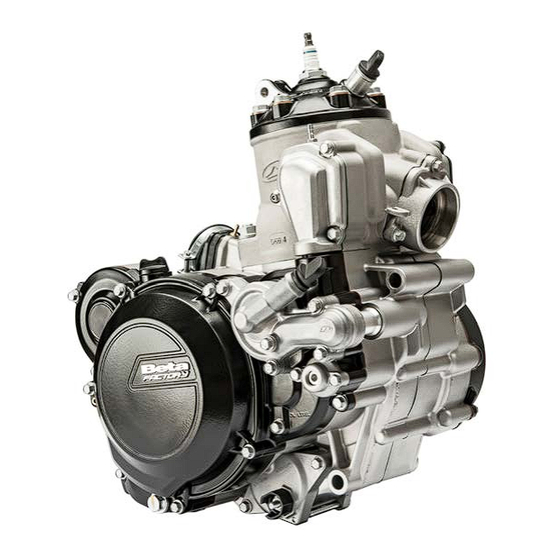
Quick Links
Advertisement
Table of Contents

Related Manuals for Beta RR300


Summarization of Contents
INTRODUCTION
SAFETY INFORMATION
General safety guidelines for engine operation and handling.
COOLANT AND HOT PARTS SAFETY
Safety precautions for coolant liquid and hot engine components.
OPERATIONAL WARNINGS
PRE-DISASSEMBLY AND GENERAL GUIDELINES
Recommendations for cleaning, tool usage, part replacement, and tightening.
1 ENGINE REMOVAL FROM VEHICLE
VEHICLE PREPARATION AND FUEL SYSTEM DISCONNECTION
Prepares vehicle, disconnects fuel system, and initial components.
EXTERNAL COMPONENTS REMOVAL
Removing frame guards, pinion guard, and exhaust components.
COOLING SYSTEM AND ELECTRICAL DISCONNECTION
Draining coolant, disconnecting hoses, and electrical connectors.
STARTER MOTOR, INTAKE, AND OTHER COMPONENTS REMOVAL
Removing starter motor, intake tube, head connections, and levers.
1 ENGINE REMOVAL FROM VEHICLE (CONTINUED)
SUBFRAME AND CARBURETTOR REMOVAL
Removing subframe screws and carburettor.
ENGINE MOUNTING COMPONENTS REMOVAL
Removing shock absorber, swingarm, and engine mounting pins.
2 ENGINE DISASSEMBLY
OIL DRAIN AND CLUTCH CONTROL ROD REMOVAL
Draining oil and removing clutch control rod and spacer.
PISTON, CYLINDER, AND HEAD DISASSEMBLY
Steps for disassembling piston, cylinder, and head.
2 ENGINE DISASSEMBLY (CONTINUED)
PISTON CIRCLIP AND PIN BOLT REMOVAL
Removing piston circlip and pin bolt.
2.4 IGNITION UNIT REMOVAL
FLYWHEEL COVER AND STATOR REMOVAL
Removing flywheel cover and stator.
FLYWHEEL AND PICK-UP UNIT REMOVAL
Removing flywheel and pick-up unit.
2.5 ELECTRIC IGNITION REMOVAL
START MOTOR AND BENDIX COUPLING REMOVAL
Removing start motor and Bendix coupling.
2.6 MAJOR ENGINE COMPONENTS REMOVAL
COOLANT LIQUID PUMP ACCESS
Accessing the coolant liquid pump.
OUTER CLUTCH COVER REMOVAL
Removing the outer clutch cover.
INNER CLUTCH COVER REMOVAL
Removing the inner clutch cover.
2.6.1 COOLANT LIQUID PUMP REMOVAL
PUMP COMPONENTS DISASSEMBLY
Disassembling pump cover, impeller, and pump body.
2.6.2 CENTRIFUGAL UNIT AND LEVERAGE REMOVAL
ADJUSTMENT COVER AND CENTRIFUGAL UNIT REMOVAL
Disassembling adjustment cover and removing centrifugal unit.
CONTROL ROD-ROCKER ARM UNIT REMOVAL
Extracting rocker arm with control rod and gasket.
CENTRIFUGAL UNIT EXTRACTION
Extracting centrifugal control lever and the complete unit.
2.6.3 CLUTCH UNIT AND COUNTERWEIGHT DISASSEMBLY
INITIAL CLUTCH UNIT DISASSEMBLY
Locking clutch unit and removing screws, washer, plate, and ring.
PRESSURE PLATE UNIT AND DISC PACK EXTRACTION
Extracting pressure plate unit and clutch disc pack.
SAFETY WASHER AND NUT REMOVAL
Removing safety washer and nut for clutch disassembly.
2.6.3 CLUTCH UNIT AND COUNTERWEIGHT DISASSEMBLY (CONTINUED)
CLUTCH DRUM AND PRIMARY GEAR NUT REMOVAL
Removing clutch drum and nut securing primary gear.
2.6.3 CLUTCH UNIT AND COUNTERWEIGHT DISASSEMBLY (CONTINUED)
COUNTERWEIGHT LOCKING AND SCREW REMOVAL
Locking counterweight and loosening screw.
2.6.3 CLUTCH UNIT AND COUNTERWEIGHT DISASSEMBLY (CONTINUED)
PRIMARY GEAR AND COUNTERWEIGHT EXTRACTION
Extracting primary gear and counterweight.
2.6.4 PEDAL KICKSTART - OPTIONAL
PEDAL KICKSTART COMPONENTS DISASSEMBLY
Disassembling kickstart components like circlip, idler gear.
2.6.4 PEDAL KICKSTART - OPTIONAL (CONTINUED)
SPRING AND KICKSTART SHAFT EXTRACTION
Releasing spring and extracting kickstart shaft with sleeve.
2.6.5 EXTERNAL GEARSHIFT UNIT
DRIVE SHAFT AND STOP CAM REMOVAL
Disassembling drive shaft, stop cam, and cam stop lever.
2.7 INTAKE SYSTEM
INTAKE MANIFOLD AND REED VALVE REMOVAL
Removing intake manifold and reed valve.
2.8 CRANKSHAFT, GEARBOX UNIT AND INTERNAL GEARSHIFT
OPENING THE CRANKCASE
Steps to detach crankcase halves and remove screws.
2.8 CRANKSHAFT, GEARBOX UNIT AND INTERNAL GEARSHIFT (CONTINUED)
COUNTERWEIGHT SUPPORT SHAFT AND CRANKSHAFT REMOVAL
Removing counterweight support shaft and crankshaft.
2.8 CRANKSHAFT, GEARBOX UNIT AND INTERNAL GEARSHIFT (CONTINUED)
FORK AND DESMODROMIC DEVICE REMOVAL
Extracting pins and removing forks and desmodromic device.
2.8 CRANKSHAFT, GEARBOX UNIT AND INTERNAL GEARSHIFT (CONTINUED)
GEARBOX UNIT EXTRACTION
Extracting the entire gearbox unit (primary and secondary).
2.9 DISASSEMBLY OF PARTS FROM CRANKCASES
RIGHT CRANKCASE HALF DISASSEMBLY
Removing parts from the right crankcase half.
2.9 DISASSEMBLY OF PARTS FROM CRANKCASES (CONTINUED)
BEARINGS REMOVAL FROM RIGHT CRANKCASE
Removing bearings and desmodromic control bearing screw.
2.9.2 LEFT CRANKCASE HALF
LEFT CRANKCASE HALF OIL SEALS AND BEARINGS REMOVAL
Removing oil seals and bearings from the left crankcase half.
3 ENGINE CHECKS AND ASSEMBLY
CRANKCASE HALF CHECKS AND LUBRICATION
Checking crankcase halves, threading, and oil passages.
3.1.1 RIGHT CRANKCASE HALF PARTS APPLICATION
RIGHT CRANKCASE HALF BEARINGS AND SEALS APPLICATION
Applying bearings, oil seals, and plate to the right crankcase half.
3.1.1 RIGHT CRANKCASE HALF PARTS APPLICATION (CONTINUED)
KICKSTART RAMP AND GEAR STOPPING DEVICE APPLICATION
Applying kickstart ramp and gear stopping device components.
3.1.2 LEFT CRANKCASE HALF PARTS APPLICATION
LEFT CRANKCASE HALF BEARINGS AND SEALS APPLICATION
Applying bearings, oil seals, and bush to the left crankcase half.
3.2 CONNECTING ROD AND ENGINE SHAFT CHECK
SLEW BEARING REMOVAL AND REFITTING
Steps for removing and refitting slew bearings.
3.2 CONNECTING ROD AND ENGINE SHAFT CHECK (CONTINUED)
HALF-SHOULDER REPLACEMENT AND TORQUE
Replacing inserts and tightening screws for the half-shoulder.
3.3 ASSEMBLY OF COMPLETE CRANKSHAFT
SLEW BEARING FITTING AND CRANKSHAFT INSERTION
Fitting slew bearing and inserting the crankshaft into the crankcase.
3.4 GEAR UNIT: CHECKS AND REASSEMBLY
GEARBOX UNIT CHECK
Checking gearbox unit for wear and play.
3.4.2 PRIMARY UNIT ASSEMBLY
PRIMARY UNIT ASSEMBLY STEPS
Sequence for assembling primary unit components onto the shaft.
3.4.3 SECONDARY UNIT ASSEMBLY
SECONDARY UNIT ASSEMBLY STEPS
Sequence for assembling secondary unit components onto the shaft.
3.4.4 CHECKING THE FORKS, FORK PINS AND DESMODROMIC DEVICE
INTERNAL GEARSHIFT COMPONENTS CHECK
Checking forks, pins, bushes, and desmodromic gearshift for wear.
3.4.4 CHECKING THE FORKS, FORK PINS AND DESMODROMIC DEVICE (CONTINUED)
FORK DIMENSIONS AND DESMODROMIC CONTROL CHECK
Measuring fork dimensions and checking desmodromic control device.
3.4.5 GEARBOX AND INTERNAL GEARSHIFT ASSEMBLY
GEARBOX AND SHAFTS INSERTION
Inserting gearbox units and lubricating shafts.
3.4.5 GEARBOX AND INTERNAL GEARSHIFT ASSEMBLY (CONTINUED)
FORKS AND DESMODROMIC DEVICE INSERTION
Inserting forks, guide bushes, and desmodromic device.
3.4.5 GEARBOX AND INTERNAL GEARSHIFT ASSEMBLY (CONTINUED)
SECONDARY UNIT FORKS AND CRANKCASE ASSEMBLY
Positioning secondary unit forks and greasing crankcase edge.
3.4.6 COUNTERWEIGHT SUPPORT SHAFT
COUNTERWEIGHT SUPPORT SHAFT CHECK AND INSERTION
Checking and inserting the counterweight support shaft.
3.5 CLOSING THE ENGINE CRANKCASE
CRANKCASE CLOSING AND SCREW TIGHTENING
Applying grease, heating bearing, fitting halves, and tightening screws.
3.6 EXTERNAL GEARSHIFT
3.6.1 CHECKING THE COMPLETE DRIVE SHAFT
Checking the distance between movable pawl and drive shaft.
3.6 EXTERNAL GEARSHIFT (CONTINUED)
GEARSHIFT COMPONENTS REASSEMBLY
Reassembly of gearshift components after inspection.
3.6.2 EXTERNAL GEARSHIFT ASSEMBLY
GEAR STOP LEVER AND CAM APPLICATION
Rotating gear stop lever, applying gear stop cam and screw.
3.7 KICKSTARTER DEVICE - OPTIONAL
3.7.1 KICKSTART SHAFT UNIT CHECK AND ASSEMBLY
Disassembling kickstart shaft parts and checking them.
3.7 KICKSTARTER DEVICE - OPTIONAL (CONTINUED)
KICKSTART SHAFT ASSEMBLY AND SLEEVE POSITIONING
Assembling kickstart shaft, sleeve, and checking positioning.
3.7 KICKSTARTER DEVICE - OPTIONAL (CONTINUED)
KICKSTART RETURN SPRING AND DEVICE COUPLING
Inserting kickstart return spring and coupling device to crankcase.
3.8 COUNTERWEIGHT, PRIMARY GEAR AND CLUTCH UNIT
INSPECTION OF COUNTERWEIGHT AND PRIMARY GEAR
Checking teeth of primary gear and counterweight for wear.
3.8 COUNTERWEIGHT, PRIMARY GEAR AND CLUTCH UNIT (CONTINUED)
PRIMARY GEAR/COUNTERWEIGHT COUPLING AND LOCK NUT APPLICATION
Tightening primary gear/counterweight coupling and applying lock nut.
3.8.3 CLUTCH CASE, ROLLER BEARING AND INTERNAL CENTRE BEARING CHECK
CLUTCH CASE AND BEARING CHECKS
Checking clutch case teeth and bearings for wear.
3.8.4 CHECKING THE CLUTCH DISCS
CLUTCH DISC THICKNESS AND DISTORTION CHECKS
Measuring clutch disc pack, driving disc thickness, and driven disc distortion.
3.8.5 CLUTCH DRUM AND CAP CHECK
CLUTCH DRUM AND SLIDING PINS CHECK
Checking clutch drum sliding pins and friction area for wear.
3.8.6 CHECKING THE THRUST BEARING DEVICE
THRUST BEARING AND SLIDING SURFACES CHECK
Checking thrust bearing and its sliding surfaces for wear.
3.8.7 CLUTCH UNIT ASSEMBLY
GEARBOX SHAFT, BEARING FITTING, AND CLUTCH UNIT ASSEMBLY
Lubricating shaft, fitting bearings, and assembling clutch unit.
3.8.7 CLUTCH UNIT ASSEMBLY (CONTINUED)
CLUTCH DRUM TIGHTENING AND DISC ARRANGEMENT
Tightening clutch drum nut and arranging clutch discs.
3.8.7 CLUTCH UNIT ASSEMBLY (CONTINUED)
THRUST BEARING ASSEMBLY AND PRESSURE PLATE FITTING
Assembling thrust bearing and fitting pressure plate, ring, and spring washer.
3.8.7 CLUTCH UNIT ASSEMBLY (CONTINUED)
CLUTCH UNIT SCREW TIGHTENING
Tightening clutch unit screws in a criss-cross pattern.
3.9 COOLANT LIQUID PUMP AND CENTRIFUGAL UNIT
PUMP AND CENTRIFUGAL UNIT FUNCTION OVERVIEW
Explains function of water pump and centrifugal unit.
3.9.1 PUMP UNIT, CENTRIFUGAL UNIT AND IDLER UNIT CHECK
PUMP AND CENTRIFUGAL UNIT CHECKS
Checking pump unit, oil seal, centrifugal shaft, axial stroke, and roller cage.
3.9.2 CENTRIFUGAL UNIT ASSEMBLY
CENTRIFUGAL UNIT AND CONTROL LEVER INSERTION
Inserting centrifugal unit and control lever with washers.
3.9.2 CENTRIFUGAL UNIT ASSEMBLY (CONTINUED)
VALVE CONTROL ROD AND CENTRIFUGAL UNIT LOCKING
Assembling valve control rod and applying locking screw.
3.9.2 CENTRIFUGAL UNIT ASSEMBLY (CONTINUED)
SPRING GUIDE AND ADJUSTMENT COVER APPLICATION
Applying springs to guide and fastening adjustment cover.
3.9.3 PUMP UNIT ASSEMBLY
PUMP UNIT OIL SEAL APPLICATION
Greasing and positioning the oil seal on the pump body.
3.9.4 COMPLETE CLUTCH COVER AND PUMP UNIT ASSEMBLY
INNER CLUTCH COVER PREPARATION AND MESHING
Preparing inner cover with gasket and meshing centrifugal shaft.
3.9.4 COMPLETE CLUTCH COVER AND PUMP UNIT ASSEMBLY (CONTINUED)
WATER HOSE INSERTION AND PUMP IMPELLER APPLICATION
Inserting water hose and applying pump impeller.
WATER PUMP ASSEMBLY AND COVER APPLICATION
Assembling water pump body and cover, tightening screws.
3.10 ELECTRIC IGNITION UNIT
3.10.1 BENDIX COUPLING CHECKS
Checking gearwheel wear and mobile coupling movement.
3.10.2 IGNITION UNIT COUPLING TO ENGINE
Applying grease and coupling starter motor to engine.
3.10 ELECTRIC IGNITION UNIT (CONTINUED)
GEAR OIL APPLICATION AND BENDIX COUPLING INSERTION
Applying gear oil and inserting Bendix coupling with collar.
3.11 IGNITION SYSTEM
3.11.1 IGNITION SYSTEM CHECK
Performing electrical inspection and checking resistance values.
3.11.2 IGNITION SYSTEM COUPLING TO CRANKCASE
Applying pick-up, gasket, and coupling flywheel and nut.
3.11 IGNITION SYSTEM (CONTINUED)
FLYWHEEL FASTENING AND STATOR COUPLING
Tightening flywheel nut and coupling stator to flywheel cover.
3.11 IGNITION SYSTEM (CONTINUED)
CENTRING PINS AND FLYWHEEL COVER APPLICATION
Inserting centring pins and applying flywheel cover.
3.12 THERMAL UNIT
3.12.1 PISTON AND ELASTIC BANDS CHECK
Checking piston for damage and measuring piston diameter.
3.12.2 CYLINDER CHECK
CYLINDER BORE MEASUREMENT AND CLASS CHECK
Measuring cylinder bore and checking cylinder class.
3.12.3 PISTON CYLINDER COUPLING PLAY
COUPLING PLAY CALCULATION AND CHECK
Calculating and checking piston-cylinder coupling play.
3.12.4 EXHAUST VALVE UNIT CHECKS AND DISASSEMBLY
EXHAUST FLANGE AND VALVE CONTROL UNIT REMOVAL
Removing exhaust flange and valve control unit.
3.12.4 EXHAUST VALVE UNIT CHECKS AND DISASSEMBLY (CONTINUED)
BOOSTER AND VALVE PIN EXTRACTION
Removing boosters, valve pins, and extracting valve.
3.12.5 EXHAUST VALVE UNIT ASSEMBLY
VALVE AND PIN INSERTION
Inserting valve and pin into their seats.
3.12.5 EXHAUST VALVE UNIT ASSEMBLY (CONTINUED)
BOOSTER UNIT AND SCREW APPLICATION
Applying booster units and fastening screws.
3.12.6 PISTON, PIN BOLT, ELASTIC BANDS AND CYLINDER ASSEMBLY
PISTON ASSEMBLY: CIRCLIP, CAGE, AND PIN BOLT INSERTION
Inserting circlip, roller cage, and pin bolt for piston assembly.
3.12.6 PISTON, PIN BOLT, ELASTIC BANDS AND CYLINDER ASSEMBLY (CONTINUED)
ELASTIC BANDS POSITIONING AND CYLINDER COUPLING
Positioning elastic bands and coupling cylinder to piston/crankcase.
CYLINDER NUTS TIGHTENING
Tightening cylinder nuts to specified torque.
3.12.7 CRANKCASE/CYLINDER GASKET THICKNESS CHECK
GASKET THICKNESS CHECK PROCEDURE
Checking crankcase/cylinder gasket thickness using specific plates.
3.12.8 HEAD APPLICATION
HEAD ASSEMBLY: O-RINGS, FITTING, AND SCREW TIGHTENING
Applying O-rings, fitting head, and tightening screws in steps.
3.12.9 EXHAUST VALVE ADJUSTMENT
VALVE CONTROL UNIT POSITIONING AND SEAT ADJUSTMENT
Positioning valve control unit and adjusting seat for alignment.
3.12.9 EXHAUST VALVE ADJUSTMENT (CONTINUED)
CONTROL ROD ROTATION AND STOP APPLICATION
Ensuring control rod rotation and applying the stop.
3.12.9 EXHAUST VALVE ADJUSTMENT (CONTINUED)
EXHAUST VALVE UNIT ADJUSTMENT SCREW
Adjusting screw for dynamic exhaust valve control.
3.12.10 APPLICATION OF COVERS
VALVE CONTROL UNIT AND EXPANSION CHAMBER COVER APPLICATION
Applying and tightening valve control and expansion chamber covers.
3.13 INTAKE UNIT CHECK AND ASSEMBLY
MANIFOLD AND REED VALVE INSPECTION
Checking intake manifold and reed valve petals for integrity.
3.13 INTAKE UNIT CHECK AND ASSEMBLY (CONTINUED)
REED VALVE BODY DISASSEMBLY AND MANIFOLD APPLICATION
Disassembling reed valve body and applying manifold with gaskets.
3.14 INSERTION OF CLUTCH ROD AND PINION SPACER
PINION SPACER AND GEARBOX ROD INSERTION
Applying pinion spacer and inserting gearbox rod.
4 ENGINE REASSEMBLY IN THE VEHICLE
ENGINE AND PINS INSERTION
Inserting engine into frame, engine pins, and swingarm pin.
4 ENGINE REASSEMBLY IN THE VEHICLE (CONTINUED)
HEAD CONNECTIONS AND FILTER BOX REASSEMBLY
Applying head connections and reassembling filter box.
4 ENGINE REASSEMBLY IN THE VEHICLE (CONTINUED)
CARBURETTOR AND MIXER TUBE CONNECTION
Connecting mixer tube and securing filter box sleeve.
ELECTRICAL WIRING FEEDING
Feeding starter motor cable and brake light wiring.
4 ENGINE REASSEMBLY IN THE VEHICLE (CONTINUED)
ELECTRICAL CONNECTORS AND CABLE SECURING
Connecting electrical connectors and securing cables.
4 ENGINE REASSEMBLY IN THE VEHICLE (CONTINUED)
CLUTCH ACTUATOR AND GEARBOX LEVER APPLICATION
Applying clutch actuator and gearbox lever.
IGNITION UNIT AND START MOTOR CABLE CONNECTION
Connecting ignition unit and starter motor cable.
RIGHT RADIATOR REASSEMBLY
RIGHT RADIATOR AND FIXING SCREWS APPLICATION
Applying right radiator and tightening fixing screws.
LEFT RADIATOR REASSEMBLY
LEFT RADIATOR AND COOLANT INSERTION
Applying left radiator, coolant, and radiator grids.
ENGINE REASSEMBLY IN THE VEHICLE (CONTINUED)
EXHAUST AND KICKSTART COMPONENTS REASSEMBLY
Applying exhaust expansion, silencer, and kickstart lever.
PINION AND FRAME GUARDS APPLICATION
Applying pinion, frame guards, and fixing straps.
ENGINE REASSEMBLY IN THE VEHICLE (CONTINUED)
TANK AND PIPE RECONNECTION
Placing tank, reconnecting connector and pipe.
ENGINE REASSEMBLY IN THE VEHICLE (CONTINUED)
REAR FASTENER AND SEAT APPLICATION
Greasing rear fastener, applying seat and engine guard plate.
RECOMMENDED ENGINE MAINTENANCE
MAINTENANCE INTERVALS AND CHECKS
Intervals for inspection, replacement, and cleaning of engine components.
RECOMMENDED LUBRICANTS AND LIQUIDS
SPECIFIED FLUIDS AND QUANTITIES
List of recommended lubricants, liquids, and their quantities.
Need help?
Do you have a question about the RR300 and is the answer not in the manual?
Questions and answers