Sign In
Upload
Manuals
Brands
HEIDENHAIN Manuals
Controller
TNC 425
HEIDENHAIN TNC 425 CNC Controller Manuals
Manuals and User Guides for HEIDENHAIN TNC 425 CNC Controller. We have
3
HEIDENHAIN TNC 425 CNC Controller manuals available for free PDF download: Technical Manual, Manual, User Manual
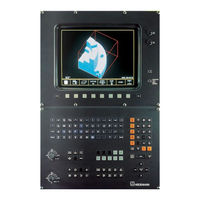
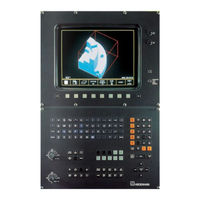
HEIDENHAIN TNC 425 Technical Manual (755 pages)
Brand:
HEIDENHAIN
| Category:
Switch
| Size: 6 MB
Table of Contents
Technical Manual
3
Contents
5
Table of Contents
7
Hardware Concept
8
1 Hardware Concept
9
2 Technical Data TNC 407/TNC 415 B/TNC
9
NC-Software Number
13
Software Types
13
Software Option
14
Digitizing with TS 120
14
Digitizing with TM 110
14
Software/Hardware
15
PLC-Software
17
EPROM Sockets
17
Tnc 415 A/Tnc 415 E
17
TNC 415 B/TNC 415 F and TNC 425 A/TNC 425 E
18
Tnc
19
Software Replacement
19
Releases
20
Software Types 243 05, 259 91 and 243
20
Software Types 259 96, 259 97 and 243
20
Software Types 259 93, 259 94 and 243
24
Software Types 280 54, 280 56 and 280 58
29
Mounting and Electrical Installation
33
Hardware Components
36
Logic Unit
36
TNC Keyboard
36
PLC Analog Board
37
PLC I/O Unit
37
Changes in the ID-Number
38
ID-Numbers Assigned to Date
38
Assembly Hints
41
Electrical Noise Immunity
41
Heat Generation and Cooling
41
Humidity
42
Mechanical Vibration
42
Mounting Position
42
Logic Unit
43
Degree of Protection
45
Visual Display Unit (VDU)
45
Summary of Connections
46
Tnc 415
46
Logic Unit and PLC I/O-Board
48
NC Power Supply
48
PLC Power Supply
49
Buffer Battery
50
X23 Power Supply for Analog Inputs
50
Power Supply for Integral Fan
51
Visual Display Unit (VDU)
51
Earthing Plan
52
Angular Measuring Systems
56
Linear Measuring Systems
56
Measuring Systems
56
Connecting Cable
57
Connector Assignments
57
Measuring System Inputs for Sinusoidal Signals (7 to 16 Μapp)
57
Connecting Cable
58
Connector Assignments
58
Measuring System Inputs for Square-Wave Signals
58
Angle Encoders
59
Spindle Orientation
59
Measuring System Connections
60
Connecting Cable
64
Connector Assignment
64
Nominal Value Output
64
Reference Pulse Inhibit Input
67
Connector Assignment X12
68
Touch Probe System Input
68
Connection of the Touch Probe System
69
TS 120 or TT 110
69
Ts 511
70
Tm 110
71
Data Interface
72
RS-232-C/V.24 Data Interface
72
RS-422/V.11 Data Interface
73
Handwheel Input
75
Integral Handwheel HR
75
Pin Assignment
75
Portable Handwheel HR
75
Integral Handwheel HR 130
76
Portable Handwheels with Permissive Buttons
77
Handwheel Adapter HRA
81
Handwheel Adapter Output X23
82
NC Supply Connection X31
82
PLC Inputs/Outputs
83
PLC Inputs
84
PLC Outputs
84
Technical Data
84
Analogue Inputs
85
Inputs for Pt 100 Thermistors
85
PLC Inputs
86
PL Connection
87
PLC Outputs
87
PLC Inputs/Outputs on the PL 400
89
PLC Inputs/Outputs on the PL 410 / PL 410 B
91
Analogue Inputs on the PL 410 / PL 410 B
92
Inputs for Thermistors on the PL 410 / PL 410 B
92
Connecting Cable
93
Connection of PLC Inputs/Outputs on the LE
93
Connector Assignment on the PA 110
93
PA 110 Connection
94
PL 400 Connection
94
PL 410 / PL 410 B Connection
94
Connection to Inputs for Thermistors
95
Machine Operating Panel
96
Pin Connections
97
Vdu
101
Connecting the BC 120
102
Dimensions
105
PLC Expansion Boards
109
Cable Adapters
112
Handwheels
115
HR 130 Integral Handwheel
115
Hr 150
118
Portable Handwheel HR 332
120
Portable Handwheel HR 410
121
Handwheel Adapter HRA 110 (for HR 150)
122
TT 110 for Tool Calibration
123
Mb 410
124
Mb 420
125
Te 400 B
126
Bc 120
127
Machine Integration
128
Linear Measurement
133
Machine Axes
133
Measuring Systems
133
Signal Period
133
Direction of Traverse
135
Measuring System Monitoring
136
Axis Designation
139
Assignment
140
Current Tool Axis
141
VDU Display
141
Traverse Ranges
143
Lubrication Pulse
146
Axis-Error Compensation
150
Backlash Compensation
150
Compensation for Reversal Errors in Circular Motion
151
Linear Axis-Error Compensation
153
Non-Linear Axis Error Compensation
154
Correction Table with Code Number 105 296
158
Input and Output of the Correction Tables Via the Data Interface
158
Temperature Compensation
159
Stiction
160
PLC Positioning
162
PLC Axes
165
"Tilt Working Plane" Function
168
Swivel Axes
168
Double Swivel Head, Right-Angled
170
Double Swivel Head, 45
172
Universal Table (Swivel, Tilt, Rotate)
173
Five-Axis NC Programs with Swivel Axes
175
Synchronized Axes
176
Synchronization Control
177
Conventions
178
Reference Marks
179
Passing over the Reference Marks
180
Measuring Systems with Distance-Coded Reference Marks
181
Measuring Systems with One Reference Mark
185
Linear Measurement Via Rotary Encoder
187
Machine Datum
190
Servo Positioning of the NC-Axes
192
The Position Control Loop of an NC-Machine
192
Servo Positioning in TNC Controls
193
Control with Servo Lag
193
Servo Resolution
198
Calculation of the Smallest Voltage Step
198
Kink Point
199
Feedforward Control
201
Offset Adjustment
204
Offset Adjustment by Code Number
204
Automatic Cyclical Offset Adjustment
204
Offset Adjustment with Integral Factor
205
Contour Behaviour
207
Radial Acceleration
207
Constant Feed Rate in Corners
207
Constant Feed Rate in Corners with M90
208
Contour Speed Related to Tool Cutting Edge
208
Preset Tolerance at Corners
209
Monitoring Functions
210
Position Monitoring for Operation with Lag
211
Position Monitoring for Operation with Feedforward Control
212
Monitoring the Analogue Voltage
213
Movement-Monitoring
213
Standstill Monitoring
214
Positioning Window
214
Controlled Axes
216
Axis-Enable, Feed Rate Enable
216
Axes in Position
217
Axes in Motion
218
Open Control Loop
219
Actual - Nominal Value Transfer
219
Main Spindle
221
Analogue Output of the Spindle Speed
222
Direction of Spindle Rotation
222
Gear Range
223
S-Override
226
Gear Change
227
BCD-Coded Output of Spindle Speed
231
Spindle-Orientation
233
Spindle Orientation with Module 9171
233
Spindle Orientation with Marker M2712
233
Sequence of Spindle Orientation with Marker M2712 or Module 9171
233
Orientation from Rotation
234
Orientation from Standstill
234
Spindle Orientation through Initiator with Marker M2501
235
Example of a PLC-Program for Spindle-Orientation with M19/M20
236
Tapping
239
Tapping with Floating Tap Holder for Analogue Spindle-Speed Output
240
Tapping with Floating Tap Holder and BCD-Coded Spindle-Speed Output
243
Rigid Tapping
244
5 EMERGENCY STOP-Routine
247
Connection Diagram
248
Flow-Diagram
249
Tnc 407
251
Display and Operation
253
Colour Adjustment
257
Graphics Window
259
View in Three Plane
259
Rotating the Coordinate System
259
BLK Form and Datum Shift
259
Status-Window
261
Position Display
261
Position Display with Rotary Axes
262
Display Mode and Range of Traverse
262
Up to Version
262
Feed Rate Display
265
Display of the M-Functions
266
Feed-Rate for Rotary Axes
266
Control Is in Operation
267
Cancel Status-Display
267
PLC-Window
268
Error Messages
269
Cycles
271
Cycle Inhibit
271
Pocket Milling
272
Milling-Cycles for Pockets with Free-Programmed Contours
273
Scaling Factor
274
Cylinder Interpolation
274
Return to the Contour
275
Files
277
File Types – Disable and Protect
277
Block Numbers - Step Size for ISO Programs
278
Table Size
278
Datum Point for Values in Datum Table
278
User-Parameters
279
Code-Numbers
279
Programming Station
280
Dialogue Language
280
Decimal Sign
281
Memory Test
281
End of Program
281
Overwrite Q-Parameter
281
Arc End-Point Tolerance
282
Radius Compensation R+, R-
282
"POWER INTERRUPTED" Message
282
Help Files
283
M-Functions
285
Program-Run Interruption with M-Functions
288
Program-Run Interruption with M06
288
Modal Cycle Call M89
288
Reduced Feed-Rate of Tool Axis with M103
288
Selecting K Factors with M105/M106
289
Key-Simulation
291
TNC-Keyboard (te 400)
291
Key-Code for the Alphabetic Keyboard
297
Key-Code for the Soft-Key Row on the Screen
297
Code for Soft Key Functions
297
Appendix
297
Machine-Control Panel
301
Touch Probe
303
Standard Touch Probe Cycles
303
Technical Requirements
307
Scanning Cycles
309
Response of the Digitizing Sequence at Corners
310
Inside Corners
311
Optimizing the Digitizing Sequence
312
Calculation of Possible Oscillations in Normal Direction
315
Digitising with the TM 110
316
Interfacing the TM 110
316
Technical Prerequisites
316
Tool Calibration with the TT 110
319
Interfacing the TT 110
319
Markers in the PLC
320
Electronic Handwheel
323
Assignment of Keys and Leds to the PLC Inputs and Outputs
326
PLC Program Example
327
HR 410 Portable Handwheel
328
Integral Handwheels HR 150 with Handwheel Adapter HRA 110
329
Assignment of Switch Positions to the PLC Inputs
330
Increment Positioning
336
Hirth Coupling
339
Positioning in Manual or Electronic Handwheel Mode
339
Positioning in Controlled Mode
339
Program Example
340
Check Nominal Position
341
Activate Hirth Module
341
Datum Correction
348
Tool Changer
350
Tool Table, Pocket Table
350
Left Side of the Tool Table
351
Right Side of the Tool Table
351
Special Tools
353
Tool Life, Replacement Tool
354
Controlling the Tool Changer
355
Variable and Fixed Pocket Coding
355
Output of Tool Number (Fixed Pocket Coding)
357
Output of Pocket Number (Variable Pocket Coding)
358
Normal Tool Follows Special Tool
361
Single Changing Arm (M2600 = 0)
361
Double Changing Arm
362
Normal Tool Follows Manual Tool
363
Manual Tool Follows Manual Tool
364
Manual Tool Follows Normal Tool
365
Manual Tool Follows Special Tool
366
Special Tool Follows Special Tool
367
Single Changing Arm
368
Special Tool Follows Normal Tool
370
Special Tool Follows Manual Tool
372
Program Module TOOL DEF
375
Program Module TOOL CALL
376
Program Module STANDBY
377
Program Module STANDBY BACK
377
Program Module MANUAL TOOL in
378
Program Module MANUAL TOOL out
379
Program Module MANUAL TOOL IN/OUT
380
Program Module CHANGE
381
Program Module COMPARE P-CODE with ISTREG
382
Program Module COMPARE GRE1 with ISTREG
383
Program Module COMPUTE SHORTEST PATH
384
Commissioning and Start-Up Procedure
385
Code Numbers for Commissioning
385
Preparation of the Machine
385
Tuning of the Drive Amplifier
386
Calculating Acceleration
387
Commissioning the Control
389
Entry of the Provisional and Pre-Defined Machine Parameters
389
Entry of the PLC-Program
389
Testing the EMERGENCY STOP Routine
389
Testing the Direction of Traverse
390
Fixing the Software Limit Switch Range
391
Optimizing the Control with Lag
391
Optimize K V Factor for the Machining Feed-Rate (X-Axis)
392
Optimizing the Control with Feedforward Control
395
Optimize K V Factor
395
Optimize Acceleration
396
Optimize Transient Response
397
Optimize the Integral Factor
399
Adjust the Offset
400
Adjustment of the Monitoring Functions
400
Special Functions for Laser Cutting Machines
401
Analogue Voltage Output
401
Voltage Proportional to Feed Rate
401
Voltage from the PLC
401
Direct Output of the Programmed Voltage
402
Voltage Varies with Distance
402
Voltage Varies with the Velocity
402
Voltage Varies with the Time (Time-Voltage Ramp)
403
Voltage for a Specific Time (Time Pulse)
403
Graphic Simulation Without TOOL CALL
404
Program Stop with M Functions
404
Machine Parameters
405
What Is a Machine Parameter?
406
User Parameters
406
Input/Output of Machine Parameters
407
Entry Format
407
Advertisement
HEIDENHAIN TNC 425 Manual (377 pages)
shop-floor programmable contouring controls
Brand:
HEIDENHAIN
| Category:
Controller
| Size: 4 MB
Table of Contents
Controls on the TNC 407, TNC 415 B and TNC 425
1
TNC Guideline
2
From Workpiece Drawing to Program-Controlled Machining
2
The TNC 425, TNC 415 B and TNC 407
3
Technical Differences between Tncs
3
Visual Display Unit and Keyboard
4
Programming
4
Graphics
4
Compatibility
4
Keyboard
5
Visual Display Unit
6
Headline
6
Soft Keys
6
Screen Layout
7
Screen Layout of Modes
8
Programming and Editing
8
Test Run
8
Manual Operation and Electronic Handwheel Modes
9
Program Run /Full Sequence, Program Run /Single Block
9
TNC Accessories
10
HEIDENHAIN 3D Touch Probes TS 511 and TS 120
10
HEIDENHAIN FE 401 Floppy Disk Unit
10
The HR 330 Electronic Handwheel
10
Fundamentals of Numerical Control
11
Introduction
11
What Is NC?
11
Conversational Programming
11
Reference System
12
Cartesian Coordinate System
12
The Geographic Coordinate System Is an Absolute Reference System
12
Designations and Directions of the Axes on a Milling Machine
12
Additional Axes
13
Polar Coordinates
13
Direction and Designation of Additional Axes
13
Identifying Positions on a Circular Arc with Polar Coordinates
13
Setting a Pole at a Circle Center (CC)
14
Setting the Datum
14
Polar Coordinates and Their Associated Reference Axes
14
The Workpiece Datum Serves as the Origin of the Cartesian Coordinates
14
The Coordinate System
15
Absolute Workpiece Positions
16
Incremental Workpiece Positions
16
Definition of Position 1 through Absolute Coordinates
16
Definition of Positions 2 and 3 through Incremental Coordinates
16
Workpiece Drawing with Coordinate Dimensioning
17
Programming Tool Movements
18
Position Encoders
18
Reference Marks
18
Linear Position Encoder
18
Switch-On
19
Graphics and Status Displays
20
Graphics During Program Run
20
Plan View
21
Projection in 3 Planes
22
TNC Graphics, Projection in Three Planes
22
Shifting Sectional Planes
22
Cursor Position During Projection in 3 Planes
23
3D View
23
Cursor Position During Detail Magnification
23
TNC Graphics, 3D View
23
To Rotate the 3D View
24
To Switch the Frame Overlay Display On/Off
24
Magnifying Details
25
To Select Detail Magnification
25
Repeating Graphic Simulation
26
Measuring the Machining Time
26
To Activate the Stopwatch Function
26
Status Displays
27
Additional Status Displays
27
Status Display in a Program Run Mode of Operation
27
General Program Information
28
Positions and Coordinates
28
Tool Information
29
Coordinate Transformations
29
Tool Measurement
29
Interactive Programming Graphics
30
To Generate Graphics During Programming
30
Generating a Graphic for an Existing Program
30
To Magnify/Reduce a Detail
31
Block Number Display ON/OFF
32
To Undo a Change in the Section Area
32
To Erase the Graphic
32
File Directory
33
TNC File Types
33
File Management Functions
33
File Status
34
Selecting a File
34
To Copy a File
35
To Erase a File
35
Protecting, Renaming, and Converting Files
36
To Protect a File
36
To Cancel File Protection
36
To Rename a File
37
To Convert a File
37
File Management for Files on an External Data Medium
38
To Erase a File on the FE 401B
38
To Protect or Unprotect a File on FE 401B
38
To Format a Floppy Disk in the FE 401 B
39
To Convert and Transfer Files
39
Moving the Machine Axes
40
Traversing with the Machine Axis Direction Buttons
40
For Continuous Movement
40
Traversing with the Electronic Handwheel
41
Using the HR 330 Electronic Handwheel
41
Interpolation Factors for Handwheel Speed
41
Incremental Jog Positioning
42
Positioning with Manual Data Input
42
Spindle Speed S, Feed Rate F and Miscellaneous Functions M
43
To Enter the Spindle Speed S
43
To Change the Spindle Speed S
43
To Change the Feed Rate F
44
To Enter a Miscellaneous Function M
44
Setting the Datum Without a 3D Touch Probe
45
Setting the Datum in the Tool Axis
45
To Prepare the TNC
45
To Set the Datum in the Working Plane
46
2.4 Tilting the Working Plane
47
For Machines with Swivel Tables
47
For Machines with Swivel Heads
47
Traversing the Reference Marks in Tilted Axes
48
Setting the Datum in a Tilted Coordinate System
48
Position Display in the Tilted System
48
Limitations on Working with the Tilting Function
48
To Activate Manual Tilting
49
To Reset
49
Menu for Manual Tilting in the Manual Operation Mode
49
To Run a Program Test
50
The Display Functions for Test Run
51
To Do a Test Run up to a Certain Block
51
Program Run
52
To Run a Part Program
52
Interrupting Machining
53
Programmed Interruptions
53
To Interrupt or Abort Machining Immediately
53
To Interrupt Machining at the End of the Current Block
53
Moving Machine Axes During an Interruption
54
Resuming Program Run after an Interruption
54
Resuming Program Run with the START Button
54
Resuming Program Run after an Error
55
MID-Program Startup
56
Returning to the Contour
57
Optional Block Skip
58
Blockwise Transfer: Testing and Executing Long Programs
59
TNC Screen During Blockwise Transfer
59
Jumping over Blocks
60
Creating Part Programs
61
Layout of a Program
61
Plain Language Dialog
61
Program Blocks Contain Words of Specific Information
61
Editing Functions
62
Types of Input
62
Selecting Blocks and Words
62
Inserting a Block
62
Editing and Inserting Words
63
Erasing Blocks and Words
63
Structuring Programs
64
Inserting a Structuring Block in the Left Screen Window
64
Inserting a Structuring Block in the Right Screen Window
64
TNC Screen for Structuring Programs
64
Tools
65
Setting the Tool Data
65
Tool Numbers
65
Tool Radius R/L
65
Oversizes for Lengths and Radii – Delta Values
66
Applications
66
Determining Tool Length with a Zero Tool
66
Oversizes DL, DR on a Toroid Cutter
66
Entering Tool Data into the Program
67
To Enter Tool Data in the Program Block
67
Entering Tool Data in Tables
68
Types of Tool Tables
68
Editing Functions for Tool Tables
68
To Edit the Tool Table TOOL.T
69
To Edit any Other Tool Table
69
Tool Data in Tables
70
To Read-Out or Read-In a Tool Table
70
Left Part of the Tool Table
70
Right Part of the Tool Table
70
Overview: Information in Tool Tables
71
Pocket Table for Tool Changer
73
To Select the Pocket Table
73
To Edit the Pocket Table
73
Calling Tool Data
74
Tool Pre-Selection with Tool Tables
74
Automatic Tool Change
75
Manual Tool Change
75
Tool Change Position
75
Automatic Tool Change: M101
76
Standard Behavior — Without M101
76
Standard NC Blocks with Radius Compensation R0, RR, RL
76
NC Blocks with Surface-Normal Vectors and 3D Compensation
76
Tool Compensation Values
77
Effect of Tool Compensation Values
77
Tool Length
77
Tool Radius
77
Tool Radius Compensation
78
Tool Movement Without Radius Compensation
78
Programmed Contour and the Path of the Tool Center
78
These Drilling Positions Are Entered Without Radius Compensation
78
Tool Movement with Radius Compensation RR, RL
79
The Tool Moves to Left or to Right of Workpiece During Milling
79
Machining Corners
80
Shortening or Lengthening Single-Axis Movements R+, R-
80
Outside Corners
80
Inside Corners
80
Three-Dimensional Tool Compensation
81
Defining Tool Shapes for 3D Compensation
81
Surface-Normal Vectors NX, NY, NZ
81
Tool Shapes for 3D Compensation
81
Target Direction of the Surface-Normal Vector
82
Compensating Other Tool Dimensions by Entering Delta Values
82
Delta Values for Oversize and Undersize
82
NC Block
83
Program Initiation
84
Defining the Blank Form – BLK FORM
84
MIN and MAX Points
84
To Create a New Part Program
85
Entering Tool-Related Data
87
Feed Rate F
87
Rapid Traverse
87
Duration of Feed Rate F
87
Spindle Speed S
88
To Change the Spindle Speed S in the Part Program
88
To Change the Spindle Speed S During Program Run
88
Entering Miscellaneous Functions and STOP
89
To Enter an M Function in a STOP Block
89
To Enter a STOP Function
89
Actual Position Capture
90
To Capture a Single Coordinate
90
To Generate a New L Block with the Actual Position Coordinates
90
Storing the Actual Position in the TNC
90
Marking Blocks for Optional Block Skip
91
To Create a Text File
92
To Leave a Text File
92
Text Editor Screen
92
Entering Text
93
Exercise Text
93
Text Editor Screen with Exercise Text
93
Finding Text Sections
94
Finding the Current Word
94
Find the Word TOOL in the File ABC.A
94
To Find any Text
94
To Erase and Insert Characters, Words and Lines
95
Delete the First Line of ABC.A and Insert It Behind by Lunch
95
Editing Sections of Text
96
Creating Pallet Files
98
To Edit Pallet Files
98
To Link Programs and Datum Tables
98
To Leave a Pallet File
99
Adding Comments to the Program
100
To Enter a Comment as a Separate Block
100
Dialog for Entering Comments
100
General Information on Programming Tool Movements
101
Path Functions
101
Free Contour Programming
101
A Contour Consists of Straight Lines and Circular Arcs
101
Subprograms and Program Section Repeats
102
Cycles
102
Parametric Programming
102
Contour Approach and Departure
103
Approaching and Departing a Helix
103
Points that Define Contour Approach and Departure
103
Radius Compensation
104
Overview of Input
104
Approach Block Without Radius Compensation
104
Paths for Approaching First or Departing Last Contour Point
104
Approaching the Contour
105
Approaching on a Straight Line with Tangential Connection
105
Approaching on a Straight Line Vertical to the First Contour Point
105
Approaching on a Circular Arc with Tangential Connection: APPR CT
106
Circular Arc as Tangential Connection from Straight to First Contour
107
Departing the Contour
108
Departing Tangentially on a Straight Line
108
Departing on a Straight Line Perpendicular to the Last Contour Point
108
Departing Tangentially on a Circular Arc
109
Connecting the Contour and a Straight Line
109
General Information
110
Machine Axis Movement under Program Control
110
Part Program Input
110
Paraxial Movement
110
Path Functions
110
Movement of Three Machine Axes
111
Entering more than Three Coordinates
111
Three Dimensional Movement
111
Example of Simultaneous Movement of more than Three Axes
111
Overview of Path Functions
112
Path Contours – Cartesian Coordinates
113
Straight Line L
113
To Program a Straight Line
113
A Linear Movement
113
Milling a Rectangle
115
Chamfer CHF
116
Prerequisites
116
To Program a Chamfer
116
Tool Radius too Large
116
Chamfering a Corner
117
Circles and Circular Arcs
118
Circle Center CC
118
Direction of Rotation DR
118
Circular Arc and Circle Center
118
Radius Compensation in Circular Paths
119
Circles in the Main Planes
119
Validity of a Circle Center Definition
119
Defining the Spindle Axis also Defines the Main Plane
119
Circle Center CC
119
Entering the CC as a Relative Value
120
To Program a Circle Center
120
Incremental Coordinates for a Circle Center
120
Circular Path C Around the Circle Center CC
121
Circular Path from S to E Around CC
121
Full Circle Around CC with a C Block
121
Coordinates of a Circular Arc
121
To Program a Circular Arc C Around a Circle Center CC
122
Milling a Full Circle in One Block
123
Circular Path CR with Defined Radius
124
Central Angle CCA and Arc Radius R
124
Circular Path from S to E with Radius R
124
Full Circle with Two CR Blocks
124
Direction of Rotation DR and Arc Shape
125
To Program a Circular Arc with Defined Radius
125
Convex Path
125
Concave Path
125
Milling a Concave Semicircle
126
Circular Path CT with Tangential Connection
127
The Straight Line Is Connected Tangentially to the
127
Circular Arc
127
The Path of a Tangential Arc Depends on the Preceding Element
127
To Program a Circular Path CT with Tangential Connection
128
Circular Arc Connecting to a Straight Line
128
Corner Rounding RND
129
To Program a Tangential Arc between Two Contour Elements
129
Rounding Radius R between G1 and G2
129
Rounding a Corner
130
Path Contours – Polar Coordinates
131
Polar Coordinate Origin: Pole CC
131
Straight Line LP
131
The Pole Is Entered as CC
131
Milling a Hexagon
133
Circular Path CP Around Pole CC
134
Milling a Full Circle
135
Circular Path CTP with Tangential Connection
136
Circular Path Around a Pole, Tangential Connection
136
Helical Interpolation
137
Input Angle
137
Input Height
137
Helix: a Combination of Circular and Linear Paths
137
To Program a Helix
138
Tapping
139
Contours – FK Free Contour Programming
140
Programming Contour Elements with FK
140
Pre-Positioning
140
These Dimensions Can be Programmed with FK
140
Initiating FK Contour Programming
141
Interactive Graphics During FK Programming
142
FK Functions
143
Values Given Relative to Another Contour Element
144
Free Programming of Straight Lines
145
Direct Data for Straight Lines or End Points of Straight Lines
145
Angle between Two Lines, Length
146
Values Given Relative to Another Contour Element or Contour Position
147
Cartesian Coordinates Based on End Point of Another Contour Element
148
Auxiliary Points
149
Auxiliary Point at a Distance from a Straight Line
150
Free Programming of Circular Arcs
151
Gradient Angle of an Arc
151
Chord Length of an Arc
151
Center of Free-Programmed Circles
151
Data on the Circle Center
152
Data that Refer to Another Contour Element or Another Contour Position
152
Relative Data for Coordinates of an Arc
152
Relative Data for Circle Center Coordinates
152
Circle Center in Polar Coordinates Related to the End Point
153
Auxiliary Points on an Arc
155
Identifying Closed Contours
156
To Program a Closed Contour
156
Beginning and End of a Closed Contour
156
Converting FK Programs
157
Drawing for the Program FKYOKE
157
Exercise in FK Free Contour Programming
158
M Functions for Contouring Behavior and Coordinate Data
161
Smoothing Corners: M90
161
Standard Behavior – Without M90
161
Duration of Effect
161
Machining Small Contour Steps: M97
162
Standard Behavior – Without M97
162
Machining Contour Steps with M97
162
Program Example
162
Machining Open Corners with M98
163
Path Without/With M98
163
Programming Machine-Referenced Coordinates M91/M92
164
Scale Reference Point
164
Machine Zero – Miscellaneous Function M91
164
Machine Datum – Miscellaneous Function M92
164
Feed Rate Factor for Plunging Movements: M103 Workpiece Datum
165
Reducing Feed Rate During Plunging – with M103 F
165
Machine Zero and Workpiece Zero
165
Feed Rate at Circular Arcs: M109/M110/M111
166
Insert Rounding Arc between Straight Lines: M112 TA
166
Constant Contouring Speed at Circular Arcs – M109
166
Ignore Points for Calculating the Rounding Arc with M112: M124 T
167
Shorter-Path Traverse of Rotary Axes : M126
167
Standard Behavior
167
Ignore Points – with M124 T
167
Automatic Compensation of Machine Geometry
168
Feed Rate in MM/Min on Rotary Axes A, B, C: M116
168
Automatically Compensating the Machine Geometry – with M114
168
Feed Rate in MM/Min on Rotary Axes – with M116
168
Reducing Display of the Rotary Axis to a Value Less than 360: M94
169
Superimposing Handwheel Positioning During Program Run: M118 XYZ
169
Reducing Display of the Rotary Axis to a Value Less than 360
169
Superimposing Handwheel Positioning – with M118 XYZ
169
M Functions for Laser Cutting Machines
170
Output Voltage as a Function of Distance: M201 V
170
Output Voltage as a Function of Speed: M202 FNR
170
Output Voltage as a Function of Time: M203/M204 V-TIME
171
Programming the System File MDI
172
To Execute the System File MDI
172
Positioning with Manual Data Input (MDI)
172
Contour Point Tables for Defining the Digitizing Range
174
Capturing Points Manually by Teach-In Programming
174
To Generate the Points Automatically
175
Principle
176
Operating Limits
176
Labels
176
Flow Diagram for a Subprogram Run
176
Subprograms and Program Section Repeats
176
Programming and Calling Subprograms
177
Mark the Beginning
177
Mark the End
177
Call the Subprogram
177
Group of Four Holes at Three Different Locations
178
Program Section Repeats
179
Programming Notes
179
Programming and Calling a Program Section Repetition
179
Flow Diagram for a Program Section Repeat
179
Row of Holes Parallel to the X Axis
180
Milling Without Radius Compensation Using Program Section Repeats
181
Main Program as Subprogram
182
Calling a Main Program as a Subprogram
182
Flow Diagram of a Main Program as Subprogram
182
Nesting Depth
183
Subprogram in a Subprogram
183
Program Layout
183
Program Execution
183
Groups of Four Holes and with Three Different Tools
184
Repeating Program Section Repeats
185
Repeating a Subprogram
186
Q Parameters Are Used for
187
Q Parameters as Variables
187
Part Families – Q Parameters Instead of Numerical Values
189
To Assign Numerical Values to Q Parameters
189
Part Dimensions as Q Parameters
189
Full Circle
190
Describing Contours through Mathematical Functions
191
Overview
191
To Select a Mathematical Operation
191
Programming Example for Fundamental Operations
192
Trigonometric Functions
193
Sides and Angles on a Right Triangle
193
If-Then Decisions with Q Parameters
194
Jumps
194
Checking and Changing Q Parameters
196
HEIDENHAIN TNC 425 User Manual (333 pages)
ISO Programming
Brand:
HEIDENHAIN
| Category:
Control Systems
| Size: 5 MB
Advertisement
Advertisement
Related Products
HEIDENHAIN TNC 150
HEIDENHAIN TNC 407
HEIDENHAIN TNC 415B
HEIDENHAIN TNC 155
HEIDENHAIN TNC 425E
HEIDENHAIN TNC 425 E
HEIDENHAIN TNC 426 PB/M
HEIDENHAIN TNC 426 PB
HEIDENHAIN TNC 426 CB
HEIDENHAIN TNC 426
HEIDENHAIN Categories
Media Converter
Measuring Instruments
Industrial Equipment
Control Systems
Control Unit
More HEIDENHAIN Manuals
Login
Sign In
OR
Sign in with Facebook
Sign in with Google
Upload manual
Upload from disk
Upload from URL