Billion BiGuard S10 Administration Manual
Ssl vpn security gateway
Hide thumbs
Also See for BiGuard S10:
- Specifications (2 pages) ,
- Quick start manual (2 pages) ,
- Product manual (20 pages)
Table of Contents
Advertisement
Quick Links
Advertisement
Table of Contents
Troubleshooting

Related Manuals for Billion BiGuard S10


Summary of Contents for Billion BiGuard S10
- Page 1 Administration Guide Administration Guide Version Release: v101_08302006...
-
Page 3: Copyright Information
Version 1.0, September 2006 Disclaimer Billion does not assume any liability arising out of the application of use of any products or software described herein. Neither does it convey any license under its patent rights nor the patent rights of others. -
Page 4: Safety Information
BiGuard S10 Administrator Guide Safety Information The BiGuard S10 is built for reliability and long service life. For your safety, be sure to read and follow the following safety warnings. Read this installation guide thoroughly before attempting to set up the BiGuard S10. -
Page 5: Table Of Contents
Getting Started About this guide ........................1 Unpacking the BiGuard S10 ....................2 Front and rear view of the BiGuard S10 ................3 Setting up the BiGuard S10 ....................3 Rackmounting the BiGuard S10 ..................4 Connecting to a WAN ....................4 Connecting to a LAN ...................... - Page 6 Routing Table ......................33 DHCP Table ....................... 34 System Log ......................35 SSL VPN Log Configuring the BiGuard S10 ................... 36 Configuring the Interface ..................... 36 ....................36 Configuring the LAN ................... 39 Configuring WAN settings ....................43 Configuring the DMZ Configuring Network Objects ..................
- Page 7 SSL Applications ......................134 Adding an application proxy ..................135 Using Network Extender ....................138 Using Transport Extender ..................142 Importing a certificate ....................146 Registering the BiGuard S10 ..................150 Configuring an Active Directory server .................151 Networking Basics IP Addresses ........................161 Net Mask ...........................161 Subnet Addressing ......................161 Private IP Addresses .......................162...
- Page 8 BiGuard S10 Administration Guide Dynamic Host Configuration Protocol (DHCP) .............162 Router Basics ........................162 What is a Router? ......................162 Why use a Router? ....................163 Routing Information Protocol (RIP) ................163 Firewall Basics .........................163 What is a Firewall? ....................163 Stateful Packet Inspection ..................163 Denial of Service (DoS) Attack ..................163...
- Page 9 Table of figures FIGURE 1 BiGuard S10 front and rear views ................. 3 FIGURE 2 Connecting the BiGuard S10 to a WAN ..............5 FIGURE 3 Connecting the BiGuard S10 to a LAN ..............5 FIGURE 4 Connecting the power adapter ................6 FIGURE 5 All in one solution: firewall, remote and Internet access ........
- Page 10 BiGuard S10 A DMINISTRATION UIDE FIGURE 45 The Service Group Table ..................47 FIGURE 46 Schedule table list ....................48 FIGURE 47 Creating a new Schedule Network Object ............48 FIGURE 48 Bandwidth Control Table ..................49 FIGURE 49 Adding a Bandwidth Control Network Object ............
- Page 11 BiGuard S10 A DMINISTRATION UIDE FIGURE 91 Transport Extender configured applications screen ........... 78 FIGURE 92 Adding tunneled applications to Transport Extender screen ......78 FIGURE 93 Transport Extender configured host name resolution screen ......78 FIGURE 94 Transport Extender add host name resolution screen ........79 FIGURE 95 SSL Certificate current certificates screen ............
-
Page 12: Getting Started
FOR THE LATEST VERSION OF THE BiGuard S10 SERVICES DOCUMENTATION About this guide This manual describes how to install and operate the BiGuard S10. Please read this manual before you install the product. This manual includes the following topics: •... -
Page 13: Unpacking The Biguard S10
Getting Started Unpacking the BiGuard S10 Unpack the BiGuard S10 and check that the following items are in the package: Warranty Card Power adapter Warranty card x 1 Mounting brackets x 2 BiGuard S10 Mounting bracket screws x 4 Quick Start Guide x 1... -
Page 14: Front And Rear View Of The Biguard S10
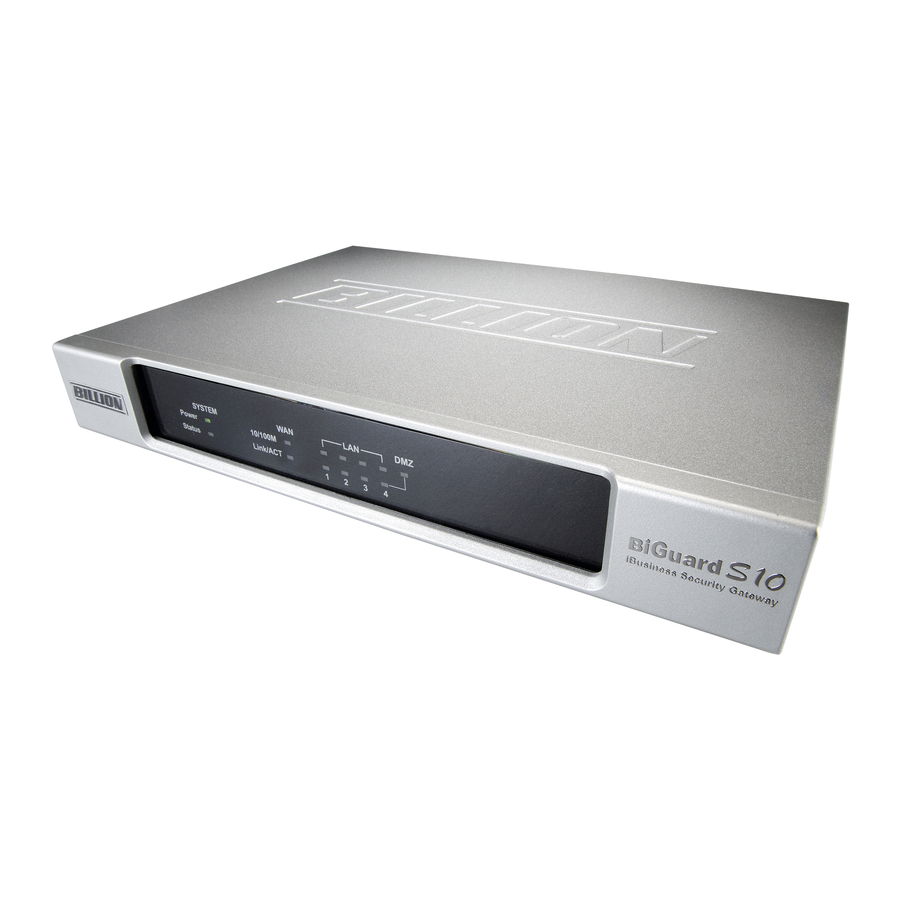
Front and rear view of the BiGuard S10 Front and rear view of the BiGuard S10 Figure 1 shows the front and rear components on the BiGuard S10. FIGURE 1 UARD FRONT AND REAR VIEWS SYSTEM Power 10/100M iBusiness Security Gateway... -
Page 15: Rackmounting The Biguard S10
Rackmounting the BiGuard S10 Follow the steps below to install the BiGuard S10 in a rack case. 1. Align one bracket with the holes on one side of the BiGuard S10 and secure it with the bracket screws. 2. Repeat step 1 to attach the other bracket. -
Page 16: Connecting To A Wan
Setting up the BiGuard S10 Connecting to a WAN Connect an RJ-45 Ethernet cable to the WAN port on the BiGuard S10, connect the other end to an ADSL modem, cable modem, or another router. FIGURE 2 ONNECTING THE UARD... -
Page 17: Connecting Power
Turning on the power and checking LED status Press the power switch on the rear of the BiGuard S10. The LEDs all blink once. The LEDs blink in sequence from LAN to WAN. Then all LEDs blink once again. In about thirty (30) seconds, the... -
Page 18: Network Deployment/Applications
Network deployment/applications Network deployment/applications The purpose of this section is to help you set up the BiGuard S10 device in your network, and to introduce the different networking environment scenarios available to you for designing the lay- out and connectivity of your organization's network. -
Page 19: Installing Behind A Gateway/Firewall
Getting Started Installing behind a gateway/firewall The BiGuard S10 can be successfully placed behind any well established network and firewall infrastructure to provide a secure remote access solution to the organization with minimal changes to your existing network topology. FIGURE 6... -
Page 20: All In One: Public Servers On Dmz Zone, Private Servers On Lan
All in one: public servers on DMZ zone, private servers on LAN The BiGuard S10 above is configured to support secure remote access, firewall and internet access functionality. Public servers are placed on DMZ zone while private servers for secure remote access are placed on the LAN side. -
Page 21: Ssl Vpn Applications
Getting Started SSL VPN Applications The BiGuard S10 provides advanced routing functionality along with SSL VPN capability. The BiGuard S10 uses internal routing tables to read each incoming packet and decide how to for- ward it. Network Extender The BiGuard S10simplifies secure remote communication by combining IP-based access with full connectivity to a company’s private network resources in the form of Network Extender. -
Page 22: Network Places
Network deployment/applications Network Places Network Places allows secure, simplified, and transparent user access within the corporate net- work to the network resources from anywhere. FIGURE 11 ETWORK LACES SSL VPN - Microsoft Internet Explorer Office server Laptop File server JComputer Marketing Accounting File directory... -
Page 23: Ssl Vpn Features
Getting Started SSL VPN Features The following sections describe some of the advanced features of the BiGuard S10. Granular Access Control With granular policy access control, remote users are granted different privileges and allowed only access to specific applications. FIGURE 13... -
Page 24: Ssl Vpn Certification
Manage, generate, and obtain security certificates from the Certificate Authority (CA). For the strongest possible SSL encryption, we recommend only trusted Certificate Authorities to secure network traffic and the strongest SSL encryption. Remember to import the Certificate to the BiGuard S10. See Importing a certificate on page 79. -
Page 25: Ssl Vpn Portals
Getting Started SSL VPN Portals The SSL Portal is the interface with which SSL VPN users interact. The components of your net- work to which you will be providing remote access through the SSL VPN, such as Application Proxy, Network Places, Network Extender, and Transport Extender, will be presented to them through the portal. -
Page 26: Authentication Domain Scenarios
Network deployment/applications Authentication Domain Scenarios The following illustration demonstrates how a BiGuard S10 can be setup in a small organization to allow administrators the flexibility to mange user authentication simply and without the need of an authentication server. FIGURE 16... -
Page 27: Firewall Settings
A Static WAN connection will be configured according to the IP properties defined by your ISP. In order to configure the BiGuard S10 for a Static WAN connection, you will need a static IP address, subnet mask, default IP gateway, and DNS information from your ISP. See... -
Page 28: Administration Guide
Basic Configuration with the Quick Start Menu The Quick Start Menu enables you to quickly get the BiGuard S10 configured and running by configuring the WAN and Secure Socket Layer Virtual Private Network (SSL VPN) and configur- ing a user account. - Page 29 Administration Guide 2. Click View Certificate. You are prompted to install a certificate. 3. Click Install Certificate. The Certificate Import Wizard appears.
-
Page 30: Basic Configuration With The Quick Start Menu
Basic Configuration with the Quick Start Menu 4. Click Next. You are prompted to choose the certificate location. 5. Select Automatically select the certificate store based on the type of certificate, and click Next. The wizard completes the installation. 6. Click Finish. A security warning appears. - Page 31 (See Navigating in the Web Manager on page 21.) 11. To log out of Web Manager, click LOGOUT. The Warning screen appears. 12. Click Yes if you do not want the BiGuard S10 IP address to remain in browser history.
-
Page 32: Navigating In The Web Manager
Basic Configuration with the Quick Start Menu WARNING: OT CLEARING THE ADDRESS OF THE UARD FROM BROWSER HISTORY IS A POTENTIAL SECURITY THREAT F YOU HAVE ENABLED S10, REMOTE ADMINISTRATION OF THE UARD BE SURE TO CHANGE THE USER NAME AND PASSWORD WARNING: LOGOUT HEN EXITING THE... -
Page 33: Quick Start To Configuring The Wan
Administration Guide Quick start to configuring the WAN This section describes how to configure the BiGuard S10 with basic settings to get your network up and running. There are three protocols for the router’s WAN settings: PPPoE, Static IP, and Obtain an IP Address Automatically (DHCP). -
Page 34: Configuring The Wan For Dhcp
Primary and Secondary DNS provided by your ISP. 9. Click Apply to confirm the settings. Configuring the WAN for DHCP Configure the WAN for DHCP to enable the BiGuard S10 to automatically assign IP addresses to client stations. Refer to the following to configure the connection: 1. -
Page 35: Quick Start To Configuring Ssl Vpn
Administration Guide Quick start to configuring SSL VPN This section describes how to configure the BiGuard S10 with basic settings so that the SSL VPN default group is accessible from outside your network. Before a user can access the SSL VPN, a Group user account must be set up for them. -
Page 36: Monitoring Configuration Status
ONITORING TATUS SCREEN ITEMS Registration Click to open a web page on Billion’s BiGuard Series website to register the BiGuard S10. Registration enables users to access new firmware, a user’s manual, latest product news, quick customer support, and a FAQ. - Page 37 Administration Guide Current Time Displays the current time. See Since you can have two servers sharing the same listening port under the same IP address you can use this item to distinguish the servers. on page 27. Software version Displays the current firmware version; check the version before upgrading. Bootrom version Displays the current bootrom version;...
-
Page 38: Changing The Device Name
Monitoring Configuration Status Changing the device name Click Device Name in the Status screen. The Device Management dialog appears. FIGURE 20 EVICE ANAGEMENT SCREEN Since you can have two servers sharing the same listening port under the same IP address you can use this item to distinguish the servers. -
Page 39: Changing Time And Time Zone Parameters
Select the check box to automatically update the time based on your loca- tion’s daylight saving settings. Resync Period Type the time in minutes to sync the BiGuard S10 internal clock with an SNTP time server. Click Apply to update new settings. -
Page 40: Changing The Default Lan Ip Address
DHCP STATUS SCREEN The BiGuard S10 is enabled to act as a DHCP server for your network. Disable this function if the stations that connect to the BiGuard S10 LAN ports use static IP addresses. To change DHCP settings, see Configuring DHCP server settings on page 37. -
Page 41: Figure 24 Mapping Mac Address To Fixed Ip Address Screen
Administration Guide APPING A ADDRESS TO A FIXED ADDRESS You can map the MAC address for stations that you want to always be assigned the same IP address. Mapped IP addresses must be outside the DHCP start/end IP range. The default start/ end IP range is 192.168.1.100 to 192.168.1.199. - Page 42 Monitoring Configuration Status 5. Click Next. 6. Click Add. 7. In the Host Name field, type a name to identify the computer. 8. Click Candidates to display a list of active PCs on the LAN and then select the computer you want to map from the list.
-
Page 43: Ssl User Status
Administration Guide SSL User Status The SSL User Status screen lists users that are currently logged onto the BiGuard S10. You can monitor user activity and disconnect specific users. FIGURE 25 SSL U TATUS SCREEN Name Displays the name of the user. -
Page 44: Routing Table
Displays the number of hops counted as the cost of the route. DHCP Table The DHCP Table lists stations on the LAN that have been assigned IP addresses via the DHCP functionality of the BiGuard S10. FIGURE 28 DHCP T... -
Page 45: System Log
Administration Guide System Log The System Log dialog logs system events for the BiGuard S10. NOTE: OU CAN MODIFY PARAMETERS FOR THE INFORMATION THAT IS SAVED TO Log and E-mail Alerts THE LOG ON PAGE FIGURE 29 YSTEM OG SCREEN ..right click here... -
Page 46: Ssl Vpn Log
Monitoring Configuration Status SSL VPN Log The SSL VPN Log dialog logs SSL VPN events for the BiGuard S10. NOTE: OU CAN MODIFY PARAMETERS FOR THE INFORMATION THAT IS SAVED TO Log and E-mail Alerts THE LOG ON PAGE FIGURE 30... -
Page 47: Configuring The Biguard S10
Administration Guide Configuring the BiGuard S10 This section explains how to configure router settings including the LAN, WAN, DMZ, how to create network objects such as addresses, services, address and service groups, schedules, bandwidth control items, and content blocking scenarios. You can also set up security policies which includes configuring packet filtering, virtual servers, quality of service (QoS), and MAC and content filters. -
Page 48: Figure 32 Dhcp Status Screen
Configuring the BiGuard S10 DHCP ONFIGURING SERVER SETTINGS The BiGuard S10 is enabled to act as a DHCP server for your network. Disable this function if the stations that connect to the BiGuard S10 LAN ports use static IP addresses. FIGURE 32 DHCP... -
Page 49: Figure 33 Dhcp Server Configuration Screen
This is the maximum time that the router can use an IP address assigned by the DHCP server. Range Start Type the start IP address that the BiGuard S10 assigns to stations on the LAN. Range End Type the end IP address that the BiGuard S10 assigns to stations on the LAN. -
Page 50: Configuring Wan Settings
Configuring the BiGuard S10 Configuring WAN settings This menu item enables you to configure WAN settings and also to set WAN outbound and inbound bandwidth parameters. ONFIGURING THE You can select one of three protocols for the router’s WAN settings: PPPoE, Static IP, and Obtain an IP Address Automatically. - Page 51 Administration Guide IP Address This field displays the IP address assigned by the PPPoE service provider (0.0.0.0 indicates that the IP address is automatically assigned. If your ISP assigned you a static IP address, type it in this field. Authentication Select the authentication protocol from the drop-down menu.
-
Page 52: Figure 35 Wan Settings Static Ip Screen
MAC Address Select Specify a MAC Address (MAC Clone) if your ISP requires a defined MAC address to access their service or to allow the BiGuard S10 to accommodate the MAC filter from the ISP. Otherwise, click Default MAC Address. -
Page 53: Figure 36 Wan Settings Dhcp Screen
Administration Guide DHCP protocol. Select this item if the BiGuard S10 is connected to a router that has DHCP functionality enabled. FIGURE 36 WAN S DHCP ETTINGS SCREEN Protocol Displays the current protocol. Click the drop-down arrow to change the protocol. -
Page 54: Configuring The Dmz
Configuring the BiGuard S10 WAN B ONFIGURING ANDWIDTH PARAMETERS This menu item enables you to set the maximum WAN outbound and inbound bandwidth that your ISP can provide. FIGURE 37 ETTING BANDWIDTH WAN Outbound Type the maximum outbound bandwidth that is provided by your ISP. -
Page 55: Configuring Network Objects
Administration Guide Configuring Network Objects A Network Object can be a single IP address on your LAN or a group of IP addresses. Network Objects can also be services, schedules, bandwidth control settings, or filter profiles. The Net- work Objects you create are then available in the drop-down menus of their respective category. Creating Network Objects makes managing your policy settings easier. -
Page 56: Creating Address Groups Network Objects
Configuring the BiGuard S10 IP Address Start / When IP Address Range is selected from the drop-down menu, these two fields are displayed. • IP Address Start: type the beginning IP address or click Candi- dates to select the starting range from one of the active PCs that are listed on the LAN. -
Page 57: Allowing Services
Administration Guide Allowing Services Click Service to display the list of allowable pre-defined and user-defined services: FIGURE 43 DEFINED AND DEFINED ERVICE ABLE The pre-defined list of services includes all normal networking services such as Telnet and Ping. Click Create to add a user-defined service to the Service Table: FIGURE 44 DDING SERVICES TO THE ERVICE... -
Page 58: Creating Service Group Network Objects
Configuring the BiGuard S10 Creating Service Group Network Objects Click Service Group to view the Service Group Table. FIGURE 45 ERVICE ROUP ABLE Service Group Type the name that you want this service group Network Object to have. Name Available Services Displays the list of available services which you can add to this group. -
Page 59: Scheduling Biguard S10 Operation
Administration Guide Scheduling BiGuard S10 operation Click Schedule to view a list of schedule items. FIGURE 46 CHEDULE TABLE LIST The Schedule Table enables the Administrator or users to set the time for a function or rule to be activated. Schedules are used for many Policy functions. -
Page 60: Managing Bandwidth Network Objects
Configuring the BiGuard S10 Managing Bandwidth Network Objects Click Bandwidth Control to display the Bandwidth Table. FIGURE 48 ANDWIDTH ONTROL ABLE Bandwidth control is used in conjunction with QoS functions. Bandwidth Network Objects are selected when setting QoS parameters. Click Create to add a new bandwidth Network Object to the Bandwidth Control Table. -
Page 61: Setting Content Blocking Parameters
Administration Guide Setting Content Blocking parameters Content blocking enables you to create filters that disable users from accessing prohibited con- tent. You can create keyword and domain filters, and restrict URL features. Click Content Blocking to display content blocking menu items. REATING EYWORD ILTER... -
Page 62: Figure 53 Adding A Domain Filter Network Object Profile
Configuring the BiGuard S10 Domain filters prohibit users from accessing specific domains (such as .ORG, .COM, or .GOV). Click Create to add a new filter Network Object profile. FIGURE 53 DDING A DOMAIN FILTER ETWORK BJECT PROFILE Profile Type the name of this profile. -
Page 63: Figure 54 Restrict Url Features Network Object List
Administration Guide URL F REATING ESTRICT EATURES ETWORK BJECTS Click Restrict URL Features to display the Restrict URL Feature list. FIGURE 54 URL F ESTRICT EATURES ETWORK BJECT LIST The Restrict URL Feature screen enables you to prohibit browser features that constitute a security threat (such as cookies, Java applets, and ActiveX scripts) from being used. -
Page 64: Setting Policy Parameters
Configuring the BiGuard S10 Setting Policy parameters Click Policy to set up packet filtering, the virtual server, and Ethernet MAC and content filtering. Enabling Packet Filtering Click Packet Filtering to display a list of packet filter items. FIGURE 56 ACKET ILTERING TABLE Packet filtering enables you to restrict types of data from being transmitted over the network. -
Page 65: Configuring The Virtual Server
Administration Guide From Address Select the origin IP address this filter will be applied to from the drop-down menu. To Address Select the destination IP address this filter will be applied to from the drop- down menu. Schedule Select the schedule for when you want this profile to be applicable. Check Enable to have the system create a log file when this filter is run. -
Page 66: Configuring Quality Of Service (Qos) Parameters
Configuring the BiGuard S10 External Service Check Redirect to Service if you need to use port redirecting instead of Port(s) port forwarding and type the range of ports to assign to the virtual server. Click Apply to confirm the settings. -
Page 67: Configuring Ethernet Mac Filtering
Administration Guide DSCP Marking DSCP Marking, also known as DiffServ enables you to classify traffic based on IP DSCP values. These values can be used to identify traffic within the network. Other interfaces can match traffic based on the DSCP markings. -
Page 68: Configuring Content Filtering Policies
Configuring the BiGuard S10 Name Type a name for the Ethernet MAC filter. Active Check Enable to activate the filter. Action Select an action from the drop-down menu. • Drop: discards the packets. • Forward: sends the packets to a specified address. -
Page 69: Figure 65 Creating A Content Filtering Profile
Administration Guide ETTING ONTENT ILTERING PARAMETERS Under Parameters, click Create to set up a new content filtering profile. FIGURE 65 REATING A ONTENT ILTERING ROFILE NOTE: OU MUST FIRST SET UP EYWORD ILTERING OMAIN ILTERING URL F ESTRICT EATURE PROFILES BEFORE YOU CAN ENABLE THESE ITEMS IN THIS SCREEN Name Type a name to be given to this profile. -
Page 70: Configuring The System
Click Apply to add the IP address to the exception list. Configuring the System Use the System menu to set the time zone, configure remote access, set up passwords, upgrade the BiGuard S10 firmware, backup and restore configuration profiles, and restart the system. Setting the Time Zone Click Time Zone to open the Time Zone screen. -
Page 71: Enabling Remote Access
Administration Guide Daylight Saving Check this box to allow the BiGuard S10 to automatically adjust for day- light saving time. Resync Period Type the number of minutes that will elapse before the BiGuard S10 adjusts the time. Enabling Remote Access Click Remote Access to enable the remote access feature. -
Page 72: Backing Up And Restoring Configurations
Configuring the BiGuard S10 To upgrade the firmware: 1. Download the firmware image from the company Web site. 2. Click Factory Default Settings or Current Settings to determine how the router will restart after the upgrade. 3. Click Browse to go to the location of the downloaded image. -
Page 73: Figure 71 Backing Up A Configuration
Administration Guide ACKING UP THE CONFIGURATION You can choose between two backup scenarios. Backup all Click Backup all configuration to your computer to save all current con- configuration figuration information to the computer. Export the Click Export the checked objects to your computer and then check checked objects which items you want to include in the backup. -
Page 74: Configuring And Changing Passwords
Configuring the BiGuard S10 Configuring and changing passwords Select Password to change the password needed to access the BiGuard S10 web configuration interface. FIGURE 73 HANGING PASSWORDS Type the new password in the Password text box. Retype the password to confirm and click Apply to save the new password. -
Page 75: Configuring Advanced Features
Administration Guide Configuring Advanced Features The Advanced Features menu enables you to set up static routing, configure DDNS (dynamic domain name server) settings, set up the firewall and SNMP (simple network management pro- tocol), and manage device settings. Creating Static Routes Click Static Route to view the Static Routing List. -
Page 76: Enabling Dynamic Dns
Configuring the BiGuard S10 Enabling Dynamic DNS Click Dynamic DNS to enable and disable Dynamic DNS (DDNS). FIGURE 77 DDNS NABLING NOTE: OU NEED TO REGISTER AND ESTABLISH AN ACCOUNT WITH THE YNAMIC DDNS. T PROVIDER USING THEIR EB SITE BEFORE USING... -
Page 77: Configuring Snmp
Administration Guide Configuring SNMP Click SNMP to enable and disable Simple Network Management Protocol. FIGURE 79 SNMP NABLING Click Enable. A screen appears allowing you to set SNMP parameters. FIGURE 80 SNMP ETTING PARAMETERS SNMP V1 and V2 This section enables you to set parameters for SNMP versions 1 and 2. The following information is entered: •... -
Page 78: Configuring Firewall Parameters
Click Enable to activate the Block WAN Request feature. Request Managing Device Parameters Click Device Management to change device parameters. FIGURE 82 HANGING PARAMETERS Device Name Type the name for the BiGuard S10. Embedded Web Type the port number for the HTTP and HTTPS ports. Server... -
Page 79: Configuring Ssl Vpn Parameters
Authentication Domain The Authentication Domain item enables you to add domains to the domain table that will be authenticated by the server. The BiGuard S10 verifies that users who log on to the system are in an authenticated domain. Click Authentication Domain to view the Authentication Domain Table. -
Page 80: Figure 85 Domain Authentication Types Screen
Configuring SSL VPN Parameters Click Create to add a new domain. The Add Domain screen appears. FIGURE 85 OMAIN AUTHENTICATION TYPES SCREEN Domain Name Type a name for the domain. RADIUS - PAP PAP (Password Authentication Protocol) is an access control protocol for dialing into a network that provides only basic functionality. - Page 81 Choose this option to have authentication performed by checking names Database in a local user database. Local Database stores the user’s data in the BiGuard S10, for the users that do not have any Authentication Domain in their environment. NOTE:...
-
Page 82: Group/Application
Configuring SSL VPN Parameters Group/Application This menu item enables you to establish groups and assign allowed applications to the group. When you create a group, you assign the group to an authenticated domain, and then add only the applications that you want group members to access. Click Group/Application to view the Group Table. -
Page 83: Ssl Vpn Applications Overview
Administration Guide SSL VPN Applications Overview The SSL Applications menu item enables you to add applications to be made available to users, and to define application parameters such as the type of application assigned and the IP address. NOTE: HE APPLICATION NAME YOU CHOOSE CAN BE THE SAME AS THE NAME OF THE APPLICATION ITSELF R YOU CAN CHOOSE MORE DESCRIPTIVE OR SHORTENED NAMES... - Page 84 Configuring SSL VPN Parameters Secure Web HTTPS (HyperText Transport Protocol Secure) is the protocol for access- (HTTPS) ing a secure Web server. Using HTTPS in the URL instead of HTTP directs the message to a secure port number rather than the default Web port number of 80.
-
Page 85: Managing Accounts
Network Extender and Transport Extender, and enable or disable access to applications assigned to the group. The BiGuard S10 ships with a default Group (BiGuard) and a default account (admin) already set up. All accounts including the admin account are managed from the Account screen. - Page 86 Configuring SSL VPN Parameters Password/ These fields are for typing and confirming the account password. Retype Password Inactivity Timeout Displays the amount in minutes of inactivity before a user is automatically logged out. The default setting is 5 minutes. Network Places When enabled, the user can use Network Place to log onto the SSL VPN.
- Page 87 Administration Guide REATING A NEW USER ACCOUNT User accounts enable specified users access to services and applications that you define in the Group/Application menu item. See Group/Application on page 71. Refer to the following to create a new account: 1. On the Menu bar, click SSL VPN → User Access → Account. 2.
-
Page 88: Managing Network Extender Ip Address And Client Routes
The Client Route item enables you to set routing rules for the Network Extender client connec- tion. For example, if the client user’s internet packet's destination address is specified in Client Route, the packet will be forwarded to the PPP connection passing through the BiGuard S10 through the SSL VPN tunnel. -
Page 89: Managing Transporter Extender Application And Host Names
Administration Guide Managing Transporter Extender application and host names Use the Transport Extender menu to configure applications for use with the Transport Extender and to configure host name resolution. Adding a tunneled Transport Extender application Click Application under the Transport Extender menu to configure an application for secure access in the SSL VPN portal. -
Page 90: Managing Ssl Certification
Configuring SSL VPN Parameters To add a new domain name, click Create. FIGURE 94 RANSPORT XTENDER ADD HOST NAME RESOLUTION SCREEN Type the Local Server IP address and the Full Qualified Domain Name for the resolution and then click Apply. Managing SSL Certification This section describes how to enable, import, and apply SSL certificates. -
Page 91: Figure 97 Downloading The Csr
Type the FQDN (Fully Qualified Domain Name). The FQDN is the com- (Domain Name) plete domain name for a specific host on the Internet, and consists of the host name and domain name (for example, “www.billion.com”). Email Type your email address. -
Page 92: Figure 98 Signing A Certificate
Configuring SSL VPN Parameters FIGURE 98 IGNING A CERTIFICATE 6. Follow the instructions from the web. You will be prompted to input your CSR. 7. Open your CSR with a text editor such as Windows Notepad (Windows Wordpad and MS Word are not suggested due to compatibility issue). FIGURE 99 PENING THE 8. -
Page 93: Figure 100 Ssl Certificate Import Certificates Screen
Administration Guide FIGURE 100 SSL C ERTIFICATE IMPORT CERTIFICATES SCREEN 12. Click Browse and go to the location of the zipped file. When the file is listed in the Certif- icate File text box, click Upload. The certificate is loaded and added to the Current Certificates list. FIGURE 101 URRENT ERTIFICATES... -
Page 94: Ssl Vpn Portal
Using SSL VPN Portal Access This chapter deals with the features that make the BiGuard S10 the ideal, secure gateway solu- tion for the novice and the professional alike. From a standard web browser, remote users can access personalized portal pages quickly and easily. -
Page 95: Installing The Network Extender
Administration Guide Application Definition Telnet JAVA based plug-in protocol for accessing remote systems. Click on con- nect and follow the on-screen instructions to complete the connection. JAVA based plug-in interface for the secure transfer of files. Click on con- nect and follow the on-screen instructions. Username and password is required for login. - Page 96 Configuring SSL VPN Parameters 4. Click Yes when prompted to accept the SSLDrv Adapter. Setup installs the adapter. After setup is complete, an icon appears in the task bar, indicating that the Network Extender is active and the Connection Status screen appears. •...
-
Page 97: Installing The Transport Extender
Administration Guide • Click Close to close the status screen. Network Extender is still active in the status bar. To view the status screen again, or perform one of the actions above, right-click the Network Extender icon, and select an option from the menu. -
Page 98: Accessing Network Place
Configuring SSL VPN Parameters • Check Uninstall if you want to uninstall the driver upon disconnecting. • Click Disconnect to disconnect the Transport Extender. • Click Close to close the Transport Extender screen. Transport Extender is still active in the status bar. To view the Transport Extender screen again, or disconnect the Transport Extender, right-click the Transport Extender icon and select an option from... - Page 99 Administration Guide The following sections explain how to access each application. SING FTP (File Transfer Protocol) is a protocol used to transfer files over a TCP/IP network. FTP is used for such tasks as uploading HTML pages to the web server. FTP includes functions to log onto the network, list directories and copy files.
- Page 100 Configuring SSL VPN Parameters Type your login name and press [Enter] to login to Telnet.
- Page 101 Administration Guide Commands may be abbreviated. Supported commands are: close close current connection display display operating parameters open connect to a site quit exit telnet set options (type 'set ?' for a list) status print status information unset unset options (type 'unset ?' for a list) ?/help print help information ONNECTING TO...
- Page 102 Configuring SSL VPN Parameters 1. Click RDP. You are prompted to install an ActiveX component. 2. Click Install. The ActiveX Control is installed. You are prompted to install the RDP pro- gram file. Click Install. The RDP program file installs and the remote desktop appears. From here, you can control the remote system.
-
Page 103: Log And E-Mail Alerts
Type the password and click OK. The remote screen appears. Log and E-mail Alerts The BiGuard S10 incorporates industry-standard alert protocols for capturing network activity information. The information can then be written to a log, sent to an external server, or to a selected E-mail address. -
Page 104: Syslog Server
The MAC Filter enables the administrator to control the access. If the MAC address is denied, the BiGuard S10 will not respond to any request from the MAC address (for example: if the device trying to access the router has a virus). -
Page 105: E-Mail Alert Notification
Administration Guide E-mail Alert Notification This item enables the router to send a security event logs by e-mail to a specified recipient. FIGURE 106 MAIL LERT SCREEN E-mail Alert Enables a log of security-related events to be sent to a specified e-mail address. -
Page 106: Troubleshooting
If DHCP is enabled, then your router assigns IP addresses automatically. You should use the dynamic settings in the network settings for your type of network. If DHCP is not enabled, then you have to configure network settings for the BiGuard S10. See Configuring the WAN for DHCP... -
Page 107: Hardware Problems
The BiGuard S10 LEDs don’t turn off after powering on When your BiGuard S10 is turned on, the LEDs stay on for about 10 seconds and then turn off. If all the LEDs stay on, there may be a hardware problem. -
Page 108: Lan Interface Problems
PC. • Verify that the IP address and the subnet mask of the BiGuard S10 and the PCs con- nected to it are on the same subnet. The date and time are not synchronized If the date and time are not being displayed correctly, set the date and time for your BiGuard S10 using the Web Configuration Interface. -
Page 109: Disabling Pop-Up Windows
NABLING POP UP BLOCKERS WITH EXCEPTIONS Follow these instructions to allow pop-up blockers with the BiGuard S10: 1. In Internet Explorer, select Tools → Internet Options. 2. Under the Privacy tab, click Settings to open the Pop-up Blocker Settings dialogue. -
Page 110: Java Permissions
If your ISP requires MAC address authentication, clone the MAC address from your computer on the LAN as BiGuard S10’s WAN MAC address. Click Specify a MAC Address (MAC Clone) and type the MAC address in the WAN Settings dialog. -
Page 111: Internet Service Provider Problems
ROUBLESHOOTING Internet service provider problems Unless you have been assigned a static IP address by your ISP, your BiGuard S10 will need to request an IP address from the ISP in order to access the Internet. I can’t access the Internet when connected to the BiGuard S10 If your BiGuard S10 is unable to access the Internet, first determine if your router is able to obtain a WAN IP address from the ISP. -
Page 112: Recovery
Recovery You can restore your BiGuard S10 to its factory settings by performing a recovery of the router. You should perform this procedure in the event a software or hardware reset is not effective. Performing a recovery of the router will rest all settings and return the router to the settings it as when you first installed it. - Page 113 • Username: admin • Password: admin QUESTION: What’s the factory default LAN IP address for the BiGuard S10 Series? ANSWER: The factory default LAN IP address for the BiGuard S10 Series is as follows: • IP address: 192.168.1.254 • Subnet Mask: 255.255.255.0...
- Page 114 Internet service provider problems QUESTION: I remember the LAN IP address for my BiGuard S10 Series router is 192.168.1.254, but I can’t login in now. What should I do? ANSWER: Follow these troubleshooting procedures: 1. Check if there is another computer or router using the following IP address: 192.168.1.254.
- Page 115 ROUBLESHOOTING QUESTION: I've just upgraded the router firmware to the latest version, but I found some of the buttons or pages don't display or work properly. ANSWER: It is possible that the browser is referencing data stored in the cache. Clear the offline browser data in the cache, restart the browser, and try again.
- Page 116 QUESTION: Why can’t I ping the WAN IP address of the BiGuard S10 Series from the Internet? ANSWER: Make sure the Block WAN Request is disabled. 1. Click Configuration → Advanced → Firewall. 2. Next to Block WAN Request, click the Disable radio button.
-
Page 117: Biguard S10 Faq
LAN side. It can prevent outside users from getting direct access to a server that has company data. The BiGuard S10 Series supports hardware DMZ. To set up a DMZ for the BiGuard S10 Series, follow these instructions. -
Page 118: Firewall
S10 FAQ UARD Firewall QUESTION: How can I setup the firewall rule to block Internet access to the IP address 192.168.1.100? Use the packet filtering function in Configuration → Policy → Packet Filtering. ANSWER: First, however, you must add this address to the Address List. Follow these instructions. - Page 119 Firewall 6. Click Create. 7. Type a descriptive name for this filter, select LAN to WAN from the Packet Flow drop- down list and check the Reverse Direction box. 8. Select HTTP from the Service drop-down list, and select the newly created address from the To Address drop-down list.
- Page 120 S10 FAQ UARD QUESTION: What does the Rule No. mean in Packet Filtering? Is it related to the priority? ANSWER: Rule No. is the packet filtering identification. It is related to the policy priority. The rule priority can be moved higher or lower by selecting before or after a specified rule num- ber.
- Page 121 Firewall 2. Click Create to add a new Keyword Filtering profile. 3. Type a descriptive name for the keyword filtering profile and type the keyword in the text boxes. 4. Click Add. The keyword is added to the Block WEB URLs list. 5.
- Page 122 S10 FAQ UARD 6. Click Apply. The new profile is listed. From here you can Edit or Delete the profile. NOTE: E CAREFUL WHEN EDITING THE PROFILE YOU MAY ALTER THE POLICY RULE HE INSTRUCTIONS IN ESTABLISH THE POLICY RULES Now that you’ve created a Keyword Filtering Profile, you can activate the filter.
- Page 123 Firewall 11. Click Apply. The new content filter is listed. From here you can Edit or Delete the content filter. NOTE: URLS HE FILTER WILL BLOCK SUCH AS WWW SEXPICTURE AND OTHER RELATED S THAT HAVE SEX IN THE DOMAIN NAME OWEVER IT WILL ALSO BLOCK “...
- Page 124 S10 FAQ UARD 2. Click Create to add a new Domain Filter profile. 3. Type a descriptive name for the domain filtering profile and type the domain name (in this case “www.sexpicture.com”) in the text boxes. Select Forbidden Domain from the Type drop-down list.
- Page 125 Firewall 5. Type the name of the domain you want to unblock in the Domain text box and select Trusted Domain from the drop-down list. 6. Click Add. The domain is added to the trusted domain list. 7. Click Apply. The new domain filters are listed. From here you can Edit or Delete the domain filter.
- Page 126 S10 FAQ UARD 8. Click Configuration → Policy → Content Filtering. 9. Click Create to add a new content filter policy. 10. Type a descriptive name for this content filtering profile and check Active to enable con- tent filtering. 11. In Domains Filtering, check Enable and select your new Keywords Filtering profile from the drop-down list.
- Page 127 Example: To allow a user access to only the www.billion.com URL, follow the two steps below. Step 1: Designate the URL www.billion.com as a trusted domain as described in Steps 5 ~ 7 in the previous section. Step 2: Click Configuration → Policy → Content Filtering → Create and select both “Domain...
- Page 128 S10 FAQ UARD QUESTION: What are “Block Java Applet” and “Block ActiveX” in Restrict Features? ANSWER: Block Java Applet and Block ActiveX blocks HTML access to potentially harmful instructions found in files with extensions such as .js, .class, .ocx or .cab. Downloaded malicious Java applets and JavaScript can steal, delete or modify information and compromise security and breach a user’s system.
- Page 129 Firewall Click Configuration → Policy → Content Filtering. 6. Click Create to create a new content filter. 7. Type a descriptive name for this content filter, and next to Active check Enable to acti- vate this content filter. 8. Next to Restrict Feature, check Enable and select the new profile from the drop-down list.
- Page 130 S10 FAQ UARD QUESTION: What is “Block Web Proxy” in Restrict Features? ANSWER: This policy blocks the user access to the Setup Web Proxy function, and prevents the user from circumventing the Restrict Features function for Internet use. To block the web proxy, follow these instructions. Click Configuration →...
- Page 131 Firewall Click Configuration → Policy → Content Filtering. 6. Click Create to create a new content filter. 7. Type a descriptive name for this content filter, and next to Active check Enable to acti- vate this content filter. 8. Next to Restrict Feature, check Enable and select the new profile from the drop-down list.
- Page 132 S10 FAQ UARD QUESTION: What is “Block Cookies” in Restrict Features? ANSWER: This policy blocks the saving/reading of cookies. Both secure and insecure web- sites are blocked from using this function. To block cookies, follow these instructions. Click Configuration → Network Object → Content Blocking → Restrict URL Fea- ture.
- Page 133 Firewall Click Configuration → Policy → Content Filtering. 6. Click Create to create a new content filter. 7. Type a descriptive name for this content filter, and next to Active check Enable to acti- vate this content filter. 8. Next to Restrict Feature, check Enable and select the new profile from the drop-down list.
- Page 134 S10 FAQ UARD QUESTION: What is “Block Surfing by IP Address” in the Restrict Features? ANSWER: Enabling the Block Surfing by IP Address policy prevents users from bypassing the Domain Filter function by blocking designated IP addresses from accessing the Internet (See example below). Example: The IP address http://123.123.123.123 will be blocked if this option is enabled.
- Page 135 Firewall From here you can Edit or Delete the profile. Now you can enable the Restrict URL Feature. 5. Click Configuration → Policy → Content Filtering. 6. Click Create to create a new content filter. 7. Type a descriptive name for this content filter, and next to Active check Enable to acti- vate this content filter.
- Page 136 S10 FAQ UARD You can also Move the filter, which changes the policy rule priority. The rule priority can be moved higher or lower by selecting before or after a specified rule number, which changes the order of the rules. See What does the Rule No.
- Page 137 What is Ethernet MAC filtering? How do I use it? ANSWER: The BiGuard S10 Series checks MAC addresses against a list of allowed or denied addresses before responding to a request. The following examples show a list of MAC filters.
- Page 138 S10 FAQ UARD Example 2: The user wants to block all MAC addresses (computers on the LAN) with the exception of address 00:11:11:11:11:11 from accessing the Internet. NOTE: 00:00:00:00:00:00 . (#) DESIGNATES ALL ADDRESS HE RULE DESIGNATES PRIORITY 1. Click Configuration → Policy → Ethernet MAC Filtering. 2.
- Page 139 10. Type 00:00:00:00:00:00 in the text box. This designates the filter to be applied to all MAC addresses. 11. Click Apply. The new filter is added to the list. QUESTION: Why can’t I ping the WAN IP address of the BiGuard S10 Series from the Internet? ANSWER: Make sure the Block WAN Request is disabled.
-
Page 140: Remote Access
S10 FAQ UARD 2. Next to Block WAN Request, click the Disable radio button. 3. Click Apply. You can now ping the BiGuard S10 WAN IP address. Remote Access QUESTION: How do I remotely configure the BiGuard S10 Series? ANSWER: Browse to http://BiGuard-S-WAN-IP-Address or https://BiGuard-S-WAN-IP- Address and ensure that the Remote Access function is enabled in the System →... - Page 141 Remote Access 2. Click Edit next to the account you would like to alter (for example, “admin”). 3. In the Inactivity Timeout text box, type the number of minutes you would like to change the auto logout timer to be. 4.
-
Page 142: Snmp
UARD 2. In the General settings tab, click Delete Files and click OK. SNMP QUESTION: What type of SNMP MIBs are supported by the BiGuard S10 Series? ANSWER: The following MIBs are supported by the BiGuard S10 Series: • RFC1213(MIB-II): •... -
Page 143: Ssl Knowledge
You will need to install Sun’s JRE 1.3.1 or newer (available for download at http://www.java.com) to use some of the features on the BiGuard S10 Series, but we recommend using version 1.5 or newer (Note: the Sun designation is version 5.0). -
Page 144: Ssl Applications
S10 FAQ UARD SSL Applications QUESTION: What SSL Applications does the BiGuard S10 Series provide? What do they ANSWER: The Billion BiGuard S10 Series provides clientless, identity-based, secure remote access to your protected internal network. Using the 'SSL VPN Portal' environ-... -
Page 145: Adding An Application Proxy
Series by HTTPS (using an administrator predefined URL), which is retrieved over HTTP by the SSL VPN, through URL request and BiGuard S10 series will redirect the request to a https server in your net- work. Web-application session authentication is supported, as are many popular web applications or web email systems, including Microsoft Outlook Web Access. - Page 146 S10 FAQ UARD 2. Click Edit to modify the group settings. 3. Click Add Application. 4. Type a descriptive name for the application, and select the application (FTP in this case) from the Application drop down list. 5. Type the designated IP address in the IP Address text box. 6.
- Page 147 SSL Applications 9. Click Create to add an account. 10. Type the user name and ensure the correct group is selected from the drop-down list. 11. Type a password in the text box, and retype the password for confirmation. 12. Check the Application Proxy Applications box (in this case “BiGuard FTP”). 13.
-
Page 148: Using Network Extender
S10 FAQ UARD 15. Click Connect for access. A new FTP browser screen is displayed for FTP access: NOTE: (SSO) INGLE FEATURE CAN ONLY BE USED IF THE USER HAS THE SAME AME AND ASSWORD ON THE EMOTE IGN ON ERVER AND THE FTP S ERVER... - Page 149 SSL Applications 2. Select the group to add the user account to from the drop-down list and click Next. 3. Type the user name and the password. Retype the password for confirmation. 4. Ensure the Network Extender Service button is enabled. 5.
- Page 150 S10 FAQ UARD A drop-down message appears at the top of your browser, prompting you to Install an ActiveX Control. 8. Click Install ActiveX Control. A Security Message is displayed. 9. Click Install. The installation begins and you see this screen.
- Page 151 SSL Applications A Hardware Installation message appears. 10. Click Continue Anyway. After setup is complete, an icon appears in the task bar, indi- cating that the Network Extender is active and the following screen appears. • Check Uninstall On Disconnect or Browser Exit to have the sys- tem uninstall the driver every time you disconnect the Network...
-
Page 152: Using Transport Extender
(192.168.1.254 by default). Alternatively, if your client address is not the same as your BiGuard S10 Series LAN network address you have to add a client route to your LAN network address as a routing table for Network Extender connection, if you would like to access the LAN network resources. - Page 153 SSL Applications The Add Account page is displayed. 3. Type the user name and the password. Retype the password for confirmation. 4. Select the Group that you want to assign the user to from the drop-down list. 5. Click the Transport Extender Service Enable button. 6.
- Page 154 S10 FAQ UARD 10. Log out and log in to the BiGuard S10 as the remote user created. The following screen is displayed 11. Click Transport Extender. A drop-down message appears at the top of your browser, prompting you to Install an ActiveX Control.
- Page 155 SSL Applications A Security Message will be displayed. 13. Click Install. The Transport Extender installs. After setup is complete, an icon appears in the task bar, indicating that the Network Extender is active and the following screen appears.
-
Page 156: Importing A Certificate
S10 FAQ UARD This screen displays the session information and a list of pending connections for applications. • Click the Error tab to view a list of session errors. • Check Enable Logging to allow the system to log all activity for the session. •... - Page 157 • FQDN (Domain Name): Type the FQDN (Fully Qualified Domain Name). The FQDN is the complete domain name for a specific host on the Internet, and consists of the host name and domain name (for example, “www.billion.com”). • Email: Type your email address.
- Page 158 S10 FAQ UARD 4. Click Save. You are prompted for a download location. Save the file to your computer and extract the files to a folder. Downloaded Extracted Extracted csr.zip file server.csr file server.key file 5. Next you can sign a certificate (for example from Verisign - www.verisign.com). 6.
- Page 159 SSL Applications 7. Open server.csr with a text editor such as Windows Notepad. 8. Copy the CSR text and paste it in the appropriate field on the certificate provider’s web- site and finish following the certificate provider’s instructions for getting a certificate. The certificate provider will send you the certificate by email.
-
Page 160: Registering The Biguard S10
15. Click Apply. The certificate is ready to be used. 16. Click Enable to enable the certificate. Registering the BiGuard S10 QUESTION: How do I register my BiGuard S10? ANSWER: Register the BiGuard S10 as follows. 1. On the status page, click Register. -
Page 161: Configuring An Active Directory Server
COM AND CLICK RODUCT EGIS TRATION This section describes how to configure an active directory server for use with the BiGuard S10. NOTE: Windows Server 2000 and 2003 support the Active Directory server fea- ture. Configuring an Active Directory server Follow these instructions to configure an Active Directory server. - Page 162 S10 FAQ UARD The Welcome to the Configure Your Server Wizard screen opens. 8. Click Next. The Preliminary Screen opens.
- Page 163 Configuring an Active Directory server 9. Click Next. The Server Role screen opens. 10. Select Domain Controller (Active Directory), and then click Next. The Summary of Selections screen appears.
- Page 164 S10 FAQ UARD 11. Click Next. The Welcome to the Active Directory Installation Wizard screen appears. 12. Click Next. The Operating System Compatibility screen appears.
- Page 165 Configuring an Active Directory server 13. Click Next. The Domain Controller Type screen opens. 14. Select Domain controller for a new domain, and then click Next The Create New Domain screen appears.
- Page 166 S10 FAQ UARD 15. Select Domain in a new forest, and then click Next. The New Domain Name screen opens. 16. Enter a domain name, and then click Next. The NetBIOS Domain Name screen appears.
- Page 167 Configuring an Active Directory server 17. Enter a domain NetBIOS name, and then click Next. The Database and Log Folders screen appears. 18. Select the folders that will store the Active Directory database and log. Then click Next. The Shared System Volume screen opens.
- Page 168 S10 FAQ UARD 19. Enter a location for the SYSVOL folder, and then click Next. The DNS Registration Diagnostics screen appears.
- Page 169 20. Select I will correct the problem later by configuring DNS manually (Advanced), and then click Next. The Permissions screen appears. 21. Select Permissions compatible only with Windows 2000 or Windows Server 2003 operating systems. 22. Click Next. The Directory Services Restore Mode Administrator Password screen appears. 23.
- Page 170 S10 FAQ UARD 24. Click Next. The Summary screen appears. 25. Click Next. The wizard will configure Active Directory automatically, and will notify you when the configuration is complete.
-
Page 171: Networking Basics
IP Addresses Networking Basics IP Addresses With the number of TCP/IP networks interconnected across the globe, ensuring that transmitted data reaches the correct destination requires each computer on the Internet to have a unique identifier. This identifier is known as the IP address. The Internet Protocol (IP) uses a 32-bit address structure, and the address is usually written in dot notation. -
Page 172: Private Ip Addresses
IP addresses from the Internet Service Provider (ISP). Not only was this method very costly, but the number of available IP addresses for computers is limited. Instead, BiGuard S10 uses a type of address sharing called Network Address Translation to grant Internet access to several computers on the same network through the same Internet account. -
Page 173: Why Use A Router
Routers periodically update each other with RIP, changing their routing tables when necessary. BiGuard S10 supports the RIP protocol. RIP also supports subnet and multicast protocols. RIP is not required for most home applications. Firewall Basics... -
Page 174: Why Use A Firewall
Internet. Still, there are ways for more dedicated hackers to either obtain information about your network or disrupt your network’s Internet access. Your BiGuard S10 provides an extra level of protection from such attacks with its built-in firewall. -
Page 175: Specifications
SSL VPN Specifications SSL VPN Access Connection • Network Extender • Transport Extender • Application Proxy Application & Management • Personalized Web Portal • Single Sign-On (SSO) • My Network Places (Web CIFS) • SSL event log and monitor • Terminal services (RDP5) •... -
Page 176: Firewall & Content Filter
Firewall & Content Filter • Stateful Packet Inspection (SPI) • Denial of Service (DoS) prevention • Packet Filter • Intrusion Detection • URL Filter • Java Applet/Active X/Cookie Blocking Web-Based Management • Easy-to-use web interface • Firmware upgraded through web-based interface •... -
Page 177: Hardware Specification
Hardware Specification Physical Interface • 1 x 10/100Mbps WAN port • 4 x 10/100Mbps LAN ports (1 port can be configured to DMZ) • Power Switch • Reset button Physical Specification • Dimensions: 19" x 6.54" x 1.65" (482mm x 166mm x 42mm w/ bracket) (250mm x 166mm x 33.8mm w/o bracket) Power Requirement •... -
Page 178: Glossary
Hardware Specification Glossary The following glossary of networking terms is provided for your convenience. Term Definition Access Point Access points are way stations in a wireless LAN that are connected to an Ethernet hub or server. Users can roam within the range of access points and their wireless device connections are passed from one access point to the next. - Page 179 LOSSARY Term Definition HTTP HTTP (HyperText Transport Protocol) is the communications protocol used to connect to servers on the World Wide Web. HTTP establishes a connection with a Web server and transmits HTML pages to client browser (for example Windows IE). HTTP addresses all begin with the prefix ‘http:/ /’...
- Page 180 Hardware Specification Term Definition Ping Ping (Packet INternet Groper) is a utility used to find out if a particular IP address is present online, and is usually used by networks for debugging. Port Ports are the communications pathways in and out of computers and net- work devices (routers and switches).
- Page 181 LOSSARY Term Definition TCP/IP TCP/IP (Transmission Control Protocol/Internet Protocol) is the main Inter- net communications protocol. The TCP part ensures that data is com- pletely sent and received at the other end. Another part of the TCP/IP protocol set is UDP, which is used to send data when accuracy and guar- anteed packet delivery are not as important (for example, in realtime video and audio transmission).
-
Page 182: Warranty
Billion, or by others than those previously specifically designated for that purpose by Billion. The warranty does not extend to defects resulting from normal wear and tear, nor does it extend to any deviating application relating to local, regional, or national (deviation) technical or safety standards.
Need help?
Do you have a question about the BiGuard S10 and is the answer not in the manual?
Questions and answers