Table of Contents
Advertisement
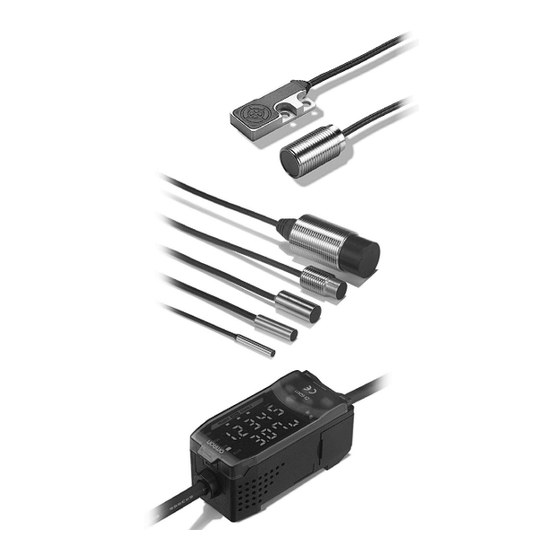
Quick Links
OMRON Corporation
Industrial Automation Company
Sensing Devices Division H.Q.
Application Sensors Division
Shiokoji Horikawa, Shimogyo-ku,
Kyoto, 600-8530 Japan
Tel: (81)75-344-7068/Fax: (81)75-344-7107
Regional Headquarters
OMRON EUROPE B.V.
Sensor Business Unit,
Carl-Benz-Str. 4, D-71154 Nufringen,
Germany
Tel: (49)7032-811-0/Fax: (49)7032-811-199
OMRON ELECTRONICS LLC
1 East Commerce Drive, Schaumburg, IL 60173
U.S.A.
Tel: (1)847-843-7900/Fax: (1)847-843-8568
OMRON ASIA PACIFIC PTE. LTD.
83 Clemenceau Avenue,
#11-01, UE Square,
239920 Singapore
Tel: (65)6835-3011/Fax: (65)6835-2711
OMRON (CHINA) CO., LTD.
Room 2211, Bank of China Tower,
200 Yin Cheng Road (M)
Shanghai, 200120 China
Tel: (86)21-5037-2222/Fax: (86)21-5037-2200
Authorized Distributor:
©
OMRON Corporation 2002
Note: Specifications subject to change without notice.
All Rights Reserved.
Printed in Japan.
0405-0.1M (1002) (M)
Smart Sensors: Inductive Displacement Type
ZX-E Series
Operation Manual
Cat. No. Z166-E1-02A
Advertisement
Chapters
Table of Contents

Related Manuals for Omron ZX-E


Summary of Contents for Omron ZX-E
- Page 1 OMRON EUROPE B.V. Sensor Business Unit, Carl-Benz-Str. 4, D-71154 Nufringen, Germany Tel: (49)7032-811-0/Fax: (49)7032-811-199 OMRON ELECTRONICS LLC 1 East Commerce Drive, Schaumburg, IL 60173 U.S.A. Tel: (1)847-843-7900/Fax: (1)847-843-8568 OMRON ASIA PACIFIC PTE. LTD. 83 Clemenceau Avenue, #11-01, UE Square, 239920 Singapore Tel: (65)6835-3011/Fax: (65)6835-2711 OMRON (CHINA) CO., LTD.
- Page 2 This manual describes the functions, performance, and application methods of a ZX-E Smart Sensor. To ensure safety, read this manual carefully before using the Sensor. In addition, keep this manual in an easily accessible location...
- Page 3 Contents, Warranty and Application Considerations, Preface Precautions for Safe Use/Correct Use, and How to Use this Manual Features Section 1 Preparations for Measurement Section 2 Basic Operation Section 3 Main Applications and Setting Methods Section 4 Detailed Settings Section 5...
- Page 4 Preface ZX-E Operation Manual...
-
Page 5: Table Of Contents
Preface Contents Contents Warranty and Application Considerations Precautions for Safe Use Precautions for Correct Use How to Use This Manual Section 1 Features ZX-E Features Section 2 Preparations for Measurement Basic Configuration Part Names and Functions Installing the Amplifier Unit... - Page 6 Preface Section 3 Basic Operation Flow of Operation Basic Knowledge for Operation Function Transition Charts Adjusting Linearity Section 4 Main Applications and Setting Methods Detecting Bottom Deadpoint Measuring Height Measuring Eccentricity and Vibration Measuring Thickness Section 5 Detailed Settings Setting Number of Samples to Average...
- Page 7 Preface Section 6 Auxiliary Functions Measuring with Multiple Amplifier Units Changing the Number of Display Digits Reversing the Display Adjusting Display Brightness (ECO Display) Using the Zero Reset Function Key Lock Function Initializing Settings Data Appendices Troubleshooting Error Messages and Countermeasures Q&A...
- Page 8 Preface ZX-E Operation Manual...
- Page 9 The following are some examples of applications for which particular attention must be given. This is not intended to be an exhaustive list of all possible uses of the products, nor is it intended to imply that the uses listed may be suitable for the products: •...
-
Page 10: Performance Data
FOR THE INTENDED USE WITHIN THE OVERALL EQUIPMENT OR SYSTEM. PERFORMANCE DATA Performance data given in this document is provided as a guide for the user in determining suitability and does not constitute a warranty. It may represent the result of OMRON’s test conditions, and the users must correlate it to actual application requirements. - Page 11 PREFACE ZX-E Operation Manual...
- Page 12 PREFACE ZX-E Operation Manual...
-
Page 13: Precautions For Safe Use
• Do not impose voltages exceeding the rated voltage (12 to 24 VDC ± 10%). • When supplying power to the Sensor, make sure that the polarity of the power is cor- rect, and do not connect to an AC power supply. -
Page 14: Precautions For Correct Use
Installation and Handling of Components Power Supply and Wiring • Do not extend the Sensor Head cable by more than 8 m. Use a ZX-XC@A Extension Cable (order separately) to extend the cable from the Sensor. • Use a shielded cable to extend the Amplifier cable. The shielded cable must have the same specifications as that of the Amplifier cable. -
Page 15: How To Use This Manual
Adjusting Linearity Outline ZX-E Smart Sensor linearity is adjusted before shipment, however more accurate linearity can be obtained by adjusting linearity again Provides an outline or gives a for the actual sensing objects and operating environment. flowchart of the operation de- scribed under the main heading. - Page 16 Procedures The order for the procedures is indicated by numbered steps. Visual Aids Provides information on important operating procedures, gives advice on how to use functions, and highlights important performance information. Indicates pages with relevant information. Indicates useful information for when problems arise.
-
Page 17: Section 1 Features
Section 1 FEATURES ZX-E Features ZX-E Operation Manual... -
Page 18: Zx-E Features
Section 1 FEATURES ZX-E Features The ZX-E Smart Sensor measures the distance between the Sensor Head and the sensing object. Example: Detecting the Bottom Deadpoint on a Press Machine Measurement detail Sensing object Distance Measurement output Judgement outputs ZX-E Operation Manual... - Page 19 Time lapsed after power up (min.) Many, Simple Functions Measurement Ready at Power ON The Smart Sensor can be used simply by installing and wiring it. Simply turn ON the power and it’s ready to operate. The measurement distance is displayed on the Amplifier Unit.
- Page 20 Section 1 FEATURES Simple Linearity Adjustment Place the sensing object at specified distances and simply press the ENT Key to exe- cute precise linearity adjustment. Time-consuming offset and range adjustments are not required. Precise adjustment is also possible for non-ferrous sensing objects.
- Page 21 Sensor Heads The Smart Sensor has a mutual interference prevention function which allows multiple Sensor Heads to be mounted close to each other. This function is supported for up to five Sensor Heads by using ZX-CAL2 Calculating Units. p. 26 and p. 120...
- Page 22 Section 1 FEATURES Extendable Sensor Head Cables An extension cable with a maximum length of 8 m can be connected. The ZX-XC-A Extension Cable is required to extend the Sensor Head cable. p. 24 Extension Cable Up to 8 m...
- Page 23 Resolution Confirm Measurement Status on a Personal Computer Use an Interface Unit and Smart Monitor V2 to view measurement waveforms and log measurement data on a personal computer. This function is useful for making on-site measurement adjustments and for day-to-day quality control.
- Page 24 Section 1 FEATURES ZX-E Operation Manual...
-
Page 25: Section 2 Preparations For Measurement
Section 2 PREPARATIONS FOR MEASUREMENT Basic Configuration Part Names and Functions Installing the Amplifier Unit Installing Sensor Heads Connections Wiring Output Cables ZX-E Operation Manual... -
Page 26: Basic Configuration
PREPARATIONS FOR MEASUREMENT Basic Configuration The basic configuration of the ZX-E-series Smart Sensors is shown below. ZX-L-series Smart Sensors (Laser Type) and ZX-E-series Smart Sensors (Inductive Displacement Type) are not compatible. Do not use ZX-L-series and ZX-E-series Smart Sensors together. Basic Configuration... -
Page 27: Part Names And Functions
103 (3) The connectors connect Calculation and Interface Units. (4) The output cable connects to the power supply and external devices, such as sync sensors or programmable controllers. (5) The Power ON indicator lights when the power is turned ON. - Page 28 Sensor Heads Preamplifier Sensor head Connector Connects to Amplifier Unit. Calculating Units Display ( ) Connectors (one on each side, two total) Connects to Amplifier Unit. Connector indicators Display Detail Light when Calculating Unit is connected to Amplifier Units. ZX-E...
- Page 29 (1) The communications connector connects the communications cable to the computer. (2) The Amplifier Unit connector connects to the Amplifier Unit. (3) The power supply indicator lights when the power is turned ON. (4) BUSY: Lights during communications with the Smart Sensor.
-
Page 30: Installing The Amplifier Unit
End Plates (order separately) PFP-M Installation Hook the connector end of the Amplifier Unit on the DIN Track and press in at the bot- tom until the Unit locks into place. Hook on the connector end Always hook the connector end of the Amplifier Unit on the DIN Track first. Mounting strength may decrease if the output cable end is hooked on the DIN Track first. - Page 31 Section 2 PREPARATIONS FOR MEASUREMENT Removal Method Push the Amplifier Unit up and pull out from the connector end. ZX-E Operation Manual...
-
Page 32: Installing Sensor Heads
ZX-ED@@T Sensor Heads (Non-threaded Type) Mounting Bracket (order separately) Y92E-F5R4 (for 5.4 mm dia.) When using a set screw, tighten the screw to a torque of 0.2 N ⋅ m or less. Mount the Sensor Head as shown in the following diagram. (Unit: mm) - Page 33 Section 2 PREPARATIONS FOR MEASUREMENT Installation Distance Mount the Sensor Head so that the distance between the Sensor Head and the sens- ing object is approximately half of the measurement distance. Example: ZX-ED01T Sensor Head Measurement distance: 0 to 1 mm 0.5 mm...
- Page 34 When using multiple Sensor Heads, separate each Sensor Head by the minimum dis- tances shown in the following diagram. The distance between Sensor Heads can be further reduced when the Sensor Heads are side by side if the mutual interference prevention function is used.
- Page 35 Use the enclosed Preamplifier Mounting Bracket. The Preamplifier can also be mounted to 35-mm DIN Track. Use the ZX-XBE2 Preamplifier DIN Track Mounting Bracket (order separately) when mounting the Preamplifier to DIN Track. Use M3 screws to fix the enclosed Preampli- fier mounting bracket.
-
Page 36: Connections
When disconnecting the Sensor Head, hold the connector ring and the Amplifier Unit connector and pull them straight out. Do not pull only on the connector ring, because the input cable of the Amplifier Unit may be dam- aged. Connector ring All settings on the Amplifier Unit will be cleared when the Sensor Head is replaced with a differ- ent model. - Page 37 Use a Calculating Unit to connect Amplifier Units when making calculations between Amplifier Units and to prevent mutual interference between Sensor Heads. The number of Amplifier Units that can be joined depends on the functions being used. Function No. of Connectable Amplifier Units...
- Page 38 Section 2 PREPARATIONS FOR MEASUREMENT Channel Numbers of Amplifier Units The following diagram shows the channel numbers when multiple Amplifier Units are connected. ZX-E Operation Manual...
- Page 39 Slide and connect the Interface Unit to the Amplifier Unit connector. Perform the above operation in the reverse order to remove Interface Units. When multiple Amplifier Units are used, connect the Interface Unit to the Amplifier Unit with the highest channel number.
-
Page 40: Wiring Output Cables
Unit, particularly when high resolution is required. (2) The GND terminal is the 0-V power supply terminal. When using an Amplifier Unit with an NPN output, the GND terminal is also the common I/O terminal for all I/O except for the linear output. - Page 41 Section 2 PREPARATIONS FOR MEASUREMENT I/O Circuit Diagrams NPN Amplifier Unit Brown 12 to 24 V DC Load HIGH judgement output White Load Green PASS judgement output Load LOW judgement output Gray 12 to 24 V DC Blue GND (0 V)
- Page 42 Section 2 PREPARATIONS FOR MEASUREMENT PNP Amplifier Unit Brown 12 to 24 V DC HIGH judgement White 12 to output V DC PASS judgement output Green Load LOW judgement output Gray Load Load Blue GND (0 V) Pink Judgement output hold input...
-
Page 43: Confirming Warm-Up Completion
PREPARATIONS FOR MEASUREMENT Confirming Warm-up Completion When the power is turned ON in RUN or T Mode, the sub-display will flash W-UP to show that the Sensor is warming up. Warm-up requires approximately 5 to 15 minutes. When warming up has been completed, the normal display will be shown. - Page 44 Section 2 PREPARATIONS FOR MEASUREMENT ZX-E Operation Manual...
-
Page 45: Section 3 Basic Operation
Section 3 BASIC OPERATION Flow of Operation Basic Knowledge for Operation Switching Modes Reading Displays Key Operations Setting Conditions Inputting Numerals Function Transition Charts Adjusting Linearity Selecting Sensing Object Material Entering Adjustment Values Executing Adjustment Initializing Adjustment Settings ZX-E Operation Manual... -
Page 46: Flow Of Operation
Adjusting Linearity p. 54 Adjusting Linearity Setting and Changing Measurement Data Making Settings for the Application p. 80 Setting Number of Samples to Average Using Hold Functions p. 81 p. 62 Detecting Bottom Deadpoint Comparing Measured Values p. 88 (Previous Value Comparison) p. - Page 47 BASIC OPERATION If Problems Occur Error Messages Abnormal Operation Error Messages and p. 137 p. 136 Troubleshooting Countermeasures Meaning of Digital Display Unknown Terms p. 139 Glossary Quick Reference for Digital p. 157 Displays Measuring with Multiple Using ECO Display Function Amplifier Units p.
-
Page 48: Basic Knowledge For Operation
Section 3 BASIC OPERATION Basic Knowledge for Operation Switching Modes The ZX-E has three modes. Use the Mode Switch on the Amplifier Unit to switch between modes. Switch to the desired mode before starting operation. Mode Description Normal operation mode... -
Page 49: Reading Displays
Section 3 BASIC OPERATION Reading Displays The data displayed on the main and sub-displays depends on the mode currently selected. When the power is first turned ON after shipment, RUN mode data is dis- played. Main display Sub-display Mode Main Display... -
Page 50: Key Operations
Section 3 BASIC OPERATION Key Operations Use the Control Keys to change the display and set measurement conditions. Control Keys The mode currently selected determines the key functions. Switching Modes, p. 46 Function RUN Mode T Mode FUN Mode LEFT Key... -
Page 51: Setting Conditions
Display the target function on the main display and select the desired value from the sub-display to set measurement conditions. This section uses the example of setting a peak hold as the hold condition to explain how to set measurement conditions. -
Page 52: Inputting Numerals
Section 3 BASIC OPERATION Inputting Numerals This section describes how to input numeric values for threshold and output settings. The example of direct input of the low threshold value will be used. Changing the low threshold from 0.2000 to 0.1900 Changing to T Mode Set the mode switch to T. -
Page 53: Function Transition Charts
The numerals shown in the above diagram are an example only. The actual display may be different. In RUN and T modes, the position of the threshold switch will determine whether the HIGH or LOW threshold will be displayed. Threshold switch... -
Page 54: Fun Mode
Note 1: Linearity adjustment is dis- played first when you enter FUN mode. p. 83 p. 81 When CLOSE is selected, the special functions will not be displayed and the display will return to LINER. Special functions Previous value (See note 2.) - Page 55 2-sensor operation is displayed on all but the CH1 Amplifier Unit. This symbol indicates that after the ENT Key has been pressed to confirm the selection, the LEFT and RIGHT Keys should be pressed to move through the menu.
-
Page 56: Adjusting Linearity
This section describes how to set the sensing object material. Selection Material FE (default) Iron Stainless steel (SUS304) Aluminum Linearity According to Material Characteristic Data, p. 148 To use the default linearity adjustment after changing materials, select the material and then perform Executing Adjustment. ZX-E Operation Manual... - Page 57 Press the ENT Key. METAL will be displayed. Press the UP or DOWN Key. The sub-display will flash. Use the UP or DOWN Key to select the mate- rial. Press the ENT Key to confirm the selection. The setting will be registered.
-
Page 58: Entering Adjustment Values
Section 3 BASIC OPERATION Entering Adjustment Values Set the sensing object at the positions for 0%, 50%, and 100% of the rated measure- ment distance and register those measured values as the adjustment values. 100% Rated measurement distance Measurement distance, p. 143 Perform the registration in order, starting with 0%, then 50% and 100% of the measure- ment distance. - Page 59 Use the LEFT and RIGHT Keys to display D050. Press the ENT Key. The sub-display will show OK and the adjustment value will be registered. Press the ENT Key again to reinput the adjust- ment value. Entering Adjustment Value for 100% Position...
-
Page 60: Executing Adjustment
Section 3 BASIC OPERATION Executing Adjustment This section describes how to execute adjustment based on the settings made in steps Executing Adjustment Use the LEFT and RIGHT Keys to display TABLE on the main display and START on the sub-display. -
Page 61: Initializing Adjustment Settings
BASIC OPERATION Initializing Adjustment Settings Initialize the linearity adjustment settings to return to the default settings. This section describes how to initialize the linearity adjustment settings only. To initial- ize other settings, use the INIT function. Initializing Settings Data, p. 133 Moving to FUN Mode and LINER Set the mode switch to FUN. - Page 62 Section 3 BASIC OPERATION ZX-E Operation Manual...
-
Page 63: Section 4 Main Applications And Setting Methods
Section 4 MAIN APPLICATIONS AND SETTING METHODS Detecting Bottom Deadpoint Measuring Height Measuring Eccentricity and Vibration Measuring Thickness ZX-E Operation Manual... -
Page 64: Detecting Bottom Deadpoint
This section describes, as an example, how to detect the bottom deadpoint of a press machine. When making settings while still connected to an external device, set the Amplifier Unit’s judgement output hold input to ON so that the output to the external device remains unchanged. - Page 65 Mount the Sensor Head and the sensing object to the press machine. Refer to the fol- lowing diagram for the required mounting jig. Installing Sensor Heads, p. 30 Use a ferrous sensing object and one that is as large as or larger than the standard sensing object. Sensing object, p. 143 Sensing object...
- Page 66 Section 4 MAIN APPLICATIONS AND SETTING METHODS Put the press machine in inching mode and lower the stripper (or top mold) to the bottom deadpoint. Stripper or top mold Bottom mold 1/2 the Adjust the position of the Sensor Head so that...
- Page 67 The hold function is used to detect the bottom deadpoint. To ignore bounding when measuring during press operation, specify a time delay from the timing signal to when sampling starts. When the timing signal cannot be input from the device, set a self-down trigger. Measured value Self-trigger level The bottom value is held.
-
Page 68: Comparing Measured Values
A value other than 0 can be set. Setting Offset Values, p. 128 Setting Tolerance Judgement Values Set the upper and lower limits (the HIGH and LOW threshold values) for the PASS (OK) range for the reference value set in step Setting... -
Page 69: Measuring Height
Section 4 MAIN APPLICATIONS AND SETTING METHODS Measuring Height This section describes how to measure the height of an object, using a rivet as an example. Rivet: Metal Plate: Resin When making settings while still connected to an external device, set the Amplifier Unit’s judgement output hold input to ON so that the output to the external device remains unchanged. - Page 70 Place the reference sample in position and adjust the Sensor Head position. Refer to the Amplifier Unit display and adjust the Sensor Head position so that the upper and lower limits of the height (H) to be measured fall within the measurement distance.
- Page 71 When the timing signal cannot be input from the device, set a self-down trigger. Measured value Self-trigger level The bottom value is held. Sampling The following settings are required when the reference sample height is displayed using the scaling function: Measurement trigger: Self-up trigger Hold condition: Peak hold Refer to Section 5 Detailed Settings for details on settings.
- Page 72 MAIN APPLICATIONS AND SETTING METHODS Measuring Reference Samples The height of the reference sample is measured using position teaching and the mea- surement result is registered as the HIGH threshold value. The registered value becomes the reference for the threshold value set in step Refer to Section 5 Detailed Settings for details on settings.
-
Page 73: Measuring Eccentricity And Vibration
This section describes, as an example, how to measure the eccentricity of a shaft. Metal shaft When making settings while still connected to an external device, set the Amplifier Unit’s judgement output hold input to ON so that the output to the external device remains unchanged. - Page 74 (resin or metal) Adjusting Measurement Distances Adjust the position of the Sensor Head so that the distance (H) between the Sensor Head and the sensing object is about half the measurement distance, as shown in the diagram. Refer to the Amplifier Unit display while adjusting the Sensor Head position.
- Page 75 (HIGH threshold) or lower limit (LOW threshold) for a PASS (OK) judgement. The judgement result will be output based on the threshold value set here. The output will depend on the type of threshold set.
-
Page 76: Measuring Thickness
Section 4 MAIN APPLICATIONS AND SETTING METHODS Measuring Thickness This section describes how to measure thickness, using the thickness of a steel plate as an example. Steel plate When making settings while still connected to an external device, set the Amplifier Unit’s judgement output hold input to ON so that the output to the external device remains unchanged. - Page 77 CH2 output cable to the external device to enable external control. Connections, p. 34 The CH1 Amplifier Unit will display (output) the measurement result for the CH1 Sensor Head only. Mounting Sensor Heads to Inspection Device Refer to the following diagram and prepare mounting jigs. Mount the Sensor Heads fac- ing each other.
- Page 78 Set a reference sample with a known thickness (T). Adjust the Sensor Heads so that the distances between the reference sample and the Sensor Heads (A and B) are each about half the measurement distance. Refer to the Amplifier Unit display when adjusting the Sensor Heads.
- Page 79 Performing Calculations, p. 116 Setting Tolerance Judgement Values Set the upper and lower limits (HIGH and LOW thresholds) for the thickness for a PASS (OK) judgement. The HIGH, PASS, and LOW judgement results will be output based on the threshold values set here.
- Page 80 Section 4 MAIN APPLICATIONS AND SETTING METHODS ZX-E Operation Manual...
-
Page 81: Section 5 Detailed Settings
Section 5 DETAILED SETTINGS Setting Number of Samples to Average Using Hold Functions Comparing Measured Values (Previous Value Comparisons) Changing Display Scales Entering Threshold Values Linear Output Setting Judgement Output Timing (Timer) ZX-E Operation Manual... -
Page 82: Setting Number Of Samples To Average
DETAILED SETTINGS Setting Number of Samples to Average The number of samples to average is the number of data points used to average data measured by the Sensor. The average value will be output. Use the number of samples to average function to ignore sudden variations in measured values. -
Page 83: Using Hold Functions
The value to be held during that sampling period is selected here. The CLAMP value is output until the first sampling period is finished. CLAMP value, p. 110 Any of the 5 settings shown in the table can be selected as the value to hold. Selection Details Hold measurement is not performed. - Page 84 Sampling period S-H (Sample hold) Holds the measured value at the start of the sampling period. The output changes at the start of the sampling period and is held until the start of the next sampling period. Output Current meas-...
- Page 85 Hysteresis (hysteresis width) Set the hysteresis based on the fluctuations in the measured values around the trigger level. The hysteresis will be applied from the start of the sampling period and will prevent timing input chatter- ing. ZX-E...
- Page 86 Selecting Trigger Types Use the LEFT and RIGHT Keys to display H- TRG on the main display. H-TRG will not be displayed if the hold condition is set to OFF. Press the UP or DOWN Key. The sub-display will flash.
- Page 87 Setting Hysteresis Width (when UP or DOWN Is Selected) Use the LEFT and RIGHT Keys to display H- HYS on the main display. H-HYS will not be displayed if timing input (TIMIG) is set as the trigger. Press the UP or DOWN Key.
- Page 88 The default delay time setting is OFF. Make the sum of the delay time and sampling period less than the timing input ON interval. If the next timing input for measurement is received before the delay and sampling period have passed, that timing input will be ignored and will not be reflected in the sampling.
- Page 89 Setting Delay Time Use the LEFT and RIGHT Keys to display H- D-T on the main display. H-D-T will not be displayed if the H-DLY function is set to OFF. Press the UP or DOWN Key. The leftmost digit of the sub-display will flash.
-
Page 90: Comparing Measured Values (Previous Value Comparisons)
(Previous Value Comparisons) Use the previous value comparison function to ignore gradual changes in measured values over time, due to factors such as temperature drift, and only detect and judge sudden changes. The hold function must be set before previous value comparison can be set. The difference from the previous hold value with a PASS judgement becomes the measured value. - Page 91 DETAILED SETTINGS Moving to COMP Press the UP or DOWN Key. The sub-display will flash. Use the UP and DOWN Keys to display SET or ALL. Press the ENT Key. Use the LEFT and RIGHT Keys to display COMP on the main display.
-
Page 92: Changing Display Scales
The scaling set here is reflected in the display only. The output does not change. The minimum display value is − 19,999 and the maximum is 59,999. If the measurement result is less than the minimum display value after scaling is executed, the display will be − 19,999. If the measurement result is greater than the maximum, the display value will be 59,999. - Page 93 Value to display: 0.3 mm Sensing object The settings listed below return to the default settings when scaling is set. Make the settings for these items after scaling settings have been completed. Self-trigger level, p. 83 Output Settings (Monitor Focus), p. 103 Using the Zero Reset Function, p.
- Page 94 Section 5 DETAILED SETTINGS One-point Scaling With one-point scaling, measurement is performed for one position and an offset value is set for that measurement. Both offset and display inversions (changing the relation- ship between increasing and decreasing values) can be set.
- Page 95 Set the sensing object at the position where the display value change is required. Set the sensing object within the measurement distance. The ENABLE indicator will be lit when the sensing object is within the measurement distance. Scaling is not possible if the sensing object is not within the distance.
- Page 96 Confirming that Scaling Is Completed If scaling has been completed correctly, the display will be OK. If scaling was unable to be completed, the display will be Check that the sensing object is within the measurement distance and execute scaling again.
- Page 97 Value to display: 0.3 mm Sensing object Separate the two specified points by at least 1% of the rated measurement distance for the con- nected Sensor. For example, the rated measurement distance for the ZX-ED01T Sensor is 1 mm. Therefore, the two specified points must be separated by 10 µ...
- Page 98 Section 5 DETAILED SETTINGS Setting the Second Point Place the sensing object in the position for which the display is to be changed (the sec- ond point). The sensing object must be set at a distance at least 1% of the rated measurement distance away from the first point and also at a distance within the measurement distance range.
-
Page 99: Entering Threshold Values
When making settings while still connected to an external device, set the Amplifier Unit judgement’s output hold input to ON so that the output to the external device remains unchanged. The judgement outputs in T mode will be the same as in RUN mode, i.e., HIGH, PASS, and LOW. - Page 100 Inputting Threshold Values Directly The threshold values can be set by directly inputting the numeric values. Direct input is useful when the dimensions for an OK judgement are known beforehand or when fine-tuning threshold values after teaching. Moving to T Mode Set the mode switch to T.
- Page 101 Threshold (upper sample (lower limit) limit) Hold, trigger mode, and scaling settings that have been made before teaching are reflected in the teaching measurements. Moving to T Mode Set the mode switch to T. Setting Threshold Values Move the threshold switch to either H or L, i.e., the threshold to be set.
- Page 102 Moving to T Mode Set the mode switch to T. Start the device. The threshold switch can be set to either position. Both HIGH and LOW thresholds will be set, regardless of the switch setting. ZX-E Operation Manual...
- Page 103 If ERRLH is displayed: p. 98 The threshold values set using automatic teaching can be changed using direct input. This is useful when setting judgement tolerances for measured values. p. 98...
-
Page 104: Hysteresis Setting
Section 5 DETAILED SETTINGS Hysteresis Setting Set the hysteresis width for the upper and lower limits of judgements when the HIGH, PASS, or LOW judgements are unstable near the threshold values. Hysteresis (hysteresis width) HIGH threshold value Measured value Operating value... -
Page 105: Linear Output
Linear output refers to the conversion of measurement results to a 3 to 21-mA current output or a − 5 to 5-V voltage output. This section describes how to choose either cur- rent or voltage output and how to set the linear output range. Match the settings to suit the connected external device. - Page 106 This section describes how to set the output range, using an example of current output with a range with the following conversions: 0.2 mm to 4 mA and 0.8 mm to 20 mA. Change the values in the example to suit a voltage output as necessary.
- Page 107 If scaling or calculation has been set, set a value that ment the numeric value. reflects those settings. The flashing digit, i.e., the digit for which a value can be set, will change as shown in the diagram. Sub-display Digit moves...
- Page 108 Press the ENT Key to confirm the settings. Confirming Completion of Monitor Focus Settings The display will read OK if monitor focus has been set correctly. The display will be NG if the settings are incorrect. If the settings are incorrect, check the following points and execute the monitor focus again.
- Page 109 Discrepancies may occur between the linear output current (or voltage) values set on the Amplifier Unit and the actual current (or voltage) values measured due to the condi- tions for the connected external device or other factors. The linear output correction function can be used to correct this discrepancy.
- Page 110 Press the ENT Key. Use the LEFT and RIGHT Keys to display L-ADJ on the main display. The units for the monitor focus settings (mA or V) will be shown on the sub-display. Press the ENT Key. The display will change to the settings for the first point (A).
- Page 111 Confirming Setting Results If linear output correction has been registered correctly, the sub-display will show OK. If the correction is not registered correctly, the display will show NG. Check that the current (or voltage) value for the two points are not the same and execute again.
- Page 112 • For voltage output: − 5 to 5 V or maximum (approx. 5.5 V) For Hold Measurements Even if KEEP is set, the output before the first hold value is obtained will be the same as CLAMP. Moving to FUN Mode and SPCL Set the mode switch to FUN.
- Page 113 Selecting Output Status for Non-measurement Press the UP or DOWN Key. The sub-display will flash. Use the UP and DOWN Keys to select either KEEP or CLAMP. Press the ENT Key to confirm the selection. The output status will be registered.
-
Page 114: Setting Judgement Output Timing (Timer)
Section 5 DETAILED SETTINGS Setting Judgement Output Timing (Timer) The timing for judgement outputs can be adjusted to match the operation of external devices. Selection Details OFF (default) Outputs the judgement as soon as the judgment result has been confirmed. - Page 115 Section 5 DETAILED SETTINGS The following description uses the OFF-delay timer as an example. Make the neces- sary adjustments if other timers are used. Moving to FUN mode and TIMER Set the mode switch to FUN. Use the LEFT and RIGHT Keys to display TIMER on the main display.
- Page 116 Section 5 DETAILED SETTINGS Use the Cursor Keys to set the timer time Move between digits. (ms). Increment and decre- ment the numeric value. Press the ENT Key to confirm the setting. The timer time will be registered. ZX-E Operation Manual...
-
Page 117: Section 6 Auxiliary Functions
Section 6 AUXILIARY FUNCTIONS Measuring with Multiple Amplifier Units Changing the Number of Display Digits Reversing the Display Adjusting Display Brightness (ECO Display) Using the Zero Reset Function Key Lock Function Initializing Settings Data ZX-E Operation Manual... -
Page 118: Measuring With Multiple Amplifier Units
The response time for CH2 Amplifier Units to which expressions have been set is increased by 1.0 ms. The response time is also influenced by the setting for the number of samples to average, so the response time will be the response time based on the set number of samples to average + 1.0 ms. - Page 119 Section 6 AUXILIARY FUNCTIONS Adding and Subtracting Measurement Results The expression A+B or A − B is used. All settings are made on the CH2 Amplifier Unit. Moving to FUN and CALC Set the mode switch to FUN on the CH2 Amplifier Unit.
- Page 120 Section 6 AUXILIARY FUNCTIONS Finding Thicknesses The expression THICK is used. Prepare a sensing object of known thickness before- hand (standard sensing object). The settings are all performed on the CH2 Amplifier Unit. Calculating Unit Thickness Moving to FUN and CALC Place the standard sensing object in positions.
- Page 121 Enter the actual dimensions of the reference object. Increment and decre- ment the numeric value. The position of the decimal point can be changed using the next steps. Press the ENT Key to confirm the setting. The numeric values will be confirmed and the decimal point will flash.
- Page 122 Setting Number of Samples to Average, p. 80 Response time is longer when the mutual interference prevention function is used. • Response time = (15 ms + response time based on set number of samples to aver- age) × number of Amplifier Units •...
- Page 123 Section 6 AUXILIARY FUNCTIONS Settings for mutual interference prevention are made on the CH1 Amplifier Unit. Moving to FUN and SPCL Set the mode switch to FUN on the CH1 Amplifier Unit. Use the LEFT and RIGHT Keys to display SPCL on the main display.
- Page 124 Enter the value for the total number of con- nected Amplifier Units. Mutual interference pre- vention cannot be set for only some of the Units. Press the ENT Key to confirm the setting. The number of connected Amplifier Units will be regis- tered.
-
Page 125: Changing The Number Of Display Digits
Select the number of digits for the main and sub-displays in RUN mode. The default setting is 5 digits. When 4 or less digits are set, the digits are disabled from the rightmost digit first. Moving to FUN and SPCL Set the mode switch to FUN. -
Page 126: Reversing The Display
AUXILIARY FUNCTIONS Reversing the Display The main and sub-digital displays can be reversed, i.e., be turned upside down. The Cursor Key operation will also be reversed. This function is useful when mounting the Amplifier Unit upside down on a device. - Page 127 The sub-display will flash. Select either OFF or ON. OFF: Display not reversed (default) ON: Display reversed Press the ENT Key to confirm the selection. The display setting will be registered. When ON is selected, the display will be reversed. ZX-E Operation Manual...
-
Page 128: Adjusting Display Brightness (Eco Display)
Section 6 AUXILIARY FUNCTIONS Adjusting Display Brightness (ECO Display) When the ECO display function is used, the digital displays are not lit, reducing current consumption. Moving to FUN and SPCL Set the mode switch to FUN. Use the LEFT and RIGHT Keys to display SPCL on the main display. -
Page 129: Using The Zero Reset Function
AUXILIARY FUNCTIONS Using the Zero Reset Function When the zero reset function is used, the reference value “0” is registered as the height and the measured value can be displayed and output as a positive or negative deviation (tolerance) from the reference value. - Page 130 Section 6 AUXILIARY FUNCTIONS Setting Offset Values Set an offset value when the reference value for zero reset is a value other than 0. Moving to FUN and SPCL Set the mode switch to FUN. Use the LEFT and RIGHT Keys to display SPCL on the main display.
- Page 131 The minimum display value is − 19,999 and the maximum is 59,999. If the measurement result after zero reset is less than the minimum, the display will be − 19,999. If the measurement result is greater than the maximum, the display will be 59,999. Zero reset can be executed only when the measured value is ±...
- Page 132 Zero reset is released when the power is turned OFF. Turn OFF zero reset memory if, as in the example below, the zero point is reset for each measure- ment. If zero reset memory is enabled, the zero reset level data will be written in the Amplifier Unit non-volatile memory (EEPROM) at each zero reset.
- Page 133 Selecting Whether or Not to Enable Zero Reset Memory Press the UP or DOWN Key. The sub-display will flash. Use the UP and DOWN Keys to select ON or OFF. ON: Zero reset memory enabled (default) OFF: Zero reset memory disabled Press the ENT Key to confirm the selection.
-
Page 134: Key Lock Function
AUXILIARY FUNCTIONS Key Lock Function The key lock function disables all Amplifier Unit keys. Once the keys have been disabled, no key input will be accepted until the lock is released. This function is useful to prevent inadvertent changes to settings. -
Page 135: Initializing Settings Data
AUXILIARY FUNCTIONS Initializing Settings Data This function resets all settings to their default values. Linearity adjustments, however, are not initialized using this function. To initialize linearity adjustment data, perform initialization in linearity adjustment mode. Initializing Adjustment Settings, p. 59 Function Default Value No. - Page 136 Section 6 AUXILIARY FUNCTIONS Set the mode switch to FUN. Use the LEFT and RIGHT Keys to display INIT on the main display. Press and hold down the ENT Key. The sub-display will display “-----”. Release the ENT Key once OK is displayed on the sub-display.
-
Page 137: Appendices
APPENDICES Troubleshooting Error Messages and Countermeasures Q&A Glossary Specifications and Dimensions Characteristic Data Quick Reference for Displays ZX-E Operation Manual... -
Page 138: Troubleshooting
• Has a timing input been made while hold is enabled and the trigger type has p. 81 on “----”. been set to TIMIG? • If the hold function is enabled and the trigger type is UP or DOWN, has the self-trigger level been set to an appropriate value? ZX-E Operation Manual... -
Page 139: Error Messages And Countermeasures
APPENDICES Error Messages and Countermeasures This section outlines the error messages displayed on the main display and the countermea- sures for those messages. Display Error Countermeasure Pages E-CHL There are two Sensors but only one • If two Amplifier Units have been connected, turn OFF the p. -
Page 140: Q&A
Type) and ZX-L-series Smart Sensors (Laser Type) are not com- patible. Can the ZX-SF11 Interface Unit used with the Yes, if the Interface Unit is version 2.0 or later. If the Interface Unit ZX-L-series Smart Sensors (Laser Type) be is an earlier version, contact your OMRON representative. -
Page 141: Glossary
54 Linear output The linear output is analog data output from the linear output line. Either a current or voltage output can be selected. The linear output is made based on the display value and monitor focus settings. -
Page 142: Specifications And Dimensions
(See note 1.) Current output: 4 to 20 mA/F.S., Max. load resistance: 300 Ω Linear output Voltage output: ± 4 V ( ± 5 V, 1 to 5 V, See note 3.), Output impedance: 100 Ω (See note 2.) Judgement outputs... - Page 143 The response speed of the judgement outputs is calculated as the measurement period x (No. of samples to average setting + 1). 2. The output can be switched between current output and voltage output using a switch on the bottom of the Amplifier Unit.
- Page 144 APPENDICES ZX-ED@@T and ZX-EM@@T Sensor Heads (Unit: mm) Preamplifier Sensor Heads (Same for all models) ZX-EDR5T Round vinyl-insulated coaxial cable, 1 core, 2.5 dia. (ZX-EDR5: 1.7 dia.) Standard length: 2 m ZX-ED01T ZX-ED02T Round vinyl-insulated coaxial cable, 9 cores, 5.1 dia.
- Page 145 0 to 2 mm 0 to 7 mm 0 to 4 mm 0 to 2 mm distance 18 × 18 mm 18 × 18 mm 30 × 30 mm 30 × 30 mm 60 × 60 mm 45 × 45 mm Standard...
- Page 146 APPENDICES 1. Resolution: The resolution is the deviation ( ± 3 σ ) in the linear output when connected to the Amplifier Unit. Notes: The above values indicate the deviations observed 30 minutes after the power is turned ON. (The resolu- tion is measured with the standard sensing object at 1/2 of the measurement distance range, with the Amplifier Unit set for the maximum average count of 4,096 per period.)
- Page 147 ZX Series Current consumption 12 mA max. (supplied from the Smart Sensor Amplifier Unit) Operating: 0 to 50 ° C, Storage: − 15 to 60 ° C (with no icing or condensation) Ambient temperature Ambient humidity Operating and storage: 35% to 85% (with no condensation)
- Page 148 APPENDICES ZX-SF11 Interface Unit (Unit: mm) Vinyl-insulated round cable, 5.2 dia. Average length: 0.5 m Connector pin arrangement Pin No. Name ZX-E Operation Manual...
- Page 149 (red) Protection circuits Reverse power supply wiring protection Operating: 0 to 50 ° C, Storage: − 15 to 60 ° C (with no icing or condensation) Ambient temperature Ambient humidity Operating and storage: 35% to 85% (with no condensation)
-
Page 150: Characteristic Data
APPENDICES Characteristic Data Linearity for Sensors (after Adjusting Linearity with Standard Sensing Object) ZX-ED01T ZX-EDR5T Measurement distance (mm) Measurement distance (mm) ZX-EM07MT ZX-ED02T/EM02T Measurement distance (mm) Measurement distance (mm) ZX-EM02HT ZX-EV04T Measurement distance (mm) Measurement distance (mm) ZX-E Operation Manual... - Page 151 APPENDICES Measuring Sensing Objects of Different Sizes after Adjusting Linearity with Standard Sensing Object ZX-ED01T ZX-EDR5T Measurement distance (mm) Measurement distance (mm) ZX-EM07MT ZX-ED02T/EM02T Measurement distance (mm) Measurement distance (mm) ZX-E Operation Manual...
- Page 152 APPENDICES ZX-EM02HT ZX-EV04T Measurement distance (mm) Measurement distance (mm) ZX-E Operation Manual...
- Page 153 APPENDICES Adjusting Linearity for Each Sensing Object (The measured sensing object is the same as the object for which linearity was adjusted.) ZX-ED01T ZX-EDR5T Measurement distance (mm) Measurement distance (mm) ZX-EM07MT ZX-ED02T/EM02T −0.8 −1.0 Measurement distance (mm) Measurement distance (mm)
- Page 154 APPENDICES ZX-EM02HT ZX-EV04T Measurement distance (mm) Measurement distance (mm) ZX-E Operation Manual...
- Page 155 APPENDICES Measuring Sensing Objects of Different Materials (Iron, Stainless Steel, and Aluminum) after Iron Selected as Material and Linearity Adjusted p. 54 ZX-ED01T ZX-EDR5T Measurement distance (mm) Measurement distance (mm) ZX-EM07MT ZX-ED02T/EM02T Measurement distance (mm) Measurement distance (mm) ZX-E Operation Manual...
- Page 156 APPENDICES ZX-EV04T Measurement distance (mm) ZX-E Operation Manual...
- Page 157 APPENDICES Selecting Material for Each Sensing Object (Iron, Stainless Steel, or Aluminum) and then Adjusting Linearity (The measured sensing object is the same as the object for which linearity was adjusted.) p. 54 ZX-ED01T ZX-EDR5T Measurement distance (mm) Measurement distance (mm)
- Page 158 APPENDICES ZX-EV04T Measurement distance (mm) ZX-E Operation Manual...
-
Page 159: Quick Reference For Displays
APPENDICES Quick Reference for Displays Using the Quick Reference Items in the Display column marked with an asterisk (*) appear on the sub-display. All other items appear on the main display. Display Details Pages (*) 1-SHT Timer/One-shot timer p. 112 A20mA The meaning of this display item depends on the selected functions. - Page 160 D000 Linearity adjustment value input at 0% of measurement distance position p. 56 D050 Linearity adjustment value input at 50% of measurement distance position p. 56 D100 Linearity adjustment value input at 100% of measurement distance posi- p. 56 tion...
- Page 161 (*) S-H Hold/Sample hold p. 81 SCALE Scaling setting p. 90 (*) SET The meaning of this display item depends on the main display. : Displays output-related functions from special menu p. 51 : Linearity adjustment p. 54 SPCL Special menu p.
- Page 162 APPENDICES ZX-E Operation Manual...
-
Page 163: Index
ECO display........126 Amplifier Units ENABLE indicator ......25 dimensions........140 error messages........ 137 installation........28 measuring with multiple Units ..116 part names........25 specifications ......... 140 FUN mode description ........46 displays ........... 47 function transitions ......52 basic configuration ...... - Page 164 Index position teaching........ 99 Power ON indicator ......25 judgement output hold input line ..38 Preamplifiers........33 judgement output timing....112 present value ........139 KEEP ..........110 Q&A ..........138 key input disabling......... 132 key lock releasing ........132 reference values setting ..........
- Page 165 ..........83 trigger mode selecting........... 83 troubleshooting ........ 136 vibration measuring ........71 warming up ....12, 17, 41, 159 wiring..........38 zero reset ......... 127 executing ........129 input line .......... 38 releasing ........130 saving ..........130 setting offset values .......
- Page 166 Index ZX-E Operation Manual...
-
Page 167: Revision History
Revision History A manual revision code appears as a suffix to the catalog number at the bottom of the front and back covers of this manual. Cat. No. Z166-E1-02A Revision code Revision code Date Revised contents Sept. 2002 Original production Sept. - Page 168 ZX-E Operation Manual...
Need help?
Do you have a question about the ZX-E and is the answer not in the manual?
Questions and answers