
Subscribe to Our Youtube Channel
Related Manuals for Webasto ProCore Edge


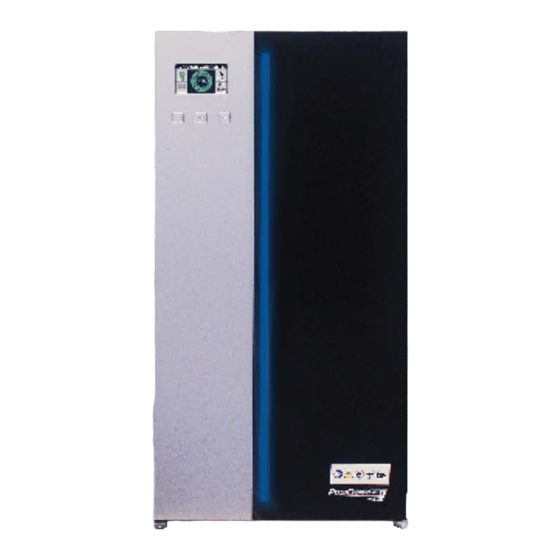
Summary of Contents for Webasto ProCore Edge
- Page 1 ProCore Edge North America Installation, Operation, Service & Maintenance Rev 04/27/23...
- Page 2 ProCore Edge © Webasto Charging Systems, Inc., 2023. All rights reserved. ProCore Edge is a product line of Webasto Charging Systems, Inc. (WCSI). Webasto Charging Systems and the Webasto Charging Systems logo are trademarks of WCSI. Corporate names, trademarks, registered trademarks, service marks, symbols, and logos stated herein are the property of the respective companies.
- Page 3 A NOTE ABOUT CUSTOMER SUPPORT Please write down the unit serial number in the Owner’s Record below to ensure superior service, and have it available when contacting Webasto Customer Service. The serial number can be found on the nameplate rating label on the left side of the unit.
- Page 4 8. Ship-to company address We also recommend taking pictures using your cell phone in case you need to send them to Webasto Customer Support via text message or email – we can use the images to help diagnose any problems.
-
Page 5: Table Of Contents
Battery Display ..................49 Alternate Battery Display ..............52 Faults and Warnings – Hardware Diagnostics ........55 Initial Software Setup ................61 Required Equipment ................62 Procedure ................... 62 Webasto Charging Systems, Inc. Page 5 of 112 Part Number 5911110 A02... - Page 6 Required Software ................. 101 Required Hardware................. 101 Definitions and Acronyms ..............102 Procedure Log ..................102 Setup Instructions .................. 103 Setup Procedure ................103 Firmware Update ..................109 Part Number 5911110 A02 Page 6 of 112 Webasto Charging Systems, Inc.
-
Page 7: Warnings And Cautions
WARNING FLAMMABLE • Keep batteries away from fire. • Do not smoke, use an open flame, or cause sparks near a battery. Webasto Charging Systems, Inc. Page 7 of 112 Part Number 5911110 A02... - Page 8 CAUTION Use only copper wires. CAUTION Every ProCore Edge is assembled and programmed for each customer’s specific needs. Webasto recommends that you contact Webasto Technical Support before making any modifications and/or additions (such as modules) to your ProCore Edge.
-
Page 9: Installation And Operation
The features described may not be included in all systems. NOTE This manual provides instructions for the installation and operation of the ProCore Edge Charging System, as well the maintenance and service of select components. The procedures should only be performed by trained and qualified technicians to enhance safety and protect equipment integrity. -
Page 10: Acronyms, Abbreviations And Symbols
Delta Temperature European Union Foot or Feet Height Hertz (frequency) Conditional Short Circuit Current Prospective Short Circuit Current Minimum Required International Electromechanical Commission Inch(es) Ingress Protection (Rating) Kilogram(s) Part Number 5911110 A02 Page 10 of 112 Webasto Charging Systems, Inc. - Page 11 Cable type (Service), which features Oil-resistant insulation, an Oil-resistant jacket, and is Water resistant Underwriters Laboratories Volt(s) Volt(s) Alternating Current Volt(s) Direct Current Width WCSI Webasto Charging Systems, Inc. Webasto Charging Systems, Inc. Page 11 of 112 Part Number 5911110 A02...
- Page 12 Installation, Operations, Service & Maintenance ProCore Edge This page left intentionally blank. Part Number 5911110 A02 Page 12 of 112 Webasto Charging Systems, Inc.
-
Page 13: Required Tools For 3-Bay And 5-Bay Cabinets
The circuit breaker ratings (maximum CB size) should be based on the charger maximum input ratings (input amps) for the number of fitted modules, as stated in this section. Webasto Charging Systems, Inc. Page 13 of 112 Part Number 5911110 A02... - Page 14 Storage temperature: −13°F to 149°F (−25°C to +65°C) Relative humidity 90%, non-condensing Enclosure IP20, NEMA 1–only indoor use Operating altitude Up to 3000 m (9843 ft) Certifications CSA certified to UL1564, C22.2 107.2-01, and CEC Part Number 5911110 A02 Page 14 of 112 Webasto Charging Systems, Inc.
-
Page 15: Required Tools For 10-Bay Cabinet
96 V @ 2.4 V/cell (Only lithium) Minimum DC 4/0 or 2/0 x 2 output wire size or 350 3/0 x 2 4/0 x 2 4/0 x 2 (AWG) Webasto Charging Systems, Inc. Page 15 of 112 Part Number 5911110 A02... - Page 16 IP20; NEMA 1 - only indoor use Operating Altitude Up to 3000 m (9843 ft.) Certifications CSA certified to UL1564, C22.2 107.2-01, and CEC Field Repair Module replacement Part Number 5911110 A02 Page 16 of 112 Webasto Charging Systems, Inc.
-
Page 17: Positioning The Charger
Use a 4 mm hex key to remove the filler screws before attaching the lifting eyebolts. Fig. 1 – Attaching points for M8 lifting eyebolts, top panel view Webasto Charging Systems, Inc. Page 17 of 112 Part Number 5911110 A02... -
Page 18: Choosing To Wall-Mount Or Floor-Mount The Charger
ProCore Edge Choosing to Wall-Mount or Floor-Mount the Charger Before you set up the ProCore Edge to be operational, you will want to choose whether to install the charger as a wall-mounted unit or a floor-mounted unit. This will help you to decide your spacing needs and length of cables, etc. - Page 19 M6: 52.22 in-lbs (5.9 Nm) M5: 35.4 in-lbs (4.0 Nm) Then secure the L bracket to the wall. Fig. 5 – L Bracket Webasto Charging Systems, Inc. Page 19 of 112 Part Number 5911110 A02...
- Page 20 Underside Securing Brackets Two available positions: One for 3-Bay One for 5-Bay Arm for Cable Management Stand Base Accessories (Cable Tidy / Pogo) Fig. 6 – Floor Mount Stand Part Number 5911110 A02 Page 20 of 112 Webasto Charging Systems, Inc.
- Page 21 ProCore Edge Installation, Operations, Service & Maintenance 1. Secure the floor stand to the floor using the eight bolting points provided. Webasto recommends using M10 (3/8 inch) bolt threads. NOTE: Anchor bolts are not included in the floor stand kit.
- Page 22 – mount the charger onto that top bracket. Bracket Slots Fig. 9 – Bracket Slots Fig. 10 – Backside of Floor Mounting Sand Part Number 5911110 A02 Page 22 of 112 Webasto Charging Systems, Inc.
- Page 23 3. After mounting the charger onto the top bracket, secure the underside of the charger with the L bracket. Then secure the L bracket onto the central beam of the floor stand. Fig. 11 – Charger Underside and L Bracket Webasto Charging Systems, Inc. Page 23 of 112 Part Number 5911110 A02...
- Page 24 Bottom Bracket and Screw with an M5 thread Fig. 13 – Charger on Fig. 14 – Bottom Bracket Mounted to the Wall-Mount Hanger the Charger with 35.4 in-lbs (4.0 Nm) of torque Part Number 5911110 A02 Page 24 of 112 Webasto Charging Systems, Inc.
- Page 25 ProCore Edge Installation, Operations, Service & Maintenance Floor Stand Installation for 10-Bay Cabinet Fig. 15 – Floor Stand Webasto Charging Systems, Inc. Page 25 of 112 Part Number 5911110 A02...
- Page 26 Installation, Operations, Service & Maintenance ProCore Edge Fig. 16 – Pre-Drilled Holes for Bolting the Bast to the Floor Fig. 17 – Optional Pogo Stick Attached to the Pogo Bracket Part Number 5911110 A02 Page 26 of 112 Webasto Charging Systems, Inc.
- Page 27 ProCore Edge Installation, Operations, Service & Maintenance Fig. 18 – Charger Hung on the Floor Stand Webasto Charging Systems, Inc. Page 27 of 112 Part Number 5911110 A02...
- Page 28 Installation, Operations, Service & Maintenance ProCore Edge M5 Screw Fig. 19 – Bottom Bracket Mounted to the Charger and Floor Stand with 35.4 in-lbs (4.0 Nm) of torque Part Number 5911110 A02 Page 28 of 112 Webasto Charging Systems, Inc.
-
Page 29: Ac Power Connection
• Verify that there is no connection to the AC before opening the cabinet, which exposes AC wiring, and making terminal connections! • Disconnect all power before servicing! Webasto Charging Systems, Inc. Page 29 of 112 Part Number 5911110 A02... - Page 30 Remove the six M5 screws on the top panel of the charger (Figure 20) with a TORX TX25, then remove the panel. Fig. 20 – Top Panel View Part Number 5911110 A02 Page 30 of 112 Webasto Charging Systems, Inc.
- Page 31 NOTE The USB connector is located in the top left corner of the charger. AC Service Entrance Fig. 21 – AC Service Entrance Webasto Charging Systems, Inc. Page 31 of 112 Part Number 5911110 A02...
- Page 32 Ground and Power Cables AC Service Entrance Fig. 22 – 3-Bay AC Service Entrance Torque Specifications Label Ground and Power Cables AC Service Entrance Fig. 23 – 5-Bay AC Service Entrance Part Number 5911110 A02 Page 32 of 112 Webasto Charging Systems, Inc.
- Page 33 Installation, Operations, Service & Maintenance Fig. 24 – 10-Bay AC Service Entrance TOP VIEW AC Service Ground & Power Cables Entrance Fig. 25 – AC Service Entrance THREE-QUARTER VIEW Torque Specifications Label Webasto Charging Systems, Inc. Page 33 of 112 Part Number 5911110 A02...
- Page 34 (2.6 Nm) to 26 in-lbs (2.9 Nm) of torque, respectively. AC line input positions are interchangeable because the three-phase input is not phase specific. 5. Ensure that the cable gland or conduit clamp has been properly tightened. Part Number 5911110 A02 Page 34 of 112 Webasto Charging Systems, Inc.
-
Page 35: Dc Power Output
DO NOT ATTEMPT TO CHARGE NON-RECHARGEABLE BATTERIES. Fast chargers are designed to be used only for charging rechargeable batteries. Attempting to charge non-rechargeable batteries could lead to death or injury from exploding batteries. Webasto Charging Systems, Inc. Page 35 of 112 Part Number 5911110 A02... - Page 36 Connecting an 80V or higher battery to a 24V-48V charger may damage the charger. Use voltage-keyed connectors on the chargers and batteries if your facility has mixed battery voltages. CAUTION User only copper wires. Part Number 5911110 A02 Page 36 of 112 Webasto Charging Systems, Inc.
- Page 37 • DC output power cables are provided with the charger. • Anderson Euro, SB, or SBX connectors are used. • Contact WCSI Customer Support at 1-866-767-4242 for more information. Webasto Charging Systems, Inc. Page 37 of 112 Part Number 5911110 A02...
- Page 38 Installation, Operations, Service & Maintenance ProCore Edge This page left intentionally blank. Part Number 5911110 A02 Page 38 of 112 Webasto Charging Systems, Inc.
-
Page 39: Battery Connections For 3-Bay And 5-Bay Cabinets (Optional)
A 10-way screw terminal connector is provided behind the DC output power cable panel. 10-Way Screw Terminal Fig. 26 – Ten-Way Screw Terminal Connector This connector facilitates the connection of battery-related signals (battery communications). Webasto Charging Systems, Inc. Page 39 of 112 Part Number 5911110 A02... - Page 40 “battery monitor,” and “pilot” (interlock) – to the screw terminal per Table 1, and tighten the terminal screws with 5.31 in-lb (0.6 Nm) of torque. Fig. 27 – Battery Communication Wires Connected to the Screw Terminal Part Number 5911110 A02 Page 40 of 112 Webasto Charging Systems, Inc.
-
Page 41: Battery Connections For 10-Bay Cabinet (Optional)
A 12-way screw terminal connector is provided behind the DC output power cable panel 12-Way Screw Terminal Fig. 28 – Twelve-Way Screw Terminal Connector This connector facilitates the connection of battery-related signals (battery com- munications). Webasto Charging Systems, Inc. Page 41 of 112 Part Number 5911110 A02... - Page 42 (interlock) – to the screw terminal per Table 1 and tighten the terminal screws with 5.31 in-lbs (0.6 Nm) of torque. Fig. 29 – Battery Communication Wires Connected to the Screw Terminal Part Number 5911110 A02 Page 42 of 112 Webasto Charging Systems, Inc.
-
Page 43: Connection And Description For 3-Bay And 5-Bay Cabinets
Positive lead connecting the 24-VDC WATERING VALVE Pin 2 Negative lead to the SPARE RELAY Pin 1 Positive lead to the SPARE RELAY CAUTION Use only copper wires. Webasto Charging Systems, Inc. Page 43 of 112 Part Number 5911110 A02... - Page 44 Negative lead to the SPARE RELAY Pin 1 Positive lead to the SPARE RELAY The connector can accept up to a 16 AWG wire. CAUTION Use only copper wires. Part Number 5911110 A02 Page 44 of 112 Webasto Charging Systems, Inc.
- Page 45 Pilot Interlock Connection Stops the charger from charging For more information, please contact your WCSI representative at 1–866–767–4242 on how to how to customize the Remote Battery Connections option. Webasto Charging Systems, Inc. Page 45 of 112 Part Number 5911110 A02...
-
Page 46: Charger Light Bar For 3-Bay, 5-Bay And 10-Bay Cabinets
10-bay charger light bar. For example, if the battery is 75% charged, the bottom 75% of the bar is cascading blue and the top 25% of the bar is dark (unilluminated). Part Number 5911110 A02 Page 46 of 112 Webasto Charging Systems, Inc. - Page 47 Equalizing Yellow The charger is undergoing equalization of the charger batteries. Solid Yellow Watering The charger is watering the battery. Solid Green Completed The charging is 100% completed. Webasto Charging Systems, Inc. Page 47 of 112 Part Number 5911110 A02...
-
Page 48: Operating Instructions
Displays the name broadcast to the ProCore™ Mobile Application (App), is sent to PosiLink and the cloud, and used in the charger logs. You can change the charger name in the charge Setup window. Part Number 5911110 A02 Page 48 of 112 Webasto Charging Systems, Inc. -
Page 49: Battery Display
State-of-charge Status bar wheel Water level Equalization schedule indicator Charge current and voltage Battery temperature Equalization Start button schedule button Stop button Fig. 31 – Graphical Battery Display Webasto Charging Systems, Inc. Page 49 of 112 Part Number 5911110 A02... - Page 50 EQ scheduled Flashing EQ charge in progress green Solid EQ charge completed for the green current week NOTE: If there is no EQ icon visible, EQ is not available. Part Number 5911110 A02 Page 50 of 112 Webasto Charging Systems, Inc.
- Page 51 • Full Charging • Initializing (Phase) • Offline – Charging is stopped to use the ProCore Mobile App to change the configuration. • Recover Charge • Watering Webasto Charging Systems, Inc. Page 51 of 112 Part Number 5911110 A02...
-
Page 52: Alternate Battery Display
NOTE There is no drop if there is a CAN battery or if there is no BMID (voltage mode). Charge current The charger controls the charging current via Webasto and voltage proprietary charging algorithms. Alternate Battery Display You can switch the battery graphical display to an alternate tabular battery display showing additional parameters for the charging battery. - Page 53 SB cables, you can disconnect a vehicle safely from ProCore™ Edge even while charging. You do not need to start or stop the charge with the following buttons. Webasto Charging Systems, Inc. Page 53 of 112 Part Number 5911110 A02...
- Page 54 The battery should be able to accept a normal charge after the recovery charge is completed. Part Number 5911110 A02 Page 54 of 112 Webasto Charging Systems, Inc.
-
Page 55: Faults And Warnings - Hardware Diagnostics
Fault (Battery over The BMID number of Use the ProCore App BMID voltage) battery cells setting is setup to set the correct incorrect. number of battery cells. (Continued) Webasto Charging Systems, Inc. Page 55 of 112 Part Number 5911110 A02... - Page 56 Use the ProCore App to The BMID configuration Battery Data recheck the battery Fault data read from the battery Invalid parameters in the BMID. are not valid for the charge. Part Number 5911110 A02 Page 56 of 112 Webasto Charging Systems, Inc.
- Page 57 BMID LOST COMM There are damaged BMID communication (comm) (BMID Fault wires in the charger output Repair the wiring. Communication cable or in the vehicle. is Lost) Webasto Charging Systems, Inc. Page 57 of 112 Part Number 5911110 A02...
- Page 58 Call Webasto service. Module General The module faulted with no Fault Fault specific reason reported. Check for obstructed air Module High The module temperature is Warning flow. Temperature very high Part Number 5911110 A02 Page 58 of 112 Webasto Charging Systems, Inc.
- Page 59 No power modules are installed. Call Webasto service. No Modules Fault No CAN or BMID messages Check the comm wiring. received when connected. Webasto Charging Systems, Inc. Page 59 of 112 Part Number 5911110 A02...
- Page 60 (There is a Fault connected without opening Module Over- the pilot. voltage) Power Stage There was a CAN bus Initialization Fault problem during power Call Webasto service. Error stage initialization. Part Number 5911110 A02 Page 60 of 112 Webasto Charging Systems, Inc.
-
Page 61: Initial Software Setup
Purpose: The purpose of this procedure is to describe how main application software is installed onto the ProCore Edge charger system board, either by the manufacturer or in the field. NOTE: This procedure describes the method of loading the firmware using a PC-connected via USB port. -
Page 62: Required Equipment
Fig. 34 – USB Connector 3. Attach the A-type end of the USB cable to a USB port on the PC running Windows. 4. Run PilotTerm on the PC. Part Number 5911110 A02 Page 62 of 112 Webasto Charging Systems, Inc. - Page 63 The message “Upload successful” will appear at the bottom left when the upload is completed. 8. If you see the message “Upload Failed,” power cycle the charger and select the Update Now button again immediately after. Webasto Charging Systems, Inc. Page 63 of 112 Part Number 5911110 A02...
- Page 64 Run Mode is Release (for production unit). 10. The loaded application should begin after the firmware load is complete. You may unplug the USB cable after this point. Part Number 5911110 A02 Page 64 of 112 Webasto Charging Systems, Inc.
-
Page 65: Service / Maintenance
Examine connectors, and replace any con- Three Output nector that exhibits signs of damage (splits, Cable cracks, exposed or pitted power pins, etc.), Connectors or excessive wear, and discoloration. Webasto Charging Systems, Inc. Page 65 of 112 Part Number 5911110 A02... - Page 66 ProCore Interior Examine for signs of damage or wear or Harness discoloration in all harness connections. Connections Part Number 5911110 A02 Page 66 of 112 Webasto Charging Systems, Inc.
- Page 67 The data contacts in the output cable has a life expectancy of 5000 disconnection cycles. Replace Disconnections Contacts per Day Data Contacts (Months) on Output Connectors Webasto Charging Systems, Inc. Page 67 of 112 Part Number 5911110 A02...
- Page 68 Installation, Operations, Service & Maintenance ProCore Edge This page left intentionally blank. Part Number 5911110 A02 Page 68 of 112 Webasto Charging Systems, Inc.
-
Page 69: Replacing A Module
Replacing a Module 1. Unplug any vehicles connected to the charger. NOTE Always press the STOP button on the ProCore Edge battery display before disconnecting SB cables from a battery. Pressing the STOP button will prevent the possibility of electrical arcing. - Page 70 Disconnect the DC output cable (below left) and the three-phase AC input cable (below right) from the power module to be replaced by squeezing the clamp releases and pulling. Fig. 39 – Disconnected Power Cables Part Number 5911110 A02 Page 70 of 112 Webasto Charging Systems, Inc.
- Page 71 6. Disconnect the power module communication cable(s). The two possible configurations for power module communications are a single-cable connection and a multi-cable connection – see the next two pages for each of these configurations. Webasto Charging Systems, Inc. Page 71 of 112 Part Number 5911110 A02...
- Page 72 The ribbon cable has a red edging to denote Pin 1. While facing the module, always insert the connectors so the cable red line is on the left. Part Number 5911110 A02 Page 72 of 112 Webasto Charging Systems, Inc.
- Page 73 Installation, Operations, Service & Maintenance 8. Multi-Cable Connection For a multi-cable connection, only the communication cables from the module to be replaced need to be disconnected. Fig. 42 – Multi-Cable Connection Webasto Charging Systems, Inc. Page 73 of 112 Part Number 5911110 A02...
- Page 74 10. Using a flathead screwdriver, turn each mounting screw counterclockwise until the spring ejects and releases the screw from the nut. Carefully pull out the power module. Fig. 43 – Power Module Removal Part Number 5911110 A02 Page 74 of 112 Webasto Charging Systems, Inc.
- Page 75 12. Insert the replacement power module. Use a flathead screwdriver to tighten the mounting screws by pushing in and turning clockwise. Fig. 44 – Replacement Power Module Insertion Webasto Charging Systems, Inc. Page 75 of 112 Part Number 5911110 A02...
- Page 76 The power module positions are 1 through 3 for the three-bay and 1 through 5 for the five-bay. The Module 1 position always starts at the top slot. Part Number 5911110 A02 Page 76 of 112 Webasto Charging Systems, Inc.
- Page 77 The power module positions are 1 through 10 – the Module 8 Module 1 position always starts at the top slot. Module 9 Module 10 Figure 48 – Power Module Positions Webasto Charging Systems, Inc. Page 77 of 112 Part Number 5911110 A02...
- Page 78 14. Reconnect all communication cables that were disconnected in steps 4 through 6. 15. Connect the flat cable(s) to the power module. Fig. 49 – Flat Cable Reconnection to the Power Module Part Number 5911110 A02 Page 78 of 112 Webasto Charging Systems, Inc.
- Page 79 ProCore Edge Installation, Operations, Service & Maintenance 16. Connect the flat cable to the termination block. Fig. 50 – Flat Cable Connection to the Terminal Block Webasto Charging Systems, Inc. Page 79 of 112 Part Number 5911110 A02...
- Page 80 Output Power Cable Cable and AC Input Power Cable 19. Close the charger door and use the flathead screwdriver to turn the latch counterclockwise to lock the door. Part Number 5911110 A02 Page 80 of 112 Webasto Charging Systems, Inc.
-
Page 81: Replacing The Output Cable
DC output power cable connection 1. Unplug any vehicles connected to the charger. NOTE Always press the STOP button on the ProCore Edge battery display before disconnecting SB cables from a battery. Pressing the STOP button will prevent the possibility of electrical arcing. - Page 82 (red) DC output power cable and one for the negative (black) DC output power cable. Fig. 54 – Three- and Five-Bay Bus Bar Arrangement Part Number 5911110 A02 Page 82 of 112 Webasto Charging Systems, Inc.
- Page 83 KIT-BUS BAR_CLAMP 2X4/0 CBL Figure 55 – Bus Bar and Clamp Kit for 350MCM Output Cable 1 Figure 56 – Bus Bar and Clamp Kit for 2x4/0 Output Cable Webasto Charging Systems, Inc. Page 83 of 112 Part Number 5911110 A02...
- Page 84 (4.5 Nm) of torque to secure them for strain relief. NOTE Prior to fastening the lower clamp, ensure the gray protective rubber sleeve is on the upper side of the DC output power cables. Part Number 5911110 A02 Page 84 of 112 Webasto Charging Systems, Inc.
-
Page 85: Replacing The Controller Pcba
• System Controller PCBA • Display (attached to the controller PCBA with VHB tape) • Most recent software uploaded for Light Bar and applications Fig. 57 – Controller PCBA (Continued) Webasto Charging Systems, Inc. Page 85 of 112 Part Number 5911110 A02... - Page 86 0.44 lb-ft Fig. 58 – PCBA 3/4 View (0.3 Nm) of torque. 5. Plug in cables J1 – J7 as shown below. Fig. 59 – PCBA Rear Facing View Part Number 5911110 A02 Page 86 of 112 Webasto Charging Systems, Inc.
-
Page 87: Replacing The Door Panel
• The door can be detached from the hinge by unscrewing the bolts. M4 Bolts Fig. 60 – Outside Cabinet View Replacement Door Bolts Door-Side Only Webasto Charging Systems, Inc. Page 87 of 112 Part Number 5911110 A02... - Page 88 Fig. 61 – Alignment Pin • The replacement door can only be installed using the new ProCore Edge cabinet featuring the hinge/pin design. • The replacement door is not fitted with the System Controller.
- Page 89 • For 5-bay cabinets, install a 5mm spacer. • For 3-bay cabinets, a spacer is not necessary. Fig. 63 – Cable Clamp Inside the Charger Cabinet Fig. 64 – New Clamp Webasto Charging Systems, Inc. Page 89 of 112 Part Number 5911110 A02...
-
Page 90: Installation
2. Install the replacement door by aligning the pin (circled below). Fig. 66 – Align the Pin 3. Install the M4 bolts and tighten them with 1.2 Nm of torque. Bolts Fig. 67 – M4 Bolts Part Number 5911110 A02 Page 90 of 112 Webasto Charging Systems, Inc. -
Page 91: Interface Board Communication Connectors / Replacing The Fuse
1. Remove the TORX TX25 screws from the DC output power cable panel (as shown below), and pull the panel up and away from the charger cabinet. Fig. 68 – Torx Screws Webasto Charging Systems, Inc. Page 91 of 112 Part Number 5911110 A02... - Page 92 Do not disconnect the wires from the mating connectors. Fig. 69 – Mating Connectors 3-Bay and 5-Bay Unit Interface Board Interface Connectors Mating Connectors Interface Board Interface Connectors Mating Connectors 10-Bay Unit Mating Connectors Part Number 5911110 A02 Page 92 of 112 Webasto Charging Systems, Inc.
- Page 93 Fig. 70 – Interface Board Screws 3-Bay and 5-Bay Unit Interface Board Screws Screws Interface Board 10-Bay Unit Interface Board Screws Webasto Charging Systems, Inc. Page 93 of 112 Part Number 5911110 A02...
- Page 94 5. Installation of the user interface is the reverse order of removal. Be sure to reconnect the two mating connectors to the interface connectors as shown below. Interface Board Interface Connectors Mating Connectors Fig. 72 – Interface Board Part Number 5911110 A02 Page 94 of 112 Webasto Charging Systems, Inc.
-
Page 95: Firmware Updates
Bluetooth with the Webasto SW Updater app. Installing the Application: To use the Webasto SW Updater app, it must first be installed on your iOS mobile device. If it is not currently installed, do the following: 1. - Page 96 Selecting an AVB File: If you previously added an AVB file via email attachment, you may load it again by opening the Webasto Updater app directly. You will see the Select File screen as shown to the right. Fig. 74 – Selecting an AVB File...
- Page 97 Select Device screen as shown to the right. The Selected file will appear at the top of the screen. A list of nearby Webasto devices with Bluetooth advertisement signals will appear below it, along with the signal bar strength of each.
- Page 98 If an upload is interrupted by the app closing, the mobile device going out of range, or the Webasto Equipment powering OFF, you can re-try the upload again when conditions are restored. The Webasto Equipment will still be listening for the app.
-
Page 99: Voltage Driven Vs Bmid Communications
Some sites do not need these high charging rates and do not use BMIDs. Here the charger uses preset charging parameters that allow a charging rate that is safe for all batteries at the site. Fig. 77 – Default Battery Setup Webasto Charging Systems, Inc. Page 99 of 112 Part Number 5911110 A02... - Page 100 Exide Tubular Flooded. The recommended Start Current Limit for voltage-mode charging is 25 A / 100 Ah. DO NOT FORGET TO SAVE THE SETTINGS!!! Fig. 78 – Default Battery Setup Part Number 5911110 A02 Page 100 of 112 Webasto Charging Systems, Inc.
-
Page 101: Power Module Firmware Update
ProCore Edge Installation, Operations, Service & Maintenance Power Module Firmware Update This document provides instructions for updating the firmware on ProCore Edge 48V and 80V power modules and firmware v1.14.0. Required Software Software Description BL_CAN_v2.15.0.exe Firmware detection program PM3K-80_PWM_v1.14.0.dfu Firmware v1.14.0... -
Page 102: Definitions And Acronyms
Revision Software Unit Under Test Procedure Log User the table below to record who performed the procedure and the date. System S/N Module S/N Firmware Rev Date Initials Part Number 5911110 A02 Page 102 of 112 Webasto Charging Systems, Inc. -
Page 103: Setup Instructions
Setup Instructions The following hardware and software components are needed to prepare for the firmware update: • Procore Edge 15kW charger • Procore Mobile App • Test Laptop with Tera Term, Peak Software, and Firmware EXE. File • Peak Can Connector •... - Page 104 Connect the PEAK adaptor on the PC to the UUT on one of the modules for the firmware installation/update. PEAK Adaptor to Power Module PEAK Adaptor to Power Module Example 1 Example 2 PEAK USB Connection to PC/Laptop Part Number 5911110 A02 Page 104 of 112 Webasto Charging Systems, Inc.
- Page 105 Next. If not, Run PeakOemDrv.exe Accept the terms, then select Next. Select the CAN device drivers and the PCAN-Basic API, then select Next. Select Install. Webasto Charging Systems, Inc. Page 105 of 112 Part Number 5911110 A02...
- Page 106 If not, connect the USB cable on J3 of the HMI board to the PC port. Module LEDs ON Connect USB Cable on J3 to of the HMI Board to the PC Port Part Number 5911110 A02 Page 106 of 112 Webasto Charging Systems, Inc.
- Page 107 57600, then select OK. 12. In the Tera Term command window, type Etst, then type pwr=1 and select the Enter key to power ON the UUT. Webasto Charging Systems, Inc. Page 107 of 112 Part Number 5911110 A02...
- Page 108 Installation, Operations, Service & Maintenance ProCore Edge 13. Confirm the power module LEDs turn ON – this confirms that all modules are powered ON. LEDs ON = Modules are powered ON Part Number 5911110 A02 Page 108 of 112 Webasto Charging Systems, Inc.
-
Page 109: Firmware Update
Firmware Update The following hardware and software components are needed to complete the firmware update: • Procore Edge 15kW charger • Procore Mobile App • Test Laptop with Tera Term, Peak Software, and Firmware EXE. File • Peak Can Connector •... - Page 110 Installation, Operations, Service & Maintenance ProCore Edge Apply AC to the power modules and very the UUT is ON by checking each power module LED. Part Number 5911110 A02 Page 110 of 112 Webasto Charging Systems, Inc.
- Page 111 Enter – this will display the power module information. The software version displayed should be 1.14.0. NOTE: The module type and serial number displayed varies, depending on the ProCore Edge 48V or 80V. Webasto Charging Systems, Inc. Page 111 of 112 Part Number 5911110 A02...
- Page 112 Installation, Operations, Service & Maintenance ProCore Edge Webasto Charging Systems, Inc. 1333 S. Mayflower Ave., Ste 100 Monrovia, CA 91016 Corporate headquarters: Friedrichshafener Str. 9 82205 Gilching Germany Part Number 5911110 A02 Page 112 of 112 Webasto Charging Systems, Inc.
Need help?
Do you have a question about the ProCore Edge and is the answer not in the manual?
Questions and answers