
Subscribe to Our Youtube Channel
Related Manuals for Webasto Unite


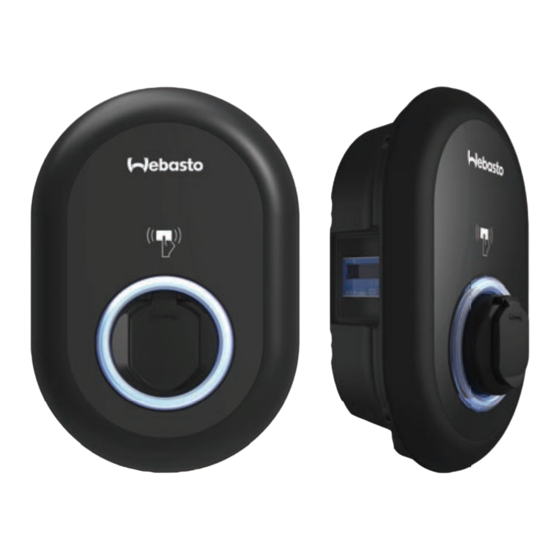
Summary of Contents for Webasto Unite
- Page 1 Webasto Unite Webasto Charging Solutions Operating- and Installation Instructions ..........................
-
Page 2: Table Of Contents
Commissioning the charging station ............ 19 Connecting your computer and your smart board to the same network............ 19 Accessing the Unite configuration interface using a web browser ............ 19 Accessing the Unite configuration interface via Wi-Fi hotspot.............. 19 Unite Configuration Interface ... 20 Main page ............... -
Page 3: Quick Start Guide For App Solutions
Quick Start Guide for App Solutions | 1 Quick Start Guide for App Solutions The Webasto Unite must be installed Download the required Apps: Open the Webasto Charger Setup by a qualified electrician. app and configure your charging 1) For installation: station. -
Page 4: General Information
WARNING the Webasto Unite charging station. In addition to the "Import- This signal word denotes a hazard with a moderate ant Information on Operating and Installation Instructions", a... -
Page 5: Safety
Do not remove markings, warning symbols and the itive area (Ex Zone). l Install the Webasto Unite in such a way that the char- type label from the charging station. l It is strictly prohibited to connect other equipment/ ging cable does not block any passageways. -
Page 6: Safety Information For Electrical Connection
Details on maintenance, cleaning and repair can be found in the manual. Safety information for replacing the charging cable DANGER Risk of fatal electric shock. Switch off and secure the power supply to the char- ging station. NOTE Only use genuine Webasto parts. 6 / 37 5111967A OI-II Webasto Unite... -
Page 7: Scope Of Delivery
To start and stop charging. Master RFID Card To add and remove user RFID Cards to and from the local RFID list. ISI Webasto Unite To install the charging station safely and adequately. 5111967A OI-II Webasto Unite 7 / 37... -
Page 8: Required Tools
Torx T25 security screwdriver Spirit level Flathead screwdriver (tip width: 2.0 - 2.5 mm) Pointed spudger Right-angle screwdriver adapter / Torx T20 secur- ity bit RJ45 crimping tool CAT5e or CAT6 Ethernet cable 8 / 37 5111967A OI-II Webasto Unite... -
Page 9: Installation And Electrical Connection
ATTENTION High voltages Danger of fatal electric shock. The Webasto Unite must be installed by a qualified elec- trician. Charging station installation steps l Installation and connection of the charging station must only be carried out by a qualified electrician. -
Page 10: Using A 1-Phase Ac Mains Connection
L1 and L3 on the grid side. For single-phase IT Grid installation, use the above wiring diagram. In the web user interface, set the grounding type to “IT Grid” using the ”Installation settings” menu 10 / 37 5111967A OI-II Webasto Unite... -
Page 11: Using A 3-Phase Ac Mains Connection
L1 and L2 and between L2 and L3 on the grid side. For three-phase IT Grid installation use this wiring diagram. In the web user interface, set the grounding type to “IT Grid” using the ”Installation settings” menu 5111967A OI-II Webasto Unite 11 / 37... -
Page 12: Using The Cable Glands
DIP-switch settings are optional. All settings can be Required circuit breaker on AC mains changed by using the Setup App, or the web configura- Charging Station C-Curve MCB tion interface (see chapter 8, "Unite Configuration Inter- Current Limiter (miniature circuit face" on page 20). Setting... -
Page 13: Setting The Dip Switches
Pin 2 DIP-switch settings are optional. All settings can be Pin assignments Relay changed by using the Setup App, or the web configura- tion interface (see chapter 8, "Unite Configuration Inter- 1, 2 Potential free contacts face" on page 20). 3, 4... - Page 14 DIP-switch settings DIP-switch settings are optional. All settings can be changed by using the Setup App, or the web configura- tion interface (see chapter 8, "Unite Configuration Inter- face" on page 20). The most recent made setting will always be ap- plied.
- Page 15 DIP-switch settings DIP-switch settings are optional. All settings can be changed by using the Setup App, or the web configura- tion interface (see chapter 8, "Unite Configuration Inter- face" on page 20). The most recent made setting will always be ap- plied.
-
Page 16: Using The Mode Selection Switch
6 | Installation and electrical connection Setting up Load shedding / Potential-free contact The Webasto Unite supports load shedding. Load shedding provides immediate charging-current reduction in case of lim- ited supply. Load shedding can be used in any mode, including Standalone and OCPP-connected modes. -
Page 17: Monitoring Welded Relay Contact Failures
In accordance with IEC 61851-1 and EV/ZE Ready requirements, seconds, then the configuration mode is cancelled and the Webasto Unite has a welded contactor sensing function. If a the charging station will behave as an autostart welded contact occurs, then the main board provides a shunt product. -
Page 18: Configuring An Ocpp Connection
T20 Security bit. Fig. 46 Pull the Ethernet cable through the cable clamps as shown by the arrows above. CN13 Fig. 47 Insert the RJ45 connector into the socket as shown in fig- ure below. 18 / 37 5111967A OI-II Webasto Unite... -
Page 19: Commissioning The Charging Station
Should problems persist, please google: clearing browser cache. Accessing the Unite configuration To access the web configuration interface, first connect your computer and charging station to the same Ethernet switch or interface via Wi-Fi hotspot router. -
Page 20: Unite Configuration Interface
Interface transition time of high to low dimming level. Sunrise and sunset time-based configuration is a periodic daily setting. The Unite Configuration Interface has a horizontal top menu bar which provides the following functions: – Logout The Log out button on the upper right corner of the screen enables you to exit the User Configuration Inter- face. - Page 21 Unite Configuration Interface | 8 8.3.2 Current limiter settings 8.3.4 External Input / Dry contact enabled Here you can set the number of installed phases and the max- This option is set to “disabled” by default. imum current limit. Please note that incorrect setting of the in- If you want to use the external enable input function, then you stalled phases (e.g.
-
Page 22: Ocpp Settings
WARNING If you change the SSID and Password of the WIFI Hot- spot, the QR Code for the Webasto Charger Setup App will not work anymore – you must enter the credentials manually after changing these settings. -
Page 23: Standalone Mode
Unite Configuration Interface | 8 "Turn on during boot" defines the behaviour of the WiFi Hot- Local Load Management spot when the charger starts (default is "enabled"). Enabled means that the WiFi Hotspot will be activated when the charger starts, Disabled means that the WiFi Hotspot will not be activ- ated when the charger starts. - Page 24 8 | Unite Configuration Interface l "Garo" means the cluster is limited to the maximum cur- 8.7.2 Modbus TCP (EMS) rent, but it also takes into account real time data from the externally connected Garo meter (requires optional ac- cessories) taking into account also other consumers in the installation (schematic see 6.7.4).
-
Page 25: System Maintenance
Unite Configuration Interface | 8 System Maintenance LOG FILES page Click the buttons to download OCPP or HMI logs. SYSTEM RESET Page The SYSTEM RESET Page enables you to perform a Soft Reset and Hard Reset by clicking the relevant buttons. -
Page 26: Setting Up Charging
Blinks red and Charging station is re- blue served. Charging station is waiting for Eco Time interval. Charging station is in Delay 1 sec Charge Mode. Constant red Firmware update 26 / 37 5111967A OI-II Webasto Unite... -
Page 27: Standalone / Offline Usage Modes
Blue glowing Charging starts and the status indicator LED glows blue. 9.3.1.2 Stop charging Fig. 55 Constant blue (or no LED Indication in power save mode) Unplug the charging cable from the vehicle first. 5111967A OI-II Webasto Unite 27 / 37... - Page 28 Make sure that your vehicle and the charging station are ready Constant Blue for charging. You can terminate charging by tapping the RFID card that you have used to start charging. Method 2 Fig. 53 28 / 37 5111967A OI-II Webasto Unite...
-
Page 29: Ocpp Connected Mode
You can terminate charging by tapping the RFID card that you have used to start charging. Fig. 53 Method 2 Constant blue (or no LED Indication in power save mode) Insert the charging plug into the vehicle inlet and the charging station socket outlet. 5111967A OI-II Webasto Unite 29 / 37... -
Page 30: Mid Meter Models
If the charging cable is locked at the charging station, the ser- vice provider may unlock the cable via this feature. MID meter models The MID meter’s display can show the total active energy. 30 / 37 5111967A OI-II Webasto Unite... -
Page 31: Troubleshooting
After a factory reset, all configuration settings must be set again. Press the button for 5 seconds to reset the user configuration to its factory default settings. The OCPP configuration and the network configuration will revert to the factory default settings. 5111967A OI-II Webasto Unite 31 / 37... -
Page 32: General Error Condition
The 6 mA sensor inside this charging station has daily self-test for proper operation. 32 / 37 5111967A OI-II Webasto Unite... -
Page 33: Disposal
The Webasto Unite was developed, manufactured, tested and supplied in accordance with the relevant directives, regulations and standards for safety, EMC and environmental compatibility. Webasto Thermo & Comfort SE hereby declares that the radio equipment type "Charging Station Webasto Unite" is in compli- ance with Directive 2014/53/EU. -
Page 34: Technical Data
Electric Vehicle Conductive Charging System Type (Mode 3 Charging Station) Model Webasto Unite * * * * * Name 1st Asterisk (*) : Rated Power AC22: 22 kW (3-phase Supply Equipment) 2nd Asterisk (*) RFID reader is standard equipment for all model variants: –... -
Page 35: Technical Specifications
Material Plastic Product size 315 mm (Width) x 460 mm (Height) x 135 mm (Depth) Dimensions (with package) 400 mm (Width) x 530 mm (Height) x 240 mm (Depth) Product weight 5 kg 5111967A OI-II Webasto Unite 35 / 37... -
Page 36: Checklist For The Installation Of The Webasto Charging Station
The location of the charging station should be selected such that vehicles cannot inadvertently collide with it. The legal requirements for electrical installations, fire protection, safety regulations and escape routes have been met. The customer/user was informed how the Webasto Unite voltage is switched off with the installation-side protective devices. - Page 37 To request this documentation in another language, please locate and contact your local Webasto dealer. You can find your nearest dealer at: https://dealerlocator.webasto.com/en-int. To provide feedback (in English or German), please email: feedback2tdt@webasto.com Webasto Charging-Hotline: UK only +800-CHARGING (00800-24274464) Webasto Thermo & Comfort UK Ltd Webasto House Webasto Thermo &...
Need help?
Do you have a question about the Unite and is the answer not in the manual?
Questions and answers