
Related Manuals for Extron electronics PowerCage 411 Series


Summary of Contents for Extron electronics PowerCage 411 Series
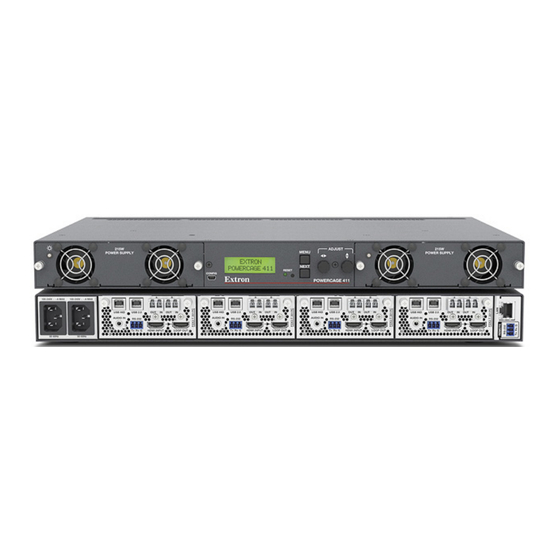
- Page 1 User Guide Fiber Optic Products PowerCage 411 Series Modular Power Enclosure and Fiber Optic Extenders 68-2640-02 Rev. A 05 23...
- Page 2 Safety Instructions...
- Page 3 Copyright © 2023 Extron. All rights reserved. www.extron.com Trademarks All trademarks mentioned in this guide are the properties of their respective owners. The following registered trademarks ( ® ), registered service marks ( ), and trademarks ( ) are the property of RGB Systems, Inc. or Extron (see the current list of trademarks on the Terms of Use page at www.extron.com):...
- Page 4 FCC Class A Notice This equipment has been tested and found to comply with the limits for a Class A digital device, pursuant to part 15 of the FCC rules. The Class A limits provide reasonable protection against harmful interference when the equipment is operated in a commercial environment.
- Page 5 Class 1 Laser Product Any service to this product must be carried out by Extron and its qualified service personnel. CAUTION: Using controls, making adjustments, or performing procedures in a manner other than what is specified herein may result in hazardous radiation exposure. NOTE: For more information on safety guidelines, regulatory compliances, EMI/EMF compatibility, accessibility, and related topics, see the Extron Safety and Regulatory...
- Page 6 Conventions Used in this Guide Notifications The following notifications are used in this guide: WARNING: Potential risk of severe injury or death. AVERTISSEMENT : Risque potentiel de blessure grave ou de mort. CAUTION: Risk of minor personal injury. ATTENTION : Risque de blessure mineure.
-
Page 7: Table Of Contents
Reset Button ........20 Symbol Definitions ......... 35 Front Panel LCD Menu Overview ...... 22 Command and Response Tables for Menu Navigation ..........22 SIS Commands ..........38 Menu System Overview ......... 22 PowerCage 411 Series • Contents... - Page 8 Unit Status Panel ........... 56 Fan Speed Panel ........... 57 Date and Time Panel ........57 Network Panel ..........58 Passwords Panel ........... 58 Firmware Panel ..........59 Modules Page ..........60 About the PowerCage 411 ......61 PowerCage 411 Series • Contents viii...
-
Page 9: Introduction
The FOX3 T 301 PC, FOX3 T 311 PC, and FOX3 T 201 PC transmitters are modular boards designed for a single slot in the PowerCage 411 enclosure. They are hot-swappable and provide HDMI video, audio, USB, and control signal extension over fiber optic cables. PowerCage 411 Series • Introduction... -
Page 10: Fiber Cable Transmission Modes
Multimode — Long distance, up to 500 m (1640 feet) (depending on the fiber cable) • Singlemode — Very long distance, up to 20 km (12.4 miles) NOTE: Multimode and singlemode boards are physically and functionally identical, with the exception of the effective range of transmission. PowerCage 411 Series • Introduction... -
Page 11: System Compatibility
This LinkLicense is enabled once and lasts for the life of the product. • Allows the FOX3 endpoints to pass uncompressed 4K @ 60 Hz video on the second SFP module, enabling the highest video performance. PowerCage 411 Series • Introduction... -
Page 12: Application Diagrams
Receiver for HDMI, AUDIO SYNC RS-232 Audio, USB HID, 100mA HDMI Tx Rx G S 5V 50-60 Hz OUT IN and RS-232 HDMI MODEL 80 Keyboard Mouse FLAT PANEL 4K Display Figure 1. Typical Point-to-Point Application PowerCage 411 Series • Introduction... - Page 13 5A MAX 12 VDC IR/SERIAL RELAYS FLEX I/O IPCP Pro 555Q xi IP Link Pro Control TLP Pro 725M Processor 7" Wall Mount Touchlink Pro Touchpanel Figure 2. Typical PowerCage 411 and FOX3 Matrix Application PowerCage 411 Series • Introduction...
-
Page 14: Features
Internal Extron Everlast power supply — Provides worldwide power compatibility, • with high-demonstrated reliability and low power consumption for reduced operating cost. Extron Everlast Power Supply is covered by a 7-year parts and labor warranty. • PowerCage 411 Series • Introduction... -
Page 15: Fox3 Pc Transmitters
Bidirectional RS 232 signal transmission over fiber optic cabling for AV device • control — Bidirectional RS 232 control pass-through enables a remote display to be controlled without the need for additional cabling. Two fibers are required for bidirectional communications. PowerCage 411 Series • Introduction... - Page 16 • Available as an 850 nm multimode model for moderate range transmissions up to 500 m (1640 feet) and a 1310 nm singlemode model for extreme distances up to 20 km (12.4 miles). PowerCage 411 Series • Introduction...
-
Page 17: Installation
Install the transmitter boards in the enclosure. Mount the enclosure to an equipment rack. Connect cables to the transmitter and to input and output devices. Connect the power cables to the unit and test the system. PowerCage 411 Series • Installation... -
Page 18: Rear Panel Features
Ground (G) Ground (G) Receive (Rx) Receive (Rx) image on the right. Transmit (Tx) Transmit (Tx) NOTE: The LAN port and RS-232 port allow communication to the enclosure and the boards (see RS-232 Insertion on page 19). PowerCage 411 Series • Installation... -
Page 19: Transmitter Rear Panels
émet une lumière invisible en continu (conforme à la classe 1) qui peut être dangereux pour les yeux, à utiliser avec précaution. Branchez la protection contre la poussière dans l’ensemble émetteur/récepteur lorsque le câble fibre optique est débranché. PowerCage 411 Series • Installation... - Page 20 In LC port. Connect the opposite end of this fiber optic cable to the Port A Out LC port on a receiver or to any other compatible Extron FOX3 device. Receiver INPUTS Figure 6. Connection PowerCage 411 Series • Installation...
-
Page 21: Installing The Transmitter Boards Into The Enclosure
Figure 7. Inserting Boards into the PowerCage Enclosure Repeat step 2 for all boards needing installation. NOTE: Cover all empty board slots. Do not leave them open. Securely fasten the screws for boards and blank panels. PowerCage 411 Series • Installation... -
Page 22: Connection Details
The table in figure 9 shows the audio format sent over the fiber connection when a specific Ring (R) audio format is not specified (see Input audio selection on page 42 to switch the active audio source). Sleeve ( ) PowerCage 411 Series • Installation 3.5 mm Stereo Plug Connector (unbalanced) -
Page 23: Rs-232 Connection
SIS commands for the enclosure (see RS-232 port on page 44). RS-232 Insertion for the individual cards can be configured via PCS (See General Settings in the PowerCage 411 Series Help File). RS-232 Tx Rx G Do not tin the wires! -
Page 24: Usb Hid And Usb 2.0 Connectors
After all related devices are connected and powered, the system is fully operational. If any problems are encountered, verify that the cables are routed and connected properly. If problems persist, call the Extron S3 Sales & Technical Support Hotline (see the contact information on page 67 of this guide). PowerCage 411 Series • Installation... -
Page 25: Operation
Failed Orange - Blinking Either fan not functional No AC power present Power supplies — Connect power to IEC power port (see figure 3 page 10). Fans — Automatically turn on when either power supply receives power. PowerCage 411 Series • Operation... - Page 26 (see Front Panel LCD Menu Overview). • Vertical Adjust knob ({) — Using the menu system, rotate this knob to scroll through the menu and to make any adjustments (see Front Panel LCD Menu Overview). PowerCage 411 Series • Operation...
-
Page 27: Rs-232 Insertion
U S IR /S 1.0A MAX +V +S PWR OUT = 6W Display Display IPCP Pro 250 IPCP Pro 250 Blu-ray Ethernet Ethernet Control LAN TLP Pro 725T Figure 13. Bidirectional Fiber System Diagram PowerCage 411 Series • Operation... -
Page 28: Resetting The Powercage 411 Enclosure With The Reset Button
1 reset. Use the 0Q SIS command (see Query firmware version on page 40) to confirm that the factory default firmware is no longer running (look for the asterisk [*] following the version number). PowerCage 411 Series • Operation... - Page 29 The factory configured passwords for all accounts on this enclosure have been set to the enclosure serial number. In the event of a complete system reset, the passwords convert to the default, which is extron (see Passwords Panel on page 58 to change a password). PowerCage 411 Series • Operation...
-
Page 30: Front Panel Lcd Menu Overview
Each of these four menus has a set of submenus, which enable the user to make desired PowerCage 411 Menu adjustments (see the diagram for the on page 24). The transmitter menu system contains configurable settings and status indicators for the FOX3 PC transmitters only (see Transmitter Menu starting on page 28). PowerCage 411 Series • Operation... - Page 31 Resetting the PowerCage 411 Enclosure with the Reset Button on page 20). NOTE: The menus time out and the default cycle displays after 30 seconds of inactivity. However, any selections made with the Adjust knobs are saved and remain in effect. PowerCage 411 Series • Operation...
-
Page 32: Powercage 411 Menu
See the transmitter MENU section to follow the Slot menu flow. NOTE: If a board is not installed or has been removed, the menu for that slot displays N/A. NEXT Figure 17. SLOT MENU Flowchart PowerCage 411 Series • Operation... -
Page 33: Frame Status Menu
The factory configured passwords for all accounts on this enclosure have been set to the enclosure serial number. In the event of a complete system reset, the passwords convert to the default, which is no password (see Passwords Panel on page 58 to change a password). PowerCage 411 Series • Operation... -
Page 34: View Comm Settings Menu
NOTE: The subnet mask is not adjustable through this Figure 19. VIEW COMM SETTINGS LCD menu. MENU Flowchart Gateway address (GW) The gateway address of the enclosure. NOTE: The gateway address is not adjustable through this LCD menu. PowerCage 411 Series • Operation... -
Page 35: Exit Menu
When one of the internal power supplies fails or the FAILED: FAILED: output voltage goes below 10% of 12 V, one of the PWR SUPPLY 1 PWR SUPPLY 2 two messages on the right displays. PowerCage 411 Series • Operation... -
Page 36: Transmitter Menu
EDID resolution, format, and refresh rate. The format appears as one of the following: D = DVI without audio • H = HDMI with 2 Ch audio • U = User memory • See the EDID Settings table on page 29 for a list of available EDID files. PowerCage 411 Series • Operation... -
Page 37: Hdcp Authorized Submenu
The information is displayed in the same format as the EDID (see EDID Submenu page 28). Test Pattern Submenu In the TEST PATTERN submenu select the test pattern. The submenu can be set to OFF or COLOR BARS. PowerCage 411 Series • Operation... -
Page 38: Input Hdcp Submenu
In the TX Reset submenu, reset the configurable settings of the transmitter to the factory default values. To activate the factory reset, press and hold the MENU button for 5 seconds. This is the same as the ZXXX SIS command (see Resets on page 38). PowerCage 411 Series • Operation... -
Page 39: Sis Configuration And Control
Connect to a host computer for configuration using SIS commands via an SSH client and IP address 203.0.113.22 and port 22023 (see Establishing a Connection on page 32 to connect to an SSH client). PowerCage 411 Series • SIS Configuration and Control... -
Page 40: Ethernet (Lan) Port
On password-protected connections, there are two levels of protection: administrator and user. Administrators have full access to all capabilities and editing functions. Users can view all settings with the exception of passwords. PowerCage 411 Series • SIS Configuration and Control... -
Page 41: Using Verbose Mode
(day, date, and time as in Thu, 02 Jun 2022 11:27:33) Vx.xx is the firmware version number. YYYY is the year. NOTE: {Day,date,time} are only reported if the connection is via the LAN or USB port. PowerCage 411 Series • SIS Configuration and Control... -
Page 42: Error Responses
NOTE: To enter multiple slot numbers, separate each slot number with a comma ( SIS responses return in the following format: response = The slot number (1-4) NOTE: If multiple slots are defined in the command, responses from each slot are separated onto different lines. PowerCage 411 Series • SIS Configuration and Control... -
Page 43: Using The Command And Response Table
Default is 255.255.255.0 X( = Gateway address Address in dotted decimal notation xxx.xxx.xxx.xxx. Default is 0.0.0.0 X1) = Hardware MAC address 00-05-A6-xx-xx-xx X1! = RS-232 Baud Rate 300 to 115200 bps, 9600 (default) PowerCage 411 Series • SIS Configuration and Control... - Page 44 X4% = Display input audio status 0 = Not detected, 1 = Detected X4^ = Input HDCP status 0 = No source detected 1 = Source with HDCP detected (default) 2 = Source with no HDCP present PowerCage 411 Series • SIS Configuration and Control...
- Page 45 X5* = Detected pixel clock 4-digit response with 0 padding (example: 297 = 0297MHZ) (0000 = No pixel clock detected) X5( = View audio output 1 = Digital, 2 = Analog PowerCage 411 Series • SIS Configuration and Control...
-
Page 46: Command And Response Tables For Sis Commands
The factory configured passwords for all accounts on the enclosure have been set to the enclosure serial number. In the Passwords Panel event of a complete system reset, the passwords convert to the default, which is extron (see on page 58 to change a password). PowerCage 411 Series • SIS Configuration and Control... - Page 47 No distinction is made between upper and lower case. The first character must be an alpha character. The last character must not be a minus sign/hyphen. = Default name Combination of model name and last 3 pairs of MAC address. PowerCage 411 Series • SIS Configuration and Control...
- Page 48 Example: 10 = power supply #1 is on and power supply #2 is failed x.xx.xxxx = Build number = Firmware version number To second decimal place (x.xx) X3& = Verbose firmware version Description, upload date and time. PowerCage 411 Series • SIS Configuration and Control...
- Page 49 To view audio mute status, digital audio status and analog audio status must be viewed individually. 1 = Digital out (Loop Out ), 2 = Analog KEY: = Audio output 0 = Unmute (default) 1 = Mute = Audio mute status PowerCage 411 Series • SIS Configuration and Control...
- Page 50 Verbose mode 2/3 Inf19*Serial number x.xx ] View updated FPGA version 35Q/q x.xx ] Verbose mode 2/3 Ver 35* View LinkLicense FOX3 Uncomprompressed Video, 79-2560-01 LELIC If LinkLicense is not installed, returns PowerCage 411 Series • SIS Configuration and Control...
- Page 51 2 = SFP B = Active fiber link = Fiber Link detection (SPF A/B IN LED) 0 = Not detected 1 = Detected SFP A and SFP B OUT LED is always active. NOTE: PowerCage 411 Series • SIS Configuration and Control...
- Page 52 0 = Clear/none (default for the LAN port), = Verbose/response mode 1 = Verbose mode (default for the RS-232 port), 2 = Tagged response for queries 3 = Verbose mode and tagged responses for queries PowerCage 411 Series • SIS Configuration and Control...
-
Page 53: Configuration Software
(see the PCS Product Configuration Software link ) and skip step 6 on page 46. For firmware, click the Firmware link ( If there is no direct link to your software, click the Software link ( PowerCage 411 Series • Configuration Software... - Page 54 Double-click the executable file and follow the on-screen directions to install the software. For Firmware: To install via PCS, see Update Firmware in the Device List on page 53. To install via the internal web pages, see the Firmware Panel on page 59. PowerCage 411 Series • Configuration Software...
-
Page 55: Connecting To Pcs
Click in the field to edit (see figure 29). Click Apply to complete and close. Alternatively, click Apply and Connect to complete and connect to the device. Click Cancel to close the box without changes. Figure 28. Communication Settings Box PowerCage 411 Series • Configuration Software... -
Page 56: Tcp/Ip Panel
In the Port field ( ), enter the port of the desired device or allow the device to search for the port to connect. Click the Connect button ( ). A new device tab opens. PowerCage 411 Series • Configuration Software... -
Page 57: Offline Device Preview
Start-up Drop-Down Menu Select the desired device model from the Device Models list ( Click the Configure button ( ). A new offline device configuration tab opens. Figure 31. New Configuration File Dialog Box PowerCage 411 Series • Configuration Software... -
Page 58: Software Overview
Figure 33. Software Menu Show Expanded Device Tabs Selecting Show Expanded Device Tabs from the Software menu displays the device IP address Figure 34. Expanded Device Tab or connection method in the Device tab. PowerCage 411 Series • Configuration Software... - Page 59 Open the PCS help file for general PCS operations. From the Software list, select Extron PCS Help. Application Licensing Log into PCS with your Extron Insider account or check licensing details. Figure 36. Application Licensing Dialog Box PowerCage 411 Series • Configuration Software...
- Page 60 Click the Close Session(s) and Exit button ( ) to disconnect the software from connected devices, close all offline device tabs, and close the software. Alternatively, click the Cancel button ( ) to leave the software open. PowerCage 411 Series • Configuration Software...
-
Page 61: Device List
PowerCage 411 Help — Open the PowerCage 411 Series PCS Help File in a separate window. About This Module — Open the About This Module dialog box, with the module part • number and firmware version of the connected device. PowerCage 411 Series • Configuration Software... -
Page 62: Internal Web Page
In the event of a complete system reset, Passwords Panel the passwords convert to the default, which is extron (see page 58 to change a password). Click the SIGN IN button, PowerCage 411 Series • Internal Web Page... -
Page 63: Web Page Panels
To view general information about the PowerCage 411, click the ABOUT link ( About £ the PowerCage 411). Figure 40. PowerCage 411 Internal Web Page The internal web page does not automatically update. To see an updated page, click the Refresh button on the web browser. PowerCage 411 Series • Internal Web Page... -
Page 64: Device Details Panel
2. The power is either On, No AC, or Not Installed. NOTE: Power supply 1 receives power from IEC 1, and power supply 2 Figure 43. Unit Status Panel receives power from IEC 2. PowerCage 411 Series • Internal Web Page... -
Page 65: Fan Speed Panel
PC. To sync the date and time with your PC: Click SYNC TO PC to set the date and time according to your PC. Figure 46. Sync to NTP Servers Mode PowerCage 411 Series • Internal Web Page... -
Page 66: Network Panel
The factory configured passwords for all accounts on this device have been set to the device serial number. In the event of a complete system reset, the passwords convert to the default, which is extron for the Admin and User. PowerCage 411 Series • Internal Web Page... -
Page 67: Firmware Panel
When the update is completed, the message window closes and the message Firmware Upload Complete appears near the top of the screen. The new firmware filename appears beside Version in the Firmware panel. PowerCage 411 Series • Internal Web Page... -
Page 68: Modules Page
1 through 4. To cancel pending changes: Click the Cancel button. The dialog box closes. Figure 53. Install Firmware Dialog Box PowerCage 411 Series • Internal Web Page... -
Page 69: About The Powercage 411
PowerCage 411, such as the firmware version, copyright, part number, licenses, patents and web page version. Click on the View the End User License Agreement link to view the user license. Figure 54. About PowerCage 411 Panel PowerCage 411 Series • Internal Web Page... -
Page 70: Reference Information
Consider equipment nameplate ratings when addressing this concern. • Reliable earthing (grounding) — Maintain reliable grounding of rack-mounted equipment. Pay particular attention to supply connections other than direct connections to the branch circuit (such as the use of power strips). PowerCage 411 Series • Reference Information... - Page 71 Mise à la terre — Assurez-vous que l’équipement est correctement mis à la terre. Accordez une attention particulière aux connexions électriques autres que les connexions directes au circuit de dérivation (ex. : les multiprises). PowerCage 411 Series • Reference Information...
-
Page 72: Rack Mounting
Place the PowerCage into the rack, aligning the holes in the rack mounting ears with those in the rack. Secure the enclosure to the rack using the supplied bolts and washers. t r o Mounting Bracket Figure 55. Rack Mounting the PowerCage 411 to a 19-inch Rack PowerCage 411 Series • Reference Information... -
Page 73: Under-Furniture Mounting
POWER SUPPLY NEXT RESET CONFIG Extron POWERCAGE 401 MBU 149 Mounting Bracket UTM 100 Attach the UTM 100 to Mounting bracket the rack ear, using the provided screws. Figure 57. PowerCage 411 with Optional UTM 100 PowerCage 411 Series • Reference Information... -
Page 74: Removing And Installing A Power Supply Module
Gently slide the replacement power supply module into the enclosure until the power supply meets resistance. Gently seat the replacement power supply into the backplane. Use a screwdriver to tighten the left and right captive panel screws to lock the replacement power supply in place. PowerCage 411 Series • Reference Information... - Page 75 Extron Electronics makes no further warranties either expressed or implied with respect to the product and its quality, performance, merchantability, or fitness for any particular use. In no event will Extron Electronics be liable for direct, indirect, or consequential damages resulting from any defect in this product even if Extron Electronics has been advised of such damage.
Need help?
Do you have a question about the PowerCage 411 Series and is the answer not in the manual?
Questions and answers