
Related Manuals for ProSoft Technology ControlLogix MVI56E-SMGC


Summary of Contents for ProSoft Technology ControlLogix MVI56E-SMGC
- Page 1 MVI56E-SMGC ControlLogix™ Platform Enhanced FMC722 TPU General Communication Module June18, 2021 USER MANUAL...
-
Page 2: Your Feedback Please
In an effort to conserve paper, ProSoft Technology no longer includes printed manuals with our product shipments. User Manuals, Datasheets, Sample Ladder Files, and Configuration Files are provided at our website: www.prosoft-technology.com... -
Page 3: Open Source Information
Open Source Software from ProSoft Technology, Inc. - against payment of the shipping and handling charges - for a period of at least 3 years since purchase of the product. Please send your specific request, within 3 years... -
Page 4: Important Safety Information
For professional users in the European Union If you wish to discard electrical and electronic equipment (EEE), please contact your dealer or supplier for further information. Warning – Cancer and Reproductive Harm – www.P65Warnings.ca.gov ProSoft Technology, Inc. Page 4 of 98... -
Page 5: Table Of Contents
Transmit Data (SMGCSendData) ..............44 3.1.6 Other Support Objects ..................45 Database Values ..................... 46 Helper Objects ....................47 Diagnostics and Troubleshooting Ethernet LED Indicators ................... 48 4.1.1 Scrolling LED Status Indicators ............... 49 ProSoft Technology, Inc. Page 5 of 98... - Page 6 5.4.4 Downloading the Sample Program to the Processor........97 5.4.5 Adding the Sample Ladder to an Existing Application ........97 Support, Service & Warranty Contacting Technical Support ................98 Warranty Information ..................98 ProSoft Technology, Inc. Page 6 of 98...
-
Page 7: Start Here
100 Mbytes of free hard disk space (or more based on application requirements) Note: The Hardware and Operating System requirements in this list are the minimum recommended to install and run software provided by ProSoft Technology . Other third party applications may have different ®... -
Page 8: Setting Jumpers
You should practice security by design, per IEC 62443-4-1, including layers of security and detection. The module relies on overall network security design, as it is only one component of what should be a defined zone or subnet. ProSoft Technology, Inc. Page 8 of 98... -
Page 9: Installing The Module In The Rack
Note: When using the XT version (if applicable), you must use the 1756-A5XT or 1756-A7LXT chassis to uphold the XT specifications. In these chassis, modules are spaced further apart than in standard ControlLogix chassis. Blank spacers are inserted between active modules. ProSoft Technology, Inc. Page 9 of 98... -
Page 10: Before You Import The Add-On Instruction
Note: You can also set the date and time from the module's web page. Important: The Optional Add-On Instruction supports only the two features listed above. You must use the regular MVI56E-SMGC Add-On Instruction for all other features including backplane transfer and FMC722 TPU data communication. ProSoft Technology, Inc. Page 10 of 98... -
Page 11: Creating The Module
ELECT ODULE select the GENERIC 1756 MODULE. If you're using a controller revision of 16 or less, expand O in the SELECT MODULE dialog box, and then select the THER GENERIC 1756 MODULE. ProSoft Technology, Inc. Page 11 of 98... - Page 12 ONFIGURATION Important: You must select the C as D - INT in the dialog box, otherwise the module will ORMAT not communicate over the backplane of the ControlLogix rack. Click OK to continue. ProSoft Technology, Inc. Page 12 of 98...
- Page 13 1 millisecond. The default value is 5 milliseconds. Values between 1 and 10 milliseconds should work with most applications. Click OK to save the module and close the dialog box. Notice that the module now appears in the C window. ONTROLLER RGANIZATION ProSoft Technology, Inc. Page 13 of 98...
- Page 14 MVI56E-SMGC ♦ ControlLogix™ Platform Start Here Enhanced FMC722 TPU General Communication Module User Manual In order to open the sample ladder logic, click at File/Open… to open the project: ProSoft Technology, Inc. Page 14 of 98...
-
Page 15: Importing The Optional Add-On Instruction
M ladder. ROGRAM OUTINE Select an empty rung in the routine, and then click the right mouse button to open a … shortcut menu. On the shortcut menu, choose I MPORT UNGS ProSoft Technology, Inc. Page 15 of 98... - Page 16 Note that if you are OUTINE using a controller revision number of 16 or less, the I dialog MPORT ONFIGURATION box does not show the I tree. MPORT ONTENT ProSoft Technology, Inc. Page 16 of 98...
- Page 17 The procedure also imports the new User Defined Data Types, Controller Tags, and the Add-On instruction for your project. Save the application and then download the sample ladder logic to the processor. ProSoft Technology, Inc. Page 17 of 98...
-
Page 18: Downloading The Sample Program To The Processor
If the key switch is in the REM position, click OK to switch the processor from PROGRAM mode to RUN mode. Note: If you receive an error message during these steps, refer to your RSLogix documentation to interpret and correct the error. ProSoft Technology, Inc. Page 18 of 98... -
Page 19: Mvi56E-Smgc Configuration
. Follow the instructions that appear on the screen. DMINISTRATOR If you want to find additional software specific to your MVI56E-SMGC, enter the model number into the ProSoft website search box and press the E key. NTER ProSoft Technology, Inc. Page 19 of 98... -
Page 20: Upgrading From Mvi56-Smgc In Prosoft Configuration Builder
PC. You can download the latest version from www.prosoft-technology.com. In ProSoft Configuration Builder's tree view, click the icon and right-click to MODULE open a shortcut menu. On the shortcut menu, select C MVI56E-SMGC. HANGE ODULE YPE TO ProSoft Technology, Inc. Page 20 of 98... -
Page 21: Setting Up The Project
When you first start PCB, the tree view consists of folders for Default Project and Default Location, with a Default Module in the Default Location folder. The following illustration shows the PCB window with a new project. ProSoft Technology, Inc. Page 21 of 98... - Page 22 In the Product Line Filter area of the dialog box, select MVI56E. In the Select Module Type dropdown list, select MVI56E-SMGC, and then click OK to save your settings and return to the ProSoft Configuration Builder window. ProSoft Technology, Inc. Page 22 of 98...
-
Page 23: Setting Module Parameters
Double-click any icon to open an Edit dialog box. To edit a parameter, select the parameter in the left pane and make your changes in the right pane. Click OK to save your changes. ProSoft Technology, Inc. Page 23 of 98... - Page 24 In the View Configuration dialog box, click the F menu and then click P RINT In the Print dialog box, choose the printer to use from the drop-down list, select the printing options, and then click OK. ProSoft Technology, Inc. Page 24 of 98...
-
Page 25: Connecting Your Pc To The Module
ENBT/CNBx and chassis in the path). To use CIPconnect, follow these steps. In the tree view in ProSoft Configuration Builder, right-click the MVI56E-SMGC icon and then choose D IAGNOSTICS In the Diagnostics window, click the S button. ONNECTION ProSoft Technology, Inc. Page 25 of 98... - Page 26 CIPconnect Path Editor dialog box. The CIPconnect Path Editor allows you to define the path between the PC and the MVI56E-SMGC module. The first connection from the PC is always a 1756-ENBT (Ethernet/IP) module. ProSoft Technology, Inc. Page 26 of 98...
- Page 27 The path can only contain ControlNet or Ethernet/IP networks. The maximum number of supported racks is six. Click C CIP P to build the path in text format. ONSTRUCT Click OK to confirm the configured path. ProSoft Technology, Inc. Page 27 of 98...
- Page 28 ENBT that is connected to the PC. MVI56E Module 1756-ENBT Rack 1 Ethernet Rack 1 Module Network Address Slot ControlLogix Processor MVI56E-SMGC 1756-ENBT IP=192.168.0.100 In ProSoft Configuration Builder, right-click the MVI56E-SMGC icon and then choose IAGNOSTICS ProSoft Technology, Inc. Page 28 of 98...
- Page 29 In the Select Connection Type dropdown list, choose 1756-ENBT. The default path appears in the text box, as shown in the following illustration. Configure the path as shown in the following illustration, and click C ONSTRUCT to build the path in text format. ProSoft Technology, Inc. Page 29 of 98...
- Page 30 Click OK to close the Test Connection pop-up and then click C to close the ONNECT Connection Set up dialog box. The Diagnostics menu is now connected through CIPconnect. ProSoft Technology, Inc. Page 30 of 98...
- Page 31 Rack 1 Ethernet ControlNet MVI56E Module 1756-CNB Rack 2 Rack 1 Module Network Address Slot ControlLogix Processor 1756-CNB Node = 1 1756-ENBT IP=192.168.0.100 Rack 2 Module Network Address Slot 1756-CNB Node = 2 MVI56E-SMGC ProSoft Technology, Inc. Page 31 of 98...
- Page 32 MVI56E-SMGC ♦ ControlLogix™ Platform MVI56E-SMGC Configuration Enhanced FMC722 TPU General Communication Module User Manual In ProSoft Configuration Builder, right-click the MVI56E-SMGC icon and then choose IAGNOSTICS In the Diagnostics window, click the S button. ONNECTION ProSoft Technology, Inc. Page 32 of 98...
- Page 33 Configure the path as shown in the following illustration, and click C ONSTRUCT to build the path in text format. Click OK to close the CIPconnect Path Editor and return to the Connection Setup dialog box. ProSoft Technology, Inc. Page 33 of 98...
- Page 34 Click OK to close the Test Connection pop-up and then click C to close the ONNECT Connection Set up dialog box. The Diagnostics menu is now connected through CIPconnect. ProSoft Technology, Inc. Page 34 of 98...
-
Page 35: Using Rswho To Connect To The Module
In the Download dialog box, choose 1756 ENBT from the Select Connection Type dropdown box. Click RSW to display modules on the network. The MVI56E-SMGC module will automatically be identified on the network. Select the module, and then click OK. ProSoft Technology, Inc. Page 35 of 98... -
Page 36: Connecting Your Pc To The Module's Ethernet Port
OR reconfigure the router/ layer 3 switch to allow routing of the UDP broadcast messages. In the tree view in ProSoft Configuration Builder, right-click the MVI56E-SMGC icon to open a shortcut menu. On the shortcut menu, choose D IAGNOSTICS ProSoft Technology, Inc. Page 36 of 98... - Page 37 The module’s default IP address is 192.168.0.250. Choose an unused IP within your subnet, and then click OK. Important: The temporary IP address is only valid until the next time the module is initialized. ProSoft Technology, Inc. Page 37 of 98...
- Page 38 Connection Setup dialog box, then click the T ONNECTION button to verify that the module is accessible with the current settings. If the Test Connection is successful, click C . The Diagnostics menu will ONNECT display in the Diagnostics window. ProSoft Technology, Inc. Page 38 of 98...
-
Page 39: Downloading The Project To The Module
Configuration Builder uses this temporary IP address to connect to the module. Click T to verify that the IP address allows access to the module. ONNECTION If the connection succeeds, click D to transfer the Ethernet configuration to OWNLOAD the module. ProSoft Technology, Inc. Page 39 of 98... - Page 40 In the Download dialog box, click B ) to open ProSoft Discovery ROWSE EVICE Service. Right-click the module and then choose S PCB. ELECT FOR Close ProSoft Discovery Service. Click D to transfer the configuration to the module. OWNLOAD ProSoft Technology, Inc. Page 40 of 98...
-
Page 41: Using Controller Tags
MVI56E-SMGC module. An instance of this object should be declared in the controller tags of the processor. The following figure displays this object: The members of this object are discussed in the following topics. ProSoft Technology, Inc. Page 41 of 98... -
Page 42: Status Object (Smgcinstat)
Use this data to monitor the state of the module at a "real-time rate". Within the SMGCInStat objects are objects containing the status information for the block transfer process and the client. ProSoft Technology, Inc. Page 42 of 98... -
Page 43: Backplane Variables (Smgcbackplane)
The SMGC_0103_LastErr object stores the information received in the last error block received from the server. When this block is received, ladder logic copies the information into this object. The structure of the object is shown in the following screen: ProSoft Technology, Inc. Page 43 of 98... -
Page 44: Command Response Data (Smgc_0104_Cmdresp)
The structure of this object is such that the data can be directly copied into a write block built for the module. The structure of this object is shown in the following screen: ProSoft Technology, Inc. Page 44 of 98... -
Page 45: Other Support Objects
ProSoft Technology, Inc. Page 45 of 98... -
Page 46: Database Values
Data for analog inputs is stored in the following data type: Data for the analog outputs is stored in the following data type: ProSoft Technology, Inc. Page 46 of 98... -
Page 47: Helper Objects
The sample ladder logic contains examples of such structures. Refer to the Enhanced FMC722 TPU General Communication Module specification for a complete understanding of each data block that can be transmitted by the protocol. ProSoft Technology, Inc. Page 47 of 98... -
Page 48: Diagnostics And Troubleshooting
No physical network connection is detected. No Ethernet Link communication is possible. Check wiring and cables. GREEN Solid Physical network connection detected. This LED must be ON solid or Blinking for Ethernet communication to be possible. ProSoft Technology, Inc. Page 48 of 98... -
Page 49: Scrolling Led Status Indicators
<Backplane Status> ERR: Module is unable to communicate with processor. For this scenario, the <Port Status> message above is replaced with "Processor faulted or is in program mode". Module IP address <IP Address> ProSoft Technology, Inc. Page 49 of 98... -
Page 50: Non-Scrolling Led Status Indicators
Verify correct configuration data is being transferred to the module from the ControlLogix controller. If the module's OK LED does not turn GREEN, verify that the module is inserted completely into the rack. If this does not cure the problem, contact ProSoft Technology Technical Support. ProSoft Technology, Inc. -
Page 51: Troubleshooting The Leds
Enhanced FMC722 TPU General Communication Module User Manual 4.3 Troubleshooting the LEDs Use the following troubleshooting steps if problems occur when the module is powered up. If these steps do not resolve the problem, please contact ProSoft Technology Technical Support. Processor Errors Steps to take... -
Page 52: Using The Diagnostics Menu In Prosoft Configuration Builder
In the tree view in ProSoft Configuration Builder, right-click the MVI56E-SMGC icon to open a shortcut menu. On the shortcut menu, choose D IAGNOSTICS In the Diagnostics window, click the S button to browse for the ONNECTION module’s IP address. ProSoft Technology, Inc. Page 52 of 98... - Page 53 ONNECTION the module is accessible with the current settings. ® You can also use CIPconnect to connect to the module through a 1756-ENBT card. If the Test Connection is successful, click C ONNECT ProSoft Technology, Inc. Page 53 of 98...
- Page 54 (using the grey cable) or directly between your computer and the module (using the red cable). If you are still not able to establish a connection, contact ProSoft Technology for assistance. ProSoft Technology, Inc.
-
Page 55: Diagnostics Menu
The Diagnostics menu for this module is arranged as a tree structure, with the Main Menu at the top of the tree, and one or more sub-menus for each menu command. The first menu you see when you connect to the module is the Main menu. ProSoft Technology, Inc. Page 55 of 98... -
Page 56: Module Information
4.5.1.2 Config Use the Configuration menu to view backplane configuration settings for the MVI56E- SMGC module. The information on this menu corresponds with the configuration information in the Module settings in ProSoft Configuration Builder. ProSoft Technology, Inc. Page 56 of 98... -
Page 57: Network Information
Use the NIC Status (Network Interface Card) menu to view configuration and status information for the MVI56E-SMGC module's Ethernet application port. The information on this menu is useful for troubleshooting Ethernet network connectivity problems. ProSoft Technology, Inc. Page 57 of 98... -
Page 58: Monitoring Backplane Information
During normal operation, the read, write, and parsing values should increment continuously, while the error value should not increment. The status values on this menu correspond with members of the Status Data Definition. ProSoft Technology, Inc. Page 58 of 98... - Page 59 MVI56E-SMGC ♦ ControlLogix™ Platform Diagnostics and Troubleshooting Enhanced FMC722 TPU General Communication Module User Manual BACKPLANE Status ProSoft Technology, Inc. Page 59 of 98...
-
Page 60: Smgc Client
Diagnostics and Troubleshooting Enhanced FMC722 TPU General Communication Module User Manual 4.5.4 SMGC Client Use the SMGC Client menu to view the SMGC Client configuration and status of the MVI56E-SMGC module. 4.5.4.1 SMGC Client Configuration ProSoft Technology, Inc. Page 60 of 98... - Page 61 MVI56E-SMGC ♦ ControlLogix™ Platform Diagnostics and Troubleshooting Enhanced FMC722 TPU General Communication Module User Manual 4.5.4.2 SMGC Client Status ProSoft Technology, Inc. Page 61 of 98...
-
Page 62: I/O Tag Configuration
Use the Tag configuration menus to view the configuration for the MVI56E-SMGC client. 4.6.1 AI Tags Use the AI Tags menu to display the Analog Input tag configuration. 4.6.2 AO Tags Use the AO Tags menu to display the Analog Output tag configuration. ProSoft Technology, Inc. Page 62 of 98... -
Page 63: Di Tags
Enhanced FMC722 TPU General Communication Module User Manual 4.6.3 DI Tags Use the DI Tags menu to display the Digital Input tag configuration. 4.6.4 DO Tags Use the DO Tags menu to display the Digital Output tag configuration. ProSoft Technology, Inc. Page 63 of 98... -
Page 64: Reading Status Data From The Module
This status value contains the total number of Client[0].TxOverflow transmit messages that exceeded the specified maximum buffer size for the client. Total number of messages with a length setting Client[0].LenErr larger than MAX_BUFFER. ProSoft Technology, Inc. Page 64 of 98... - Page 65 0x0020 Bit 5 0x0040 Bit 6 0x0080 Bit 7 0x0100 Bit 8 0x0200 Bit 9 0x0400 Bit 10 0x0800 Bit 11 0x1000 Bit 12 0x2000 Bit 13 0x4000 Bit 14 0x8000 Bit 15 ProSoft Technology, Inc. Page 65 of 98...
-
Page 66: Connecting To The Module's Webpage
4.8 Connecting to the Module's Webpage The module's internal webserver provides access to general product information, firmware download link, and links to the ProSoft Technology's website. In the tree view in ProSoft Configuration Builder, right-click the MVI56E-SMGC icon and then choose D... -
Page 67: Firmware Upgrade
MVI56E-SMGC ♦ ControlLogix™ Platform Diagnostics and Troubleshooting Enhanced FMC722 TPU General Communication Module User Manual 4.8.1 Firmware Upgrade Firmware upgrade is available through the module’s webpage. Follow the prompts to complete the upgrade. ProSoft Technology, Inc. Page 67 of 98... -
Page 68: Reference
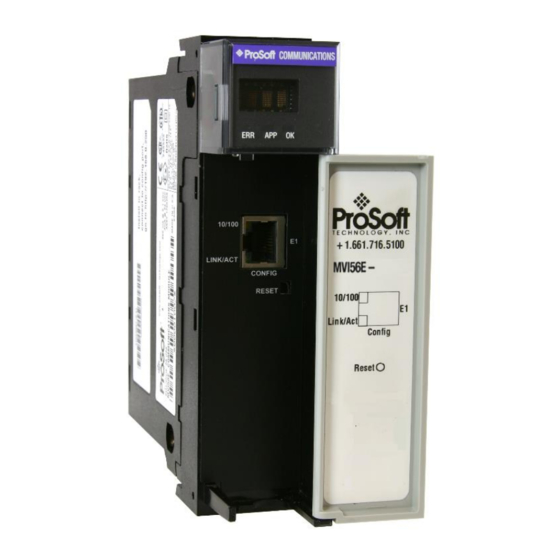
Shows module, version, IP, application port setting, port 4-character, scrolling, status, and error information alphanumeric LED display 10/100 Base-T, RJ45 Connector, for CAT5 cable Ethernet port Link and Activity LED indicators Auto-crossover cable detection ProSoft Technology, Inc. Page 68 of 98... -
Page 69: Functional Overview
Messages transmitted by the module are those constructed in ladder logic and passed to the module. Messages received by the module from the server are passed to the ladder logic for parsing. ProSoft Technology, Inc. Page 69 of 98... - Page 70 Enhanced FMC722 TPU General Communication Module User Manual 5.2.1.2 Main Logic Loop Upon completing the power up configuration process, the module enters an infinite loop that performs the functions shown in the following diagram. ProSoft Technology, Inc. Page 70 of 98...
- Page 71 Additionally, the user is responsible for constructing messages to be transferred out of the module by building the messages in the output image of the module. ProSoft Technology, Inc. Page 71 of 98...
- Page 72 The data set is located in the block starting at word offset 2. The ladder logic must handle data received by the module. The structure of each block received by the client is well defined in the SMGC protocol specification. If the client ProSoft Technology, Inc. Page 72 of 98...
- Page 73 This value should be copied to the first word of the output image (write block sequence number). Using this sequence number, the arrival of new data can easily be recognized by both the processor and the module. ProSoft Technology, Inc. Page 73 of 98...
- Page 74 Word 3 of the block defines the number of SMGC protocol data blocks contained in the write block. For simple application of the module, this word should be set to 1 and the ProSoft Technology, Inc. Page 74 of 98...
- Page 75 Abort the client socket Word 27 is utilized to control the module. The module as displayed in the following table recognizes two commands: Code Description No operation to perform Warm boot module Cold boot module ProSoft Technology, Inc. Page 75 of 98...
- Page 76 The client is issuing an abort socket is forced closed. (reset) on the connection. 2000 The Delay state after a failure. In this state, the module will delay for 10 seconds before trying to connect to the server. ProSoft Technology, Inc. Page 76 of 98...
- Page 77 The client is set to connect to the server and waiting for the connection to establish. The client is connected to the server and can transfer data The connection is being closed by the client. ProSoft Technology, Inc. Page 77 of 98...
- Page 78 (unsolicited response) without a request message. Ladder logic must be developed to parse these blocks as they are sent from the module to the ProSoft Technology, Inc. Page 78 of 98...
- Page 79 It is the responsibility of the application engineer to construct ladder logic for each request message to be sent to the remote server. ProSoft Technology, Inc. Page 79 of 98...
- Page 80 Ladder logic is responsible for parsing each data block received over the backplane and for placing the data in the correct controller tags. ProSoft Technology, Inc. Page 80 of 98...
- Page 81 Low Scale REAL Units Index REAL Future Option REAL Alarm Hysteresis REAL High-High Limit REAL High Limit REAL Low Limit REAL Low-Low Limit SINT[8] Future Option DINT[2] Time in POSIX Format REAL Out.Value Out.Status ProSoft Technology, Inc. Page 81 of 98...
- Page 82 Tag Index value to determine which array index to use for placing the data into the controller tag database. These blocks are passed to the module from the server when the associated data changes in the server. ProSoft Technology, Inc. Page 82 of 98...
- Page 83 Tag Index value to determine which array index to use for placing the data into the controller tag database. These blocks are passed to the module from the server when the associated data changes in the server. ProSoft Technology, Inc. Page 83 of 98...
- Page 84 These blocks are passed to the module from the server when requested by the client (request data block 0x101) or when the associated data changes in the server. ProSoft Technology, Inc. Page 84 of 98...
- Page 85 1 = Setpoint 2 = Step (0=stop, >0=move open, <0=Move closed) The ladder logic should be programmed to send this message when a new setpoint value is required for a specific tag in the server. ProSoft Technology, Inc. Page 85 of 98...
- Page 86 These blocks are passed to the module from the server when requested by the client (request data block 0x101) or when the associated data changes in the server. ProSoft Technology, Inc. Page 86 of 98...
- Page 87 Digital Output Request data block code 0x00001002 6 to 7 DINT Tag Index Setpoint The ladder logic should be programmed to send this message when a new setpoint value is required for a specific tag in the server. ProSoft Technology, Inc. Page 87 of 98...
- Page 88 The server will respond with a block with the following format (read block from the module): Word Offset Byte Count Data Type Description 2 to 3 DINT Ping data block code (0x00000102) 4 to 5 DINT Tag Index (unused) ProSoft Technology, Inc. Page 88 of 98...
- Page 89 Command Response data block code 0x00000104 4 to 5 DINT Tag Index Return Value 7 to 8 DINT Data block type code matching this block Return Value: 0 = NACK, 1 = ACK ProSoft Technology, Inc. Page 89 of 98...
- Page 90 Number of Samples: Number of samples to be taken for a sensor signature request. Max number of samples is 400 if MAX_BUFFER is sufficient. If Operation Code = 0 or 1, set to 120 for valve signature ProSoft Technology, Inc. Page 90 of 98...
- Page 91 SMGC.CFG file for each data type. This process is required in order to set the tag index values in the server. The ladder logic and controller tags defined in the ControlLogix processor must be set up to match the tags defined in each data type. ProSoft Technology, Inc. Page 91 of 98...
-
Page 92: Ethernet Cable Specifications
Also, high Ethernet traffic may impact performance, so consider one of these options: Use managed switches to reduce traffic coming to module port Use CIPconnect for these applications and disconnect the module Ethernet port from the network ProSoft Technology, Inc. Page 92 of 98... -
Page 93: Using The Sample Program
You can always download the latest version of the sample ladder logic and user manuals for the MVI56E-SMGC module from the ProSoft Technology website, at www.prosoft-technology.com From that link, navigate to the download page for your module and choose the sample program to download for your version of Studio 5000 and your processor. - Page 94 This tab shows ENERAL information about the processor, including the Revision (firmware) version. In the following illustration, the firmware version is 11.32 Select the sample ladder logic file for your firmware version. ProSoft Technology, Inc. Page 94 of 98...
-
Page 95: Selecting The Controller Type
Open the T dropdown list, and then select your ControlLogix controller. Select the correct firmware revision for your controller, if necessary. Click OK to save your changes and return to the previous window. ProSoft Technology, Inc. Page 95 of 98... -
Page 96: Selecting The Slot Number For The Module
OK. RSLogix will automatically apply the slot number change to all tags, variables and ladder logic rungs that use the MVI56E-SMGC slot number for computation. ProSoft Technology, Inc. Page 96 of 98... -
Page 97: Downloading The Sample Program To The Processor
Copy the User-Defined Data Types from the sample program. Copy the Ladder Rungs from the sample program. Save and Download the new application to the controller and place the processor in RUN mode. ProSoft Technology, Inc. Page 97 of 98... -
Page 98: Support, Service & Warranty
User Manual 6 Support, Service & Warranty 6.1 Contacting Technical Support ProSoft Technology, Inc. is committed to providing the most efficient and effective support possible. Before calling, please gather the following information to assist in expediting this process: Product Version Number...
Need help?
Do you have a question about the ControlLogix MVI56E-SMGC and is the answer not in the manual?
Questions and answers