
Related Manuals for ProSoft Technology MVI56E-LDM


Summary of Contents for ProSoft Technology MVI56E-LDM
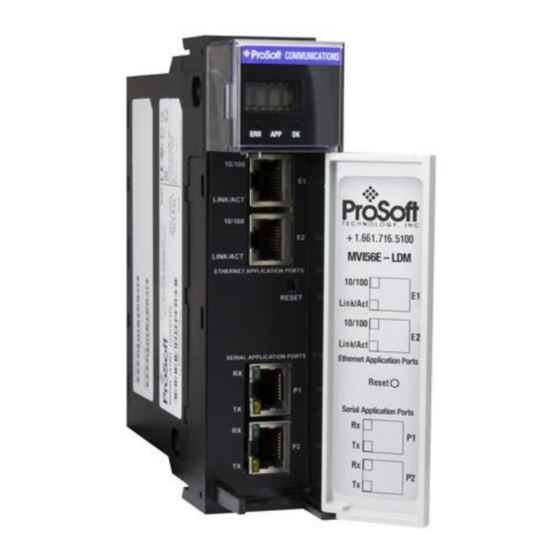
- Page 1 MVI56E-LDM ControlLogix Platform Linux Development Module ThingWorx® Add-On January 9, 2020 QUICK START GUIDE...
-
Page 2: Your Feedback Please
® ProSoft Technology , is a registered copyright of ProSoft Technology, Inc. All other brand or product names are or may be trademarks of, and are used to identify products and services of, their respective owners. In an effort to conserve paper, ProSoft Technology no longer includes printed manuals with our product shipments. -
Page 3: Table Of Contents
Configuring the ControlLogix Processor ..............17 Run the Sample Application Check the Certificate Dates..................19 Install the Sample Application ................. 20 Set the MVI56E-LDM’s Ethernet IP Addresses ............21 Configuration of the Sample Application ..............22 6.4.1 Set the Host ......................22 6.4.2... - Page 4 Running of Sample Application ................42 Visual Studio 2017 Project 10.1 Build using Visual Studio ..................43 Support, Service & Warranty 11.1 Contacting Technical Support ................. 45 11.2 Warranty Information ....................47 Index Page 4 of 49 ProSoft Technology, Inc.
-
Page 5: Start Here
Our goal is to read and write data from the PLC to and from ThingWorx. This will be accomplished by running the sample application on the MVI56E-LDM, connected to the ThingWorks Server. -
Page 6: Development Environment
Quick Start Guide ThingWorx® Add-On The Quick Start Guide provides the steps to install the software onto a Windows 10 PC, build the sample application, and load it on the MVI56E-LDM. You will then configure it with a working sample. Development Environment The MVI56E-LDM development tools run in Linux. -
Page 7: Prerequisites
MVI56E-LDM-TW .zip file Navigate to the MVI56E-LDM product page at www.prosoft-technology.com, and download the zip file MVI56E-LDM-TW-xxx.zip (where xxx is version number). On your PC, create a folder C:\Workspace. Save and unzip this file in this folder. The interface library contains the following components:... -
Page 8: Source Code For The Thingworx Edge C Sdk
Prerequisites MVI56E-LDM ♦ ControlLogix Platform Quick Start Guide ThingWorx® Add-On Source Code for the ThingWorx Edge C SDK Download the C-SDK (c-sdk-2-2-1-1321.zip) file for the ThingWorx Platform from the PTC Marketplace https://marketplace.ptc.com/apps/193540/c-sdk#!overview. Note: At the time of this writing, the C-SDK version was 2.2.1.1321. -
Page 9: Thingworx Hosted Evaluation Server
MVI56E-LDM ♦ ControlLogix Platform Prerequisites ThingWorx® Add-On Quick Start Guide ThingWorx Hosted Evaluation Server Go to the ThingWorx Developer Portal and sign up for a free 30 day trial hosted Evaluation Server. The Developer Portal can be found here: https://developer.thingworx.com/login?returnURL=%2Fen%2Fprofile%2Fhosting ProSoft Technology, Inc. -
Page 10: Launch The Thingworx Server
Prerequisites MVI56E-LDM ♦ ControlLogix Platform Quick Start Guide ThingWorx® Add-On 2.3.1 Launch the ThingWorx Server Log in to the ThingWorx Evaluation Server. Click the C button. This will take a few minutes. REATE ERVER The Server Status will move to ‘Provisioning’ and then to ‘Running’. -
Page 11: Get The Appkey
MVI56E-LDM ♦ ControlLogix Platform Prerequisites ThingWorx® Add-On Quick Start Guide 2.3.2 Get the AppKey Find the AppKey on the ThingWorx server’s development page. From the main menu, go to Browse > Security > Application Keys > TWX-AppKey. Copy the Key ID. It will be used when configuring the sample application. -
Page 12: Turn On Hyper-V
Prerequisites MVI56E-LDM ♦ ControlLogix Platform Quick Start Guide ThingWorx® Add-On Turn on Hyper-V Ensure that Hyper-V is turned on. Note that VMware can be used instead of Hyper-V, although Hyper-V is the recommended method. Docker Docker Desktop for Windows is required to run the toolchain from a container running Debian OS. -
Page 13: Development Environment Setup
MVI56E-LDM ♦ ControlLogix Platform Development Environment Setup ThingWorx® Add-On Quick Start Guide Development Environment Setup Create user Some Docker files will be stored in your Windows 10 \User folder. You can use your existing Windows login ID, or create a new one. -
Page 14: Overwrite Json Files
Development Environment Setup MVI56E-LDM ♦ ControlLogix Platform Quick Start Guide ThingWorx® Add-On Overwrite JSON files Navigate to C:\Workspace\ThingWorx-edge-c-sdk\src\thirdParty\cJSON. Copy the 2 files from C:\Workspace\cJSON and copy them over the files in C:\Workspace\ThingWorx-edge-c-sdk\src\thirdParty\cJSON. You can create a backup copy of the originals if desired (they are shown... -
Page 15: Build
MVI56E-LDM ♦ ControlLogix Platform Build ThingWorx® Add-On Quick Start Guide Build Acquire the IP address of your PC. Open PowerShell console. Navigate to C:\Workspace\ThingWorx-ldm-interface-lib\scripts. Run script build.ps1: ./build.ps1 -SHARED_FOLDER //192.168.1.73/Workspace -SHARED_FOLDER_USER bfluser –SHARED_FOLDER_PASSWORD passwd Replace the IP address shown (192.168.1.73) with the PC’s IP address. - Page 16 MVI56E-LDM ♦ ControlLogix Platform Quick Start Guide ThingWorx® Add-On Page 16 of 49 ProSoft Technology, Inc.
-
Page 17: Connect To The Mvi56E-Ldm
Quick Start Guide Connect to the MVI56E-LDM Physical Connections With the MVI56E-LDM in the ControlLogix rack, connect the top Ethernet port to your local network, and connect to the PC. Use the 2 Ethernet port to connect to the Internet. - Page 18 MVI56E-LDM ♦ ControlLogix Platform Quick Start Guide ThingWorx® Add-On Page 18 of 49 ProSoft Technology, Inc.
-
Page 19: Run The Sample Application
MVI56E-LDM ♦ ControlLogix Platform Run the Sample Application ThingWorx® Add-On Quick Start Guide Run the Sample Application Check the Certificate Dates In C:\Workspace\ThingWorx-ldm-sample-app-mvi56e, double-click on the root_ca.cer file and confirm that the current date is valid. If the hosted ThingWorx CA certificate is changed by PTC, or if it expires, or if you are using a local ThingWorx server, then install the ThingWorx server certificate’s root CA certificate. -
Page 20: Install The Sample Application
Quick Start Guide ThingWorx® Add-On Install the Sample Application Note: If an application is currently running on the MVI56E-LDM, back it up before proceeding. Download the .firmware file that was just built to the module via the module’s webpage. Refer to MVI56E-LDM Developer Manual for details. -
Page 21: Set The Mvi56E-Ldm's Ethernet Ip Addresses
ThingWorx® Add-On Quick Start Guide Set the MVI56E-LDM’s Ethernet IP Addresses Set the MVI56E-LDM’s Ethernet port IP addresses by modifying the /etc/network/interfaces file on the module. Refer to the Developer Manual for detailed information about the interfaces file. ProSoft Technology, Inc. -
Page 22: Configuration Of The Sample Application
Run the Sample Application MVI56E-LDM ♦ ControlLogix Platform Quick Start Guide ThingWorx® Add-On Configuration of the Sample Application The configuration file config.json, in JSON format, should be edited manually (access it over FTP using a client such as WinSCP There are only a few changes needed for the sample application. - Page 23 Defines the list of tags defined in the PLC, and settings to map them to the ThingWorx things. Name of the tag in PLC. Defined for MVI56E-LDM only. DataType Data type of the tag in the PLC. Possible values are BOOL, SINT, INT, DINT, LINT, USINT, UINT, UDINT, ULINT, REAL, LREAL, BYTE, WORD, DWORD, LDWORD, STRING82.
-
Page 24: Running Of Sample Application
ID. Then, start up the sample application by running the command: ./tw-ldm-sample-app-mvi56e Now that the MVI56E-LDM is running the sample application, the next step is to configure the ThingWorx server. Page 24 of 49... -
Page 25: Import Sample Entities
MVI56E-LDM ♦ ControlLogix Platform Run the Sample Application ThingWorx® Add-On Quick Start Guide Import Sample Entities Log in to the ThingWorx Evaluation Server that you created in section ThingWorx Hosted Evaluation Server. Entities are the model definition of the user’s data that will be created in the ThingWorx Server instance. - Page 26 Run the Sample Application MVI56E-LDM ♦ ControlLogix Platform Quick Start Guide ThingWorx® Add-On Expand the Mashups section to see the SteamSensor mashup in the list of mashups. Mashup is a graphical screen design unit in ThingWorx. Click the SteamSensor mashup to open the designer page: The mashup shows the GUI widgets in the center panel, with their properties and data binding settings displayed in other panels.
- Page 27 MVI56E-LDM ♦ ControlLogix Platform Run the Sample Application ThingWorx® Add-On Quick Start Guide In the runtime view, the Connected label will display with a green checkmark , indicating the ThingWorx server is exchanging data with the PLC. ProSoft Technology, Inc.
- Page 28 MVI56E-LDM ♦ ControlLogix Platform Quick Start Guide ThingWorx® Add-On Page 28 of 49 ProSoft Technology, Inc.
-
Page 29: Installing Root Ca Certificate
Signature Trust Co®, a well-known Certificate Authority, which is a parent of SSL certificates used in ThingWorx trial servers, hosted by PTC. Copying this certificate to the MVI56E-LDM makes sure that the sample application is trusted by the PTC servers. No additional certificate steps are required. -
Page 30: Local Server Instance
Installing Root CA Certificate MVI56E-LDM ♦ ControlLogix Platform Quick Start Guide ThingWorx® Add-On Local Server Instance If you decide to use a ThingWorx local server instead of the hosted server, there additional certification steps are required. In case of using local instance of ThingWorx server with SSL certificate, which is... - Page 31 MVI56E-LDM ♦ ControlLogix Platform Installing Root CA Certificate ThingWorx® Add-On Quick Start Guide As a result, the SSL certificate will be displayed in new window. Click on Certificate Path tab to display the certificates chain: Select root level certificate entry from the Certificate path tree (in the...
- Page 32 Installing Root CA Certificate MVI56E-LDM ♦ ControlLogix Platform Quick Start Guide ThingWorx® Add-On … In new window, select Details tab page and click on the C OPY TO button. The Certificate Export Wizard window will be opened. Click on the N button.
- Page 33 MVI56E-LDM ♦ ControlLogix Platform Installing Root CA Certificate ThingWorx® Add-On Quick Start Guide Select format Base-64encoded X.509 (.CER) and click on N button: Select location and file name to export, by clicking on the B button: ROWSE ProSoft Technology, Inc.
- Page 34 Installing Root CA Certificate MVI56E-LDM ♦ ControlLogix Platform Quick Start Guide ThingWorx® Add-On Export to file, and name it root_ca.cer (default name). You can choose a different name if you prefer, and in that case modify the configuration file config.json to reference the different name.
-
Page 35: Thingworx-Ldm Interface Library
MVI56E-LDM ♦ ControlLogix Platform ThingWorx-LDM Interface Library ThingWorx® Add-On Quick Start Guide ThingWorx-LDM Interface Library This section is intended for developers building custom applications using the library. It describes high-level design of the library and main API functions required for customer applications. -
Page 36: Main Api Functions And Data Flow
ThingWorx-LDM Interface Library MVI56E-LDM ♦ ControlLogix Platform Quick Start Guide ThingWorx® Add-On Main API functions and Data Flow 8.2.1 Functions Implemented by the Library Below are functions defined in header file C:\Workspace\ThingWorx-ldm-interface- lib\tw-ldm-interface-lib\inc\tw-ldm-interface-lib.h are expected to be called from the user application: int tw_ldm_initialize(const char* path_to_config_file, get_app_key_callback_function_type app_key_cb_function);... -
Page 37: Callback Function Declarations
MVI56E-LDM ♦ ControlLogix Platform ThingWorx-LDM Interface Library ThingWorx® Add-On Quick Start Guide 8.2.2 Callback Function Declarations Functions - Callbacks, which are called by ThingWorx-LDM Interface Library during runtime and should be implemented by the user application (default implementations are provided in sample application): int tw_ldm_read_value(tw_tag* tag, plc_value* value);... -
Page 38: Data Flow For Reading Of Tag Values
ThingWorx-LDM Interface Library MVI56E-LDM ♦ ControlLogix Platform Quick Start Guide ThingWorx® Add-On Note that logging feature uses standard Linux daemon syslog. The script S10- syslog, which configures and starts it is located in source code folder of the sample application, which is included into the firmware and installed in the module into folder /etc/init.d and starts syslog daemon at system boot. -
Page 39: Data Flow For Writing Of Tag Values
MVI56E-LDM ♦ ControlLogix Platform ThingWorx-LDM Interface Library ThingWorx® Add-On Quick Start Guide 8.4 Data Flow for Writing of Tag Values To write values, the Thingworx-ldm-interface-lib library registers 2 Thing services: SetNumericProperty and SetStringProperty. They both take 2 arguments: name (for thing's property name), and value - to pass value. - Page 40 ThingWorx-LDM Interface Library MVI56E-LDM ♦ ControlLogix Platform Quick Start Guide ThingWorx® Add-On In the composer, to write values for properties, a separate local service can be created for each property. This calls the remote SetNumericProperty or SetStringProperty service. For example, the screenshot below shows a definition of the local service SetPressure.
-
Page 41: Firmware Details
Quick Start Guide Firmware Details Firmware Contents The .firmware file downloaded to the MVI56E-LDM contains a number of files sourced from the C:\Workspace folder. Although they are installed on the module with the module webpage’s Firmware Download process, the files can be FTP’d independently as well. -
Page 42: Running Of Sample Application
Firmware Details MVI56E-LDM ♦ ControlLogix Platform Quick Start Guide ThingWorx® Add-On File location on Windows 10 PC FTP to folder Description on MVI56E- C:\Workspace\ThingWorx-ldm-sample- /opt/thingworx Note: if the folder /opt/thingworx does app-mvi56e\ not exist, it needs to be created. subscribed_properties.bin... -
Page 43: Visual Studio 2017 Project
MVI56E-LDM ♦ ControlLogix Platform Visual Studio 2017 Project ThingWorx® Add-On Quick Start Guide 10 Visual Studio 2017 Project Optionally, you can use Visual Studio to build the sample application. Ensure the Prerequisites Development Environment Setup is done first. 10.1 Build using Visual Studio The Visual Studio 2017 solution file, located at C:\Workspace\ThingWorx-ldm- sample-app-mvi56e\tw-ldm-sample-app-mvi56e.sln has 2 projects:... - Page 44 Visual Studio 2017 Project MVI56E-LDM ♦ ControlLogix Platform Quick Start Guide ThingWorx® Add-On On the left, choose Build Events. Notice the Command Line on the right. Copy the Command Line to Notepad, and modify it: a. Set the correct IP address. This should be your PC’s IP address.
-
Page 45: Support, Service & Warranty
Contacting Technical Support ............... 45 Warranty Information ................45 11.1 Contacting Technical Support ProSoft Technology, Inc. is committed to providing the most efficient and effective support possible. Before calling, please gather the following information to assist in expediting this process: Product Version Number... - Page 46 Support, Service & Warranty MVI56E-LDM ♦ ControlLogix Platform Quick Start Guide ThingWorx® Add-On Asia Pacific Europe / Middle East / Africa Regional Office Regional Office Phone: +60.3.2247.1898 Phone: +33.(0)5.34.36.87.20 asiapc@prosoft-technology.com europe@prosoft-technology.com Languages spoken: Bahasa, Chinese, English, Languages spoken: French, English...
-
Page 47: Warranty Information
Languages spoken: Spanish, English REGIONAL TECH SUPPORT support.la@prosoft-technology.com 11.2 Warranty Information For complete details regarding ProSoft Technology’s TERMS & CONDITIONS OF SALE, WARRANTY, SUPPORT, SERVICE AND RETURN MATERIAL AUTHORIZATION INSTRUCTIONS, please see the documents at: www.prosoft-technology/legal Documentation is subject to change without notice. - Page 48 MVI56E-LDM ♦ ControlLogix Platform Support, Service & Warranty ThingWorx® Add-On Quick Start Guide ProSoft Technology, Inc. Page 48 of 49...
-
Page 49: Index
MVI56E-LDM ♦ ControlLogix Platform Support, Service & Warranty ThingWorx® Add-On Quick Start Guide Index AppKey, 11, 22 PLC, 5, 23, 37, 39 PowerShell, 12, 15 PTC, 7, 8, 29 CA certificate, 19, 22, 30 certificate, 19, 22, 29, 30, 31, 34, 41...
Need help?
Do you have a question about the MVI56E-LDM and is the answer not in the manual?
Questions and answers