
Related Manuals for DENTSPLY inLab MC X5


Summary of Contents for DENTSPLY inLab MC X5
- Page 1 10.2017 New as of: inLab MC X5 Operating Instructions English Operating Instructions...
- Page 2 Dentsply Sirona Operating Instructions inLab MC X5 Dear Customer, ® Thank you for your purchase of this inLab MC X5 unit from Dentsply Sirona. This device enables you to produce dental restorations, e.g. from ceramic material with a natural appearance (CEramic REConstruction).
-
Page 3: Table Of Contents
Dentsply Sirona Table of contents Operating Instructions inLab MC X5 Table of contents General data......................Contact information ..................General conventions and structure of the document........1.2.1 Structure of the document ............... 1.2.1.1 Identification of the danger levels ........1.2.1.2 Formats and symbols used .......... - Page 4 Table of contents Dentsply Sirona Operating Instructions inLab MC X5 Connection of external equipment ..............Ventilation slots ..................... Opening the processing chamber door ............Transportation and installation ................. Transport and unpacking ................Disposal of packaging materials ..............Installation conditions ..................
- Page 5 Dentsply Sirona Table of contents Operating Instructions inLab MC X5 Referencing run.................... Machining processes..................6.2.1 Process types.................. 6.2.1.1 Grinding ................6.2.1.2 Milling ................6.2.1.3 Wet processing..............6.2.1.4 Dry processing..............6.2.2 Tool magazine................. 6.2.2.1 Available tools ..............6.2.3 Equipping the multi-block holder .............
-
Page 6: Dentsply Sirona
Filling and connecting the coolant tank ......7.9.2.2 Equipping the workpiece holder for Medentika-PreFace® semi-finished products 7.9.2.3 Loading inLab MC X5 with Medentika PreFace® holders. 7.9.3 After processing / before changing to processing another material . 7.9.3.1 Retrofitting the machine ............ -
Page 7: General Data
Dentsply Sirona 1 General data Operating Instructions inLab MC X5 1.1 Contact information General data Contact information Customer service center For technical questions, use the contact form on the internet at the following address: http://srvcontact.sirona.com Manufacturer's address Sirona Dental Systems GmbH Fabrikstrasse 31... -
Page 8: Formats And Symbols Used
1 General data Dentsply Sirona 1.3 Scope of these Operating Instructions Operating Instructions inLab MC X5 1.2.1.2 Formats and symbols used The formats and symbols used in this document have the following meaning: Prerequisite Prompts you to do something. 1. First action step 2. -
Page 9: Legend
Dentsply Sirona 1 General data Operating Instructions inLab MC X5 1.5 Legend Legend Year of manufacture Product disposal symbol (see "Disposal [ → 106]"). Accompanying documents This symbol can be found on the rating plate on the unit. Meaning: Observe the Operating Instructions when operating the unit. -
Page 10: Dentsply Sirona
1 General data Dentsply Sirona 1.5 Legend Operating Instructions inLab MC X5 Symbols on the packaging Take note of the following symbols on the packaging: Protect from moisture Fragile; handle with care Do not stack Temperature during storage and transport Relative humidity during storage and transport... -
Page 11: General Information On The Device
Dentsply Sirona 2 General information on the device Operating Instructions inLab MC X5 2.1 Standards/ approvals/ certifications General information on the device Standards/ approvals/ certifications CE mark This product bears the CE mark in accordance with the provisions of Council Directive 2006/42/EC (machinery directive). As such, the following standards apply: DIN EN ISO 12100:2011-03, DIN EN 61010- 1:2011-07 and DIN EN 61326-1:2013-07. -
Page 12: Intended Use
2 General information on the device Dentsply Sirona 2.2 Intended use Operating Instructions inLab MC X5 Intended use The device creates computer-supported dentures using a milling or grinding process for work pieces or dental work from blanks in block or disc form. -
Page 13: Technical Description (Component And Interfaces)
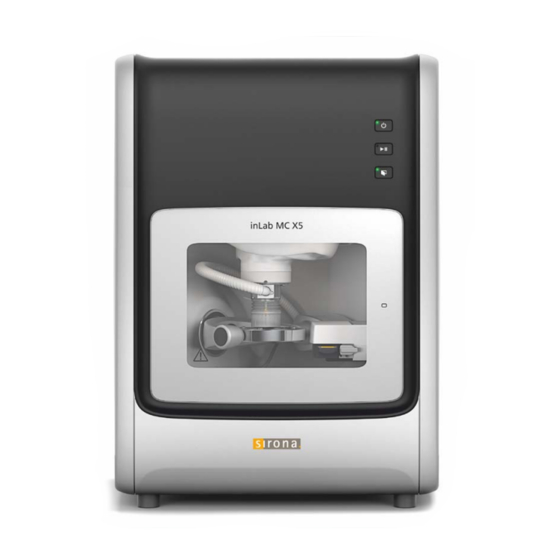
Dentsply Sirona 2 General information on the device Operating Instructions inLab MC X5 2.4 Technical description (component and interfaces) Technical description (component and interfaces) 2.4.1 Major components 2.4.1.1 Front view Processing chamber door Door unlocking button ON/OFF button Processing chamber Process start/ interrupt... -
Page 14: Connections
2 General information on the device Dentsply Sirona 2.4 Technical description (component and interfaces) Operating Instructions inLab MC X5 2.4.1.2 Connections Coolant drainage Communications interface for connection suction Connection for suction Coolant inlet connection Filter regulator 64 78 759 D3608 D3608.201.01.07.02 10.2017... -
Page 15: Dentsply Sirona
Dentsply Sirona 2 General information on the device Operating Instructions inLab MC X5 2.4 Technical description (component and interfaces) Service interface Compressed air quick-connect coupling USB 2.0/3.0 "Ethernet (RJ45)" connection for LAN USB 5V OUT Mains connection AC 100V ... 240V Service interface... -
Page 16: Processing Chamber
2 General information on the device Dentsply Sirona 2.4 Technical description (component and interfaces) Operating Instructions inLab MC X5 2.4.1.3 Processing chamber Workpiece holder Tool magazine Dummy tool Processing chamber screen Tool sensor 64 78 759 D3608 D3608.201.01.07.02 10.2017... -
Page 17: Standard Accessories
Dentsply Sirona 2 General information on the device Operating Instructions inLab MC X5 2.4 Technical description (component and interfaces) 2.4.2 Standard accessories ● Power supply cable ● Filter regulator including screws ● Compressed air pipe, 3m ● Compressed air pipe opaque blue, 0.75m ●... -
Page 18: Technical Data
2 General information on the device Dentsply Sirona 2.5 Technical data Operating Instructions inLab MC X5 Technical data Type designation inLab MC X5 Rated line voltage AC 100V ... 240V Rated power frequency 50/60 Hz Nominal current 2.0A Nominal power output 200VA Permissible line voltage ±10% of nominal voltage... -
Page 19: Safety Information
● The maintenance and repair of this unit may be performed only by Dentsply Sirona or by agencies authorized by Dentsply Sirona. ● Components which have failed and influence the safety of the unit must be replaced with original (OEM) spare parts. -
Page 20: Accessories
In order to ensure product safety, this device may be operated only with original Dentsply Sirona accessories or third-party accessories expressly approved by Dentsply Sirona. In particular, only the power cable also supplied or the corresponding original spare part may be used with the unit. -
Page 21: Interference Immunity
Dentsply Sirona 3 Safety information Operating Instructions inLab MC X5 3.2 Electromagnetic compatibility 3.2.2 Interference immunity The UNIT is intended for operation in the electromagnetic environment specified below. The customer or user of the UNIT should make sure that it is used in such an environment. -
Page 22: Dentsply Sirona
3 Safety information Dentsply Sirona 3.2 Electromagnetic compatibility Operating Instructions inLab MC X5 Interference DIN EN 61326-1 Test level Compliance level Electromagnetic environment – immunity tests guidelines Conducted RF d= [1.2] √P interference 150 kHz to 80 MHz IEC 61000-4-6 Radiated RF... -
Page 23: Working Clearances
Dentsply Sirona 3 Safety information Operating Instructions inLab MC X5 3.2 Electromagnetic compatibility 3.2.3 Working clearances Recommended working clearances The UNIT is intended for operation in an electromagnetic environment, between portable and mobile RF where radiated RF interference is checked. The customer or the user of... -
Page 24: Electrostatic Charge
3 Safety information Dentsply Sirona 3.3 Electrostatic charge Operating Instructions inLab MC X5 Electrostatic charge 3.3.1 ESD protective measures ESD stands for ElectroStatic Discharge. ESD protective measures ESD protective measures include: ● Procedures for preventing electrostatic charge build-up (e.g. air conditioning, air moistening, conductive floor coverings and non- synthetic clothing) ●... -
Page 25: Dentsply Sirona
Dentsply Sirona 3 Safety information Operating Instructions inLab MC X5 3.3 Electrostatic charge Background Integrated circuits (logical circuits and microprocessors) are used to implement a wide variety of functions in dental/X-ray/CAD/CAM systems. The circuits must be miniaturized to a very high degree in order to include as many functions as possible on these chips. -
Page 26: Connecting The Unit
3 Safety information Dentsply Sirona 3.4 Connecting the unit Operating Instructions inLab MC X5 Connecting the unit Perform connection by following the directions given in the present operating instructions. Connection of external equipment If any equipment not approved by Sirona is connected, it must comply with the applicable standards: ●... -
Page 27: Transportation And Installation
4.1 Transport and unpacking Transportation and installation Transport and unpacking All products from Dentsply Sirona are carefully checked prior to shipment. Please perform an incoming inspection immediately after delivery. 1. Check the delivery note to ensure that the consignment is complete. -
Page 28: Installation Conditions
4 Transportation and installation Dentsply Sirona 4.3 Installation conditions Operating Instructions inLab MC X5 Installation conditions 4.3.1 Installation site requirements Make sure that the device is erected on an even, horizontal surface of approx. 640 x 600 mm (W x D). The maximum capacity should be at least 90 kg. -
Page 29: Connecting The Suction Device
Dentsply Sirona 4 Transportation and installation Operating Instructions inLab MC X5 4.4 Connecting the suction device Connecting the suction device This section describes the connection of the Sirona suction. If you use a suction device from an external supplier, note the following information. -
Page 30: Connecting The Coolant Tank
4 Transportation and installation Dentsply Sirona 4.5 Connecting the coolant tank Operating Instructions inLab MC X5 Connecting the coolant tank IMPORTANT Coolant-lubricant mix Make sure that the configuration of the coolant-lubricant mix is correct according to the material class to be processed:... -
Page 31: Dentsply Sirona
Dentsply Sirona 4 Transportation and installation Operating Instructions inLab MC X5 4.5 Connecting the coolant tank 4. Connect the coolant hose to the coolant inlet connection (C) for supply of coolant to the machine. 5. Connect the coolant inlet hose as well as the coolant return hose to the connections provided in the tank system. -
Page 32: Connecting The Filter Regulator
4 Transportation and installation Dentsply Sirona 4.6 Connecting the filter regulator Operating Instructions inLab MC X5 Connecting the filter regulator NOTICE Avoiding any damage to the machine The unit is equipped with a high-frequency mandrel that has a pneumatic collet chuck and an air purge mechanism. A filter regulator... -
Page 33: Connecting The Pc/Interfaces
Use a network cable to do this (LAN connection). ➢ Connect the unit with the network card of your PC using the provided network cable. IMPORTANT If you wish to integrate the inLab MC X5 into an existing network then please contact your responsible IT technician. Repacking ✔... -
Page 34: Commissioning
5 Commissioning Dentsply Sirona 5.1 Putting the inLab 4 PC into operation Operating Instructions inLab MC X5 Commissioning Putting the inLab 4 PC into operation Observe the following steps in order to put the unit into operation using the inLab 4-PC (optional). -
Page 35: Dentsply Sirona
Dentsply Sirona 5 Commissioning Operating Instructions inLab MC X5 5.1 Putting the inLab 4 PC into operation Also required: ● VGA/DVI monitor including VGA/DVI cable (not included in scope of supply) CAUTION Image may not display Please note the required minimum monitor resolution of 1280 x 1024 at 70Hz. -
Page 36: Making Connections
5 Commissioning Dentsply Sirona 5.1 Putting the inLab 4 PC into operation Operating Instructions inLab MC X5 5.1.1.2 Making connections NOTICE Do not connect and turn on the device yet! First, connect the PC to the monitor, keyboard, and mouse. Follow the instructions in this document exactly in order to successfully perform start-up of your device. -
Page 37: Safety
Dentsply Sirona 5 Commissioning Operating Instructions inLab MC X5 5.1 Putting the inLab 4 PC into operation 5.1.2 Safety inLab 4-PC V 1.0.1 is equipped with Windows 7 Professional (64 bit). The Windows Firewall is activated. The software Microsoft Security Essentials is also pre-installed by default. Please activate the automatic update function in the settings of this software for optimal protection. -
Page 38: Installing The Software
5 Commissioning Dentsply Sirona 5.1 Putting the inLab 4 PC into operation Operating Instructions inLab MC X5 5.1.3 Installing the software NOTICE Initial installation without device Perform the initial installation of the software without the connected device. The software requires the 2.00 firmware version of the license stick. -
Page 39: Putting The Unit Into Operation
Dentsply Sirona 5 Commissioning Operating Instructions inLab MC X5 5.2 Putting the unit into operation Putting the unit into operation 5.2.1 Connecting the unit to the power supply NOTICE Grounded power outlet The unit must be connected to a grounded power outlet. -
Page 40: Color Status Of The Buttons And The Processing Chamber
5 Commissioning Dentsply Sirona 5.2 Putting the unit into operation Operating Instructions inLab MC X5 5.2.3.2 Color status of the buttons and the processing chamber The LED elements of the buttons A, B, C and the illumination of the processing chamber indicate the operating status of the device. -
Page 41: Removing The Transport Safety Device And Putting The Processing
Dentsply Sirona 5 Commissioning Operating Instructions inLab MC X5 5.2 Putting the unit into operation the collet chuck and this should therefore be executed at the machine because you can then grab the tool. 5.2.4 Removing the transport safety device and putting the... -
Page 42: Filling The Coolant Tank
5 Commissioning Dentsply Sirona 5.2 Putting the unit into operation Operating Instructions inLab MC X5 8. Connect the suction hose of the mandrel suction A in the processing chamber. 9. Mount the suction bellows on the mandrel. To do this, first allow the rear part of the bellows to engage into the groove of the mandrel. -
Page 43: Dentsply Sirona
Dentsply Sirona 5 Commissioning Operating Instructions inLab MC X5 5.2 Putting the unit into operation 1. Draw off the machine-sided coolant drainage hose (A) with the large diameter as well as the thin coolant supply hose (B) from the tank. 2. Open the tank lid clip (C) and pull the filter system out. -
Page 44: Switching The Unit On And Off
5 Commissioning Dentsply Sirona 5.2 Putting the unit into operation Operating Instructions inLab MC X5 5.2.6 Switching the unit ON and OFF NOTICE Do not put the unit into operation at low temperatures! If you move the unit to the operating site from a cold environment, condensation may form and result in a short circuit. -
Page 45: Installing And Configuring The Unit
"Connecting the PC/interfaces [ → 33]". IMPORTANT The inLab MC X5 can be operated with both a static as well as an automatically assigned IP address. From the factory the inLab MC X5 is always configured with a static IP address. -
Page 46: Configuring The Device
5 Commissioning Dentsply Sirona 5.2 Putting the unit into operation Operating Instructions inLab MC X5 5.2.7.1.2 Manual unit search ✔ The unit is connected to the PC using a direct connection via Ethernet cable. ✔ The unit is switched on. "inLab CAM"... -
Page 47: Dentsply Sirona
Dentsply Sirona 5 Commissioning Operating Instructions inLab MC X5 5.2 Putting the unit into operation 5.2.7.2.1 Editing inLab MC X5 device settings "inLab MC X5" Via menu item / unit name you can make or view the following changes retroactively: ● Name/ description ●... - Page 48 Using the setting, you can choose whether the selected block size should be checked, and if the exact position of the block in the machine should be determined, for the inLab MC X5 during grinding and milling processes. IMPORTANT Please note that in cases where this option ( "Use Spindle Touch"...
-
Page 49: Dentsply Sirona
PEEK, PMMA and composite and this takes place as a dry process. Firmware download Each device (inLab MC XL or inLab MC X5) requires a firmware version which is compatible with the respective version of the software inLab CAM. -
Page 50: Dentsply Sirona
1. Click on the start button to start the spindle maintenance. 2. Then simply proceed as prompted by the software. 3. Read also which steps are to be performed in the inLab MC X5 operating instructions under the section "Tool spindle maintenance". -
Page 51: Dentsply Sirona
Dentsply Sirona 5 Commissioning Operating Instructions inLab MC X5 5.2 Putting the unit into operation Switching the suction on/off 1. Click on the start button to turn on the suction device. The suction is switched on. 2. Click on the pause button to turn off the suction device. -
Page 52: Operation
6 Operation Dentsply Sirona 6.1 Referencing run Operating Instructions inLab MC X5 Operation Referencing run NOTICE Observe the Operator’s Manual Please also observe the information in the Operator's Manual for inLab CAM SW software. The referencing run is used for the function check of the detection system and the position check of moving parts in the processing chamber. -
Page 53: Machining Processes
Dentsply Sirona 6 Operation Operating Instructions inLab MC X5 6.2 Machining processes Machining processes Before every process, make sure that all necessary connections are correctly coupled and check the function of the suction device, air pressure provision and water supply. IMPORTANT Note the processing instructions of the respective material manufacturer for all manufacturing processes. -
Page 54: Grinding
6 Operation Dentsply Sirona 6.2 Machining processes Operating Instructions inLab MC X5 6.2.1.1 Grinding The grinding process is done in a wet condition. Check the functioning and tightness of the connections for the coolant tank as well as the filling level regularly using the min / max marking. Use the following tools for grinding. -
Page 55: Milling
Dentsply Sirona 6 Operation Operating Instructions inLab MC X5 6.2 Machining processes 6.2.1.2 Milling The milling process is done in a wet or dry condition. Regularly check whether the connections of the coolant tank and the suction device are functioning properly and are leak-proof. Depending on the respective materials, use the tools listed in the table for milling. -
Page 56: Wet Processing
6 Operation Dentsply Sirona 6.2 Machining processes Operating Instructions inLab MC X5 Tool Image Ring color Bur 2.5 Composite (coated) Blue 6551688 (for software version inLab CAM SW ≥ 15.0 only) Bur 0.5 sintering metal Gray 6478080 Bur 1.0 sintering metal Gray 6478072 Bur 2.5 sintering metal... -
Page 57: Tool Magazine
Dentsply Sirona 6 Operation Operating Instructions inLab MC X5 6.2 Machining processes 6.2.2 Tool magazine Tool magazine locked (C) Tool magazine unlocked (C) Tool magazine Tool magazine holder Tool magazine lock Color scheme of tool magazine Tool magazine handle Dummy tool Button for tool length precision... -
Page 58: Dentsply Sirona
A tool magazine has six user-assignable tool places which are numbered and can be individually populated via the inLab CAM software ("Configuration /Devices / inLab MC X5 / Machine and Instrument tray Management / Instrument tray database"). Several tool magazines can be created for different materials. These can be color-coded using the tool magazine color scheme (D) for better distinction. -
Page 59: Dentsply Sirona
Dentsply Sirona 6 Operation Operating Instructions inLab MC X5 6.2 Machining processes IMPORTANT When creating a grinding tool kit, at least 3 positions should be assigned to the three different griding tools. While creating a magazine with milling tools, at least 1 x 2.5 mm milling tool and 1 x 1.0 mm milling tool of a material type (ZrO2, PMMA or sintering metal) must be equipped. -
Page 60: Available Tools
6 Operation Dentsply Sirona 6.2 Machining processes Operating Instructions inLab MC X5 6.2.2.1 Available tools Tool Image Ring color Diamond 1.4 White 6478015 Diamond 1.2 White 6478023 Diamond 2.2 White 6478007 Diamond 0.6 White 6542232 Bur 0.5 PMMA 6478114 Bur 1.0 PMMA 6478106 Bur 2.5 PMMA... -
Page 61: Equipping The Multi-Block Holder
Dentsply Sirona 6 Operation Operating Instructions inLab MC X5 6.2 Machining processes Tool Image Ring color Bur 1.0 Composite Blue 6478163 (for software version (no longer inLab CAM SW ≤ 4.3.1 only) available) Bur 2.5 Composite Blue 6478155 (for software version (no longer inLab CAM SW ≤... -
Page 62: Dentsply Sirona
6 Operation Dentsply Sirona 6.2 Machining processes Operating Instructions inLab MC X5 Preparing the multi-block holder The multi-block holder is supplied with separate spherical pressure screws for fixing the material blocks. Use the tool for the block clamp for this. 1. Insert the supplied spherical pressure screws in the appropriate places of the multi-block holder and proceed with equipping. -
Page 63: Loading With The Workpiece (Round Blank)
Dentsply Sirona 6 Operation Operating Instructions inLab MC X5 6.2 Machining processes In order to equip the multi-block holder, proceed as follows: CAUTION Risk of injury while reaching out to the processing chamber There is the risk of cut injuries and crushing through sharp tools and moving parts. - Page 64 6 Operation Dentsply Sirona 6.2 Machining processes Operating Instructions inLab MC X5 2. Loosen the three screws (A) that are located on the fixing ring of the workpiece holder using the torque wrench for the tool holder. 3. Turn the fixing ring counterclockwise and remove the fixing ring of the workpiece holder.
- Page 65 Dentsply Sirona 6 Operation Operating Instructions inLab MC X5 6.2 Machining processes 4. Now place the workpiece to be machined, and make sure that the workpiece is parallel to the base and is not slanted. Ensure clean contact surfaces. After inserting a workpiece which has not yet been milled attach a positioning marking to the round holder in the same way as the position etched into the tool workpiece support.
-
Page 66: Loading With The Multi-Block Holder
6 Operation Dentsply Sirona 6.2 Machining processes Operating Instructions inLab MC X5 6. Now slightly tighten the screws on the fixing ring with the help of the torque wrench for the tool holder in an alternating manner. Make sure that the fixing ring is parallel to the base and is not slanted. If the ring... - Page 67 Dentsply Sirona 6 Operation Operating Instructions inLab MC X5 6.2 Machining processes 2. Loosen the three screws (A) that are located on the fixing ring of the workpiece holder using the torque wrench for the tool holder. 3. Turn the fixing ring counterclockwise and remove the fixing ring of the workpiece holder.
- Page 68 6 Operation Dentsply Sirona 6.2 Machining processes Operating Instructions inLab MC X5 5. In order to attach the multi-block holder, remove the fixing ring and place it back in the workpiece holder. Turn the fixing ring clockwise until the stop. 64 78 759 D3608...
-
Page 69: Process Start
Dentsply Sirona 6 Operation Operating Instructions inLab MC X5 6.2 Machining processes 6. Now slightly tighten the screws on the fixing ring with the help of the torque wrench for the tool holder in an alternating manner. Make sure that the fixing ring is parallel to the base and is not slanted. If the ring is parallel, tighten the screws finally using the torque wrench at the preset torque. -
Page 70: Maintenance And Cleaning
Care, cleaning agents, and disinfectants NOTICE Approved care, cleaning, and disinfecting agents Use only care, cleaning, and disinfecting agents approved by Dentsply Sirona! A continuously updated list of approved media can be downloaded from the internet via the online portal for technical documents. You can reach this portal at the address: www.dentsplysirona.com/manuals... -
Page 71: Maintenance Intervals
Dentsply Sirona 7 Maintenance and cleaning Operating Instructions inLab MC X5 7.2 Maintenance intervals Maintenance intervals Interval Scope of maintenance Before all sintering metalworking See section "Before processing sintering metal materials [ → 86]". After all sintering metalworking See section "After processing sintering metal materials [ → 86]". -
Page 72: Cleaning Surfaces
7 Maintenance and cleaning Dentsply Sirona 7.3 Cleaning surfaces Operating Instructions inLab MC X5 Cleaning surfaces NOTICE Do not allow liquids to run into the ventilation slots! 7.3.1 Disinfecting Wipe surfaces down with a surface disinfectant (wiping disinfectant). Observe the manufacturer’s instructions regarding restrictions for use. -
Page 73: Maintenance For The Tool Mandrel
Dentsply Sirona 7 Maintenance and cleaning Operating Instructions inLab MC X5 7.4 Maintenance for the tool mandrel Maintenance for the tool mandrel The tool mandrel is a high-frequency mandrel (HF-mandrel). Steel ball bearings The ball bearings of the HF-mandrel are equipped with permanent grease lubrication. -
Page 74: Service Kit
7 Maintenance and cleaning Dentsply Sirona 7.4 Maintenance for the tool mandrel Operating Instructions inLab MC X5 7.4.1 Service kit The machine comes with a service kit for maintenance of the HF-mandrel. This kit consists of: ● Dummy tool ● Isoflex Topas NB 52 lubricant ●... - Page 75 If you have started the process once, do not cancel the operation. Do not turn off the machine during the changing process and do not disconnect the power supply to the machine. 1. Start the inLab MC X5. 2. Start the inLab CAM software. "Configuration"...
-
Page 76: During Longer Downtimes
7 Maintenance and cleaning Dentsply Sirona 7.4 Maintenance for the tool mandrel Operating Instructions inLab MC X5 NOTICE Damage to the collet chuck The collet chuck may be damaged if you use a different lubricating grease or oil. ➢ Only use the grease for collet chuck from the service kit. -
Page 77: Tool Has Broken Or Not Been Stored
Dentsply Sirona 7 Maintenance and cleaning Operating Instructions inLab MC X5 7.4 Maintenance for the tool mandrel 7.4.4 Tool has broken or not been stored If a tool breaks during the machining process, it can no longer be stored automatically; proceed as follows:... -
Page 78: Suction System
7 Maintenance and cleaning Dentsply Sirona 7.5 Suction system Operating Instructions inLab MC X5 Suction system 7.5.1 Suction bellows The machine is equipped with suction bellows for the extraction of dust. Check the suction bellows regularly for proper operation. If the slats are broken, replace the suction bellows. -
Page 79: Processing Chamber Screen
Dentsply Sirona 7 Maintenance and cleaning Operating Instructions inLab MC X5 7.6 Filter regulator 7.5.3 Processing chamber screen The machine is equipped with a processing chamber screen (B) for collecting material residues. Check the screen regularly. If there are many chips and machining residues on the screen of the processing chamber, remove it, and empty it. -
Page 80: Coolant System
7 Maintenance and cleaning Dentsply Sirona 7.7 Coolant system Operating Instructions inLab MC X5 Coolant system CAUTION Risk of injury There is risk of injury through sharp-edged restorations as well as sharp- edged material residues in the tank. ➢ Pay attention to the sharp-edged restorations / material residues after processing, during cleaning and coolant changes. -
Page 81: Changing The Tank Filter
Dentsply Sirona 7 Maintenance and cleaning Operating Instructions inLab MC X5 7.7 Coolant system 7.7.2 Changing the tank filter NOTICE Change the filter insert regularly We recommend changing the filter insert monthly (REF 6387067). If a message appears stating that the water pressure is too low, please check whether the filter has become clogged or the tank filling level has fallen below the "min"... -
Page 82: Replace The Coolant When Using Dentatec
7 Maintenance and cleaning Dentsply Sirona 7.7 Coolant system Operating Instructions inLab MC X5 7.7.3 Replace the coolant when using DENTATEC (for material classes PMMA/wax, composite and grinding materials) NOTICE Damage to the pump and the tool mandrel! Too high a proportion of ceramic in the coolant will damage the pump and the tool mandrel. -
Page 83: Complete A Coolant Change
Dentsply Sirona 7 Maintenance and cleaning Operating Instructions inLab MC X5 7.7 Coolant system 7.7.3.2 Complete a coolant change CAUTION Risk of injury There is risk of injury through sharp-edged restorations as well as sharp- edged material residues in the tank. ➢ Pay attention to the sharp-edged restorations / material residues after processing, during cleaning and coolant changes. - Page 84 7 Maintenance and cleaning Dentsply Sirona 7.7 Coolant system Operating Instructions inLab MC X5 2. Open the tank lid clip (C) and pull the filter system out. Pay attention to any remainder liquid. 3. Drain two-thirds of the coolant tank. 4. Shake the tank.
-
Page 85: Procedure For Processing Sintering Metal
“Coolant tank complete (REF: 63 85 137)” or in combination with a new tool magazine and the accompanying sintering metal grinder “Starter Kit Sintering Metal inLab MC X5 (REF 65 61 986)”. IMPORTANT Ask your disposal company whether the filter waste needs to be correctly sorted for disposal. -
Page 86: Before Processing Sintering Metal Materials
After processing sintering metal materials 1. Clean the drain hose to the tank using suitable cleaning brushes (e.g. in those contained in the “Starter Kit Sintering Metal inLab MC X5 REF 65 61 986”). 2. Perform an automatic cleaning process (without a clamped round) via the service menu of the inLab CAM SW. -
Page 87: Cleaning The Coolant Tank
Dentsply Sirona 7 Maintenance and cleaning Operating Instructions inLab MC X5 7.8 Procedure for processing sintering metal 7.8.4 Cleaning the coolant tank NOTICE The tank may become unusable Regularly check the condition of the deposited solids and clean the tank in good time to prevent the solids from hardening in the tank (after approx. -
Page 88: Filling The Coolant Tank
7 Maintenance and cleaning Dentsply Sirona 7.8 Procedure for processing sintering metal Operating Instructions inLab MC X5 7.8.5 Filling the coolant tank 1. Fill the tank with water up to the mark (max, D) (approx. 10 liters). 2. Place the filter system in the tank. -
Page 89: Procedure When Processing Medentika-Preface® Abutment Semi-Finished
Dentsply Sirona 7 Maintenance and cleaning Operating Instructions inLab MC X5 7.9 Procedure when processing Medentika-PreFace® abutment semi-finished products made of Procedure when processing Medentika- PreFace® abutment semi-finished products made of titanium 7.9.1 Important information CAUTION Risk of injury There is risk of injury through sharp-edged restorations as well as sharp- edged material residues in the tank. -
Page 90: Before Processing Titanium Workpieces
7 Maintenance and cleaning Dentsply Sirona 7.9 Procedure when processing Medentika-PreFace® abutment semi-finished products made of titanium Operating Instructions inLab 7.9.2 Before processing titanium workpieces CAUTION Risk of injury while reaching out to the processing chamber There is the risk of cut injuries and crushing through sharp tools and moving parts. - Page 91 Dentsply Sirona 7 Maintenance and cleaning Operating Instructions inLab MC X5 7.9 Procedure when processing Medentika-PreFace® abutment semi-finished products made of 1. Add one bottle of coolant lubricant additive DentaLub (REF 6597228) to an empty tank. 2. Fill the tank with water up to the mark (max, D) (approx. 10 liters).
-
Page 92: Equipping The Workpiece Holder For Medentika-Preface
7 Maintenance and cleaning Dentsply Sirona 7.9 Procedure when processing Medentika-PreFace® abutment semi-finished products made of titanium Operating Instructions inLab 7.9.2.2 Equipping the workpiece holder for Medentika-PreFace® semi- finished products ® The machine has the option of processing up to 6 Medentika-PreFace Abutment semi-finished products in one process at the same time. -
Page 93: Loading Inlab Mc X5 With Medentika Preface® Holders
7.9 Procedure when processing Medentika-PreFace® abutment semi-finished products made of 7.9.2.3 Loading inLab MC X5 with Medentika PreFace® holders 1. Open the door of the machine by pressing the Unlock door button. The mandrel and the workpiece holder have automatically moved to the loading position beforehand. - Page 94 7 Maintenance and cleaning Dentsply Sirona 7.9 Procedure when processing Medentika-PreFace® abutment semi-finished products made of titanium Operating Instructions inLab 4. Remove the three screws (A). 64 78 759 D3608 D3608.201.01.07.02 10.2017...
- Page 95 Dentsply Sirona 7 Maintenance and cleaning Operating Instructions inLab MC X5 7.9 Procedure when processing Medentika-PreFace® abutment semi-finished products made of ® 5. Place the Medentika-PreFace holder into the machine. Make sure ® that the PreFace holder is parallel to the base and is not slanted.
- Page 96 7 Maintenance and cleaning Dentsply Sirona 7.9 Procedure when processing Medentika-PreFace® abutment semi-finished products made of titanium Operating Instructions inLab ® 6. To fasten the PreFace holder, place the three screws (A) back into the respective fixation. Make sure that the thread does not tilt during this step.
-
Page 97: After Processing / Before Changing To Processing Another Material
Dentsply Sirona 7 Maintenance and cleaning Operating Instructions inLab MC X5 7.9 Procedure when processing Medentika-PreFace® abutment semi-finished products made of 7.9.3 After processing / before changing to processing another material 7.9.3.1 Retrofitting the machine CAUTION Risk of injury while reaching out to the processing chamber There is the risk of cut injuries and crushing through sharp tools and moving parts. - Page 98 7 Maintenance and cleaning Dentsply Sirona 7.9 Procedure when processing Medentika-PreFace® abutment semi-finished products made of titanium Operating Instructions inLab ® 1. Unscrew the Medentika-PreFace holder. 64 78 759 D3608 D3608.201.01.07.02 10.2017...
-
Page 99: Cleaning The Drain Sieve
Dentsply Sirona 7 Maintenance and cleaning Operating Instructions inLab MC X5 7.9 Procedure when processing Medentika-PreFace® abutment semi-finished products made of 2. Tighten the screw (A) again at the respective point. 3. Insert the fixing ring. 4. Separate the coolant tank from the machine for processing titanium workpieces. -
Page 100: Change The Coolant
7 Maintenance and cleaning Dentsply Sirona 7.9 Procedure when processing Medentika-PreFace® abutment semi-finished products made of titanium Operating Instructions inLab 7.9.3.3 Change the coolant CAUTION Risk of injury There is risk of injury through sharp-edged restorations as well as sharp- edged material residues in the tank. - Page 101 Dentsply Sirona 7 Maintenance and cleaning Operating Instructions inLab MC X5 7.9 Procedure when processing Medentika-PreFace® abutment semi-finished products made of 2. Open the tank lid clip (C) and pull the filter system out. Pay attention to any remainder liquid. 3. Drain two-thirds of the coolant tank.
-
Page 102: Replacing The Main Fuse
7 Maintenance and cleaning Dentsply Sirona 7.10 Replacing the main fuse Operating Instructions inLab MC X5 7.10 Replacing the main fuse WARNING Electric shock Disconnect the power plug at the unit end before replacing the fuses. NOTICE Fuse type The main fuses F1 and F2 are of the T3.15A 500V type. They are available under the REF 6361336. -
Page 103: Error Messages And Measures
Dentsply Sirona 7 Maintenance and cleaning Operating Instructions inLab MC X5 7.11 Error messages and measures 7.11 Error messages and measures In the event of an error, the machine outputs error messages. Refer to the following table for measures to be taken for the respective error. -
Page 104: Consumables
7 Maintenance and cleaning Dentsply Sirona 7.12 Consumables: Operating Instructions inLab MC X5 Error message Action An error has occurred during the reference Please re-start the machine. If the error persists, contact customer run of the machine. service. The B-axis is in an unknown starting Please manually adjust the workpiece holder so that it is parallel with the position. - Page 105 Dentsply Sirona 7 Maintenance and cleaning Operating Instructions inLab MC X5 7.12 Consumables: Tool Image Ring color Bur 1.0 ZrO2 Yellow 6478049 Bur 2.5 ZrO2 Yellow 6478031 Bur 0.5 ZrO2 DC Yellow 6572957 Bur 1.0 ZrO2 DC Yellow 6572940 Bur 2.5 ZrO2 DC...
-
Page 106: Dismantling And Disposal
8 Dismantling and disposal Dentsply Sirona 8.1 Dismantling and reinstallation Operating Instructions inLab MC X5 Dismantling and disposal Dismantling and reinstallation For dismantling and re-installing the device, proceed according to the instructions in chapter Transportation and installation [ → 27] so as to ensure the proper functioning and stability of the unit. -
Page 107: Index
Dentsply Sirona Index Operating Instructions inLab MC X5 Index Application, 12 Maintenance, 8, 19 Regulations, 70 Manufacturer's address, 7 Building installation, 19 Nominal current, 18 Care, cleaning, and disinfecting agents, 70 CE mark, 11 Coolant tank Operating mode, 18 Change the coolant, 82... - Page 108 We reserve the right to make any alterations which may be required due to technical improvements. © Sirona Dental Systems GmbH Sprache: englisch Printed in Germany D3608.201.01.07.02 10.2017 Ä.-Nr.: 124 504 Sirona Dental Systems GmbH Contact in the USA: Sirona Dental, Inc. Fabrikstraße 31 4835 Sirona Drive 64 78 759 D3608...
Need help?
Do you have a question about the inLab MC X5 and is the answer not in the manual?
Questions and answers