Table of Contents
Advertisement
Advertisement
Table of Contents

Related Manuals for DENTSPLY PROPEX II


Summary of Contents for DENTSPLY PROPEX II
-
Page 1: User Manual
APEX LOCATOR User Manual FISDR-ISR / F1902127X / 03 /2012 – updated 01/2016... - Page 2 1 / 120...
- Page 3 CONTENTS English ..................4 Français ..................26 Deutsch ..................50 Español ..................72 Italiano ..................94 Electronic instructions for use For additional languages, visit our website: www.dentsplymaillefer.com Technical modifications on our products are not subject to notification. Photos of our devices are not contractual.
- Page 4 3 / 120...
-
Page 5: Table Of Contents
User Manual Table of contents Introduction Indications for use Contraindications Warnings Precautions Adverse Reactions Step-by-Step Instructions Contents Connecting the AC plug adapter Recharging the Battery Replacement of the Rechargeable Battery Getting Started Search for the Apex Sound Adjustment Demo Mode Automatic Shutdown ®... -
Page 6: Introduction
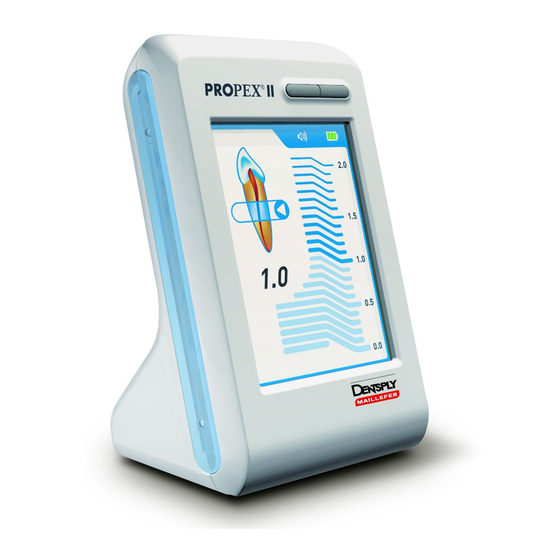
FOR DENTAL USE ONLY DIRECTIONS FOR USE Introduction ® Congratulations on the purchase of ProPex ® ProPex II is a device aimed at detecting the minor apical foramen based on analysis of electrical properties of different tissues inside the root canal system. For optimal safety and performance, read this user manual carefully before use. -
Page 7: Contraindications
2. Contraindications ® The ProPex II is not recommended for use: in patients who have a pacemaker or other implanted electrical devices, or have been cautioned by their physicians against the use of small electric appliances such as shavers, hair dryers, etc, ... -
Page 8: Precautions
4. Precautions Important notice The use of apex locators alone without a preoperative and postoperative radiograph is not a recommended practice, since apex locators may not be able to work properly in all conditions. It is mandatory to confirm radiographically the working length established using the apex locator. -
Page 9: Adverse Reactions
As a safety precaution in order to avoid over-instrumentation, it is recommended to proceed as follows: place the file onto an endodontic ruler at the point where II indicates ‘APEX’. Subtract a minimum of 0.5 mm from the ® the ProPex measured file length. -
Page 10: Step-By-Step Instructions
6. Step-by-Step Instructions A. Content Check the content of the equipment before use: ® one ProPex II apex locator one switching charger with EU, UK, USA, AUS exchangeable plugs one measurement cable two lip clips two connection hooks two connection forks one user manual B. -
Page 11: Recharging The Battery
C. Recharging the Battery ® The ProPex II is delivered with a rechargeable battery. ® On ProPex II a screen indicator shows the level of the battery charge. When this is flashing, the battery requires recharging. However, it is still functional for several treatments before the battery shuts down. -
Page 12: Replacement Of The Rechargeable Battery
D. Replacement of the Rechargeable Battery ® The battery compartment is located at the bottom of ProPex II and its cover is secured by a screw. Release the screw and remove the battery compartment cover Remove the battery and disconnect the battery cable from the connector Insert the new battery cable into the connector Insert the battery into the battery compartment Close the battery compartment and secure it with the screw... -
Page 13: Getting Started
E. Getting Started Disconnect the charger from the device if connected. Connect the measurement cable and switch the device On – after a short logo presentation, the main screen is displayed and the cursor on the tooth image will start blinking. (While turning the device On without the measurement cable –... -
Page 14: Search For The Apex
F. Searching for the Apex 1) Coronal and Medial Zone Slowly introduce the file into the canal. The cursor on the tooth icon indicates the progression of the file inside the canal. Further progression of the file in the canal is shown both by the cursor on the tooth ®... - Page 15 2) Apical Zone The apical zone is divided into 10 segments graduated from 0.9 to 0.0 (apex) as visual information of file progression. When the apex is reached, the cursor shows “APEX” and a solid tone is emitted. Beginning of Apical Middle of Apical Zone Apical position Zone...
-
Page 16: Sound Adjustment
G. Sound Adjustment ® ProPex II is equipped with a sonic indicator which enables monitoring of the progression of the file within the canal. This function, in conjunction with the display of progression, enables working "blind" while still monitoring the progression of the file. The volume can be adjusted to one of four levels: mute, low, normal and high, by successive presses on the volume key. -
Page 17: Automatic Shutdown
Automatic Shutdown ® ProPex II automatically shuts down after 5 minutes without use. It is advisable, however, to manually switch off equipment after measurement by simply pressing key (On/Off). ® J. Maintenance of your ProPex The device does not contain user serviceable parts. The service and repair should be provided by factory trained service personnel only. -
Page 18: Warranty
K. Warranty ® ProPex II is warranted for 24 months from the date of purchase. The accessories (cables, battery etc.) are warranted for 6 months from the date of purchase. The warranty is valid for normal usage conditions. Any modification or accidental damage will render the warranty void. -
Page 19: Standard Symbols
M. Standard symbols On the device label appear standard symbols as follows: Class II equipment Type BF Applied part Follow instructions for use Direct current Recycling : PLEASE DO NOT THROW AWAY! This product and all its components must absolutely be recycled through your supplier 18 / 120... -
Page 20: Disinfection, Cleaning And Sterilization
7. Disinfection, cleaning and sterilization procedure for the ProPex II accessories ® Foreword The lip clip, the hook and the fork must be cleaned, disinfected and sterilized before each use to prevent any contamination. This concerns the first use as well as the subsequent uses. - Page 21 Operation Operating mode Warning 2. Rinsing - Rinse manually and abundantly the accessories with current water 3. Manual - clean manually the - the hook mechanism has to be Cleaning accessories with an activated during the cleaning adequate brush, process (press several times the preliminary soaked in a push button) clean pre-disinfectant...
- Page 22 Operation Operating mode Warning 9. Sterilization - Steam sterilization at: - The accessories (lip clip, hook 134°C (237°F) during 3 and fork) must be sterilized according to the packaging labeling. - Use fractionated vacuum or gravity (less preferred) autoclaves (according to EN 13060, EN 285). - Use validated sterilization procedure according to ISO 17665-1...
-
Page 23: Troubleshooting
8. Troubleshooting Please review the checklist below should you experience a problem with your ® ProPex II. If the problem persists after following the proposed solutions, please contact your distributor. Warning: The following patient's related factors may prevent accurate readings: ... - Page 24 Problem Possible cause Solution Indication of file 1. There is not a good 1. Ensure a good contact position is not steady contact between the lip between the mucosa during the procedure. clip and the oral mucosa. and lip clip (Place the lip clip in the labial angle opposite the tooth to be treated).
-
Page 25: Disposal Of The Product
Problem Possible cause Solution 5. The root canal may be 5. Completely remove the blocked by the remnants remnants prior to use. of a medication (e.g. calcium hydroxide). 6. Root canal is extremely 6. Rinse the root canal dry. with NaCl solution. Dry the access cavity with a cotton pellet/ air-blower. -
Page 26: Appendix
Appendix Electromagnetic compatibility (emc) Changes or modifications to this product not expressly approved by the manufacturer may result in increased emissions or decreased immunity performance of the product and could cause EMC issues with this or other equipment. This product is designed and tested to comply with applicable regulations regarding EMC and shall be installed and put into service according to the EMC information stated as follows. - Page 27 Guidance and manufacturer’s declaration – electromagnetic emissions The Product is intended for use in the electromagnetic environment specified below. The customer or the user of the Product should assure that it is used in such an environment. Emissions test Compliance Electromagnetic environment - guidance RF emissions...
- Page 28 Guidance and manufacturer’s declaration – electromagnetic immunity for not life support equipment The Product is intended for use in the electromagnetic environment specified below. The customer or the user of the Product should assure that it is used in such an environment. Immunity Compliance Electromagnetic environment - guidance...
- Page 29 Recommended separation distances between portable and mobile RF communications equipment and the not life support equipment The Product is intended for use in an electromagnetic environment in which radiated RF disturbances are controlled. The customer or the user of the Product can help prevent electromagnet interference by maintaining a minimum distance between portable and mobile RF communications equipment (transmitters) and the Product as recommended below, according to the maximum output power of the communications equipment.
- Page 30 29 / 120...
- Page 31 www.dentsplymaillefer.com Maillefer Instruments Holding Sàrl Chemin du Verger 3 CH – 1338 Ballaigues Switzerland FISDR-ISR / F1902127X / 03 /2012 – updated 01/2016...
Need help?
Do you have a question about the PROPEX II and is the answer not in the manual?
Questions and answers