Sign In
Upload
Manuals
Brands
Thermo Scientific Manuals
Measuring Instruments
Applied Biosystems SeqStudio Genetic Analyzer
Thermo Scientific Applied Biosystems SeqStudio Genetic Analyzer Manuals
Manuals and User Guides for Thermo Scientific Applied Biosystems SeqStudio Genetic Analyzer. We have
2
Thermo Scientific Applied Biosystems SeqStudio Genetic Analyzer manuals available for free PDF download: User Manual, Getting Started Manual
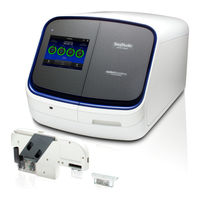
Thermo Scientific Applied Biosystems SeqStudio Genetic Analyzer User Manual (242 pages)
Brand:
Thermo Scientific
| Category:
Measuring Instruments
| Size: 32 MB
Table of Contents
Table of Contents
3
CHAPTER 1 Product Information
12
Instrument Overview
13
Parts of the Instrument
14
Instrument Status Indicator
15
Seqstudio ™ Genetic Analyzer Consumables
15
Cartridge
16
Seqstudio Genetic Analyzer Cathode Buffer Container
20
Radio Frequency Identification
20
Important Notice Regarding Use of Consumables that Exceed Supported Limits
21
Software Features
22
Seqstudio ™ Plate Manager Overview
24
Computer and Operating System Options
25
Recommended Browsers
25
Seqstudio ™ Remote Monitoring App Overview
26
Network Connection Options
27
Network and Password Security Requirements
27
Network Configuration and Security
27
Password Security
27
Experiment Types
28
Data Output
29
Secondary Analysis Software
29
Workflow: Connect Cloud-Based Platform or Desktop
31
Workflow: Instrument
32
Precautions for Use
33
CHAPTER 2 Prepare the Samples and the Instrument
34
Power on the Instrument
34
Sign in
34
Sign in with the Guest Instrument Profile
35
Sign out
35
Parts of the Home Screen
36
Prepare the Samples
37
Sample Preparation Guidelines
37
Plate Layout and Loading Guidelines
38
Prepare the Plate
38
Prepare the Tubes
39
Prepare the Instrument
39
Check the Consumables Status
39
Load the CBC, the Sample Plate, and the Cartridge
41
CHAPTER 3 Use the Instrument with the Connect Cloud-
43
Based Platform
43
Understanding Instrument and Connect Cloud-Based Platform Interaction
43
Connect" Versus "Link
43
First User Who Links Is Assigned Administrator Role
43
Local Versus Connect Cloud-Based Platform Instrument Profiles
44
If You Link When You Are Signed in to the Instrument
44
If You Link When You Are Not Signed in to the Instrument
45
Connect Cloud-Based Platform Instrument Profile Roles and Functions
47
For more Information on Using the Connect Cloud-Based Platform
47
Connect Cloud-Based Platform Administrators for an Instrument
48
Connect Cloud-Based Platform Administrator Functions
48
Assign Instrument Administrator Role to Other Users
48
Manage the Users and Administrators of Your Instrument
49
Disconnect Individual Users from an Instrument
50
Register and Obtain a Connect Cloud-Based Platform Account
50
Link the Instrument to Your Connect Cloud-Based Platform Account
51
Change Your Own Connect Cloud-Based Platform Instrument Profile PIN
52
Set up Email Notifications from the Instrument
53
And E-Signature (SAE) V2.0 Module
55
CHAPTER 4 Use the Instrument with the Security, Auditing
56
Overview of the Security, Auditing, and E-Signature (SAE) V2.0 Module Components
56
Overview of the Security, Auditing, and E-Signature (SAE) V2.0
56
Module Components
56
Configuring the SAE Module
57
Instrument Functionality When SAE Is Enabled or Disabled
58
Connect the Instrument to an SAE Server (Administrator Only)
58
Enable SAE on the Instrument and Specify the SAE Server (Administrator Only)
59
Disable SAE (Administrator Only)
59
Enable SAE on the Instrument and Specify the SAE Server
59
(Administrator Only)
59
Sign in with SAE Enabled
60
Specify Audit Reasons
61
E-Signature Requirements When You Start a Run
61
Sign a Plate Setup
63
View E-Signature Records for a Plate Setup
63
Sign a Dye Calibration or an Install Run
64
View E-Signature Records for a Dye Calibration or an Install Run
64
Signing in after Automatic Screen Locking
64
Use the Instrument When the SAE Server Is Offline
65
Auditing of Imported Plate Setups
65
SAE Error Messages and Actions
66
CHAPTER 5 Create or Modify a Plate Setup from the
67
Plate Manager
67
Overview of Plate Setup Settings
67
Set up a Plate Using Default Settings (Plate Manager)
69
Access the Plate Manager on the Connect Cloud-Based Platform
69
Access the Plate Manager on the Desktop
69
Create or Open a Plate Setup PSM File
69
Enter Plate Properties
70
Assign Wells: Sample and Run Information
71
Keyboard Shortcuts for the Sample Table
72
Save a Plate Setup in the Plate Manager
73
Additional Plate Settings (Plate Manager)
74
Specify Replicate Injections
74
Edit Analysis Settings
75
Modify the Default File Name Convention
75
Hide or Share a Plate (Plate Setup Security)
76
Define Custom Fields
76
CHAPTER 6 Create or Modify a Plate Setup from the Instrument
77
PSM and CSV Plate Setup Files for Import into the Instrument
78
Shared (Public), Hidden (My Plates), and Guest Plate Setup Files
79
Overview of Plate Setup Settings
79
(Optional) Set up for Auto Export of Sample Data Files (AB1 and FSA)
80
Set up a Plate Using Default Settings (Instrument)
81
Create or Import a Plate Setup
81
Enter Plate Properties
82
Assign Wells: Run Module, Size Standard, Dye Set, and Kit
84
Assign Wells: Sample Name, Sample Type, and Custom Fields
86
Set Optional Plate Settings (Instrument)
87
Specify Replicate Injections
87
Modify Analysis Settings
87
Modify the Default File Name Convention
88
Hide or Share a Plate (Plate Setup Security)
89
Define Custom Fields
89
(Optional) View the Injection List, Change Injection Settings or Order, or Specify Replicates and Re-Injections
91
Load the Plate or the Tube Assembly
92
CHAPTER 7 Start and Monitor a Run
93
Select a Plate Setup and Start a Run
93
Automatic File Cleanup
94
Lock the Touchscreen
95
Monitor a Run from the Connect Cloud-Based Platform
95
Open the Remote Monitoring App from Instrument Connect App
95
Open the Remote Monitoring App from the Plate Manager
97
Platform Account
99
View Results in the Remote Monitoring App on the Connect Cloud-Based Platform
99
Monitor a Run from a Mobile Device
103
Monitor a Run from the Instrument
105
(Optional) View the Injection List, Change Injection Settings or Order, or Specify Replicates and Re-Injections
105
View the Run Status
105
View Real-Time Results
106
Pause a Plate or Cancel or Stop Injections
106
View Results When the Run Is Completed
107
Unload the Plate or the Tube Assembly
109
CHAPTER 8 View and Analyze Results
110
View Results in the Remote Monitoring App on the Connect Cloud-Based Platform
110
View Results on the Instrument
111
View Results When the Run Is Completed
111
Fragment/Hid Analysis Results
113
Sequence Analysis Results
115
EPT Plot
117
View Results for a Previously Run Plate (Run History)
118
Data Quality Alerts
119
Sizecalling and Basecalling Quality Alerts
119
Edit Injection Parameters and Re-Inject Samples
120
Export a Report (QC Report)
120
Export Results from the Instrument (Sample Data Files and QC Reports)
121
Analyze Data
121
CHAPTER 9 Manage the Software (Plate Manager)
122
Add a Custom Dye Calibration to the Plate Manager
122
Download a Plate Setup Template as a CSV File
122
Save a Plate Setup as a PDF
123
Save a Plate Setup as a CSV File
123
Create a Plate Setup Template
123
Delete Plate Setups
124
Manage Email Notifications in the Connect Cloud-Based Platform
124
Manage Run Modules
125
Manage Size Standards
125
Manage Analysis Settings
126
Fragment/Hid Analysis Settings (Size Calling)
126
Sequencing Settings (Base Calling)
129
CHAPTER 10 Manage the Software (Instrument)
130
Connect the Instrument to a Network Drive
130
Determine IP Address for a Computer on a Network
130
Create Folders and Enable Network Folder Sharing
131
Connect to a Network Drive
132
Set up a Default Connect Cloud-Based Platform Location for Opening Plate Setups
132
(Auto Export)
133
Set up a Default Network Location for Opening Plate Setups
133
Set up a Default Network Location for Saving Results (Auto Export)
134
Link the Instrument to Your Connect Cloud-Based Platform Account
136
Lock the Touchscreen
137
Manage Plate Setups
138
Export or Delete a Plate Setup (PSM File)
138
Import a Plate Setup from a CSV or PSM File
139
Manage Run Settings (Instrument)
139
Manage Run Modules
139
Manage Size Standard Definitions
142
Manage Analysis Settings
142
Modify the Default File Name Convention
146
Manage Instrument Settings
147
Display Instrument Hardware and Software Information
147
Change the Instrument Name
148
Enable Demo Mode
148
Manage Date and Time Settings
148
Manage the Network Configuration
149
Check for Software Updates (Administrator Only)
150
Manage Instrument Profiles on the Instrument
151
Local Instrument Profile Roles and Functions
151
Create a Local Instrument Profile for Another User (Administrator Only)
151
Change the Role of a Local Instrument Profile (Administrator Only)
152
Delete an Instrument Profile from an Instrument (Administrator Only)
152
Delete the PIN for a Local Instrument Profile (Administrator Only)
152
Create Your Own Local Instrument Profile
153
Change Your Own Local Instrument Profile PIN
153
Manage Storage Space
153
Automatic File Cleanup
153
Export or Delete a Plate Setup (PSM File)
154
Export Results from the Instrument (Sample Data Files and QC Reports)
154
Delete a Run History
155
Back up User Data (Plates and Results) (Administrator Only)
155
CHAPTER 11 Maintain the Instrument
156
Regular Maintenance Tasks
156
Check the Cathode Buffer Fill Level
156
Clean the Instrument Exterior and Touchscreen
157
Clean the Autosampler
157
Manage the Cartridge
158
Cartridge Storage
158
Set Cartridge Storage Mode (Administrator Only)
159
Check or Export the Instrument-Cartridge History
160
Check or Export the Cartridge History
160
Fill the Capillary Array and Refresh the Polymer Delivery System
161
Remove the Cartridge
161
Insert the Cartridge
161
Store the Cartridge
163
Seqstudio Integrated Capillary Protector
164
Long-Term On-Instrument Cartridge Storage
165
Install Cathode Buffer
166
Remove the Seqstudio ™ Genetic Analyzer Cathode Buffer Container
166
Assemble the Seqstudio
166
Insert the Cathode Buffer Container
167
Troubleshooting Resources
169
APPENDIX A Troubleshooting
170
Troubleshooting Workflow
170
Export Log Files for Plates, Install Runs, Injections, and Instrument
170
View the Raw Data and the EPT Plot
171
Data Quality Alerts
171
Sizecalling and Basecalling Quality Alerts
171
Check Size Standard Quality
172
Instrument Troubleshooting
173
Cartridge Troubleshooting
174
Sample and Data Troubleshooting
175
EPT Data
180
Software Troubleshooting
181
Service Tools
183
APPENDIX B Link the Instrument to Your Connect Cloud- Based Platform Account-Detailed Instructions
184
Workflow: Set up the Instrument for Connect Cloud-Based Platform Access
184
Network Requirements
184
Link the Instrument from a Mobile Device
185
The Instrument
186
Register the Instrument with the Instrument Connect App
186
Link the Instrument Using a Link Code
186
Set up Email Notifications from the Instrument
190
APPENDIX C Dye Calibration and Install Standard Checks
192
Calibrate Dyes
192
Overview of System Dye Set and Custom Dye Set Calibration
192
System Versus Custom Dyes
192
Factory, Auto, and Manual Calibration
193
Determine if Manual Calibration Is Required
193
Perform a System Dye Calibration
195
Perform a Custom Dye Calibration
197
View the Dye Calibration History
201
Import or Export a Custom Dye Set
202
Perform an Install Run
203
Overview of Install Checks
203
Perform an Install Run
204
View Install Run Results
205
Export the Install Run Report
208
View the Install Run History
210
APPENDIX D Create and Run an HID Plate
212
HID Analysis Requirements
212
Pull-Up Reduction Feature
213
Resolution Algorithm
214
Workflow: HID Analysis
215
HID Install Run
215
HID Run Module, Dye Sets, Size Standard Definitions, and Kits
216
Manage Kits (HID Applications Only)
217
APPENDIX E Run Modules
218
Run Modules, Read Lengths, Size Ranges, and Run Times
218
APPENDIX F Parts and Materials
220
Required Materials Not Supplied
220
APPENDIX G Instrument Specifications and Layout
222
Instrument Dimensions
222
Instrument Clearances
222
Environmental Requirements
223
Electrical Requirements
224
Electrical Protective Devices
224
Network Requirements
225
Safety Requirements
225
Safety Practices
225
Required Safety Equipment
226
APPENDIX H Safety
227
Symbols on this Instrument
227
Conformity Symbols
228
Safety Alerts on this Instrument
229
Safety Information for Instruments Not Manufactured by Thermo Fisher Scientific
230
Instrument Safety
230
General
230
Physical Injury
230
Electrical Safety
230
Cleaning and Decontamination
231
Instrument Component and Accessory Disposal
231
Laser
231
Safety and Electromagnetic Compatibility (EMC) Standards
232
Safety Compliance
232
Emc
232
Environmental Design
233
Radio Compliance
233
Chemical Safety
234
Biological Hazard Safety
235
Documentation and Support
236
Related Documentation
236
Customer and Technical Support
236
Limited Product Warranty
237
Index
238
Advertisement
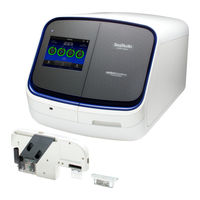
Thermo Scientific Applied Biosystems SeqStudio Genetic Analyzer Getting Started Manual (64 pages)
Create and run plate setups, monitor runs, and view results
Brand:
Thermo Scientific
| Category:
Measuring Instruments
| Size: 6 MB
Table of Contents
Table of Contents
3
CHAPTER 1 Product Information
6
Product Description
6
Workflow
7
CHAPTER 2 Prepare the Samples and the Instrument
9
Prepare the Samples
9
Sample Preparation Guidelines
9
Plate Layout and Loading Guidelines
11
Prepare the Instrument
11
Power on the Instrument
11
Check the Consumables Status
11
Load the CBC, the Sample Plate, and the Cartridge
12
Prepare and Load the Plate or Tubes
14
Prepare the Plate
14
Prepare the Tubes
14
Load the Plate or the Tube Assembly
15
Unload the Plate or the Tube Assembly
15
CHAPTER 3 Set up a Plate Using Default Settings
16
Manager
16
Access the Plate Manager
16
Create or Open a Plate Setup PSM File
17
Enter Plate Properties
17
Assign Wells: Sample and Run Information
18
Save a Plate Setup in the Plate Manager
20
CHAPTER 4 Set up a Plate Using Default Settings (Instrument)
22
Sign in
22
(Optional) Set up for Auto Export of Sample Data Files (AB1 and FSA)
23
Create or Import a Plate Setup
24
Export or Delete a Plate Setup (PSM File)
24
Enter Plate Properties
25
Assign Wells: Run Module, Size Standard, Dye Set, and Kit
26
Assign Wells: Sample Name, Sample Type, and Custom Fields
26
Save And/Or Run a Plate Setup
27
CHAPTER 5 Start and Monitor a Run
28
Load the Plate or the Tube Assembly
28
Select a Plate Setup and Start a Run
29
Start a Run on the Instrument
30
Monitor a Run from the Connect Cloud-Based Platform
31
Open the Remote Monitoring App from Instrument Connect App
31
View Notifications from the Instrument on Your Connect Cloud-Based
32
Platform Account
32
Pause or Cancel an Injection in the Remote Monitoring App
32
View Results in the Remote Monitoring App on the Connect Cloud-Based Platform
33
Monitor a Run from a Mobile Device
36
Monitor a Run from the Instrument
39
View the Run Status
39
View Real-Time Results
39
Pause a Plate or Cancel or Stop Injections
40
View Results When the Run Is Completed
41
(Optional) View the Injection List, Change Injection Settings or Order, or Specify Replicates and Re-Injections
42
CHAPTER 6 View and Analyze Results
43
View Results in the Remote Monitoring App on the Connect Cloud-Based Platform
43
View Results on the Instrument
44
View Results When the Run Is Completed
44
View Results for a Previously Run Plate (Run History)
48
Edit Injection Parameters and Re-Inject Samples
50
Export a Report (QC Report)
50
Export Results from the Instrument (Sample Data Files and QC Reports)
50
Analyze Data
51
Secondary Analysis Software
51
APPENDIX A Link the Instrument to Your Connect Cloud- Based Platform Account-Detailed Instructions
53
Workflow: Set up the Instrument for Access to the Connect Cloud-Based Platform
53
Based Platform
53
Register and Obtain a Connect Cloud-Based Platform Account
54
Link the Instrument from a Mobile Device
54
The Instrument
55
Register the Instrument with the Instrument Connect App
55
Link the Instrument Using a Link Code
56
APPENDIX B Keyboard Shortcuts for Plate Manager
59
Keyboard Shortcuts for the Sample Table
59
Documentation and Support
61
Related Documentation
61
Customer and Technical Support
61
Limited Product Warranty
62
Advertisement
Related Products
Thermo Scientific appliedbiosystems SeqStudio Flex Series
Thermo Scientific Orion Star A212
Thermo Scientific Star A221
Thermo Scientific Star A321
Thermo Scientific Orion Star A213
Thermo Scientific Star A325
Thermo Scientific AQUAfast AQ3140 COD
Thermo Scientific AquaSensors AV38
Thermo Scientific AutoXP
Thermo Scientific Antaris MX
Thermo Scientific Categories
Laboratory Equipment
Measuring Instruments
Accessories
Freezer
Refrigerator
More Thermo Scientific Manuals
Login
Sign In
OR
Sign in with Facebook
Sign in with Google
Upload manual
Upload from disk
Upload from URL