Table of Contents
Advertisement
Quick Links
™
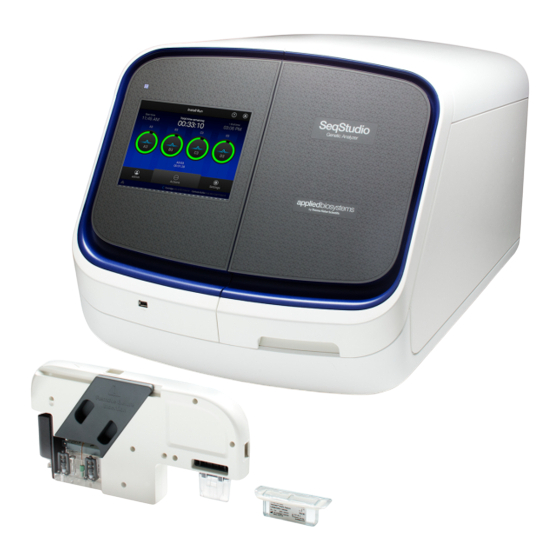
SeqStudio
GETTING STARTED GUIDE
Create and run plate setups, monitor runs, and view results
for use with:
SeqStudio
Data Collection Software v1.2
™
SeqStudio
Genetic Analyzer Cartridge (Cat. No. A33671)
™
SeqStudio
Genetic Analyzer Cartridge v2 (Cat. No. A41331)
™
SeqStudio
Plate Manager
™
SeqStudio
Remote Monitoring App
™
Publication Number MAN0018654
Revision A.0
For Research Use Only. Not for use in diagnostic procedures.
Genetic Analyzer
Advertisement
Table of Contents

Related Manuals for Thermo Scientific Applied Biosystems SeqStudio Genetic Analyzer


Summary of Contents for Thermo Scientific Applied Biosystems SeqStudio Genetic Analyzer
- Page 1 ™ SeqStudio Genetic Analyzer GETTING STARTED GUIDE Create and run plate setups, monitor runs, and view results for use with: SeqStudio Data Collection Software v1.2 ™ SeqStudio Genetic Analyzer Cartridge (Cat. No. A33671) ™ SeqStudio Genetic Analyzer Cartridge v2 (Cat. No. A41331) ™...
- Page 2 Manufacturer: Products: Life Technologies Holdings Pte Ltd | ™ SeqStudio Genetic Analyzer Block 33 | ™ SeqStudio Data Collection Software Marsiling Industrial Estate Road 3 | ™ SeqStudio Plate Manager (desktop) #07-06, Singapore 739256 ™ SeqStudio Genetic Analyzer Cartridge ™ SeqStudio Genetic Analyzer Cartridge v2 Security, Auditing, and E‑signature (SAE) v2.0 module...
-
Page 3: Table Of Contents
Contents ■ CHAPTER 1 Product information ........6 Product description . - Page 4 Contents Assign wells: sample name, sample type, and custom fields ......26 Save and/or run a plate setup ........... . 27 ■...
- Page 5 Contents ■ APPENDIX B Keyboard shortcuts for Plate Manager ....59 Keyboard shortcuts for the sample table ......... . 59 ■...
-
Page 6: Chapter 1 Product Information
Product information ■ Product description ........... . 6 ■... -
Page 7: Workflow
Chapter 1 Product information Workflow Workflow Prepare the samples and the instrument Prepare the samples (page 9) ▼ Prepare the instrument (page 11) ▼ Prepare and load the plate or tubes (page 14) Create a plate setup ™ ™ SeqStudio Plate Manager SeqStudio Genetic Analyzer... - Page 8 Chapter 1 Product information Workflow Start a run Load the plate or the tube assembly (page 15) ▼ Select a plate setup and start a run (page 29) ▼ Start a run on the instrument (page 30) Monitor a run Connect cloud-based platform Mobile device SeqStudio...
-
Page 9: Chapter 2 Prepare The Samples And The Instrument
Prepare the samples and the instrument ■ Prepare the samples ........... 9 ■... - Page 10 Chapter 2 Prepare the samples and the instrument Prepare the samples Item Guidelines • Prepare sequencing reactions according to kit instructions, and purify the Sequence analysis sample extension products with ethanol precipitation, spin columns, or the BigDye preparation XTerminator ™ Purification Kit.
-
Page 11: Plate Layout And Loading Guidelines
Chapter 2 Prepare the samples and the instrument Prepare the instrument Plate layout and • Samples are stable for 16–24 hours on the instrument. loading guidelines • Load a maximum of 48 samples per plate if you use a long run module (Long Seq, Long Seq BDX, and Long Frag Analysis). -
Page 12: Load The Cbc, The Sample Plate, And The Cartridge
Chapter 2 Prepare the samples and the instrument Prepare the instrument Display Cartridge Cathode buffer Yellow OK for use, but: OK for use, but: • 1–25 injections remain for the capillary • 1–25 injections remain for the cathode array, buffer, •... - Page 13 Chapter 2 Prepare the samples and the instrument Prepare the instrument 1. Touch , touch Eject plate, then open the instrument door when prompted. 2. Press the release button on the autosampler to open the lid, then remove the CBC. Release button Location of CBC 3.
-
Page 14: Prepare And Load The Plate Or Tubes
Chapter 2 Prepare the samples and the instrument Prepare and load the plate or tubes Prepare and load the plate or tubes Prepare the plate On a clean and level surface: 1. Prepare the sample according to your application protocol, then pipet the sample into the plate. -
Page 15: Load The Plate Or The Tube Assembly
Chapter 2 Prepare the samples and the instrument Prepare and load the plate or tubes 4. Centrifuge the tube assembly briefly to collect the contents at the bottom of each tube. Centrifuge the tube assembly again if the contents are not at the bottom of the tubes. -
Page 16: Chapter 3 Set Up A Plate Using Default Settings
Set up a plate using default settings (Plate Manager) ■ Access the Plate Manager ..........16 ■... -
Page 17: Create Or Open A Plate Setup Psm File
Chapter 3 Set up a plate using default settings (Plate Manager) Create or open a plate setup PSM file Create or open a plate setup PSM file 1. Click to display the home screen. 2. In the Plate setup screen, create or open a plate setup: If you are running the Plate Manager on the Connect cloud-based platform: Click... -
Page 18: Assign Wells: Sample And Run Information
Chapter 3 Set up a plate using default settings (Plate Manager) Assign wells: Sample and run information 2. Select an option in the Plate setup security field. • Hidden—Prevents other users from using or accessing the plate on the instrument. Your analysis settings are saved with the plate setup, and are used the next time that you open or create a hidden plate. - Page 19 Chapter 3 Set up a plate using default settings (Plate Manager) Assign wells: Sample and run information 2. If you are creating a mixed plate, select the Application type for the selected injection groups. 3. (Optional) Edit the default Sample name (well) for each well. Note: If multiple injection groups are selected when you edit the Sample name or Sample type, both wells with the same capillary number are edited.
-
Page 20: Save A Plate Setup In The Plate Manager
Chapter 3 Set up a plate using default settings (Plate Manager) Save a plate setup in the Plate Manager 8. Select a Run module for the selected injection groups. Note: Run module 1 is used for the first injection you specify. If you specify replicate injections, additional run module fields are added. - Page 21 Chapter 3 Set up a plate using default settings (Plate Manager) Save a plate setup in the Plate Manager 2. Click Save. Note: The Monitor my run button is available only in the Connect cloud-based platform app. If you are running the Plate The plate setup is saved as a...
-
Page 22: Chapter 4 Set Up A Plate Using Default Settings (Instrument)
Set up a plate using default settings (instrument) ■ Sign in ............. . 22 ■... -
Page 23: (Optional) Set Up For Auto Export Of Sample Data Files (Ab1 And Fsa)
Chapter 4 Set up a plate using default settings (instrument) (Optional) Set up for auto export of sample data files (AB1 and FSA) (Optional) Set up for auto export of sample data files (AB1 and FSA) By default, sample data files (AB1 and FSA) are saved to the instrument. When you create a plate setup, you can also set the Save location to Cloud, Network Drive, and/or USB. -
Page 24: Create Or Import A Plate Setup
Chapter 4 Set up a plate using default settings (instrument) Create or import a plate setup Create or import a plate setup In the home screen: 1. Touch Set up run. 2. Create, open, or import a plate setup: Procedure Create a new plate 1. -
Page 25: Enter Plate Properties
Chapter 4 Set up a plate using default settings (instrument) Enter plate properties 4. If you touched: • Export, select a storage location, then touch Export. • Delete, then touch Yes to delete the plate setup. Enter plate properties 1. At the top-right of the Plate properties screen, touch the Properties tab. 2. -
Page 26: Assign Wells: Run Module, Size Standard, Dye Set, And Kit
Chapter 4 Set up a plate using default settings (instrument) Assign wells: run module, size standard, dye set, and kit Assign wells: run module, size standard, dye set, and kit Note: You can assign these settings to one or more injection groups at the same time. 1. -
Page 27: Save And/Or Run A Plate Setup
Chapter 4 Set up a plate using default settings (instrument) Save and/or run a plate setup 3. Touch Done to close the screen then Done to close the Edit Plate screen. Application type—Sequencing, Fragment or HID; designated by S, F, or H Save the plate or start the run 4. -
Page 28: Chapter 5 Start And Monitor A Run
Start and monitor a run ■ Load the plate or the tube assembly ........28 ■... -
Page 29: Select A Plate Setup And Start A Run
Chapter 5 Start and monitor a run Select a plate setup and start a run Select a plate setup and start a run After you load the plate in the instrument (see “Load the plate or the tube assembly“ on page 15): 1. -
Page 30: Start A Run On The Instrument
Chapter 5 Start and monitor a run Start a run on the instrument 4. Touch Start run. • If a new cartridge was inserted before the run, the instrument performs an optical alignment before starting the run. • During the run, the instrument performs an automatic spectral calibration adjustment (auto calibration) for each sample to correct for spectral overlap. -
Page 31: Monitor A Run From The Connect Cloud-Based Platform
Chapter 5 Start and monitor a run Monitor a run from the Connect cloud-based platform Monitor a run from the Connect cloud-based platform Open the Remote A run is accessible from InstrumentConnect for 24 hours after the run is complete, or until another run is started. -
Page 32: View Notifications From The Instrument On Your Connect Cloud-Based
Chapter 5 Start and monitor a run Monitor a run from the Connect cloud-based platform Figure 1 Remote Monitoring App 1. In any screen in the Connect cloud-based platform, click View notifications from the instrument on your Connect cloud-based platform account 2. -
Page 33: View Results In The Remote Monitoring App On The Connect Cloud-Based Platform
Chapter 5 Start and monitor a run Monitor a run from the Connect cloud-based platform View results in the 1. Open the Remote Monitoring App (see “Open the Remote Monitoring App from Instrument Connect App“ on page 31). Remote Monitoring App on 2. - Page 34 Chapter 5 Start and monitor a run Monitor a run from the Connect cloud-based platform Remote Monitoring App raw trace Figure 2 Fragment analysis raw trace Zoom in/out. Raw trace. Thumbnail trace—Click-drag to view another region of the trace. Lock/unlock trace zooming for all traces in the injection group. View Options—Select the dye color to display;...
- Page 35 Chapter 5 Start and monitor a run Monitor a run from the Connect cloud-based platform Remote Monitoring App EPT trace The EPT view (ElectroPhoresis Telemetry) shows instrument data conditions (currents, temperatures, electrophoresis voltage) as a function of time. Remote Monitoring App analyzed trace Figure 4 Fragment analysis analyzed trace Lock/unlock trace zooming for all traces in the injection group.
-
Page 36: Monitor A Run From A Mobile Device
Chapter 5 Start and monitor a run Monitor a run from a mobile device Figure 5 Sequence analysis analyzed trace Zoom in/out. Analyzed trace. Thumbnail trace—Click-drag to view another region of the trace. Lock/unlock trace zooming for all traces in the injection group. View Options—Select the basecalls to display;... - Page 37 Chapter 5 Start and monitor a run Monitor a run from a mobile device 3. Swipe left to view consumable status. 4. Touch the status dial to view the injection list. SeqStudio Genetic Analyzer Instrument and Software Getting Started Guide ™...
- Page 38 Chapter 5 Start and monitor a run Monitor a run from a mobile device 5. Touch an injection group to display quality alerts, then touch View raw plot to view the data. • Swipe left to view the entire trace. •...
-
Page 39: Monitor A Run From The Instrument
Chapter 5 Start and monitor a run Monitor a run from the instrument Monitor a run from the instrument View the run During a run, the run status screen is displayed. status View the run time information and the status dial for each capillary. The status dials are color-coded for quality alerts: •... -
Page 40: Pause A Plate Or Cancel Or Stop Injections
Chapter 5 Start and monitor a run Monitor a run from the instrument Pause a plate or 1. In the run status screen, touch Actions. cancel or stop injections 2. Manage the plate or injections: Touch View results View the list of injections and status. Edit plate For injections that have not yet been run, edit Sample Name, Run Module, Dye Set, Size Standard, Sample Type, and custom... -
Page 41: View Results When The Run Is Completed
Chapter 5 Start and monitor a run Monitor a run from the instrument View results when View results for the plate when the run is completed (all injections are finished). the run is 1. Touch Results to view the run results. completed Arrows o use in this SVG. -
Page 42: (Optional) View The Injection List, Change Injection Settings Or Order, Or Specify Replicates And Re-Injections
Chapter 5 Start and monitor a run Monitor a run from the instrument (Optional) View In the Plate properties screen: the injection list, 1. Touch Injection options. change injection settings or order, 2. Touch an injection group, then configure the injection list: or specify •... -
Page 43: Chapter 6 View And Analyze Results
View and analyze results ■ View results in the Remote Monitoring App on the Connect cloud- based platform ............43 ■... -
Page 44: View Results On The Instrument
Chapter 6 View and analyze results View results on the instrument View results on the instrument View results when View results for the plate when the run is completed (all injections are finished). the run is 1. Touch Results to view the run results. completed in this SVG. - Page 45 Chapter 6 View and analyze results View results on the instrument Fragment/HID analysis trace Trace color hide/show—Touch to open, then touch a color to hide or show. Analyzed trace Size standard curve (red line) Thumbnail trace—Drag the center of the pane in the thumbnail trace to display another trace area in the top pane.
- Page 46 Chapter 6 View and analyze results View results on the instrument Sequence analysis trace Quality Value bars and values: • Pure base with QV ³20 • Pure base with QV 15–19 • Pure base with QV <15 • Mixed base Bases—Mixed bases are highlighted in red.
- Page 47 Chapter 6 View and analyze results View results on the instrument EPT plot The EPT view (ElectroPhoresis Telemetry) shows instrument data conditions (currents, temperatures, electrophoresis voltage) as a function of time. Touch on the left border of the plot to display the legend. SeqStudio Genetic Analyzer Instrument and Software Getting Started Guide ™...
-
Page 48: View Results For A Previously Run Plate (Run History)
Chapter 6 View and analyze results View results on the instrument Adjust the trace display See “View results when the run is completed“ on page 41 to access results. • Drag one finger to pan to the left or right. •... - Page 49 Chapter 6 View and analyze results View results on the instrument 3. Touch a sample file name. 4. View the results in the Run history screen, or touch to view well details. 5. Touch a sample file name, then touch View. If you select more than one sample file name, the View button is dimmed.
-
Page 50: Edit Injection Parameters And Re-Inject Samples
Chapter 6 View and analyze results Export results from the instrument (sample data files and QC reports) Edit injection You can edit injection parameters and re-inject samples during a run or after a run is complete. parameters and re-inject samples 1. -
Page 51: Analyze Data
Chapter 6 View and analyze results Analyze data Note: If you select a plate, select View, then select Export, only an FSA or AB1 file for each analyzed sample is exported. Analyze data 1. Export results (see “Export results from the instrument (sample data files and QC reports)“... - Page 52 Chapter 6 View and analyze results Analyze data Analysis Description Fragment analysis Microsatellite Analysis Analyzes a mixture of DNA fragments, separated by size, on Software supported capillary electrophoresis systems. Desktop secondary analysis software IMPORTANT! Older versions of the desktop secondary analysis software cannot ™...
-
Page 53: Appendix A Link The Instrument To Your Connect Cloud- Based Platform Account-Detailed Instructions
Link the instrument to your Connect cloud-based platform account— detailed instructions ■ Workflow: Set up the instrument for access to the Connect cloud- based platform ............53 ■... -
Page 54: Register And Obtain A Connect Cloud-Based Platform Account
Appendix A Link the instrument to your Connect cloud-based platform account—detailed instructions Register and obtain a Connect cloud-based platform account Register and obtain a Connect cloud-based platform account 1. Go to www.thermofisher.com. 2. On the home page, select Sign In4 Register. 3. -
Page 55: The Instrument
Appendix A Link the instrument to your Connect cloud-based platform account—detailed instructions Link the instrument from a mobile device 5. Touch Mobile devices. The QR code is displayed. Register the 1. On your mobile device, download the InstrumentConnect from the Apple Store or from Google ™... -
Page 56: Link The Instrument Using A Link Code
Appendix A Link the instrument to your Connect cloud-based platform account—detailed instructions Link the instrument using a link code Link the instrument using a link code 1. From the instrument Sign In screen, navigate to the Connect to the Thermo Fisher Cloud screen: Do you have a local Description... - Page 57 Appendix A Link the instrument to your Connect cloud-based platform account—detailed instructions Link the instrument using a link code 3. Sign into your Connect cloud-based platform account on a separate computer. Go to thermofisher.com/connect. 4. Click , then click Add an Instrument. 5.
- Page 58 Appendix A Link the instrument to your Connect cloud-based platform account—detailed instructions Link the instrument using a link code 6. Enter the link code from the instrument touchscreen (from step 2), then click Send. 7. If you have not previously set up a PIN, enter a PIN to use when you sign in to an instrument, then click Send.
-
Page 59: Appendix B Keyboard Shortcuts For Plate Manager
Keyboard shortcuts for Plate Manager Keyboard shortcuts for the sample table Keys Action Navigation Arrow keys Move to the cell above, below, to the right, or to the left of the current cell. Move to the cell to the right of the current cell. Shift+Tab Move to the cell to the left of the current cell. - Page 60 Appendix B Keyboard shortcuts for Plate Manager Keyboard shortcuts for the sample table Keys Action Ctrl+X Cut. Ctrl+V Paste. Ctrl+Enter Fill all selected cells with edited cell's value: Select a range of cells, then press F2 to edit the first cell in the selection. Type a value, then press Ctrl+Enter to fill all selected cells with the value.
-
Page 61: Documentation And Support
Documentation and support Related documentation Document Pub. No. SeqStudio Genetic Analyzer Instrument and Software User Guide ™ MAN0018646 SeqStudio Genetic Analyzer Instrument and Software Getting Started Guide ™ MAN0018654 SeqStudio ™ Genetic Analyzer for HID Instrument and Software v1.2 User Bulletin— 100086084 New Features and Developmental Validation SeqStudio... -
Page 62: Limited Product Warranty
Documentation and support Limited product warranty Limited product warranty Life Technologies Corporation and/or its affiliate(s) warrant their products as set forth in the Life Technologies' General Terms and Conditions of Sale at www.thermofisher.com/us/en/home/global/terms-and-conditions.html. If you have any questions, please contact Life Technologies at www.thermofisher.com/support. SeqStudio Genetic Analyzer Instrument and Software Getting Started Guide ™... - Page 64 thermofisher.com/support | thermofisher.com/askaquestion thermofisher.com 1 November 2019...
Need help?
Do you have a question about the Applied Biosystems SeqStudio Genetic Analyzer and is the answer not in the manual?
Questions and answers