Sign In
Upload
Manuals
Brands
Compuprint Manuals
Printer
X03
Compuprint X03 Manuals
Manuals and User Guides for Compuprint X03. We have
1
Compuprint X03 manual available for free PDF download: User Manual
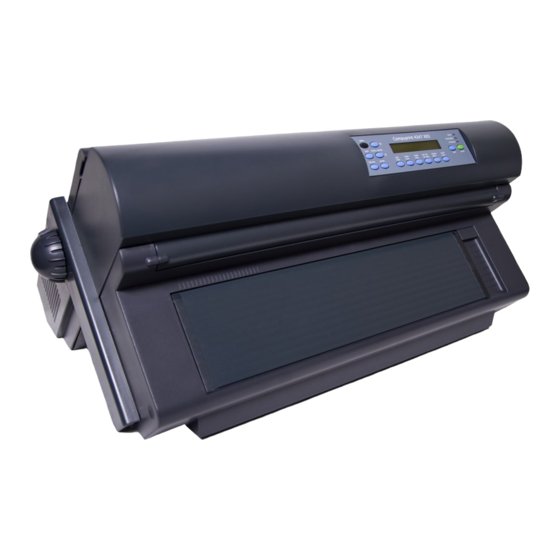
Compuprint X03 User Manual (200 pages)
Serial Matrix Printers
Brand:
Compuprint
| Category:
Printer
| Size: 6 MB
Table of Contents
Table of Contents
3
Figures
7
Tables
9
Attention Notices
11
Safety and Environmental Notices
11
Safety Notices
11
Danger Hazard Level
11
Caution Hazard Level
11
Safety Precautions
12
Electrical Safety
12
Approved Power Cord and Receptacle
12
Electrical Safety and Portable Power Strip Receptacles
12
Connecting or Disconnecting a Communication Port, a Teleport, or an Attachment Connector
13
Servicing During an Electrical Storm
13
How to Use this Guide
15
Preface
15
Chapter 1. Getting Started
17
Printer Parts
18
Printer Parts: Front and Rear View
18
Unpacking the Printer
19
Contents of Shipping Container
19
Choosing a Suitable Location
20
Removing the Shipping Locks from the Printer
20
Printer Clearances
20
Performing a Power-Receptacle Safety-Check
21
Installing the Controller Board
21
Handling the Controller Board
21
4247 Model X03 Nominal AC Input Power Requirements
21
Inserting the Controller Board
22
Removing the Two Screws on the Metal Plate
22
Sliding the Board in the Slot
23
Attaching the Controller Board
23
Installing the Operator Panel Overlay
24
Installing the Ribbon Cartridge
25
Ribbon Cartridge
25
Opening the Top Cover
26
Aligning the Cartridge Pins
26
Print Head and Ribbon Guide Mask Showing Correct Positioning of the Ribbon
27
Positioning the Snap Arm
27
Removing the Ribbon Cartridge
28
Aligning the Ribbon Mounting Pins
28
Power Connection
29
Inserting the Power Cable Plug
29
Power Switch in the I Position (ON)
29
Changing the Display Language (from English)
31
Loading Forms in the Front Push Tractors
32
Opening the Push Tractors Cover
32
Unlocking the Sprockets of the Front1 Push
32
Opening the Left and Right Sprocket Covers
33
Closing the Left Sprocket Cover
33
Inserting the Paper on the Right Sprocket Pins
34
Matching the Left Sprocket for the First Printing
34
Printing Your First Documents
35
Adjusting the Right Sprocket
35
Closing the Push Tractors Cover
35
Installing the Optional Second Tractor
36
Opening the Tractor Area Cover
36
Second Tractor
37
Aligning the Second Tractor Hooks
37
Connecting the Second Tractor
38
Rotating the Tractor Gear Protection Cover
38
Second Tractor in the Closed Position
39
Paper Path Direction
39
Removing the Optional Second Tractor
40
Disconnecting the Second Tractor
40
Closing the Protection Cover
40
Attaching the 4247 Printer to Your Computer
41
Completing Printer Setup
41
Software Driver Selection
42
Chapter 2. Understanding the Operator Panel
43
Status Indicators
43
Ready
43
Printer Operator Panel
43
Processing
44
Attention
44
Display Panel
44
Audible Alarm
45
Custom Set In-Use Indicator
45
Function Keys
45
Menu
46
SCROLL/MICRO↑ or SCROLL/MICRO
46
Enter
47
Return
48
Park/Path
48
Line Feed
49
Load/Eject
49
Form Feed
50
Set Top of Form
51
Start
51
Stop
51
Cancel Print
52
Test
52
Chapter 3. Checking and Changing Configuration Parameter Values
53
Printing Configuration Defaults
53
Checking and Changing Parameter Values
54
Exiting the Configuration Menu
55
Exiting Using START
55
Exiting Using RETURN
55
Locking the Printer Configuration Menu
56
Configuration Categories
56
Configuration Storage
57
Attachment
57
IPDS Configuration
57
Configuration Storage Category
57
Attachment Category
57
IPDS Configuration Category
57
ASCII Configuration
58
Printer Setup
61
Printer Adjustment
62
Power on Reset
62
Printer Setup
62
Display Language
63
Vital Product Data
63
Quiet Print
63
Vital Product Data Category
63
Quiet Print Category
63
Hex Print
64
Quit from Menu
64
Quit from Menu Category
64
Chapter 4. Configuration Storage
65
Custom Sets
65
Non-Custom Set
65
Save Current Values in Custom Sets
66
Recall Custom Set Values
67
Power-On Custom Set
67
Power-On Paper Source
68
Recall Factory Defaults
69
Printing Custom Sets
70
Chapter 5. Attachment Options
71
Chapter 6. IPDS Configuration
73
Characters Per Inch (CPI)
73
Lines Per Inch (LPI)
74
Maximum Print Position (MPP)
74
Maximum Page Length (MPL)
75
Print Quality
76
Print Language
77
Supported Print Languages
77
Emulation Mode
78
Media Size Priority
79
Bar Code Mode
80
Graphics Mode
81
Alarm Control
82
Chapter 7. ASCII Configuration
83
Characters Per Inch (CPI)
83
Position
83
Lines Per Inch (LPI)
84
Maximum Print Position (MPP)
85
Maximum Page Length (MPL)
86
Perforation Skipping
87
Emulation Mode
87
Print Language
88
Print Quality
90
NLQ Typeface
91
Character Set
91
Printer Compatibility 3 (Automatic Line Feed on Carriage Return)
92
Printer Compatibility 4 (Automatic Carriage Return on Line Feed)
92
Printer Compatibility 5 (Form Feed Suppression)
93
Printer Compatibility 6 (Init)
94
Printer Compatibility 7 (Condensed Print)
95
Printer Compatibility 8 (Slashed Zero)
95
Printer Compatibility 9 (20 CPI)
96
Alarm Control
97
Override Host Parameters
98
Paper Source
98
Characters Per Inch (CPI)
99
Lines Per Inch (LPI)
100
Maximum Page Length
101
Parallel Interface
102
Interface Type
102
Input Buffer Size
102
Select-In
103
Autofeed-XT
104
Serial Interface
104
Interface Type
104
Input Buffer Size
105
Data Bits
106
Baud Rate
106
Parity
107
Pacing Control
108
Connection Type
108
LAN Interface
109
LAN Interface IP Address Assignment
109
IP Address Assignment
109
IP Address
109
Subnet Mask
110
Default Gateway
111
Host Name
111
Workgroup Name
112
SMTP Service
113
Mail Server Address
113
E-Mail Address (Receiver)
114
E-Mail Address (Sender)
115
Chapter 8. Printer Setup
117
Paper Source Front Forms Backup
117
Rear Forms Backup
119
Continuous Forms Linking
120
Form Feed Mode
121
Controlling Tear off Operations
122
Using Automatic Eject to Control Forms Eject
122
Using Automatic Restore to Control Restoring of Forms
122
Automatic Eject
123
Single Path Usage Recommendations
123
Dual Path Usage Recommendations
123
Automatic Restore
124
Continuous Forms Eject Mode
125
Bar Code Print Direction
126
Graphics Print Direction
127
Perforation Safety
128
Jam Sensors
129
Chapter 9. Printer Adjustments
131
Paper-Load-Position to Tear-Position Relationship
131
Front Automatic Forms Thickness Adjustment (AFTA)
132
Front Tear Position
132
Front Left Margin Alignment
133
Front Paper Load Position
133
Rear Automatic Forms Thickness Adjustment (AFTA)
134
Rear Tear Position
134
Rear Left Margin Alignment
135
Rear Paper Load Position
136
Bidirectional Adjustment
136
Sensor Tune
137
Quit from Menu
137
Chapter 10. Power-On Reset (POR)
139
Chapter 11. Display Language
141
Display Languages
141
Chapter 12. Vital Product Data
143
Serial Number
143
Device Specific Information
144
Chapter 13. Quiet Print
145
Chapter 14. Hex Print
147
Chapter 15. Quit from Menu
149
Chapter 16. Dual Push Tractor Forms Paths
151
Introduction
151
Forms Selection
151
Using Different Forms on Two Paths
152
Setting up Printer
152
Using Path Switching
152
Using same Forms on both Paths (Linking)
153
Setting up Printer
153
How Forms Linking Works
154
Parking One Continuous Form and Loading Another
154
Parking a Continuous Form
154
Changing the Forms Path
154
Chapter 17. Using the Operator Print Tests
155
General Test Instructions
155
Quick Reference
156
Printer Demonstration
156
Printer Configuration
157
Print Custom Sets
157
Firmware Information
158
Printer Adjustments
158
Chapter 18. Supplies, Optional Features, and Maintenance
161
Continuous Forms Specifications
161
Proper Forms Loading
162
Correctly Loaded Paper
162
Forms Handling Paper Paths
163
Forms Stacking Recommendations
163
Forms Stack Input and Output Locations
163
Supplies
164
Optional Features
164
Maintenance
165
Removing the Ribbon Cartridge
165
Cleaning the Printer
165
Freeing the Shifter Holder
165
Chapter 19. Problem Solving
167
Using Status Code and Problem Listings
167
Status Code and Messages Displays
167
No Status Code Displays
167
Status Codes and Recovery Actions Problem List Index
167
Forms Problems
175
Print Quality and Ribbon Problems
176
Configuration Problems
178
Miscellaneous Problems
178
Clearing Forms Jams
179
Gripping the Bail Assembly
179
Inserting the Left and Right Paper Bail End Cap
180
Appendix A. Printer Specifications
181
General Information
181
Operating and Service Clearance
182
Weight
182
Power Consumption
182
Heat Output
182
Printer Clearances
182
Airflow
183
Declaration of Product Noise Emission Values
183
The Parallel Interface
183
Parallel Connector Pin Assignments
183
Sound Emission Levels - with Standard Covers
183
The Serial Interface
184
RS-232C Connector Pin Assignments
184
RS232/C Serial Interface Signals
184
The LAN Interface
185
LED Indicators
185
Environmental Requirements
185
Operating Environment
185
Shipping Environment
185
Storage Environment
186
Electrical Requirements
186
Power Cord
186
Safety
187
Branch Circuits and Grounding
187
Appendix B. 4247 Model X03 - Configuration Menu
189
Appendix C. Printer Driver Support
191
IBM Pseries AIX Colon Files
191
IBM System I Workstation Customization Objects
191
Index
193
Notices
197
Advertisement
Advertisement
Related Products
Compuprint 10200
Compuprint 10300
Compuprint 3046
Compuprint 3056
Compuprint 30X6
Compuprint Categories
Printer
Label Maker
Software
More Compuprint Manuals
Login
Sign In
OR
Sign in with Facebook
Sign in with Google
Upload manual
Upload from disk
Upload from URL