Sign In
Upload
Manuals
Brands
Beckman Coulter Manuals
Laboratory Equipment
LH 780
Beckman Coulter LH 780 Manuals
Manuals and User Guides for Beckman Coulter LH 780. We have
3
Beckman Coulter LH 780 manuals available for free PDF download: Instructions Manual, Instructions For Use Manual, Operator's Manual
Beckman Coulter LH 780 Instructions For Use Manual (182 pages)
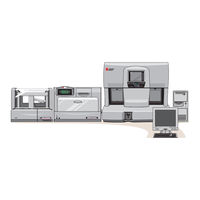
Hematology analyzer
Brand:
Beckman Coulter
| Category:
Measuring Instruments
| Size: 3 MB
Table of Contents
Warnings and Precautions
2
Revision Status
3
Table of Contents
5
Contents
6
Introduction
13
How to Use Your Coulter ® Lh 780 System Hard-Copy Manuals
13
About this Manual
14
Online Help System
14
Conventions
14
1 Controls and Indicators
15
Analyzer
15
Analyzer Screen and CRT Buttons
15
Diluter
16
Numeric Keypad
16
Numeric Keypad--0-9
17
Numeric Keypad--Alarm Reset
17
Numeric Keypad--CE
18
Numeric Keypad--CLEAR APERT
18
Numeric Keypad--DRAIN
19
Numeric Keypad--ENTER
19
Numeric Keypad--F
20
Numeric Keypad--ID
20
Numeric Keypad--POWER off
20
Numeric Keypad--POWER on
21
Numeric Keypad--PREMIX
21
Numeric Keypad--PRIME APERT
22
Numeric Keypad--RINSE
22
Numeric Keypad--SHUT down
23
Numeric Keypad--START up
23
Numeric Keypad--START/CONT
24
Numeric Keypad--STOP
25
Power Supply
26
Side/Front
26
Back
27
Power Supply Function Levels
27
Power Supply Function Status
28
Power Supply Adjustment Controls
28
Workstation
30
CD ROM Drive
30
3.5-Inch Diskette Drive
30
Power On/Off (Workstation)
31
Workstation Keyboard
31
Monitor and Volume Controls
32
Using Command Center
32
Process Type
33
Bar-Code ID Field
33
Status Area
34
Default Type
35
Last Message
35
Reviewing System Status
35
2 Startup
37
Logging Off/On the Workstation
37
Logging off
37
Logging on
37
Performing Daily Startup
37
Checking Instrument Operation
37
Setting up Analyzer Date and Time
38
Setting up Analyzer Date Format
38
Turn Pneumatics on
38
Checking Power Supply and Vacuum Level
39
Check Baths
39
Automatic Startup Cycles
40
Checking Daily Test Results
40
Checking Background Test Results
40
Checking HGB Voltage Test Results
41
Checking Instrument Setup
41
Checking Precision Test Results
41
Checking Ramp Test Results
42
Possible Startup Problems and Fixes
42
Running Controls
42
3 Quality Control
43
Quality Control Overview
43
Latron
43
Running Latex Control-Diff
43
Running Latex Control-Retic
45
Time
45
Running Latex Control-Diff and Retic
46
Series Cell Control and Retic-C
47
Cycling Controls
47
Results
47
Aspirate Control in Manual Mode
48
Reviewing Control Results
49
Control Codes and Flags
49
When a Control Is Outside Its Expected Ranges
50
When a Latex Control Is Outside Its Expected Ranges
51
Controls Window
51
Transmit, Print and Archive
52
Deleting Control Data
52
Adjusting Control Limits
53
Providing Comments for Quality Assurance
53
Performing NRBC Quality Control
53
Extended Qc
55
Overview
55
Extended QC - Random Error
56
Extended QC- Systematic Error
56
Extended QC- Total Error
57
Xb Analysis
58
Overview
58
Reviewing XB Results
58
Adding Comments to an XB Batch
59
XM Analysis Overview
59
Overview
59
Reporting
62
Reviewing XM Results
62
Adding Comments to an XM Batch
63
Participating in Iqap
63
IQAP Setup
63
IQAP Download Procedure
63
Troubleshooting
64
PARTICIPATING in Eiqap
64
Enroll in Eiqap
64
Data Submission for Eiqap
64
4 Run Samples
67
Collecting Whole Blood Specimens
67
Storing Specimens
67
Venipuncture Specimens
67
Identifying Samples Overview
68
Automatic Aspiration Mode
68
Manual Aspiration Mode
68
Using the Predilute Mode
68
Setting up Identifiers
69
Universal Tube Processing
69
Overview
69
Using Bar-Code Labels
70
Labeling Requirements-Tubes Without Adapters or Clips
70
Labeling Requirements-Tubes with Sleeve Adapters
71
Labeling Requirements-Tubes with Cassette Clips
72
Clips
73
Cassette Handling
74
Cleaning the
74
LOADING the Using Cassette
75
Clips
75
Installing the Cassette
76
Using Handheld
77
Scanner
78
Setting up Bar-Code
78
Cycling Samples in Automatic Aspiration
79
Cycling Samples in Manual Aspiration
79
Mode
80
Changing the Number of Aspirations Per
81
Changing Test
81
Enabling/Disabling Blood
82
Configuration
82
5 Reviewing Data
83
Reviewing Sample
83
Results & Graphics Overview
83
Reviewing 2D
85
Enlarged View
85
What to Look for
85
Reviewing 3D
86
Retrieving Data
87
Changing the Minimizing the
87
What to Look for
88
Editing Sample
88
Reviewing Histograms
88
Reviewing Patient
89
Processing Results
89
Flagging
89
Rules for Flagging Results
90
8 Setup,8-1
90
Overview
90
Flags
92
Codes
94
Suspect Messages
95
5.12 Definitive Messages
96
Auto Validation Overview
97
6 Shutdown
103
Power On/Off Overview
103
Workstation
103
Analyzer/Diluter
103
Power Supply
104
Performing Daily Shutdown
104
Performing Extended Shutdown and Restart
104
Shutdown
104
Restart
104
Shutting down the Workstation
105
Resetting the Workstation
106
Using the Command Center
106
Using the Keyboard
106
7 Database and todo List
107
Database & todo Window
107
Columns You May Not Understand
107
Finding and Sorting
107
Selecting
107
Transmitting, Printing and Archiving
108
Other Actions
108
Common Functions (Overview)
108
Transmitting Results
108
Printing Reports
108
Archiving Data
109
Deleting Data
109
Deleting Patient Data
109
Deleting Sample Information
109
Printing
110
What Prints When You Select
110
Archiving
112
Formatting a CD for Direct Archiving
112
Archiving to a CD
112
Reviewing Archived Information
113
Saving Sample Results
114
Adding a Sample Request to the todo List
115
Adding a Test to an Existing Set of Sample Results
115
Database Overview
116
How Overwriting and Database Storage Work for Sample Results
116
Setting up Autosequencing
117
RANDOM ACCESS Random Access
118
Overview
119
Results of a Search
120
Name
121
Information
122
Setup
123
Information
124
Values
126
Information
127
Controls
128
Analysis
129
Analysis
130
Controls
131
Identifier
132
Range
133
8.13 Setting up Reporting Units
134
Manually Setting up Controls in Units Other than US1 or US2
135
8.14 Setting up Flagging Limits
136
Flagging Preferences
137
Defining Definitive Messages
138
Editing Existing Flagging Limits
138
8.15 Setting up Rules for Flagging Sample Results
139
Defining Delta Check Criteria
140
Defining Reflex Manager Criteria
141
Setting up the Rule Environment
141
8.16 Setting up the RBC Histogram Normal Range
142
8.17 Setting up Reports
143
Show Last Name before First Name
143
8.18 Setting up Institution Details
144
8.19 Setting up Lis / His Communications
144
Setting up Auto Validation
145
Sending LH
148
8.20 Changing an Instrument Name
148
8.21 Reviewing Workstation Settings
148
8.22 Setting up User Access Levels
149
Changing Your Password
149
8.23 Changing Physician List
151
Adding to the List
151
Deleting from the List
151
Editing the List
151
8.24 Changing Location List
152
Adding to the List
152
Editing the List
152
Deleting from the List
153
8.25 Setting up Database Storage Limits
153
Setting up Screen Saver
153
Setting up Colors
154
Setting up Date and Time
154
Setting up a New Printer
155
Setting up Your Default Printer
155
8.26 Run Configuration Window
156
Changing Your Default Printout Format
157
Changing Your Default Report Layout
157
Setting up Which Results to Print Automatically
157
Setting up Which Results to Transmit Automatically
158
Setting up When to Make a Slide
159
Turning Autocollation OFF/ON
160
Specifying Default Control Lot Numbers
161
Changing the Active Printer
162
COULTER Tubes
169
Kabe
170
Ldm
171
Workstation
172
Workstation
173
Trademarks
181
Advertisement
Beckman Coulter LH 780 Instructions Manual (244 pages)
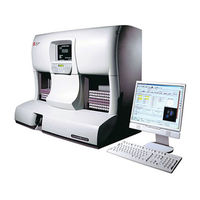
Hematology Analyzer
Brand:
Beckman Coulter
| Category:
Laboratory Equipment
| Size: 8 MB
Table of Contents
Table of Contents
5
Index
16
Calibration
18
Results
19
Check
20
Results
21
Procedure
22
Window
23
Clean
24
Needed
25
Mode
26
Information
27
Aspiration Mode
28
Overview
29
Plate
30
For Analyzer
31
Bleaching Apertures
32
Solution
33
Bleach
34
Bath
35
Bath
36
Blood.
37
Procedure
38
Bath
39
Bath
40
Blood.
41
Zapping Apertures
42
Sections)
43
Bsv
44
C Clean BSV
47
Location
48
Bsv
49
Flushing System
50
Plate
51
Cell
52
Chamber
53
Wipe
54
Procedure
55
Bath
56
Prime
57
Drain
58
Clear
59
Belt
60
Workstation
61
It 3800)
62
Reader
64
Summary
65
Order
66
Summary
67
Order
69
Plate
72
Replacement Procedures
75
Bath
76
M. Press
77
Procedure
77
Instrument
78
Cord
79
Compartment
80
Clip
81
Replacing Chokes
82
Reconnect the Primary Power Cord
83
Replacing Needle
83
Cartridge
84
Tubing
85
Needle
86
Turn on the Main Breaker on the Power Supply
87
Location
87
Check for Leaks and Air Bubbles
88
Close the Bath Compartment
88
Press
88
Chamber
88
Tubing
90
O-Rings
91
Blocks
92
Compartment
93
Summary
94
Procedure
95
Valve
96
Valve
97
Routed.
98
Logbook
99
Tubing
100
Container
101
Mode
103
Voltage
104
Information
105
Database
106
Time
107
Detector
108
Scanner
110
Settings
111
Codabar
112
Troubleshooting
113
Electronic Tests
114
Reagent Troubleshooting
115
Chamber
116
Go to the Numeric Keypad
116
Press
116
Select
116
Active
117
Tank
118
Cleaning Apertures
119
Control—Diff
121
Control—Retic
122
Volume
124
Volume
125
Bath
126
Prime
127
Test
129
Reagent
130
Reagent
131
Priming Diluent
132
Solution
133
Test
134
Baths
135
Dispensing Retic Stain
136
Solution
137
Control
138
Ensure the Pneumatics Are on
126
Place a Cassette Containing Tubes in each Cassette Position on the Rocker Bed to the Right of the Tube Detector
139
Press to Stop the Tube Advance. the Numeric Keypad Displays FUNCTION
139
Remove the Cassette from the Rocker Bed
139
Monitoring Low Vacuum
139
Go to the Analyzer Screen
144
To Move the Cassette through the Piercing Station One Tube Position at a Time. the Numeric Keypad Displays TUBE ADVANCE While the Instrument Performs this Function
139
Press MAIN MENU
144
Press ANALYZER FUNCTIONS
144
Test
144
Test
145
Card
147
Logbook
151
Cover
152
Autostop
153
Autostop Options
154
Lines
155
Error Messages
165
About, Workstation Messages
166
Diluter Errors
168
Non-Diluter Errors
169
Workstation Messages
213
Beckman Coulter LH 780 Operator's Manual (174 pages)
Brand:
Beckman Coulter
| Category:
Measuring Instruments
| Size: 8 MB
Table of Contents
Warnings and Precautions
2
Revision Status
3
Introduction
5
How to Use Your Coulter Lh 700 Series System Hard-Copy Manuals
5
About this Manual
6
Online Help System
6
Conventions
6
Table of Contents
7
Contents
8
Fuse and Function
13
Intended Use
13
Method History
13
System Components
14
Slidemaker (Front View)
14
Slidemaker Screen
14
Power On/Off
14
Reset Switch
15
Regulators (Slidemaker)
15
Vacuum Accumulator
15
Catch Tray
16
Slide Cassette
17
Input Queue
17
Output Queue
18
Ejector
18
Truck
19
Shuttle
19
Dispense Module
20
Pusher Bars
20
Main Fluidics
21
Dryer
21
Platen and Elevator
21
Basket Queue
22
Label Printer
22
Printer Ribbon
23
Needle Changes
23
Reagents
24
Installation
25
Delivery Inspection
25
Special Requirements: Hardware
25
Space and Accessibility
25
Electrical Input
26
Ambient Temperature and Humidity
26
Air Conditioning
26
Ventilation
26
Drainage
26
Special Requirements: Software
27
Interunit Connections
27
Fluid, Pressure and Vacuum Connections
27
Power and Signal Cables
29
Operation Principles
31
Slide and Sample Flow
31
Slide Request
31
Slide Preparation
31
Sample Aspiration
31
Slide Labeling
31
Sample Dispensing
31
Smear Production
31
Smear Drying
32
Basket Filling and Unloading
32
Next Sample
32
Choosing Slides
32
Storage and Handling
32
Specifications/Characteristics
33
Physical Specifications
33
Dimensions
34
Power
34
Input
34
Consumption
34
Recommended Reagents
34
Sample Volume
34
Aspirated Volume
34
Dispensed Volume
34
Slide Specifications
35
Slide Dimensions
35
25 MM X 75 MM Slide
35
26 MM X 76 MM Slide
35
Other Slide Parameters
36
Material
36
Color and Optical Properties
36
Precleaning
36
Boiling and Solubility
36
Ribbon Specifications
37
Performance Characteristics
37
Precision
37
Carryover
38
Accuracy
38
Quality Control Processing with LH Slidemaker
39
One-Time Action
39
Per Control Run
39
Operating Procedures
41
Slidemaker Screens
41
Main Menu Screen
41
Routine Functions
41
Special Functions
41
Run Mode
42
Special Cycles
42
Run Mode Screen
42
Slidemaker Setup
42
Setting up Slidemaker
42
Ensuring the Slidemaker Is Enabled
43
System Setup - [Communications]
43
Run Configuration - Slidemaker Tab
43
Starting up the Slidemaker
43
Procedure
43
Using Slides, Cassettes and Baskets
44
Loading Slides into a Cassette
44
Procedure
44
Loading Slide Cassettes
46
Procedure
46
Removing Slide Cassettes
47
Procedure
47
Locking a Slide Cassette
48
Procedure
48
Unlocking a Slide Cassette
48
Loading Baskets
49
Procedure
49
Unloading Baskets
50
Procedure
50
Checking Smear Quality
50
Shutdown
52
Shutting down the Slidemaker
52
Procedure
52
Extended Shutdown (Slidemaker)
53
Procedure
53
Cleaning/Replacement Procedures
55
Cleaning Procedures
55
Cleaning and Replacing Air Filter
55
Procedure
55
Cleaning Blood Spills and Broken Slides
57
Procedure
57
Cleaning a Catch Tray
60
Procedure
60
Cleaning the Dispense Probe and Rinse Cup
61
Procedure
61
Clearing a Clogged Dispense Probe and Rinse Cup
65
Procedure
65
Priming/Backwashing Slidemaker
72
Procedure
72
Flushing the Slidemaker (Bleach System)
72
Replacement Procedures
73
Replacing Slidemaker Fuses
73
Procedure
73
Replacing the Slidemaker Label Roll
74
Procedure
74
Replacing the Slidemaker Printer Ribbon
76
Procedure
76
Overview
79
Expiration Dates and Slide Storage Conditions
79
Temperature and Humidity Recommendations
80
Slidejams or Debris
80
Checking the Dryer
80
Procedure
80
Checking the Dryer Temperature
82
Testing the Slidemaker Dryer and Heater
83
Procedure
83
Checking the Pusher Bars
85
Procedure
85
Checking the Shuttle
87
Procedure
87
Checking the Slide Cassette
89
Procedure
89
Checking the Slide Ejector Module
90
Procedure
90
Checking the Truck
92
Procedure
92
Slide Basket/Cassette
95
Advancing a Slide Basket
95
Procedure
95
Unlocking a Slide Cassette
95
Label Printing
96
Testing Label Printing
96
Procedure
96
Saving Printer Label Intensity as Default
96
Rebooting the Slidemaker Printer
97
Procedure
97
Decreasing Slidemaker Printer Label Intensity
97
Increasing Slidemaker Printer Label Intensity
98
Procedure
98
Reagents and Reagent Reservoirs
98
Draining the Slidemaker
98
Draining the Slidemaker Vacuum Accumulator
99
Procedure
99
Priming/Backwashing Slidemaker
99
Priming Reagent Reservoirs
100
Procedure
100
Hardware
100
Checking Pneumatic/Power Supplies (Slidemaker)
100
Testing the Slidemaker Keypad
101
Procedure
101
Testing the Slidemaker Display
101
Testing the Slidemaker Dryer and Heater
102
Procedure
102
Viewing Slidemaker Settings
102
Viewing Slidemaker Errors on the Slidemaker
103
Procedure
103
Slidemaker Error Messages
105
Advertisement
Advertisement
Related Products
Beckman Coulter Cell Lab Quanta SC
Beckman Coulter Optima LE-80K
Beckman Coulter Optima L-100K
Beckman Coulter Optima L-90K
Beckman Coulter COULTER LH 750 System
Beckman Coulter Coulter LH 700 Series
Beckman Coulter 45 Ti Rotor
Beckman Coulter Airfuge
Beckman Coulter Allegra 21 Series
Beckman Coulter Allegra 21R
Beckman Coulter Categories
Laboratory Equipment
Measuring Instruments
Cash Counter
Medical Equipment
Desktop
More Beckman Coulter Manuals
Login
Sign In
OR
Sign in with Facebook
Sign in with Google
Upload manual
Upload from disk
Upload from URL