Xerox 2101 User Manual
Xerox 2101: user guide
Hide thumbs
Also See for 2101:
- Configuration manual (192 pages) ,
- Customer release notes (14 pages) ,
- Getting started manual (12 pages)
Table of Contents
Advertisement
Quick Links
Download this manual
See also:
Configuration Manual
Advertisement
Table of Contents

Related Manuals for Xerox 2101


Summary of Contents for Xerox 2101
- Page 1 Xerox 2101 user guide...
- Page 2 , The stylized X, and all Xerox product names and product numbers mentioned in this publication are trademarks of XEROX CORPORATION. Other company brands and product names may be trademarks or registered trademarks of the respective companies and are also acknowledged.
-
Page 3: Preface
As a member of the International Energy Star Program, Xerox confirms this product satisfies the requirements for the international Energy Star Program program. The following web site contains a knowledge database where you can find information on the Xerox 2101. www.xerox.com/support... -
Page 4: Features In Brief
Features in Brief The following is a list of the main features of this machine in brief. The illustrations in this manual are created as realistic as possible to help in making the explanation of the features easier to understand. ●... -
Page 5: Erasing Edges
Features in Brief ● ● Stapling Erasing Edges You can staple and output copies. You can erase shadows that might form on the sides or center portion of bound document image. Report “5.5 Stapling” “5.10 Erasing Edges” ● Punching Holes ●... -
Page 6: Adjusting Image Quality
Features in Brief ● ● Separating Facing Pages Adjusting Image Quality You can make copies from a bound document onto You can prevent copying of images from reverse separate sheets. page and adjust contrast automatically. “5.13 Copying Facing Pages onto “5.17 Adjusting Image Quality”... -
Page 7: Adjusting Density Control
Features in Brief ● ● Adjusting Density Control Inserting Separators You can adjust color density of image in terms of You can insert blank sheets of paper as separators low/medium/high density levels. between transparencies. Report “5.20 Adjusting Density Control” “5.23 Inserting Transparency Separators” ●... -
Page 8: Copying With Covers
Features in Brief ● ● Copying With Covers Copying on Tab Paper You can add color or heavy weight paper as covers You can copy on tab paper for copies. Report Report Report “5.29 Copying on Tab Paper” “5.26 Copying With Covers” ●... -
Page 9: Scanning Documents
Features in Brief ● ● Documents With Different Settings Saving Scanned Data You can scan documents of different copying You can save scanned data with copying settings settings by batches and then output the copies on the hard disk as a copy file. By connecting to a together. -
Page 10: Table Of Contents
Contents Preface..................................i Features in Brief................................ii Contents..................................viii Using This Guide............................... xiii Conventions ................................xv Safety Notes................................xvi The Objective of the International Energy Star Program ..................xxiii Illegal Copies................................xxiv Chapter 1 Knowing Your Copier Main Components and Their Functions ..............2 Switching On/Off Power ................... -
Page 11: Contents
Contents 3.2.4 Automatic Image Rotation................. 50 Chapter 4 Basic Copy Procedure Basic Copying Procedures..................52 4.1.1 Making Copies ..................52 4.1.2 Checking Settings ..................57 4.1.3 Programming Ahead ................. 60 4.1.4 Checking Job Status ................. 62 4.1.5 Priority Printing..................64 Interrupting Copying.................... - Page 12 Contents 5.20 Adjusting Density Control..................137 5.21 Adjusting Sharpness .................... 139 Stored Basic Features Added Features Image Quality Output Format Job Templates 5.22 Multiple-Documents Copying on One Copy ............141 5.23 Inserting Transparency Separators..............145 5.24 Outputting Face Up/Down..................149 5.25 Making Multiple Copies on a Single Sheet............
- Page 13 Contents 7.2.5 Sending Scanned Files Automatically............. 250 Scanning Documents ................... 263 7.3.1 Scanning Documents................264 7.3.2 Checking Saved Files ................269 7.3.3 Changing File Name ................271 7.3.4 Deleting Files ..................274 Installing the Scanner Driver ................276 7.4.1 About the Operating Environment............276 7.4.2 Installing the Scanner Driver..............
- Page 14 Contents Solving Curled Output ..................369 Chapter 10 Daily Care 10.1 Cleaning Copier ....................372 10.2 Consumables ....................... 373 10.3 Replacing Toner Cartridge ................... 376 10.4 Replacing Waste Toner Bottle A ................379 10.5 Replacing Staple Cartridge .................. 381 10.6 Emptying Punch Scrap Container ................ 385 10.7 Checking Meter ....................
-
Page 15: Using This Guide
Using This Guide This product is designated as 2101 in all markets except for those served by Fuji Xerox (FX) and FX Asian Pacific (FXAP). In FX and FXAP, the product designation is 1015S. The organization of this manual is as follows. - Page 16 Using This Guide Chapter 9 Troubleshooting Explains how to deal with paper/document jams and error messages. Read this chapter when you encounter problems with your machine. Chapter 10 Daily Care Explains how to carry out maintenance of your machine, like cleaning, replacing consumables like toner cartridge and checking meters.
-
Page 17: Conventions
Conventions This manual uses the following conventions: When an optional product is needed Touch panel display before a procedure Select buttons on touch panel display Buttons/features on touch panel display Buttons on control panel Additional information about operations and features. Points to pay attention to. -
Page 18: Safety Notes
Safety Notes Read these safety notes carefully before using this product to ensure you operate the machine safely. This section explains the safety symbols used throughout the manual is used to alert operators to an operating procedure, practice, or condition that, if not strictly observed, can result in severe injury or loss of life. - Page 19 Safety Notes With staple finisher (optional) When moving the machine, be sure to unplug the power cord from the outlet. If the machine is moved with the power cord connected, it can cause damage to the cord which could result in fire or electric shocks. When moving the machine, do not tilt it more than 10 degrees.
- Page 20 Disconnect Device 15A branch circuit. If this machine needs to be The power cable is the disconnect device for this moved to a different location, contact a Xerox equipment. It is attached to the back of the ma- service representative.
- Page 21 Xerox representative or unless a procedure is • Use the supplies and cleaning materials only as specifically described in one of the copier/ directed in this manual.
- Page 22 Extra Low Voltage Approval interference when the equipment is operated in a commercial environment. This equipment The 2101 copier/printer is in compliance with generates, uses, and can radiate radio various governmental agencies and national frequency energy and, if not installed and safety regulations.
- Page 23 Safety Notes ■ Locations of warning and caution labels To ensure your safety in operating the copier, please read the warning and caution labels pasted on the internal parts of the machine carefully. Label Label Label Label Label Label Label...
- Page 24 Safety Notes This page is intentionally blank. xxii...
-
Page 25: The Objective Of The International Energy Star Program
The Objective of the International Energy Star Program To protect the global environment and conserve energy resources, the International Energy Star Program encourages the following product features. Fuji Xerox confirms this product satisfies the requirements for this program. ■ Two-sided copying feature This product has a two-sided copying feature to reduce the volume of copy paper used. -
Page 26: Illegal Copies
Illegal Copies Congress, by statute, has forbidden the reproduction of the following subjects under certain circumstances. Penalties of fine or imprisonment may be imposed on those guilty of making such reproductions. 1. Obligations or Securities of the United States Government, such as: Certificates of IndebtednessNational Bank Currency Coupons from Bonds Federal Reserve Bank Notes... - Page 27 Illegal Copies 2. Adjusted Compensation Certificates for Veterans of the World Wars. 3. Obligations or Securities of any Foreign Government, Bank, or Corporation. 4. Copyrighted material, unless permission of the copyright owner has been obtained or the reproduction falls within the “fair use” or library reproduction rights provisions of the copyright law. Further information of these provisions may be obtained from the Copyright Office, Library of Congress, Washington, D.C.
- Page 28 Illegal Copies Canada Parliament, by statute, has forbidden the copying of the following subjects under certain circumstances. Penalties of fines or imprisonment may be imposed on those guilty of making such copies. 1. Current bank notes or current paper money. 2.
- Page 29 Illegal Copies This page is intentionally blank. xxvii...
- Page 30 Illegal Copies xxviii...
- Page 31 Knowing Your Copier Main Components and Their Functions......2 Switching On/Off Power ............6 Using the Touch Panel Display .........12 Entering Password.............21 Using the Foreign Interface Device ........22...
-
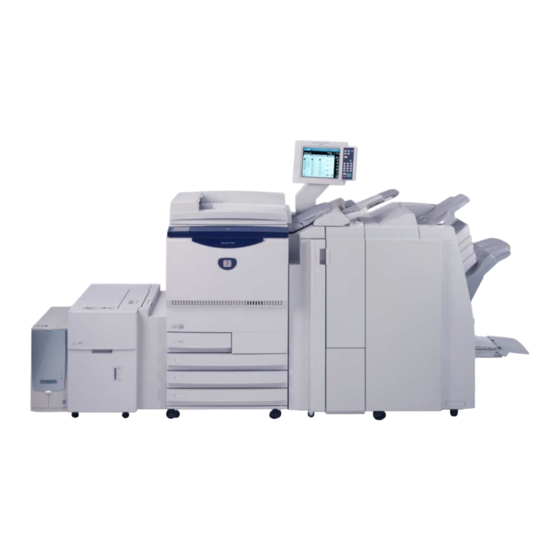
Page 32: Main Components And Their Functions
Main Components and Their Functions This section explains the names and functions of every part of the copier. ● The diagram below shows how the machine will look like when all the optional products are installed. Name Function Document cover To press down the document that is placed on the document glass. - Page 33 1.1 Main Components and Their Functions Back Back Name Function Power switch Switches on/off the power of the machine. Document output tray Receives documents that are scanned and output from the machine. Lower right cover Open to clear paper jams. Fuser unit Fuses toner to fix image on the paper.
- Page 34 1.1 Main Components and Their Functions ● Optional kit High Capacity Feeder (HCF) ● Optional kit Booklet Maker Finisher and Folding Unit (Z and C)
- Page 35 1.1 Main Components and Their Functions Name Function Tray 6 (HCF) (optional) Load the paper. Top cover Open to clear paper jams in tray 6. Top right cover Open to clear paper jams in tray 6. Shift tray 6 to the left to open. Tray 7 Load paper for covers or transparency separators.
-
Page 36: Switching On/Off Power
Switching On/Off Power Switch on the power of the copier before you begin copying. The server will then start automatically. After the power is on, the machine will take about 7 minutes (for 100 V model) or 6 minutes (for 200 V, 220-240 V models) to warm up before you can start making copies. - Page 37 1.2 Switching On/Off Power The message displayed changes to “Ready to copy” after X minutes. ● The content of error messages and screen to be displayed may differ with the optional products installed. ● ■ Switching off power Procedure Check that all copying is completed.
-
Page 38: Saving Energy
1.2 Switching On/Off Power 1.2.2 Saving Energy This machine has a Power Saver feature that reduces the power consumption of the machine in two stages, namely, the Low Power Mode and Power Saver Off Mode: ● Low Power Mode Power consumption Standby mode 285 W or less about 460 W... -
Page 39: Exiting The Power Saver Mode
1.2 Switching On/Off Power ■ Switching to the Power Saver Mode manually You can also switch to Low Power Mode manually. Procedure Press Power Saver. The machine enters the Low Power mode. When you need to ● Once the machine is in the Low Power Mode, it will enter the Power make copies, press the Power Saver Off Mode if the machine... -
Page 40: Auto Start
1.2 Switching On/Off Power 1.2.3 Auto Start While waiting for the machine to warm up after the power is switched on, you can press the Start button to program copying. This feature is called Auto Start. ■ Enabling Auto Start To use the Auto Start feature, load the document, specify the desired settings and then press the Start button. -
Page 41: Breaker Switch
1.2 Switching On/Off Power 1.2.4 Breaker Switch There are two breaker switches on this machine. The breaker switch is usually at the positions shown in the diagram below. If the machine will not be used for a long time or when moving the machine, push the switch down or to the right. To switch it on, push it up;... -
Page 42: Using The Touch Panel Display
Using the Touch Panel Display This section explains the names and functions of every part of the main control panel and the messages that appear in the touch panel display. 1.3.1 Main Control Panel This section explains the names and functions of every part of the main control panel. * The * button cannot be selected. - Page 43 1.3 Using the Touch Panel Display Name Function Touch panel display Displays the respective features and machine status. Touch this panel directly to select the features and instructions displayed. “1.3.2 Touch Panel Display” Job Status button Press to check the presently processed job. On the Job Status screen, once a job is selected, you can pause it if it is being scanned or delete it if is paused.
-
Page 44: Touch Panel Display
1.3 Using the Touch Panel Display 1.3.2 Touch Panel Display The touch panel display is located at the left side of the control panel. It displays the messages and feature buttons required for performing a copy job. By touching the display with your fingers, you can make settings or select required screens. - Page 45 1.3 Using the Touch Panel Display ● Free Memory Indicates the amount of remaining hard disk memory in a percentage that can be used for saving copied or scanned document data. ● Free Memory doesn’t mean the amount of remaining memory that can be used for scanning. ●...
-
Page 46: Copier Screen
1.3 Using the Touch Panel Display 1.3.3 Copier Screen There are four tabs for these screen displays: Basic Features, Added Features, Image Quality, Output Format and one button: Stored Job Templates. The respective screens of these tabs are called Basic Features screen, Added Features screen, Image Quality screen, Output Format screen or Stored Job Templates screen. - Page 47 1.3 Using the Touch Panel Display ● Each feature is at factory setting. This default setting can be changed in the Tools Mode. For details, refer to “8.3 Setting Tools Mode”. ■ Copier Screen Message Area Document Count Number of copies Stored Job Templates button Selection button ●...
- Page 48 1.3 Using the Touch Panel Display ■ Buttons in each screen When a feature button is selected, the screen displaying the settings for that selected button will be shown. After selections are made on this screen, select the Save button to confirm the selections and exit that screen.
-
Page 49: Other Screens
1.3 Using the Touch Panel Display 1.3.4 Other Screens ■ Password Entry screen When the Auditron Mode is enabled, the following screen will be displayed. Enter your password by using the keypad on the screen and the copier screen will be displayed. “1.4 Entering Password”... -
Page 50: Operations On Saved File
1.3 Using the Touch Panel Display 1.3.5 Operations on saved file You can do the following operations on a saved copy file: ● Selecting/deselecting file Select a file from the displayed list. Select the file again for deselection. “Order” displays numbers in the sequence of file selection. If a file in the middle of sequence is deselected, the succeeding file numbers are incremented one each. -
Page 51: Entering Password
Entering Password If the Auditron Mode is enabled, you need to enter your password (by department/user) before you can start making copies. This section explains how to enter the password and to display the Password Entry screen. Approach your Auditron Administrator if you need a user password. ●... -
Page 52: Using The Foreign Interface Device
The following screen will be displayed if a Foreign Interface Device (optional) is installed. Optional Follow the instructions. Please insert Xerox Charge Card. Please insert Xerox charge card. If another type of copy control device is used, follow the instructions displayed on the screen. -
Page 53: Chapter 2 Loading Paper
Loading Paper Paper to Use ...............24 Loading Paper/Changing Paper Size of Paper Trays..27 Checking/Changing Paper Supply Settings ....37... -
Page 54: Paper To Use
• Contact your Xerox Customer Support Center if you wish to use any other paper types. ● Do not use transparencies and paper meant for ink jet printer as they can cause machine breakdown. - Page 55 2.1 Paper to Use ● Paper stock that can be used For each paper tray, use paper with the following paper weight, paper type and paper tray capacity: Paper weight Paper tray Paper type Lbs. weight Tray 1 18 - 28 lb. bond Normal 64 - 105 g/m Trays 2, 3, 4...
-
Page 56: Storing And Handling Paper
2.1 Paper to Use ■ Storing and handling paper Take note of the following when storing paper: • Always store paper in a cabinet or at a place with low humidity. Damp paper may cause jams or affect the image quality. •... -
Page 57: Loading Paper/Changing Paper Size Of Paper Trays
Loading Paper/Changing Paper Size of Paper Trays This section explains how to load paper into and change the paper size of trays 1-4, tray 5 (bypass) and the optional tray (HCF) and 7. If paper runs out during copying, the following message will be displayed: “Tray x is out of paper. Load xx paper into the tray.”... - Page 58 2.2 Loading Paper/Changing Paper Size of Paper Trays When changing the paper size: You can change the paper size for trays 2, 3, 4. (1)Remove any paper in the tray. (2)While gripping paper guide lever A, shift it back until the end.
- Page 59 2.2 Loading Paper/Changing Paper Size of Paper Trays (6)Paste the paper size label on the tray. Push the tray in slowly until the end. ● After you have replenished the Once the tray is correctly set, the paper supply, you can press the message, “Press Start button to Start button on the control panel to continue.”...
-
Page 60: Loading Paper In Tray 5 (Bypass)
2.2 Loading Paper/Changing Paper Size of Paper Trays 2.2.2 Loading Paper in Tray 5 (Bypass) Load the following paper in tray 5 (bypass): transparency, postcard, heavy weight paper and other special and non-standard size paper that cannot be loaded in trays 1 - 4 and the optional tray 6 (HCF). - Page 61 2.2 Loading Paper/Changing Paper Size of Paper Trays (2)Lift the paper guide to shift its position. The Standard positions of the paper guide are as follows: Standard 12"/305mm refers to 12 18"; 12.6"/320mm refers to SRA3 (320 450mm/12.6 17.7"). Standard (3)Tighten the screw.
- Page 62 2.2 Loading Paper/Changing Paper Size of Paper Trays Select A/B Series, Inch, or Non-standard as the paper size type, then select the paper size. ● For details on selecting paper size, refer to “5.3 Selecting Paper Tray”. ● Shift the paper guide if you are copying onto the following paper sizes: SRA3 (320 450mm/12.6 17.7") of A/B Series Size;...
-
Page 63: Loading Paper In Tray 6 (Hcf)
2.2 Loading Paper/Changing Paper Size of Paper Trays 2.2.3 Loading Paper in Tray 6 (HCF) The factory setting of the paper size is 8.5×11" or A4 portrait depending on your market area. You can change the paper size to B5 portrait, A4 portrait, or 8.5×11" portrait. ●... - Page 64 2.2 Loading Paper/Changing Paper Size of Paper Trays (3)Insert the guide into the slot desired paper size and tighten the screw. (4)When the paper size is changed to B5 portrait, ● When B5 portrait has been changed remove the horizontal to A4 portrait or 8.5 11"...
-
Page 65: Loading Paper In Tray 7
2.2 Loading Paper/Changing Paper Size of Paper Trays 2.2.4 Loading Paper in Tray 7 The factory setting of the paper size is 8.5×11" or A4 portrait depending on your market area. You can change the paper size to B5 portrait, A4 portrait, or 8.5×11" portrait. Tray 7 is meant for loading paper to be used as separators when copying with transparency separators or covers. -
Page 66: Loading Tab Paper
2.2 Loading Paper/Changing Paper Size of Paper Trays (3)Load the paper, aligning to the front side of the ● Do not load different types of paper tray. in the tray. This may result in paper jam. ● Do not load paper exceeding the maximum fill line. -
Page 67: Checking/Changing Paper Supply Settings
Checking/Changing Paper Supply Settings The types of paper loaded in the respective trays are shown on the screen. The displayed information includes the paper size, orientation, and paper type. This section explains how to check and change the paper supply settings. -
Page 68: Meter Check
2.3 Checking/Changing Paper Supply Settings Procedure Press System Settings/ Meter Check. The Menu screen is displayed. Select System Administrator Mode. A screen to confirm whether you want to switch control panel appears. Select Switch. ● You can also switch the screen by pressing Stop on the main control panel and 2 on the keypad at the same time. -
Page 69: Control Panel
2.3 Checking/Changing Paper Supply Settings After a while, the following screen is displayed and operation is switched from the main control panel to the copier control panel. Lift the cover of the copier control panel. Select Tools Mode. ● For details on the Auditron Administration mode, refer to “8.5 Auditron Menu”. - Page 70 2.3 Checking/Changing Paper Supply Settings Enter the tools password by using the keypad and then select Confirm. ● The factory setting of the Tools Password is 11111. If you do not have a password, check with your administrator. ● Each input digit is represented by an asterisk.
- Page 71 2.3 Checking/Changing Paper Supply Settings to select the tray which you want to change setting, and then select Change Settings. The screen of the selected tray is displayed. Here, we will illustrate by selecting Tray 2. Select the desired paper type. ●...
- Page 72 2.3 Checking/Changing Paper Supply Settings Select Back on the screen displayed on the main control panel. Operation is switched from the copier control panel to the main control panel, and after a while, the Copy screen is displayed. ●...
-
Page 73: Chapter 3 Loading Documents
Loading Documents Types of Documents ............44 Loading Documents............46... -
Page 74: Types Of Documents
Types of Documents You can load your document either on the document glass or in the optional Duplex Automatic Document Feeder (DADF). The DADF allows multiple sheets of documents to be loaded and copied. This section explains the types of documents that can be placed on the document glass or loaded in the DADF. 3.1.1 Document Sizes The sizes of documents that can be loaded on the document glass or in the DADF are as follows:... -
Page 75: Special Documents To Note
3.1 Types of Documents 3.1.3 Special Documents to Note ■ Document glass When using the following types of documents for copying, automatic document size sensing might not work and image loss might occur. Resolve the problem accordingly. • Non-standard size documents Specify the document size by selecting Original Size from the Added Features screen. -
Page 76: Loading Documents
Loading Documents This section explains how to load your documents on the document glass or in the DADF. 3.2.1 Loading on Document Glass The following procedure explains how to load document on the document glass. ● When using the document glass, options like 2 -> 2 Sided and 2 -> 1 Sided cannot be selected. ●... - Page 77 3.2 Loading Documents Lower document cover. ● When copying thick document, excessive force to press it against the document glass. The glass may break and injure you. ● When making copies with the document cover open, do not look directly at the copy lamp. It might tire or hurt your eyes.
-
Page 78: Loading In Dadf
3.2 Loading Documents 3.2.2 Loading in DADF The DADF allows you to load up to 50 sheets of documents from 148 210 mm to 297 432 mm. Scanning for copying will begin with the topmost sheet of document and the copies will be output facing down. -
Page 79: Original Orientation
3.2 Loading Documents 3.2.3 Original Orientation This machine comes with the Margin Shift feature that allows you to adjust the position of the image by adjusting its top, bottom, left, right positions. The orientation of the document must be right in order for copying to be done correctly. -
Page 80: Automatic Image Rotation
3.2 Loading Documents 3.2.4 Automatic Image Rotation The machine will automatically rotate the image of the document and make the correct copies even if the document and the paper tray are not in the same orientation.This feature is called Automatic Image Rotation. - Page 81 Basic Copy Procedure Basic Copying Procedures ..........52 Interrupting Copying............65 Copying on Postcards ............67 Copying on Transparency ..........69 Copying on Heavy Weight ..........72 Removing Copies from the Tri-Fold Output Tray ....73 Removing Copies from the Booklet Output Tray ....74...
-
Page 82: Basic Copying Procedures
Basic Copying Procedures This section explains about the basic copying procedures of this machine. It also shows you how to check specified features and status of current jobs, as well as to store programmings for the next job. Before you begin copying, first check that you are in Copy or Copy and Save mode. The factory settings are as follows: 1 ->... - Page 83 4.1 Basic Copying Procedures Check that Copy mode is selected. Select a percentage from Reduce/Enlarge, and Select a paper tray from Paper Supply. “5.2 Enlarging/Reducing Image” “5.3 Selecting Paper Tray” If you select Auto, a paper size matching the size of the document will be automatically selected.
-
Page 84: Press Start
4.1 Basic Copying Procedures Select an option according to your document type. Select Save to specify settings for other features. Enter number copies using ● Press the C button on the control panel to clear any error when keypad. entering the number of sets to be The number of copies will be copied. - Page 85 4.1 Basic Copying Procedures If you select Next Original while scanning documents loaded in the DADF, you can continuously copy the documents. ● The number of copies can be changed on the screen that appears when a stack of documents has been scanned or when you select Stop.
- Page 86 4.1 Basic Copying Procedures ■ Automatic tray switching This feature allows the machine to automatically switch to another paper tray with paper of the same size, orientation, and type to continue with the copy job, when paper in the specified tray runs out. This feature is called Automatic Tray Switching (ATS).
-
Page 87: Checking Settings
4.1 Basic Copying Procedures 4.1.2 Checking Settings You can check settings on the displayed Review screen. For copy files stored in the server, you can check the features specified when saved. ■ Checking settings In the Copy, Save to File, Copy and Save modes, you can check the specified features before pressing the Start button. - Page 88 4.1 Basic Copying Procedures ■ Checking settings of saved files You can check the copy settings of the copy files saved in the server. ● If the build job files and merged files are selected, all the settings for the entire file are displayed. Procedure Select Select Folder to display the Hard Disk (Copy File) screen.
- Page 89 4.1 Basic Copying Procedures This screen will display information like the file name and stored date of the copy file when saved into the server. Select Review on the screen. The Review screen is displayed. Select Close when all the settings have been checked. The display returns to the Review screen.
-
Page 90: Programming Ahead
4.1 Basic Copying Procedures 4.1.3 Programming Ahead Once the scanning of documents loaded on the DADF for copying has begun, you can start to specify settings for the next copy job before you load the next set of documents. Once the current set of documents is scanned, the next set of documents, if loaded, can be scanned immediately. - Page 91 4.1 Basic Copying Procedures Specify settings for any feature, if necessary. When the first set of documents loaded has been scanned for copying, load the next set of documents, and press Start. Repeat steps to continue scanning of other documents. ●...
-
Page 92: Checking Job Status
4.1 Basic Copying Procedures 4.1.4 Checking Job Status On the Job Status screen, you can check job status like whether the documents are being scanned for copying or a print job is being carried out. You can also pause or cancel jobs that are displayed on the list. ●... -
Page 93: Deleting Jobs
4.1 Basic Copying Procedures ■ Deleting jobs To delete paused jobs or to stop copying or scanning of documents. Procedure Select a job whose job status is Stop/User Action, and then press Delete Job. ● You can select Delete Job only when the job that has been paused is selected. -
Page 94: Priority Printing
4.1 Basic Copying Procedures 4.1.5 Priority Printing When there are multiple jobs waiting to be printed, you can give a particular job higher priority so that it is printed first. A job that is assigned higher print priority will be output immediately following the job that is currently being printed. -
Page 95: Interrupting Copying
Interrupting Copying You can interrupt a current copy job to proceed with a more urgent job by pressing the Interrupt button. Once you press the Interrupt button, the current copy job will be paused as soon as it is possible. The interrupted copy job can be resumed once you exit the Interrupt mode. - Page 96 4.2 Interrupting Copying After the interrupt copy job has been done, press Interrupt. The interrupt indicator will be off and the machine will exit the Interrupt mode. Remove documents that are loaded in the DADF for interrupt copying. Press Start. The job interrupted in Step 1 resumes.
-
Page 97: Copying On Postcards
Copying on Postcards This section explains how to copy on postcards. For copying onto postcards, use tray 5 (bypass). ● Usable postcards depend on the weight, size, and paper type. Contact your Customer Support Center for more information. ● Do not load the postcards into trays 1, 2, 3, and 4 and the optional trays 6 (HCF) and 7 as it may cause machine breakdown or paper jam. - Page 98 4.3 Copying on Postcards Select A/B Series Size or Postcard for paper size. ● “When Postcard is selected for paper size, Heavywt 2 is automatically selected for Paper Type. Select Save to specify settings for other features. Using the keypad, enter the number of copies desired and then press Start on the control panel.
-
Page 99: Copying On Transparency
Copying on Transparency To copy on transparencies, load them in tray 5 (bypass) and then select the correct paper type for copying. ● Do not load the transparencies into trays 1, 2, 3, and 4 and the optional trays 6 (HCF) and 7 as it may cause machine breakdown or paper jam. - Page 100 4.4 Copying on Transparency Select Save to specify settings for other features if necessary. Load separators needed. Proceed to Step 6 if no separator is required. Load the separators in the same orientation and of the same paper size as the transparencies. Load the separators in trays 1-4 or the optional trays 6 (HCF) or 7.
- Page 101 4.4 Copying on Transparency When On is selected for Transparency Separators, option buttons to specify whether to print on the separators and Paper Tray Settings are displayed on the right of the screen. Select Blank Separators to make copies with blank separators inserted. Select Printed Separators to make copies on both the transparencies and separators inserted.
-
Page 102: Copying On Heavy Weight
Copying on Heavy Weight To copy on special papers like heavy weight paper, load them in tray 5 (bypass) and then select the correct paper type for copying. “2.1 Paper to Use” Procedure Load the documents. “3.2 Loading Documents” Place the paper with the side for copying facing up “2.2.2 Loading Paper in Tray 5 and then insert the paper... -
Page 103: Removing Copies From The Tri-Fold Output Tray
Removing Copies from the Tri-Fold Output Tray This section explains how to remove the copies from the tri-fold output tray. ● Keep the power on while you remove the copies from the tri-fold output tray. If you turn off the power and press the Tri-Fold Output Tray button, the tray will not open. -
Page 104: Removing Copies From The Booklet Output Tray
Removing Copies from the Booklet Output Tray This section explains how to remove the copies from the booklet output tray. ● When the booklet output tray is full, a message appears on the screen. Follow the instructions to remove the copies. ●... - Page 105 4.7 Removing Copies from the Booklet Output Tray ■ Lowering the Flap of the Booklet Output Tray If you lower the flap of the booklet output tray, the copies will drop from the tray. If you place a box under the tray, it will temporarily hold the copies and you can make a large volume of copies without removing the output each time the tray fills up.
- Page 106 4.7 Removing Copies from the Booklet Output Tray...
-
Page 107: Making Copies
Making Copies 1-Sided/2-Sided Copying Sided]........78 Enlarging/Reducing Image [Reduce/Enlarge] ....84 Selecting Paper Tray [Paper Supply] .......92 Sorting Output [Output].............97 Stapling [Output]..............99 Punching Holes [Output]..........102 Z-Folding [Output/Finishing/Z Fold].......105 Making Sample Copies [Sample Set] ......108 Loading Documents in Batches [High Document Volume]..........110 5.10 Erasing Edges [Edge Erase] ........... -
Page 108: 1-Sided/2-Sided Copying
1-Sided/2-Sided Copying 2 Sided This feature allows you to make 2- or 1-sided copies from 1- or 2-sided documents. ● The factory setting for this 2-Sided feature is 1 -> 1 Sided. ● The factory setting can be changed in the Tools Mode. For details, refer to “8.3 Setting Tools Mode”. 5.1.1 1-Sided Copying The following procedure explains how to make 1-sided copies from 1- or 2-sided documents:... - Page 109 5.1 1-Sided/2-Sided Copying When More is selected: (1)Select 1 -> 1 Sided or 2 -> 1 Sided. ● When 2 -> 1 Sided is selected, (2)When 2 -> 1 Sided is selected, specify Originals. specify in Originals, how the two sides of the 2-sided document are When 1 ->...
-
Page 110: 2-Sided Copying
5.1 1-Sided/2-Sided Copying 5.1.2 2-Sided Copying The following procedure explains how to make 2-sided copies from 1- or 2-sided documents: 1-sided document 2-sided document 2-sided copy Report Report Report 1st page 2nd page ■ Making 2-sided copies from 1-sided documents To make 2-sided copies from 1-sided documents: ●... - Page 111 5.1 1-Sided/2-Sided Copying When More is selected: (1)Select 1 -> 2 Sided. ● When 2 -> 1 Sided is selected, specify in Originals, how the two sides of the 2-sided document are (2)Specify Copies. printed. • Select Head to Head for documents with both sides printed in the same direction.
- Page 112 5.1 1-Sided/2-Sided Copying ■ Making 2-sided copies from 2-sided documents To make 2-sided copies from 2-sided documents: Procedure Load the documents. When making 2-sided copies from 2-sided documents, load the documents in “3.2 Loading Documents” the DADF. From 2 Sided, select 2 -> 2 Sided. Select More to specify Originals or Original Orientation.
- Page 113 5.1 1-Sided/2-Sided Copying (3)Check Original Orientation. Confirm the documents are loaded in the direction as specified in Original “5.14 Specifying Image Orientation” Orientation. ● Head to Top: ● Head to Left: Head Head Head Head (4)Select Save to specify settings for other features if necessary.
-
Page 114: Enlarging/Reducing Image
Enlarging/Reducing Image Reduce/Enlarge This feature allows you to select a percentage (%) to enlarge or reduce your copy image. There are two ways to specify this %: a similar or different % for the length and width of the image. ●... - Page 115 5.2 Enlarging/Reducing Image Copy to Edge When the document image fills right to the paper edge, there might be an image loss at the edge if it is copied at 100%. Selecting Copy to Edge will prevent this as the document image will be copied at a % slightly less than 100%.
- Page 116 5.2 Enlarging/Reducing Image When More is selected: (1)Select R/E Presets, and select the %. (2)Select Copy to Edge when you want to make copies slightly smaller than the document. (3)Select Save to specify settings for other features if necessary. ● To cancel any setting, select Cancel. Using the keypad, enter the number of copies desired and then press Start on the control panel.
- Page 117 5.2 Enlarging/Reducing Image ■ Specifying your own % You can specify your own % for copying. The % that can be set ranges from 25 to 400%, in 1% increments. Copy Document 141% 173% 200% 245% 282% 115% 141% 163% 200% 231% 100%...
- Page 118 5.2 Enlarging/Reducing Image Select Variable %, and specify the % by using the keypad on the screen or ● To amend a specified %, select Clear and then re-enter the value. Select Save to specify settings for other features if necessary. ●...
-
Page 119: Different % For Length And Width
5.2 Enlarging/Reducing Image 5.2.2 Different % for Length and Width You can change the length or width of the document in different % for copying. Options available are: Independent X-Y % Select a % each for the length (Y) and width (X) within the range of 25 to 400%, in 1% increments. Auto-Fit The % for the length (Y) and width (X) are automatically specified according to the paper size for copying. - Page 120 5.2 Enlarging/Reducing Image Select the option to specify the % for copying the length and width. When Independent X-Y % is selected: The display for Independent X-Y % appears. Use the respective to specify the % for Y and X. When for XY is used, you can change the values of X and Y at the same time.
- Page 121 5.2 Enlarging/Reducing Image Check Original Orientation. Confirm the documents are loaded in the direction as specified in Original “5.14 Specifying Image Orientation” Orientation. ● Head to Top: ● Head to Left: Head Head Head Head Select Save to specify settings for other features if necessary. ●...
-
Page 122: Selecting Paper Tray
Selecting Paper Tray Paper Supply This feature allows you to select a paper tray loaded with the required paper size for copying. There are two ways to do this: the tray is automatically selected to match the document size or is manually specified. ●... -
Page 123: Manually Selecting Paper Tray
5.3 Selecting Paper Tray Using the keypad, enter the number of copies desired and then press Start on the control panel. Copies will be made. ● ● ● 5.3.2 Manually Selecting Paper Tray The following procedure describes how to select a paper tray loaded with the desired paper size for copying. - Page 124 5.3 Selecting Paper Tray Using the keypad, enter the number of copies desired and then press Start on the control panel. Copies will be made. ● ■ Selecting tray 5 (bypass) To load paper in tray 5 for copying when it cannot be loaded in trays 1, 2, 3, or 4. You must specify the paper size and paper type when using tray 5 (bypass).
- Page 125 5.3 Selecting Paper Tray Select the paper size. When A/B Series Size is selected: Select the specific paper size. ● SRA3 refers to the size, 320 ✕450 mm or 12.6 ✕17.7”. When you make copies on SRA3-sized paper, adjust the paper guide to the 12.6"/320 mm position.
- Page 126 5.3 Selecting Paper Tray Specify the setting for Paper Type. Select Save to specify settings for other features if necessary. ● To cancel any setting, select Cancel. Load paper into tray 5 (bypass) if it is empty. Using the keypad, enter the number of copies desired and then press Start on the control panel.
-
Page 127: Sorting Output
Sorting Output Output Optional This feature allows you to sort copies output. Options available for this feature are: Auto For documents placed on the document glass, copies are output by page numbers (e.g. page 1, 1, 1…2, 2, 2…3, 3, 3…). For documents loaded in the DADF, copies are output by page sequence (e.g. page 1, 2, 3…1, 2, 3…1, 2, 3…). - Page 128 5.4 Sorting Output Procedure Load the documents. “3.2 Loading Documents” From Output, select how the copies are to be sorted. ● If you are using the DADF to copy more than 51 sheets of documents, load the documents in batches. By using the High Document Volume feature, you can load documents in batches and yet copy them with the...
-
Page 129: Stapling
Stapling Output Optional This feature allows you to output copies collated and stapled by sets. Copies are output offset and can be stapled in two positions. The number of sheets that can be stapled is 2 to 50 (FX P paper) using the staple cartridge for 50 sheets (optional) and 2 to 100 (FX P paper) using the staple cartridge for 100 sheets. -
Page 130: Load The Documents
5.5 Stapling ● When a message prompting you to replace staple cartridge appears, the machine will not start even if you press the Start button. To proceed, replenish the staples first. For details, refer to “10.5 Replacing Staple Cartridge”. ● When the positions for punching and stapling are in conflict (e.g. stapling on the top left and punching on the right), the machine will not start even if you press the Start button. - Page 131 5.5 Stapling Form Stapling, select the staple position. Check Original Orientation. ● For details on the setting of Ensure that the correct orientation is selected. punching, refer to “5.6 Punching Holes”. Select Save to specify settings for other features if necessary. ●...
-
Page 132: Punching Holes
Punching Holes Output Optional When the optional finisher is installed, this feature allows you to output copies with punched holes. You can select the number of punch holes from 2 Holes or 4 Holes. ● Suitable paper sizes for punching and punch positions The following paper sizes and positions are suitable for punching: Position Left... - Page 133 5.6 Punching Holes Procedure Load the documents. “3.2 Loading Documents” From Output, select how the copies are to be sorted. Select Collated/Stapled/Punched.
- Page 134 5.6 Punching Holes From Punching, select the punching positions. Check Original Orientation. ● For details on the setting of stapling, Ensure that the correct orientation is selected. refer to “5.5 Stapling”. Select Save to specify settings for other features if necessary. ●...
-
Page 135: Z-Folding
Z-Folding Output/Finishing/Z Fold Optional When the optional folding unit (Z and C) is installed, the feature allows you to make Z-folded copies. This section explains how to Z-folded copies using the Mixed Size Originals and stapling/punching features as an example. Available paper sizes for Z-folding are B4, A3, 11×17", and 8 K. - Page 136 5.7 Z-Folding (1)Align edge A and B of the documents. ● Edge A of the document refers to Load the documents the edge that is to be inserted into aligned to the edge of the DADF. the DADF. “3.2.2 Loading in DADF” (2)Select 100% for Reduce/Enlarge and Auto for Paper Supply on the Basic Features screen.
- Page 137 5.7 Z-Folding Select On for Z Fold. When selecting Z Fold with stapling/punching: The copies are stapled as shown below depending on the position(s) specified for stapling or punching holes. When Top Left is selected When Top Right is selected ●...
-
Page 138: Making Sample Copies
Making Sample Copies Sample Set When making multiple copies, you can output a single sample in advance. Making a sample copy allows you to confirm function settings and make sure that the copy appearance meets your expectations. The remaining copies will be made after the sample copy is confirmed. A sample copy is not made. - Page 139 5.8 Making Sample Copies Specify settings for other features if necessary. Press Start. The document is scanned, a sample copy of the document is made according to the settings, then the machine temporarily stops. When a sample copy is output, a screen appears to prompt you to verify the copy.
-
Page 140: Loading Documents In Batches
Loading Documents in Batches High Document Volume This feature allows you to load documents in batches for copying with the same settings. You can load your documents either on the document glass or in the DADF. When Next Original is selected on the screen that is displayed while scanning documents loaded in the DADF, the documents will be scanned continuously even if Off is selected for HighDocVol. - Page 141 5.9 Loading Documents in Batches Using the keypad, enter the number of copies desired and then press Start on the control panel. Copying will begin. When the stack of documents has been scanned for copying, a message will appear on the right of the screen as follows: Documents loaded in the DADF will be placed in the output tray after being scanned.
-
Page 142: Erasing Edges
Erasing Edges Edge Erase This feature allows you to erase shadows or marks that might be created at the edges or the center of the copies when copying bound documents. Options available for this feature are: Top and Bottom Edges Erases shadows at the top and bottom edges of the copies.The edges are erased based on the orientation of the document set. - Page 143 5.10 Erasing Edges Procedure Load the documents. “3.2 Loading Documents” Select Edge Erase on the Added Features screen. The Edge Erase screen is displayed. If you specify the width of the Edge Erase, select Variable Erase or Independent Variable Erase. ●...
- Page 144 5.10 Erasing Edges (3)Select Top and Bottom Edges again to save the setting. When Independent Variable Erase is selected: You can specify different values for the top, bottom, left, and right edges. (1)Select the item for which you want to specify the width of the Edge Erase.
-
Page 145: Shifting Image
Shifting Image Margin Shift This feature allows you to shift the image position of the document for copying. You can also set a margin of white space on your copy. Options available for this feature are: No Shift The copies are made without shifting the image of the document. Auto Center The document is copied with its center shifted to the center of the copy paper. - Page 146 5.11 Shifting Image Procedure Load the documents. “3.2 Loading Documents” Select Margin Shift on the Added Features screen. The Margin Shift screen is displayed. Select Side 1. The Side 1 screen is displayed. Select the type of margin shift. When Auto Center is selected: to specify the values for Left/Right and Up/ Down.
- Page 147 5.11 Shifting Image When Corner Shift is selected: Select a corner for the margin shift. When Variable Shift is selected: to specify the values for Left/Right and Up/ Down.
- Page 148 5.11 Shifting Image Check Original Orientation. Confirm the documents are loaded in the direction as specified in Original “5.14 Specifying Image Orientation” Orientation. ● Head to Top: ● Head to Left: Head Head Head Head Select Save when all the settings have been checked. The display returns to the Margin Shift screen.
-
Page 149: Specifying Document Size
Specifying Document Size Original Size This feature allows you to specify a document size for copying when using a non-standard size document or when the size of the document is different from the copy paper. Options available for this feature are: Auto Size Detect The document size is automatically detected. - Page 150 5.12 Specifying Document Size Procedure Load the documents. “3.2 Loading Documents” Select Original Size on the Added Features screen. The Original Size screen is displayed. Specify the document size. When specifying a standard size: Select from the standard sizes listed.
- Page 151 5.12 Specifying Document Size When specifying a non-standard size: to specify the values for X and Y. Select Save to specify settings for other features if necessary. ● To cancel any setting, select Cancel. Using the keypad, enter the number of copies desired and then press Start on the control panel.
-
Page 152: Copying Facing Pages Onto Separate Sheets
Copying Facing Pages onto Separate Sheets Bound Originals This feature allows you to copy the facing pages of a bound document on separate sheets, in page sequence. You can also choose to copy in page sequence, only the left, right, top or bottom pages of the document onto one side of the paper. - Page 153 5.13 Copying Facing Pages onto Separate Sheets Select Bound Originals on the Added Features screen. The Bound Originals (Scan Order) screen is displayed. Select the Bound Originals option and the pages of the bound document to be copied. Here, we will illustrate by selecting Left Page Then Right and Both Pages. ●...
-
Page 154: Specifying Image Orientation
Specifying Image Orientation Original Orientation When you are using features like 2-Sided, Margin Shift, Edge Erase, Multiple Up, Image Repeat and Independent X-Y %, you have to use this feature to specify the image orientation. The setting for the image orientation will be the default set for these various features and which can be done on each of the screen of these features. - Page 155 5.14 Specifying Image Orientation Procedure Load the documents. “3.2 Loading Documents” Select Original Orientation on the Others screen. ● When Original Orientation is selected after selecting the Bound Originals function, a screen is displayed to confirm whether the Bound Originals function is to be canceled.
-
Page 156: Copying Mixed Size Originals
Copying Mixed Size Originals Mixed Size Originals This feature allows you to scan documents of various sizes before copying them onto the corresponding copy paper sizes. Alternatively, you can make copies of these documents on one selected paper size. ● This feature only works when documents are loaded in the DADF. ●... - Page 157 5.15 Copying Mixed Size Originals Specify settings for Reduce/Enlarge and Paper Supply on the Basic Features screen. When copying images at 100% on paper of the same size as the documents: Select 100% for Reduce/Enlarge and Auto for Paper Supply. When copying mixed-sized documents onto one paper size: Select Auto% for Reduce/Enlarge and a desired paper tray for Paper Supply.
- Page 158 5.15 Copying Mixed Size Originals Select On and check Original Orientation. ● If the documents are not loaded in the direction as specified in Original Orientation, the copies obtained will not be as desired. • Head to Top: Head • Head to Left: Head Select Save to specify settings for other features if necessary.
-
Page 159: Making Two Sided Copies From A Bound Document
Making Two sided Copies From a Bound Document Book Duplex Copies of facing pages in a bound document can be made with pages assigned so that they are in the same facing state as the document. A blank sheet is automatically inserted as the first page. The start and end pages can also be specified to the left or right of the facing pages. - Page 160 5.16 Making Two sided Copies From a Bound Document Select Book Duplex on the Added Features screen. The Book Duplex screen is displayed. Select the original type and Start Page & End Page. For example, select Left Page Then Right. Specify the width for Binding Erase if necessary.
-
Page 161: Image Quality Presets
Adjusting Image Quality Image Quality Presets This feature allows you to change the document image to suit your purpose of copying. Once an image quality preset is selected for copying, image qualities like Lighter/Darker, Sharpness, and Density Control will be automatically adjusted. You can also fine-tune these image qualities after having selected an image quality preset. - Page 162 5.17 Adjusting Image Quality Procedure Load the documents. “3.2 Loading Documents” Select an image quality preset from Image Quality Presets on the Image Quality screen. Once an image quality preset is selected, image qualities like Lighter/Darker, Original Type, Density Control, Sharpness will be automatically selected. A mark ( ) will be added to Original Type, Density Control, and Sharpness.
-
Page 163: Adjusting Copy Density
Adjusting Copy Density Lighter/Darker This feature allows you to adjust the copy density. Options available for this feature are: Auto The copy density will be automatically adjusted. However, if Photo or Map has been selected for Original Type, the copy density will be adjusted to the level of Normal. -
Page 164: Specifying Document Type
Specifying Document Type Original Type This feature allows you to make fairly faithful copies of documents by selecting from one of the Original Type options to match the type of your documents. Options available for this feature are: Text & Photo Select this if the document contains both text and photographs. - Page 165 5.19 Specifying Document Type Select Original Type on the Image Quality screen. The Original Type screen is displayed. Select an option according to your document type. If you select Text: Select the set of options displayed.
- Page 166 5.19 Specifying Document Type If you select Text & Photo: Select the next set of options displayed. If you select Photo: Select the next set of options displayed. If you select Map: Proceed to Step 4. Select Save to specify settings for other features if necessary. ●...
-
Page 167: Adjusting Density Control
Adjusting Density Control Density Control This feature allows you to adjust the density control in terms of low, medium and high density, each in seven levels. Document Copy Medium Density High Density Low Density (high) (high) (high) ● The factory setting is 0. ●... - Page 168 5.20 Adjusting Density Control Specify the density control levels by each of the The level of each density is displayed on the bar graph. Select Save to specify settings for other features if necessary. ● To cancel any setting, select Cancel. Using the keypad, enter the number of copies desired and then press Start on the control panel.
-
Page 169: Adjusting Sharpness
Adjusting Sharpness Sharpness This feature allows you to adjust the sharpness of the image outline from five levels, Softer to Sharper. Document Copy Softer Shaper ● The factory setting is Normal. ● If any image quality preset has been selected, the sharpness level will be automatically specified. Any sharpness level set before selecting an image quality preset will be changed accordingly. - Page 170 5.21 Adjusting Sharpness Select one of the levels from Softer to Sharper. Select Save to specify settings for other features if necessary. ● To cancel any setting, select Cancel. Using the keypad, enter the number of copies desired and then press Start on the control panel. Copies will be made.
-
Page 171: Multiple-Documents Copying On One Copy
Multiple-Documents Copying on One Copy Multiple Up This feature allows you to copy two, four or eight sheets of documents on one copy. You can specify the order of the images to be copied. Options available for this feature are: 1 Up Copy one sheet of document on one sheet of paper. - Page 172 5.22 Multiple-Documents Copying on One Copy ● This feature cannot be combined with the following features: Bound Originals, Binding Erase, Mixed Size Originals, Repeat Image, Auto Contrast of Image Quality Presets, or Copy to Edge of Reduce/Enlarge. ● When specifying your own % for the Reduce/Enlarge feature, you can only set within the range of 25-100%. ●...
- Page 173 5.22 Multiple-Documents Copying on One Copy Select the option for Multiple Up and Image Order. For example, select 4 Up. ● To cancel any setting, select Cancel. Check Original Orientation. Confirm the documents are loaded in the direction as specified in Original “5.14 Specifying Image Orientation”...
- Page 174 5.22 Multiple-Documents Copying on One Copy Using the keypad, enter the number of copies desired and then press Start on the control panel. When documents are placed in the DADF: Copies will be made on one sheet of paper according to the order the documents are being placed in the DADF and to the specified number of documents to be copied.
-
Page 175: Inserting Transparency Separators
Inserting Transparency Separators Transparency Separators When copying on transparencies, this feature allows you to insert a blank sheet of paper of the same size and orientation between each pair of transparencies as a separator. To copy on transparencies, load them in tray 5 (bypass) and then select the correct paper type for the transparencies for copying. - Page 176 5.23 Inserting Transparency Separators ● This feature cannot be combined with the 2-Sided, Covers, Auto (Large Output), Collated, Uncollated Face Down of Output Orientation, Staple, or Punch options. ● The separators will not be used for copying and will be output as blank sheets. They will not be counted by the meters. However, they will be counted when Printed Separators is selected.
- Page 177 5.23 Inserting Transparency Separators The Transparency Separators screen is displayed. Select On, and Blank Separators or Printed Separators. When you select On, options to specify whether to copy on the separators as well as the option of Paper Tray Settings will be displayed on the right of the screen.
- Page 178 5.23 Inserting Transparency Separators From Separators Tray, select the tray that you have loaded paper as separators in Step 4. Select Save to specify settings for other features if necessary. ● To cancel any setting, select Cancel. ● When paper selection is made from the Basic Features screen after Press Start.
-
Page 179: Outputting Face Up/Down
Outputting Face Up/Down Output Orientation This feature allows you to specify whether copies should be output facing up or down. For copies that are output facing up, you can check the copies result. Options available for this feature are: Auto Automatically determines whether the copies should be output facing up or down. - Page 180 5.24 Outputting Face Up/Down From Paper Supply on the Basic Features screen, select a paper tray with the desired paper size. Select Output Orientation on the Output Format screen. The Output Orientation screen is displayed.
- Page 181 5.24 Outputting Face Up/Down Select how the copies are to be output. Select Save to specify settings for other features if necessary. ● To cancel any setting, select Cancel. Using the keypad, enter the number of copies desired and then press Start on the control panel. Copies will be made.
-
Page 182: Making Multiple Copies On A Single Sheet
Making Multiple Copies on a Single Sheet Repeat Image Multiple copies of an document image can be made on a single sheet of paper. Each document image is copied onto a single sheet of paper, and can be repeated within that sheet up to 8 times. The Repeat Image variations are as follows. Document images are not repeated. - Page 183 5.25 Making Multiple Copies on a Single Sheet Procedure In the Basic Features screen, select the desired preset % and the paper tray from Reduce/Enlarge and Paper Supply. ● When Auto is selected for Reduce/ Enlarge and Paper Supply, the preset % is calculated and automatically according to the document size and the specified...
- Page 184 5.25 Making Multiple Copies on a Single Sheet Select the number of image repetitions to be made on a single sheet of paper. Here, we will select 2 Images. Load the documents. Select Save to specify settings for other features if necessary. ●...
-
Page 185: Copying With Covers
Copying With Covers Covers This feature allows you to add papers that are not used for copying the body pages, like colored or heavy weight papers, as covers when copying. You can specify whether or not to copy on these covers. When copying is to be done on these covers, the cover sheet(s), added as the specified cover page(s), will be output copied with images. - Page 186 5.26 Copying With Covers ● Load paper of the same size and orientation for the covers and the body pages. ● When using heavywt 1 paper as covers, load them in trays 2, 3, 4 and tray 5 (bypass). For details on heavy weight paper that can be used, refer to “2.1 Paper to Use”.
- Page 187 5.26 Copying With Covers Procedure Load the documents. “3.2 Loading Documents” Load paper to be used as covers in any of trays 1 to 7. ● Load paper of the same size and in the same orientation for both the covers and the body pages.
- Page 188 5.26 Copying With Covers Specify whether or not to copy on the covers. When selecting Front Cover Only: When selecting Front Cover Only: Blank Covers: Outputs copies with the front cover blank. Printed Covers: Prints the external side of the front cover. Printed Covers (2 Sided): Prints the front cover equally as the body text.
- Page 189 5.26 Copying With Covers Select Paper Tray Settings. ● When Printed Covers is selected, you can select only Normal/ Heavywt 1 for tray 5 (bypass). ● When Printed Covers is selected, you cannot use tray 7 for covers. ● You cannot make two-sided copies when selecting Normal/Heavywt 1 of tray 5 (bypass).
- Page 190 5.26 Copying With Covers (1)Select Quantity. (2)Specify the number of sheet that machine needs to feed from the paper tray for each copy set. Select Save to specify settings for other features if necessary. ● To cancel any setting, select Cancel. Using the keypad, enter the number of copies desired and then press Start on the control panel.
-
Page 191: Creating A Booklet
Creating a Booklet Booklet Creation This feature allows you to copy four pages of document onto a sheet of paper. To create a booklet, fold the copies in half. You can also set the center binding margin (gutter) and add front/back covers. Document Left-Bound Right-Bound... - Page 192 5.27 Creating a Booklet Procedure Specify the tray that you loaded paper in the horizontal direction from Paper Supply on the Basic Features screen. ● You cannot select Auto for Paper Supply. Paper should be loaded in the paper tray in the horizontal direction.
- Page 193 5.27 Creating a Booklet Load the documents. “3.2 Loading Documents” Document direction Document direction Long edge Short edge Long edge Short edge feed feed feed feed Specify settings for other features if necessary. When creating a booklet with covers: (1)Select a covers method. Printed Covers: Prints also on the cover sheet.
- Page 194 5.27 Creating a Booklet (3)Select paper trays at Covers Tray and Body Pages Tray, and Save. ● Orient the cover tray and paper tray in the same direction as the loaded paper. ● If tray 5 (bypass) or tray 7 is specified as the cover tray, cover pages cannot be printed.
- Page 195 5.27 Creating a Booklet When creating a booklet with a center margin (gutter): (1)Select Gutter. ● You can set the center margin (gutter) in the range from 0 to 50 mm by 1 mm increments. The Gutter screen appears. (2)Set the center margin with...
- Page 196 5.27 Creating a Booklet When selecting Folding/Stapling: When the optional booklet maker finisher is installed, you can select Bi-Fold or Bi-Fold + Stapled. If Bi-Fold + Stapled is selected, the copies are folded in ● If Bi-Fold + Stapled is selected for a half and stapled at the center.
-
Page 197: Copying With Stamp Or Date
Copying with Stamp or Date Annotation This machine can output copies with stamps, page numbers, and copy management numbers that are not in their originals. Stamp types, date formats, and page number formats are prepared for selection. The annotation added to the copy can be selected from four types. - Page 198 5.28 Copying with Stamp or Date Procedure Load the documents. “3.2 Loading Documents” Select Annotation on the Output Format screen. The Annotation screen appears. Set On to Stamp, Date, Page Numbering or Set Numbering for annotation.
- Page 199 5.28 Copying with Stamp or Date When printing Stamp: Specify Options, Print On, Position, and Font/Size. ● A stamp is printed at a position adjacent to the square 20 mm inside from the top, bottom, right and left edges of paper. A customer engineer is permitted to adjust the printing position.
- Page 200 5.28 Copying with Stamp or Date When printing Page Numbering: Specify Display Format, Print On, Position and Font/Size. ● A page number is printed at a position adjacent to the square 10 mm inside from the top, bottom, right and left edges of paper. A customer engineer is permitted to adjust the printing position.
-
Page 201: Copying On Tab Paper
These copied papers can be loaded in Tray 7 and used as covers or separators. Available tab paper sizes are A4 portrait and 8.5×11" portrait. ● Be sure to use the tab paper recommended by Fuji Xerox. Otherwise, a paper jam or failure may result. Document... - Page 202 5.29 Copying on Tab Paper Procedure Select Tab Copying on the Output Format screen. “3.2 Loading Documents” The Tab Copying screen appears. Select Copy to Tab or Shift All, specify the amount of shifting, and options for Tab Stock Size and Paper Type. ●...
- Page 203 5.29 Copying on Tab Paper Load the document. Check that the orientation of the loaded document is as shown below. “5.14 Specifying Image Orientation” Head Head Load the tab paper in tray 5 (bypass). Load the paper with the side to be copied facing up and with the edge opposite to the tab to be fed first.
-
Page 204: Outputting Bi-Folded Or Tri-Folded Copies
Outputting Bi-Folded or Tri- Folded Copies Folding With the booklet maker finisher installed Optional If the booklet maker finisher (optional) is installed, the copies can be folded in half. Additionally, if the optional folding unit (Z and C) is installed, the copies can be folded in thirds outward (Tri- Fold Out) or inward (Tri-Fold In). - Page 205 5.30 Outputting Bi-Folded or Tri-Folded Copies Procedure Load the documents. “3.2 Loading Documents” Select Folding on the Output Format screen. The Folding screen appears. Select the type of folding and the side to be copied. Bi-Fold and Print Inside are selected as an example. ●...
- Page 206 5.30 Outputting Bi-Folded or Tri-Folded Copies Select Save to specify settings for other features if necessary. ● To cancel any setting, select Cancel. Using the keypad, enter the number of copies desired and then press Start on the control panel. Copies will be made.
-
Page 207: Stored Job Templates
Job Template Settings for Copying Stored Job Templates This feature allows you to store, and to recall by just selecting a button, frequently-used settings for copying. You can therefore use this feature to program settings that are complicated or used very often. Options available for this feature are: Store Job Templates Stores the programmed settings in the memory. - Page 208 5.31 Job Template Settings for Copying Select Store Job Templates and a job number to store your settings. Select a screen to be displayed when recalling a job. ● If you change the stored setting for the job, delete the job first, then store a new setting.
-
Page 209: Entering The Job Name
5.31 Job Template Settings for Copying 5.31.2 Entering the Job Name Procedure Select Enter/Change Job Name, and the number of the job name. The Change Job Name screen is displayed. Enter the name and select Save. You can set the same name as the existing job. ●... -
Page 210: Deleting Job Templates
5.31 Job Template Settings for Copying 5.31.3 Deleting Job Templates The following procedure explains how to delete a stored setting from the memory. Procedure Select Delete Job Templates and the job number to be deleted. Select Confirm if you wish to delete the job. ●... -
Page 211: Recalling Job Templates
5.31 Job Template Settings for Copying 5.31.4 Recalling Job Templates The following procedure explains how to recall programmed settings stored in the memory. Procedure Load the documents. “3.2 Loading Documents” Select Recall Job Templates and the job number to retrieve. Press Start. -
Page 212: Copying Documents Of Different Settings (Build Job)
Copying Documents of Different Settings (Build Job) You can use the Build Job feature to first scan documents with different copying settings while separating them by pages and document stacks, save the settings in the server memory, and lastly output all the copies at the same time. - Page 213 5.32 Copying Documents of Different Settings (Build Job) If necessary, specify settings for Annotation, Output Orientation, Covers, Separators, and Output/Finishing/Z Fold. When adding annotation: The setting is applied to a whole job. “5.28 Copying with Stamp or Date” Select Stamp, Date, Page Numbering or Set Numbering. When specifying Output Orientation: The setting is applied to a whole job.
-
Page 214: Select Start
5.32 Copying Documents of Different Settings (Build Job) Select Start. The screen to build the job appears. The example used in this explanation assumes that Annotation, Covers, Separators, and Output/Finishing options are not selected. Specify settings for copying. ● In Build Job mode, Collated and Uncollated cannot be selected. - Page 215 5.32 Copying Documents of Different Settings (Build Job) Select Next. When On is selected, the files set for Build Job are saved for copying or merging later. ● To cancel Build Job, select End Job When Off is selected, the files set for Build Job are not saved. and after you have checked the screen that appears to prompt you for confirmation, the display returns...
- Page 216 5.32 Copying Documents of Different Settings (Build Job) Only one set with the specified Build Job settings will be copied. Once copying is done, the Sample Set screen is displayed. (2)Check the results of the sample copies. (3) If necessary, enter the number of copies desired using the ●...
- Page 217 5.32 Copying Documents of Different Settings (Build Job) (2)Specify a file folder and select Select Folder. ● Enter a folder number by using the keypad on the control panel and press Start to search the folder. ● To cancel copying in progress, click Copying starts.
- Page 218 5.32 Copying Documents of Different Settings (Build Job) (2)Specify a file folder and select Select Folder. ● Enter a folder number by using the keypad on the control panel and press Start to search the folder. File saving starts. To exit Build Job mode, select any other mode (e.g. Copy). ●...
- Page 219 Server About Server..............190 Setting Folders ..............192 Saving Data...............207 Editing Files..............214 Copying and Moving Files..........227 Printing Files ..............232...
-
Page 220: About Server
About Server Using server allows you to save scanned documents for copying as well as the copy settings to the server as a copy file. When you need to copy the same documents with the same settings again, you can use the file stored in the server to print out the copies without scanning. - Page 221 6.1 About Server ● Whether the optional stapler or optional booklet maker finisher, paper tray 7 (At Document Centre 2101VS, it is an option.), and optional HCF are installed or not, this machine can be linked to other machines (Document Centre 2101S / Document Centre 2101VS) through a network.
-
Page 222: Setting Folders
Setting Folders This section explains the procedure for setting a folder to save a file and for setting a link destination folder. The procedure for setting a folder name is also explained. ● If the machine is connected to a network, link folders 31 to 36 and FTP folders 37 to 42 can be set. 6.2.1 Roles of the Folders There are 42 folders are available for saving a file. - Page 223 6.2 Setting Folders Folder Type Items Description Setting • Password items None or 4-digit code • Remote IP address You can set the IP address of a linked machine. • No. 31 to 36 • Remote FTP password Shared folders of network- You can set the FTP password of a linked machine.
-
Page 224: Setting Storage Folders
6.2 Setting Folders 6.2.2 Setting Storage Folders The following procedure explains how to set a password and a remote link folder to storage folders (No.1 to 29) when necessary. Procedure Press System Settings/ Meter Check. The Menu screen appears. Select Create/Change Folder. The Create/Change Folder (Copy File) screen appears. - Page 225 6.2 Setting Folders Specify one folder from 1 to 29 and then select Select Folder. ● Enter a folder number by using the keypad on the control panel and press Start to search the folder. The Create/Change Folder screen appears. Specify an item to register its value and then select Modify.
- Page 226 6.2 Setting Folders When specifying Password: You can restrict user access to the folders if you set a password for the folders. Set Password if necessary. Set the Password with a four-digit numeric value. (1)Enter a Password and then select Confirm. ●...
- Page 227 6.2 Setting Folders (2)Select On, and then Save continuously until the display returns to the Create/Change Folder screen. ● If a folder with no link folder is specified, you cannot select On. Set the link folder first. For the setting procedure, see “6.2.4 Setting Link Folder/FTP Folder”.
-
Page 228: Setting Shared Folder
6.2 Setting Folders 6.2.3 Setting Shared Folder The following procedure explains how to set the shared folder (No.30). If the shared folder is set, the file stored in the folder can be accessed from network-connected machines. ● All files transferred from the linked machine are saved in the shared folder. Procedure Press System Settings/ Meter Check. - Page 229 6.2 Setting Folders Select folder 30 and Select Folder. ● Enter a folder number by using the keypad on the control panel and press Start to search the folder. The Create/Change Folder screen appears. Specify an item to register or change its value and select Modify.
- Page 230 6.2 Setting Folders When setting FTP Password: You can set the FTP password to access from an external machine. (1)Enter the FTP password and select Save. The display returns to the Create/Change Folder screen. With setting Auto Print: For Auto Print, see the messages displayed on the following screen. (1)Select On and then Save.
- Page 231 6.2 Setting Folders The display returns to the Create/Change Folder screen. To finish the settings, select Save or Close continuously until the display returns to the copy screen. ● ● About the Auto Print function A file is automatically printed when a linked machine transfers the file to the shared folder with Auto Print feature enabled.
-
Page 232: Setting Link Folder/Ftp Folder
6.2 Setting Folders 6.2.4 Setting Link Folder/FTP Folder The following procedure explains how to set link folders (No.31 to 36) and FTP folders (No.37 to 42). You can set the folders when your machine is linked to other machines and FTP servers via a network. - Page 233 6.2 Setting Folders Select one of folders 31 to 42 and Select Folder. The Create/Change Folder screen appears. Specify an item to register or change its value and select Modify.
- Page 234 6.2 Setting Folders When setting Remote IP Address: Set the IP address of a linked machine. Check the address with the network administrator. (1)Enter the IP address and select Save. "." is entered automatically every three digits. The display returns to the Create/Change Folder screen. When setting Remote FTP password: Set the FTP password of a linked machine.
-
Page 235: Setting Folder Name
6.2 Setting Folders 6.2.5 Setting Folder Name The following procedure explains the procedure for setting or changing a folder name. Not Registered is displayed for a folder with no name. Procedure Press System Settings/ Meter Check. The Menu screen appears. Select Create/Change Folder. - Page 236 6.2 Setting Folders Specify a folder and then select Enter/Change Folder Name. ● Enter a folder number by using the keypad on the control panel and press Start to search the folder. The Change Folder Name screen appears. Enter a folder name and then select Save. ●...
-
Page 237: Saving Data
Saving Data This section explains the procedure for saving scanned data. Item Value Description Destination Folders Copy files can be saved in folders. “6.2 Setting Folders” File name Automatic Names are automatically assigned to copy files saved on the server. The (Year, month, file name assigned is actually the time when the file is saved and is in the... -
Page 238: Saving Data
6.3 Saving Data 6.3.1 Saving Data To save data scanned from documents, switch to the server functions by selecting either Save to File or Copy and Save. ● The settings of number of copies and Sample Set are not saved. ■... - Page 239 6.3 Saving Data Press Start on the control panel. The scanning of documents will begin. If a Remote Link Folder is set to the folder: When you specify one of folders 1 to 29 where the remote link folder is set, the following screen appears.
- Page 240 6.3 Saving Data During file saving, the following screen remains displayed: When the scanning is done normally: The files are saved in the selected folder. When an error occurs during scanning (or scanning is paused by selecting Stop): The operation will continue after the error is resolved. After the operation is correctly done, the data will be saved as a file.
-
Page 241: Checking Saved File
6.3 Saving Data 6.3.2 Checking saved file You can check the file properties in the list and preview a specified page of the file. Procedure Select Edit/Print Files to display the Hard Disk (Copy File) screen. Specify a folder where the file is stored and then select Select Folder. - Page 242 6.3 Saving Data Checking the preview image of a specified page You can check the preview image of a specified page saved in a storage folder (No. 1 to 29) or the shared folder (No. 30). (1)Specify a folder, and select Merge/Edit Files. The Merge/Edit Files screen appears.
- Page 243 6.3 Saving Data (3) Enter the page number, and select Save. The preview image of the specified page appears. (4)Select Rotate 90 to the left, Rotate 90 to the right or Zoom In if necessary. ● A stamp image that was selected in the Annotation feature cannot be displayed.
-
Page 244: Editing Files
Editing Files This section explains how to edit files stored in the server. You can rename, delete, or merge files, and make settings to attach covers, insert separators, sort or staple copies, and punch holes. 6.4.1 Changing File Name You can change the file name stored in a storage folder (No. 1 to 29) or the shared folder (No. 30). ●... - Page 245 6.4 Editing Files Specify a file to change its name and then select Change File Name. ● Select only one copy file for changing name. When multiple copy files are selected, the file names cannot be changed. The Change File Name screen appears. Enter the file name and then select Save.
-
Page 246: Deleting Files
6.4 Editing Files 6.4.2 Deleting Files You can delete files stored in a storage folder (No. 1 to 29) , the shared folder (No. 30), or a FTP folder (No. 37 to 42). ● You can restore the deleted files. ●... - Page 247 6.4 Editing Files (3)Select the required file and then select Delete File(s). The Delete File(s) screen appears. Select Delete. ● Selecting Cancel will close the Delete File(s) screen without deleting the copy files. ● The number of copy files selected will appear in the Delete File(s) screen.
-
Page 248: Merging Files
6.4 Editing Files 6.4.3 Merging Files You can merge multiple files that are stored in the same folder to create a new file. The merged file can be merged with another merged file or Build Job file. When multiple files are selected, they will be merged for printing in the order of selection. ●... - Page 249 6.4 Editing Files The Merge/Edit Files screen appears. Select Merge/Edit Files. The Merge/Edit Files screen appears. If necessary, specify settings for Annotation, Covers, Separators, and Output/Finishing. ● Select Previous Screen if you want to return to the previous screen and reconfirm the copy files to be merged.
- Page 250 6.4 Editing Files When adding annotation: You can add annotation to a selected or merged file. Select Stamp, Date, Page Numbering or Set Numbering. “5.28 Copying with Stamp or Date” If annotation has already been set to the original file, the initial annotation setting will be cancelled.
- Page 251 6.4 Editing Files The Merge Files screen is displayed. Select Merge (Del Source) or Merge (Keep Source). When Merge (Del Source) is selected, the files selected from the list for merging are deleted and a new file is merged. When Merge (Keep Source) is selected, a new file is merged without deleting ●...
- Page 252 6.4 Editing Files After the merging is completed, the display returns to the Hard Disk (Copy File) screen. The merged files will become a new file and displayed at the top of the list. ●...
-
Page 253: Deleting Pages/Inserting File
6.4 Editing Files 6.4.4 Deleting Pages/Inserting File You can delete or insert a specified page in a file stored in a storage folder (Nos. 1 to 29) or shared folder (No. 30). ● Delete Page You can delete a specified page. ●... - Page 254 6.4 Editing Files Select the files that you want to merge in the order that they are to be printed, and then select Merge/Edit Files. If selecting multiple files, you ● cannot delete or insert pages. The Merge/Edit Files screen appears. Select Edit Pages.
- Page 255 6.4 Editing Files The preview image of the specified page appears. Select Delete Page or Insert File. When deleting a page: You can delete a specified page. (1)Select Delete Page. The Delete Page screen appears. (2)After checking the page number, select Delete. If you delete the page of a two- ●...
- Page 256 6.4 Editing Files When inserting a file: You can insert a file after the specified page. Only a file in the same folder can be inserted. (1) Select Insert File. The Insert File screen appears. (2) After checking the page number, select Confirm. (3) Select a file, and Insert.
-
Page 257: Copying And Moving Files
Copying and Moving Files This section explains how to copy or move files stored in a folder to another folder. 6.5.1 Copying or Moving Files to a Folder The following procedure explains how to copy and move files stored in a folder to another folder. ■... - Page 258 6.5 Copying and Moving Files Specify a file to copy or move and then select Copy/Move Files. The Copy/Move File screen appears. Select Hard Disk. The Folder List (Copy File) screen appears.
- Page 259 6.5 Copying and Moving Files Specify a folder and select Start or Move. When selecting the shared folder (No.30): When the Auto Print function is enabled at the shared folder, the following screen appears. Specify settings if necessary. When performing Auto Print, select On at Auto Print. When deleting the file after printing, select On at Save to File.
- Page 260 6.5 Copying and Moving Files When selecting one of link folders (No.31 to 36): The following screen appears. Specify settings if necessary. When performing Auto Print, select On at Save to File at Remote Machine. When deleting the file after printing, select On at Save to File at Remote Machine.
- Page 261 6.5 Copying and Moving Files ● About the Auto Print feature set for the shared folder (No. 30) If the Auto Print feature is set for a shared folder, files that are copied or moved to this folder are automatically printed in the order of storage. Refer to “6.2.3 Setting Shared Folder”...
-
Page 262: Printing Files
Printing Files This section explains how to print files saved in the folder. A file is printed according to the settings saved. When multiple files are selected, they are printed in the order of selection. If multiple file-copy-link-folders are specified in the folder where a file is saved, you can specify whether to automatically print and save files at the remote machines. - Page 263 6.6 Printing Files (2)Select file(s) to be printed. Using the keypad, enter the number of copies desired and then press Start on the control panel. ● When the finisher is installed, The Print File screen appears. merged copy files are output to the finisher tray as they are printed.
- Page 264 6.6 Printing Files (3)Select Save. The display returns to the Print File screen. When setting Output Orientation: You can set the output orientation of the copies. Options are Auto, Face Up, and Face Up Reverse Order. If Stapled/Punched or Booklet Creation is set to On, only Auto can be selected for Output Orientation.
- Page 265 6.6 Printing Files If reprinting is executed by specifying a folder (No.1 to 29) where the remote link folder is registered, the File Copy Target Folder screen appears. (1)For automatic printing at the linked machine, select On at Auto Print at Remote Machine. (2)For file saving at the linked machine, select On at Save to File at Remote Machine.
- Page 266 6.6 Printing Files ● Reprinting a file with the Set Numbering Machine A Machine B setting: Report If the network-connected machine reprints a file with the Set Numbering setting and requests to print the file at the remote machines that have been programmed with Machine C the Auto Print feature, sequential numbers Report...
- Page 267 Scanning About Scanning..............238 Mailbox Settings...............239 Scanning Documents ............263 Installing the Scanner Driver ..........276 Downloading Scanned Data..........281...
-
Page 268: About Scanning
About Scanning This section explains the scanning function. Scanned document data is saved as a file in the Mailbox. You can download files saved in the Mailbox by connecting to the Mailbox from a client computer connected to the network. If the Auto Send function for scanned file is set to the mailbox, a scanned file can be transferred to a specified FTP server or sent by e-mail. -
Page 269: Mailbox Settings
Mailbox Settings This section explains the procedures for setting mailboxes. • Assigning a Password • Setting the Mailbox Name • Displaying the File Name Entry Screen • Setting a Mailbox as the SMB Shared Folder • Sending Scanned Files Automatically 7.2.1 Assigning a Password to the Mailbox The following procedure explains how to set or change a mailbox password. - Page 270 7.2 Mailbox Settings Specify a mailbox and select Select Mailbox. When setting a new password, select a non-registered mailbox. When changing an existing password, select the corresponding mailbox. ● Enter a folder number by using the keypad on the operator panel and press Start to search the folder The Create/Change Mailbox screen appears.
- Page 271 7.2 Mailbox Settings Type in the password you want to set and select Confirm. To enter the password, use the number buttons displayed on the display. ● The password you enter is displayed The numbers used as passwords must consist of 4 digits. as a series of “*”...
-
Page 272: Setting The Mailbox Name
7.2 Mailbox Settings 7.2.2 Setting the Mailbox Name The following procedure explains how to set or change a mailbox name. “Not Registered” is displayed for a mailbox with no name. Procedure Press System Settings/ Meter Check. The Menu screen is displayed. Select Create/Change Mailbox. - Page 273 7.2 Mailbox Settings Select the Mailbox whose name you want to set, then select Enter/Change Mailbox Name. ● Enter a folder number by using the keypad on the control panel and press Start to search the folder. ● Do not select more than one Mailbox.
-
Page 274: Displaying The File Name Entry Screen
7.2 Mailbox Settings 7.2.3 Displaying the File Name Entry Screen Once you set the machine to display the File Name Entry screen, you can save data after entering a file name. After specifying the scanner parameter and pressing Start, the File Name Entry screen is displayed to enter a file name. - Page 275 7.2 Mailbox Settings Specify a mailbox and select Select Mailbox. ● Enter a folder number by using the keypad on the control panel and press Start to search the folder. The Create/Change Mailbox screen appears. Select Enter File Name Entry Screen and then Modify. ●...
- Page 276 7.2 Mailbox Settings Select On and then Save. ● If Off is set, a name consisting of date and time is automatically assigned to the file. The display returns to the Create/Change Mailbox screen. To finish the settings, select Save or Close continuously until the display returns to the copy screen.
-
Page 277: Setting A Mailbox As The Smb Shared Folder
7.2 Mailbox Settings 7.2.4 Setting a Mailbox as the SMB Shared Folder If you set a mailbox as the SMB shared folder, you can directly access the mailbox from the client computer using the folder sharing feature. Client computers can manage files such as moving, copying, deleting, renaming files, and changing properties of files. - Page 278 7.2 Mailbox Settings The Create/Change Mailbox screen appears. Select SMB Sharing and then Modify. The SMB Sharing screen appears.
- Page 279 7.2 Mailbox Settings Select On and then Save. The display returns to the Create/Change Mailbox screen. To finish the settings, select Save or Close continuously until the display returns to the copy screen. ●...
-
Page 280: Sending Scanned Files Automatically
7.2 Mailbox Settings 7.2.5 Sending Scanned Files Automatically If the Auto send feature is set to a mailbox, files can be transferred automatically by E-mail or FTP. ■ Supported FTP server environment ● Operating system for the server • Microsoft Windows NT Server 4.0 (Service Pack 6a) •... - Page 281 7.2 Mailbox Settings ■ Setting the transfer protocol The following procedure explains how to transfer scanned files. Confirm the FTP address, user name, password, and the destination folder of the file through your network administrator. ● If Single-page TIFF is selected for File Format, all files (scanned pages) are transferred. Procedure Press System Settings/ Meter Check.
- Page 282 7.2 Mailbox Settings The Create/Change Mailbox screen appears.
- Page 283 7.2 Mailbox Settings Specify Auto Send and then Modify. The Auto Send screen appears. Select Send as E-mail or Send via FTP, and then Save. The display returns to the Create/Change Mailbox screen.
- Page 284 7.2 Mailbox Settings Specify the following items. When selecting Send as E-Mail: Specify the following items and then Modify. (1) E-mail Address (3) E-mail Comment (2) E-mail Subject (4) Maximum E-mail Size (1)Enter an address and select Save. ● Up to 60 characters can be entered. The display returns to the Create/Change Mailbox screen.
- Page 285 7.2 Mailbox Settings (3)Enter comments and select Save. Up to 60 characters can be entered. The display returns to the Create/Change Mailbox screen. (4)Set the maximum size of the file that the machine can automatically send as an E-mail. Use the keypad on the control panel and select Save. The factory setting is 1.0MB.
- Page 286 7.2 Mailbox Settings When selecting Send via FTP: Specify the following item and then Modify. (1) FTP Address (3) FTP Password (2) FTP Login Name (4) FTP Path (1)Enter the FTP address and select Save. The display returns to the Create/Change Mailbox screen. (2)Enter the login name and select Save.
- Page 287 7.2 Mailbox Settings (3)Enter the destination FTP password and select Save. ● Up to 20 characters can be entered. The display returns to the Create/Change Mailbox screen. (4)Enter the location and select Save. ● Up to 60 characters can be entered. The display returns to the Create/Change Mailbox screen.
- Page 288 7.2 Mailbox Settings Select Transmitted File and then Check/Change if necessary. Select Delete or Save and then Save. The display returns to the Create/Change Mailbox screen. To finish the settings, select Save or Close continuously until the display returns to the copy screen. ●...
- Page 289 7.2 Mailbox Settings ■ Checking and Changing E-Mail Settings E-Mail is transmitted via an SMTP server. The following procedure explains how to check or change the SMTP server address, port settings, the address for E-mail notification in case of a transmission failure, and the sender address.
- Page 290 7.2 Mailbox Settings You can check the current settings. When changing an E-Mail setting, select Modify. The Check/Change Network Settings screen appears. Specify an item to change and select Modify.
- Page 291 7.2 Mailbox Settings When setting the SMTP server address: Enter the SMTP server address and select Save. ● Up to 12 characters can be entered. When setting the SMTP server port: Enter the SMTP server port and select Save.
- Page 292 7.2 Mailbox Settings When setting the Error To address: The Error To address indicates the address for a file transmission failure notice. Usually, it is recommended to enter the address of the machine administrator. Enter the Error To address and select Save. ●...
-
Page 293: Scanning Documents
Scanning Documents This section explains how to scan a document and save it to a Mailbox on the server. This section also explains how to change file names and how to delete files. Item Saved Value Saved Description File name Automatic A name will be automatically assigned to the file saved on the server. -
Page 294: Scanning Documents
7.3 Scanning Documents 7.3.1 Scanning Documents When you save the scanned data in a mailbox, select Scan to change the copy mode. A name will be automatically assigned to the file saved in the mailbox. ● Combinations of Resolution, File Format, and Color Gradation D: Default setting A: Available N/A: Not available... - Page 295 7.3 Scanning Documents Procedure Select Scan mode. The Mailbox List (Scan File) screen is displayed. Select the Mailbox where you want to save the file, then select Select Mailbox. When the Mailbox name is not set, “Not registered” is displayed for Mailbox Name.
- Page 296 7.3 Scanning Documents When specifying the density: Specify the density of the data when scanning and saving. ● You can specify Density when Select Auto or a density setting from the range Lightest to Darkest. Black/White is selected for Color •...
- Page 297 7.3 Scanning Documents Specify other settings if necessary. When specifying 2 Sided Original: When using the DADF to scan 2-sided documents, select the orientation of the document. • Select 2 Sided Head to Head if the images of the document for both side one and two are in the same orientation.
- Page 298 7.3 Scanning Documents When specifying High Document Volume: Use this option to make settings for the next document before you start “5.9 Loading Documents in Batches” scanning, and scan it using previously made settings. When On is selected, scanning starts as in step 6, and once the document is finished scanning, the screen prompting you to load the next document is displayed.
-
Page 299: Checking Saved Files
7.3 Scanning Documents 7.3.2 Checking Saved Files Files are saved in the previously selected Mailbox. When a password is set for the Mailbox, you must enter the password for that box. Procedure Select Scan mode. The Mailbox List (Scan File) screen is displayed. Select the Mailbox where the file is saved, then select Check Files. - Page 300 7.3 Scanning Documents Check the contents of the saved file. ● Files saved in a Mailbox can be downloaded to the client computer. For details, refer to “7.5 Downloading Scanned Data”. ●...
-
Page 301: Changing File Name
7.3 Scanning Documents 7.3.3 Changing File Name The following procedure explains how to change the name of the saved file in a mailbox. Select only one scan file to change its name. Procedure Select Scan mode. The Mailbox List (Scan File) screen is displayed. Select the Mailbox where the file is saved, then select Check Files. - Page 302 7.3 Scanning Documents The Change File Name screen is displayed. Type in the file name and select Save. ● To enter the file name, use the keys displayed on the Change File Name screen. ● If you made a mistake while entering the name, press the Backspace button once to clear one character or the Clear button to clear all the...
- Page 303 7.3 Scanning Documents For a file name that is in use: When there is an existing file with the newly saved file name, the Check File screen appears. To overwrite the file, select Overwrite. To change to another file name, select Redo. ●...
-
Page 304: Deleting Files
7.3 Scanning Documents 7.3.4 Deleting Files The following procedure explains how to delete saved files in a Mailbox. ● You cannot delete a mailbox. Procedure Select Scan mode. The Mailbox List (Scan File) screen is displayed. Select the Mailbox where the file is saved, then select Check Files. - Page 305 7.3 Scanning Documents Select the required file, then select Delete File(s). The Delete File(s) screen is displayed. Select Delete. ● Files deleted from Mailboxes cannot be retrieved. ● Selecting Cancel will close the Delete File(s) screen without deleting the files. ●...
-
Page 306: Installing The Scanner Driver
Installing the Scanner Driver This product is designated as 2101 in all markets except for those served by Fuji Xerox (FX) and FX Asian Pacific (FXAP). In FX and FXAP, the product designation is 1015S. This section explains how to install the software that is required to download files saved in a Mailbox to a client computer. -
Page 307: Installing The Scanner Driver
7.4 Installing the Scanner Driver 7.4.2 Installing the Scanner Driver The following explains how to install the scanner driver on a client computer. Procedure Insert the installation CD-ROM in the CD-ROM drive. Open X:\ FX1010S_Scan-YYY\ Disk1. ● “X” is the name of the CD-ROM drive. - Page 308 7.4 Installing the Scanner Driver Enter your User Name and Company Name. Select Next. Installation starts.
- Page 309 7.4 Installing the Scanner Driver When installation is completed, select Finish. Installation is completed. The scanner driver is installed in the following location. Z:\Windows\twain.32\FX1010S_Scan\ ● “Z” is the name of the drive. ●...
-
Page 310: Uninstalling The Scanner Driver
7.4 Installing the Scanner Driver 7.4.3 Uninstalling the Scanner Driver The following procedure explains how to uninstall (delete) the scanner driver. Procedure Click My Computer > Control Panel > Add/Remove Programs. The Add/Remove Programs Properties dialog box appears. Select DocuCentre1010S Scanner Driver and click Add/ Remove. -
Page 311: Downloading Scanned Data
Downloading Scanned Data Scanned document data is saved in the previously selected Mailbox when scanning starts. You can download files saved in the Mailbox by connecting to the Mailbox from a client computer connected to the network. When a password is set in the Mailbox, you can check the scanned file by entering the password. This section explains how to download files saved in a Mailbox to a client computer. -
Page 312: Downloading Files With A Web Browser
7.5 Downloading Scanned Data 7.5.1 Downloading files with a Web browser You can download scanned files saved in a Mailbox using FTP via a Web browser. ■ Supported browsers You can use the following Web browsers: ● For Windows • Internet Explorer 5.0 or later •... -
Page 313: Downloading Files Using Ftp
7.5 Downloading Scanned Data ● Passwords When accessing the server, you must enter the password registered for the Mailbox. Example: When the Mailbox No. is “001” and a password is registered for the Mailbox, enter the password as follows: ● If the Scan Auditron Administrator Password is set, you can enter this password instead of the mailbox password to access a file in the mailbox. -
Page 314: Accessing Smb Shared Folder
7.5 Downloading Scanned Data 7.5.3 Accessing SMB Shared Folder If SMB Sharing is On for the mailbox, you can download a file using the folder sharing feature. You can move, copy, delete, rename files, and change the properties of files from the client computer. Log in using the following method: ●... - Page 315 System Administrator Mode Settings System Administrator Mode ...........286 Overview of Tools Mode ..........294 Setting Tools Mode ............304 Overview of Auditron Mode ..........308 Auditron Menu ..............310 Checking Network Settings..........319...
-
Page 316: System Administrator Mode
System Administrator Mode This section explains how to enter or exit the System Administrator Mode. As we need to operate the control panel of the copier to enter the System Administrator Mode, the procedure on how to switch to the System Administrator Mode is also explained. - Page 317 8.1 System Administrator Mode ■ Copier control panel The names and functions of each part of the copier control panel are as follows. ● With models that are equipped with the printer function (with the printer kit installed), refer to “1.2 Printer Operation Panel” in the Printer manual.
- Page 318 8.1 System Administrator Mode ■ Switching to System Administrator Mode Procedure Press System Settings/ Meter Check. The Menu screen is displayed. Select System Administrator Mode. ● For details on the Auditron Administration mode, refer to “8.5 Auditron Menu”. A screen to confirm whether you want to switch control panel appears. Select Switch.
-
Page 319: Entering/Exiting Tools Mode
8.1 System Administrator Mode After a while, the following screen is displayed and operation is switched from the main control panel to the copier control panel. ● Select Back to exit the System Administrator Mode. Lift the cover of the copier control panel to start using the panel. -
Page 320: Entering Tools Mode
8.1 System Administrator Mode ■ Entering Tools Mode Procedure Switch to the System Administrator Mode. “8.1.1 Using System Administrator Mode” Select Tools Mode. ● For details on the Auditron Administration mode, refer to “8.5 Auditron Menu”. The Tools Password Entry screen is displayed. Use the keypad to enter the password. -
Page 321: Exiting Tools Mode
8.1 System Administrator Mode ■ Exiting Tools Mode Procedure Select Exit on the Tools Menu screen. Select Back on the screen displayed on the main control panel. From the copier control panel, we will switch back to the main control panel. The copy screen or the User Password Entry screen is displayed soon. -
Page 322: Entering/Exiting Auditron Mode
8.1 System Administrator Mode 8.1.3 Entering/Exiting Auditron Mode From the Auditron Administrator Mode, you can calculate the number of copies that each account (by department/user) has made by the Auditron Administrator password entered. With the need to enter the password for copying, this would also allow you to control the use of the machine. After switching from the main control panel to the copier control panel, you can start to use the Auditron Administrator Mode. - Page 323 8.1 System Administrator Mode Select Confirm. The Auditron Menu is displayed. ● ■ Exiting Auditron Administrator Mode Procedure From the Auditron Menu, select Exit. Select Back displayed on the main control panel screen. From the copier control panel, we will switch back to the main control panel. The copy screen or the User Password Entry screen is displayed soon.
-
Page 324: Overview Of Tools Mode
Overview of Tools Mode This section gives an overview of the Tools Mode. This section introduces you to the respective screens for setting and changing the features on Tools Mode, as well as the function, range of setting, and the factory setting of each feature. ■... -
Page 325: Audio Tones
8.2 Overview of Tools Mode ● Auto Tray Switching (ATS) This feature allows you to specify whether to automatically switch to another tray that contains paper of the same size, orientation and type (Plain paper only) to continue copying once paper in the selected tray has run out. Item Description Options... -
Page 326: Administrator Password
8.2 Overview of Tools Mode ■ Timers You can set the time needed to automatically activate the following items: Item Description Available options Job Complete Specify the time for the feature settings to return to 1 to 59 sec (in 1 sec Auto Clear their default values automatically after copying is increments),... -
Page 327: Copy Defaults
8.2 Overview of Tools Mode ■ Copy Defaults You can set the default values of the copy features. The settings of the machine will return to the default values set here when the power is switched on; when the machine recovers from the Power Saver mode; or when the Clear All button is pressed. So if you specify the settings or values of frequently used features as the default values, there is no need to change these values whenever you need to use them. - Page 328 8.2 Overview of Tools Mode Item Description Available options Corner Shift Specify the default values of Corner Shift (Side 1 and Top left*, left, (Side 1) Side 2) of Margin Shift on the Added Features screen. bottom left, bottom, Bottom right, right, Corner Shift top right, top (Side 2)
-
Page 329: Screen Layout
8.2 Overview of Tools Mode ■ Screen Layout There are two types of settings for Screen Layout. ● The following settings will not be reflected: Tray Preset 1 and Tray Preset 2 of Basic Features Presets; and Relocate Features. ● Basic Features Presets You can change some of the settings that are displayed for Paper Supply and Reduce/Enlarge on the Basic Features screen. -
Page 330: Original Size Defaults
8.2 Overview of Tools Mode ■ Reduce/Enlarge Presets There are two types of settings for Reduce/Enlarge Presets. ● Reduce/Enlarge Presets You can select the six preset ratios (besides 100%, Auto%, 50%) for Reduce/Enlarge on the Basic Features screen.You can choose from 20 ratios to assign to the six buttons for Reduce/Enlarge Presets. Item Available options Reduce/Enlarge Preset... -
Page 331: Image Quality
8.2 Overview of Tools Mode Item Available options Original Size 1 A and B series: (Left, 2nd from top) A3, B4, A4, A4 portrait, B5, B5 portrait, A5, A5 portrait, B6, A6, Postcard, Inch sizes: Original Size 2 11 17”, 8.5 14”, 8.5 13”, 8.5 11”, 8.5 11” portrait, 5.5 8.5”, Original Size 3 5.5 8.5”... -
Page 332: Scan Mode Settings
8.2 Overview of Tools Mode Item Description Available options Photo You can adjust the photo reproduction level of the Lower to Normal* to Higher Reproduction machine when copying with Text & Photo of Original (5 levels) Level Type on the Image Quality screen. If Lower is selected, then the black color of the image will be emphasized. - Page 333 8.2 Overview of Tools Mode ● Reduce/Enlarge Presets You can select the six preset ratios (besides 100%, Auto%, 50%) for Reduce/Enlarge on the Others screen.You can choose from 20 ratios to assign to the six buttons for Reduce/Enlarge Presets. Item Available options Reduce/Enlarge Preset 25%, 35% (A3 A6), 50% (A3 A5), 64% (11 17”...
-
Page 334: Setting Tools Mode
Setting Tools Mode This section explains how to specify the Tools Mode setting. 8.3.1 Changing Tools Mode Settings The following procedure explains how to specify basic Tools Mode settings, using the default values of the features as an illustration. Use the same procedure to specify other settings not mentioned here. - Page 335 8.3 Setting Tools Mode Select Change Settings. The default value screen of the selected feature is displayed. Here, we will illustrate by selecting Lighter/Darker. Select an option, and then select Save. The display returns to the Feature Defaults screen and the presently set value will be reflected.
-
Page 336: Changing Tools Password
8.3 Setting Tools Mode 8.3.2 Changing Tools Password You can change the password for accessing Tools Mode. You can enter a password between 4 to 12 digits. Procedure Display the Tools Mode screen. “8.1.1 Using System Administrator Mode” Select Administrator Password. “8.1.2 Entering/Exiting Tools Mode”... - Page 337 8.3 Setting Tools Mode Use the keypad to enter the same password that you have entered in Step 3. Select Confirm. The change of password will not be carried out if the same password is not entered for Step 3 and 6. If you made a mistake while entering the password, press Reset and proceed from Step 3 again.
-
Page 338: Overview Of Auditron Mode
Overview of Auditron Mode By the Auditron Administrator Mode, you can calculate the number of copies made by each account. As shown below, you can control the use of the machine as a password is needed to do copying. ● When a copy control device, like copylyser is installed, you cannot use the Auditron Administrator Mode. ■... - Page 339 8.4 Overview of Auditron Mode ■ Using the Auditron Administrator Mode To make use of the Auditron Administrator Mode features, firstly, you will need to specify settings for the account (by department/user), like user password and copy limit, on Create/Modify Accounts from Auditron Administrator Mode, and secondly, enable the mode from Auditron Setup.
-
Page 340: Auditron Menu
Auditron Menu This section explains how to set the Auditron Menu. 8.5.1 Review Accounts You can check the password assigned to each account, copy limit, and the current number of copies here. ● You do not need to be the Auditron Administrator in order to check these data here. For details, refer to “10.7 Checking Meter”. Procedure Display the Auditron Menu screen. -
Page 341: Create/Modify Accounts
8.5 Auditron Menu Select Confirm. The password, copy limit, and current copy volume of the account appears. Check the settings and then select Close. The display returns to the Auditron Menu screen. “8.1.3 Entering/Exiting Auditron Mode” Exit from the Auditron Administration mode. ●... -
Page 342: Account Data
8.5 Auditron Menu Select Key in Account Number and then enter the account number you wish to review by using the keypad. ● Account numbers range from 100 to 2,099. Alternatively, you can select the account number. Select Confirm. The password, copy limit, and current copy volume of the selected account appears. - Page 343 8.5 Auditron Menu When setting/modifying the copy limit: (1) Select Key in Copy Limit. The input area is blank. (2)Using the keypad, enter 0 or a value within the range of 0 to 6,553,500 in increments of 100, and then select Confirm. ●...
-
Page 344: Reset Account Data
8.5 Auditron Menu 8.5.3 Reset Account Data There are three ways to reset account data. Reset All Account Data You can reset the copy volumes of all accounts (by department/user) to zero. Also, you can reset data of each account (by department/user) such as password and copy limit. Reset All Copy Volumes You can reset the copy volume of all accounts (by department/user) to zero. -
Page 345: Auditron Setup
8.5 Auditron Menu Select Confirm to delete. Select Close. The display returns to the Auditron Menu screen. Exit from the Auditron Administrator Mode. “8.1.3 Entering/Exiting Auditron Mode” ● 8.5.4 Auditron Setup There are two types of Auditron setup: Auditron Mode To switch on or off the Auditron Mode. - Page 346 8.5 Auditron Menu Proceed to enable/disable the Auditron Mode and set the User Password Entry Screen Timer. When enabling/disabling Auditron Mode: (1)Select Off to disable or On to enable the Auditron Mode. ● When you have not set the account (by department/user) data, you cannot use the Auditron feature even if you select On for Auditron...
-
Page 347: Change Of Password
8.5 Auditron Menu 8.5.5 Change of Password You can change the password for accessing Auditron Administrator Mode. You can enter a password between 4 to 12 digits. Procedure Display the Auditron Menu screen. “8.1.3 Entering/Exiting Auditron Mode” Select Auditron Administrator Password. The Auditron Administrator Password screen is displayed. - Page 348 8.5 Auditron Menu Select Confirm. Use the keypad to enter the same password that you have entered in Step 3. Select Confirm. The setting will not be carried out if the passwords that you have entered in Step 3 and 5 are different. If you enter wrongly, select Reset and repeat from Step 3.
-
Page 349: Checking Network Settings
Checking Network Settings The following procedure explains how to check the network settings of this machine. ● You can change the mail settings. For the mail setting change procedure, see “7.2.5 Sending Scanned Files Automatically”. Procedure Press System Settings/ Meter Check. The Menu screen is displayed. - Page 350 8.6 Checking Network Settings Check the system settings. To finish checking, select Close continuously until the display returns to the copy screen. ●...
- Page 351 Troubleshooting Troubleshooting ...............322 Clearing Paper Jams............326 Clearing Document Jams ..........361 Solving Stapling Problems..........365 Solving Curled Output .............369...
-
Page 352: Troubleshooting
Troubleshooting This section explains how to deal with troubles when they occur. 9.1.1 Dealing With Error Messages A message will be shown on the display if paper jam or internal machine breakdown occurs. Follow the instructions shown to deal with the problem. If the problem persists even after you have tried the following solutions suggested, contact your Customer Support Center. -
Page 353: Dealing With Other Troubles
9.1 Troubleshooting 9.1.3 Dealing With Other Troubles When other problems occur, follow the check points below to troubleshoot. Symptoms Check Point Treatment No power. Is the plug inserted into the socket? Push the plug into the socket properly. Is the plug firmly inserted to the machine? Push the plug into the machine firmly. - Page 354 9.1 Troubleshooting Symptoms Check Point Treatment Parts of the images are Is the paper moist or damp? If the paper is damp, parts of the image not copied. may not be copied or the copies may not be clear. Replace with paper from a new ream.
- Page 355 9.1 Troubleshooting Symptoms Check Point Treatment Document jams occur Are suitable documents used? Load suitable documents on the DADF. very often. Are your documents out of shape, name “3.1 Types of Documents” cards, transparencies or of thin material? “3.2 Loading Documents” Does the document have any adhesive Remove all attachment like adhesive paper, clips or cellophane attached to it?
-
Page 356: Clearing Paper Jams
Clearing Paper Jams Once a paper jam is detected, the machine will stop and an error message is displayed. Follow the instructions displayed to remove the jammed paper. Remove the jammed paper gently to avoid tearing it. Even if the paper tears while you are removing it from the machine, ensure that you discard all the torn pieces. -
Page 357: Trays 1 - 4
9.2 Clearing Paper Jams 9.2.1 Trays 1 - 4 The following message will be displayed if paper is jammed in trays 1 to 4. Follow the procedure below to remove the jammed paper. Procedure Pull out the paper tray that is shown on the display. -
Page 358: Tray 5 (Bypass)
9.2 Clearing Paper Jams If the paper is torn, check that no torn pieces are left in the machine. Push the tray in slowly to the end. ● A message will appear and the machine will not start if the tray is not pushed in completely. - Page 359 9.2 Clearing Paper Jams Remove jammed paper from tray “2.2.2 Loading Paper in Tray 5 (bypass). (Bypass)” If the paper is torn, check that no torn pieces are left in the machine. Close the top cover of tray 5 (bypass). ●...
-
Page 360: Hcf
9.2 Clearing Paper Jams 9.2.3 Here, we explain how to remove paper jams which can occur at the various locations of the HCF. The explanation is divided into: “Paper jam at HCF”, “Paper jam inside HCF (top cover)”, “Paper jam inside HCF (top right cover)”... - Page 361 9.2 Clearing Paper Jams If the paper is torn, check that no torn pieces are left in the machine. Push in the tray slowly until it stops. ● A message will appear and the machine will not start if the tray is not closed completely.
- Page 362 9.2 Clearing Paper Jams Remove jammed paper. If the paper is torn, check that no torn pieces are left in the machine. Close the top cover. ● If the top cover of the machine is not closed completely, an error message will appear and the machine will not start.
- Page 363 9.2 Clearing Paper Jams Procedure Slide the HCF to the left, until the end. Open the top right cover of the HCF. Remove jammed paper. If the paper is torn, check that no torn pieces are left in the machine. Close the top right cover.
- Page 364 9.2 Clearing Paper Jams Slide back the HCF to the right, until it is connected to the machine. ● ■ Paper jam between HCF and copier The following message will be displayed if paper is jammed between the HCF and the copier. Follow the procedure below to remove the jammed paper.
- Page 365 9.2 Clearing Paper Jams Press the latch on the lower left cover of the machine to open it. Remove jammed paper. If the paper is torn, check that no torn pieces are left in the machine. Close the lower left cover of the machine.
-
Page 366: Tray 7
9.2 Clearing Paper Jams 9.2.4 Tray 7 The following message will be displayed if paper is jammed at tray 7. Follow the procedure below to remove the jammed paper. Procedure Lift document output tray, and press the button shown diagram. Open cover R4 to remove the jammed paper. -
Page 367: Lower Left Area
9.2 Clearing Paper Jams Close cover R4 and return the document output tray ● If the cover is not closed completely, to the original position. an error message is and the machine will not start. If paper or documents are still jammed at other locations, other error messages will be displayed. - Page 368 9.2 Clearing Paper Jams Remove jammed paper. If the paper is torn, check that no torn pieces are left in the machine. Close the lower left cover of the machine. ● If the lower left cover of the machine is not closed completely, an error message is displayed and the machine will not start.
-
Page 369: Inside Copier
9.2 Clearing Paper Jams 9.2.6 Inside Copier The following message will be displayed if paper is jammed at the transfer module of the machine. Follow the instructions below to clear the jammed paper. Never touch the areas on or near the fuser unit that are affixed with labels like Hot Surface and CAUTION. - Page 370 9.2 Clearing Paper Jams Remove jammed paper while lifting lever 1. Never touch the areas on or near the fuser unit that are affixed with labels like Hot Surface and CAUTION. You can get burnt as a result. If paper is jammed at the top of the transfer module or inside the fuser unit, remove it by pulling it out...
- Page 371 9.2 Clearing Paper Jams Press levers 3 and 4 up to their original positions. Push transfer module completely and turn the green lever to the left. If the lever cannot be turned, pull out the transfer module halfway and push it in again. Close the front door.
-
Page 372: Inside Finisher Left Door
9.2 Clearing Paper Jams 9.2.7 Inside Finisher Left Door Here, we explain how to remove jammed paper inside the finisher. The explanation is divided into: “Paper jam at lever R1 and cover 5”; “Paper jam at lever R1 and knob R2”; and “Paper jam at levers R3a and R3b”. - Page 373 9.2 Clearing Paper Jams Procedure Open the left door of the finisher. Lift up lever R1, press down the button at the lower right of the finisher and open the lower right cover 5. Remove jammed paper. If the paper is torn, check that no torn pieces are left in the machine.
- Page 374 9.2 Clearing Paper Jams ■ Paper jam at lever R1 and knob R2 The following message will be displayed if paper is jammed at lever R1 and knob R2 of the finisher. Follow the instructions below to clear the jammed paper. Procedure Open the left door of the finisher.
- Page 375 9.2 Clearing Paper Jams ■ Paper jam at levers R3a and R3b The following message will be displayed if paper is jammed at levers R3a and R3b of the finisher. Follow the instructions below to clear the jammed paper. Procedure Open the left door of the finisher.
-
Page 376: Inside Finisher Right Door
9.2 Clearing Paper Jams Return levers R3a and original position. Close the left door of the finisher. ● 9.2.8 Inside Finisher Right Door Here, we explain how to remove jammed paper inside the finisher. The explanation is divided into: “Paper jam at levers R12a and R12b”; “Paper jam at lever R14a and knob R13”; “Paper jam at lever R14b and knob R15”;... - Page 377 9.2 Clearing Paper Jams ■ Paper jam at levers R12a and R12b The following message will be displayed if paper is jammed at levers R12a and R12b of the finisher. Follow the instructions below to clear the jammed paper. Procedure Open the right door of the finisher.
- Page 378 9.2 Clearing Paper Jams ■ Paper jam at lever R14a and knob R13 The following message will be displayed if paper is jammed at lever R14a and knob R13 of the finisher. Follow the instructions below to clear the jammed paper. Procedure Open the right door of the finisher.
- Page 379 9.2 Clearing Paper Jams ■ Paper jam at lever R14b and knob R15 The following message will be displayed if paper is jammed at lever R14b and knob R15 of the finisher. Follow the instructions below to clear the jammed paper. Procedure Open the right door of the finisher.
- Page 380 9.2 Clearing Paper Jams ■ Paper jam at lever R16 and knob R11 The following message will be displayed if paper is jammed at lever R16 and knob R11 of the finisher. Follow the instructions below to clear the jammed paper. Procedure Open the right door of the finisher.
-
Page 381: Folding Unit (Z And C)
9.2 Clearing Paper Jams 9.2.9 Folding Unit (Z and C) This section explains how to remove jammed paper from inside the folding unit (Z and C) when this optional unit is installed in a staple finisher (optional) or a booklet maker finisher (optional); “Paper jam at areas R5 and R11”;... - Page 382 9.2 Clearing Paper Jams Procedure Open the right door of the finisher. Lift up lever R5 and then turn knob counterclockwise remove jammed paper. If the paper is torn, check that no torn pieces are left in the machine. Return lever R5 to the original position.
- Page 383 9.2 Clearing Paper Jams ■ Paper jam at lever R6 and knob R7 The following message will be displayed if paper is jammed at lever R6 and knob R7 of the finisher. Follow the instructions below to clear the jammed paper. Procedure Open the right door of the finisher.
- Page 384 9.2 Clearing Paper Jams ■ Paper jam at knob R7, levers R8a/area R8b, and tri-fold output tray R9 The following message will be displayed if paper is jammed. Follow the instructions below to clear the jammed paper. Procedure Open the right door of the finisher. Pull out the tri-fold output tray R9, swing lever R8a to the right, and remove...
- Page 385 9.2 Clearing Paper Jams Swing back the opened lever (R8b or R8a), and push back tri-fold output tray R9. Close the right door of the finisher. ● ■ Paper jam at tri-fold output tray R9 and lever R10 The following message will be displayed if paper is jammed at tri-fold output tray R9 and lever R10 of the finisher.
- Page 386 9.2 Clearing Paper Jams If the paper is torn, check that no torn pieces are left in the machine. Return lever R10 to the original position and push back the tri-fold output tray R9. Close the right door of the finisher. ●...
- Page 387 9.2 Clearing Paper Jams Pull out unit R17. Turn knob R19 to the left remove jammed paper from the left side of the unit. If paper is jammed at lever R18, open lever R18 to remove the paper. If the paper is torn, check that no torn pieces are left in the machine.
-
Page 388: Output Area Of Finisher
9.2 Clearing Paper Jams 9.2.10 Output Area of Finisher Here, we explains how to remove jammed paper at the output area of the finisher. The explanation is divided into: “Paper jam at output tray”; “Paper jam at finisher tray”; Paper jam at booklet output tray”. ■... - Page 389 9.2 Clearing Paper Jams ■ Paper jam at finisher tray The following message will be displayed if paper is jammed. Follow the instructions below to clear the jammed paper. Procedure Remove jammed paper from the finisher tray. If the paper is torn, check that no torn pieces are left in the machine.
- Page 390 9.2 Clearing Paper Jams ■ Paper jam at booklet output tray The following message will be displayed if paper is jammed at booklet output tray of the finisher. Follow the instructions below to clear the jammed paper. Procedure Open the right door of the finisher.
-
Page 391: Clearing Document Jams
Clearing Document Jams Once the document is jammed in the DADF, the machine will stop and error message will appear. Follow the instructions to clear the jam and then re-load the documents into the DADF. ■ Document jam at left cover (top area) Once the document is jammed in the DADF, the machine will stop and the following error message will appear. - Page 392 9.3 Clearing Document Jams Remove jammed document. Push the left cover of the DADF back until it clicks. Check that the documents are not torn, folded or ● Loading torn, folded or wrinkled documents will jam or damage the wrinkled, and then follow documents.
- Page 393 9.3 Clearing Document Jams ■ Document jam at output area and underneath DADF The following message will be displayed if paper is jammed at the output area and underneath the DADF. Follow the instructions below to clear the jammed document. Procedure Remove jammed...
- Page 394 9.3 Clearing Document Jams Lift the DADF slowly. Remove jammed document. Put the DADF slowly back in place. Check that the documents are not torn, folded or ● Loading torn, folded or wrinkled wrinkled, and then follow documents will jam or damage the the displayed instructions documents.
-
Page 395: Solving Stapling Problems
Solving Stapling Problems This section explains the problems that may arise from stapling. If no staple is found or the staple is bent after stapling, follow the procedure on the next page to proceed. If the suggestion does not solve your problem, contact your Customer Support Center. - Page 396 9.4 Solving Stapling Problems Procedure Check that the machine has stopped and then open the right door of the finisher. Remove the staple cartridge. “UR1” (1) Lift up the lever as shown diagram. (2)Pull staple cartridge. (3)Open staple cartridge cover ●...
- Page 397 9.4 Solving Stapling Problems (4)If the jammed staple cannot removed, ● If the staples cannot be removed in push the staple in the the suggested way, contact your direction shown Customer Support Center. remove it. (5)Push staple cartridge back to the original position.
- Page 398 9.4 Solving Stapling Problems (3)Remove the jammed staple as shown in the diagram. When removing the staple, be extra careful not to injure your fingers. (4)Holding the tabs of the booklet staple cartridge, return cartridge to the original position gently push it until it clicks.
-
Page 399: Solving Curled Output
Solving Curled Output You can correct the curling of output by pressing the De-curl button. This feature is used only when the output is curled upward. The De-curl button functions both in suspension and in operation if the power of the this machine is on. The curling may be reversed by reloading the paper upside down if the output is curled downward. - Page 400 9.5 Solving Curled Output ■ Modes and functions of De-curl button De-curl button Functions Indicator Mode Auto Performs curling correction automatically. The optimal curling correction is automatically performed according to the paper size or output orientation. It is recommended that this feature be used in Auto mode. The Auto mode is entered in the following cases: - After turning on the power of this machine - After canceling the power saver mode...
- Page 401 Daily Care 10.1 Cleaning Copier..............372 10.2 Consumables..............373 10.3 Replacing Toner Cartridge ..........376 10.4 Replacing Waste Toner Bottle A ........379 10.5 Replacing Staple Cartridge ..........381 10.6 Emptying Punch Scrap Container ........385 10.7 Checking Meter ..............387...
-
Page 402: Cleaning Copier
Cleaning Copier If the document cover, DADF (belt area) and document glass are dirty, copies made might be dirtied and the document size might not be detected accurately. In order that clean copies can be made each time, you are recommended to clean the copier once a month. -
Page 403: Consumables
Consumables You can check the consumables status on the screen. This section explains how to handle the consumables and check their status. ■ Checking consumables status Refer to the Consumables screen to check the consumables status at a glance. The consumables status is indicated as “OK”, “Replace Soon (Near Empty)”, “Replace Now (Empty)”... - Page 404 -- XE 5000 4 sets per box 8R12925 Staple cartridge for booklet maker finisher Xerox C *1 Optional *2 For booklet maker finisher ● You can replace the staple cartridge installed in the finisher to the optional cartridge for 50 sheets. For details, contact your...
-
Page 405: Handling Consumables
10.2 Consumables ■ Handling consumables • Do not place the boxes of consumables vertically. • Open the packaging of the consumables only when you need to use them. Do not store them in the following places: Hot and humid places Near a fire Under direct sunlight Dusty places... -
Page 406: Replacing Toner Cartridge
Replacing Toner Cartridge The toner cartridge contains toner that decreases each time after a copy is made. When it is time for the toner cartridge to be replaced, the message below is displayed. When the message is displayed, replace the toner cartridge.I f you continue to do copying without replacing the toner cartridge, you can make another 2,000 copies before the machine stops and no further copying will then be allowed. - Page 407 10.3 Replacing Toner Cartridge Turn the toner cartridge unit to the right to open. Turn the toner cartridge to the left until it aligns with the unlock sign and a click sound is heard. Pull out the toner cartridge slowly and then lift to Pull out the toner cartridge slowly.
- Page 408 10.3 Replacing Toner Cartridge Push and turn the toner cartridge to the right until the end. Turn the toner cartridge unit to the left until it clicks. Close the front door. The “Ready to copy” message is ● If the front door of the machine is not displayed.
-
Page 409: Replacing Waste Toner Bottle A
Replacing Waste Toner Bottle A When the waste toner bottle is full, the message below will be displayed. When the message is displayed, replace the waste toner bottle. If you continue to do copying without replacing the waste toner bottle, you can make another 2,100 copies before the machine stops. The number of copies allowed, however, may differ according to the document used. - Page 410 10.4 Replacing Waste Toner Bottle A Grip the handle of the waste toner bottle and pull The waste toner bottle is long and ● out about half of it. may be heavy due to the used toner in it. Use both hands to support the cartridge as you pull it out.
-
Page 411: Replacing Staple Cartridge
Replacing Staple Cartridge The message below will be displayed when it is time to replace to staple cartridge. Replace the staple cartridge when the message is displayed. ● Contact your Customer Support Center to place order for the staple cartridge. ●... - Page 412 10.5 Replacing Staple Cartridge Replace the staple case. When staple cartridge UR1 is used (1)Hold the UR1 at the position shown in the diagram lift slightly. (2)Pull staple cartridge. (3)Push positions indicated by arrows to remove the staple case from the cartridge. (4)Push the new staple case into the staple cartridge.
- Page 413 10.5 Replacing Staple Cartridge (6)Hold the staple case as shown in the diagram. (7)Push removed cartridge back to the original position. (8)Push it downward until it clicks. ● Take care not to jam paper in the cartridge when paper remains in the finisher.
- Page 414 10.5 Replacing Staple Cartridge (4)Holding the tabs of the booklet staple cartridge, return the cartridge to the original position and gently push it until it clicks. (4)Push the cartridge back to the original position. Close the right door of the finisher. ●...
-
Page 415: Emptying Punch Scrap Container
Emptying Punch Scrap Container The message below will be displayed when it is time to empty the punch scrap container. Discard the scraps when the message is displayed. When pulling the punch scrap container out to dispose the punch scraps, ensure that all the scraps are discarded. - Page 416 10.6 Emptying Punch Scrap Container Discard all the scraps. ● When the punch scrap container has been pulled out even slightly, ensure that all the scraps are discarded. If there are scraps remaining, the container may be full before the next message is displayed, and this may cause machine breakdown.
-
Page 417: Checking Meter
Checking Meter You can check the total number of copies made so far on the Meter Check screen. The total number of copies for each department can be checked on the Accounts Meter Check screen. When the Auditron Administration Mode is enabled, you can also check the total number of copies made for an account. “8.5 Auditron Menu”... -
Page 418: Checking The Total Number Of Copies For Each Department
10.7 Checking Meter The Billing Meter screen is displayed. ● Record the reading of Meter 1 of Current Meter Reading when reporting your meter reading fax. Select Close after checking. The display returns to the Menu screen. Select Close. The display returns to the copy screen. ●... - Page 419 10.7 Checking Meter Select Account Billing Meter. ● The copy document counter displays the number of document pages fed up to present, along with the number of pages that have been copied and output. When Rest is selected, the number of pages counted returns to “0”.
- Page 420 10.7 Checking Meter...
-
Page 421: Appendix
Appendix Specifications..............392 Possible Combinations of Features .......398 Originals/Copies Orientation (With Covers) ....404 Originals/Copies Orientation (With Drilled Paper) ..407... -
Page 422: Specifications
Specifications The following is a list of main specifications of the 2101. Changes to specifications and the appearance of the product may be made without prior notice. ■ Standard specifications Copier Type Console Copying Method Indirect electrostatic Development Method Dry development... - Page 423 A Specifications Continuous Copy Speed <Using trays 1 to 4 and 6, continuous 1-sided copying, size-for-size:> B5 portrait : 110 copies/min : 62 copies/min A4 portrait : 101 copies/min : 62 copies/min : 62 copies/min : 52 copies/min <Using tray 5 (bypass), continuous 1-sided copying, size-for-size:> A4 portrait : 50 copies/min : 35 copies/min...
- Page 424 A Specifications ■ DADF Document Size Maximum: 297×432 mm (A3, 11×17"), Minimum: 148×210 mm (A5 portrait) A3, B4, A4, A4 portrait, A5, A5 portrait, B5, B5 portrait, 8.5×11", 8.5×11" portrait, 8.5×14" G.S.M. 38 to 128 g/m (2-sided document: 50 to 110 g/m Output Tray Capacity 50 sheets (but up to 40 sheets only for paper exceeding 100 g/m ) (FX P and L paper)
- Page 425 A Specifications ■ Staple finisher (optional)/booklet maker finisher (optional) Tray Type Output tray : Collated/Uncollated Finisher tray : Collated/Uncollated (Offset available) Output Tray Paper Size A3, B4, A4, A4 portrait, B5, B5 portrait, A5, postcard, 12×18", 12.6×17.7" (SRA3), 11×17", 8.5×14", 8.5×13", 8.5×11", 8.5×11" portrait, 8×10" portrait, 5.5×8.5", 8 K, 16 K portrait, non-standard sizes (Y direction: 100 to 320 mm, X direction: 148 to 457.2 mm) Capacity...
- Page 426 A Specifications Booklet Output Tray Paper Size A3, B4, A4, 11×17", 8.5×14", 8.5×13", 8.5×11", 8 K, non-standard sizes Non-standard sizes are as follows: • Y direction: 210 to 297 mm, X direction: 279 to 432 mm • X and Y are the same sizes. •...
- Page 427 A Specifications ■ Folding unit (Z and C) (optional) Z Fold Paper Size A3, 11×17", B4, 8 K Capacity Max.: 30 sheets (A3, 11×17", FX P paper) 20 sheets for 8 K and B4 G.S.M. 60 to 90 g/m Delivered to Finisher tray Tri-Fold (In/Out) Paper Size...
-
Page 428: Possible Combinations Of Features
Possible Combinations of Features Tray 5 (bypass) Selected Feature (Second selection) Selected Feature (First selection) A A A A A A A A A A A E Paper Supply - Auto A A A A A A A A A A Trays 1 -4/Tray 6 - Plain Trays 2-4/Tray 6 - Heavywt 1 A A A A A A A A A A A... -
Page 429: B Possible Combinations Of Features
B Possible Combinations of Features Tray 5 (by pas s ) S elected F eature (S econd selection) S elected F eature (F irst selection) P aper S upply - A uto Trays 1 -4/Tray 6 - P lain Trays 2-4/Tray 6 - Heavywt 1 Tray 7 (S eparator/C over) E 11 P lain/Heavywt 1... - Page 430 B Possible Combinations of Features B uild S elected F eature (S econd selection) S elected F eature (F irst selection) P aper S upply - A uto Trays 1 -4/Tray 6 - P lain Trays 2-4/Tray 6 - Heavywt 1 10 10 10 10 10 10 Tray 7 (S eparator/C over) P lain/Heavywt 1...
- Page 431 B Possible Combinations of Features T ra y 5 (b yp a s s ) S e le c te d F e a tu re (S e c o n d s e le c ti o n ) S e le c te d F e a tu re (S e c o n d s e le c ti o n ) A n n o ta ti o n...
- Page 432 B Possible Combinations of Features Selected Feature (Second selection) Selected Feature (First selection) B 15 Bound Originals - Top then Bottom B 15 Bound Originals - Left then Right/Right then Left B 15 Bound Originals - 2 Sided B 15 Bound Originals - 1 Sided B 15 Book Duplex...
- Page 433 B Possible Combinations of Features Build Selected Feature (Second selection) Selected Feature (First selection) Annotation Margin Shift - Auto Center Margin Shift - Corner (Side 1) Margin Shift - Corner (Side 2) Margin Shift - Variable (Side 1) Margin Shift - Variable (Side 2) Edge Erase - Top &...
-
Page 434: Originals/Copies Orientation (With Covers)
Originals/Copies Orientation (With Covers) This section explains the orientation of the documents and copies when copying with covers: ● The following table indicates that Normal/HeavyWt-1 is selected for tray 5 (bypass). ■ Without stapling Document setting Copy paper setting & Tray 7 not Tray 7 selected Copies result... - Page 435 C Originals/Copies Orientation (With Covers) ■ With stapling Document setting Copy paper setting Tray 7 not Copies result Tray 7 selected Orientation Original Output selected Staple on DADF orientation orientation Tray 5 Tray 5 Tray 7 1st Page Head to Top Top Left &...
- Page 436 C Originals/Copies Orientation (With Covers) Document setting Copy paper setting Tray 7 not Copies result Tray 7 selected Orientation Original Output selected Staple on DADF orientation orientation Tray 5 Tray 5 Tray 7 Head to Top Top Left Head to Left &...
-
Page 437: Originals/Copies Orientation (With Drilled Paper)
Originals/Copies Orientation (With Drilled Paper) The following table shows the orientation of documents and copies when copying with drilled paper. Copy paper setting Copies result Output Staple Orientation on DADF Tray 6 (resulting image) orientation Tray 1 Tray 2 to 4 (high capacity) Staples (Left Double) - Page 438 D Originals/Copies Orientation (With Drilled Paper) Copy paper setting Copies result Output Staple Orientation on DADF Tray 6 (resulting image) orientation Tray 1 Tray 2 to 4 (high capacity) Head to No staples staples Head to Left This table displays the orientation for A4 size documents and copies. Refer to this table when the output orientation is Auto (Face down).
-
Page 439: Index
Index ...........182 Numerics Build Job ..........14 Build Job button ........... 300 100% Fine-tune ..........78 1-sided copying ....80 1-sided documents to 2-sided copies ............78 ........13 2 Sided C (Clear) button ............141 ........10 2 Up Cancelling Auto Start .......... - Page 440 Index ..........223 ............25 Deleting pages ........... 137 Density Control ............14 Display ........3 Document check light ..........17 ......... 295 Document count Hard Keypad Input Tone ..........2 ............5 Document cover ......2 ......... 49 Document glass Head to Left ..........
- Page 441 Index ..........25 Paper weight .......26 Paper, storing and handling ........13 ........295 Password button Machine Ready Tone ......... 283 ......... 12 Passwords Main Control Panel ..........62 ........2 Pause operation Main control panel ........134 ... 129 Photo (Original Type) Making two sided copies from a bound document .......
- Page 442 Index ..........167 ..........5 Set Numbering Top left cover ........205 .... 122 Setting Folder Name Top Page Then Bottom (Bound Originals) ....239 ..........5 Setting or Changing Mailbox Password Top right cover ........194 ......13 Setting Storage Folders Touch panel display .......
- Page 443 Xerox Corporation Global Knowledge & Language Services 800 Phillips Road - Bldg 845-17S Webster, New York 14580-9791 Printed in the USA...
- Page 444 July 2003 701P40566...
Need help?
Do you have a question about the 2101 and is the answer not in the manual?
Questions and answers