Table of Contents
Advertisement
Quick Links
I-VICFLEX
FIELD INSTALLATION HANDBOOK
Victaulic
• Read and understand all instructions before attempting to install any
Victaulic products.
• Always verify that the piping system has been completely depressurized
and drained immediately prior to installation, removal, adjustment, or
maintenance of any Victaulic products.
• Confirm that any equipment, branch lines, or sections of piping that may
have been isolated for/during testing or due to valve closures/positioning
are identified, depressurized, and drained immediately prior to installation,
removal, adjustment, or maintenance of any Victaulic products.
• Wear safety glasses, hardhat, foot protection, and hearing protection.
Failure to follow these instructions could result in death or serious personal
injury and property damage.
Contact Victaulic with any questions regarding safe and proper installation
Visit victaulic.com for the most up-to-date information on Victaulic products.
VicFlex
®
WARNING
of products featured in this handbook.
Products
™
Advertisement
Table of Contents

Subscribe to Our Youtube Channel
Related Manuals for Victaulic VicFlex I-VICFLEX


Summary of Contents for Victaulic VicFlex I-VICFLEX
- Page 1 Failure to follow these instructions could result in death or serious personal injury and property damage. Contact Victaulic with any questions regarding safe and proper installation of products featured in this handbook. Visit victaulic.com for the most up-to-date information on Victaulic products.
-
Page 3: Table Of Contents
Table of Contents GENERAL INFORMATION ............... 11 Hazard Identification ..............12 Introduction .................12 CONSTRUCTION REQUIREMENTS ........... 17 STYLES AB1, AB2, AND AB10 BRACKETS ....... 21 Introduction .................22 Style AB1 Bracket Assembly Drawing ..........22 Style AB2 Bracket Assembly Drawing ..........23 Style AB10 Bracket Assembly Drawing ........24 Installation of Style AB1, AB2, and AB10 Brackets for ASTM 635 Ceiling Suspension Systems in Accordance with ASTM 636 Standards ..................24... - Page 4 STYLE AB4 BRACKET ............39 Introduction .................40 Style AB4 Bracket Assembly Drawing ..........40 Installation of AB4 Bracket for ASTM C645 Hat Furring Channel Ceiling Systems in Accordance with ASTM C754 Standards ..41 STYLE AB5 BRACKET ............43 Introduction .................44 Style AB5 Bracket Assembly Drawing ..........44 Installation for Wood Joists/Studs ..........45 STYLE AB6 BRACKET ............
- Page 5 STYLE AB11 BRACKET ............69 Introduction .................70 Style AB11 Bracket Assembly Drawing ........70 Installation of Style AB11 Brackets for ASTM C635 Ceiling Suspension Systems Installed in Accordance with ASTM C636 or ASTM C754 Standards ..............71 STYLE AB12 BRACKET ............73 Introduction .................74 Style AB12 Bracket Assembly Drawing ........74 Installation of Style AB12 Brackets Onto 3/8-inch/M10 Threaded...
- Page 6 ™ Series AH1-CC, AH1-CC-LP, AH2-CC, AH2-CC-LP, or AH2-CC-300 VICTAULIC VicFlex Flexible Hose ...........131 ® ™ Instructions for the Initial Use of A Victaulic Firelock No. 101 90° ® ™ Elbow or No. 102 Straight Tee Installation-Ready Fitting with a ™...
- Page 7 Brackets ..................146 SPRINKLER INSTALLATION ..........149 Sprinkler Installation for AB1, AB2, AB3, AB4, AB5, AB7, AB10, AB11, AB12, ABBA, and ABMM Brackets .........150 Ceiling Tile Installation for AB1 and AB2 Brackets ......150 VICTAULIC VICFLEX TAMPER-EVIDENT LABELS ....151 ® ™ Overview ..................152 Applying the Tamper-Evident Label to the Style AB7 End Bracket ..................153...
- Page 8 Listing and Approval Information – Flexible Hose and Bracket Combinations (AH2-CC-300/AH2-300 AND AH3/AH3-LP) ..164 Listing and Approval Information – Flexible Hose and Bracket Combinations (AH4/AH4-LP) .............165 Listing and Approval Information – Flexible Hose and Bracket ........... 166 Combinations (AH5 AND VS1) Listing and Approval Information –...
- Page 9 Series AH2-AB6/AH2-CC-AB6 Flexible Hose Friction Loss Data (UL) ..................189 Series AH5 Flexible Hose Friction Loss Data (UL) ......190 Series AH1, AH1-CC, AH1-LP, and AH1-CC-LP Flexible Hose Friction Loss Data (VDS) ............191 Series AH2, AH2-CC, AH2-LP, and AH2-CC-LP Flexible Hose Friction Loss Data (VDS) ............192 Series AH3, AH3-LP and AH4 Flexible Hose Friction Loss Data (VDS) ..................193 Series AH1, AH1-CC, AH2, and AH2-CC Flexible Hose Friction...
- Page 10 This page intentionally left blank I-VICFLEX_10...
-
Page 11: General Information
General Information I-VICFLEX_11... -
Page 12: Hazard Identification
® ™ building codes to ensure proper product selection and application. Additional copies of installation instructions and submittal documents are available to download on the Victaulic ® website, victaulic.com. Always follow good piping practices. Specified pressures, temperatures, performance standards, and tolerances shall never be exceeded. - Page 13 WARNING • Read and understand all instructions before attempting to install any Victaulic ® products. • Always verify that the piping system has been completely depressurized and drained immediately prior to installation, removal, adjustment, or maintenance of any Victaulic products.
- Page 14 Victaulic VicFlex products are intended to be installed in wet, dry, or preaction ® ™ actuated systems. Deviations from these standards or alterations to Victaulic ® VicFlex products or sprinklers will void any Victaulic warranty and will impact ™...
- Page 15 Victaulic VicFlex Series AH1 and AH2 Flexible Hoses can be installed for ® ™ hydrostatic testing and then readjusted for final sprinkler placement once the ceiling structure and associated Victaulic VicFlex brackets are installed. ® ™ • Protect wet piping systems from freezing temperatures.
- Page 16 This page intentionally left blank I-VICFLEX_16...
-
Page 17: Construction Requirements
Construction Requirements I-VICFLEX_17... - Page 18 Geipel Knauf Odenwald Rockfon Pagos Metallic Style AB3 Bracket The Victaulic VicFlex Style AB3 Bracket is designed for use as a surface-mount bracket ® ™ for pendent or sidewall applications in wood, metal, or concrete block walls or ceilings. Style AB4 Bracket Construction shall meet the requirements of ASTM C645 for hat furring channel ceiling systems and shall be installed in accordance with ASTM C754 standards.
- Page 19 Style AQC-U The Victaulic VicFlex Style AQC-U Sprinkler Fitting is FM Approved for use with ® ™ cleanroom ceilings. Refer to the “Listing and Approval Information - Flexible Hose Assemblies with Corresponding Maximum Working Pressure Rating (AQC-U/AQC and AQD)” section in this handbook.
- Page 20 This page intentionally left blank I-VICFLEX_20...
-
Page 21: Styles Ab1, Ab2, And Ab10 Brackets
Styles AB1, AB2, and AB10 Brackets Installation Instructions I-VICFLEX_21... -
Page 22: Introduction
INTRODUCTION Victaulic VicFlex Sprinkler Fittings connect the sprinkler piping directly to the sprinkler ® ™ using a flexible hose and fittings and are designed for use in ceiling suspension systems. • Refer to the “General Information” and “Construction Requirements” sections. -
Page 23: Style Ab2 Bracket Assembly Drawing
STYLE AB2 BRACKET ASSEMBLY DRAWING Item Style AB2 Description 24-inch/610-mm or 48-inch/1219-mm Square Bar* Center Gate Assembly with Adjustment Screw End Bracket with Sheet Metal Screw Wing Screw Relocation Warning Label Helical Spring-Lock Washer T25 Socket Button Head Cap Screw *For the UL Listing, when the 48-inch/1220-mm length bracket is used, the maximum sprinkler K-factor is K8.0 and the maximum spacing is 30-inches/762-mm. -
Page 24: Style Ab10 Bracket Assembly Drawing
STYLE AB10 BRACKET ASSEMBLY DRAWING Item Style AB10 Description 6-inch/152-mm Square Bar Center Gate Assembly with Wing Nut End Bracket with Sheet Metal Screw Relocation Warning Label Helical Spring-Lock Washer T25 Socket Button Head Cap Screw INSTALLATION OF STYLE AB1, AB2, AND AB10 BRACKETS FOR ASTM 635 CEILING SUSPENSION SYSTEMS IN ACCORDANCE WITH ASTM 636 STANDARDS... - Page 25 FOR STYLES AB1 AND AB2 BRACKETS ONLY: For adjustment purposes, the wing screw on top of the end bracket assembly can be loosened to allow the end bracket to slide on the square bar. Tighten the wing screw on top of the end bracket assembly to a torque of 36 inch-lbs/ 4 N•m (approximately 1/2 to 3/4 of a turn past hand-tight) to secure the...
-
Page 26: Installation Of The Style Ab2 Bracket For Astm C645 Hat Furring Channel Ceiling Systems Installed In Accordance With Astm C754 Standards (Fm And Vds Only)
INSTALLATION OF THE STYLE AB2 BRACKET FOR ASTM C645 HAT FURRING CHANNEL CEILING SYSTEMS INSTALLED IN ACCORDANCE WITH ASTM C754 STANDARDS (FM AND VDS ONLY) 1. Install the flexible hose into the sprinkler piping and the sprinkler reducing nipple onto the flexible hose by following the applicable instructions in the “Connection to Sprinkler Piping”... - Page 27 4. To secure the end brackets to the T-bar rails of the CD Profile (60-mm) Channel Ceiling System, tighten a #10 diameter x 1-inch length sheet metal screw (not provided) into the center and bottom right hole locations of each end bracket (four total locations), as shown above.
-
Page 28: Wood Joists/Studs Installation (Fm Only For Ab1 And Fm/Ul For Ab2)
WOOD JOISTS/STUDS INSTALLATION (FM ONLY FOR AB1 AND FM/UL FOR AB2) 1. Install the flexible hose into the sprinkler piping and the sprinkler reducing nipple onto the flexible hose by following the applicable instructions in the “Connection to Sprinkler Piping” and “Connecting the Sprinkler Reducing Nipple to the Flexible Hose” sections. 2. -
Page 29: Astm C645 Metal Joists/Studs In Accordance With Astm C754 Standards Installation (Fm Only For Ab1 And Fm/Ul For Ab2)
ASTM C645 METAL JOISTS/STUDS IN ACCORDANCE WITH ASTM C754 STANDARDS INSTALLATION (FM ONLY FOR AB1 AND FM/UL FOR AB2) 1. Install the flexible hose into the sprinkler piping and the sprinkler reducing nipple onto the flexible hose by following the applicable instructions in the “Connection to Sprinkler Piping”... -
Page 30: Alternative #1 - Wood Joist/Stud Installation (Fm Only For Ab1 And Ab2)
ALTERNATIVE #1 – WOOD JOIST/STUD INSTALLATION (FM ONLY FOR AB1 AND AB2) 1. Install the flexible hose into the sprinkler piping and the sprinkler reducing nipple onto the flexible hose by following the applicable instructions in the “Connection to Sprinkler Piping”... -
Page 31: Alternative #1 - Metal Joist/Stud Installation (Fm Only For Ab1 And Ab2)
ALTERNATIVE #1 – METAL JOIST/STUD INSTALLATION (FM ONLY FOR AB1 AND AB2) 1. Install the flexible hose into the sprinkler piping and the sprinkler reducing nipple onto the flexible hose by following the applicable instructions in the “Connection to Sprinkler Piping”... -
Page 32: Alternative #2 - Wood Joist/Stud Installation (Fm Only For Ab1 And Ab2)
ALTERNATIVE #2 – WOOD JOIST/STUD INSTALLATION (FM ONLY FOR AB1 AND AB2) 1. Install the flexible hose into the sprinkler piping and the sprinkler reducing nipple onto the flexible hose by following the applicable instructions in the “Connection to Sprinkler Piping”... -
Page 33: Alternative #2 - Metal Joist/Stud Installation (Fm Only For Ab1 And Ab2)
ALTERNATIVE #2 – METAL JOIST/STUD INSTALLATION (FM ONLY FOR AB1 AND AB2) 1. Install the flexible hose into the sprinkler piping and the sprinkler reducing nipple onto the flexible hose by following the applicable instructions in the “Connection to Sprinkler Piping”... - Page 34 This page intentionally left blank I-VICFLEX_34...
-
Page 35: Style Ab3 Bracket
Style AB3 Bracket Installation Instructions I-VICFLEX_35... -
Page 36: Introduction
INTRODUCTION The Style AB3 Sprinkler Fitting can be installed as a surface mount bracket for pendent or sidewall applications in wood, metal, or concrete block walls or ceilings, along with VicFlex™ flexible hoses. For institutional sprinklers used with the Style AB3 Bracket, refer to the specific sprinkler manufacturer’s technical data and installation instructions for complete requirements. -
Page 37: Installation Of The Style Ab3 Surface-Mount Bracket On A Wall Or Ceiling
MOUNT BRACKET ON A WALL OR CEILING WARNING • The flexible hose shall not be bent or fluctuated up-and-down or side-to-side when pressurized. • Style AB3 Surface-Mount Brackets shall be installed only with Victaulic ® VicFlex Series AH1, AH2, AH2-300, AH2-CC-300, AH2-638 or AH4 flexible ™... - Page 38 NOTICE • When the Style AB3 is used in institutional applications, install the institutional sprinkler by following the manufacturer’s installation instructions. For other applications that utilize Victaulic FireLock Automatic Sprinklers, refer to ® ™...
-
Page 39: Style Ab4 Bracket
Style AB4 Bracket Installation Instructions I-VICFLEX_39... -
Page 40: Introduction
INTRODUCTION Victaulic VicFlex Sprinkler Fittings connect the sprinkler piping directly to the sprinkler ® ™ using a flexible hose and fittings and are designed for use in hat furring channel ceiling applications. Ceiling construction shall meet the requirements of ASTM C645 and shall be installed in accordance with ASTM C754. -
Page 41: Installation Of Ab4 Bracket For Astm C645 Hat Furring Channel Ceiling Systems In Accordance With Astm C754 Standards
INSTALLATION OF AB4 BRACKET FOR ASTM C645 HAT FURRING CHANNEL CEILING SYSTEMS IN ACCORDANCE WITH ASTM C754 STANDARDS 1. Install the flexible hose into the sprinkler piping and the sprinkler reducing nipple onto the flexible hose by following the applicable instructions in the “Connection to Sprinkler Piping”... - Page 42 5. Tighten the wing screw on top of each end bracket assembly to a torque of 36 inch-lbs/4 N•m (approximately 1/2 to 3/4 of a turn past hand-tight) to secure the end brackets to the square bar. 5/16 6. Using a -inch hex drive bit, tighten the #10-24 x -inch sheet metal screw (provided with the bracket) through the two locations on each end bracket and into the...
-
Page 43: Style Ab5 Bracket
Style AB5 Bracket Installation Instructions I-VICFLEX_43... -
Page 44: Introduction
INTRODUCTION Victaulic VicFlex Sprinkler Fittings connect the sprinkler piping directly to the sprinkler ® ™ using a flexible hose and fittings. • Refer to the “Technical Data for Flexible Hoses” section. • Refer to the “Important Installation Information” section. STYLE AB5 BRACKET ASSEMBLY DRAWING... -
Page 45: Installation For Wood Joists/Studs
INSTALLATION FOR WOOD JOISTS/STUDS 1. Install the flexible hose into the sprinkler piping and the sprinkler reducing nipple onto the flexible hose by following the applicable instructions in the “Connection to Sprinkler Piping” and “Connecting the Sprinkler Reducing Nipple to the Flexible Hose” sections. 2. - Page 46 INSTALLATION FOR CD PROFILE (60 MM) CHANNEL CEILING SYSTEMS (FM AND VdS ONLY) 1. Install the flexible hose into the sprinkler piping and the sprinkler reducing nipple onto the flexible hose by following the applicable instructions in the “Connection to Sprinkler Piping”...
- Page 47 INSTALLATION FOR ASTM C645 METAL JOISTS/ STUDS INSTALLED IN ACCORDANCE WITH ASTM C754 STANDARDS 1. Install the flexible hose into the sprinkler piping and the sprinkler reducing nipple onto the flexible hose by following the applicable instructions in the “Connection to Sprinkler Piping”...
- Page 48 INSTALLATION FOR ASTM C645 HAT FURRING CHANNEL CEILING SYSTEMS INSTALLED IN ACCORDANCE WITH ASTM C754 STANDARDS (FM ONLY) NOTICE • The installer shall verify suitability of fit between the Style AB5 Bracket assembly, sprinkler head, and hat furring channel ceiling system. •...
- Page 49 5. Secure the end brackets to the square bar by tightening the wing screw on top of each end bracket assembly until the bottom of the wing screw reaches metal- to-metal contact with the top of the end bracket. 6. Complete the installation by following the applicable instructions in the “Sprinkler Reducing Nipple Installation”...
- Page 50 This page intentionally left blank I-VICFLEX_50...
-
Page 51: Style Ab6 Bracket
Style AB6 Bracket Installation Instructions I-VICFLEX_51... -
Page 52: Introduction
10.90 for details regarding Style AB6 Bracket Assembly ® weights. The ceiling or wall shall be designed to support the load of the Style AB6 Bracket Assembly. Victaulic publication 10.90 can be downloaded at victaulic.com ® DRY SPRINKLER INSTALLATION EXAMPLE End seal 1-inch/33.7-mm... -
Page 53: Technical Data For Models V33, V36, And V40 Dry Sprinklers
For technical information regarding the Model V33, V36, or V40 Dry Sprinkler, refer to Victaulic publication 10.90, which can be downloaded at victaulic.com. ® NOTE: The graphic shown on the previous page is an example of a typical sleeve and skirt configuration. - Page 54 TEMPERATURE MAINTAINED AT 60°F/16°C MINIMUM Ambient Temperature Exposed to Discharge “D” Freezer Ceiling or End of Sprinkler Wall Thickness “A” Order Length 3 – 6 inch/76 – 152 mm 12 inch/305 mm Down to 20°F Down to -6.7°C 7 – 12 inch/178 – 305 mm 18 inch/457 mm 3 –...
-
Page 55: Assembly Weights
ASSEMBLY WEIGHTS The values in the tables below are the total weight in pounds/kilograms for a Model V33, V36, or V40 Dry Sprinkler, a Series AH2 Flexible Hose (water-filled), and a Style AB6 Bracket Assembly. V33, V36, Weight - pounds/kilograms or V40 AB6 Order AH2-31-AB6 AH2-36-AB6 AH2-48-AB6 AH2-60-AB6 AH2-72-AB6... -
Page 56: Notes For Preparation Of Sleeve And Skirt And Recessed Configurations
NOTES FOR PREPARATION OF SLEEVE AND SKIRT AND RECESSED CONFIGURATIONS The following section covers steps that are required for preparation of dry sprinklers with removable sleeve and skirt and recessed escutcheon options. NOTE: RECESSED PENDENT SPRINKLER ASSEMBLIES AND SUPPLIED ESCUTCHEON COMPONENTS ARE NOT FM APPROVED FOR THE 286°F/131°C TEMPERATURE CONFIGURATION. -
Page 57: Installation Of The Style Ab6 Bracket Assembly
INSTALLATION OF THE STYLE AB6 BRACKET ASSEMBLY CAUTION • The hole cut into the ceiling or wall shall be deburred on both sides. Failure to follow this instruction could cause sprinkler assembly leakage, resulting in property damage. NOTICE • The following photos depict an installation in a freezer application where the Style AB6 Bracket Assembly is installed through the ceiling;... -
Page 58: Adjusting The Location Of The V33, V36, Or V40 Dry Sprinkler
4. Tighten each hex flange screw to a torque of 40 inch-lbs/4.5 N•m. DO NOT exceed the specified torque. ADJUSTING THE LOCATION OF THE V33, V36, OR V40 DRY SPRINKLER 1. Support the barrel of the V33, V36, or V40 Dry Sprinkler while loosening the two nuts located at the back of the Style AB6 Bracket Assembly. -
Page 59: Installation Of The Series Ah2 Or Ah2-Cc Flexible Hose To The Style Ab6 Threaded Inlet Adapter
INSTALLATION OF THE SERIES AH2 OR AH2-CC FLEXIBLE HOSE TO THE STYLE AB6 THREADED INLET ADAPTER TURN CONNECTION NUT ONLY 1. Confirm that the seal inside the nut of the Series AH2 or AH2-CC Flexible Hose is in place and is free from damage prior to installation. -
Page 60: Instructions For Using The Style Ab6 Adapter For Draining The
3. Reinstall the bulb protector onto the sprinkler until the sprinkler system is placed in service. Use caution when reinstalling the bulb protector to prevent damage to the bulb, deflector, and frame arms. DO NOT use any tools to reinstall the bulb protector INSTRUCTIONS FOR USING THE STYLE AB6 ADAPTER FOR DRAINING THE ASSEMBLY 1. -
Page 61: Style Ab7 Bracket
Style AB7 Bracket Installation Instructions I-VICFLEX_61... -
Page 62: Introduction
INTRODUCTION Victaulic VicFlex Sprinkler Fittings connect the sprinkler piping directly to the sprinkler ® ™ using a flexible hose and fittings and are designed for use in ceiling suspension systems. • Refer to the “General Information” and “Construction Requirements” sections. -
Page 63: Installation Of Style Ab7 Bracket Assembly For Astm C635 Ceiling Suspension Systems Installed In Accordance With Astm C636 Standards
INSTALLATION OF STYLE AB7 BRACKET ASSEMBLY FOR ASTM C635 CEILING SUSPENSION SYSTEMS INSTALLED IN ACCORDANCE WITH ASTM C636 STANDARDS WARNING • The flexible hose shall not be bent or fluctuated up-and-down or side-to-side when pressurized. Failure to follow this instruction could cause improper sprinkler operation, resulting in death or serious personal injury and property damage. -
Page 64: Installation For Wood Joists/Studs (Fm Only)
INSTALLATION FOR WOOD JOISTS/STUDS (FM ONLY) 1. Install the flexible hose into the sprinkler piping and the sprinkler reducing nipple onto the flexible hose by following the applicable instructions in the “Connection to Sprinkler Piping” and “Connecting the Sprinkler Reducing Nipple to the Flexible Hose” sections. 2. -
Page 65: Installation For Astm C645 Metal Joists/Studs In Accordance With Astm C754 Standards (Fm Only)
INSTALLATION FOR ASTM C645 METAL JOISTS/ STUDS IN ACCORDANCE WITH ASTM C754 STANDARDS (FM ONLY) 1. Install the flexible hose into the sprinkler piping and the sprinkler reducing nipple onto the flexible hose by following the applicable instructions in the “Connection to Sprinkler Piping”... -
Page 66: Alternative Wood Joists/Studs Installation (Fm Only)
ALTERNATIVE WOOD JOISTS/STUDS INSTALLATION (FM ONLY) 1. Install the flexible hose into the sprinkler piping and the sprinkler reducing nipple onto the flexible hose by following the applicable instructions in the “Connection to Sprinkler Piping” and “Connecting the Sprinkler Reducing Nipple to the Flexible Hose” sections. 2. -
Page 67: Alternative Metal Joist/Stud Installation (Fm Only)
ALTERNATIVE METAL JOIST/STUD INSTALLATION (FM ONLY) 1. Install the flexible hose into the sprinkler piping and the sprinkler reducing nipple onto the flexible hose by following the applicable instructions in the “Connection to Sprinkler Piping” and “Connecting the Sprinkler Reducing Nipple to the Flexible Hose” sections. 2. - Page 68 This page intentionally left blank I-VICFLEX_68...
-
Page 69: Style Ab11 Bracket
Style AB11 Bracket Installation Instructions I-VICFLEX_69... -
Page 70: Introduction
INTRODUCTION Victaulic VicFlex Sprinkler Fittings connect the sprinkler piping directly to the ® ™ sprinkler using a flexible hose and fittings and are designed for use in suspended ceiling applications. • Refer to the “Technical Data for Flexible Hoses” section. -
Page 71: Installation Of Style Ab11 Brackets For Astm C635 Ceiling
INSTALLATION OF STYLE AB11 BRACKETS FOR ASTM C635 CEILING SUSPENSION SYSTEMS INSTALLED IN ACCORDANCE WITH ASTM C636 OR ASTM C754 STANDARDS 1. Install the flexible hose into the sprinkler piping and the sprinkler reducing nipple onto the flexible hose by following the applicable instructions in the “Connection to Sprinkler Piping”... - Page 72 3. Apply light downward pressure, as shown above, to maintain the position of the end bracket flat against the T-bar rail. To secure the end brackets to the T-bar rails, tighten the pre- installed sheet metal screws using a T25 drive bit. Penetrate through the T-bar rail until the end bracket is seated fully against the T-bar rail.
-
Page 73: Style Ab12 Bracket
Style AB12 Bracket Installation Instructions I-VICFLEX_73... -
Page 74: Introduction
INTRODUCTION Victaulic VicFlex Sprinkler Fittings connect the sprinkler piping directly to the sprinkler ® ™ using a flexible hose and fittings. The Style AB12 Bracket secures the sprinkler in position and utilizes a -inch/M10 threaded rod to attach to a surface, such as a concrete deck or sprinkler piping. -
Page 75: Installation Of Style Ab12 Brackets Onto 3/8-Inch/M10 Threaded Rod
INSTALLATION OF STYLE AB12 BRACKETS ONTO 3/8-INCH/M10 THREADED ROD 1. Install the flexible hose into the sprinkler piping and the sprinkler reducing nipple onto the flexible hose by following the applicable instructions in the “Connection to Sprinkler Piping” and “Connecting the Sprinkler Reducing Nipple to the Flexible Hose” sections. 2. - Page 76 6. Using a T25 drive bit, tighten the adjustment screw to a torque of 75-inch-lbs/ 8.5 N•m (until adjustment screw makes metal-to-metal contact with bottom of gate). NOTE: The sprinkler reducing nipple can be adjusted after the drywall is installed by using the adjustment screw on the center gate assembly.
-
Page 77: Style Ab12 Bracket Installation Dimensions
STYLE AB12 BRACKET INSTALLATION DIMENSIONS Un nished 1 ⁄ -inch/ Ceiling Face / -inch/M10 29-mm Threaded Rod (3-feet/0.9-meter Maximum Length) ⁄ -inch/ "A" 3-mm See Table "B" See Table Finished Face of / -inch/16-mm V2707 ½-inch/12.7-mm MAX. RECESS Typical Ceiling Low-Profile Low-Profile Standard... - Page 78 1 ⁄ -inch/ 29-mm ⁄ -inch/ 3-mm / -inch/M10 Threaded Rod (3-foot/0.9-meter Maximum Length) V2703 ½-inch/12.7-mm STYLE AB12 BRACKET INSTALLATION FOR I-VICFLEX_78 SUSPENDED AND HARD LID CEILINGS REV_A...
-
Page 79: Abba/Abmm Bracket
ABBA/ABMM Bracket Installation Instructions I-VICFLEX_79... -
Page 80: Introduction
• Refer to the “Technical Data for Flexible Hoses” section. • Refer to the “Important Information Installation” section. NOTICE • Victaulic VicFlex Style ABBA and ABMM Brackets (regional availability only) ® ™ can be installed in multiple configurations on various wall and ceiling surfaces, along with the VicFlex flexible hoses. -
Page 81: Style Abba Bracket Assembly Drawing
STYLE ABBA BRACKET ASSEMBLY DRAWING Item Description Gate Adjustment Screw Square Bar Retaining Screw Bracket Body Square Bar Mounting Plate STYLES ABBA/ABMM BRACKET INSTALLATION FOR FIRE PROTECTION SERVICE REV_A I-VICFLEX_81... -
Page 82: Installation Notes For The Style Abba Bracket
BRACKET For floor-above-mount and cantilever-mount configurations: The Style ABBA Bracket can be installed in wood or concrete block wall or ceiling applications. Victaulic does not supply the screws for attaching the mounting plate to the wall or ceiling. The installing contractor shall select screws that are suitable for the wall or ceiling material. -
Page 83: Installation Configurations For The Style Abba Bracket
INSTALLATION CONFIGURATIONS FOR THE STYLE ABBA BRACKET STYLE ABBA BRACKET USED FOR STYLE ABBA BRACKET USED FOR FLOOR-ABOVE MOUNT – FLOOR-ABOVE MOUNT – PENDENT CONFIGURATION (FM) SIDEWALL CONFIGURATION (FM) STYLE ABBA BRACKET USED FOR STYLE ABBA BRACKET USED FOR CANTILEVER MOUNT – CANTILEVER MOUNT –... -
Page 84: Installation Notes For The Style Abmm Bracket
For surface-mount configurations: The Style ABMM Bracket can be installed in wood or concrete block wall or ceiling applications or metal wall or ceiling applications. Victaulic ® does not supply the screws for attaching the Style ABMM Bracket to the wall or ceiling. -
Page 85: Installation Configurations For The Style Abmm Bracket
INSTALLATION CONFIGURATIONS FOR THE STYLE ABMM BRACKET STYLE ABMM BRACKET ON STYLE ABMM BRACKET ON STYLE AB2 SQUARE BAR STYLE AB5 SQUARE BAR AND END BRACKETS (FM) AND END BRACKETS (FM) STYLE ABMM BRACKET USED FOR STYLE ABMM BRACKET USED FOR STANDOFF MOUNT –... - Page 86 This page intentionally left blank I-VICFLEX_86...
-
Page 87: Style Aqc-U Bracket
Style AQC-U Bracket Installation Instructions I-VICFLEX_87... -
Page 88: Introduction
Zander Facility Engineering GmbH, SBB Daldrop, and SBB Gorilla Grid cleanroom ceiling systems (refer to notes below). Other cleanroom ceilings can be evaluated on a case-by- case basis by contacting Victaulic. The installer shall wear proper cleanroom attire during installation of the Victaulic ® VicFlex Style AQC-U Bracket. - Page 89 Insert the Victaulic VicFlex Style AQC-U assembly into the cross block location. ® ™ Align the holes in the swivel bracket of the Victaulic VicFlex Style AQC-U with ® ™ the T-Bolts. Secure the swivel bracket to the ceiling grid by installing a flat washer, lock washer, and nut (supplied with the ceiling grid) onto the end of each T-Bolt.
-
Page 90: Attaching The Style Aqc-U To The Cleanroom Ceiling Grid (Gordon Installation)
ATTACHING THE STYLE AQC-U TO THE CLEANROOM CEILING GRID (GORDON INSTALLATION) Exploded View of Installation Components VicFlex Series AH2-CC Flexible Sprinkler Hose Gordon/VicFlex Sprinkler Assembly 4 x ¼-20 Screw* Bracket Gasket Sprinkler with Bulb Protector* Ceiling Grid* * Components provided by ceiling grid manufacturer or others. - Page 91 Insert the Victaulic VicFlex Style AQC-U assembly into the ceiling grid. ® ™ Align the holes of the Victaulic VicFlex Style AQC-U bracket with the ceiling grid. ® ™ Secure the bracket to the ceiling grid by installing a 4 x 1/4-20 screw (supplied with the ceiling grid) through each hole in the bracket and into the ceiling grid.
- Page 92 This page intentionally left blank I-VICFLEX_92...
-
Page 93: Style C-Aqc Bracket
Style C-AQC Bracket Installation Instructions I-VICFLEX_93... -
Page 94: Introduction
Other cleanroom ceilings can be evaluated on a case-by-case basis by contacting Victaulic ® The installer shall wear proper cleanroom attire during installation of the Victaulic® VicFlex™ Style C-AQC. Contact the building’s owner or designated representative to confirm requirements for the specific cleanroom application. -
Page 95: Attaching The Style C-Aqc To The Cleanroom Ceiling Grid
Insert the Victaulic VicFlex Style C-AQC assembly into the cross block location. ® ™ Align the holes in the swivel bracket of the Victaulic VicFlex Style C-AQC with the ® ™ T-Bolts. Secure the swivel bracket to the ceiling grid by installing a nut (supplied with the ceiling grid) onto the end of each T-Bolt. - Page 96 This page intentionally left blank I-VICFLEX_96...
-
Page 97: Style Aqd-M Bracket
Style AQD-M Bracket Installation Instructions I-VICFLEX_97... -
Page 98: Introduction
INTRODUCTION Victaulic VicFlex Style AQD-M Brackets connect the branch line directly to the sprinkler and can be installed on round or square metal duct. • Refer to the “Technical Data for Flexible Hoses” section. • Refer to the “Important Installation Information” section. -
Page 99: Style Aqd-M Bracket Assembly Drawing
STYLE AQD-M BRACKET ASSEMBLY DRAWING Item Series AH2-CC Description Bracket Sprinkler Reducer Coupling Assembly O-Ring (0.984" ID X 0.139" Width) Sprinkler Bag* * Two different bag materials (cellophane and polyethylene) are provided with the shipment. Choose the bag material that is appropriate for system conditions. The polyethylene bag is larger than the cellophane bag. -
Page 100: Connection To The Sprinkler Piping Using The Supplied No. 140 Male Npt Or Bspt Thread X Groove Adapter
CONNECTION TO THE SPRINKLER PIPING USING THE SUPPLIED NO. 140 MALE NPT OR BSPT THREAD X GROOVE ADAPTER WARNING • The flexible hose shall not be bent or fluctuated up-and-down or side-to-side when pressurized. Failure to follow this instruction could cause improper sprinkler operation, resulting in death or serious personal injury and property damage. - Page 101 2. Apply duct mastic/sealant to the duct around the drilled hole as shown in the picture to the left. Always refer to the duct mastic/sealant manufacturer’s instructions. 3. Place the bracket onto the duct. 3a. Verify that the bracket opening is aligned with the hole in the duct.
-
Page 102: Sprinkler Installation
SPRINKLER INSTALLATION 1. Install the sprinkler by following the manufacturer’s installation instructions. For Victaulic sprinklers, refer to the I-40 Victaulic FireLock Automatic Sprinklers Installation ® ™ and Maintenance Instructions. 2. Install the bag and O-ring. NOTE: Two different bag materials (cellophane and polyethylene) are provided with the shipment. -
Page 103: Sprinkler Bag Inspection/Maintenance
Victaulic products. Failure to follow this instruction could result in death or serious personal injury and property damage. - Page 104 This page intentionally left blank I-VICFLEX_104...
-
Page 105: Style Aqd Bracket
Style AQD Bracket Installation Instructions I-VICFLEX_105... -
Page 106: Introduction
Refer to the “Important Installation Information” section. CONNECTING THE STYLE AQD SPRINKLER FITTING TO THE BRANCHLINE WARNING • Victaulic VicFlex™ products shall not be bent or fluctuated up-and-down or ® side-to-side when pressurized. Failure to follow this instruction could cause improper sprinkler operation, resulting in death or serious personal injury and property damage. -
Page 107: Installing The Style Aqd Onto The Duct
INSTALLING THE STYLE AQD ONTO THE DUCT WARNING • A particle mask and protective gloves shall be worn during preparation of the duct. • Wear safety glasses, hardhat, and foot protection. Failure to follow these instructions could result in serious respiratory system illness or other personal injury. - Page 108 FOR FRP DUCTS ONLY: Use a disc sander to prepare a 6 x 6-inch/ 152 x 152-mm area around the hole cut into the duct in Step 1. This area shall be sanded until the surface is rough to ensure a proper bond with the mounting block.
- Page 109 3 – 6-mm layer of adhesive to the mating surface of the mounting block and 6 x 6-inch/ 152 x 152-mm area around the hole cut into the duct. Refer to the table above for a listing of recommended adhesives. NOTE: Victaulic does not supply the adhesive.
- Page 110 Consult the adhesive manufacturer’s instructions for detailed curing times and additional technical information. Install the sprinkler by following the manufacturer’s installation instructions. For Victaulic sprinklers, refer to the I-40 ® Victaulic FireLock Automatic Sprinklers ®...
- Page 111 8. Tighten the union onto the mounting block by turning it clockwise until contact occurs between the union and mounting block. Use caution to prevent cross-threading. DO NOT over-tighten the union. 8a. Using a 3-mm hex key wrench, tighten the locking screw on the union by turning it clockwise.
-
Page 112: Inspection
Victaulic products. Failure to follow this instruction could result in death or serious personal injury and property damage. -
Page 113: Vs1 Dry Sprinkler
VS1 Dry Sprinkler Installation Instructions I-VICFLEX_113... -
Page 114: Introduction
INTRODUCTION Victaulic VicFlex Sprinkler Fittings connect the sprinkler piping directly to the sprinkler ® ™ using a flexible hose and fittings. Style VB1 Bracket Assemblies can be used with all VS1 Sprinklers. Style VB2 Bracket Assemblies are used only with Style VS1 Recessed Pendent Sprinklers. -
Page 115: Style Vs1 Sprinkler Assembly Drawing
WARNING • Replacement/relocation of this Victaulic VicFlex Style VS1 Dry Sprinkler ® ™ SHALL be performed by qualified personnel familiar with the system’s original design criteria, sprinkler listings/ approvals, and state and local codes (including NFPA 13 standards). Failure to properly replace/relocate a Style VS1 Dry Sprinkler could affect its performance during a fire, resulting in death or serious personal injury and property damage. -
Page 116: Style Vb2 Bracket Assembly Drawing
Style VB2 End Bracket with Tapping Screw Relocation/Tamper Evident Warning Label Wing Screw * Square bar length is in reference to nominal ceiling grid spacing. NOTICE • VICTAULIC VICFLEX STYLE VB2 BRACKET ASSEMBLIES ARE ® ™ RECOMMENDED FOR USE WITH STYLE VS1 RECESSED PENDENT SPRINKLERS. -
Page 117: Style Vb3 Bracket Assembly Drawing
Style VB3 End Bracket with Tapping Screw Relocation/Tamper Evident Warning Label Wing Screw * Square bar length is in reference to nominal ceiling grid spacing. NOTICE • VICTAULIC VICFLEX STYLE VB3 BRACKET ASSEMBLIES ARE ® ™ RECOMMENDED FOR USE WITH STYLE VS1 CONCEALED PENDENT SPRINKLERS. -
Page 118: Style Vb4 Bracket Assembly Drawing
Style VB4 End Bracket with Tapping Screw Relocation/Tamper Evident Warning Label Wing Screw * Square bar length is in reference to nominal ceiling grid spacing. NOTICE • VICTAULIC VICFLEX STYLE VB4 BRACKET ASSEMBLIES ARE ® ™ RECOMMENDED FOR USE WITH STYLE VS1 SLEEVE AND SKIRT PENDENT SPRINKLERS. -
Page 119: Style Vs1 Sprinkler Assembly Pitching Requirements
STYLE VS1 SPRINKLER ASSEMBLY PITCHING REQUIREMENTS Sidewall Continuous Downward Slope Inlet Heated Space Unheated Space Outlet ACCEPTABLE PITCH Inlet Low Point Outlet Heated Space Unheated Space UNACCEPTABLE PITCH Pendent Inlet Continuous Downward Slope Heated Space Unheated Space Outlet ACCEPTABLE Inlet Low Point Heated Space Unheated Space... - Page 120 FOR DRY SYSTEMS ONLY: • The Style VS1 Dry Sprinkler’s inlet shall be installed only into the outlet of a fitting (excluding elbows) or welded outlet that meets the dimensional requirements of ANSI B16.3 and ANSI B16.4, Class 125 and Class 150. Use a sample fitting to confirm proper engagement and to verify that there is no interference between the sprinkler and the fitting.
-
Page 121: Style Vb1 Bracket Installation For Wood Or Metal Joists/Studs
FOR WET SYSTEMS ONLY: DO NOT install Style VS1 Dry Sprinklers into any threaded elbow, thread-by-thread • coupling, or fitting that interferes with thread penetration. The inlet of the Style VS1 Dry Sprinkler SHALL NOT bottom out in the fitting. Use a sample fitting to confirm proper engagement. - Page 122 5/16 3. Using a -inch hex socket, remove the hex cap screw from the bracket. Remove Hex Cap Screw for Installation 4. Snap the bracket onto the weld fitting, as shown to the left. Verify that the slot of the bracket aligns with the lip on the weld fitting.
- Page 123 6. Anchor the bracket in the desired location on the wood or metal joist/stud by using two #10 x 1 1/2-inch long wood screws (for wood joists/studs shown above) or two #10 x 1 1/2-inch long sheet metal screws (for metal joists/studs). NOTE: Victaulic does not ®...
-
Page 124: Style Vb2, Style Vb3, And Vb4 Brackets- Installation For Astm
STYLE VB2, STYLE VB3, AND VB4 BRACKETS- INSTALLATION FOR ASTM C635 CEILING SUSPENSION SYSTEMS INSTALLED WITH LAY- IN TILES (IN ACCORDANCE WITH ASTM C636 STANDARDS) WARNING • DO NOT attempt to adjust or remove a Style VS1 Dry Sprinkler while the sprinkler system is pressurized. - Page 125 2a. For center-of-tile installations, align the end bracket with the center- of-tile slot of the T-bar rail (with the side facing the opening of the center Side Facing the gate assembly), as shown to the left. Opening of the NOTE: For the UL Listing, when the Center Gate Assembly 48-inch/1220-mm length VB2, VB3, or...
-
Page 126: Style Vb3 And Vb4 Brackets - Installation For Wood Joists/Studs
STYLE VB3 AND VB4 BRACKETS - INSTALLATION FOR WOOD JOISTS/STUDS 1. Install the inlet of the Style VS1 Dry Sprinkler into the sprinkler piping, as described in step 1 on page 124. 2. Loosen and remove the wing screw of the Style VB3 or VB4 end bracket assembly. -
Page 127: Style Vb3 And Vb4 Brackets - Installation For Astm C645 Metal
STYLE VB3 AND VB4 BRACKETS – INSTALLATION FOR ASTM C645 METAL JOISTS/STUDS INSTALLED IN ACCORDANCE WITH ASTM C754 STANDARDS 1. Install the inlet of the Style VS1 Dry Sprinkler into the sprinkler piping, as described in step 1 on page 124. 2. - Page 128 This page intentionally left blank I-VICFLEX_128...
-
Page 129: Connection To The Sprinkler Piping
Connection to the Sprinkler Piping I-VICFLEX_129... -
Page 130: Connection To The Sprinkler Piping Using An Adapter Nipple And A
CONNECTION TO THE SPRINKLER PIPING USING AN ADAPTER NIPPLE AND A SERIES AH1, AH1-LP, AH2, AH2-LP, AH2-300, AH3, AH3-LP, AH4, AH4-LP, AH5, OR AH2-638 VICTAULIC VICFLEX FLEXIBLE HOSE ® ™ WARNING • The flexible hose shall not be bent or fluctuated up-and-down or side-to-side when pressurized. -
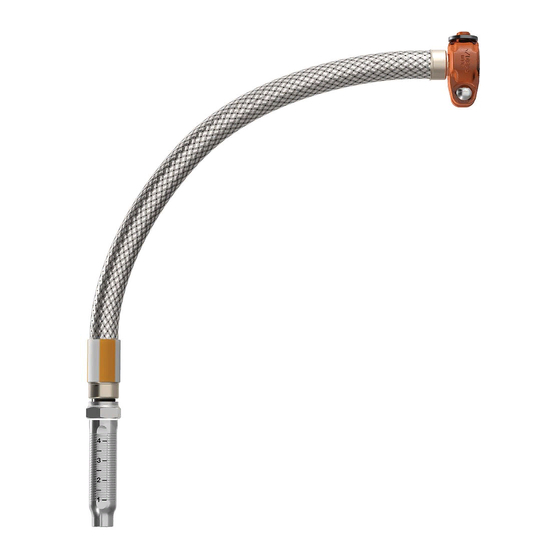
Page 131: Victaulic ® Vicflex ™ Flexible Hose
Refer to Victaulic publication ® 05.01 for the color code chart, which can be downloaded at victaulic.com, and the “NOTICE” on the following page for important gasket information. CONNECTION TO THE SPRINKLER PIPING REV_A... - Page 132 Failure to use a compatible lubricant may cause gasket damage, resulting in joint leakage and property damage. 3a. If any conditions listed in the “NOTICE” below are met, apply a thin coat of a compatible lubricant, such as Victaulic Lubricant or an EPDM-compatible lubricant, only ®...
- Page 133 • A negative impact on system integrity • Personal injury or death NOTICE • During tightening, support the hose near the Style 108 Coupling to verify that the inlet end of the Victaulic VicFlex Model V32 K-Factored Sprinkler ® ™...
- Page 134 Scan QR code for access to the I-IMPACT, Impact Tool Usage/ Selection Guidelines, document on victaulic.com. WARNING • Visual inspection of each joint is required. • Improperly assembled joints shall be corrected before the system is tested or placed into service.
-
Page 135: Instructions For The Initial Use Of A Victaulic ® Firelock
INSTRUCTIONS FOR THE INITIAL USE OF A VICTAULIC FIRELOCK NO. 101 90° ELBOW OR ® ™ NO. 102 STRAIGHT TEE INSTALLATION-READY ™ FITTING WITH A VICTAULIC VICFLEX FLEXIBLE ® ™ HOSE (1-INCH/DN25 IGS CONNECTION) ™ NOTICE • The following procedure applies only to 1-inch/DN25 No. 101 90° Elbows and No. - Page 136 Tee is removed from the sprinkler piping and reused. SCAN QR CODE FOR ACCESS SCAN QR CODE FOR ACCESS TO THE FULL I-101/103 TO THE FULL I-102/104 INSTALLATION INSTRUCTIONS INSTALLATION INSTRUCTIONS ON ON VICTAULIC.COM VICTAULIC.COM I-VICFLEX_136 CONNECTION TO THE SPRINKLER PIPING REV_A...
-
Page 137: Hose
AH1-CC-LP, AH2-CC, AH2-CC-LP, or AH2-CC-300 Flexible Hose by removing the nut, bolt gasket, and linkage from the housing. Inspect all components for any damage or wear. If any damage or wear is present, use a new Victaulic -supplied coupling assembly. - Page 138 • DO NOT use excessive lubricant on the gasket sealing lips and exterior. Failure to use a compatible lubricant may cause gasket damage, resulting in joint leakage and property damage. 7. Apply a thin coat of a compatible lubricant, such as Victaulic Lubricant or an EPDM- ®...
-
Page 139: Connecting The Sprinkler Reducing Nipple To The Flexible Hose
Connecting the Sprinkler Reducing Nipple to the Flexible Hose I-VICFLEX_139... -
Page 140: Connecting The Sprinkler Reducing Nipple To The Flexible Hose (Ab1/Ab2/Ab3/Ab4/Ab5/Ab7/Ab8/Ab10/Abba/Abmm)
CONNECTING THE SPRINKLER REDUCING NIPPLE TO THE FLEXIBLE HOSE (AB1/AB2/AB3/ AB4/AB5/AB7/AB8/AB10/ABBA/ABMM) Confirm that the seal inside the nut of TURN CONNECTION the flexible hose is in place and is free from NUT ONLY damage prior to installation. Connect the nut to the sprinkler reducing nipple. -
Page 141: Sprinkler Reducing Nipple Installation
Sprinkler Reducing Nipple Installation I-VICFLEX_141... -
Page 142: Sprinkler Reducing Nipple Installation For Style Ab1/Ab7/Ab10/Ab11 Brackets
SPRINKLER REDUCING NIPPLE INSTALLATION FOR STYLE AB1/AB7/AB10/AB11 BRACKETS 1. Move the center gate assembly of the Style AB1/AB7/AB10/AB11 Bracket to the desired location. Loosen the wing nut to open the center gate assembly, then slide the sprinkler reducing nipple into the center gate assembly. NOTE: The pivot screw of the center gate assembly is staked to resist removal of the wing nut. -
Page 143: Sprinkler Reducing Nipple Installation For The Style Ab2 Bracket
SPRINKLER REDUCING NIPPLE INSTALLATION FOR THE STYLE AB2 BRACKET Adjustment Wing Screw Adjustment Wing Screw 1. Move the center gate assembly of the Style AB2 Bracket to the desired location. Using a T25 drive bit, loosen the adjustment wing screw, then push open the center gate assembly. -
Page 144: Sprinkler Reducing Nipple Installation For Style Ab4/Ab5/Ab8 Brackets
SPRINKLER REDUCING NIPPLE INSTALLATION FOR STYLE AB4/AB5/AB8 BRACKETS Move the center gate assembly of the Style AB4 or AB5 Bracket to the desired location. Using a T25 drive bit, loosen the adjustment screw, then push open the center gate assembly. Slide the sprinkler reducing nipple into the center gate assembly. -
Page 145: Sprinkler Reducing Nipple Installation For Style Abba/Abmm Brackets
SPRINKLER REDUCING NIPPLE INSTALLATION FOR STYLE ABBA/ABMM BRACKETS 1. For floor-above-mount, cantilever- mount, and temporary fire protection configurations: Move the bracket body to the desired location on the square bar. NOTE: The square bar retaining screw may need to be loosened with a T25 Torx* recessed drive bit to allow the bracket Square Bar body to slide on the square bar. -
Page 146: Sprinkler Reducing Nipple Installation For Style Vb2/Vb3/Vb4 Brackets
SPRINKLER REDUCING NIPPLE INSTALLATION FOR STYLE VB2/VB3/VB4 BRACKETS 1a. (VB2/VB3) Move the center gate assembly of the Style VB2/VB3 Bracket to the desired location. Loosen the wing nut to open the center gate assembly, then slide the sprinkler reducing nipple into the center gate assembly, as shown above. - Page 147 3a. (VB2/VB3) Close the center gate assembly around the sprinkler reducing nipple. Swing the pivot screw and washer into the slot on the gate. Tighten the wing nut to a torque of 50-inch-lbs/6 N•m (approximately hand-tight, plus 1/2 to 3/4 of a turn), as shown above.
- Page 148 This page intentionally left blank I-VICFLEX_148...
-
Page 149: Sprinkler Installation
Sprinkler Installation I-VICFLEX_149... -
Page 150: Sprinkler Installation For Ab1, Ab2, Ab3, Ab4, Ab5, Ab7, Ab10, Ab11, Ab12, Abba, And Abmm Brackets
SPRINKLER INSTALLATION FOR AB1, AB2, AB3, AB4, AB5, AB7, AB10, AB11, AB12, ABBA, AND ABMM BRACKETS Install the sprinkler by following the manufacturer’s installation instructions. For Victaulic sprinklers, refer to the I-40 Victaulic FireLock Automatic Sprinklers Installation and ® ™... -
Page 151: Victaulic ® Vicflex ™ Tamper-Evident Labels
Victaulic VicFlex ® ™ Tamper-Evident Labels Application Instructions I-VICFLEX_151... -
Page 152: Overview
VicFlex product has been moved from ™ its intended location. Additional copies of these labels are available through your Victaulic sales representative ® or through the Victaulic website, victaulic.com. Always refer to the instructions supplied ®... -
Page 153: Applying The Tamper-Evident Label To The Style Ab7 End Bracket
APPLYING THE TAMPER-EVIDENT LABEL TO THE STYLE AB7 END BRACKET 1. Align the edge of the larger tamper- evident label (part code Z000AQFTMP) with the edge of the Style AB7 end bracket. The label shall be affixed with the warning block facing outward (away from the center gate). - Page 154 This page intentionally left blank I-VICFLEX_154...
-
Page 155: Minimum Bend Radius Guides
Minimum Bend Radius Guides I-VICFLEX_155... -
Page 156: Minimum Bend Radius Guide Usage
MINIMUM BEND RADIUS GUIDE USAGE WARNING • Read and understand all instructions before attempting to install any Victaulic VicFlex ® ™ products. • Wear safety glasses, hardhat, and foot protection. • These installation instructions are intended for an experienced, trained installer. -
Page 157: Technical Data
Technical Data WARNING • It is the system designer’s responsibility to verify suitability of stainless steel flexible hose for use with the intended fluid media within the piping system and external environment. Failure to follow these instructions could cause product failure, resulting in serious personal injury and/or property damage. -
Page 158: Flexible Hose Bend Characteristics
FLEXIBLE HOSE BEND CHARACTERISTICS NOTE: Care shall be taken to avoid torquing the flexible hose. Minimum Bend Radius Minimum Bend Radius 90° Minimum Bend Radius Minimum Bend Radius Minimum Bend Radius Minimum Bend Radius Minimum Minimum Bend Radius Bend Radius Minimum Bend Radius MAXIMUM WORKING PRESSURE RATING OF... -
Page 159: Maximum Ambient Temperature Rating Of Flexible Hoses
MAXIMUM AMBIENT TEMPERATURE RATING OF FLEXIBLE HOSES Generally, the maximum ambient temperature rating of Victaulic VicFlex hoses is ® ™ 225°F/107°C. Exceptions are the following: • 150° F/ 66° C (UL) with AH2-300 and AH2-CC-300 hose models. • 150° F/66° C (UL/FM) when the AH2 or AH2-CC Flexible Hose is used for the seal of the Style AB6 Bracket Assembly. -
Page 160: Listing And Approval Information - Flexible Hose And Bracket Combinations (Ah1/Ah1-Lp)
LISTING AND APPROVAL INFORMATION – FLEXIBLE HOSE AND BRACKET COMBINATIONS (AH1/AH1-LP) The following table provides listing and approval information related to flexible hose and bracket combinations. Approval for Hose/Bracket Combination Series AH1 Series AH1-LP AB11 AB10 AB11 AB12 ABBA ABMM AB10 AB12 ABBA... -
Page 161: Listing And Approval Information - Flexible Hose And Bracket Combinations (Ah1-Cc/Ah1-Cc-Lp)
LISTING AND APPROVAL INFORMATION – FLEXIBLE HOSE AND BRACKET COMBINATIONS (AH1-CC/AH1-CC-LP) The following table provides listing and approval information related to flexible hose and bracket combinations. Approval for Hose/Bracket Combination Series AH1-CC Series AH1-CC-LP – AB10 AB11 AB12 ABBA ABMM AB10 AB12 ABBA... -
Page 162: Listing And Approval Information - Flexible Hose And Bracket Combinations (Ah2/Ah2-Lp)
LISTING AND APPROVAL INFORMATION – FLEXIBLE HOSE AND BRACKET COMBINATIONS (AH2/AH2-LP) The following table provides listing and approval information related to flexible hose and bracket combinations. Approval for Hose/Bracket Combination Series AH2 Series AH2-LP AB11 AB10 AB11 AB12 ABBA ABMM AB10 AB12 ABBA... -
Page 163: Listing And Approval Information - Flexible Hose And Bracket Combinations (Ah2-Cc/Ah2-Cc-Lp)
LISTING AND APPROVAL INFORMATION – FLEXIBLE HOSE AND BRACKET COMBINATIONS (AH2-CC/AH2-CC-LP) The following table provides listing and approval information related to flexible hose and bracket combinations. Approval for Hose/Bracket Combination Series AH2-CC Series AH2-CC-LP AB11 AB10 AB11 AB12 ABBA ABMM AB10 AB12 ABBA... -
Page 164: Listing And Approval Information - Flexible Hose And Bracket Combinations (Ah2-Cc-300/Ah2-300 And Ah3/Ah3-Lp)
LISTING AND APPROVAL INFORMATION – FLEXIBLE HOSE AND BRACKET COMBINATIONS (AH2-CC-300/AH2-300 AND AH3/AH3-LP) The following table provides listing and approval information related to flexible hose and bracket combinations. Approval for Hose/Bracket Combination Series AH2-CC-300 Series AH2-300 AB10 AB10 AB12 AB12 ABBA ABBA ABMM... -
Page 165: Listing And Approval Information - Flexible Hose And Bracket Combinations (Ah4/Ah4-Lp)
LISTING AND APPROVAL INFORMATION – FLEXIBLE HOSE AND BRACKET COMBINATIONS (AH4/AH4-LP) The following table provides listing and approval information related to flexible hose and bracket combinations. Approval for Hose/Bracket Combination Series AH4 Series AH4-LP AB11 AB12 ABBA ABMM AB10 AB12 ABBA ABMM AB11... -
Page 166: Listing And Approval Information - Flexible Hose And Bracket Combinations (Ah5 And Vs1)
LISTING AND APPROVAL INFORMATION – FLEXIBLE HOSE AND BRACKET COMBINATIONS (AH5 AND VS1) The following table provides listing and approval information related to flexible hose and bracket combinations. Approval for Hose/Bracket Combination Series AH5 Approval for Hose/Bracket Combination Style VS1 Dry Sprinkler I-VICFLEX_166 TECHNICAL DATA FOR FLEXIBLE HOSES REV_A... -
Page 167: Listing And Approval Information - Sprinkler Fittings For Cleanroom Applications And Ceiling Grid Manufacturer Combinations (Aqc-U And C-Aqc)
LISTING AND APPROVAL INFORMATION – SPRINKLER FITTINGS FOR CLEANROOM APPLICATIONS AND CEILING GRID MANUFACTURER COMBINATIONS (AQC-U AND C-AQC) Approval for Sprinkler Fitting for Cleanroom Applications and Ceiling Grid Manufacturer Combinations Series AQC-U Series C-AQC M+W Zander Facility M+W Zander Facility Engineering BmbH Engineering Ceiling Type... -
Page 168: Flexible Hose Minimum Bend Radius
FLEXIBLE HOSE MINIMUM BEND RADIUS Agency Flexible 104l G412024 Hose 3 inches 7 inches 76 mm 76 mm 178 mm Series AH1 76 mm 178 mm 3 inches 3 inches 7 inches 3 inches 7 inches 76 mm 76 mm Series AH1-CC –... -
Page 169: Branchline Connection
BRANCHLINE CONNECTION The following table provides the type of branchline connection for applicable hose type/ approvals. Connection Size Hose/Approval Type 3/4”/DN20 BSPT VdS only 1”/DN25 NPT/BSPT UL, FM, VdS, LPCB, CCC 1”/DN25 IGS (CC Hoses) UL, FM, VdS, LPCB 11/4”/DN32 BSPT LPCB with AH2 only TECHNICAL DATA FOR FLEXIBLE HOSES REV_A I-VICFLEX_169... -
Page 170: Series Ah1/Ah1-Cc Flexible Hose Friction Loss Data (Fm)
AH1-72 AH1-CC-72 1830 84.7 25.8 3/4-inch/DN20 outlet data shown with K14.0 - For other K-factor friction loss data, refer to Victaulic ® submittal 10.95. 7-inch/178-mm minimum bend radius (tested with standard 5 3/4-inch/146-mm length straight reducer). A higher number of bends may be permitted, provided the sum of degrees is equal to or less than the total maximum allowable degrees of bends (e.g. -
Page 171: Series Ah1-Lp/Ah1-Cc-Lp Flexible Hose Friction Loss Data (Fm)
1830 85.7 DN20 26.1 ¹ 3/4-inch/DN20 outlet data shown with K14.0 - For other K-factor friction loss data, refer to Victaulic ® submittal 10.95. 7-inch/178-mm minimum bend radius. A higher number of bends may be permitted, provided the sum of degrees is equal to or less than the total maximum allowable degrees of bends. -
Page 172: Series Ah2/Ah2-Cc Flexible Hose Friction Loss Data (Fm)
AH2-CC-72 1830 37.5 DN20 11.4 3/4-inch/DN20 outlet data shown with K14.0 - For other K-factor friction loss data, refer to Victaulic ® submittal 10.85. 7-inch/178-mm minimum bend radius (tested with standard 5 3/4-inch/146-mm length straight reducer). A higher number of bends may be permitted, provided the sum of degrees is equal to or less than the total maximum allowable degrees of bends. -
Page 173: Series Ah2-Lp/Ah2-Cc-Lp Flexible Hose Friction Loss Data (Fm)
1830 LP-72 DN20 12.4 3/4-inch/DN20 outlet data shown with K14.0 - For other K-factor friction loss data, refer to Victaulic ® submittal 10.85. 7-inch/178-mm minimum bend radius. A higher number of bends may be permitted, provided the sum of degrees is equal to or less than the total maximum allowable degrees of bends (e.g. -
Page 174: Series Ah2-300/Ah2-Cc-300 Flexible Hose Friction Loss Data (Fm)
1830 37.5 CC-300-72 DN20 11.4 3/4-inch outlet data shown with K14.0 - For other K-factor friction loss data, refer to Victaulic ® submittal 10.84. 8-inch/203-mm minimum bend radius (tested with standard 5 3/4-inch/146-mm length straight reducer). A higher number of bends may be permitted, provided the sum of degrees is equal to or less than the total maximum allowable degrees of bends (e.g. -
Page 175: Series Ah2-Ab6/Ah2-Cc-Ab6 Friction Loss Data (Fm)
SERIES AH2-AB6/AH2-CC-AB6 FRICTION LOSS DATA (FM) NOTICE • The following table contains FM friction loss data. Always refer to the applicable “Listing and Approval Information – Flexible Hose and Bracket Combinations” section to verify the listings/approvals for the particular flexible hose/bracket combination. -
Page 176: Series Ah3/Ah3-Lp Flexible Hose Friction Loss Data (Fm)
Three 90° bends equal 270°). The minimum bend radius and maximum number of 90° offset (bends), stated in these installation instructions, refer to the final installed condition of the hose. • For friction loss data for elbows, refer to Victaulic submittal 10.94. ®... -
Page 177: Series Ah4/Ah4-Lp Flexible Hose Friction Loss Data (Fm)
DN20 12.6 11.7 SERIES AH4 - REGIONAL AVAILABILITY ONLY. 3/4-inch/DN20 outlet data shown with K14.0 - For other K-factor friction loss data, refer to Victaulic ® submittal 10.82. 7-inch/178-mm minimum bend radius (tested with standard 5 3/4-inch/146-mm length straight reducer). -
Page 178: Style Aqc-U Flexible Hose Sprinkler Fitting Friction Loss Data (Fm)
STYLE AQC-U FLEXIBLE HOSE SPRINKLER FITTING FRICTION LOSS DATA (FM) NOTICE • The following table contains FM friction loss data. Always refer to the applicable “Listing and Approval Information – Flexible Hose and Bracket Combinations” section to verify the listings/approvals for the particular flexible hose/bracket combination. -
Page 179: Style C-Aqc Flexible Hose Sprinkler Fitting Friction Loss Data (Fm)
STYLE C-AQC FLEXIBLE HOSE SPRINKLER FITTING FRICTION LOSS DATA (FM) NOTICE • The following table contains FM friction loss data. Always refer to the applicable “Listing and Approval Information – Flexible Hose and Bracket Combinations” section to verify the listings/approvals for the particular flexible hose/bracket combination. -
Page 180: Style Aqd-M Flexible Hose Sprinkler Fitting Friction Loss Data (Fm)
STYLE AQD-M FLEXIBLE HOSE SPRINKLER FITTING FRICTION LOSS DATA (FM) NOTICE • The following table contains FM friction loss data. Always refer to the applicable “Listing and Approval Information – Flexible Hose and Bracket Combinations” section to verify the listings/approvals for the particular flexible hose/bracket combination. -
Page 181: Style Aqd Flexible Hose Sprinkler Fitting Friction Loss Data (Fm)
STYLE AQD FLEXIBLE HOSE SPRINKLER FITTING FRICTION LOSS DATA (FM) NOTICE • The following table contains FM friction loss data. Always refer to the applicable “Listing and Approval Information – Flexible Hose and Bracket Combinations” section to verify the listings/approvals for the particular flexible hose/bracket combination. -
Page 182: Series Ah1/Ah1-Cc Flexible Hose Friction Loss Data (Ul)
AH1-CC-72 1830 90.0 27.4 DN20 3/4-inch outlet data shown with K14.0 - For other K-factor friction loss data, refer to Victaulic submittal ® 10.95. 3-inch/76-mm minimum bend radius (tested and UL Listed only with standard 5 3/4-inch/ 146-mm length straight reducer). For the UL Listing, when the 48-inch/1220-mm length bracket is used with the Series AH1/AH1-CC Flexible Hose, the maximum sprinkler K-factor is K8.0 and the... -
Page 183: Series Ah1-Lp Flexible Hose Friction Loss Data (Ul)
99.0 DN20 30.2 3/4-inch/DN20 outlet data shown with K14.0 - For other K-factor friction loss data, refer to Victaulic ® submittal 10.95. For the UL Listing, when the 48-inch/1220-mm length bracket is used with the Series AH1-LP Flexible Hose, the maximum sprinkler K-factor is K8.0 and the maximum spacing is 30 inches/762 mm. -
Page 184: Series Ah2/Ah2-Cc Friction Loss Data (Ul)
SERIES AH2/AH2-CC FRICTION LOSS DATA (UL) NOTICE • The following table contains UL friction loss data. Always refer to the applicable “Listing and Approval Information – Flexible Hose and Bracket Combinations” section to verify the listings/approvals for the particular flexible hose/bracket combination. - Page 185 3/4-inch/DN20 outlet data shown with K14.0 - For other K-factor friction loss data, refer to Victaulic ® submittal 10.85. 2-inch/50-mm minimum bend radius (tested and UL listed only with standard 5 3/4-inch/ 146-mm length straight reducer). A higher number of bends may be permitted, provided the sum of degrees is equal to or less than the total maximum allowable degrees of bends (e.g.
-
Page 186: Series Ah2-300/Ah2-Cc-300 Flexible Hose Friction Loss Data (Ul)
AH2-CC-300-72 1830 DN20 11.0 3/4-inch/DN20 outlet data shown with K14.0 - For other K-factor friction loss data, refer to Victaulic ® submittal 10.85. 3-inch/76-mm minimum bend radius (tested and UL listed only with standard 5 3/4-inch/ 146-mm length straight reducer). -
Page 187: Series Ah2-Lp/Ah2-Cc-Lp Flexible Hose Friction Loss Data (Ul)
SERIES AH2-LP/AH2-CC-LP FLEXIBLE HOSE FRICTION LOSS DATA (UL) NOTICE • The following table contains UL friction loss data. Always refer to the applicable “Listing and Approval Information – Flexible Hose and Bracket Combinations” section to verify the listings/approvals for the particular flexible hose/bracket combination. - Page 188 3/4-inch/DN20 outlet data shown with K14.0 - For other K-factor friction loss data, refer to Victaulic submittal 10.85. 2-inch/50-mm minimum bend radius. A higher number of bends may be permitted, provided the sum of degrees is equal to or less than the total maximum allowable degrees of bends (e.g.
-
Page 189: Series Ah2-Ab6/Ah2-Cc-Ab6 Flexible Hose Friction Loss Data (Ul)
SERIES AH2-AB6/AH2-CC-AB6 FLEXIBLE HOSE FRICTION LOSS DATA (UL) NOTICE • The following table contains UL friction loss data. Always refer to the applicable “Listing and Approval Information – Flexible Hose and Bracket Combinations” section to verify the listings/approvals for the particular flexible hose/bracket combination. -
Page 190: Series Ah5 Flexible Hose Friction Loss Data (Ul)
NOTE: Differences in equivalent lengths are due to varying test methods, per the UL 2443 standard. Refer to this standard for additional information regarding friction loss test methods. For friction loss data for elbows, refer to Victaulic submittal 10.89. ®... -
Page 191: Series Ah1, Ah1-Cc, Ah1-Lp, And Ah1-Cc-Lp Flexible Hose Friction Loss Data (Vds)
When using a No. 101 90° Elbow or a No. 102 Straight Tee in place of a Style 108 Coupling on the end of a Series AH1-CC or AH2-CC Flexible Hose, the friction loss data shown above shall be added to the No. 101 or No. 102 friction loss data published in Victaulic submittal 10.54. -
Page 192: Series Ah2, Ah2-Cc, Ah2-Lp, And Ah2-Cc-Lp Flexible Hose Friction Loss Data (Vds)
When using a No. 101 90° Elbow or a No. 102 Straight Tee in place of a Style 108 Coupling on the end of a Series AH1-CC or AH2-CC Flexible Hose, the friction loss data shown above shall be added to the No. 101 or No. 102 friction loss data published in Victaulic submittal 10.54. -
Page 193: Series Ah3, Ah3-Lp And Ah4 Flexible Hose Friction Loss Data (Vds)
When using a No. 101 90° Elbow or a No. 102 Straight Tee in place of a Style 108 Coupling on the end of a Series AH1-CC or AH2-CC Flexible Hose, the friction loss data shown above shall be added to the No. 101 or No. 102 friction loss data published in Victaulic submittal 10.54. -
Page 194: Series Ah1, Ah1-Cc, Ah2, And Ah2-Cc Flexible Hose Friction Loss Data (Lpcb)
When using a No. 101 90° Elbow or a No. 102 Straight Tee in place of a Style 108 Coupling on the end of a Series AH1-CC or AH2-CC Flexible Hose, the friction loss data shown above shall be added to the No. 101 or No. 102 friction loss data published in Victaulic submittal 10.54. -
Page 195: Series Ah1 Flexible Hose Friction Loss Data (Ccc)
SERIES AH1 FLEXIBLE HOSE FRICTION LOSS DATA (CCC) NOTICE • The following table contains CCC friction loss data. Always refer to the applicable “Listing and Approval Information – Flexible Hose and Bracket Combinations” section to verify the listings/approvals for the particular flexible hose/bracket combination. -
Page 196: Series Ah2 Flexible Hose Friction Loss Data (Ccc)
SERIES AH2 FLEXIBLE HOSE FRICTION LOSS DATA (CCC) NOTICE • The following table contains CCC friction loss data. Always refer to the applicable “Listing and Approval Information – Flexible Hose and Bracket Combinations” section to verify the listings/approvals for the particular flexible hose/bracket combination. -
Page 197: Series Ah3 Flexible Hose Friction Loss Data (Ccc)
SERIES AH3 FLEXIBLE HOSE FRICTION LOSS DATA (CCC) NOTICE • The following table contains CCC friction loss data. Always refer to the applicable “Listing and Approval Information – Flexible Hose and Bracket Combinations” section to verify the listings/approvals for the particular flexible hose/bracket combination. -
Page 198: Series Ah4 Flexible Hose Friction Loss Data (Ccc)
41.5 DN20 12.6 SERIES AH4 - REGIONAL AVAILABILITY ONLY. 3/4-inch/DN20 outlet data shown with K14.0 - For other K-factor friction loss data, refer to Victaulic ® submittal 10.82. 7-inch/178-mm minimum bend radius (tested with standard 5 3/4-inch/146-mm length straight reducer). -
Page 199: Style C-Aqc Flexible Hose Sprinkler Fitting Friction Loss Data (Ccc)
STYLE C-AQC FLEXIBLE HOSE SPRINKLER FITTING FRICTION LOSS DATA (CCC) NOTICE • The following table contains CCC friction loss data. Always refer to the applicable “Listing and Approval Information – Flexible Hose and Bracket Combinations” section to verify the listings/approvals for the particular flexible hose/bracket combination. -
Page 200: Series Ah4 Assembly Model Number Correlation
SERIES AH4 ASSEMBLY MODEL NUMBER CORRELATION Series Series AQB AH4 Hose Hose Assembly Series AFB Hose Assembly Assembly Outlet Size Designation Designation AQB31HLD AQB31HLD AH4-31 AQB31TLD AQB31HLD AQB36HLD AQB36HLD AH4-36 AQB36TLD AQB36HLD AQB48HLD AQB48HLD AH4-48 AQB48TLD AQB48HLD AQB60HLD AQB60HLD AH4-60 AQB60TLD AQB60HLD AQB78HLD... -
Page 201: Low-Profile Elbow Product Marking Information
LOW-PROFILE ELBOW PRODUCT MARKING INFORMATION UL 2443 Model Outlet Designation Fitting Mark Description AH1 with Low-Profile Short Elbow AH1-XX-LPSE LPSE Reducer Outlet AH1 with Low-Profile Long Elbow AH1-XX-LPLE LPLE Reducer Outlet AH1-CC-LP with Low-Profile Short Elbow AH1-CC-XX-LPSE LPSE Reducer Outlet AH1-CC-LP with Low-Profile Long Elbow AH1-CC-XX-LPLE LPLE... - Page 204 I-VICFLEX 15936 REV A 03/2021 Z000VFXPHB Victaulic and all other Victaulic marks are the trademarks or registered trademarks of Victaulic Company, and/or its affiliated entities, in the U.S. and/or other countries. All other trademarks listed herein are the property of their respective holders, in the U.S.
Need help?
Do you have a question about the VicFlex I-VICFLEX and is the answer not in the manual?
Questions and answers