
Related Manuals for DPS Telecom NetGuardian 832A G5


Summary of Contents for DPS Telecom NetGuardian 832A G5
- Page 1 NetGuardian 832A/864A G5 Web Browser USER MANUAL Visit our website at www.dpstelecom.com for the latest PDF manual and FAQs. March 6, 2020 D-UM-NETG5.12101 Firmware Version v.5.6D...
- Page 2 © 2020 DPS Telecom Notice The material in this manual is for information purposes and is subject to change without notice. DPS Telecom shall not be liable for errors contained herein or consequential damages in connection with the furnishing, performance, or...
-
Page 3: Table Of Contents
Contents Visit our w ebsite at w w w .dpstelecom .com for the latest PDF m anual and FAQs Overview Introduction Potential Problems using Web Interface in a Secure Proxy Network What's New in NetGuardian G5 Unit Configuration Logging on to the NetGuardian Using RADIUS Authentication (Available as of Firmware v5.0I) Entering System Settings Changing the Logon Password... - Page 4 2.6.10 Echo Notification Setup Defining Point Groups Configuring Base Discrete Alarms Event Qualification Timers 2.10 Setting System Alarm Notifications 2.11 Variable Bindings 2.12 SNMP Alarms 2.13 Configure the Accumulation Timer 2.14 Configuring Ping Targets 2.15 Analog Sensors 2.15.1 Integrated Temperature and Battery Sensor (Optional) 2.15.2 D-Wire Sensors (Optional) 2.15.3...
- Page 5 2.23 Alarm Sync 2.24 Saving Changes or Resetting Factory Defaults 2.25 Rebooting the NetGuardian Monitoring Your NetGuardian Alarm Summary Window Monitoring Base Alarms Monitoring Ping Targets Monitoring SNMP Alarms Monitoring Analogs Monitoring DSCP Devices Monitoring System Alarms Operating Controls Event Logging 3.10 Monitoring Data Port Activity 3.11...
-
Page 6: Overview
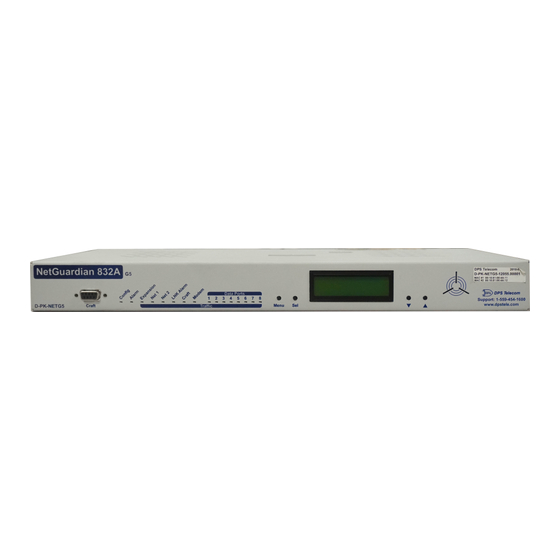
The NetGuardian supports Internet Explorer versions 4.0 and above and Netscape Navigator versions 4.7 and above. Fig. 1.2. NetGuardian 832A G5 has the capacity to monitor IP aware devices' network presence and also interfaces discrete alarm points and controls at your network sites... -
Page 7: What's New In Netguardian G5
What's New in NetGuardian G5 The NetGuardian G5 series adds these new features: SNMP v2c Support and Robust Message Delivery NetGuardian G5 supports SNMP v2c, and the SNMP INFORM command, which permits robust delivery of alarm notification to your SNMP manager. Alarm Point Grouping Each NetGuardian Alarm point can be assigned to one of eight groups, which are identified with a user- defined label. -
Page 8: Unit Configuration
• You can reset the Event Log by Alarm Point Group; for example, clear power alarms while retaining intruder alarms. Alarm Sync Makes Turnup and Testing Easy NetGuardian G5 also provides a new command to re-synchronize all alarms. This command clears all alarms, so that a new notification is sent for all standing alarms. -
Page 9: Using Radius Authentication (Available As Of Firmware V5.0I)
Using RADIUS Authentication (Available as of Firmware v5.0I) RADIUS (Remote Authentication Dial In User Service) is an industry-standard way to manage logins to many different types of equipment in one central location. The NetGuardian 832A / 864A G5 connects to your central RADIUS server. -
Page 10: Entering System Settings
Entering System Settings Use the following steps to define your NetGuardian system information: 1. From the Edit menu choose System, see Figure 2.2. 2. Enter the designated user name for your NetGuardian.* 3. Enter the location or address of the NetGuardian.* 4. - Page 11 DCP Port Enter the DCP Port for this NetGuardian. (1-8 serial otherwise UDP/IP Port) Note: DCPe added to the list of DCP protocols. DCP Protocol Choose between DCPx, DCPf, or DCPe. Get History Select the Download button to download the logs for all D-Wire sensors (Only available with the D-Wire top board hardware build option).
-
Page 12: Changing The Logon Password
Logon Profile screen. (See section for dial-back and logon profile configuration information.) The factory default password is dpstelecom. DPS Telecom strongly recommends that the default password be changed. Use the following steps to change the logon password: 1. -
Page 13: Logon Profiles And Access Rights
2.4.1 Logon Profiles and Access Rights Creating logon profiles allows you to grant personnel access to certain functions of the NetGuardian without allowing access to sensitive or secure areas of the database. Use the following steps to create logon profiles: 1. -
Page 14: Security Dial-Back
Profile Field Description User Enter a username or a user description. (18 characters maximum) Enter a unique user password. (4 character minimum) Note: This password will be used by the NetGuardian to determine whether Password or not to initiate the "Call-Back" function and also if any limited access applies. -
Page 15: Configuring Port Parameters
Configuring Port Parameters 2.5.1 Ethernet Ports To configure your NetGuardian's Ethernet Ports: 1. Click the Ethernet link from the Edit menu. 2. Enter the appropriate information for your ethernet port in the corresponding fields. 3. Click Submit Data to save your configuration settings. Fig. - Page 16 Field Description Unit Address IP address of the NetGuardian A road sign to the NetGuardian telling it whether your packets should stay on Subnet Mask your local network or be forwarded somewhere else on a wide area network. An important parameter if you are on a network that is connected to a wide Default area network.
-
Page 17: Using The Base Url Field
2.5.1.1 Using the Base URL Field The NetGuardian allows users to turn each alarm point description into a hyperlink. When utilized, the alarm description for each alarm point that appears in the monitor mode (for base alarms, ping targets, or system alarms) becomes a link that directs technicians/managers to specific Web pages or to other files viewable by a Web browser. -
Page 18: T1/E1 Wan Configuration
2.5.1.2 T1/E1 WAN Configuration If you ordered your NetGuardian with the optional T1 or E1 WAN port, you will find additional T1/E1 related configuration options in the WAN Top Board menu. The WAN Top Board menu provides additional configuration options for your T1/E1 port and 4 port switch Field Description... -
Page 19: Setting Up Snmpv1, V2C Or V3
2.5.2 Setting Up SNMPv1, v2c or v3 Use the following steps to define your NetGuardian system information: 1. From the Edit menu choose SNMP, see Figure 2.6. 2. Set Source Address to Follow, Net 1, or Net 2 3. Set Read and Write Access to All, v1-Only, or v2c-Only. 4. - Page 20 ID for the unit, which is automatically generated by the unit.The default ID is generated according to RFC3411 and is based on the unit's unique MAC address and DPS Telecom's SNMP enterprise number. Note: To have the unit generate a unique Engine ID, clear the v3 Engine ID field and press the Submit key.
- Page 21 v3-Users Association to the v3-User Table is made to specify the username, security mode, and passwords that should be used for sending a v3-Trap. Table 2.E. Fields in the Edit > SNMP settings Note: If you are using SNMPv3, any changes to the Engine ID or passwords will require a reboot. At bootup,you may experience a slight delay while the authorization and privatization keys update.
-
Page 22: Filter Ipa Config And Operation
2.5.3 Filter IPA Config and Operation The Filter IPA table allows you to increase the NetGuardian's network security by allowing or blocking packets from specified IP addresses. Addresses which appear in the table will be processed by the NetGuardian. Defined IP addresses associated with network cameras or the network time server are automatically processed and will not be filtered out by this feature. - Page 23 Hot Tip! Entering a zero in any of the octet fields will declare that part of the octet to be a wildcard. WARNING: "Filter IPA" is incompatible with networks that assign IP addresses. You may use the wildcard field to open an entire subnet. "Enhanced"...
- Page 24 Configuring a firewall rule 5. After clicking a "Configure" link, use the "IPA Filter Rule #" screen to set up one of your firewall rules: Field Description Description Enter a descriptive nickname for this rule. Enable rule Check the box to enable this rule. Rules not enabled will be skipped during evaluation.
-
Page 25: Changing Craft Port Communication Settings
2.5.4 Changing Craft Port Communication Settings Use the following steps to change the craft port communication settings: 1. From the Edit menu > Ports screen, scroll down to the Craft section, see figure below. 2. You can set the baud rate for the craft port to 300, 600, 1200, 2400, 4800, 9600, 19200, 38400, 57600, 115200. -
Page 26: Configuring Modem Port Settings
2.5.5 Configuring Modem Port Settings Use the following steps to configure the modem port settings. Default for these fields is blank. 1. From the Edit menu > Ports screen, scroll to the Modem section, see Figure 2.10. 2. In the Ring Count field enter the number of rings before answering. (Default = 1) 3. -
Page 27: Configuring Data Ports
2.5.6 Configuring Data Ports 1 - 9 Data port settings can be configured in the Edit menu > Ports screen. Use the following steps to define your data port settings: 1. From the Ports window, scroll down to the Data Ports section, see Figure 2.11. 2. - Page 28 Hot Tip! NGDdxk is the expansion type to choose when using a 216 G3 as an expansion. The 216 expansion provides an additional 16 alarms, 2 controls and 8 analogs. When the port is assigned with this type, base control 1 will be used to support the keying of a radio to transmit communication between the NetGuardian G5 and the 216 expansion.
-
Page 29: Data Port Types
2.5.6.1 Data Port Types Each of the NetGuardian's 8 data ports can be configured with different functions: Makes reach-through available at TCP ports (Telnet). RTCP Raw TCP (negates Telnet negotiation). The RTCP (Raw TCP Data Port) negates Telnet negotiation and will allow all characters (including [FF]) to pass straight through from IP to serial or serial to IP. - Page 30 For use if DX (expansion) is connected to this port. DSCP Port protocol used for wireless applications. Refer to DSCP Configuration. For use if an ECU is connected to this port (see section "Building Access Controller"). NTCP Nailed-up TCP. The NTCP establishes a permanent link that will remain up as long as the physical connection persists.
-
Page 31: Defining Sps8 Ports
2.5.6.2 Defining SPS8 Ports Fig. 2.12. Select SPS8 port type from the Edit > Ports, Data Ports screen The SPS8 port type can be selected in the Type option when configuring data ports with NGEdit4 or the Web Browser Interface. However, you may only edit SPS8 port descriptions in NGEdit5. The Web Browser Interface will allow you to set SPS8 type, but not the port descriptions. -
Page 32: Defining Ntcp Ports
2.5.6.3 Defining NTCP Ports Fig. 2.13. Select NTCP port type from the Edit > Ports, Data Ports screen The Nailed-up TCP (NTCP) is a Transmission Control Protocol. Rather than provide a listening port for other devices to link, NTCP establishes its own unique permanent connection. Once you define a NetGuardian data port as NTCP, you can configure its options in the Nailed TCP Connection Configuration table located just below. -
Page 33: Direct And Indirect Proxy Connections
Field Description Address The IP address of the device you want to connect to. Port The TCP port of the device you want to connect to. Connection Retry Interval Specifies the time interval between attempts to reestablish connection. This field is set at 5 seconds by default. 2.5.6.4 Direct and Indirect Proxy Connections The NetGuardian supports two proxy connections, direct and indirect. -
Page 34: Setting Up Notification Methods
Allows an alarm point on the NetGuardian G5 to operate a control on another SNMP- Echo enabled, DPS Telecom RTU. Table 2.G. Notification formats Many cellular carriers offer a TAP gateway to SMS. Check with your carrier to see if you can use a dial- up connection to send SMS messages to your phone. -
Page 35: Alpha Numeric Pager Setup
2.6.1 Alpha Numeric Pager Setup The alpha numeric pager can receive text messages including alarm descriptions, time of occurrence, and point addresses. Use the following steps to configure the alpha numeric pager settings: 1. From the Edit menu > Notification screen, select an ID number to use. See Table 2.G for pager descriptions. -
Page 36: Text Paging Setup
Note: Pager IDs are used in the alarm provisioning screen to designate the primary and secondary person/device being paged when an alarm condition occurs or clears. 2. Under the Type column select Numeric from the drop-down menu, see Figure 2.16. 3. -
Page 37: Smtp Pop3 Authentication Support
3. Enter the domain name of the email address under the Phone/Domain heading. This is the portion of an email address after the @ symbol in name@domain.com. Note: There cannot be any spaces in the domain name. 4. Enter the email recipient's user name under the PIN/Rcpt/Port heading. This is the portion of an email address before the @ symbol in the name@domain.com. -
Page 38: Snmpv1 Notification Setup
"user@yourdomain.com" for POP before SMTP authentication. 3. Click Submit Data to save your changes. 4. Click on the Edit menu > System link. 5. In the Name field type the name of the address you want to receive notifications from the NetGuardian (the part of the email address coming before the @ symbol - user@yourdomain.com). -
Page 39: Tcp Paging Setup
2.6.8 TCP Paging Setup <MSG_BEG 00001> VID : DPS Telecom FID : NetGuardian SNMP v5.0B.3206 SITE: Yale Office PNT : 99.01.01.01 DESC: RECTIFIER 1 STAT: CLEAR DATE: 01/01/2001 TIME: 12:17:02 <MSG_END 00001> Fig. 2.19. Example TCP message Heading Description MSG_BEG... -
Page 40: Num17 Pager Setup
2.6.9 Num17 Pager Setup The Num17 Pager can receive point addresses of alarms. It is quite similar to the Numeric Paging format in the way it receives and reports alarms. However, on certain pager systems the symbol * will cause a freeze or other undesirable situations. Num17 eliminates the * symbol from the pages it receives and reports alarms as a 17-digit series of numbers. -
Page 41: Defining Point Groups
Defining Point Groups Each NetGuardian Alarm point can be assigned to one of eight groups, which are identified with a user- defined label. Once the point groups are defined, the Point Group IDs can be used to group base and system alarms, see section "Configuring Base Discrete Alarms."... -
Page 42: Configuring Base Discrete Alarms
Configuring Base Discrete Alarms All of the NetGuardian's 32 discrete alarms are configured from the Edit menu > Base Alarms screen. Descriptions of the alarm point, polarity (normal or reversed), whether to use an SNMP Trap or not, and the primary and secondary pager used to report the alarm, and group assignments, are configured in this screen. -
Page 43: Event Qualification Timers
Event Qualification Timers Fig. 2.22. Edit the Even Qualification Timer settings from the Edit > Even Qual screen Use the following steps to configure your Event Qual timer settings: 1. From the Edit menu select from the Event Qual drop down menu. 2. - Page 44 Also, you must set the Type field first, before attempting to edit other data for each ID. To setup Event Qualification Timers, follow the instructions below: 1. Choose the Event Qual tab from the menu selections 2. Enter the ID of the Event qual you would like to modify, 3. Then input the Type, Display, Point, Value and Timer units for each ID.
-
Page 45: Setting System Alarm Notifications
2.10 Setting System Alarm Notifications Fig. 2.23. SNMP Traps and primary or secondary pager devices can be selected for each system alarm The System Alarms screen allows you to individually set the notification method for each system alarm. See Appendix A for system alarm point descriptions. Use the following steps to configure your system alarm notification settings: 1. -
Page 46: Variable Bindings
2.11 Variable Bindings Note: Variable bindings are used when setting up SNMP alarms. The Edit > Variable Bindings menu Variable Bindings Identification number for the variable binding. OID of the variable binding. Note: Using a * in this field is like a "wild card"... -
Page 47: Snmp Alarms
2.12 SNMP Alarms The Edit > SNMP Alarms menu Edit > SNMP Alarms > Details SNMP Alarms Settings SNMP Alarm ID number. Description User-definable description for the SNMP alarm. Check which notification device(s), 1 through 8, will send alarm notifications Notification Devices in response to this SNMP alarm. -
Page 48: Configure The Accumulation Timer
2.13 Configure the Accumulation Timer Fig. 2.24. Define the Accumulation Timer settings to send an Accumulation Event alarm Field Description Display and Point Reference Indicates which alarm point is to be monitored Point Description The user-defined description of the monitored alarm point. Point Status The current status of the monitored point. -
Page 49: Configuring Ping Targets
2.14 Configuring Ping Targets Fig. 2.25. Configure the ping target parameters from the Ping Info screen Each of the 32 ping targets can be provisioned with a description, an IP address, primary and secondary notification devices, and an option to verify connection using SNMPv1 GET. The NetGuardian G5 will issue a call to the primary notification device followed by a call to the secondary notification device in the event a ping alarm occurs.* Use the following steps to configure the ping targets:... -
Page 50: Analog Sensors
2.15 Analog Sensors Each of the NetGuardian G5's analog channels must be individually configured to monitor data. The ADCs (analog to digital converters) support a range of –94 to 94 VDC. There are four alarm trip points (thresholds) in ascending order: major under, minor under, minor over, and major over. The thresholds must be set from Under to Over in either ascending or descending voltage (or current) order. -
Page 51: Integrated Temperature And Battery Sensor (Optional)
relative humidity, F for ° Fahrenheit, etc.). 7. In the box below the abbreviated native unit, enter the reading that corresponds to the maximum voltage output entered in the previous step. (Optional) In this menu, you can also enter the Point Group ID designated for each alarm level (MjU = Major Under, MnU = Minor Under, MjO = Major Over, MnO = Minor Under), see section "Defining Point Groups."... - Page 52 In Reference 1 enter % (integrated percent) in the box to the right of VDC. Look for calibration check box (only visible for air flow sensor) - this is a control, not a configuration. 2. Supply maximum possible air flow while calibrating.
-
Page 53: D-Wire Sensors (Optional)
You can view the calibration progress in the D-Wire Sensors Monitor page. The first part of the calibration should display the qual percentage, followed by the calibration percentage. Once calibration finishes, same air flow should result in 100%. 2.15.2 D-Wire Sensors (Optional) Fig. -
Page 54: Analog Polarity Override
2.15.3 Analog Polarity Override iF : integrated temperature sensor in fahrenheit or iC for celsius oV+ : override polarity VDC to positive oV- : override polarity VDC to negative If you have a positive powered NetGuardian, you may want to use this feature if you are using the internal battery sensor. - Page 55 correspond to the fourth D-wire sensor field in Edit > D-Wire Sensors (which may not be the fourth node in the daisy chain, if any previous node uses more than one field). The maximum amount that the analog reading can change within the given time period, in either direction, before the Analog Delta Acceptable Delta alarm is triggered.
- Page 56 Once the Analog Delta alarm is set to a valid configuration, the Current Stats and Previous Alarm monitoring menus will appear underneath, in blue. Current Stats will show the most recent delta calculation, and Previous Alarm will show the most recent delta that was large enough to trigger the alarm.
-
Page 57: Configuring The Control Relays
2.16 Configuring the Control Relays Fig. 2.29. Configure controls in the Edit menu > Controls screen The Relays of the NetGuardian G5 can be identified and configured using the Edit menu > Controls screen. A description can be entered for each of the relays. You can also designate whether or not to send SNMP Traps when a relay is actuated. -
Page 58: Activating Relays From An Alarm Point's Change Of Status
NOTE: Selecting the 'Enable Advanced Features' checkbox will occupy control relay slots #1 and #2. Edit Controls > Enable Advanced Features Monitoring Trigger This selects which severity level will cause Control #1 to latch and start the generator. The Battery Monitoring feature monitors analog channels 5 and/or 6 (Battery A and B). -
Page 59: 2.16.2.3 Making Control Relays Exclusive From Each Other
2.16.2.3 Making Control Relays exclusive from each other In the Description field, enter the token _XMOM followed by any number. For example: _XMOM2. The _XMOM token will put the control into Exclusive Momentary mode. This mode will cause the control to only accept momentary or release commands via SNMP or DCP, and the control will not be allowed to latch if a control with the same numerical tag is currently latched. -
Page 60: Relay Operating Modes
_OR D1.3-5 is logically equivalent to (1.3 || 1.4 || 1.5) _AN D 1.3-5 D2.6 _OR D3.7 is logically equivalent to ((1.3 && 1.4 && 1.5 && 2.6) || 3.7) _OR D01.03-05 D02.06 _AN D02.07 D03.10.-12 is logically equivalent to ((1.3 || 1.4 || 1.5 || 2.6)&& (2.7 &&... -
Page 61: Override Default Relay Momentary Time Using Event Qualification
2.16.5 Override Default Relay Momentary Time Using Event Qualification Fig. 2.31. Using Event Qualification to override default relay momentary time Use the following steps to override default relay momentary time, using the NetGuardian's Event Qualification feature: 1. From the Edit menu click on the Event Qual drop-down menu and select the appropriate group. 2. -
Page 62: Setting System Timers
2.17 Setting System Timers Fig. 2.32. When a target fails to respond to a ping within the fail time period, a fault is declared Ping Cycle Period Failure Ping Fail Time Declared Min. Fig. 2.33. Default timer settings The NetGuardian's System Timers allow you to control the rate of your pinging activity, time of speaker sounding, inactivity time for data ports, and discrete alarm detect time. - Page 63 however, you will increase traffic on your LAN. 1. From the Edit menu select System Timers. 2. Set the Cycle time. This determines how often the NetGuardian will go through its list of ping targets and attempts to reach them with an ICMP ping. Set the value between zero and 120 and set the units to either seconds or minutes.
-
Page 64: Setting The System Date And Time
The default Web monitor refresh time is 60 seconds. Note: The time units are preset to seconds by default and cannot be changed. 16. Set the LCD Delay time between 1–60 seconds. This timer is used when you have set the LCD to "Point Mode."... -
Page 65: Network Time Protocol Support
2.18.1 Network Time Protocol Support Fig. 2.35. Configure the Network Time Protocol feature in the Date and Time screen 1. From the Edit menu select Date and Time. 2. Click on the Time Zone drop-down menu and select the appropriate time zone. 3. - Page 66 Configure your Serial/Data Ports through the Edit > Ports screen Use the following steps to configure your DSCP device settings: 1. From the Edit > Ports menu, select the 'DSCP' type for the serial port the DSCP device is connected 2.
- Page 67 Configure your external DSCP devices through the Edit > DSCP screen Advanced Configuration and Details: Module Configuration Module Address High 4-byte identification address that is automatically acquired when the DSCP device is sync'd with the NetGuardian. Module Address Low 4-byte identification address that is automatically acquired when the DSCP device is sync'd with the NetGuardian.
-
Page 68: Configuring Ppp Modes
2.20 Configuring PPP Modes Fig. 2.36. Configure the PPP port settings in the Edit menu > PPP screen Configuration Description Port Configure a port (CDMA, GPRS, Dial-Up, Serial, etc.) VJ Compression Enable VJ Compression. Client Mode Choose the client mode (Backup, etc.) Phone Enter your client's phone number. -
Page 69: Cellular
2.20.1 Cellular Normally, the NetGuardian uses a wire LAN connection to monitor a specific alarm configured by the user (typically a ping target). At the moment a ping target fails - with Trigger Mode enabled and configured (via the Edit > PPP menu) - the NetGuardian will disable wired LAN and activate Cellular PPP. -
Page 70: Dialup
2.20.2 Dial Up If LAN fails or isn't available, you can keep in touch with your remote equipment by using the NetGuardian as a PPP Server via dial-up. Use the following steps to access the NetGuardian with dialup: 1. Select PPP from the Edit menu. 2. - Page 71 Fig. 2.38. Select PPP and Telnet access privileges in the Edit menu > Logon > Logon Profiles screen 9. Select Logon in the Edit menu. Hot Tip! There can be up to 16 different user names and each one must have its own password. 10.
-
Page 72: Building Access Controller
2.21 Building Access Controller Fig. 2.39 Configure building access from the BAC Option The Building Access Controller (BAC) option is only available if the BAC is installed on the NetGuardian (See the BAC 32 User Manual for more information). The BAC can function in a number of different operational modes. However, for basic functionality, the user only has to enter the BAC Unit ID. -
Page 73: Entry/Exit Logging
Internal Door user profiles from a BACTL unit. Broadcast Port Allows door to be held open without an alarm from 5-90 Propped-Door ECU G3 V3.0D or minutes. A beep indication will be given by the ECU during Minutes above the last two enabled minutes if the door is still open to show the command is about to expire. -
Page 74: 2.21.2.1 Exit Mode
· Set the In-Facility Send Count between 1 and 3, determining how many times the NetGuardian will attempt to send the broadcast. For more information about the In-Facility Broadcast mode, see your Building Access 32 manual. 2.21.2.1 Exit Mode Exit Mode allows users operating in In-Facility Broadcast mode to signal to the BAC that they are leaving a facility, and that they would like to re-enable door violations, preventing others from taking advantage of the time remaining on an in-facility broadcast to gain access to otherwise restricted areas. -
Page 75: Alarm Sync
Camera Field Description Name Enter the name of the camera. Description Enter a description of the camera. Enter the IP Address of the camera (not the NetGuardian). The NetGuardian IP Address will provision this in the camera. The unit will also send the NetGuardian subnet and gateway information. -
Page 76: Rebooting The Netguardian
NetGuardian." 1. From the Edit menu select NVRAM, see Figure 2.42. 2. Select Write to cause the current data in RAM to be written to NVRAM and then verified. 3. Select Initialize to reload factory defaults into NVRAM. DO NOT SELECT THIS OPTION UNLESS YOU WANT TO RE-ENTER ALL OF YOUR CONFIGURATION INFORMATION AGAIN. -
Page 77: Alarm Summary Window
Alarm Summary Window Fig. 3.1. The Alarm Summary display can be accessed by selecting either the Monitor or the Summary link Clicking on the Monitor or Summary buttons shows the Alarm Summary display. The Summary screen gives you a quick indication of any alarms that have been triggered in the NetGuardian's base alarms, ping targets, analogs, system alarms, and any NetGuardian discrete expansions. -
Page 78: Monitoring Ping Targets
Monitoring Ping Targets Ping Targets can be viewed by going to Monitor > Ping Targets. Here you can view the state (either Clear or Alarm) for each of your configured Ping Targets. Up to 32 ping targets may be configured. View the status of Ping Targets from the Monitor >... -
Page 79: Monitoring Analogs
Monitoring Analogs Fig. 3.4. View the status of the Analogs from the Monitor > Analogs screen This selection provides the status of the system's analogs by indicating if an alarm has been triggered. The Monitor menu > Analogs screen provides a description of each analog channel, the current reading, the units being read, and alarm conditions (major under, minor under, major over, minor over) according to your analog settings. -
Page 80: Monitoring System Alarms
Monitoring System Alarms Fig.3.6. View the status of the System Alarms from the Monitor > System Alarms screen This selection provides the status of the system alarms by indicating if an alarm has been triggered. Under the State column, the description defined in Edit menu > Point Groups will appear in red if an alarm has been activated. -
Page 81: Event Logging
Event Logging Fig. 3.8. Monitor the last 100 events recorded by the NetGuardian in the Event Log window Event Log Field Description Event number (1-100) Date Date the event occurred* Time Time the event occurred* State of the event (A=alarm, C=clear) Pref Point reference. -
Page 82: Monitoring Data Port Activity
3.10 Monitoring Data Port Activity Fig. 3.9. To view the data being received by the connected equipment, select the data port number from the Monitor menu > Port Receive drop-down menu The Port Transmit and Port Receive screens provide live status information for the eight data ports by displaying transmit or receive activity in ASCII for the selected port. -
Page 83: Monitoring Switch Status
3.11 Monitoring Switch Status Fig. 3.10 The Monitor > Switch Status Menu. If you ordered your NetGuardian G5 with the optional Fiber top board, you will see the Switch Status option in the Monitor Menu. From here, you'll keep tabs on Link Status, Speed, and Packets from both the 10/100/1000 Base Switch and SFP Fiber ports. -
Page 84: Pan-And-Tilt Camera Controls
3.12.1 Pan-and-tilt Camera Controls Control left-right and up-down viewing options via the Pan/Tilt options. Clicking on the image will make that the new center point. In order to have pan-and-tilt controls, your Internet settings must be set to check for newer versions of stored pages every visit to the page, see section "Camera Internet Settings."... -
Page 85: Appendixes
Fig. 3.13 Enter the IP Address or Host Name of each camera, and title your camera Before you can setup multiple camera views, you will need to set up your camera for "live streaming." See your camera user manual to configure your camera for live streaming. You may only use up to 15 alphanumeric characters to name your camera. - Page 86 8453 1-32 Analog Channel 7** 8513- 9513-9517 8517 1-32 Analog Channel 8** 8577- 9577-9581 8581 1-32 Relays/System Alarms (See 8641- 9641-9676 table below) 8676 1-16 NGDx 1 Alm 1-16 6001- 7001-7064 6064 17-18 NDX 1 Ctl 1-2 6001- 7001-7064 6064 33-48 NGDx 2 Alm 1-16 6001-...
- Page 87 1-32 NGDx 3 Alg 1 6449- 7449-7512 6512 33-64 NGDx 4 Alg 1 6449- 7449-7512 6512 1-32 NGDx 5 Alg 1 6513- 7513-7576 6576 33-64 NGDx 6 Alg 1 6513- 7513-7576 6576 1-32 NGDx 7 Alg 1 6577- 7577-7640 6640 33-64 NGDx 8 Alg 1 6577-...
- Page 88 is 8003, etc. ** The TRAP number descriptions for the Analog channels (1-8) are in the following order: minor under, minor over, major under, and major over. For example, for Analog channel 1, the "Set" number for minor under is 8129, minor over is 8130, major under is 8131, and major over is 8132. Port Address Display...
- Page 89 SNMP Trap #s Points Description Clear 1-16 Relays 1-16 8641-8656 9641-9656 Timed Tick 8657 9657 Exp. Module Callout 8658 9658 Network Time Server 8659 9659 Accumulation Event 8660 9660 Duplicate IP Address 8661 9661 T1/E1 Error 8662 9662 ECU Emergency Unlock 8663 9663 D-Wire Sensor Not Detected...
-
Page 90: System Alarms Display Map
NetGuardian DX 2 fail 8697 9697 NetGuardian DX 3 fail 8698 9698 GLD/BSU 1 fail 8699 9699 GLD/BSU 2 fail 8700 9700 GLD/BSU 3+ fail 8701 9701 Chan. Port Timeout 8702 9702 Craft Timeout 8703 9703 Event Que Full 8704 9704 Table A.2 Display 11 System Alarms point descriptions 4.1.1... - Page 91 a correct IP Address, reboot the unit to clear the System alarm. Check the back of the unit and WAN connection not detected. T1/E1 Error confirm WAN cable is connected Loss of signal, or loss of frame. and WAN LED is solid green. Will clear when fire and gas alarms clear.
- Page 92 restore process to finish. Use Web or latest version of The internal NVRAM may be Lost NGEditG5 to configure unit. Power damaged. The unit is using default Provisioning cycle to see if alarm goes away. configuration settings. May require RMA. Displa Points Alarm Point Description...
- Page 93 Serial 3 RcvQ full Serial 4 RcvQ full Serial 5 RcvQ full Serial 6 RcvQ full Serial 7 RcvQ full Serial 8 RcvQ full Displa Points Alarm Point Description Solution Under Ports > Options, verify the number of configured NGDdx units. NetGuardian NGDdx 1 Fail (Expansion shelf 1 Use EXP filter debug and port...
- Page 94 Enable DCP timestamp polling on Event Que The Event Que is filled with more the master so events are collected, Full than 500 uncollected events. or reboot the system to clear the alarm. Table A.3 System Alarms Descriptions...
-
Page 95: Appendix B - Snmp Manager Functions
Appendix B — SNMP Manager Functions The SNMP Manager allows the user to view alarm status, set date/time, issue controls, and perform a resync. The display and tables below outline the MIB object identifiers. Table B.1 begins with dpsRTU; however, the MIB object identifier tree has several levels above it. The full English name is as follows: root.iso.org.dod.internet.private.enterprises.dps-Inc.dpsAlarmControl.dpsRTU. - Page 96 Tbl. B1 (O.)_OV_Traps Tbl. B2 (.1) Identity points Tbl. B3 (.2) DisplayGrid points points Ident _OV_vTraps (1.3.6.1.4.1.2682.1.4.1) DisplayEntry (1.3.6.1.4.1.2682.1.4.0) (1.3.6.1.4.1.2682.1.4.2.1) Manufacturer (.1) PointSet (.20) Port (.1) Model (.2) PointClr (.21) Address (.2) Firmware Version (.3) SumPSet (.101) Display (.3) DateTime (.4) SumPClr (.102) DispDesc (.4)* ResyncReq (.5)*...
- Page 97 Undefined** 33-64 Disp Ping Targets 1-32 Undefined** 33-64 Disp Analog 1 Undefined** 5-64 Disp Analog 2 Undefined** 5-64 Disp Analog 3 Undefined** 5-64 Disp Analog 4 Undefined** 5-64 Disp Analog 5 Undefined** 5-64 Disp Analog 6 Undefined** 5-64 Disp Analog 7 Undefined** 5-64 Disp...
-
Page 98: Appendix C - Snmp Granular Trap Packets
NET 2 not active NET link down Modem not No dial-tone SNMP trap not Pager Que Notification Craft RCVQ full Modem RCVQ Data 1-8 RCVQ 48-55 NGDdx 1-3 fail 56-58 GLD/BSU 1-3 fail 59-61 CHAN timeout CRFT timeout Table B.6. Alarm Point Descriptions * "No data"... - Page 99 SNMP Header Description Version Public Request Trap Request 1.3.6.1.4.1.2682.1.4 Enterprise Agent 126.10.230.181 address Enterprise Specific Generic Trap 8001 Specific Trap 617077 Time stamp 1.3.7.1.2.1.1.1.0 Object NetGuardian 216 v1.0K Value 1.3.6.1.2.1.1.6.0 Object 1-800-622-3314 Value 1.3.6.1.4.1.2682.1.4.4.1.0 Object 01-02-1995 05:08:27.760 Value 1.3.6.1.4.1.2682.1.4.5.1.1.99.1.1 Object Value 1.3.6.1.4.1.2682.1.4.5.1.2.99.1.1 Object...
-
Page 100: Appendix D - Ascii Conversion
Appendix D — ASCII Conversion The information contained in Table D.1 is a list of ASCII symbols and their meanings. Refer to the bulleted list below to interpret the ASCII data transmitted or received through the data ports. Port transmit and receive activity can be viewed from the Web Browser Interface. •... -
Page 101: Appendix E - Radius Dictionday File (Available On Resource Disk)
Appendix E - RADIUS Dictionday File (Available on Resource Disk) # -*- text -*- # dictionary.dps DPS Telecom, Inc For assistance or support, please contact support@dpstele.com v1.0 Released - 1/23/09 (CBH/DPS) VENDOR 2682 # Standard attribute for NetGuardian RTU. # All values are integer with 1 = True, 0 = False. -
Page 102: Appendix F - Dnp3 Configuration / Interoperability Guide
"Document," it is in fact a table, and only a component of a total interoperability guide. DNP V3.0 DEVICE PROFILE DOCUMENT (Also see the DNP 3.0 Implementation Table in Section 4.6.2) Vendor Name: DPS Telecom Inc. Device Name: NetGuardian 832A/864A G5 Highest DNP Level Supported:... - Page 103 Requires Application Layer Confirmation: o Never o Always o When reporting Event Data (Slave devices only) x When sending multi-fragment responses (Slave devices only) o Sometimes DNP V3.0 DEVICE PROFILE DOCUMENT (Also see the DNP 3.0 Implementation Table in Section 4.6.2) Timeouts while waiting for: Data Link Confirmation: Fixed at 2s...
- Page 104 Sends Unsolicited Responses Sends Static Data in Unsolicited Responses: x Never o Only certain objects x Never o Sometimes (attach explanation) o When Device Restarts o ENABLE/DISABLE UNSOLICITED o When Status Flags Change Function codes supported Counters Roll Over at: Default Counter Object/Variation: x No Counters Reported x No Counters Reported...
- Page 105 00, 01 00, 01 (start-stop) Binary Input (read) (response) (start-stop) range, or all) 00, 01 Binary Output 00, 01 (start-stop) Status (read) (response) (start-stop) range, or all) Control Relay 17, 28 echo of (direct op) Output Block (index) (response) request (dir.
- Page 106 DNP V3.0 Point List The tables below identify all the default data points provided by the NetGuardian 832A/864A G5 DNP3. Binary Input Points Binary Input Points Static Variation: Obj 01 Var 01 - Binary Input w/o status Request function codes supported: 1 (read) Point Description Class...
- Page 107 NET1 not active NET2 not active NET Link Down Modem not responding No Dial Tone SNMP Trap not Sent Pager Queue Overflow Notification failed Craft receive queue full Modem receive queue full Data 1 receive queue full Data 2 receive queue full Data 3 receive queue full Data 4 receive queue full Data 5 receive queue full...
- Page 108 Binary Output Status Points and Control Relay Output Blocks The following table lists both the Binary Output Status Points (Object 10) and the Control relay Output Blocks (Object 12). Binary Output Status Points Static Variation: Obj 10 Var 02 - Binary Output Status Control Variation: Obj 12 Var 01 - Control Relay Output Block Request function codes supported: 5 (direct operate), 6 (direct operate, no ack) Supported relay output: Latch on, Latch off.
- Page 109 DX 2 Control 8 DX 3 Control 1 DX 3 Control 2 DX 3 Control 3 DX 3 Control 4 DX 3 Control 5 DX 3 Control 6 DX 3 Control 7 DX 3 Control 8 Analog Inputs The following table lists Analog Inputs (Object 30). It is important to note that Analog Inputs, Analog Output Control Blocks, and Analog Output Statuses are transmitted through DNP as singed numbers.
-
Page 110: Appendix G - Modbus Registers
DX 2 Analog Channel 2 Voltage (VDC) DX 2 Analog Channel 3 Voltage (VDC) DX 2 Analog Channel 4 Voltage (VDC) DX 2 Analog Channel 5 Voltage (VDC) DX 2 Analog Channel 6 Voltage (VDC) DX 2 Analog Channel 7 Voltage (VDC) DX 2 Analog Channel 8 Voltage (VDC) - Page 111 Function Code Register Description Scaling Bits Analog 1 Sign 7/16 Analog 2 Value Analog 2 Scaling 1/16-3/16 Range Analog 2 Sign 7/16 Analog 3 Value Analog 3 Scaling 1/16-3/16 Range Analog 3 Sign 7/16 Analog 4 Value Analog 4 Scaling 1/16-3/16 Range Analog 4 Sign...
- Page 112 Function Code Register Description Scaling Bits Analog 5 Sign 7/16 Analog 6 Value Analog 6 Scaling 1/16-3/16 Range Analog 6 Sign 7/16 Analog 7 Value Analog 7 Scaling 1/16-3/16 Range Analog 7 Sign 7/16 Analog 8 Value Analog 8 Scaling 1/16-3/16 Range Analog 8 Sign...
- Page 113 Function Code Register Description Function Code Register Description 1200-1247 NetGuardian DX48 Expansion 1 Alarm 1-48 1300-1307 NetGuardian DX48 Expansion 1 Relay 1-8 1400-1447 NetGuardian DX48 Expansion 2 Alarm 1-48 1500-1507 NetGuardian DX48 Expansion 2 Relay 1-8 1600-1647 NetGuardian DX48 Expansion 3 Alarm 1-48 1700-1707 NetGuardian DX48 Expansion 3...
- Page 114 Function Code Register Description Expansion 1 Relay 1-8 Function Code Register Description 1300-1307 NetGuardian 832/864(as DX) Expansion 1 Relay 1-8 1500-1507 NetGuardian 832/864(as DX) Expansion 2 Relay 1-8 1700-1707 NetGuardian 832/864(as DX) Expansion 3 Relay 1-8 Function Code Register Description Scaling Bits NetGuardian...
- Page 115 Function Code Register Description Scaling Bits NetGuardian 1/16-3/16 (832/864 as DX) Expansion 1 Analog 4 Scaling NetGuardian 7/16 (832/864 as DX) Expansion 1 Analog 4 Sign NetGuardian (832/864 as DX) Expansion 1 Analog 5 Value NetGuardian 1/16-3/16 (832/864 as DX) Expansion 1 Analog 5 Scaling NetGuardian...
- Page 116 Function Code Register Description Scaling Bits NetGuardian 7/16 (832/864 as DX) Expansion 1 Analog 8 Sign * See Scaling Range Table Below Function Code Register Description Scaling Bits NetGuardian (832/864 as DX) Expansion 2 Analog 1 Value NetGuardian 1/16-3/16 (832/864 as DX) Expansion 2 Analog 1 Scaling NetGuardian...
- Page 117 Function Code Register Description Scaling Bits NetGuardian 7/16 (832/864 as DX) Expansion 2 Analog 4 Sign NetGuardian (832/864 as DX) Expansion 2 Analog 5 Value NetGuardian 1/16-3/16 (832/864 as DX) Expansion 2 Analog 5 Scaling NetGuardian 7/16 (832/864 as DX) Expansion 2 Analog 5 Sign NetGuardian...
- Page 118 * See Scaling Range Table Below Function Code Register Description Scaling Bits NetGuardian (832/864 as DX) Expansion 3 Analog 1 Value NetGuardian 1/16-3/16 (832/864 as DX) Expansion 3 Analog 1 Scaling NetGuardian 7/16 (832/864 as DX) Expansion 3 Analog 1 Sign NetGuardian (832/864 as DX) Expansion 3 Analog...
- Page 119 Function Code Register Description Scaling Bits Expansion 3 Analog 5 Value NetGuardian 1/16-3/16 (832/864 as DX) Expansion 3 Analog 5 Scaling NetGuardian 7/16 (832/864 as DX) Expansion 3 Analog 5 Sign NetGuardian (832/864 as DX) Expansion 3 Analog 6 Value NetGuardian 1/16-3/16 (832/864 as DX)
- Page 120 Function Code Register Description Scaling Bits Expansion 1 Analog 1 Value NetGuardian 1/16-3/16 (832/864 as DX) Expansion 1 Analog 1 Scaling NetGuardian 7/16 (832/864 as DX) Expansion 1 Analog 1 Sign NetGuardian (832/864 as DX) Expansion 1 Analog 2 Value NetGuardian 1/16-3/16 (832/864 as DX)
- Page 121 Function Code Register Description Scaling Bits Expansion 1 Analog 5 Scaling NetGuardian 7/16 (832/864 as DX) Expansion 1 Analog 5 Scaling NetGuardian (832/864 as DX) Expansion 1 Analog 6 Value NetGuardian 1/16-3/16 (832/864 as DX) Expansion 1 Analog 6 Scaling NetGuardian 7/16 (832/864 as DX)
- Page 122 Function Code Register Description Scaling Bits Expansion 2 Analog 1 Scaling NetGuardian 7/16 (832/864 as DX) Expansion 2 Analog 1 Sign NetGuardian (832/864 as DX) Expansion 2 Analog 2 Value NetGuardian 1/16-3/16 (832/864 as DX) Expansion 2 Analog 2 Scaling NetGuardian 7/16 (832/864 as DX)
- Page 123 Function Code Register Description Scaling Bits Expansion 2 Analog 5 Sign NetGuardian (832/864 as DX) Expansion 2 Analog 6 Value NetGuardian 1/16-3/16 (832/864 as DX) Expansion 2 Analog 6 Scaling NetGuardian 7/16 (832/864 as DX) Expansion 2 Analog 6 Sign NetGuardian (832/864 as DX) Expansion 2 Analog...
- Page 124 Function Code Register Description Scaling Bits Expansion 3 Analog 1 Sign NetGuardian (832/864 as DX) Expansion 3 Analog 2 Value NetGuardian 1/16-3/16 (832/864 as DX) Expansion 3 Analog 2 Scaling NetGuardian 7/16 (832/864 as DX) Expansion 3 Analog 2 Sign NetGuardian (832/864 as DX) Expansion 3 Analog...
- Page 125 Function Code Register Description Scaling Bits Expansion 3 Analog 6 Value NetGuardian 1/16-3/16 (832/864 as DX) Expansion 3 Analog 6 Scaling NetGuardian 7/16 (832/864 as DX) Expansion 3 Analog 6 Sign NetGuardian (832/864 as DX) Expansion 3 Analog 7 Value NetGuardian 1/16-3/16 (832/864 as DX)
-
Page 126: Frequently Asked Questions
Scaled Value: 2162 * 0.008098398 = 17.5087 (if Analog Sign = 1 then multiply by -1) Scaled Value = 17.5087 Example 2: Modbus Response: Analog 1 Value: [0A][47] = 2631 Analog 1 Scaling Range: 3 = 0.01819765 Analog 1 Sign = 1 Scaled Value: 2631 * 0.01819765 = 47.8780 (if Analog Sign = 1 then multiply by -1) - Page 127 alarm point) to the most general (an entire monitored device). An alarm point is a number representing an actual contact closure that is activated when an alarm condition occurs. For example, an alarm point might represent a low oil sensor in a generator or a open/closed sensor in a door.
-
Page 128: Snmp Faqs
A. The control relays are operated by issuing the appropriate set commands, which are contained in the DPS Telecom MIB. For more information about the set commands, see Reference Information, Display Mapping, in any of the NetGuardian software configuration guides. -
Page 129: Pager Faqs
2. Make sure all alarm points are configured to send SNMP traps. 3. Make sure the NetGuardian and the SNMP manager are both on the network. Use the NetGuardian's ping command to ping the SNMP manager. Pager FAQs Q. Why won't my alpha pager work? A. -
Page 130: Technical Support
Please have your user manual and hardware serial number ready. 3. Have access to troubled equipment. Please be at or near your equipment when you call DPS Telecom Technical Support. This will help us solve your problem more efficiently. -
Page 131: End User License Agreement
DPS Telecom which arise out of or are related to the non-fulfillment of any covenant or obligation of End User in connection with this Agreement. - Page 133 Warranty DPS Telecom warrants, to the original purchaser only, that its products a) substantially conform to DPS' published specifications and b) are substantially free from defects in material and workmanship. This warranty expires two years from the date of product delivery with respect to hardware and ninety days from the date of product delivery with respect to software.
- Page 134 Free Tech Support is Only a Click Away Need help with your alarm monitoring? DPS Information Services are ready to serve you … in your email or over the Web! www.DpsTelecom.com Free Tech Support in Your Email: The Protocol Alarm Monitoring Ezine The Protocol Alarm Monitoring Ezine is your free email tech support alert, delivered directly to your in-box every two weeks.
Need help?
Do you have a question about the NetGuardian 832A G5 and is the answer not in the manual?
Questions and answers