
Related Manuals for DPS Telecom NetGuardian 240T


Summary of Contents for DPS Telecom NetGuardian 240T
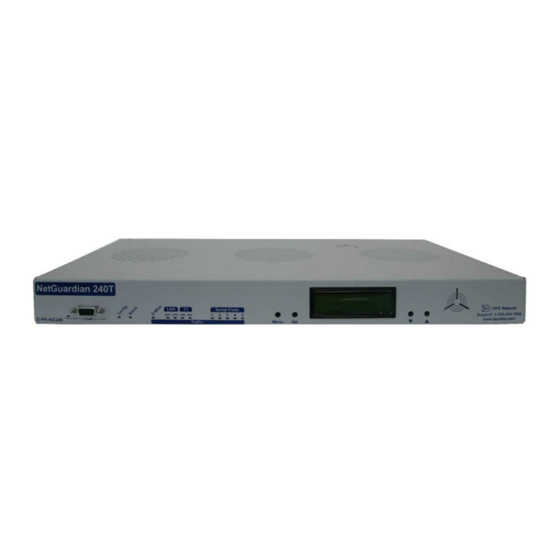
- Page 1 NetGuardian 240T / 216T HARDWARE USER MANUAL Visit our website at www.dpstelecom.com for the latest PDF manual and FAQs. October 27, 2017 D-UM-NETGT / D-UM-NETGT Firmware Version 1.0...
-
Page 2: Revision History
Notice The material in this manual is for information purposes and is subject to change without notice. DPS Telecom shall not be liable for errors contained herein or consequential damages in connection with the furnishing, performance, or use of this... -
Page 3: Table Of Contents
Contents Visit our w ebsite at w w w .dpstelecom .com for the latest PDF m anual and FAQs NetGuardian 240T/216T Overview Shipping List Optional Accessories 216T G2 Build Option Specifications Hardware Installation Tools Needed Mounting Power Connection LAN Connection Alarm and Control Relay Connections 6.5.1... - Page 4 13.2.1 Ethernet Port Setup 13.2.2 Tune 202 Modem 13.2.3 RADIUS Configuration 13.2.4 TTY Command Mode 13.3 Monitoring 13.3.1 Monitoring the NetGuardian 13.3.1.1 Monitoring Base Alarms 13.3.1.2 Monitoring Ping Targets 13.3.1.3 Monitoring and Operating Relays (Controls) 13.3.1.4 Monitoring Analogs 13.3.1.5 Monitoring System Alarms 13.3.1.6 Monitoring Data Port Activity 13.3.1.7 Monitoring the Accumulation Timer 13.3.2...
-
Page 5: Netguardian 240T/216T Overview
Optional 12V or 24V sensor power option for powering external sensors. · Supports up to 16 D-Wire sensors. New: The NetGuardian 240T/216T supports serial baud rates up to 115,200, analog readings accurate to within +/- 1%, one 10/100 NICs (isolated), SNMPv2c, SNMPv2c Inform trap, and SNMPv3. Stand-alone local visibility You don't need an alarm master unit to monitor your site with the NetGuardian. -
Page 6: Shipping List
While unpacking the NetGuardian, please make sure that all of the following items are included. If some parts are missing, or if you ever need to order new parts, please refer to the part numbers listed and call DPS Telecom at (800) 622-3314. -
Page 7: Optional Accessories
Power Connector Plugs for Main Power 3/4-Amp GMT Main Power Fuses 2-820-00862-02 2-741-00750-00 Cable Tie Pads 1-012-00106-00 2-015-00030-00 Optional Accessories Telephone Cable 6 ft. NetGuardian SiteMON IP G2 D-PR-045-10A-01 D-PK-CAMRA (Optional, if ordering modem) NetGuardian 240T Hinged Pluggable Panel D-PK-NGPAN-12054... -
Page 8: 216T G2 Build Option
For a more cost effective solution, this NetGuardian can be ordered as the 216T G2 build option which does not have the second Amphenol connector thus reducing the number of discrete alarms to 16. All other features remain the same between the NetGuardian 240T and 216T. -
Page 9: Specifications
Specifications Discrete Alarm Inputs: 40 (16 with 216T G2 Build Option) Analog Alarms: Up to 8 Analog Input Range: (–94 to 94 VDC or 4 to 20 mA) Analog Accuracy: +/- 1% of actual value Control Relays: 2 (Form C) Maximum Voltage: 60 VDC/120 VAC Maximum Current:... -
Page 10: Hardware Installation
Hardware Installation Tools Needed To install the NetGuardian, you'll need the following tools: Phillips No. 2 Screwdriver Small Standard No. 2 Screwdriver Wire Strippers/Cutter PC with terminal-emulating software (i.e. HyperTerminal) Mounting The NetGuardian can be flush or rear-mounted The NetGuardian mounts in a 19" rack or a 23" rack using the provided rack ears for each size. Two rack ear locations are provided. -
Page 11: Power Connection
Power Connection The NetGuardian 240T is powered by two barrier plug power connectors. Power connectors and fuses To connect the NetGuardian to a power supply, follow these steps: 1. Always use safe power practices when making power connections. Be sure to remove fuses from the fuse distribution panel, as well as the back of the NetGuardian, before making your power connections. -
Page 12: Lan Connection
Fig. 5.4.1. Chart of Ethernet and T1 WAN Connections The NetGuardian 240T has a 10/100 BaseT Ethernet hub for connecting through LAN. To connect the NetGuardian to the LAN, insert a standard RJ45 Ethernet cable into one of the Ethernet ports. - Page 13 RJ45 Ethernet Connection RJ45 T1 Connection 6 Trans mit Out - (Tx-) 5 Trans mit Out + (Tx+) 4 Trans mit Out - (Tx-) 3 Trans mit Out + (Tx+) 2 Receive In - (Rx-) 2 Receive In + (Rx+) 1 Receive In + (Rx+) 1 Receive In - (Rx-) Fig.
-
Page 14: Alarm And Control Relay Connections
50-pin connectors labeled "Discretes 1–16 / Analogs 1–4 / Relays 1–2" and "Discretes 17–40" on the back panel. Note: Analog channels are a build option for the NetGuardian 240T. Your NetGuardian 240T may not have user- definable analog inputs. -
Page 15: Alarm And Control Relay Connector Pinout Table
6.5.1 Alarm and Control Relay Connector Pinout Table Discretes 1–16 Amphenol 1 ALM 1 ALM 2 ALM 3 ALM 4 ALM 5 ALM 6 ALM 7 ALM 8 ALM 9 ALM 10 ALM 11 ALM 12 ALM 13 ALM 14 ALM 15 ALM 16 Analogs 1–4... - Page 16 Amphenol 2 Discretes 17–40 ALM 17 ALM 18 ALM 19 ALM 20 ALM 21 ALM 22 ALM 23 ALM 24 ALM 25 ALM 26 ALM 27 ALM 28 ALM 29 ALM 30 ALM 31 ALM 32 ALM 33 ALM 34 ALM 35 ALM 36 ALM 37...
-
Page 17: Discrete Alarms
Discrete alarm points can connect as a dry contact or a contact to ground The NetGuardian 240T features up to 40 discrete alarm inputs (16 with 216T G2 Build Option) — also called "digital inputs" or "contact closures". Discrete alarms are either active or inactive, so they're typically used to monitor on/off conditions like power outages, equipment failures, door alarms and so The NetGuardian's discrete alarm points are single-lead signals referenced to ground. -
Page 18: D-Wire Sensor Inputs
D-Wire Sensor Inputs The port on your NetGuardian labeled D-Wire supports up to 16 D-Wire sensors. Your NetGuardian powers and communicates with your D-Wire sensors via simple RJ-11 connection. The max cable length depends on the number of sensors daisy chained together. The cable lengths and corresponding number of sensors can be seen in the table below. -
Page 19: Serial Ports
TCP or UDP reach-through port. The NetGuardian can support simultaneous proxy connections for up to 5 users. Note: If connecting a NetGuardian DX to the NetGuardian 240T, use cable# D-PR-1032-10B-08 to connect the serial port to DX IN port of the expansion unit. -
Page 20: Optional 66 Block Connector
Optional 66 Block Connector The 50-pin connectors on the back panel of the NetGuardian can be connected to the optional 25-pair 66 Block Connector (part number D-PR-966-10A-00). Note: If connecting to a 50-pair split block, all connections should be made on the two pin columns closest to the right-hand side of the block or bridge clips should be installed. - Page 21 Pinout for Optional 66 Block Connector for 240T only...
-
Page 22: Lcd Display
LCD Display NetGuardian Front Panel LCD The front panel LCD displays the current alarm and control status and provides a command menu for controlling the NetGuardian's basic functions. Using the LCD command menu The four buttons surrounding the front panel LCD are used to access the LCD Command Menu. To access the menu, press the Menu button. -
Page 23: Lcd Command Menu
This new feature allows you to change the way active alarms are displayed on the NetGuardian's front panel LCD screen. When the LCD is in "Point Mode," only the display points in alarm are displayed on the screen, instead of the full alarm descriptions. -
Page 24: Sound Off
7.2.1 Sound off Sound Off command Sound off The Sound off command suppresses sounds from the alarm speaker for a user-defined period of 10, 20, or 30 minutes. To scroll to the next menu command, press the q button. To change the Sound off setting, press Sel to select the command. The arrow cursor (>) will move to the right of the colon (:) in Sound off: to indicate that the command submenu is selected. -
Page 25: Contrast
7.2.4 Contrast Contrast command Contrast The Contrast command provides controls for adjusting the contrast of the LCD. To adjust the contrast, press Sel to select the command. The arrow cursor (>) will move to the right of the colon (:) in Contrast: to indicate that the command submenu is selected. Press the q or p button until you're satisfied with the contrast setting, then press Sel to make your selection. -
Page 26: Front Panel Leds
Front Panel LEDs Front panel LEDs The NetGuardian's front panel LEDs indicate communication and alarm reporting status. LED status messages are described below. Status Description Blink Green Transmit over craft port Craft Blink Red Receive over craft port Blink Green Valid Configuration Config Blink Red... -
Page 27: Back Panel Leds
Back Panel LEDs Back panel LEDs The back panel LEDs indicate the status of power and Ethernet connections. LED status messages are described below. Status Description Solid Green Polarity is correct on power feed A or B. Power A and/or B No Power or Polarity Reverse Solid Red Fuse failure... -
Page 28: Connecting To The Netguardian
Connecting to the NetGuardian 12.1 ... via Craft Port NetGuardian Craft Port The simplest way to connect to the NetGuardian is over a physical cable connection between your PC's COM port and the NetGuardian's craft port. Use the DB9M-DB9F download cable provided with your NetGuardian to make a craft port connection. Select the following COM port options: •... -
Page 29: Via Lan
12.2 ... via LAN LAN Ports You can also connect to the NetGuardian over a LAN connection. This is a very convenient way to provision multiple NetGuardian units at multiple locations. To connect to the NetGuardian via LAN, all you need is the unit's IP address (Default IP address is 192.168.1.100). -
Page 30: Via Wan
12.3 ... via WAN NetGuardian WAN Link Once WAN settings are provisioned, you can also connect to the NetGuardian over a WAN connection by connecting to the T1 WAN port. Note: You don't have to be connected to a NetGuardian unit to use NGEdit. You only need a connection to the unit to read or write configuration files to its NVRAM. -
Page 31: Establishing An Ssh Session
NetGuardian's TTY interface via SSH session. If you are unsure as to whether or not your NetGuardian is equipped with hardware acceleration, reference your NetGuardian's model number (D-PK-...) and contact support@dpstele.com. DPS Telecom recommends using PuTTY to access the TTY interface via SSH session. To establish an SSH session with your NetGuardian using PuTTY: · Open Putty ·... -
Page 32: Unit Configuration
13.2 Unit Configuration 13.2.1 Ethernet Port Setup The NetGuardian must be assigned an IP address before you will be able to connect via LAN/WAN using a Telnet client or a Web browser. To connect via LAN, the minimum configuration requires setup of the IP address and subnet mask. -
Page 33: Tune 202 Modem
NetGuardian, local authentication will not be valid. 13.2.2 Tune 202 Modem Tuning the 202 modem on a NetGuardian 240T can only be done from the TTY interface (using either HyperTerminal through the front craft port or by telnet over LAN on port 2002). -
Page 34: Radius Configuration
13.2.3 RADIUS Configuration RADIUS (Remote Authentication Dial In User Service) is an industry-standard way to manage logins to many different types of equipment in one central location. The NetGuardian connects to your central RADIUS server. Every time a device receives a login attempt (usually a username & password), it requests an authentication from the RADIUS server. -
Page 35: Tty Command Mode
RADIUS logon screen prompts for a Username and Password. 13.2.4 TTY Command Mode This command line mode offers an alternate way of configuring the NetGuardian 240T. This interface is scriptable, and is recommended for advanced users. Entries are NOT case sensitive. - Page 36 Operation Command Params get help None Help init nvram {g2} None Initialize NVRAM set nvram None Write NVRAM get nvram None Read NVRAM get sysuptime None View System Up Time get prodid None View Firmware Version {get,set} dataport {1...4} desc string {0...15} chars Data Port Description {get,set} dataport {1...4} baud...
- Page 37 {get,set} net 1 gateway Gateway Gateway IPA {get,set} proxybase {1..32767} Proxy Base {get,set} alg {1...8} desc string {0..48} chars Analog Description {get,set} alg {1...8} unit string {0..3} chars Analog Display Unit {get,set} alg {1...8} thres mju {-94.0000...94.0000} Analog Major Under Threshold {get,set} alg {1...8} thres mnu {-94.0000...94.0000}...
-
Page 38: Monitoring
Examples · You want to find out how long this NetGuardian has · You want to see the alarm description for Base been running (since last rebooted.) Get system Alarm 1. To see the description, type get alm base uptime by typing get sysuptime, then press Enter. 1 desc ·... -
Page 39: Monitoring Base Alarms
13.3.1.1 Monitoring Base Alarms View the status of the device connected to the discrete alarms from the M)onitor menu > A)larms option. Under Status, the word Alarm will appear if an alarm has been activated and Clear will appear if an alarm condition is not present. -
Page 40: Monitoring And Operating Relays (Controls)
13.3.1.3 Monitoring and Operating Relays (Controls) The NetGuardian comes equipped with 4 relays that can be used to control external devices. Monitor the status of your relays from the M)onitor menu > R)elays option. Relays 3 and 4 are set to normally open (N/O) as the factory default, but each or all of them can be changed to normally closed (N/C) by changing their respective jumper. -
Page 41: Monitoring System Alarms
This display allows you to monitor your eight analog inputs 13.3.1.5 Monitoring System Alarms View the status of the NetGuardian's system alarms from the M)onitor menu > S)ystem option. Under Status, the word Alarm will appear if an alarm has been activated and Clear will appear if an alarm condition is not present. -
Page 42: Monitoring Data Port Activity
13.3.1.6 Monitoring Data Port Activity View the status of the NetGuardian's 4 data ports from the M)onitor menu > p(O)rts option. Enter the number of the port you wish to view and press Enter. The NetGuardian provides an ASCII description under Transmit and Receive Choose a) Transmit to view data transmitted to another device. -
Page 43: Monitoring The Accumulation Timer
13.3.1.7 Monitoring the Accumulation Timer The Accumulation Timer keeps a running total of the amount of time a point is in an alarm state. An alarm point that exceeds a user defined threshold will trigger a Accumulation Event system alarm. Monitor and reset the Accumulator Timer Field Description... -
Page 44: Viewing Live Target Pings
13.3.2 Viewing Live Target Pings Choose P)ing to ping any of the NetGuardian's user defined IP addresses. Then enter the ID number (1-32) of the IP address or enter any IP address to ping. Continuously ping an IP address that has been defined in the NetGuardian's ping table 13.3.3 Proxy Menu You can create proxy connections to reach-through to the craft port, modem port or any of the other eight serial ports from the P)roxy menu. -
Page 45: Event Logging
13.3.4 Event Logging Choose E)vent log to view the up to 100 events posted to the NetGuardian; including power up, base and system alarms, ping alarms, analog alarms, and controls. Posted events for the various alarms include both alarm and clear status. -
Page 46: Backing Up Netguardian Configuration Data Via Ftp
13.3.5 Backing Up NetGuardian Configuration Data via FTP 1. From the Start menu on your PC, select RUN. 2. Type "ftp" followed by the IP address of the NetGuardian you are backing up (e.g. ftp 126.10.120.199). 3. After the connection is made press Enter. 4. -
Page 47: Debug Input And Filter Options
13.3.6 Debug Input and Filter Options Debug Options Exit Debug Show BAC status points Show task status Show DUART information Show network routing table Clear debug enable bitmap. Turn all debug filters OFF Display Options (1) Alarm toggle switch. Shows posting of alarm data (2) Analog toggle switch. -
Page 48: Reference Section
Reference Section 14.1 Display Mapping Port Address Display Points Description Clear 1-16 Discrete Alarms 1-16 8001-8016 9001-9016 1-40 Discrete Alarms 17-40 (240T Only) 8001-8040 9001-9040 1-32 Ping Table 8065-8096 9065-9096 Analog Channel 1** 8129-8132 9129-9132 Analog Channel 2** 8193-8196 9193-9196 Analog Channel 3** 8257-8260 9257-9260... -
Page 49: System Alarms Display Map
14.1.1 System Alarms Display Map Table 13.1.1.A - System Alarms Descriptions Display Points Alarm Point Description Solution Toggles state at constant rate as configured by the Timed Tick timer To turn the feature off, set the Timed Tick Timed Tick variable. - Page 50 Table 13.1.1.A (Continued from previous page) Display Points Alarm Point Description Solution Remove configured modem initialization An error has been detected during string, then power cycle the unit. If Modem not modem initialization. The modem did not alarm persists, try resetting the Modem responding respond to the initialization string.
- Page 51 Table 13.1.1.A (Continued from previous page) Display Points Alarm Point Description Solution Connect just GLD unit 1 and attempt to poll. Verify GLD is GLD 1 fail GLD address 1 is failed. connected to data port 8 and the hardware is RS485, not RS232. Verify the GLD unit addressing, GLD 2 fail GLD address 2 is failed.
-
Page 52: Snmp Manager Functions
14.2 SNMP Manager Functions The SNMP Manager allows the user to view alarm status, set date/time, issue controls, and perform a resync. The display and tables below outline the MIB object identifiers. Table B.1 begins with dpsRTU; however, the MIB object identifier tree has several levels above it. -
Page 53: Snmp Granular Trap Packets
14.3 SNMP Granular Trap Packets SNMP Trap managers can use one of two methods to get alarm information: 1. Granular traps (not necessary to define point descriptions for the NetGuardian) 2. The SNMP manager reads the description from the Trap. UDP Header Description 1238... -
Page 54: Trap Snmp Logic
14.4 Trap SNMP Logic NET1 NET2 Trap Dest. Result Subnet 1 & Gateway Not Defined Subnet 3 Trap goes out NET1's Gateway Subnet 1 & Gateway Subnet 2, No Gateway Subnet 3 Trap goes out NET1's Gateway Subnet 1 & Gateway Subnet 2 &... -
Page 55: Radius Dictionary File (Available On Resource Disk)
14.6 RADIUS Dictionary File (Available on Resource Disk) # -*- text -*- # dictionary.dps DPS Telecom, Inc For assistance or support, please contact support@dpstele.com v1.0 Released - 1/23/09 (CBH/DPS) VENDOR 2682 # Standard attribute for NetGuardian RTU. # All values are integer with 1 = True, 0 = False. - Page 56 § Enter User Name and Password Information o Enter a User name and press enter. If it's a valid user, it will now ask for a password. The default username is Administrator. o Enter the password. If the login was accepted, it should say "User logged in". The default password is printed on the Default Network Settings tag.
-
Page 57: Technical Support
Technical Support DPS Telecom products are backed by our courteous, friendly Technical Support representatives, who will give you the best in fast and accurate customer service. To help us help you better, please take the following steps before calling Technical Support: 1. -
Page 58: End User License Agreement
DPS Telecom which arise out of or are related to the non-fulfillment of any covenant or obligation of End User in connection with this Agreement. - Page 60 “D ependable, Powerful Solutions that allow users to monitor larger, more complicated networks with a smaller, less trained staff” “Yo u r Part n ers i n Net w o rk Al arm Man ag emen t ” www.dpstele.com 4955 E Yale • Fresno, CA 93727 559-454-1600 •...
Need help?
Do you have a question about the NetGuardian 240T and is the answer not in the manual?
Questions and answers