Table of Contents
Advertisement
Advertisement
Table of Contents

Related Manuals for Aerotech Npaq DL 4010 Series


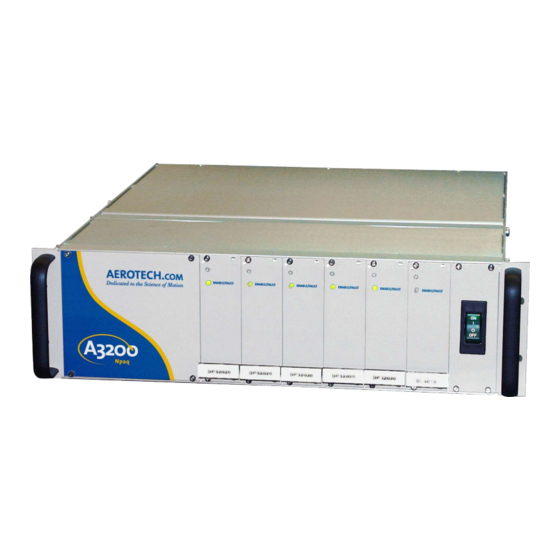
Summary of Contents for Aerotech Npaq DL 4010 Series
-
Page 1: Npaq Hardware Manual
Npaq Hardware Manual Revision: 3.08.00... - Page 2 This manual contains proprietary information and may not be reproduced, disclosed, or used in whole or in part without the express written permission of Aerotech, Inc. Product names mentioned herein are used for identification purposes only and may be trademarks of their respective companies.
-
Page 3: Table Of Contents
2.6.4.1. End Of Travel Limit Phasing 2.6.5. Encoder Fault Interface 2.6.6. Brake Output 2.7. Position Synchronized Output (PSO) Connector 2.7.1. PSO Opto Output (J7) 2.7.2. PSO Differential Outputs (J7) 2.7.3. PSO Interlock (J7) 2.7.4. PSO SYNC IO (J7) 2.8. High-Speed I/O Connector (J8) www.aerotech.com... - Page 4 4.4. MXR Board Assembly 4.5. Soft-Start Board Assembly 4.6. Analog I/O Board Assembly [Archive] 4.7. RDP Board Assembly [Archive] 4.8. Fuse Replacement 4.9. Preventative Maintenance Appendix A: Warranty and Field Service Appendix B: Revision History Appendix C: Avertissements Index www.aerotech.com...
-
Page 5: List Of Figures
Analog Inputs (J10) Figure 2-42: Joystick Inputs (J11) Figure 2-43: Joystick Interface Figure 2-44: User Interrupt Inputs (J12) Figure 2-45: Emergency Stop Sense Input Connections (J12) Figure 2-46: Brake Option Connections (Internal) (J12) Figure 2-47: Ethernet Connection Figure 3-1: ESTOP Option Interface www.aerotech.com... - Page 6 Figure 4-1: Control Board Assembly Figure 4-2: Drive Interface Board Assembly Figure 4-3: Rear Panel Interface Board Assembly Figure 4-4: MXR Board Assembly Figure 4-5: Soft-Start/Voltage Select Board Figure 4-6: Analog I/O Board Assembly Figure 4-7: RDP Board Assembly www.aerotech.com...
-
Page 7: List Of Tables
Analog Output Pins on the Analog I/O Connector (J10) Table 2-43: Differential Analog Input 1 Specifications (J10) Table 2-44: Analog Input Pins on the Analog I/O Connector (J10) Table 2-45: Joystick Connector Pinout Table 2-46: Mating Connector Part Numbers for the Joystick Connector www.aerotech.com... - Page 8 MXR Board Test Points (where “x” represents the channel number) Table 4-12: Soft-Start Fuse Replacement Part Numbers Table 4-13: Analog I/O Option Board Jumper Settings Table 4-14: RDP Board Test Points (where “x” represents the channel number) Table 4-15: Typical Fuse Replacement Part Numbers Table 4-16: Preventative Maintenance www.aerotech.com...
-
Page 9: Eu Declaration Of Conformity
Declaration of Conformity Npaq® Hardware Manual EU Declaration of Conformity Manufacturer Aerotech, Inc. Address 101 Zeta Drive Pittsburgh, PA 15238-2811 Product Npaq Model/Types This is to certify that the aforementioned product is in accordance with the applicable requirements of the... -
Page 10: Agency Approvals
U8 14 12 68995 016 Standards: CAN/CSA-C22.2 No. 61010-1:2012; UL 61010-1:2012 Visit https://www.tuev-sued.de/product-testing/certificates to view Aerotech's TÜV SÜD certificates. Type the certificate number listed above in the search bar or type "Aerotech" for a list of all Aerotech certificates. www.aerotech.com... -
Page 11: Safety Procedures And Warnings
N O T E : Aerotech continually improves its product offerings; listed options may be superseded at any time. All drawings and illustrations are for reference only and were complete and accurate as of this manual’s release. - Page 12 4. Do not expose this product to environments or conditions outside of the listed specifications. Exceeding environmental or operating specifications can cause damage to the equipment. 5. Operators must be trained before operating this equipment. 6. All service and maintenance must be performed by qualified personnel. www.aerotech.com...
-
Page 13: Quick Installation Guide
There are five standard connections that must be made to the Npaq. Topic Section AC Power Section 2.2.1. AC Power Connections Device Number Section 2.3. Communication Channel Settings PC Communication Section 2.13. FireWire Interface Motor Power Section 2.5. Motor Output Connectors Motor Feedback Section 2.6. Motor Feedback Connectors Figure 1: Quick Start Connections www.aerotech.com... - Page 14 Npaq® Hardware Manual Quick Installation Guide This page intentionally left blank. www.aerotech.com...
-
Page 15: Chapter 1: Introduction
The Npaq uses plug-in amplifiers supporting both linear and PWM topologies to control brushless, DC brush, or stepper motor types at up to 320 VDC operating voltage and 30 A peak current capability. The Npaq contains two configurable power supply sections to support a variety of motors with different operating www.aerotech.com Chapter 1... -
Page 16: Table 1-1: Feature Summary
Three High Speed Bi-directional lines ESTOP sense Input Two Opto-Isolated User Interrupt Inputs Brake Output (Optional) Feedback / Limit Hall Inputs (3 per axis) Inputs Encoder / Marker Inputs CW, CCW & Home Limit Inputs Motor Over-Temperature Input Chapter 1 www.aerotech.com... -
Page 17: Table 1-2: Configurations And Options
Axis 1-2 Vbus1, Axis 3-6 Vbus2 /SPLIT BUS 1-3/4-6 Axis 1-3 Vbus1, Axis 4-6 Vbus2 /SPLIT BUS 1-4/5-6 Axis 1-4 Vbus1, Axis 5-6 Vbus2 /SPLIT BUS 1-5/6 Axis 1-5 Vbus1, Axis 6 Vbus2 /SPLIT BUS 1-6 No split, Axis 1-6 Vbus1 www.aerotech.com Chapter 1... - Page 18 /S160-2 Shunt for Vbus2, 160 VDC operation NOTE: Both shunts permitted for 160VDC option. /S320-1 Shunt for Vbus1, 320 VDC operation /S320-2 Shunt for Vbus2, 320 VDC operation NOTE: Only one shunt permitted for 320 VDC option. Chapter 1 www.aerotech.com...
- Page 19 1-2 axis RD converter board. Must be on axis 1-2 /RDP4-y 1-4 axis RD converter board. Must be on axis 1-4 /RDP6-y 1-6 axis RD converter board. NOTE: Where y is the frequency (options are 5, 7.5, or 10 KHz) www.aerotech.com Chapter 1...
-
Page 20: Figure 1-2: Functional Diagram
Npaq® Hardware Manual Introduction The following block diagram illustrates the features and options of the Npaq. Figure 1-2: Functional Diagram Chapter 1 www.aerotech.com... -
Page 21: Electrical Specifications
Over Temperature shutdown. Bus supply inrush current limit during initial power-on. Isolation Opto and transformer isolation between control and power stages. Indicator (Power) Power switch contains a power-on indicator. Indicator (Enabled) Individual Amplifier LED’s indicates drive enabled state. www.aerotech.com Chapter 1... -
Page 22: Table 1-4: Servo Amplifier Electrical Specifications
Heat Sink Temperature (maximum allowable) °C 75 (All Amplifiers) (1) AC voltage, Bus supply / load may result in significantly lower maximum peak currents. (2) For a locked motor condition with 0 Ω load. (3) Selectable through parameters. Chapter 1 www.aerotech.com... -
Page 23: System Power Requirements
Pin = SUM ( Pout + Ploss ) / EfficiencyFactor For linear amplifier types: An EfficiencyFactor of approximately 50% should be used in the following equations. Linear Motor Pdiss[W] = MotorCurrentPeak[A] * TotalBusVoltage[V] * 3 / 2 Pin = SUM ( Pdiss ) / EfficiencyFactor www.aerotech.com Chapter 1... -
Page 24: Mechanical Specifications
Do not use the handles on the front of the product to lift or move this product. Use the handles only to slide the product in and out of its enclosure. Lift this product only by the base. Do not use the cables or the connectors to lift or move this product. Chapter 1 www.aerotech.com... -
Page 25: Figure 1-3: Dimensions
Introduction Npaq® Hardware Manual Figure 1-3: Dimensions www.aerotech.com Chapter 1... -
Page 26: Environmental Specifications
Up to 2000 meters. Pollution Pollution degree 2 (normally only non-conductive pollution). Indoor use only. 71 db at 1 meter (rear fan and side fan) Audible Noise 77 db at 1 meter (rear fan and side fan) Chapter 1 www.aerotech.com... -
Page 27: Drive And Software Compatibility
Drives that list a specific version number in the Last Software Version column will not be supported after the listed version. Table 1-5: Drive and Software Compatibility Drive Type Firmware Revision First Software Version Last Software Version 1.07 2.55 Npaq 2.09 Current www.aerotech.com Chapter 1... - Page 28 Npaq® Hardware Manual Introduction This page intentionally left blank. Chapter 1 www.aerotech.com...
-
Page 29: Chapter 2: Installation And Configuration
Customer order number (please provide this number when requesting product support) Drawing number System part number The Npaq power label contains the factory configured AC power requirements. D A N G E R : The AC power label must be changed if the AC Input Voltage is reconfigured. www.aerotech.com Chapter 2... -
Page 30: Electrical Installation
AC power and provides protection to the Npaq system in case of severe overloads. This breaker is selected to meet the maximum current requirements of the Npaq system and is normally a 10 A breaker. Figure 2-2: Power Switch Chapter 2 www.aerotech.com... - Page 31 Some Npaq systems may use +12 V for the limit switch supply (Special request / requirements). The Npaq can also provide an external +24 V output for Brake applications. The +24 V Brake output is only provided when the Brake option is used. www.aerotech.com Chapter 2...
-
Page 32: Ac Power Connections
D A N G E R : See the user documentation provided with your Npaq system to determine if the Npaq chassis is limited to only one AC input voltage. Operation at other voltages may result in damage to the Npaq chassis. Chapter 2 www.aerotech.com... -
Page 33: Minimizing Conducted, Radiated, And System Noise
2. Insulation rating will need to be rated for the higher voltage if the wiring is in proximity to wiring operating at voltages above 60 V. 3. Larger gauge wire may be required to minimize voltage drop due to voltage (IR) loss in the cable. www.aerotech.com Chapter 2... -
Page 34: Communication Channel Settings
The Npaq drive chassis can be set to any communication channel number from 1 to 27 (the Npaq will automatically claim the next 5 sequential device numbers). If the Npaq is set to 2, the next available communication channel number is 8. Chapter 2 www.aerotech.com... -
Page 35: Table 2-2: Device Number Switch Settings (S2)
26 through 31 27 through 32 28 - 32 (1) S2 switches 5 through 9 should be left in their factory-preset positions. (2) The maximum allowable base communication channel number for the Npaq is 27 (through 32). www.aerotech.com Chapter 2... -
Page 36: Soft Start / Voltage Selection Overview
Damage to the Soft-Start circuit may result if +24 VDC is not connected. Figure 2-5: Soft-Start / Voltage Board Table 2-3: AC Input Power Connector (J1) Pin Assignment Description Wire Color AC LO Blue AC LO Blue AC HI Brown AC HI Brown Chapter 2 www.aerotech.com... -
Page 37: Table 2-4: +24 Vdc Power Connector (J2) Pin Assignment
Fan AC HI (115 VAC) Brown Fan AC LO Blue W A R N I N G : Transformer wire colors refer only to Aerotech’s (P/N EAX01010) transformer. Do not use with other transformers. Table 2-7: AC Input Power Connector (J1/MXR Board) Pin Assignment... -
Page 38: Voltage Selection Operation
W A R N I N G : If the user changes the Voltage Selector settings, it is also the user's responsibility to change the Npaq AC power label located next to the AC inlet. Refer to the Section 1.1. for power ratings. Chapter 2 www.aerotech.com... -
Page 39: Motor Output Connectors
1.3 mm (#16 AWG) Reserved 1.3 mm (#16 AWG) Ground Table 2-10: Mating Connector Part Numbers for the Motor Power Output Connector Aerotech P/N Third Party Source P/N Description Male 5 Pin D-Style ECK01236 ITT Cannon DBM5W5PK87 Contact (QTY. 5) ECK00660 ITT Cannon DM53745-7... -
Page 40: Brushless Motor Connections
Refer to Section 2.5.1.1. for powered motor phasing or Section 2.5.1.2. for unpowered motor and feedback phasing. N O T E : If using standard Aerotech motors and cables, motor and encoder connection adjustments are not required. Chapter 2 www.aerotech.com... -
Page 41: Powered Motor Phasing
Installation and Configuration Npaq® Hardware Manual 2.5.1.1. Powered Motor Phasing Refer to the Motor Phasing Calculator in the Configuration Manager for motor, Hall, and encoder phasing. Figure 2-8: Encoder and Hall Signal Diagnostics www.aerotech.com Chapter 2... -
Page 42: Unpowered Motor And Feedback Phasing
With the designations of the motor and Hall leads of a third party motor determined, the motor can now be connected to an Aerotech system. Connect motor lead A to motor connector A, motor lead B to motor connector B, and motor lead C to motor connector C. Hall leads should also be connected to their respective feedback connector pins (Hall A lead to the Hall A feedback pin, Hall B to Hall B, and Hall C to Hall C). -
Page 43: Dc Brush Motor Connections
5. Connect the motor lead from the voltmeter to the ØA motor terminal on the Npaq. Connect the motor lead from the negative lead of the voltmeter to the ØB motor terminal on the Npaq. N O T E : If using standard Aerotech motors and cables, motor and encoder connection adjustments are not required. -
Page 44: Stepper Motor Connections
Figure 2-14: Clockwise Motor Rotation N O T E : If using standard Aerotech motors and cables, motor and encoder connection adjustments are not required. N O T E : After the motor has been phased, use the ReverseMotionDirection parameter to change the dir- ection of “positive”... -
Page 45: Motor Feedback Connectors
(1) Pins 3, 6, 7, 14, 15, 17 and 18 have a different function when used with the resolver input option, see Section 3.6. for more information. Table 2-12: Mating Connector Part Numbers for the Motor Feedback Connector Mating Connector Aerotech P/N Third Party P/N 25-Pin D-Connector ECK00101 FCI DB25P064TXLF Backshell ECK00656 Amphenol 17E-1726-2 www.aerotech.com... -
Page 46: Encoder Interface (J1-J6)
Encoder Sine + Input Encoder Sine - Input Signal Common for Encoder (1) Pins 3, 6, 7, 14, 15, 17 and 18 have a different function when used with the resolver input option, see Section 3.6. for more information. Chapter 2 www.aerotech.com... -
Page 47: Line Driver Encoder (Standard)
An analog encoder is used with the -MXR option (refer to Section 2.6.1.2. for more information). Table 2-14: Encoder Specifications Specification Value Encoder Frequency 10 MHz maximum (25 nsec minimum edge separation) x4 Quadrature Decoding 40 million counts/sec Figure 2-15: Line Driver Encoder Interface www.aerotech.com Chapter 2... -
Page 48: Mxr Option (Analog Encoder Interface)
Analog Encoder Phasing Reference Diagram (-MXR option) N O T E : The input amplitude is measured peak to peak for any encoder signal (sin, sin-n, cos, cos-n) relative to signal common. These signals have a typical offset voltage of 2V to 2.5V. Chapter 2 www.aerotech.com... -
Page 49: Figure 2-17: Mxr Analog Encoder Interface
Installation and Configuration Npaq® Hardware Manual Figure 2-17: MXR Analog Encoder Interface www.aerotech.com Chapter 2... -
Page 50: Encoder Phasing
Figure 2-18: Encoder Phasing Reference Diagram (Standard) N O T E : Encoder manufacturers may refer to the encoder signals as A, B, and Z. The proper phase rela- tionship between signals is shown in Figure 2-18. Chapter 2 www.aerotech.com... -
Page 51: Figure 2-19: Position Feedback In The Diagnostic Display
Installation and Configuration Npaq® Hardware Manual Figure 2-19: Position Feedback in the Diagnostic Display www.aerotech.com Chapter 2... -
Page 52: Hall-Effect Interface
Hall-Effect Sensor C (brushless motors only) Input Signal Common for Encoder (1) Pins 3, 6, 7, 14, 15, 17 and 18 have a different function when used with the resolver input option, see Section 3.6. for more information. Figure 2-20: Hall-Effect Inputs Chapter 2 www.aerotech.com... -
Page 53: Thermistor Interface
The nominal trip value of the sensor is 1k Ohm. Table 2-17: Thermistor Pin on the Motor Feedback Connector Pin # Description In/Out/Bi Motor Over Temperature Thermistor Input Figure 2-21: Thermistor Interface Input www.aerotech.com Chapter 2... -
Page 54: End Of Travel Limit Input Interface
End of Travel Limit Input Pins on the Motor Feedback Connector Pin # Description In/Out/Bi Clockwise End of Travel Limit Input +5V Power for Limit Switches (500 mA max) Output Signal Common for Limit Switches Home Switch Input Input Counterclockwise End of Travel Limit Input Chapter 2 www.aerotech.com... -
Page 55: Figure 2-23: End Of Travel Limit Interface Input
Installation and Configuration Npaq® Hardware Manual Figure 2-23: End of Travel Limit Interface Input www.aerotech.com Chapter 2... -
Page 56: End Of Travel Limit Phasing
CW and CCW inputs at the motor feedback connector. The logic level of the EOT limit inputs may be viewed in the diagnostic display (shown in Figure 2-24). Figure 2-24: Limit Input Diagnostic Display Chapter 2 www.aerotech.com... -
Page 57: Encoder Fault Interface
Table 2-19: Encoder Fault Pin on the Motor Feedback Connector Pin # Description In/Out/Bi Encoder Fault Input Input Figure 2-25: Encoder Fault Interface Input www.aerotech.com Chapter 2... -
Page 58: Brake Output
Section 2.12.3. for more information on using the brake output with the solid state relay. Table 2-20: Brake Output Pins on the Motor Feedback Connector Pin # Description In/Out/Bi Optional Brake - Output Output Optional Brake + Output Output Chapter 2 www.aerotech.com... -
Page 59: Position Synchronized Output (Pso) Connector
Input Reset (Active Low) Output Common + 5 V (500 mA max) Output Table 2-22: Mating Connector Part Numbers for the PSO Connector Mating Connector Aerotech P/N Third Party P/N 25-Pin D-Connector ECK00101 FCI DB25P064TXLF Backshell ECK00656 Amphenol 17E-1726-2 www.aerotech.com Chapter 2... -
Page 60: Pso Opto Output (J7)
Normally Open 1-2 * (Recommended) Normally Closed Table 2-24: Output Specifications Description Specification Maximum Voltage 24 V Current 250 mA Latency 120 ns Maximum Frequency 12.5 MHz Figure 2-26: PSO Output Sources Current Figure 2-27: PSO Output Sinks Current Chapter 2 www.aerotech.com... -
Page 61: Pso Differential Outputs (J7)
2-29). The differential format is recommended for maximum noise immunity. Differential and open- collector outputs are active low polarity only. JP16 does not change the active polarity of these signals. Figure 2-28: PSO Output 1 and 2 Differential Outputs Figure 2-29: PSO Opto-Isolated Output and PSO Open Collector Outputs www.aerotech.com Chapter 2... -
Page 62: Pso Interlock (J7)
Table 2-25: PSO Interlock Specifications Description Specification Input Voltage Range 5 - 24 V Table 2-26: Reset Specifications Description Specification Output Voltage Level LVTTL (3.3 V) Max. Current (Sink / Source) 24 ma Output Type Active Low Chapter 2 www.aerotech.com... -
Page 63: Pso Sync Io (J7)
Description Specification Output Type LVTTL (0 - 3.3 Volts) Max Current 24 ma (Source & Sink) Figure 2-32: SYNCIN (1-6) Outputs Table 2-28: SYNCIN Specifications Description Specification Output Type Input Logic Levels 0 Volt / 5 Volt www.aerotech.com Chapter 2... -
Page 64: High-Speed I/O Connector (J8)
(1) These pins are not available to the user when the Analog I/O Board option is installed. Table 2-30: Mating Connector Part Numbers for the High-Speed I/O Connector Mating Connector Aerotech P/N Third Party P/N 25-Pin D-Connector ECK00101 FCI DB25P064TXLF... -
Page 65: High-Speed Differential Outputs (J8)
Differential Output 12- / Sin 3- / Dir - Output Differential Output 13+ / Cos 3+ Output Differential Output 13- / Cos 3- Output (1) These pins are not available to the user when the Analog I/O Board option is installed. www.aerotech.com Chapter 2... -
Page 66: Figure 2-33: High Speed Differential Outputs
Npaq® Hardware Manual Installation and Configuration Figure 2-33: High Speed Differential Outputs Chapter 2 www.aerotech.com... -
Page 67: High-Speed Differential Inputs (J8)
Aux Encoder 2 Sin + Input Aux Encoder 2 Sin - Input Aux Encoder 2 Cos + Input Aux Encoder 2 Cos - Input (1) These pins are not available to the user when the Analog I/O Board option is installed. www.aerotech.com Chapter 2... -
Page 68: Figure 2-34: High-Speed Differential Inputs
Npaq® Hardware Manual Installation and Configuration Figure 2-34: High-Speed Differential Inputs Chapter 2 www.aerotech.com... -
Page 69: High-Speed Bidirectional I/O (J8)
2.8.3. High-Speed Bidirectional I/O (J8) The bidirectional I/O signals default to inputs on reset and may be configured as input/outputs by the PORT DIR command. High-speed inputs/outputs 14-16 can source/sink 12 mA when configured as outputs. Figure 2-35: High-Speed Bidirectional I/O www.aerotech.com Chapter 2... -
Page 70: Digital Opto-Isolated I/O Connector (J9)
Digital Input 7 (Opto-Isolated) Input Not Used Not Used Not Used Table 2-34: Mating Connector Part Numbers for the Digital Opto-Isolated I/O Connector Mating Connector Aerotech P/N Third Party P/N 25-Pin D-Connector ECK00101 FCI DB25P064TXLF Backshell ECK00656 Amphenol 17E-1726-2 Chapter 2... -
Page 71: Digital Outputs (J9)
It is important that the diode be installed correctly (normally reversed biased). Refer to Figure 2-36 for an example of a current sinking output with diode suppression and Figure 2- for an example of a current sourcing output with diode suppression. www.aerotech.com Chapter 2... -
Page 72: Figure 2-36: Digital Outputs Connected In Current Sinking Mode
Npaq® Hardware Manual Installation and Configuration N O T E : Outputs must be connected as all sourcing or all sinking. Figure 2-36: Digital Outputs Connected in Current Sinking Mode Figure 2-37: Digital Outputs Connected in Current Sourcing Mode Chapter 2 www.aerotech.com... -
Page 73: Digital Inputs (J9)
Digital Input 0 (Opto-Isolated) Input Digital Input 1 (Opto-Isolated) Input Digital Input 2 (Opto-Isolated) Input Digital Input 3 (Opto-Isolated) Input Digital Input 4 (Opto-Isolated) Input Digital Input 5 (Opto-Isolated) Input Digital Input 6 (Opto-Isolated) Input Digital Input 7 (Opto-Isolated) Input www.aerotech.com Chapter 2... -
Page 74: Figure 2-38: Digital Inputs Connected In Current Sinking Mode
Npaq® Hardware Manual Installation and Configuration N O T E : Inputs must be connected as all sourcing or all sinking. Figure 2-38: Digital Inputs Connected in Current Sinking Mode Figure 2-39: Digital Inputs Connected in Current Sourcing Mode Chapter 2 www.aerotech.com... -
Page 75: Analog I/O Connector (J10)
Analog Output 1 Output Analog Ground * Pin 5 is unused on Npaq's produced before February 2009. Table 2-40: Mating Connector Part Numbers for the Analog I/O Connector (J10) Mating Connector Aerotech P/N Third Party P/N 15-Pin D-Connector ECK00100 Amphenol DA15P064TXLF Backshell ECK01022 Amphenol 17E-1725-2 N O T E : Analog inputs 2 and 3 are required for Joystick operation. -
Page 76: Analog Outputs (J10)
Resolution (volts) 305 µV Table 2-42: Analog Output Pins on the Analog I/O Connector (J10) Pin # Description In/Out/Bi Analog Output 0 Output Analog Ground Analog Ground Analog Output 1 Output Analog Ground Figure 2-40: Analog Outputs (J10) Chapter 2 www.aerotech.com... -
Page 77: Analog Inputs (J10)
Analog Input 1+ Input Analog Input 2+ Input Analog Input 3+ Input Analog Ground Analog Ground Analog Input 0- Input Analog Input 1- Input Analog Input 2- Input Analog Input 3- Input Analog Ground Figure 2-41: Analog Inputs (J10) www.aerotech.com Chapter 2... -
Page 78: Joystick Connector (J11)
Joystick Interlock (Input 10) Input Analog 3- Input (Common) Input Not Used Table 2-46: Mating Connector Part Numbers for the Joystick Connector Mating Connector Aerotech P/N Third Party P/N 15-Pin D-Connector ECK00100 Amphenol DA15P064TXLF Backshell ECK01022 Amphenol 17E-1725-2 N O T E : The joystick uses the same analog inputs (2 and 3) provided by the Analog Interface (J10). The joystick analog inputs and the analog inputs 2 &... -
Page 79: Figure 2-42: Joystick Inputs (J11)
Figure 2-42: Joystick Inputs (J11) Aerotech joysticks JI (NEMA12 (IP54) rated) and JBV are powered from 5V and have a nominal 2.5V output in the center detent position. Three buttons are used to select axis pairs and speed ranges. An optional interlock signal is used to indicate to the controller that the joystick is present. -
Page 80: Figure 2-43: Joystick Interface
Npaq® Hardware Manual Installation and Configuration Figure 2-43: Joystick Interface Chapter 2 www.aerotech.com... -
Page 81: Miscellaneous I/O Connector (J12)
I/O Brake + output (I/O Brake option only) Output I/O Brake - output (I/O Brake option only) Output Table 2-48: Mating Connector Part Numbers for the Miscellaneous I/O Connector (J12) Mating Connector Aerotech P/N Third Party P/N 15-Pin D-Connector ECK00100 Amphenol DA15P064TXLF Backshell ECK01022 Amphenol 17E-1725-2 www.aerotech.com... -
Page 82: User Interrupt Input (Uint) (J12)
Opto-Isolated User Interrupt + (Input 13+) Input Opto-Isolated User Interrupt - (Input 13-) Input Table 2-50: UINT Opto-Isolator Specifications (J12) Specification (HCPL-0630) Value Opto Coupler Forward Current 5 - 15 mA Opto Coupler Forward Voltage 1.5 V Chapter 2 www.aerotech.com... -
Page 83: Emergency Stop Sense Input (J12)
Opto-Isolated ESTOP + input, (5-24 volts) Input Opto-Isolated ESTOP - input, (5-24 volts) Input Table 2-52: ESTOP Opto-Isolator Specifications (J12) Specification (PS2802-4) Value Opto Coupler Forward Current 2.9 mA Opto Coupler Forward Voltage 1.1 V Power Dissipation 60 mW www.aerotech.com Chapter 2... -
Page 84: Brake Option (J12)
The brake control operation can be software configured; refer to the A3200 Help file for more information (see topics for the EnableBrakeControl axis parameter and the BRAKE command). Figure 2-46: Brake Option Connections (Internal) (J12) Chapter 2 www.aerotech.com... - Page 85 Brake-IO J12-15 I/O Brake - Output Table 2-54: Drive Interface Board Fuse (F1) Information Fuse Aerotech P/N Manufacturer P/N 3 amp, 5x20 mm Fuse EIF00180 Littelfuse 2183.15 F1 is a socketed fuse. N O T E : The brake itself will normally cause a small change in axis position when activated.
-
Page 86: Solid State Relay Specifications
Installation and Configuration 2.12.3.1. Solid State Relay Specifications The user must verify that the application will be within the specifications of the Brake output. Table 2-55: Relay Specifications Solid State Relay Rating (M11), Aerotech PN. ECS394 Value Voltage 5-60 VDC Maximum Current... -
Page 87: Firewire Interface
0.9 m (3 ft) long, 6 pin to 6 pin NCONNECT-10000-GOF 10 m (32.8 ft), glass fiber optical cable NCONNECT-15000-GOF 15 m (49.2 ft), glass fiber optical cable NCONNECT-20000-GOF 20 m (65.6 ft), glass fiber optical cable NCONNECT-30000-GOF 30 m (101.7 ft), glass fiber optical cable www.aerotech.com Chapter 2... -
Page 88: Ethernet Interface
Ethernet cables and their part numbers that can be used with the Npaq drive chassis. Table 2-59: Ethernet Cable Listing Cable Description Aerotech P/N Manufacturer P/N 0.9 m I/O crossover cable NCONNECT-IO-900 L-Com # TRD855XCR-3 1.5 m I/O crossover cable... -
Page 89: Pc Configuration And Operation Information
Installation and Configuration Npaq® Hardware Manual 2.15. PC Configuration and Operation Information For additional information about Npaq and PC configuration, hardware requirements, programming, utilities and system operation see the A3200 Help file. www.aerotech.com Chapter 2... - Page 90 Npaq® Hardware Manual Installation and Configuration This page intentionally left blank. Chapter 2 www.aerotech.com...
-
Page 91: Chapter 3: Options
Six Analog outputs, 4 inputs, (+/-10 VDC) Analog I/O Section 3.5. Four Analog inputs, (+/-10 VDC) Resolver Section 3.6. Six channel resolver feedback interface. Interface (1) This option is no longer available for purchase. This section is for legacy users. www.aerotech.com Chapter 3... -
Page 92: External / Fan Tray Cooling Options
The Fan Tray options also require additional unobstructed space both below and above the Npaq chassis to allow for sufficient airflow. The dimensions of the Npaq with the optional fan trays are shown in Section 1.2. Chapter 3 www.aerotech.com... -
Page 93: Ac Line Filter Option
The AC Line Filter option provides an internal line voltage filter to reduce conducted line emissions. This filter is required to meet CE requirements, but does not improve servo performance or reduce the effects of PWM noise in the motor cables. Table 3-2: AC Line Filter Part Number Aerotech P/N Manufacturer P/N ECZ284 Schaffner FN2070-10-06 www.aerotech.com... -
Page 94: Emergency Stop Options (Estop1,2,3)
FaultMask parameters. However, this operation is not considered part of the safety circuit and is not compliant with EN ISO 13849-1. Table 3-4: Relay Specifications ESTOP1 CR1 and ESTOP2 CR1 and CR2 Aerotech: ECW01106 Relay Part Number Sprecher & Schuh: CA7-16E-01-24E AC-1 (resistive load) Rating of 32 A Turn On The coil requires 17.0 W to turn on (which is equal to 700 mA @ 24 V) -
Page 95: Figure 3-1: Estop Option Interface
Options Npaq® Hardware Manual Figure 3-1: ESTOP Option Interface Figure 3-2: ESTOP1 Option (Category 2, PL d) www.aerotech.com Chapter 3... - Page 96 Npaq® Hardware Manual Options Figure 3-3: ESTOP2 Option (Category 3, PL d) Chapter 3 www.aerotech.com...
- Page 97 Options Npaq® Hardware Manual Figure 3-4: ESTOP3 Option (Category 3, PL d) www.aerotech.com Chapter 3...
-
Page 98: Shunt Option
S320-2 Bus 2, 0-320 VDC If Fuse F1 on the shunt board opens, all drives connected to that bus power supply will be automatically disabled. See Section 4.8. for fuse replacement information. Figure 3-5: Shunt Board Assembly Chapter 3 www.aerotech.com... -
Page 99: Analog I/O Board Option [Archive]
Analog Input 7- Input Analog Input 4- Input Analog Input 5- Input Table 3-7: Mating Connector Part Numbers for the Analog I/O Connector (J80) Mating Connector Aerotech P/N Third Party P/N 25-Pin D-Connector ECK00101 FCI DB25P064TXLF Backshell ECK00656 Amphenol 17E-1726-2 www.aerotech.com... -
Page 100: Power Configuration For The -Aio Option [Archive]
Table 3-8: External Power Supply Specifications Supply Voltage Maximum Current J80 Pin # +3.3V 320 mA 50 mA +12V 60 mA -12V 60 mA Common 5, 7, 13, 17, 19, 21 Chapter 3 www.aerotech.com... -
Page 101: Analog Inputs On The -Aio Option Board (Ain4-Ain6) [Archive]
Differential Analog Input 1 Specifications Specification Value +10 V to -10 V (AI+) - (AI-) Resolution (bits) 16 bits Resolution (volts) 305 µV 1. Signals outside of this range may damage the input Figure 3-6: Analog I/O Option Board Inputs www.aerotech.com Chapter 3... -
Page 102: Analog Outputs On The -Aio Option Board (Aout4-Aout9) [Archive]
-10 V to +10 V Output Current 5 mA Resolution (bits) 16 bits Resolution (volts) 305 µV N O T E : AO0 and AO1 are available on J10, see Section 2.10.1. Figure 3-7: Analog I/O Option Board Outputs Chapter 3 www.aerotech.com... -
Page 103: Resolver Option [Archive]
Resolver Reference + Output Resolver Reference - Output Resolver Reference Shield Shield Table 3-12: Mating Connector Part Numbers for the Resolver Connector Mating Connector Aerotech P/N Third Party P/N 9-Pin D-Connector ECK00137 FCI# DE09P064TXLF Backshell ECK01021 Amphenol 17E-1724-2 www.aerotech.com Chapter 3... - Page 104 Npaq® Hardware Manual Options Figure 3-8: Sine/Cosine Resolver Signal Input Circuitry Figure 3-9: Reference Resolver Signal Output Circuitry Chapter 3 www.aerotech.com...
-
Page 105: Chapter 4: Maintenance
The green Ethernet LED indicates that the Npaq is receiving data when it is Not labeled (Ethernet connector, Rear Panel) The orange / yellow Ethernet LED indicates that the Npaq is transmitting data when it is on. www.aerotech.com Chapter 4... - Page 106 3. Over temperature condition - Turn off and let amplifier cool down. Provide better ventilation. 4. Motor Feedback problem (Encoder or Hall inputs). 1. Bad encoder feedback device. Encoder Feedback Fault 2. Power supply voltage low at encoder. Chapter 4 www.aerotech.com...
-
Page 107: Control Board
Control Board Jumper Configuration Jumper Setting Description PSO Output Active Low PSO Output Active High N/A: Internal Aerotech Use Only N/A: Internal Aerotech Use Only Reset Timeout enabled (must be set to this position) Reset Timeout disabled External FireWire power source +12V Power Source External FireWire power source +12V Power Source... - Page 108 Signal Common N.A. Not Used Not Used N.A. Enable Enable Input Not Used Not Used N.A. Test Mode Select Input +5 Volt Output Not Used Not Used N.A. Not Used Not Used N.A. Not Used Not Used N.A. Chapter 4 www.aerotech.com...
-
Page 109: Drive Interface Board Assembly
D A N G E R : Always disconnect the Mains power connection before opening the Npaq chassis. Figure 4-2: Drive Interface Board Assembly Table 4-6: Drive Interface Board Fuse Information Fuse Description Size Aerotech P/N Manufacturer's P/N +5 VDC User Power 3 A, resettable EIF01001 Raychem RGE300 www.aerotech.com Chapter 4... - Page 110 Connects Bus Supply (B-, RTN, B+) between Axis 5 and 6 BW50, 51, 52 Splits Bus Supply (B-, RTN, B+) between Axis 5 and 6 In * Disable Axis power monitor for Brake Enable Axis power monitor for Brake (Additional wiring and hardware is required) * default Chapter 4 www.aerotech.com...
-
Page 111: Rear Panel Interface Board Assembly
Rear Panel Interface board assembly. D A N G E R : Always disconnect the Mains power connection before opening the Npaq chassis. Figure 4-3: Rear Panel Interface Board Assembly www.aerotech.com Chapter 4... - Page 112 Axis 6 Limit supply from (Internal) J16 (Cut trace 1-2) In * +5 Volt minimum load (System has less than 3 axes) System has more than 3 axes 1-2 * N/A: Internal Aerotech Use Only N/A: Internal Aerotech Use Only 1-2 * N/A: Internal Aerotech Use Only N/A: Internal Aerotech Use Only 1-2 * N/A: Internal Aerotech Use Only...
-
Page 113: Mxr Board Assembly
Flash 1 Write Enable-N A/D Data Sine Flash 1 Output Enable-N A/D Select Cosine Flash 1 Chip Enable-N A/D Clock Cosine Flash 2 Write Enable-N A/D Data Cosine Flash 2 Output Enable-N Digital Common Flash 2 Chip Enable-N Analog Common www.aerotech.com Chapter 4... -
Page 114: Soft-Start Board Assembly
J5. Table 4-12 lists the part numbers for the fuses. Table 4-12: Soft-Start Fuse Replacement Part Numbers Fuse Manufacturer P/N Aerotech P/N 2 A SLO BLO, 3AG Littelfuse 313002 EIF00102 3 A SLO BLO, 3AG Littelfuse 313003 EIF00103... -
Page 115: Analog I/O Board Assembly [Archive]
Analog I/O Option Board Jumper Settings Jumper Setting Function Analog and Digital +3.3V Supply Connected Out * Analog and Digital +3.3V Supply Isolated (Default) Analog and Digital Common Connected Out * Analog and Digital Common Isolated (Default) www.aerotech.com Chapter 4... -
Page 116: Rdp Board Assembly [Archive]
Figure 4-7: RDP Board Assembly Table 4-14: RDP Board Test Points (where “x” represents the channel number) Test Point Description Signal Common TPx01 Cosine input Channel x after buffer TPx02 Sine input Channel x after buffer Chapter 4 www.aerotech.com... -
Page 117: Fuse Replacement
W A R N I N G : 10 amp fuses are not user replaceable. An open fuse usually indicates that the unit should be returned to Aerotech for service. D A N G E R : Residual voltages greater than 60V may be present inside Npaq chassis for longer than 10 seconds after power has been disconnected. -
Page 118: Preventative Maintenance
Npaq while cleaning. Do not allow cleaning substances or other fluids to enter the Npaq or to get on to any of the connectors. Avoid cleaning labels to prevent removing the label information. Chapter 4 www.aerotech.com... -
Page 119: Appendix A: Warranty And Field Service
Aerotech makes no warranty that its products are fit for the use or purpose to which they may be put by the buyer, whether or not such use or purpose has been disclosed to Aerotech in specifications or drawings previously or subsequently provided, or whether or not Aerotech’s... - Page 120 Aerotech's approval. On-site Warranty Repair If an Aerotech product cannot be made functional by telephone assistance or by sending and having the customer install replacement parts, and cannot be returned to the Aerotech service center for repair, and if Aerotech determines the problem could be warranty-related, then the following policy applies:...
-
Page 121: Appendix B: Revision History
Updated fuse replacement part numbers: Table 4-15 3.05.00 3.04.00 3.03.00 3.02.00 3.01.00 3.00.00 2.01.00 2.00.00 1.10 1.09 Revision changes have been archived. If you need a copy of this revision, contact Aerotech Global Technical Support. 1.08 1.07 1.06 1.05a 1.05 1.04 1.03 1.02 1.01 1.00 www.aerotech.com... - Page 122 Npaq® Hardware Manual Revision History This page intentionally left blank. Appendix B www.aerotech.com...
-
Page 123: Appendix C: Avertissements
électrique (tous les interrupteurs externes à l'amplificateur) sont en position d'arrêt avant de procéder à tout réglage mécanique. D A N G E R : Les pièces mobiles connectées au Npaq posent un risque de blessures durant le fonctionnement. www.aerotech.com Appendix C... - Page 124 Soft-Start. A V E R T I S S E M E N T : Les couleurs de fil du transformateur ne concernent que le transformateur d'Aerotech (réf. EAX01010). Ne pas utiliser avec d'autres transformateurs. Appendix C...
- Page 125 A V E R T I S S E M E N T : Il incombe à l'utilisateur d'évaluer les niveaux de risque pour l'opérateur et de concevoir les circuits de sécurité externes de façon appropriée. www.aerotech.com Appendix C...
- Page 126 D A N G E R : Toujours débrancher la connexion d'alimentation principale avant d'ouvrir le châssis Npaq. Carte MXR D A N G E R : Toujours débrancher la connexion d'alimentation principale avant d'ouvrir le châssis Npaq. Appendix C www.aerotech.com...
- Page 127 A V E R T I S S E M E N T : Les fusibles de 10 A ne sont pas remplaçables par l'utilisateur. Lorsqu'un fusible est ouvert, cela indique généralement qu'il faut renvoyer l'unité à Aerotech pour qu’elle soit réparée.
- Page 128 Npaq® Hardware Manual Avertissements This page intentionally left blank. Appendix C www.aerotech.com...
-
Page 129: Index
Drive Interface Board Assembly AOUT4-AOUT9 Audible Noise Electrical Installation Auxiliary Encoder Electrical Specifications 21-22 Emergency Stop (ESTOP) Bidirectional I/O Emergency Stop Sense Input (ESTOP) Brake Option EN 61326-1 Brake Options Encoder and Hall Signal Diagnostics Brake Output Encoder Echo Brushless Motor Connections www.aerotech.com... - Page 130 Minimizing Conducted, Radiated, and System Hall-Effect Interface Noise High Speed Bidirectional I/O (J8) Miscellaneous I/O (J12) High Speed Differential Inputs (J8) Motor Feedback Connector Pin Assignment High Speed Differential Outputs (J8) Motor Output Humidity Motor Output Connections Motor Phasing Oscilloscope Example www.aerotech.com...
- Page 131 Collector Outputs Technical Support PSO Opto Output Thermistor Interface PSO Output 1, PSO Output 2 Differential Outputs 61 PSO Output Polarity Settings for JP1 UINT Opto-Isolator Specifications PSO SYNC IO (J7) unit weight Unpacking the Chassis Quick Installation Guide www.aerotech.com...
- Page 132 Npaq® Hardware Manual Index Unpowered Motor and Feedback Phasing User Interrupt Input (UINT) Voltage Selection Operation Voltage Selection Overview Warranty and Field Service weight www.aerotech.com...
Need help?
Do you have a question about the Npaq DL 4010 Series and is the answer not in the manual?
Questions and answers