Sign In
Upload
Manuals
Brands
KTM Manuals
Motorcycle
250 EXC AUS
KTM 250 EXC AUS Manuals
Manuals and User Guides for KTM 250 EXC AUS. We have
3
KTM 250 EXC AUS manuals available for free PDF download: Repair Manual, Owner's Manual
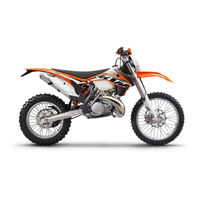
KTM 250 EXC AUS Repair Manual (289 pages)
Brand:
KTM
| Category:
Motorcycle
| Size: 12.59 MB
Table of Contents
Table of Contents
4
Table of Contents 2
4
1 Means of Representation
8
Symbols Used
8
Formats Used
8
2 Safety Advice
9
Repair Manual
9
Degrees of Risk and Symbols
9
Work Rules
9
3 Important Information
10
Guarantee, Warranty
10
Operating and Auxiliary Substances
10
Spare Parts, Accessories
10
Figures
10
4 Serial Numbers
11
Chassis Number
11
Type Label
11
Engine Number
11
Fork Part Number
11
Shock Absorber Part Number
11
5 Motorcycle
12
Raising the Motorcycle with the Lift Stand
12
Removing the Motorcycle from the Lift Stand
12
Starting
12
Starting the Motorcycle for Checking
13
6 Fork, Triple Clamp
14
Exc Eu/Aus, XC-W
14
Adjusting the Compression Damping of the Fork
14
Adjusting the Rebound Damping of the Fork
14
Adjusting the Spring Preload of the Fork
14
Bleeding the Fork Legs
15
Cleaning the Dust Boots of the Fork Legs
15
Loosening the Fork Protection
16
Positioning the Fork Protection
16
Removing the Fork Legs
16
Installing the Fork Legs
16
Removing the Fork Protector
17
Installing the Fork Protector
17
Performing a Fork Service
18
Disassembling the Fork Legs
18
Cartridge Disassembly
21
Disassembling the Compression Damping Fitting
23
Checking the Fork Legs
23
Assembling the Compression Damping Fitting
24
Assembling the Cartridge
25
Assembling the Fork Legs
26
Greasing the Steering Head Bearing
31
Removing the Lower Triple Clamp
31
Installing the Lower Triple Clamp
32
Checking the Play of the Steering Head Bearing
33
Adjusting the Play of the Steering Head Bearing
34
250/300 Six Days
34
Adjusting the Compression Damping of the Fork
34
Adjusting the Rebound Damping of the Fork
35
Bleeding the Fork Legs
35
Cleaning the Dust Boots of the Fork Legs
35
Loosening the Fork Protection
36
Positioning the Fork Protection
36
Removing the Fork Legs
36
Installing the Fork Legs
37
Removing the Fork Protector
37
Installing the Fork Protector
38
Performing a Fork Service
38
Disassembling the Fork Legs
38
Removing the Spring
40
Disassembling the Cartridge
41
Disassembling the Piston Rod
42
Disassembling the Hydrostop Unit
43
Disassembling the Seal Ring Retainer
44
Checking the Fork Legs
44
Assembling the Seal Ring Retainer
45
Assembling the Hydrostop Unit
46
Assembling the Piston Rod
46
Assembling the Cartridge
48
Assembling the Fork Legs
49
Greasing the Steering Head Bearing
52
Removing the Lower Triple Clamp
53
Installing the Lower Triple Clamp
53
Checking the Play of the Steering Head Bearing
55
Adjusting the Play of the Steering Head Bearing
55
7 Handlebar, Controls
56
Handlebar Position
56
Adjusting the Handlebar Position
56
Adjusting the Basic Position of the Clutch Lever
56
Checking the Routing of the Throttle Cable
57
Checking the Play in the Throttle Cable
57
Adjusting the Play in the Throttle Cable
58
8 Frame
59
Removing the Engine Guard (250/300 SIX DAYS)
59
Installing the Engine Guard (250/300 SIX DAYS)
59
9 Shock Absorber, Swingarm
60
Adjusting the High-Speed Compression Damping of the Shock Absorber
60
Adjusting the Low-Speed Compression Damping of the Shock Absorber
60
Adjusting the Rebound Damping of the Shock Absorber
61
Measuring the Sag of the Unloaded Rear Wheel
61
Checking the Static Sag of the Shock Absorber
61
Checking the Riding Sag of the Shock Absorber
62
Adjusting the Spring Preload of the Shock Absorber
62
Adjusting the Riding Sag
63
Removing the Shock Absorber
63
Installing the Shock Absorber
63
Servicing the Shock Absorber
64
Removing the Spring
64
Disassembling the Damper
65
Disassembling the Piston Rod
66
Disassembling the Seal Ring Retainer
67
Replacing the Pilot Bushing
68
Checking the Damper
69
Disassembling the Rebound Adjuster
69
Removing the Heim Joint
70
Installing the Heim Joint
71
Assembling the Rebound Adjuster
72
Assembling the Seal Ring Retainer
72
Assembling the Piston Rod
73
Assembling the Damper
74
Bleeding and Filling the Damper
77
Filling the Damper with Nitrogen
79
Installing the Spring
80
Changing the Heim Joint
81
10 Exhaust
83
Removing the Main Silencer
83
Installing the Main Silencer
83
Changing the Glass Fiber Yarn Filling of the Main Silencer
83
11 Air Filter
85
Removing the Air Filter Box Lid
85
Installing the Air Filter Box Lid
85
Removing the Air Filter
85
Installing the Air Filter
85
Cleaning the Air Filter and Air Filter Box
86
Sealing the Air Filter Box
86
12 Fuel Tank, Seat, Trim
87
Opening the Filler Cap
87
Closing the Filler Cap
87
Removing the Seat
87
Mounting the Seat
88
Removing the Fuel Tank
88
Installing the Fuel Tank
89
Fuel Tap
90
13 Mask, Fender
91
Removing the Front Fender
91
Installing the Front Fender
91
Removing the Headlight Mask with the Headlight
91
Refitting the Headlight Mask with the Headlight
92
14 Wheels
93
Checking the Tire Air Pressure
93
Checking the Tire Condition
93
Checking the Brake Discs
94
Checking the Spoke Tension
94
Front Wheel
95
Removing the Front Wheel
95
Installing the Front Wheel
95
Removing the Brake Disc of the Front Brake
96
Installing the Brake Disc of the Front Brake
96
Rear Wheel
96
Removing the Rear Wheel
96
Installing the Rear Wheel
97
Removing the Brake Disc of the Rear Brake
98
Installing the Brake Disc of the Rear Brake
98
Checking the Chain for Dirt
98
Cleaning the Chain
99
Checking the Chain Tension
99
Checking the Chain, Rear Sprocket, Engine Sprocket and Chain Guide
100
Adjusting the Chain Tension
101
15 Wiring Harness, Battery
103
Plug-In Connection, Ignition Timing Map
103
Removing the Main Fuse
103
Installing the Main Fuse
103
Recharging the Battery
103
Disconnecting the Negative Cable of the Battery
104
Connecting the Negative Cable of the Battery
105
Removing the Battery
105
Installing the Battery
106
Checking the Charging Voltage
106
Checking the Closed Current
106
Checking the Starter Relay
107
16 Brake System
108
Checking the Front Brake Linings
108
Changing the Front Brake Linings
108
Checking the Free Travel of the Hand Brake Lever
110
Adjusting Free Travel of Hand Brake Lever (All 250/300 EXC Models)
110
Adjusting the Basic Position of the Hand Brake Lever (All 250/300 XC-W)
110
Checking the Front Brake Fluid Level
111
Adding Front Brake Fluid
111
Changing the Front Brake Fluid
112
Checking the Rear Brake Linings
113
Changing the Brake Linings of the Rear Brake
114
Checking the Free Travel of Foot Brake Lever
115
Adjusting the Basic Position of the Foot Brake Lever
115
Checking the Rear Brake Fluid Level
116
Adding Brake Fluid for the Rear Brake
116
Changing the Rear Brake Fluid
117
17 Lighting System, Instruments
119
Checking the Headlight Setting
119
Adjusting the Headlight Range
119
Exc Eu/Aus, XC-W
119
Speedometer Overview
119
Activation and Test
120
Setting Kilometers or Miles
120
Adjusting the Speedometer Functions
120
Setting the Clock
121
Activating the Additional Functions
121
Setting the Wheel Circumference
122
Querying Lap Time
122
250/300 Six Days
123
Speedometer Overview
123
Activation and Test
123
Setting Kilometers or Miles
123
Setting the Speedometer Functions
124
Setting the Clock
124
Setting the Wheel Circumference
125
Viewing the Lap Time
125
18 Engine
126
Removing the Engine
126
Installing the Engine
130
Engine Disassembly
135
Clamping the Engine into the Engine Work Stand
135
Draining the Gear Oil
135
Removing the Clutch Push Rod
135
Removing the Shift Lever
135
Removing the Engine Sprocket
135
Removing the Spacer
136
Removing the Starter Motor
136
Removing the Kick Starter
137
Removing the Cylinder Head
138
Removing the Cylinder
138
Removing the Piston
139
Removing the Water Pump Cover
140
Removing the Clutch Cover
140
Removing the Clutch Discs
140
Removing the Clutch Basket
141
Removing the Kick Starter Shaft
142
Removing the Intermediate Kick Starter Gear
142
Removing the Shift Shaft
143
Removing the Shift Drum Locating Unit
143
Removing the Locking Lever
143
Removing the Rotor
143
Removing the Reed Valve Housing
144
Removing the Left Engine Case Section
144
Removing the Shift Rails
144
Removing the Shift Drum
145
Removing the Shift Forks
145
Removing the Transmission Shafts
145
Removing the Crankshaft
145
Work on Individual Parts
146
Work on the Right Section of the Engine Case
146
Work on the Left Section of the Engine Case
147
Removing the Crankshaft Bearing Inner Race
147
Installing the Crankshaft Bearing Inner Race
148
Changing the Connecting Rod, Conrod Bearing, and Crank Pin
148
Checking the Crankshaft Run-Out at the Bearing Pin
149
Checking/Measuring the Cylinder
149
Removing the Exhaust Control
150
Checking the Exhaust Control
152
Installing the Exhaust Control
152
Cylinder - Nikasil ® Coating
154
Checking/Measuring the Piston
155
Checking the Piston Ring End Gap
156
Piston/Cylinder - Measuring the Mounting Clearance
156
Checking the Reed Valve Housing, Reed Valve, and Intake Flange
157
Work on the Clutch Cover
157
Checking the Clutch
161
Preassembling the Shift Shaft
162
Checking the Shift Mechanism
163
Disassembling the Main Shaft
164
Disassembling the Countershaft
165
Checking the Transmission
165
Assembling the Main Shaft
166
Assembling the Countershaft
167
Checking the Kick Starter
169
Preassembling the Kick Starter Shaft
169
Checking the Electric Starter Drive
171
Engine Assembly
172
Installing the Crankshaft
172
Installing the Transmission Shafts
172
Installing the Shift Forks
173
Installing the Shift Drum
173
Installing the Shift Rails
173
Installing the Left Engine Case Section
173
Installing the Reed Valve Housing
174
Installing the Rotor
174
Installing the Locking Lever
175
Installing the Shift Drum Locating Unit
175
Installing the Shift Shaft
175
Installing the Intermediate Kick Starter Gear
175
Installing the Kick Starter Shaft
175
Installing the Clutch Basket
176
Installing the Clutch Discs
177
Installing the Clutch Cover
178
Installing the Water Pump Cover
179
Installing the Piston
179
Installing the Cylinder
180
Checking the X-Distance
181
Adjusting the X-Distance
182
Adjusting the Z-Distance
182
Installing the Cylinder Head
184
Installing the Kick Starter
184
Installing the Starter Motor
184
Installing the Spacer
186
Installing the Engine Sprocket
186
Installing the Shift Lever
186
Installing the Clutch Push Rod
187
Installing the Gear Oil Drain Plug
187
Removing the Engine from the Work Stand
187
19 Carburetor
188
Choke
188
Carburetor - Adjusting the Idle Speed
188
Emptying the Carburetor Float Chamber
189
Removing the Carburetor
189
Installing the Carburetor
190
Checking/Adjusting the Carburetor Components
191
Disassembling the Carburetor
192
Checking the Choke Slide
193
Checking the Jet Needle
193
Checking the Throttle Slide
193
Checking the Float Needle Valve
194
Assembling the Carburetor
194
Checking/Adjusting the Float Level
195
20 Clutch
196
Checking/Correcting the Fluid Level of the Hydraulic Clutch
196
Changing the Hydraulic Clutch Fluid
196
21 Water Pump, Cooling System
197
Cooling System
197
Checking the Antifreeze and Coolant Level
197
Checking the Coolant Level
197
Draining the Coolant
198
Refilling with Coolant
198
22 Exhaust Control
200
Engine Characteristic - Setting the Auxiliary Spring
200
23 Lubrication System
201
Changing the Gear Oil
201
Draining the Gear Oil
201
Refilling with Gear Oil
202
Checking the Gear Oil Level
202
Adding Gear Oil
202
24 Ignition System
204
Checking the Ignition System
204
Ignition Coil - Checking the Primary Winding
204
Ignition Coil - Checking the Secondary Winding
205
Checking the Spark Plug Connector
205
Alternator - Checking the Charging Coil of the Ignition
206
Alternator - Checking the Battery Winding
206
Alternator - Checking the Light Winding
207
Checking the Ignition Pulse Generator
207
Removing the Stator and Crankshaft Position Sensor
208
Installing the Stator and Crankshaft Position Sensor
208
25 Electric Starter
209
Checking the Starter Motor
209
26 Technical Data
210
Engine
210
All 250 Models
210
All 300 Models
210
Engine Tolerance, Wear Limits
211
Engine Tightening Torques
212
Capacities
212
Gear Oil
212
Coolant
212
Fuel
213
Chassis
213
Electrical System
214
Tires
214
Fork
214
Exc Eu/Aus, XC-W
214
250/300 Six Days
215
Shock Absorber
215
Chassis Tightening Torques
216
Carburetor
217
Exc Eu, 250 Exc Six Days Eu
217
Exc aus
217
XC-W Usa
217
Exc Eu, 300 Exc Six Days Eu
217
Exc aus
218
XC-W Usa, 300 XC-W Six Days Usa
218
Carburetor Tuning
219
Carburetor Tuning (All 250 Models)
219
Carburetor Tuning (All 300 Models)
220
General Carburetor Tuning
221
27 Cleaning, Care
222
Cleaning the Motorcycle
222
Checks and Maintenance Steps for Winter Operation
223
28 Storage
224
Preparing for Use after Storage
224
29 Service Schedule
225
Service Work (as Additional Order)
226
30 Wiring Diagram
228
250 Exc Eu, 300 Exc Eu)
228
250 Exc Eu, 300 Exc Eu)
230
250 Exc Eu, 300 Exc Eu)
232
250 Exc Eu, 300 Exc Eu)
234
250 Exc Eu, 300 Exc Eu)
236
250 Exc Six Days Eu, 300 Exc Six Days Eu)
238
250 Exc Six Days Eu, 300 Exc Six Days Eu)
240
250 Exc Six Days Eu, 300 Exc Six Days Eu)
242
250 Exc Six Days Eu, 300 Exc Six Days Eu)
244
250 Exc Six Days Eu, 300 Exc Six Days Eu)
246
250/300 Exc Aus)
248
250/300 Exc Aus)
250
250/300 Exc Aus)
252
250/300 Exc Aus)
254
250/300 Exc Aus)
256
250 XC-W Usa, 300 XC-W Usa)
258
250 XC-W Usa, 300 XC-W Usa)
260
250 XC-W Usa, 300 XC-W Usa)
262
300 XC-W Six Days Usa)
264
Page 1 of 3 (300 XC‑W SIX DAYS USA)
264
300 XC-W Six Days Usa)
266
Page 2 of 3 (300 XC‑W SIX DAYS USA)
266
300 XC-W Six Days Usa)
268
Page 3 of 3 (300 XC‑W SIX DAYS USA)
268
Advertisement
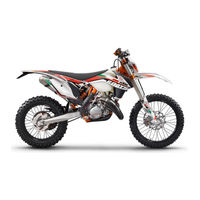
KTM 250 EXC AUS Owner's Manual (139 pages)
201 year
Brand:
KTM
| Category:
Motorcycle
| Size: 4.41 MB
Table of Contents
Table of Contents
4
1 Means of Representation
7
Symbols Used
7
Formats Used
7
2 Safety Advice
8
Use Definition - Intended Use
8
Degrees of Risk and Symbols
8
Tampering Warning
8
Safe Operation
9
Protective Clothing
9
Work Rules
9
Environment
9
Owner's Manual
9
3 Important Notes
10
Guarantee, Warranty
10
Operating and Auxiliary Substances
10
Spare Parts, Accessories
10
Service
10
Figures
10
Customer Service
10
4 View of Vehicle
11
View of Vehicle, Front Left (Example)
11
View of Vehicle, Rear Right (Example)
12
5 Serial Numbers
13
Chassis Number
13
Type Label
13
Key Number (All EXC Models)
13
Engine Number
13
Fork Part Number
13
Shock Absorber Part Number
14
6 Controls
15
Clutch Lever
15
Hand Brake Lever
15
Throttle Grip
15
Kill Switch (All EXC Models)
15
Kill Switch (XC-W)
16
Horn Button (All EXC Models)
16
Light Switch (All EXC Models)
16
Light Switch (XC-W)
16
Turn Signal Switch (All EXC Models)
16
Emergency off Switch (EXC AUS)
17
Electric Starter Button (200/250/300 EXC EU, 250/300 EXC SIX DAYS EU, XC-W)
17
Electric Starter Button (EXC AUS)
17
Overview of Indicator Lamps (All EXC Models)
17
Speedometer
17
Overview
17
Activation and Test
18
Tripmaster Switch
18
Setting Kilometers or Miles
18
Adjusting the Speedometer Functions
18
Setting the Clock
19
Querying Lap Time
19
Display Mode SPEED (Speed)
20
Display Mode SPEED/H (Operating Hours)
20
Display Mode SPEED/CLK (Clock)
20
Display Mode SPEED/LAP (Lap Time)
21
Display Mode SPEED/ODO (Odometer)
21
Display Mode SPEED/TR1 (Trip Master 1)
21
Display Mode SPEED/TR2 (Trip Master 2)
21
Display Mode SPEED/A1 (Average Speed 1)
22
Display Mode SPEED/A2 (Average Speed 2)
22
Display Mode SPEED/S1 (Stop Watch 1)
22
Display Mode SPEED/S2 (Stop Watch 2)
23
6.14.19 Table of Functions
23
6.14.20 Table of Conditions and Menu Activation
23
Opening the Filler Cap
24
Closing the Filler Cap
24
Fuel Tap
25
Choke
25
Shift Lever
25
Kick Starter
26
Foot Brake Lever
26
Side Stand
26
Steering Lock (All EXC Models)
26
Locking the Steering (All EXC Models)
27
Unlocking the Steering (All EXC Models)
27
7 Preparing for Use
28
Advice on First Use
28
Running in the Engine
29
Preparing the Vehicle for Difficult Riding Conditions
29
Preparations for Riding on Dry Sand
30
Preparations for Riding on Wet Sand
30
Preparations for Riding on Wet and Muddy Surfaces
31
Preparations for Riding at High Temperatures and Low Speeds
31
Preparing for Riding at Low Temperatures or in Snow
32
8 Riding Instructions
33
Checks and Maintenance Work When Preparing for Use
33
Starting
33
Start off
34
Shifting, Riding
34
Braking
34
Stopping, Parking
35
Transport
35
Refueling
36
9 Service Schedule
37
Service Work (as Additional Order)
38
10 Tuning the Chassis
39
Checking the Basic Chassis Setting with the Rider's Weight
39
Compression Damping of Shock Absorber
39
Adjusting the Low-Speed Compression Damping of the Shock Absorber
39
Adjusting the High-Speed Compression Damping of the Shock Absorber
40
Adjusting the Rebound Damping of the Shock Absorber
40
Measuring the Sag of the Unloaded Rear Wheel
41
Checking the Static Sag of the Shock Absorber
41
Checking the Riding Sag of the Shock Absorber
42
Adjusting the Spring Preload of the Shock Absorber
42
Adjusting the Riding Sag
43
Checking the Basic Setting of the Fork
43
Adjusting the Compression Damping of the Fork
44
Adjusting the Rebound Damping of the Fork
45
Adjusting the Spring Preload of the Fork (EXC EU/AUS, XC-W)
46
Handlebar Position
46
Adjusting the Handlebar Position
47
11 Service Work on the Chassis
48
Raising the Motorcycle with the Lift Stand
48
Removing the Motorcycle from the Lift Stand
48
Bleeding the Fork Legs
48
Cleaning the Dust Boots of the Fork Legs
49
Loosening the Fork Protection
49
Positioning the Fork Protection
50
Removing the Fork Legs
50
Installing the Fork Legs
50
Removing the Fork Protector
51
Installing the Fork Protector
52
Removing the Lower Triple Clamp (EXC EU/AUS, XC-W)
52
Removing the Lower Triple Clamp (EXC SIX DAYS)
53
Installing the Lower Triple Clamp (EXC EU/AUS, XC-W)
53
Installing the Lower Triple Clamp (EXC SIX DAYS)
55
Checking the Play of the Steering Head Bearing
57
Adjusting the Play of the Steering Head Bearing
57
Greasing the Steering Head Bearing
58
Removing the Front Fender
58
Installing the Front Fender
58
Removing the Shock Absorber
58
Installing the Shock Absorber
59
Removing the Seat
60
Mounting the Seat
60
Removing the Air Filter Box Lid
60
Installing the Air Filter Box Lid
60
Removing the Air Filter
61
Installing the Air Filter
61
Cleaning the Air Filter and Air Filter Box
61
Sealing the Air Filter Box
62
Removing the Main Silencer
62
Installing the Main Silencer
62
Changing the Glass Fiber Yarn Filling of the Main Silencer
63
Removing the Fuel Tank
63
Installing the Fuel Tank
64
Checking the Chain for Dirt
65
Cleaning the Chain
65
Checking the Chain Tension
66
Adjusting the Chain Tension
66
Checking the Chain, Rear Sprocket, Engine Sprocket and Chain Guide
67
Adjusting the Chain Guide
69
Checking the Frame
70
Checking the Swingarm
70
Checking the Routing of the Throttle Cable
70
Checking the Rubber Grip
71
Additionally Securing the Rubber Grip
71
Adjusting the Basic Position of the Clutch Lever
71
Checking/Correcting the Fluid Level of the Hydraulic Clutch
72
Changing the Hydraulic Clutch Fluid
73
Removing the Engine Guard (EXC SIX DAYS)
74
Installing the Engine Guard (EXC SIX DAYS)
74
12 Brake System
75
Checking the Free Travel of the Hand Brake Lever
75
Adjusting Free Travel of Hand Brake Lever (All EXC Models)
75
Adjusting the Basic Position of the Hand Brake Lever (XC-W)
75
Checking the Brake Discs
76
Checking the Front Brake Fluid Level
76
Adding Front Brake Fluid
76
Checking the Front Brake Linings
77
Changing the Front Brake Linings
78
Checking the Free Travel of Foot Brake Lever
79
Adjusting the Basic Position of the Foot Brake Lever
79
Checking the Rear Brake Fluid Level
80
Adding Brake Fluid for the Rear Brake
80
Checking the Rear Brake Linings
81
Changing the Brake Linings of the Rear Brake
81
13 Wheels, Tires
84
Removing the Front Wheel
84
Installing the Front Wheel
84
Removing the Rear Wheel
85
Installing the Rear Wheel
85
Checking the Tire Condition
86
Checking the Tire Air Pressure
87
Checking the Spoke Tension
87
14 Electrical System
89
Removing the Battery (All 200/250/300 Models)
89
Installing the Battery (All 200/250/300 Models)
89
Recharging the Battery (All 200/250/300 Models)
90
Changing the Main Fuse (All 200/250/300 Models)
91
Removing the Headlight Mask with the Headlight
92
Refitting the Headlight Mask with the Headlight
92
Changing the Headlight Bulb
92
Changing the Turn Signal Bulb (All EXC Models)
93
Checking the Headlight Setting
94
Adjusting the Headlight Range
94
Changing the Speedometer Battery
94
15 Cooling System
96
Checking the Antifreeze and Coolant Level
96
Checking the Coolant Level
97
Draining the Coolant
97
Refilling with Coolant
98
16 Tuning the Engine
100
Checking the Play in the Throttle Cable
100
Adjusting the Play in the Throttle Cable
100
Carburetor - Idle
100
Carburetor - Adjusting the Idle Speed
101
Emptying the Carburetor Float Chamber
102
Checking the Basic Position of the Shift Lever
103
(All 250/300 Models)
103
Engine Characteristic - Setting the Auxiliary
103
Spring X (All 250/300 Models)
103
17 Service Work on the Engine
105
Checking the Gear Oil Level
105
Changing the Gear Oil
105
Draining the Gear Oil
106
Refilling with Gear Oil
106
Adding Gear Oil
107
18 Cleaning, Care
109
Cleaning the Motorcycle
109
Checks and Maintenance Steps for Winter Operation
110
19 Storage
111
Preparing for Use after Storage
111
20 Troubleshooting
112
21 Technical Data
114
Engine
114
Exc Eu, 125 Exc Six Days Eu
114
All 200 Models
114
All 250 Models
115
All 300 Models
115
Engine Tightening Torques
116
All 125/200 Models
116
All 250/300 Models
117
Capacities
118
Gear Oil
118
Coolant
118
Fuel
118
Chassis
118
Electrical System
119
Tires
119
Fork
120
EXC EU, All 200 Models
120
250/300 Exc Eu, 250/300 Exc Aus, 250/300 XC-W
120
Exc Six Days Eu
121
Shock Absorber
122
All 125/200 Models
122
All 250/300 Models
122
Chassis Tightening Torques
123
Carburetor
124
21.10.1 125 Exc Eu, 125 Exc Six Days Eu
124
21.10.2 200 Exc Eu
124
21.10.3 200 Exc aus
124
21.10.4 200 XC-W Usa
124
21.10.5 250 Exc Eu, 250 Exc Six Days Eu
125
21.10.6 250/300 Exc aus
125
21.10.7 250 XC-W Usa
125
21.10.8 300 Exc Eu, 300 Exc Six Days Eu
126
21.10.9 300 XC-W Usa
126
Carburetor Tuning (125 EXC EU, 125 EXC SIX DAYS EU)
126
Carburetor Tuning (All 200 Models)
127
Carburetor Tuning (All 250 Models)
128
Carburetor Tuning (All 300 Models)
129
General Carburetor Tuning 16.7 Adjusting the Basic Position of the Shift 22
131
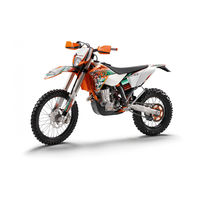
KTM 250 EXC AUS Owner's Manual (136 pages)
2012 Motorcycle
Brand:
KTM
| Category:
Motorcycle
| Size: 4.26 MB
Table of Contents
Table of Contents
4
Means of Representation
7
Important Information
8
View of Vehicle
10
View of Vehicle, Front Left (Example)
10
View of Vehicle, Rear Right (Example)
11
Serial Numbers
12
Chassis Number
12
Type Label
12
Key Number (All EXC Models)
12
Engine Number
13
Fork Part Number
13
Shock Absorber Part Number
13
Controls
14
Clutch Lever
14
Hand Brake Lever
14
Throttle Grip
14
Kill Switch (All EXC Models)
14
Short Circuit Button (XC-W)
15
Light Switch (All EXC Models)
15
Turn Signal Switch (All EXC Models)
15
Horn Button (All EXC Models)
15
Emergency off Switch (200 EXC AUS)
15
Emergency off Switch (250/300 EXC AUS)
16
Electric Starter Button (250/300 EXC EU, EXC SIX DAYS, 250/300 XC-W)
16
Electric Starter Button (250/300 EXC AUS)
16
Light Switch (XC-W)
16
Overview of Indicator Lamps (All EXC Models)
16
Speedometer
17
Speedometer Activation and Test
17
Tripmaster Switch
17
Setting Kilometers or Miles
17
Setting the Clock
18
Adjusting the Speedometer Functions
18
Querying Lap Time
19
Display Mode SPEED (Speed)
19
Display Mode SPEED/H (Operating Hours)
19
Display Mode SPEED/CLK (Clock)
20
Display Mode SPEED/LAP (Lap Time)
20
Display Mode SPEED/ODO (Odometer)
20
Display Mode SPEED/TR1 (Trip Master 1)
20
Display Mode SPEED/TR2 (Trip Master 2)
21
Display Mode SPEED/A1 (Average Speed 1)
21
Display Mode SPEED/A2 (Average Speed 2)
21
Display Mode SPEED/S1 (Stop Watch 1)
22
Display Mode SPEED/S2 (Stop Watch 2)
22
Fuel Tap
23
Opening the Filler Cap
23
Closing the Filler Cap
24
Shift Lever
24
Kickstarter
24
Foot Brake Lever
25
Side Stand
25
Steering Lock (All EXC Models)
25
Locking the Steering (All EXC Models)
25
Unlocking the Steering (All EXC Models)
26
Preparing for Use
27
Advice on First Use
27
Running in the Engine
28
Preparing the Vehicle for Difficult Operating Conditions
28
Preparations for Riding on Dry Sand
29
Preparations for Riding on Wet Sand
29
Preparations for Riding on Wet and Muddy Surfaces
30
Preparations for Riding at High Temperatures and Low Speeds
30
Preparing for Rides at Low Temperatures or in Snow
31
Riding Instructions
32
Checks and Maintenance Work When Preparing for Use
32
Starting
32
Start off
33
Shifting, Riding
33
Braking
33
Stopping, Parking
34
Refueling
34
Service Schedule
36
Maintenance Work (as an Additional Order)
37
Tuning the Chassis
38
Checking the Basic Chassis Setting with the Rider's Weight
38
Compression Damping of Shock Absorber
38
Adjusting the High-Speed Compression Damping of the Shock Absorber
38
Adjusting the Low-Speed Compression Damping of the Shock Absorber
39
Adjusting the Rebound Damping of the Shock Absorber
39
Measuring the Sag of the Unloaded Rear Wheel
40
Checking the Static Sag of the Shock Absorber
40
Checking the Riding Sag of the Shock Absorber
41
Adjusting the Spring Preload of the Shock Absorber
41
Adjusting the Riding Sag
42
Checking the Basic Setting of the Fork
42
Adjusting the Compression Damping of the Fork
43
Adjusting the Rebound Damping of the Fork
43
Adjusting the Spring Preload of the Fork
44
Handlebar Position
44
Adjusting the Handlebar Position
44
Service Work on the Chassis
46
Raising the Motorcycle with the Lift Stand
46
Removing the Motorcycle from the Lift Stand
46
Bleeding the Fork Legs
46
Cleaning the Dust Boots of the Fork Legs
47
Loosening the Fork Protection
47
Positioning the Fork Protection
48
Removing the Fork Legs
48
Installing the Fork Legs
48
Removing the Fork Protector
49
Installing the Fork Protector
50
Removing the Lower Triple Clamp (EXC EU/AUS, XC-W)
50
Removing the Lower Triple Clamp X (EXC SIX DAYS)
50
Installing the Lower Triple Clamp (EXC EU/AUS, XC-W)
51
Installing the Lower Triple Clamp (EXC SIX DAYS)
52
Checking the Play of the Steering Head Bearing
54
Adjusting the Play of the Steering Head Bearing
54
Greasing the Steering Head Bearing
55
Removing the Start Number Plate (XC-W)
55
Installing the Start Number Plate (XC-W)
55
Removing the Front Fender
56
Installing the Front Fender
56
Removing the Shock Absorber
56
Installing the Shock Absorber
56
Removing the Seat
57
Mounting the Seat
57
Removing the Air Filter Box Lid
58
Installing the Air Filter Box Lid
58
Removing the Air Filter
58
Installing the Air Filter
58
Cleaning the Air Filter and Air Filter Box
59
Removing the Main Silencer
59
Installing the Main Silencer
60
Changing the Glass Fiber Yarn Filling of the Main Silencer
60
Removing the Fuel Tank
60
Installing the Fuel Tank
61
Checking the Chain for Dirt
62
Cleaning the Chain
62
Checking the Chain Tension
63
Checking the Chain, Rear Sprocket, Engine Sprocket and Chain Guide
63
Adjusting the Chain Tension
65
Adjusting the Chain Guide
66
Checking the Frame
67
Checking the Swingarm
67
Checking the Throttle Cable Routing
67
Checking the Rubber Grip
68
Additionally Securing the Rubber Grip
68
Adjusting the Basic Position of the Clutch Lever
68
Checking the Fluid Level of the Hydraulic Clutch
69
Changing the Hydraulic Clutch Fluid
69
Brakes
71
Checking Free Travel of Hand Brake Lever
71
Adjusting the Basic Position of the Hand Brake Lever (XC-W)
71
Adjusting Free Travel of Hand Brake Lever (All EXC Models)
71
Checking the Brake Discs
72
Checking the Front Brake Fluid Level
72
Adding Front Brake Fluid
72
Checking the Front Brake Linings
73
Changing the Front Brake Linings
74
Checking the Free Travel of Foot Brake Lever
75
Adjusting the Basic Position of the Foot Brake Lever
75
Checking the Rear Brake Fluid Level
76
Adding Brake Fluid for the Rear Brake
76
Checking the Rear Brake Linings
77
Removing the Rear Brake Linings
77
Installing the Rear Brake Linings
78
Changing the Rear Brake Linings
78
Wheels, Tires
80
Removing the Front Wheel
80
Installing the Front Wheel
80
Removing the Rear Wheel
81
Installing the Rear Wheel
81
Checking the Tire Condition
82
Checking the Tire Air Pressure
83
Checking the Spoke Tension
83
Electrical System
85
Removing the Battery (All 250/300 Models)
85
Installing the Battery (All 250/300 Models)
85
Recharging the Battery (All 250/300 Models)
85
Changing the Main Fuse (All 250/300 Models)
86
Removing the Headlight Mask with the Headlight (All EXC Models)
87
Refitting the Headlight Mask with the Headlight (All EXC Models)
88
Changing the Headlight Bulb (All EXC Models)
88
Checking the Headlight Setting (All EXC Models)
89
Adjusting the Headlight Range (All EXC Models)
89
Changing the Speedometer Battery
89
Cooling System
91
Checking the Antifreeze and Coolant Level
91
Checking the Coolant Level
92
Draining the Coolant
92
Refilling with Coolant
93
Tuning the Engine
95
Checking the Play in the Throttle Cable
95
Adjusting the Play in the Throttle Cable
95
Carburetor
95
Carburetor - Adjusting the Idle Speed
96
Emptying the Carburetor Float Chamber
97
Checking the Basic Position of the Shift Lever
98
Adjusting the Basic Position of the Shift Lever
98
Engine Characteristic - Auxiliary Spring (All 250/300 Models)
98
Engine Characteristic - Adjusting the Auxiliary Spring (All 250/300 Models)
98
Service Work on the Engine
100
Checking the Gear Oil Level
100
Changing the Gear Oil
100
Draining the Gear Oil
101
Refilling with Gear Oil
101
Adding Gear Oil
102
Cleaning, Care
103
Cleaning the Motorcycle
103
Checks and Maintenance Steps for Winter Operation
104
Storage
105
Preparing for Use after Storage
105
Troubleshooting
106
Technical Data - Engine
108
125 Exc Eu, 125 Exc Six Days Eu
108
All 200 Models
108
All 250 Models
109
All 300 Models
109
Capacity - Transmission Oil
110
Capacity - Coolant
110
Technical Data - Engine Tightening Torques
111
All 125/200 Models
111
All 250/300 Models
112
Technical Data - Carburetor
113
125 Exc Eu, 125 Exc Six Days Eu
113
200 Exc Eu
113
200 Exc aus
113
200 XC-W Usa
113
250 Exc Eu, 250 Exc Six Days Eu
114
250 Exc aus
114
250 XC-W Usa
114
300 Exc Eu, 300 Exc Six Days Eu
114
300 Exc aus
115
300 XC-W Usa
115
Carburetor Configuration (125 EXC EU, 125 EXC SIX DAYS EU)
115
Carburetor Configuration (All 200 Models)
117
Carburetor Configuration (All 250 Models)
118
Carburetor Configuration (All 300 Models)
119
General Carburetor Configuration
120
Technical Data - Chassis
121
Lighting Equipment
122
Tires
122
Capacity - Fuel
122
Technical Data - Fork
123
All 125/200 Models
123
All 250/300 Models
123
Advertisement
Advertisement
Related Products
KTM 250 EXC AUS 2010
KTM 250 EXC AUS 2012
KTM 250 EXC AUS 2013
KTM 250 EXC AU 2017
KTM 250 EXC AUS 2014
KTM 250 EXC AU 2016
KTM 250 EXC AUS 2011
KTM 250 EXC-F Six Days EU
KTM 250 EXC-F Six Days
KTM 250 EXC SIX DAYS 2008
KTM Categories
Motorcycle
Motorcycle Accessories
Offroad Vehicle
Engine
Bicycle Accessories
More KTM Manuals
Login
Sign In
OR
Sign in with Facebook
Sign in with Google
Upload manual
Upload from disk
Upload from URL