Advertisement
Quick Links
Advertisement

Subscribe to Our Youtube Channel
Related Manuals for NovaStar Vunit 3000


Summary of Contents for NovaStar Vunit 3000
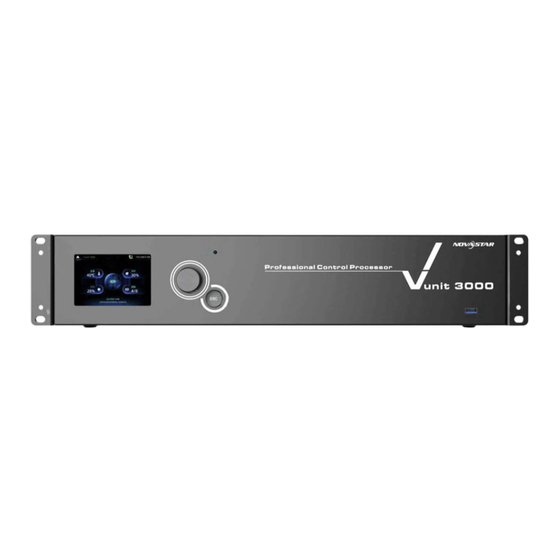
- Page 1 Vunit 3000 Professional Control Processor User Manual...
-
Page 2: Change History
Vunit 3000 Professional Control Processor User Manual Change History Document Release Description Version Date V1.0.0 2024-03-20 First release www.novastar.tech... -
Page 3: Table Of Contents
Vunit 3000 Professional Control Processor User Manual Contents Change History ....................................i 1 Control Connections ................................... 1 Control Connections ................................1 Software Installation ................................1 1.2.1 Obtaining ..................................1 1.2.2 Installation ..................................2 2 Menu Operations ..................................3 Switch Screen ..................................3 Menu Functions .................................. - Page 4 Vunit 3000 Professional Control Processor User Manual 4.2.2 Batch Update ................................18 Synchronize Device Clocks .............................. 19 Run Diagnostics .................................. 20 Factory Reset ..................................21 5 Configure Central Control Devices ............................22 Read Back Device Information ............................22 Configure Connector Parameters ..........................22 5.2.1 Configure Serial Port Parameters ........................
- Page 5 Vunit 3000 Professional Control Processor User Manual 5.8.1 Import Project Files ..............................51 5.8.2 Export Project Files ..............................51 5.8.3 Send to Device ................................52 Manage Logs ..................................53 6 Language ...................................... 54 www.novastar.tech...
-
Page 6: Control Connections
Vunit 3000 Professional Control Processor User Manual Control Connections Control Connections Figure 1-1 Device control connections Software Installation 1.2.1 Obtaining You can obtain the installation package of BCTools via the following two ways. Obtain the installation package from the device provider and copy it to your computer. -
Page 7: Installation
Vunit 3000 Professional Control Processor User Manual 1.2.2 Installation Uncompress the software package to your computer, and then double click the installation package named BCTools.exe. Follow the instructions to complete the installation. You can install BCTools on Windows 7 or later only. -
Page 8: Menu Operations
Vunit 3000 Professional Control Processor User Manual Menu Operations Operating Instructions: Knob: On the home screen, press the knob to enter the operation menu screen. − On the home screen, rotate the knob to view the device overall status and backplane −... -
Page 9: Menu Functions
Vunit 3000 Professional Control Processor User Manual Figure 2-2 Backplane connector status Descriptions for the connector status: Green: The connector is connected normally. White: The connector is not connected. The empty card slot indicates that no card is installed. -
Page 10: Network Settings
Vunit 3000 Professional Control Processor User Manual Figure 2-4 Return to home screen 2.2.2 Network Settings When a control PC is used for device control, ensure that the device and the control PC are on the same network segment and the device IP address must not conflict with the IP address of the control PC. -
Page 11: Advanced Settings
Vunit 3000 Professional Control Processor User Manual On the main menu screen, rotate the knob to select Firmware Version and press the knob to show the relevant information. Figure 2-6 Firmware version 2.2.4 Advanced Settings The advanced settings allow you to set the serial port, I/O port, IR, device update, factory reset and USB import/export. -
Page 12: I/O Settings
Vunit 3000 Professional Control Processor User Manual Channel No.: Select the channel number of the corresponding card where the COM port is located. Baud Rate, Data Bits, Stop Bits and Parity: Set the communication parameters between the COM port and the controlled device. Please refer to the relevant parameters of the controlled device for configuration. -
Page 13: Ir Settings
Vunit 3000 Professional Control Processor User Manual 2.2.4.3 IR Settings Step 1 On the main menu screen, rotate the knob to select Advanced Settings and press the knob to enter the advanced settings screen. Step 2 On the advanced settings screen, rotate the knob to select IR Settings and press the knob to enter the IR settings screen. -
Page 14: Firmware Update
2.2.4.5 Firmware Update The Vunit 3000 allows you to update the device via a USB drive. Before updating, you need to save the update program to the root directory of the USB drive. Step 1 Insert a USB drive into the USB port on the device front panel or the USB port on the main control card. -
Page 15: Factory Reset
Vunit 3000 Professional Control Processor User Manual Figure 2-12 Updating firmware After the firmware is updated successfully, the device will restart automatically. After the restarting is complete, rotate the knob to select Firmware Version and press the knob to enter the corresponding screen where you can view the device and card versions. -
Page 16: About Us
Vunit 3000 Professional Control Processor User Manual Figure 2-14 Language switching 2.2.6 About Us Under this menu item, you can view the official website and email address. On our official website, you can check the latest device information and the updates for this device. You can also send your feedback or suggestion to us for improvements via the supplied email address. -
Page 17: Device Connections
Vunit 3000 Professional Control Processor User Manual Device Connections Connect Devices Prerequisites The Vunit 3000 and control PC must be on the same network segment. Operating Procedure Step 1 Double click the BCTools shortcut icon to run the control end. -
Page 18: Change Ip Information
Vunit 3000 Professional Control Processor User Manual Figure 3-2 Network card set successfully Step 4 Click Start Scan and the system will automatically scan the MAC addresses of all the Vunit 3000 on the current network segment, and then display the scanned devices. -
Page 19: Batch Change Ip Information
Step 3 Click Apply to complete and apply the change. Batch Change IP Information You can batch change the IP information of the connected Vunit 3000 units in BCTools. Prerequisites The device is connected in BCTools. Operating Procedure Step 1 Check the boxes in front of the desired devices. - Page 20 Vunit 3000 Professional Control Processor User Manual Figure 3-5 Batch select devices Step 2 Click Batch Config to expand the Batch Network Configuration pane. Figure 3-6 Batch network configuration Step 3 Enter the device start IP address in the text box below Start IP.
-
Page 21: Configure Devices
Vunit 3000 Professional Control Processor User Manual Configure Devices Change Device Names After the devices are connected successfully, their default names are the same. You can change the device name to distinguish different devices. Change Single Device Name Step 1 Click the Device Configuration tab to enter the device configuration page. -
Page 22: Update Firmware
After the device name is set successfully, other device names are followed by a serial number starting from 1. For example, if you enter Vunit 3000 in the text box, the name of the first device in the device list is Vunit 3000-1 and the name of the second one is Vunit 3000-2. -
Page 23: Batch Update
Vunit 3000 Professional Control Processor User Manual Operating Procedure Step 1 On the Device Configuration page, select the desired device from the device list. Step 2 Click in the column of Action to open the firmware update window. Figure 4-3 Firmware update Step 3 Click Select and then select the obtained update package. -
Page 24: Synchronize Device Clocks
Vunit 3000 Professional Control Processor User Manual Figure 4-4 Batch update Step 3 Check the boxes in front of the desired devices or corresponding cards installed on the devices. Step 4 Click Update and the system will automatically update the selected devices or cards. -
Page 25: Run Diagnostics
Vunit 3000 Professional Control Processor User Manual You can synchronize the device clock via two methods, including Server and Manual. Server: When you synchronize the device clock via a server, make sure the communication between the device and server used for time synchronization is normal. -
Page 26: Factory Reset
Vunit 3000 Professional Control Processor User Manual Figure 4-6 Run diagnostics Step 5 Send the test result to our technical support staff for confirming and fixing the problems as soon as possible. Factory Reset When you need to reconfigure or change the control device, you can quickly clear the saved information using the factory reset function. -
Page 27: Configure Central Control Devices
Vunit 3000 Professional Control Processor User Manual Configure Central Control Devices Click the Central Control Configuration tab to enter the corresponding page. Figure 5-1 Central control configuration Read Back Device Information After the device is connected in BCTools, the device related information will be automatically read back. -
Page 28: Configure Serial Port Parameters
Figure 5-2 Configure connector parameters 5.2.1 Configure Serial Port Parameters When the Vunit 3000 is connect to the control device via a serial port, you need to configure the communication parameters of the serial port and control device to ensure normal communication. -
Page 29: Configure I/O Modes
Mode is selected, you can set the input and output mode of the I/O connector. 5.2.3 Configure CAN Modes When the Vunit 3000 is connect to the controlled device via a CAN port, you need to configure the communication parameters of the CAN port and control device to ensure normal communication. -
Page 30: Configure Matrixes
Configure Matrixes The Vunit 3000 is equipped with the VIT_4xHDMI2.0 IN + 3x HDMI2.0 OUT card that can function as a small matrix with 4 inputs and 3 outputs. On the Matrix page, you can set the relationship between the input and output. The one-to-one and one-to-many relationships are supported. - Page 31 Vunit 3000 Professional Control Processor User Manual Figure 5-6 Matrix configurations Step 4 Select the desired card slot number from the drop-down list next to Slot No.. The matrix configuration table will be automatically displayed. Step 5 Click the matrix cells to relate or unrelate the inputs with the outputs.
-
Page 32: Configure Edid
Vunit 3000 Professional Control Processor User Manual 5.3.2 Configure EDID Step 1 Click the Central Control Configuration tab to enter the corresponding page. Step 2 Select the desired device from the device list on the left. Step 3 Click the Matrix tab to enter the matrix configuration page. -
Page 33: Save Presets
Vunit 3000 Professional Control Processor User Manual Figure 5-9 Parameters for advanced EDID settings Import/Export Export the configured resolution parameters file for future use, or import an existing EDID configuration file. Export EDID: Only the input or output resolution of a single connector can be −... -
Page 34: Other Operations
Vunit 3000 Professional Control Processor User Manual Other Operations Change the preset. Click the desired preset to load it. In the matrix configuration table on the left, change the relationship between the input and output. Click Save to complete and apply the change. -
Page 35: Configure Serial Port Events
Vunit 3000 Professional Control Processor User Manual 5.4.1 Configure Serial Port Events Configure COM Events When the backend device is controlled via COM protocol, you need to set the serial port mode to COM as described in 5.2.1 Configure Serial Port Parameters. Additionally, set the baud rate, data bits, stop bits and parity check according to the communication parameters of the backend device. - Page 36 Vunit 3000 Professional Control Processor User Manual HEX: The control command is in hexadecimal format. ASCII: The control command is in text format. JSON: The control command is in .json format. Step 7 Enter the control command in the text box next to Data Content.
- Page 37 Vunit 3000 Professional Control Processor User Manual Step 3 Select Serial Port from the drop-down list next to Event Type. Step 4 Select the slot number of the corresponding card matched with the added event. Step 5 Select the channel number of the corresponding card matched with the added event.
-
Page 38: Configure I/O Events
Vunit 3000 Professional Control Processor User Manual Figure 5-13 Add Modbus events The event ID is generated automatically and cannot be edited. The ID cannot repeat and should increase in ascending order. After an event is deleted, the new event ID continues to increase based on the original order. -
Page 39: Configure Ir Events
Vunit 3000 Professional Control Processor User Manual Figure 5-14 Add new events Step 2 Enter a name for the new event. Step 3 Select I/O from the drop-down list next to Event Type. Step 4 Select the slot number of the corresponding card matched with the added event. -
Page 40: Configure Relay Events
Vunit 3000 Professional Control Processor User Manual Figure 5-15 Add new events Step 2 Enter a name for the new event. Step 3 Select IR from the drop-down list next to Event Type. Step 4 Select the slot number where the corresponding card matched with the added event is installed. -
Page 41: Configure Delay Events
Vunit 3000 Professional Control Processor User Manual Figure 5-16 Add new events Step 2 Enter a name for the new event. Step 3 Select Relay from the drop-down list next to Event Type. Step 4 Select the slot number of the corresponding card matched with the added event. -
Page 42: Configure Ethernet Port Events
Vunit 3000 Professional Control Processor User Manual Figure 5-17 Add new events Step 2 Enter a name for the new event. Step 3 Select Delay from the drop-down list next to Event Type. Step 4 Enter the delay time ranging from 1 to 65535. The unit is ms. - Page 43 Vunit 3000 Professional Control Processor User Manual Figure 5-18 Add new events Step 2 Enter a name for the new event. Step 3 Select Ethernet Port from the drop-down list next to Event Type. Step 4 Select the transmission protocol.
-
Page 44: Configure Can Events
Vunit 3000 Professional Control Processor User Manual 5.4.7 Configure CAN Events Step 1 On the event configuration page, click Add at the top right to open the new event adding window. Figure 5-19 Add new events Step 2 Enter a name for the new event. -
Page 45: Other Operations
Select the desired event type from the drop-down list next to Event Type. You can − view the added events according to the selected event type. Configure Timeline The Vunit 3000 supports the automatic execution of tasks within a predetermined timeline. Prerequisites You have configured the event as described in Configure Events. - Page 46 Vunit 3000 Professional Control Processor User Manual Figure 5-20 Configure timeline Step 2 Click Add at the top right to open the new timeline adding window. Figure 5-21 Add timeline and task Step 3 Enter a timeline name for easy task triggering in the future.
- Page 47 Vunit 3000 Professional Control Processor User Manual Pause: When a pause task is triggered, the task configured to Paused will be automatically executed and the timer will be paused. Stop: When a stop task is triggered, the task configured to Stop will be automatically ...
-
Page 48: Configure Triggers
: Delete the selected timeline task. Configure Triggers The Vunit 3000 supports the conditional and scheduled triggers. Conditional trigger: Configure the trigger condition. When the trigger condition is met, the system will automatically execute the added events in order. -
Page 49: Configure Conditional Triggers
Vunit 3000 Professional Control Processor User Manual Figure 5-23 Triggers 5.6.1 Configure Conditional Triggers Prerequisites You have added the event or matrix preset. Operating Procedure Step 1 Click the Conditional Trigger tab to enter the conditional trigger configuration page. Step 2 Click Add at the top right to open the conditional trigger adding window. - Page 50 Vunit 3000 Professional Control Processor User Manual Step 3 Select the desired protocol. The supported options include Serial Port, I/O Port and Ethernet Port. Serial Port: Receive the serial command sent by the trigger end. You need to configure ...
-
Page 51: Configure Scheduled Triggers
Vunit 3000 Professional Control Processor User Manual 5.6.2 Configure Scheduled Triggers Prerequisites You have added the event or matrix preset. Operating Procedure Step 1 Click the Schedule Trigger tab to enter the schedule trigger configuration page. Step 2 Click Add at the top right to open the scheduled trigger adding window. -
Page 52: Other Operations
Vunit 3000 Professional Control Processor User Manual When Once is selected, you need to set the date and start time. Step 5 Configure the command processing information. Select the command processing type. The supported options include Event, Preset and Timeline. -
Page 53: Configure Ir Command Library
Configure IR Command Library Add the desired controlled devices to the Vunit 3000 so that you can select the corresponding execution command when adding the IR event. On the Central Control Configuration page, click IR to enter the corresponding page. -
Page 54: Configure Ir Learning
Vunit 3000 Professional Control Processor User Manual Step 5 Click OK to complete the level adding. Note: Once the product type and manufacturer are added, you can simply select the added one from the drop- down list for future use. -
Page 55: Other Operations
Vunit 3000 Professional Control Processor User Manual Step 6 Aim the remote control matched with the selected product model at the Vunit 3000 and press the buttons matched with the commands. The system will automatically learn the IR commands one by one and display them in the text boxes below Command. -
Page 56: Project Files
Vunit 3000 Professional Control Processor User Manual Test the IR command. After the IR learning is completed and the controlled device is connected, click Execute in the column of Action to test whether the current command is correct. Export the IR command. -
Page 57: Send To Device
5.8.3 Send to Device After the device configuration is complete, you can save the configuration information as a project file and also send the configuration information to other Vunit 3000 devices via this function. Step 1 On the Central Control Configuration page, click Project at the top right to open the corresponding window. -
Page 58: Manage Logs
Vunit 3000 Professional Control Processor User Manual Step 3 Click Add and enter the IP information of the desired control processor. Click OK to add it to the control processor list. Step 4 Click to send the configuration information to the selected control processor. -
Page 59: Language
Vunit 3000 Professional Control Processor User Manual Language Change the UI language. BCTools supports English and Simplified Chinese. www.novastar.tech...
Need help?
Do you have a question about the Vunit 3000 and is the answer not in the manual?
Questions and answers