
Related Manuals for NovaStar VX6s


Summary of Contents for NovaStar VX6s
- Page 1 VX6s All-in-One Controller User Manual Document Version: V1.0.1 Document Number: NS160100417...
- Page 2 Xi’an NovaStar Tech Co., Ltd. Statement You are welcome to use the product of Xi’an NovaStar Tech Co., Ltd. (hereinafter referred to as NovaStar). This document is intended to help you understand and use the product. For accuracy and reliability, NovaStar may make improvements and/or changes to this document at any time and without notice.
-
Page 3: Preface
The VX6s is equipped with an expansion card which can connect a USB drive to play the media files stored in it. By connecting a mouse and monitor, the USB playback can be intuitively monitored in real-time. - Page 4 VX6s All-in-One Controller User Manual Preface Change History Version Hardware Release Description Version Date V1.1.0 V1.0.6.0 2019-05-16 Updated the device rear panel picture. Added the hardware version description. Changed part of menu names. Adjusted the menu order.
-
Page 5: Table Of Contents
VX6s All-in-One Controller User Manual Contents Contents Preface ............................... ii 1 Overview ............................1 2 Appearance ............................. 2 2.1 Appearance ..............................2 2.2 Applications ..............................5 2.3 Home Screen ............................... 6 3 Menu Operations .......................... 7 3.1 Operation Instructions ..........................7 3.2 Screen Brightness ............................ -
Page 6: Overview
The VX6s is equipped with an expansion card which can connect a USB drive to play the media files stored in it. By connecting a mouse and monitor, the USB playback... -
Page 7: Appearance
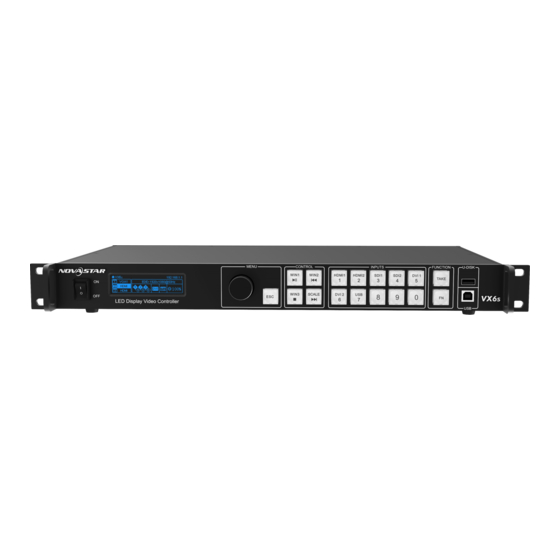
VX6s All-in-One Controller User Manual 2 Appearance Appearance 2.1 Appearance Front Panel No. Button Function ON/OFF Power button button OLED screen Displays the current status and setting menu of the device. Knob On the home screen, pressing the knob enters the operation menu screen. - Page 8 VX6s All-in-One Controller User Manual 2 Appearance Window Pressing a button enters the corresponding window property control menu. buttons Statuses of button indicators: On: The window is open. Off: The window is closed. Flashing: The window is being edited.
- Page 9 VX6s All-in-One Controller User Manual 2 Appearance files in it are described as follows. USB drive: FAT/FAT32 The USB drive cannot be a partitioned one or used as the system startup disk. Picture file format: JPG, JPEG, BMP, PNG and ...
-
Page 10: Applications
VX6s All-in-One Controller User Manual 2 Appearance 2.2 Applications... -
Page 11: Home Screen
User Manual 2 Appearance 2.3 Home Screen After the VX6s is powered on, the home screen is shown in the figure below. Figure 2-1 Home screen 1. Product name and device IP address 2. Resolution of configured screen and output refresh rate 3. -
Page 12: Menu Operations
User Manual 3 Menu Operations Menu Operations The VX6s has powerful functions and is easy to operate. By using the knob and ESC button, you can perform any operations. Besides, you can switch the input sources by pressing only one button. -
Page 13: Screen Settings
VX6s All-in-One Controller User Manual 3 Menu Operations Figure 3-1 Screen brightness 3.3 Screen Settings 3.3.1 Quick Configuration Prerequisites The LED screen is a regular one, not an irregular one. The cabinets of the LED screen are regular, and each cabinet has the same resolution. -
Page 14: Loading Rcfgx Files
(namely RCFGx files) that have been configured on NovaLCT software to the VX6s. Step 1 On NovaLCT, after you configured the screen, click Save to File to save the... - Page 15 VX6s All-in-One Controller User Manual 3 Menu Operations Figure 3-4 Saving receiving card configuration file Step 2 On NovaLCT, choose Tools > Controller Cabinet Configuration File Import, click Add Configuration File and select the configuration file you have saved to PC in step 1.
-
Page 16: Saving To Rv Card
Step 3 Review the configuration file name and click Save the Change to HW to save the configuration file to the VX6s. Figure 3-6 Saving configuration file to VX6s 3.3.3 Saving to RV Card After the cabinet configuration file is loaded or the receiving card color is changed, if you save the configuration data to receiving card by using the Save to RV Card function, the configuration data will not be lost even if power failure occurred. -
Page 17: Advanced Configuration
3.3.4 Advanced Configuration The connection of cabinets loaded by each Ethernet port must follow the 8 data flow patterns provided in the VX6s. In advanced configuration, you must manually set the Cabinet Row Qty, Cabinet Column Qty, Horizontal Offset, Vertical Offset and Data Flow for each Ethernet port. -
Page 18: Window Settings
Figure 3-11 Configuration template 3.4 Window Settings The VX6s supports up to 3 windows. The input source, size, position, priority and input cropping of each window can be set. Window Settings Step 1 Rotate the knob to select Window1 Setting, and press the knob to enter the submenu. -
Page 19: Input Settings
This function can make the window image fill the entire LED screen. 3.5 Input Settings The resolutions of input sources can be changed on the VX6s. Currently, only HDMI and DVI connectors support setting the input resolutions. To change the resolutions of other connectors, the only way is to change the output resolutions on the front-end devices. -
Page 20: Color Adjustment
Figure 3-14 Custom resolution 3.5.2 Color Adjustment The VX6s supports adjustment of the input color (namely image quality), including brightness, contrast, saturation, hue and red/green/blue brightness (R/G/B). Step 1 Choose Color Adjustment > HDMI 1 to enter the color adjustment page of HDMI 1 input source. -
Page 21: Osd Settings
User Manual 3 Menu Operations 3.6 OSD Settings The VX6s supports overlapped display of the prestored images or text. After you add an OSD file on V-Can, you can send the file to VX6s. Figure 3-16 Adding OSD Figure 3-17 OSD settings ... -
Page 22: Preset Settings
You can adjust the brightness, space and speed of the test pattern based on test needs. Figure 3-19 Test pattern 3.8 Preset Settings The VX6s supports 16 user presets. After the preset data is configured, you can recall and use the configured presets by selecting the preset name. -
Page 23: Image Mosaic
Unequal The areas loaded by all VX6s units are not the same. You need to set the total H pixels, total V pixels, load area width, load area height, as well as the start X and Y of the load area. - Page 24 VX6s All-in-One Controller User Manual 3 Menu Operations Figure 3-21 Hardware connection for image mosaic The parameter settings for Equal and Unequal are shown in the below table. Equal VX6s 1 VX6s 2 Total Width Pixels 3000 Total Height Pixels...
-
Page 25: Advanced Settings
Figure 3-22 Advanced settings System Mode You can set the system mode of VX6s here, including switcher and direct modes. Figure 3-23 System mode Switcher: Monitor the image being edited. The edited image is displayed on the monitoring screen first, and then click TAKE to send the image to the LED screen. - Page 26 Figure 3-25 Fn settings Redundancy The VX6s supports redundancy settings. You can set current device as the primary or backup device. If the primary device becomes abnormal, the backup device can take over the work immediately. This can prevent black out of display.
- Page 27 Grayscale: Adjust the grayscale of the OLED screen. The range is 4–15. Hardware Version This function is used to check the hardware version of the VX6s. If a new version is released, you can log in to NovaLCT on the PC to update the firmware programs of...
-
Page 28: Facotry Reset
USB first When the VX6s is connected to the control computer via both the USB and Ethernet ports, if the communication mode is set as USB First, the control computer will communicate with the VX6s via the USB port. - Page 29 VX6s All-in-One Controller User Manual 3 Menu Operations Network Figure 3-29 Network The network parameters can be set manually and automatically. When you set the network manually, the IP address of current device cannot conflict with IP addresses of other devices. You can use the Reset function to reset the Device IP and Subnet...
-
Page 30: Language
VX6s All-in-One Controller User Manual 3 Menu Operations 3.13 Language The UI language of VX6s currently supports Chinese and English. You can change the language freely as you need. Figure 3-30 Language... -
Page 31: Usb Playback
Step 1 Store the media files to the USB drive. Step 2 Insert the USB drive into the USB port on the rear panel of the VX6s. Step 3 Connect the mouse to the VX6s via the USB port of the expansion card on the rear panel. - Page 32 will all be lighted and can be used as playback operation buttons. When the input source is set as USB, the VX6s will automatically detect the files that can be played in the USB drive and then automatically play the files in full...
-
Page 33: Specifications
VX6s All-in-One Controller User Manual 5 Specifications Specifications Input Connector Quantity Description 3G-SDI Supports input resolutions 1920×1080@60Hz and downward compatibility. SDI 1 supports de-interlacing. USB 2.0 Connects to a mouse/keyboard, or connects to a USB drive to play media files stored in the drive. - Page 34 VX6s All-in-One Controller User Manual 5 Specifications VESA standard Supports input resolutions up to 1920×1200@60Hz and downward compatibility. Supports HDCP. DVI LOOP DVI loop output connector HDMI Supports input resolutions up to 1920×1200@60Hz and downward compatibility. Supports HDCP. Output Connector...
Need help?
Do you have a question about the VX6s and is the answer not in the manual?
Questions and answers