
Related Manuals for Thermo Scientific iS5N Series


Summary of Contents for Thermo Scientific iS5N Series
- Page 1 Nicolet iS5 Series Spectrometers Nicolet iS5N User Guide 269-318900 Revision A May 2016...
- Page 2 © 2016 Thermo Fisher Scientific Inc. All rights reserved. Microsoft, Windows, and Excel are either trademarks or registered trademarks of Microsoft Corporation in the United States and/or other countries. All other trademarks are the property of Thermo Fisher Scientific Inc. and its subsidiaries. For U.S.
-
Page 3: Table Of Contents
Regenerating the Desiccant ........33 Checking and Changing the Purge Gas Filter ......35 Thermo Scientific Nicolet iS5N Spectrometer User Guide... - Page 4 Index ..............65 Nicolet iS5N Spectrometer User Guide Thermo Scientific...
-
Page 5: Welcome
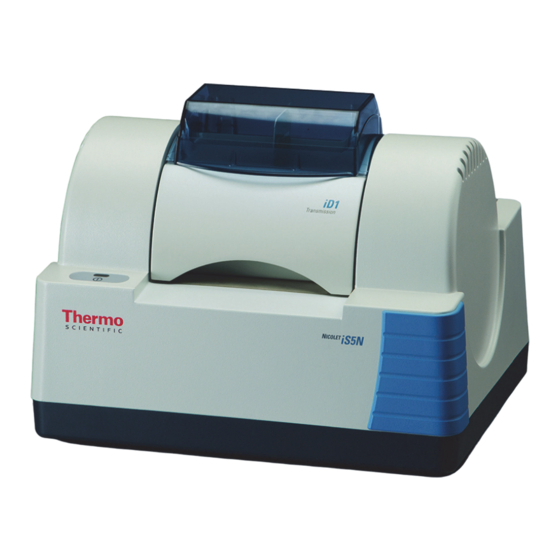
Transmission accessory installed The Thermo Scientific Nicolet™ iS™5N Fourier transform near-infrared (FT-NIR) spectrometer lets you perform chemical analyses of sample materials by collecting data in the near-infrared spectral range using a variety of transmission and other accessories. The system has integrated verification features, a powerful software suite, and many other features that make data collection easy. -
Page 6: Conventions Used
Ordering Parts To order parts, contact If you need to send the instrument or an accessory to us for repair, call or e-mail us first for any shipping requirements or other instructions. Nicolet iS5N Spectrometer User Guide Thermo Scientific... -
Page 7: Contacting Us
To copy the diagnostics log to your Windows desktop, start OMNIC software and choose File > Copy Diagnostics File to Desktop. Attach this file to an e-mail message to our Technical Support group. Thermo Scientific Nicolet iS5N Spectrometer User Guide... -
Page 9: Operation
Provide a fume hood or other active venting system that is free of spark and other ignition sources and that prevents flammable vapors from collecting in the atmosphere surrounding the instrument. Thermo Scientific Nicolet iS5N Spectrometer User Guide... -
Page 10: Electrical And Communication Cabling
The ground must be a noncurrent-carrying wire connected to earth ground at the main distribution box. NOTICE Do not position the instrument so that it is difficult to operate the power switch or access the power supply and power cord. Nicolet iS5N Spectrometer User Guide Thermo Scientific... -
Page 11: Turning The Power On And Off
(about 2 minutes) and then the indicator stays lit. During initialization, OMNIC software displays the number of seconds remaining and the Collect menu is disabled; the system cannot collect data until initialization is completed. Power indicator Thermo Scientific Nicolet iS5N Spectrometer User Guide... -
Page 12: Installing An Accessory
Contact us for details. All of our integrated accessories and baseplates are easy to install and remove and are recognized automatically by the software. Nicolet iS5N Spectrometer User Guide Thermo Scientific... -
Page 13: Installing Integrated Accessories
These accessories fit over two alignment pins on the spectrometer baseplate and are held in place by magnets. Magnets Alignment pins Thermo Scientific Nicolet iS5N Spectrometer User Guide... -
Page 14: Installing Baseplate-Mounted Accessories
Special baseplates are available to accommodate a wide variety of accessories for FT-NIR sampling. iD Base Adapter The iD Base Adapter provides a place to mount large transmission accessories and other specialized accessories. Nicolet iS5N Spectrometer User Guide Thermo Scientific... - Page 15 Magnets hold the adapter in the proper position. Note Avoid installing the iD Base Adapter without an attached accessory. Very strong magnets hold the adapter in place; you may need to use a tool to pry it free. Thermo Scientific Nicolet iS5N Spectrometer User Guide...
- Page 16 Remove screws and panel for use with a diffuse reflectance accessory To install the adapter, remove any accessory from the spectrometer and place the adapter over the pins on the spectrometer baseplate. Magnets hold the adapter in the proper position. Nicolet iS5N Spectrometer User Guide Thermo Scientific...
-
Page 17: Installing Slide-Mounted Accessories
Installing an Accessory Installing Slide-Mounted Accessories The iD1 Transmission Accessory is designed to accommodate gas or liquid transmission cells and thin film or pellet holders that have a 2 x 3 inch slide mount. Thermo Scientific Nicolet iS5N Spectrometer User Guide... -
Page 18: Installing Attenuation Screens
Changing the Gain setting can also be used to amplify or reduce the interferogram signal. Ideally, the (interferogram) signal should be just below 6 volts. If the signal is too low for a Nicolet iS5N Spectrometer User Guide Thermo Scientific... -
Page 19: Collecting Data
See Installing a Purge Kit for more information. For best results the purge gas should be dried to a dew point of -70 °C (-94 °F) or below. Thermo Scientific Nicolet iS5N Spectrometer User Guide... - Page 20 4. If you are using an accessory that is purged, set the purge gas controls for the accessory as indicated below. • Accessory pressure, 5 psig • Accessory flow, 4–10 scfh (1.9–4.7 l/min) NOTICE Flow rates greater than recommended values can cause vibration which can affect data quality. Nicolet iS5N Spectrometer User Guide Thermo Scientific...
-
Page 21: Aligning Your Spectrometer
Note The laser is verified automatically each time you run a Performance Verification (PV) test. We recommend running a PV test at least once a month. Thermo Scientific Nicolet iS5N Spectrometer User Guide... -
Page 22: Using The Id1 Transmission Accessory
The iD1 transmission accessory lets you collect spectra of transmission samples, such as thin films, liquids in a liquid cell or gases in a gas cell. Install the module as explained in Installing an Accessory. Nicolet iS5N Spectrometer User Guide Thermo Scientific... -
Page 23: Installing Samples In The Id1 Transmission Accessory
Narrow slot Wide slot Beam focus The wide slot provides clearance for certain slide-mounted accessories. Related Topics • Installing Integrated Accessories • Collecting Data With the iD1 Transmission Accessory Thermo Scientific Nicolet iS5N Spectrometer User Guide... -
Page 24: Collecting Data With The Id1 Transmission Accessory
See Troubleshooting contact us for assistance.) 2. Click the Installation icon. An information screen appears. Update any pertinent information, enter today’s date and choose Save. Nicolet iS5N Spectrometer User Guide Thermo Scientific... - Page 25 Operation Entering Serial Numbers Related Topics • Maintaining Your Instrument • Troubleshooting Thermo Scientific Nicolet iS5N Spectrometer User Guide...
-
Page 27: Maintenance
Update. In the Standard Settings box, select Installation Date and enter today’s date. Choose Yes after the prompt to reinitialize the Performance Verification standard’s values. Then run Performance Verification and insert the new reference card after the prompt. Thermo Scientific Nicolet iS5N Spectrometer User Guide... - Page 28 (There should not be a sample in the iD1 sample compartment.) C screen 3. Click the System Status shield in the OMNIC main window. System Status The System Status Overview box is displayed. 4. Choose Performance Verification and then choose Run. Nicolet iS5N Spectrometer User Guide Thermo Scientific...
- Page 29 After the polystyrene measurement is completed, the overall PV test result is displayed in the System Status Overview window. Detailed PV test results are saved automatically. 7. To view or print the results, choose Report (see the previous image). Thermo Scientific Nicolet iS5N Spectrometer User Guide...
-
Page 30: Cleaning Your Instrument
Never allow any liquid to come into contact with a window or optical component in the instrument. Related Topics • Static Electricity Precautions Nicolet iS5N Spectrometer User Guide Thermo Scientific... -
Page 31: Static Electricity Precautions
Follow these steps to monitor the humidity level inside the instrument. Related Topics • Replacing the Desiccant • Regenerating the Desiccant • Troubleshooting Thermo Scientific Nicolet iS5N Spectrometer User Guide... - Page 32 To check the internal humidity indicator 1. From the OMNIC software main screen, choose Advanced Diagnostics in the Collect menu. The Diagnostics screen appears. Nicolet iS5N Spectrometer User Guide Thermo Scientific...
-
Page 33: Replacing The Desiccant
• iS5 series desiccant replacement kit (or desiccant canisters that have been regenerated) • 0.05-inch Hex key • #2 Phillips head screw driver • Gloves, finger cots, or laboratory tissue (to handle the humidity indicator) Note To order parts, contact Technical Support; see Contacting Thermo Scientific Nicolet iS5N Spectrometer User Guide... - Page 34 4. Use the #2 Phillips head screw driver to loosen the two captive screws from the desiccant cartridge, and lift the cartridge straight up and out of the instrument. Nicolet iS5N Spectrometer User Guide Thermo Scientific...
- Page 35 Remove the canisters. Note The desiccant canisters can be regenerated. See Regenerating the Desiccant details. Humidity indicator Desiccant cartridge Channel Remove these screws (4 on each side) Desiccant canisters Thermo Scientific Nicolet iS5N Spectrometer User Guide...
- Page 36 13. Plug in the power cord to the instrument and turn on the power. 14. Record the desiccant replacement date in OMNIC software. Start OMNIC software and then choose Advanced Diagnostics in the Collect menu. The Diagnostics screen appears. Nicolet iS5N Spectrometer User Guide Thermo Scientific...
-
Page 37: Regenerating The Desiccant
Time needed: 3 hours Tools needed: • Used desiccant canisters • Vented oven • Insulated cloth or hot pad Thermo Scientific Nicolet iS5N Spectrometer User Guide... - Page 38 Otherwise, they will absorb moisture from the air in the room and quickly become saturated again. Related Topics • Checking the Humidity Indicators • Replacing the Desiccant • Installing a Purge Kit Nicolet iS5N Spectrometer User Guide Thermo Scientific...
-
Page 39: Checking And Changing The Purge Gas Filter
1. Turn off the purge gas at the main valve. Do not turn down the flowmeter or the pressure regulator. 2. Remove the plastic bowl that houses the filter and then remove the filter. (You can unscrew them both by hand.) Bowl Filter Thermo Scientific Nicolet iS5N Spectrometer User Guide... -
Page 40: Installing Or Replacing Hardware
Time needed: 30 minutes or less Set up needed: • Source of dry air or nitrogen that meets Thermo Scientific specifications for the Nicolet iS5N spectrometer. See the Preparing Your Site manual in your documentation set for more information. - Page 41 If you used a 3/8-inch female fitting on the purge gas source, install the 3/8-inch to 1/4-inch reducing nipple from the purge kit. Wrap the reducing nipple with pipe tape before you install it, and use an 11/16-inch open-ended wrench to tighten the connection. Thermo Scientific Nicolet iS5N Spectrometer User Guide...
- Page 42 Entry of flammable liquids or gases into the desiccant compartment is an explosion hazard. If such entry occurs, contact us immediately and do not apply power to the instrument until the condition has been corrected. Nicolet iS5N Spectrometer User Guide Thermo Scientific...
- Page 43 10. Remove the desiccant cartridge with purge fittings from the packet, insert the cartridge in the desiccant compartment, make sure it is seated properly over the O-ring and then secure it using the two screws. Thermo Scientific Nicolet iS5N Spectrometer User Guide...
- Page 44 (with or without the purge connectors) to maintain the required humidity. Make sure you check the humidity indicator once a month (see Checking the Humidity Indicators) and replace the desiccant when necessary (see Replacing the Desiccant). Nicolet iS5N Spectrometer User Guide Thermo Scientific...
-
Page 45: Replacing Sample Compartment Windows
• Replace sample compartment windows only with replacement parts supplied by us. Time needed: 10 minutes Tools needed: • iS5 series window replacement tool (provided) • iS5N sample compartment window replacement kit (contains 2 quartz windows) • latex gloves Window replacement tool Replacement windows Thermo Scientific Nicolet iS5N Spectrometer User Guide... - Page 46 8. Turn on the instrument power and start OMNIC software. 9. Make sure the window type is properly configured in OMNIC software. Choose Advanced Diagnostics in the Collect menu. The Diagnostics screen is displayed. Nicolet iS5N Spectrometer User Guide Thermo Scientific...
-
Page 47: Replacing The Power Supply
• Do not allow liquid to run into the power supply or the back of the instrument. • Do not block access to the power supply, AC power cord or power switch. • Turn off the spectrometer power switch before replacing the power supply. Thermo Scientific Nicolet iS5N Spectrometer User Guide... - Page 48 5. Connect the power supply first to the instrument power connector and then to the wall outlet or power strip. The wall outlet you use must be equipped with a 3-wire line: live, neutral, and ground. Nicolet iS5N Spectrometer User Guide Thermo Scientific...
- Page 49 Type the serial number for the new power supply, enter today’s date and click Save. 8. Make sure the system has been on for at least 15 minutes (one to six hours for best results), and then run the Performance Verification (PV) test. Related Topics • Troubleshooting Thermo Scientific Nicolet iS5N Spectrometer User Guide...
-
Page 50: Replacing The Source
4. Remove any installed accessories from the instrument (see Removing an Accessory). CAUTION Make sure at least 10 minutes have passed since you turned off the instrument before you perform the next step. Nicolet iS5N Spectrometer User Guide Thermo Scientific... - Page 51 7. Grasp the bale firmly and pull the source straight out of the instrument. 8. Record the serial number for the new source on a piece of paper. You will need to enter it after the source is installed. Thermo Scientific Nicolet iS5N Spectrometer User Guide...
- Page 52 Verify that the new source is working properly. (If it does not work properly, a red slash mark appears over the Source icon on this screen. Contact Technical Support for assistance; see Contacting Us.) Click the Installation icon. A diagnostic information screen appears. Nicolet iS5N Spectrometer User Guide Thermo Scientific...
-
Page 53: Replacing The Laser
Troubleshooting Replacing the Electronics Module The electronics module in your instrument is not user-replaceable. If you suspect there is a problem with the electronics module, contact us for assistance. Related Topics • Troubleshooting Thermo Scientific Nicolet iS5N Spectrometer User Guide... -
Page 54: Replacing Fuses
The fuses in your instrument are in the power supply and are not user-replaceable. If the fuses blow, you must replace the power supply (see Replacing the Power Supply). If you need assistance, contact Related Topics • Replacing the Power Supply • Troubleshooting Nicolet iS5N Spectrometer User Guide Thermo Scientific... -
Page 55: Chapter 4 Troubleshooting
WARNING When performing any of the procedures in the troubleshooting topics, always follow the safety precautions included in this document or Help system and in any of the other documentation that came with your instrument. Thermo Scientific Nicolet iS5N Spectrometer User Guide... -
Page 56: Hardware Problems
You should see a spot of yellow light that is about 1 cm in diameter. If you don’t see the light beam, replace the source and rerun PV. Nicolet iS5N Spectrometer User Guide Thermo Scientific... -
Page 57: System Suitability Test Failed
Make sure the light beam is not blocked by a sample holder or sample. d. Rerun SS taking care to install the correct polystyrene reference after the software prompt. – For the iD1 accessory, use the polystyrene reference card from the iS5N accessory kit. Thermo Scientific Nicolet iS5N Spectrometer User Guide... - Page 58 SS. – If a noise level test fails again, choose Collect > Experiment Setup > Diagnostic > Align, wait for spectrometer alignment to complete and rerun SS. Nicolet iS5N Spectrometer User Guide Thermo Scientific...
- Page 59 If the Gain was set incorrectly, reset it and rerun SS. – If the interferogram peak maximum is greater than 6 volts with the C screen installed and Gain set to “1”, contact Technical Support. Thermo Scientific Nicolet iS5N Spectrometer User Guide...
-
Page 60: Spectral Peaks Appear Shifted In Wavenumber Axis
2. If the internal humidity is too high, see Humidity Is Too High. 3. If the internal temperature is out of specification, see Instrument Temperature Is Out of Specification. 4. Contact Technical Support for assistance; see Contacting Nicolet iS5N Spectrometer User Guide Thermo Scientific... -
Page 61: System Scans Normally But Signal Intensity Is Low
Choose Collect > Experiment Setup > Diagnostic and select View Reference Detector. b. If a normal sized interferogram appears (5 to 6 volt maximum), deselect the reference detector by clearing the View Reference Detector checkbox. Thermo Scientific Nicolet iS5N Spectrometer User Guide... -
Page 62: Spectra Have Noise Spikes
Contact Technical Support for assistance; see Contacting Spectral Baseline Is Not Stable 1. Minimize the acoustic noise inside the instrument. If the instrument has the purge option, lower the purge flow rate until the baseline is stable. Nicolet iS5N Spectrometer User Guide Thermo Scientific... -
Page 63: Alignment Fails
OMNIC Collect menu is disabled. 2. Close OMNIC software and turn off the computer. Turn off the instrument power. Check the computer cable. If it is damaged, replace it. If the cable is loose or Thermo Scientific Nicolet iS5N Spectrometer User Guide... -
Page 64: Error Messages
2. The ambient temperature may be too high. The ambient temperature should be between 15 °C and 35 °C (between 60 °F and 95 °F). Allow 1 to 6 hours for the spectrometer to reach temperature equilibrium. 3. Contact Technical Support for assistance; see Contacting Nicolet iS5N Spectrometer User Guide Thermo Scientific... -
Page 65: Omnic Cannot Communicate With The Detector
Maintain at least 30 cm (12 in) of clearance behind the instrument and 64 cm (25 in) of clearance above the table. Make sure the ambient temperature is between 15 °C and 35 °C (between 60 °F and 95°F). 7. Contact Technical Support for assistance; see Contacting Thermo Scientific Nicolet iS5N Spectrometer User Guide... -
Page 66: Laser Voltage Is Out Of Specification
1. Make sure the room temperature is between 15 °C and 35 °C (between 60 °F and 95 °F), and allow the instrument adequate time to stabilize. 2. Contact Technical Support for assistance; see Contacting Nicolet iS5N Spectrometer User Guide Thermo Scientific... -
Page 67: Laser Frequency Is Out Of Specification
1. Choose Experiment Setup > Diagnostic > Align and wait for spectrometer alignment to complete. 2. Choose Experiment Setup > Diagnostic > Laser Verification and wait for laser verification to complete. 3. Contact Technical Support for assistance; see Contacting Thermo Scientific Nicolet iS5N Spectrometer User Guide... -
Page 69: Index
Thermo Scientific Nicolet iS5N Spectrometer User Guide... - Page 70 Nicolet iS5N Spectrometer User Guide Thermo Scientific...
- Page 71 Performance Verification test slots power in iD1 Transmission Module turning on or off solvents power indicator warning blinks continuously source does not light replacing power outlet source voltage error specifications for specification Thermo Scientific Nicolet iS5N Spectrometer User Guide...
- Page 72 Transmission Module vents access to verifying laser vibration and flow rate warming up the instrument warning desiccant harmful if swallowed Nicolet iS5N Spectrometer User Guide Thermo Scientific...
Need help?
Do you have a question about the iS5N Series and is the answer not in the manual?
Questions and answers