
Related Manuals for MICRO-EPSILON induSENSOR DTD


Summary of Contents for MICRO-EPSILON induSENSOR DTD
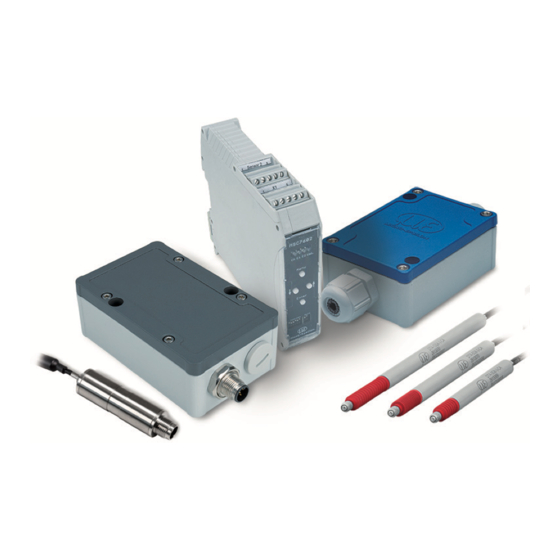
- Page 1 Operating Instructions induSENSOR DTD / MSC7401 / 7802 / 7602 MSC7401 MSC7602 MSC7401(0x0) MSC7802 MSC7802(0x0)
- Page 2 Miniature sensor controller for inductive displacement sensors MICRO-EPSILON MESSTECHNIK GmbH & Co. KG Koenigbacher Str. 15 94496 Ortenburg / Germany Phone +49 (0) 8542 / 168-0 Fax +49 (0) 8542 / 168-90 e-mail info@micro-epsilon.com www.micro-epsilon.com...
-
Page 3: Table Of Contents
Power Supply and Signal ......................37 4.5.2 Digital Interface ..........................38 4.5.3 Sensor ............................39 Power Supply, Sensor and Signal Output MSC7602 ..................41 4.6.1 Power Supply and Signal ......................42 4.6.2 Sensor ............................43 4.6.3 Digital Interface ..........................44 induSENSOR DTD / MSC7xxx... - Page 4 Example D: Adjustment via Two-point Adjustment, Channel 1 ........... 61 Multi-Channel Operation..........................62 5.5.1 Operation on the RS485 Bus with Multiple Channels ..............63 5.5.2 Synchronization and Installation of Multiple Channels ..............65 Service, Repair ........................67 Disclaimer ..........................68 Decommissioning, Disposal ....................69 induSENSOR DTD / MSC7xxx...
- Page 5 Hardware Configuration ..........................97 A 4.3 Protocol ................................97 A 4.4 Commands ..............................98 A 4.4.1 Identification ..........................98 A 4.4.2 Assign New Address ........................99 A 4.4.3 Reset ............................99 A 4.4.4 Get Measuring Value ......................... 100 induSENSOR DTD / MSC7xxx...
- Page 6 DTD / MSC7xxx...
-
Page 7: Safety
Avoid shocks and impacts to the sensor and controller. > Damage to or destruction of the controller and/or the sensor The supply voltage must not exceed the specified limits. > Damage to or destruction of the controller and/or the sensor induSENSOR DTD / MSC7xxx Page 7... -
Page 8: Notes On Ce Marking
No sharp or heavy objects should be allowed to affect the cables. Avoid folding the cables. > Damage or destruction of the cable, failure of the measuring device Notes on CE Marking The following apply to the induSENSOR DTD / MSC7401 / 7802 / 7602 series: - EU Directive 2014/30/EU - EU Directive 2011/65/EU Products which carry the CE mark satisfy the requirements of the EU directives cited and the relevant appli- cable harmonized European standards (EN). -
Page 9: Proper Environment
-40 ... +85 °C (-40 ... +185 °F) ƒ Storage: -40 ... +85 °C (-40 ... +185 °F) - Humidity: 5 ... 95 % (non-condensing) - Ambient pressure: Atmospheric pressure - Shock: EN 60068-2-27 - Vibration: EN 60068-2-6 induSENSOR DTD / MSC7xxx Page 9... -
Page 10: Functional Principle, Technical Data
Secondary + and Secondary -, or make the according setting in the controller, see 5.3.4. 20 mA 10 V Signal 12 mA 4 mA 50 % 100 % Plunger Sensor Measuring range Fig. 1 Measuring principle induSENSOR DTD / MSC7xxx Page 10... -
Page 11: Structure
MICRO-EPSILON recommends the inductive displacement sensors and gauging sensors of the induSENSOR DTA and LDR series because they are optimally adjusted with the controller. -
Page 12: Technical Data
Circumferential Installation 2 x mounting holes for M4 DIN rail 35 mm clamping Storage -40 ... +85 °C (-40 ... 185 °F) Temperature range Operation -40 ... +85 °C (-40 ... 185 °F) induSENSOR DTD / MSC7xxx Page 12... - Page 13 5) With controllers including a current output, the output signal is limited to approx. 21 mA. 6) Mounting clamp included in delivery, see 3.1 7) Adjustable via buttons; via software, additional steps can be adjusted under frequency. induSENSOR DTD / MSC7xxx Page 13...
-
Page 14: Delivery
If there is damage or parts are missing, immediately contact the manufacturer or your supplier. Optional accessories are listed in the appendix, see A Storage Temperature range (storage): -40 ... +85 °C (-40 ... +185 °F) Humidity: 5 ... 95 % (non-condensing) induSENSOR DTD / MSC7xxx Page 14... -
Page 15: Installation And Assembly
In addition with the DTD model: Avoid cyclic movements of the crimps and ferrite of the sensor cable. In the case of cyclic movements (e.g. use in a drag chain), fix the sensor cable additionally with suitable means. induSENSOR DTD / MSC7xxx Page 15... -
Page 16: Controller
(.39) 8(35) Ferrite Fig. 2 Dimensional drawing of DTD controller, dimensions in mm (inches) Depth: 7.94 mm Ø3.2 (.13 dia.) 22.6 Through-hole (.89) Fig. 3 Dimensional drawing of mounting clamp, dimensions in mm (inches) induSENSOR DTD / MSC7xxx Page 16... -
Page 17: Msc7401 Model
1.5 Nm and for the SW19 (M16) cable gland is 3 Nm. Please note that less torque should be applied for cable glands with various cable sheath materials. > Damage to the cable sheath induSENSOR DTD / MSC7xxx Page 17... - Page 18 Clamping range 4.5 mm ... 10 mm Clamping range 1 mm ... 5 mm 25.5 76 (2.99) 21.5 (1.0) (.85) Ø4.3 (.17 dia.) Ø7.5 (.29 dia.) Fig. 4 Dimensional drawing of MSC7401 controller, dimensions in mm (inches) induSENSOR DTD / MSC7xxx Page 18...
- Page 19 Power and signal connection Sensor connection: M12x1 plug; 5-pole M9 5-pole socket Series 712 (Binder) 76 (2.99) 14.5 (.12) (.57) Ø4.3 (.17 dia.) Ø7.5 (.29 dia.) Fig. 5 Dimensional drawing of MSC7401(010) controller, dimensions in mm (inches) induSENSOR DTD / MSC7xxx Page 19...
-
Page 20: Msc7802 Model
1.5 Nm and for the SW19 (M16) cable gland is 3 Nm. Please note that less torque should be applied for cable glands with various cable sheath materials. > Damage to the cable sheath induSENSOR DTD / MSC7xxx Page 20... - Page 21 Clamping range 4.5 mm ... 10 mm Clamping range 1 mm ... 5 mm Ø7.5 (.29 dia.) Ø4.3 (.17 dia.) 105 (4.13) 25.5 21.5 152 (5.98) (.85) Fig. 6 Dimensional drawing of MSC7802 controller, dimensions in mm (inches) induSENSOR DTD / MSC7xxx Page 21...
- Page 22 Sensor connections: M12x1 plug; 5-pole M9 5-pole socket Series 712 (Binder) Ø7.5 (.29 dia.) Ø4.3 (.17 dia.) 15.5 105 (4.13) (.61) (.16) 124.6 (4.90) Fig. 7 Dimensional drawing of MSC7802(010) controller, dimensions in mm (inches) induSENSOR DTD / MSC7xxx Page 22...
-
Page 23: Msc7602 Model
For dismantling, pull the locking element on the controller forwards, e.g., using a screwdriver , see Fig. 9. Tilt the controller in order to remove it from the DIN rail , see Fig. 9 induSENSOR DTD / MSC7xxx Page 23... - Page 24 Installation and Assembly 22.6 29.2 (4.21) (.89) (1.15) 113.65 (4.47) Fig. 10 Dimensions of MSC7602 controller model, dimensions in mm (inches) induSENSOR DTD / MSC7xxx Page 24...
- Page 25 This ferrite must be mounted as close as possible to the input terminals. Fastening clips Ferrite Fig. 11 Installation example of induSENSOR MSC7602 with ferrite Avoid applying force on the terminals and the sensor cables. > Damage to the sensor cables and/or the controller induSENSOR DTD / MSC7xxx Page 25...
-
Page 26: Power Supply, Sensor And Signal Output Dtd (Lvdt)
Brown RS485 - A White Blue 5-pin. M12x1 housing connector M12x1 (A-coded, view on pole side) Signal out Black RS485 - B Gray Fig. 13 Table for pin assignment for power supply and signal induSENSOR DTD / MSC7xxx Page 26... -
Page 27: Power Supply, Sensor And Signal Output Msc7401
Screw terminal connection; AWG 16 up to AWG 24; up to AWG 28 with ferrule ƒ Alternatively: female connector M9; 5-pole, series 712, Co. Binder Fig. 14 View with cable gland, MSC 7401 Fig. 15 View with plug-in connectors, MSC 7401(010) induSENSOR DTD / MSC7xxx Page 27... - Page 28 Brown Fig. 17 Table of the pin assignment for the sensor at terminal block X2, full bridge 1) The colors and pins listed refer to the sensors from MICRO-EPSILON MESSTECHNIK GmbH & Co. KG. induSENSOR DTD / MSC7xxx Page 28...
- Page 29 The pin assignment for the terminal blocks can also be found in the graphic and the tables, see Fig. 20 1) The colors and pins listed refer to the sensors from MICRO-EPSILON & Co. KG. induSENSOR DTD / MSC7xxx Page 29...
-
Page 30: Power Supply And Signal
Installation and Assembly 4.4.1 Power Supply and Signal Fig. 20 Pin assignment for supply and signal on the terminal blocks X2, X3, X1 induSENSOR DTD / MSC7xxx Page 30... -
Page 31: Digital Interface
Use the IF7001 single-channel USB/RS485 converter for MSC7xxx available as an optonal accessory, see A RS485 A Brown Do not apply the IF7001 shield! RS485 B White Fig. 22 Table for pin assignment of digital interface RS485 induSENSOR DTD / MSC7xxx Page 31... -
Page 32: Sensor
Secondary center tap Gray Gray Gray Secondary + White White Black Secondary - Brown Black White Primary + Green Green Blue Primary - Yellow Yellow Brown Fig. 23 Table for pin assignment of sensor (DTA/LVDT) induSENSOR DTD / MSC7xxx Page 32... - Page 33 Brown Secondary - Brown Blue Primary + Primary - Fig. 24 Table for pin assignment of sensor (LDR) Cable lengths ≥ 10 m between sensor and controller may impair the technical data, see 2.3. induSENSOR DTD / MSC7xxx Page 33...
-
Page 34: Power Supply, Sensor And Signal Output Msc7802
Screw terminal connection; AWG 16 up to AWG 24; up to AWG 28 with ferrule ƒ Alternatively: female connector M9; 5-pole, series 712, Co. Binder Fig. 25 View with cable gland, MSC7802 Fig. 26 View with plug-in connectors, MSC7802(010) induSENSOR DTD / MSC7xxx Page 34... - Page 35 Brown Fig. 28 Table of the pin assignment for the sensor at terminal block X2, full bridge 1) The colors and pins listed refer to the sensors from MICRO-EPSILON MESSTECHNIK GmbH & Co. KG. induSENSOR DTD / MSC7xxx Page 35...
- Page 36 The pin assignment for the terminal blocks can also be found in the graphic and the tables, see Fig. 31 1) The colors and pins listed refer to the sensors from MICRO-EPSILON MESSTECHNIK GmbH & Co. KG. induSENSOR DTD / MSC7xxx...
-
Page 37: Power Supply And Signal
Power Supply and Signal D1 D2 D3 D4 Sensor 1 Chan. E1 E2 Value X2-1 X2-2 Menu Enter Sensor 2 Down Fig. 31 Pin assignment for power supply and signal on the terminal blocks X2, X3, X1 induSENSOR DTD / MSC7xxx Page 37... -
Page 38: Digital Interface
Use the IF7001 single-channel USB/RS485 converter for MSC7xxx available as an optonal RS485 A Brown accessory, see A RS485 B White Do not apply the IF7001 shield! Fig. 33 Table for pin assignment of digital interface RS485 induSENSOR DTD / MSC7xxx Page 38... -
Page 39: Sensor
Secondary center tap 2 Gray Gray Gray Secondary + White White Black Secondary - Brown Black White Primary + Green Green Blue Primary - Yellow Yellow Brown Fig. 34 Table for pin assignment of sensor (DTA/LVDT) induSENSOR DTD / MSC7xxx Page 39... - Page 40 Brown Secondary - Brown Blue Primary + Primary - Fig. 35 Table for pin assignment of sensor (LDR) Cable lengths ≥ 10 m between sensor and controller may impair the technical data, see 2.3. induSENSOR DTD / MSC7xxx Page 40...
-
Page 41: Power Supply, Sensor And Signal Output Msc7602
X2-1 sensor 2 sensor 1 Din rail bus connector Fig. 36 View MSC7602 Fig. 37 Upper view, Fig. 38 Lower view, Fig. 39 View rear side, MSC7602 MSC7602 MSC7602 inclusive DIN rail bus connector induSENSOR DTD / MSC7xxx Page 41... -
Page 42: Power Supply And Signal
Ground 0 V RS485 A RS485 B Sync-signal ME22,5 TBUS 1,5/4P1S KMGY (Phoenix: 2201732) 3 4 5 Suitable mating plug: MCVR 1.5/5-ST-3.81 (Phoenix: 1827156) Fig. 41 Table for pin assignment of DIN rail bus connector induSENSOR DTD / MSC7xxx Page 42... -
Page 43: Sensor
Brown Black White Primary + Green Green Blue Primary - Yellow Yellow Brown Cable shield sensor 1 + 2, see X1 and X3 Fig. 44 Table for pin assignment sensor 1 + 2 (DTA/LVDT) induSENSOR DTD / MSC7xxx Page 43... -
Page 44: Digital Interface
Brown B (RS485) White 1 2 3 4 5 Cable shield sensor 1 (direct connection to DIN rail) X2-1 1 2 3 4 5 Fig. 46 Table for pin assignment of digital interface X3 induSENSOR DTD / MSC7xxx Page 44... -
Page 45: Operation
A 4 or the sensorTOOL. Only with the induSENSOR DTD With the induSENSOR DTD, everything is set at the factory. There are no operation elements. Settings can only be made via the sensorTOOL program. induSENSOR DTD / MSC7xxx... -
Page 46: Initial Operation
Then switch on the power supply. Set the controller to its basic setting, see 5.3. Down Menu Enter Fig. 47 Controller induSENSOR MSC7401 induSENSOR DTD / MSC7xxx Page 46... - Page 47 Chan. E1 E2 Value Menu D1 D2 D3 D4 Sensor 1 Chan. E1 E2 Value X2-1 Enter X2-2 Address Sync Menu Enter Sensor 2 Down Fig. 48 Controller induSENSOR MSC7802 Fig. 49 Controller induSENSOR MSC7602 induSENSOR DTD / MSC7xxx Page 47...
-
Page 48: Control And Display Elements
The Value LED indicates the LED D4 / Value Value display current value of the selected parameters. Enter Address Sync Fig. 51 Control and display 1) Description also applies for MSC7802 model. elements MSC7602 induSENSOR DTD / MSC7xxx Page 48... -
Page 49: Setting
A Adjustment , see 5.3.4 Automatic sensor Point of entry , see 5.3.1 recognition Signal , see 5.3.2 Sensor parameter , see 5.3.3 Fig. 52 Menu structure (simple), details, see 5.4 induSENSOR DTD / MSC7xxx Page 49... -
Page 50: Automatic Sensor Recognition
This function allows you to adjust the type of output signal, e.g., 2 ... 10 V or 4 ... 20 mA. Automatic recognition is available. For a load at the output of: > 1 kOhm, voltage output 2 ... 10 V is set, < 1 kOhm, current output 4 ... 20 mA is set. induSENSOR DTD / MSC7xxx Page 50... -
Page 51: Sensor Parameters
With 8 mm drawbar 23 kHz 14 mm With 10 mm drawbar 23 kHz LVP-25 With 8 mm drawbar 16 kHz 25 mm 16 kHz With 10 mm drawbar Fig. 53 Sensor models and sensor parameters induSENSOR DTD / MSC7xxx Page 51... -
Page 52: Adjustment
The first of the two points is the electrical zero point at which a differential sensor shows the highest stability on principle. Fig. 54 Graphic Two-point adjustment Fig. 55 Graphic Zero-point adjustment induSENSOR DTD / MSC7xxx Page 52... -
Page 53: Menu Structure
LED green flashing LED red LED red flashing LED off Start of measuring range Mid of measuring range End of measuring range Fig. 56 Legend of the menu structure 1) For pages 51 to 58 induSENSOR DTD / MSC7xxx Page 53... - Page 54 0 ... 10 V 2 ... 10 V Voltage 0 ... 5 V Signal E1 level ENTER ENTER ENTER 0.5 ... 4.5 V 4 ... 20 mA Current 0 ... 20 mA 0 ... 10 mA induSENSOR DTD / MSC7xxx Page 54...
- Page 55 16 kHz 10 kHz 21 kHz 13 kHz 23 kHz ENTER 550 mV 350 mV Amplitude E1 level ENTER 150 mV 75 mV Fig. 57 Menu structure for the MSC7401 / 7802 / 7602 controllers induSENSOR DTD / MSC7xxx Page 55...
-
Page 56: Two-Point Adjustment
Fig. 58 Menu structure for the MSC7401 / 7802 / 7602 controllers, adjustment mode: Two-point adjustment 1) Position X must be > 10 % of the 1) Position X must be > 10 % of the measuring range away from X measuring range away from X induSENSOR DTD / MSC7xxx Page 56... -
Page 57: Zero-Point Adjustment
> 10 % of the center of the sensor. measuring range away from X Fig. 59 Menu structure for the MSC 7401 / 7802 / 7602 controllers, adjustment mode: Zero-point search induSENSOR DTD / MSC7xxx Page 57... -
Page 58: Example A: Sensor Parameter Adjustment: Dta-5G8, Channel 1
Frequency: 5 KHz; with the selection can be changed here. Confirm by pressing the ENTER button. ENTER Excitation voltage: 550 mV; with the selection can be changed here. Confirm by pressing the ENTER button. ENTER induSENSOR DTD / MSC7xxx Page 58... -
Page 59: Example B: Signal Output Adjustment: 2
2 ... 10 V; with the selection can be changed here. Confirm by pressing the ENTER button. ENTER Output situation: The sensor parameters are already set; depending on the approach, LED D4 is green or switched off. induSENSOR DTD / MSC7xxx Page 59... -
Page 60: Example C: Adjustment Via Zero-Point Adjustment, Channel 1
) and use the arrow keys to set 2.00 V (V For better orientation, LED D4 changes the color depending on the plunger position. Near the zero point, LED D4 flashes orange. Confirm by pressing the ENTER button. ENTER induSENSOR DTD / MSC7xxx Page 60... -
Page 61: Example D: Adjustment Via Two-Point Adjustment, Channel 1
Now move the measuring object 6.000 mm towards the end of the measuring range (X Use the arrow buttons to set 10.000 V (V Confirm by pressing the ENTER button. ENTER (2 V) 6 mm Fig. 61 Example Two-point adjustment induSENSOR DTD / MSC7xxx Page 61... -
Page 62: Multi-Channel Operation
When operating the MSC7401 / MSC7602 / MSC7802 models, multi-channel operation is possible. For multi-channel operation, a distance of at least 100 mm between the respective sensors is recom- mended. Recommended distance between the sensors ≥ 100 mm Fig. 62 Multi-channel operation of 2 sensors induSENSOR DTD / MSC7xxx Page 62... -
Page 63: Operation On The Rs485 Bus With Multiple Channels
The maximum number of participants (incl. master) on a bus line is 64. Depending on the length of the line and environmental conditions, an external terminating resistor may be required. Fig. 63 DIP switch on the MSC7602 for multi-channel operation induSENSOR DTD / MSC7xxx Page 63... - Page 64 Please note that the bus master requires an individual address. With the bus master from MICRO-EPSI- LON MESSTECHNIK (e.g., sensorTOOL, IF1032 or IF2030), this address is always 1. This is how max. 62 single-channel or 31 dual-channel controllers can be operated on the RS485 bus. induSENSOR DTD / MSC7xxx Page 64...
-
Page 65: Synchronization And Installation Of Multiple Channels
The respective synchronization modes can be set via DIP switches: Switch setting Operation Sensor 1 Sensor 2 independent independent Master Slave Slave independent Slave Slave Fig. 65 DIP switch on the induSENSOR MSC7602 for synchronization 1) Factory settings induSENSOR DTD / MSC7xxx Page 65... - Page 66 Sync signal signal signal Fig. 66 Example of synchronization induSENSOR MSC7602 MSC7802 model The MSC7802 offers restricted synchronization possibilities. If these are necessary in the application, please contact Micro-Epsilon Messtechnik GmbH & Co. KG. induSENSOR DTD / MSC7xxx Page 66...
-
Page 67: Service, Repair
If the cause of a fault cannot be clearly identified, Koenigbacher Str. 15 please send the entire measuring system to: 94496 Ortenburg / Germany Tel. +49 (0) 8542/ 168-0 Fax +49 (0) 8542/ 168-90 info@micro-epsilon.com www.micro-epsilon.com induSENSOR DTD / MSC7xxx Page 67... -
Page 68: Disclaimer
MICRO-EPSILON or to your distributor / retailer. MICRO-EPSILON undertakes no liability whatsoever for damage, loss or costs caused by or related in any way to the product, in particular consequential damage, e.g., due to... -
Page 69: Decommissioning, Disposal
Here you can inform yourself about the respective national collection and return points. - Old devices can also be returned for disposal to MICRO-EPSILON at the address given in the imprint at https://www.micro-epsilon.de/impressum/. We would like to point out that you are responsible for deleting the measurement-specific and personal data on the old devices to be disposed of. -
Page 70: Appendix
Power and output cable; connector M12x1, 5 pin, A-coding, length: 5 m, 5-core, open ends, OD: 5.6 mm, IP 67 IF7001 Single-channel USB/RS485 converter for MSC7xxx You will find further information on IF7001 under: https://www.micro-epsilon.com/download/manuals/ass-- IF-7001--de-en.pdf#zoom=Fit induSENSOR DTD / MSC7xxx Page 70... - Page 71 Software integration into the PLC with EDS file; Certified according to Ethernet/IP CT16 IF1032/ETH Multi-channel analog/Ether- net-EtherCAT converter - three analog inputs - one RS485 (single channel) in addition with trigger input induSENSOR DTD / MSC7xxx Page 71...
-
Page 72: A 2 Factory Settings
- Automatic recognition of customer signals - Automatic sensor recognition Upon successful recognition: - Start of measuring range (plunger pulled-out): ~2 V or 4 mA - Mid of measuring range (electric zero): ~6 V or 12 mA induSENSOR DTD / MSC7xxx Page 72... -
Page 73: A 3 Software
Software sensorTOOL gives you documented software that can be used for setting the sensors, for demonstration purposes or for quick visualization of the measurement data. You can find it online at https://www.micro-epsilon.de/download/software/sensorTOOL.exe. A 3.1 Controller Search Connect the controller to a free USB port of your PC (e.g. via the IF7001) and connect the power supply. -
Page 74: Configure Baudrate
3.4. Fig. 68 Window Change serial configuration - sensorTOOL Set the baud rate to 256,000. A sensor address can be assigned for the sensor. Please observe the DIP settings of MSC7602, see Fig. 64. induSENSOR DTD / MSC7xxx Page 74... -
Page 75: A 3.3 Menu Settings
Appendix | Software A 3.3 Menu Settings A 3.3.1 General Fig. 69 View Settings - General induSENSOR DTD / MSC7xxx Page 75... - Page 76 If the sensor model is not listed in the drop down menu, please contact Micro-Epsilon. Fields with dark Please note that changing the sensor model overwrites all manually set parameters.
-
Page 77: A 3.3.2 Output
Appendix | Software A 3.3.2 Output Fig. 70 View Settings - Output Fig. 71 Settings - Analog output induSENSOR DTD / MSC7xxx Page 77... - Page 78 In order to achieve an optimal resolution, it is recommended to reduce the frequency response as much as possible. Please note that a reduced frequency response also involves a reduced measurement dynamics. Fields with gray background re- quire a selection. Fields with dark border require entry of a value. induSENSOR DTD / MSC7xxx Page 78...
-
Page 79: A 3.3.3 Adjustment
Fig. 72 View 1 Two-point adjustment Please make sure before the adjustment that the basic settings were carried out (sensor configuration, output signal) and that the target can be positioned accordingly. Start the sensor adjustment via the button. induSENSOR DTD / MSC7xxx Page 79... - Page 80 Appendix | Software Then move the target to the desired position X Enter the corresponding output value. Click Accept X Fig. 73 View 2 Two-point adjustment Repeat this process for the second position X induSENSOR DTD / MSC7xxx Page 80...
- Page 81 , see Fig. 1) Sensor designation, e.g., DTA-3G8 Custom The chart is divided into 3 areas: Green Taught-in range, limited by X and the associated output signals. White Usable range outside the taught-in range Unavailable range induSENSOR DTD / MSC7xxx Page 81...
-
Page 82: A 3.3.3.2 Zero-Point Adjustment
Start the sensor adjustment via the Start button. Then move the target to the zero point X (target position = 0 %) Enter the desired output value for the midrange and accept it by clicking the button Accept X induSENSOR DTD / MSC7xxx Page 82... - Page 83 Appendix | Software Fig. 76 View 2 Zero-point adjustment Now move the target inside the midrange to point X Also enter the desired output value there and accept it by pressing the button Accept X induSENSOR DTD / MSC7xxx Page 83...
- Page 84 Custom The chart is divided into 3 areas: Green Taught-in range, limited by X and the associated output signals. White Usable range outside the taught-in range Unavailable range 1) Sensor designation, e.g., DTA-3G8 Custom induSENSOR DTD / MSC7xxx Page 84...
-
Page 85: A 3.4 Measurement Menu
To check your measurements, a simple data acquisition is available. Apply your desired settings before initial operation, see A 3.3. Fig. 78 View Measurement menu By clicking the Disconnect button you return to the controller search, see Fig. Fig. 79 View Disconnect induSENSOR DTD / MSC7xxx Page 85... -
Page 86: A 3.4.1 Data Acquisition
Start the data acquisition by clicking the Start button, see Fig. The acquisition is completely restarted and the record stopped before is deleted. Stop the data acquisition by clicking the Stop button, see Fig. Fig. 80 Start Fig. 81 Stop induSENSOR DTD / MSC7xxx Page 86... -
Page 87: Signal Processing
Fig. quire a selection. Reset Resets the master Fields with dark 1) For example every 5000 ms: The signal course displayed is updated after this period has elapsed. border require entry of a value. induSENSOR DTD / MSC7xxx Page 87... -
Page 88: Csv Output
Click this button to save the currently selected measurement value. Measurement CSV output Format Point / Comma Separator Comma / Semicolon / Tabulator Fields with gray background re- quire a selection. Fields with dark border require entry of a value. induSENSOR DTD / MSC7xxx Page 88... -
Page 89: A 3.4.4 Description Data Acquisition Table
Selection of the output to be displayed. The outputs are set before in the Settings Unit menu under Output / Output range and Adjustment. Number of digits 0 - 12 Fig. 84 Description data acquisition table induSENSOR DTD / MSC7xxx Page 89... -
Page 90: A 3.5 Single Value Menu
Fig. 85 Single value menu The following settings have an effect on this display: - Output: Analog output, see A 3.3.2. - Adjustment: Two-point adjustment, see A 3.3.3.1 and zero point, see A 3.3.3.2 induSENSOR DTD / MSC7xxx Page 90... -
Page 91: A 3.6 Info Menu
This window provides the current overview of the controller information, sensor information, diagnostic infor- mation and the currently connected sensor. When you click the Disconnect button, the menu jumps back to the sensorTOOL start page, see Fig. induSENSOR DTD / MSC7xxx Page 91... - Page 92 Export settings opens the explorer to store the setting values in a default file *.csv on the Import settings opens the explorer to import the setting values from a default file *.csv on the PC. induSENSOR DTD / MSC7xxx Page 92...
-
Page 93: A 3.7 Multi-Sensor Daq Mode
A 3.7 Multi-Sensor DAQ Mode The sensorTOOL also offers the possibility to output the data from several channels of the induSENSOR DTD / MSC7xxx series. Please note that the RS485 interface is a serial bus. Even if the measured values are output simultaneously in sensorTOOL, they are recorded with a time delay. - Page 94 Now enable the Multi sensor DAQ mode. Then enable the individual checkboxes Use sensor in MULTI-DAQ of the respective channels. Fig. 88 First interactive site after calling the sensorTOOL for the Multi sensor DAQ mode Now press the button. induSENSOR DTD / MSC7xxx Page 94...
- Page 95 Appendix | Software In the Data Acquisition menu, see A 3.4, the data output of the selected channels is displayed. Fig. 89 Data Acquisition menu, Multi sensor DAQ mode induSENSOR DTD / MSC7xxx Page 95...
- Page 96 Appendix | Software The Single Value, see A 3.5, menu also displays the data as numerical value. Fig. 90 Single value menu, Multi sensor DAQ mode induSENSOR DTD / MSC7xxx Page 96...
-
Page 97: A 4 Communication Via Rs485 Digital Interface
A 4.1 General These instructions tell you how to obtain digital measurement values from the induSENSOR MSC7xxx con- troller without the MICRO-EPSILON sensorTOOL. The controller must be configured as per these Operating Instructions prior to direct digital communication. A 4.2... -
Page 98: A 4.4 Commands
4 bytes, uint32, little endian Article description Bytes 54 - 85: MSC7401 32 bytes, ASCII 1) DA: 126 2) SA: 1 3) CH: Checksum Send: Bytes 5 - 13 4) CH: Checksum Receive: Bytes 5 - 87 induSENSOR DTD / MSC7xxx Page 98... -
Page 99: A 4.4.2 Assign New Address
0x68 0x01 0x7E 0x08 0x33 0x30 0x5E 0xB0 0x00 0x01 0x02 0xFB 0x16 1) DA: 126 2) SA: 1 3) CH: Checksum Send: Bytes 5 - 13 4) CH: Checksum Receive: Bytes 5 - 13 induSENSOR DTD / MSC7xxx Page 99... -
Page 100: Get Measuring Value
Maximum speed for data transmission (1x send + 1x receive): ~3 ms @ 256.000 Baud 1) DA: 126 2) SA: 1 3) CH: Checksum Send: Bytes 2 - 4 4) CH: Checksum Receive: Bytes 5 - 15 induSENSOR DTD / MSC7xxx Page 100... - Page 101 Appendix | Communication via RS485 Digital Interface induSENSOR DTD / MSC7xxx Page 101...
- Page 102 MICRO-EPSILON MESSTECHNIK GmbH & Co. KG Koenigbacher Str. 15 · 94496 Ortenburg / Germany Tel. +49 (0) 8542 / 168-0 · Fax +49 (0) 8542 / 168-90 X9751377-B032062HDR info@micro-epsilon.com · www.micro-epsilon.com Your local contact: www.micro-epsilon.com/contact/worldwide/ MICRO-EPSILON MESSTECHNIK...
Need help?
Do you have a question about the induSENSOR DTD and is the answer not in the manual?
Questions and answers